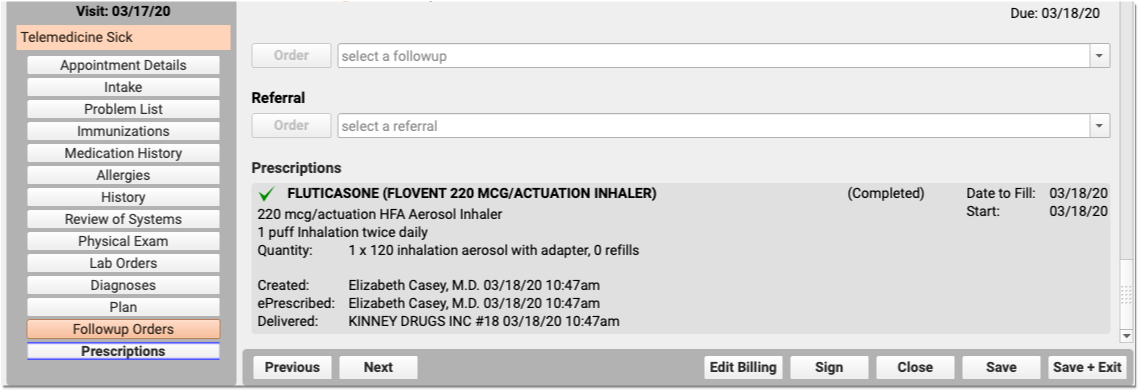
After a clinician charts an encounter, they click “Bill” to make the encounter ready for billing. Once they’ve verified procedures, diagnoses, and linking, you can “check out” the encounter by posting charges.
As you post charges for an encounter, you can review and update patient and encounter information, double-check the linking and codes that the clinician selected, work with TOS payments, and more.
Watch a Video: You can watch a quick video introduction to posting charges in PCC EHR.
Learn All Steps for the Biller Role: This article (and video) is part of the New User Training for Billers. You can use that outline to learn how to complete other billing tasks in PCC EHR.
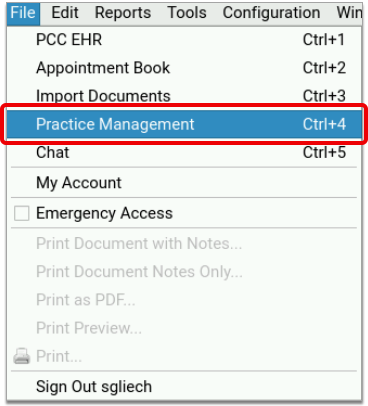
Post Charges and Payments in PCC EHR
Read the procedure below to learn how to post charges in PCC EHR.
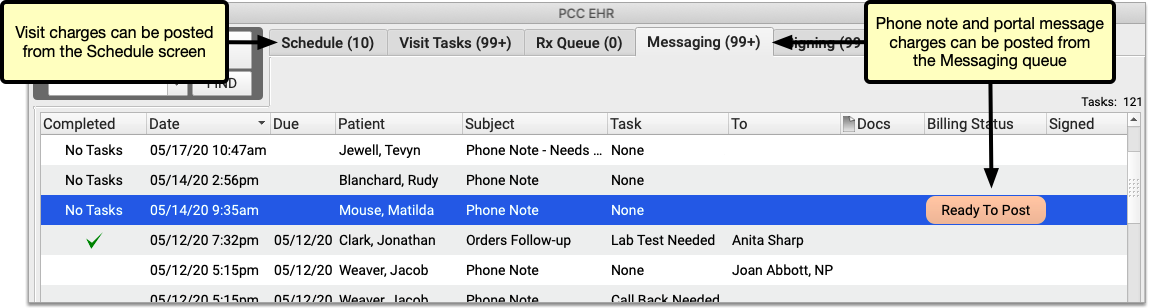
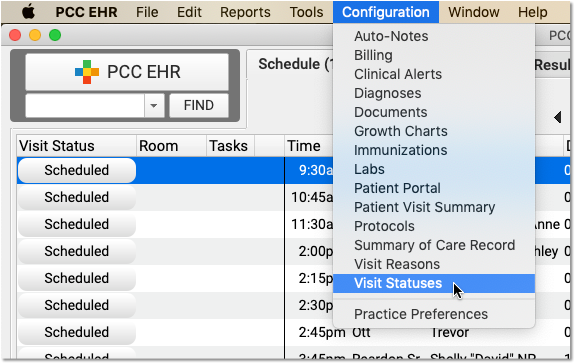
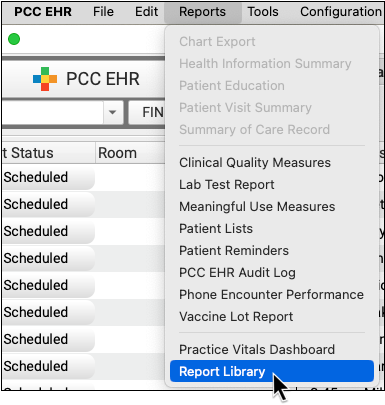
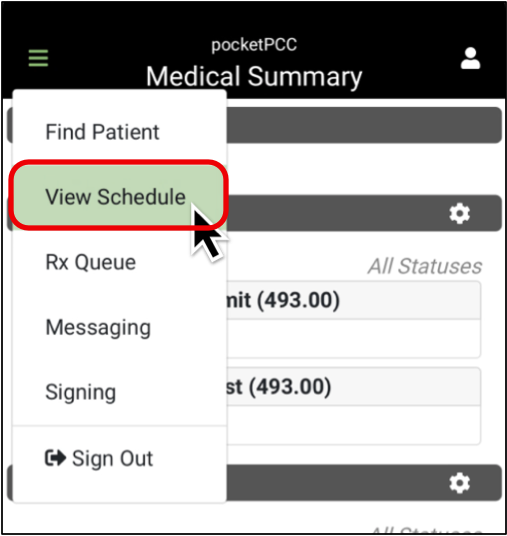
Click “Ready to Post” on the Schedule or Messaging Queue
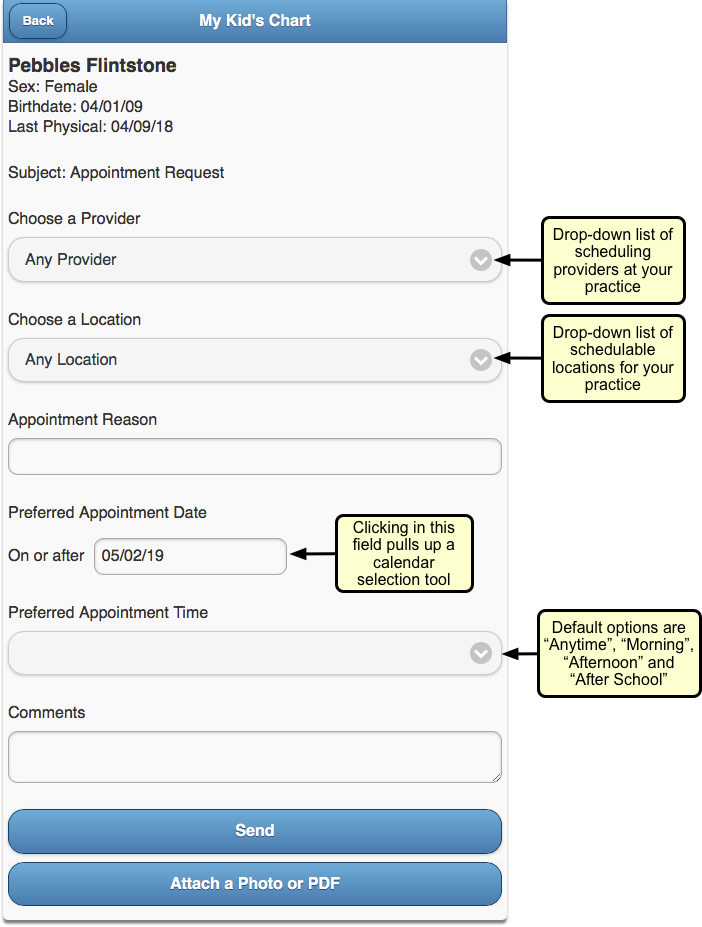
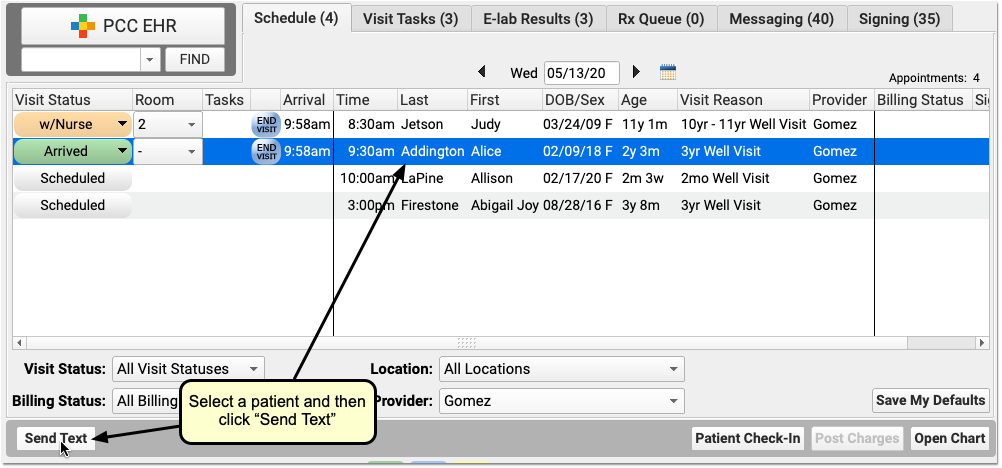
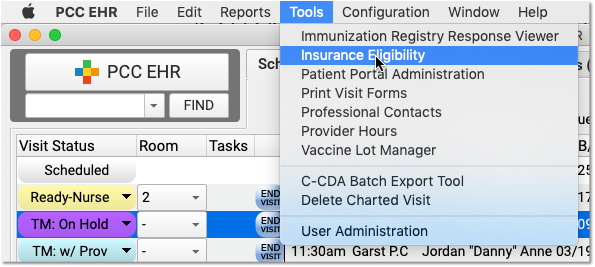
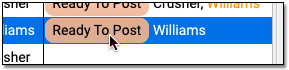
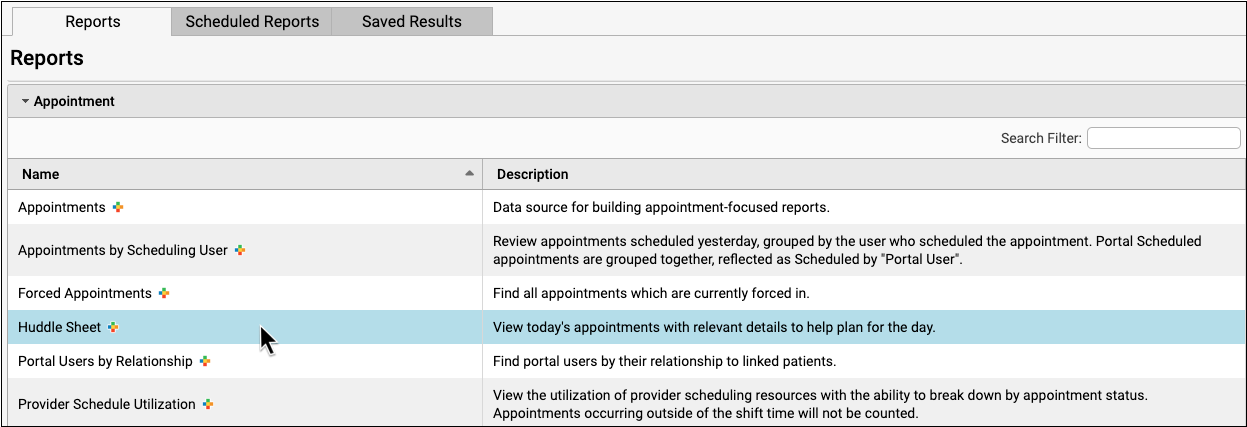
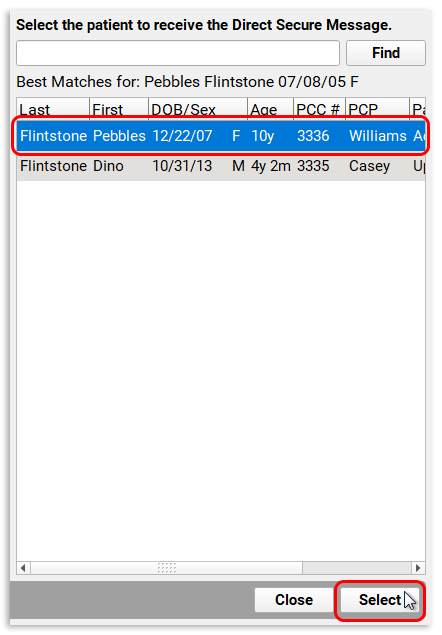
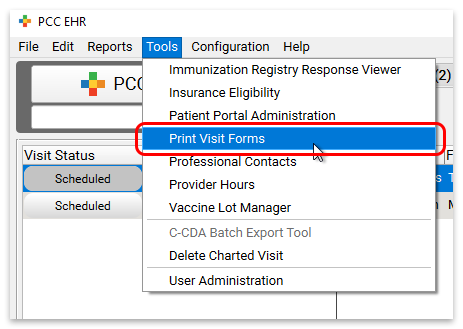
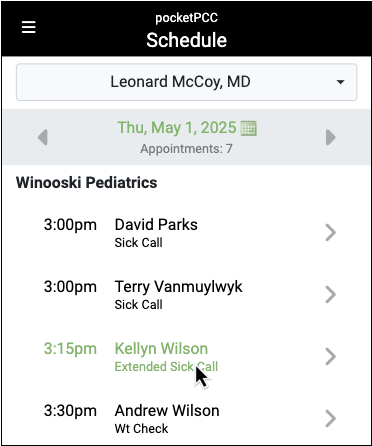
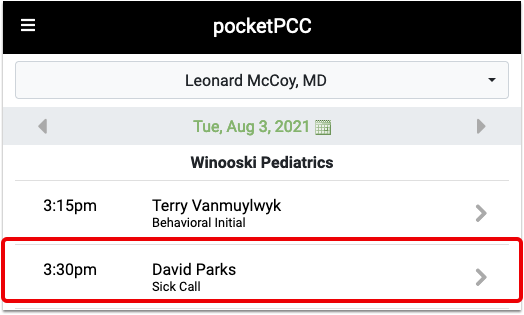
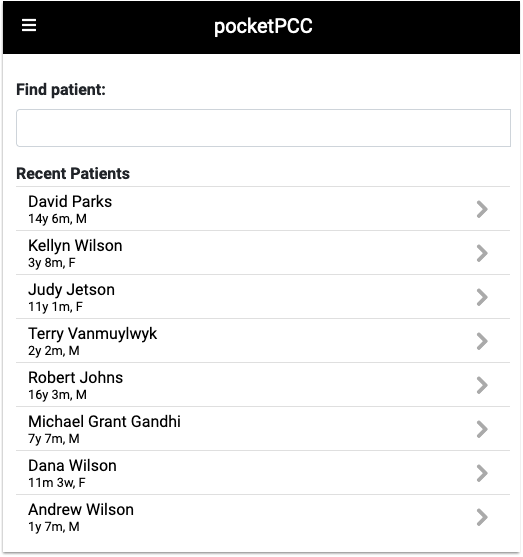
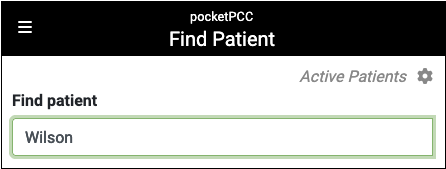
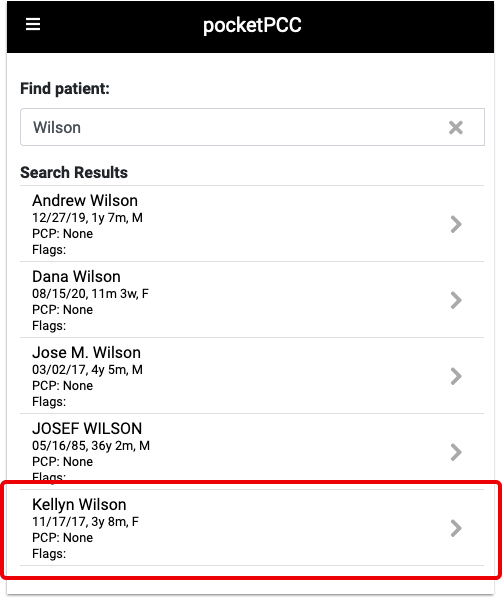
Find an encounter ready to post on either the PCC EHR Schedule screen or the Messaging queue and click “Ready to Post”.
PCC EHR will open a Post Charges window.
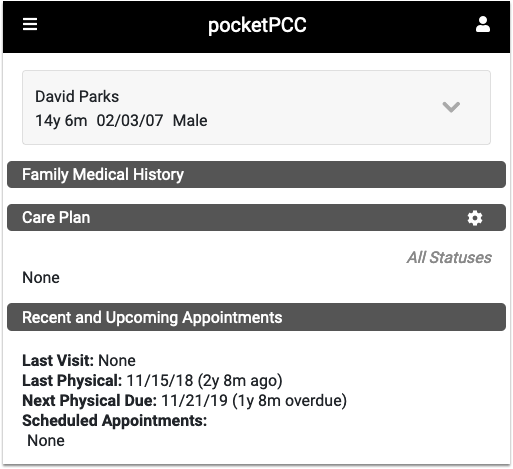
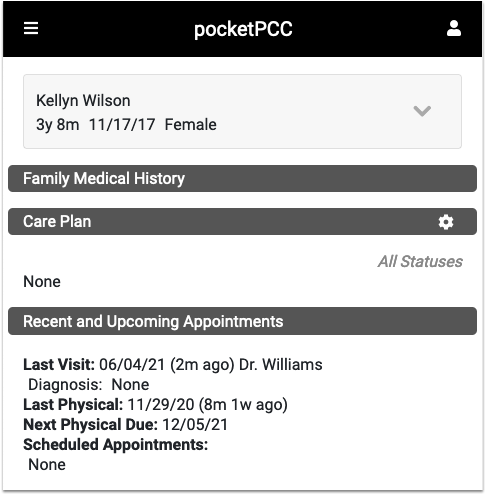
Review Patient History, Patient Details, and the Chart Note
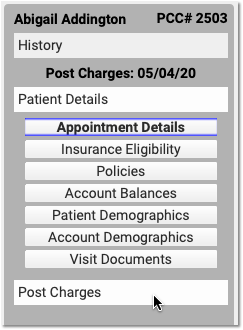
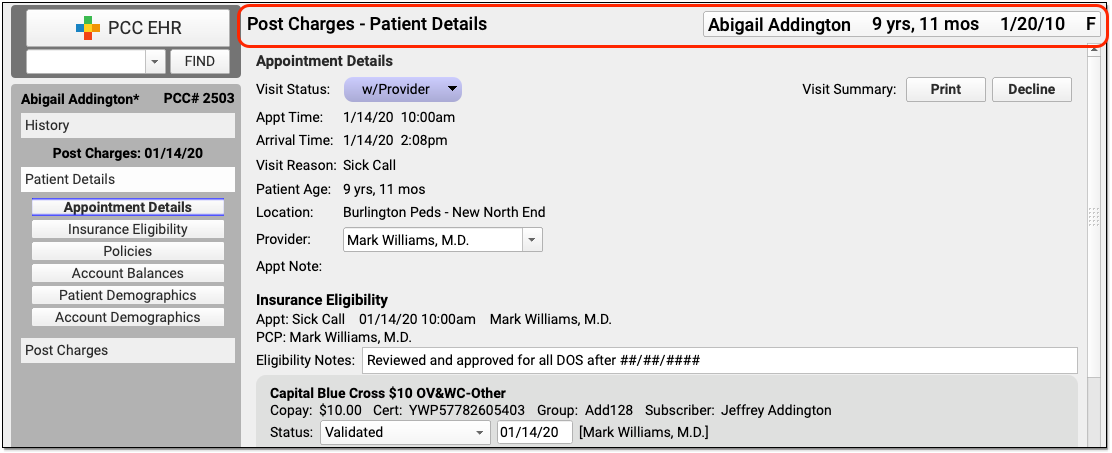
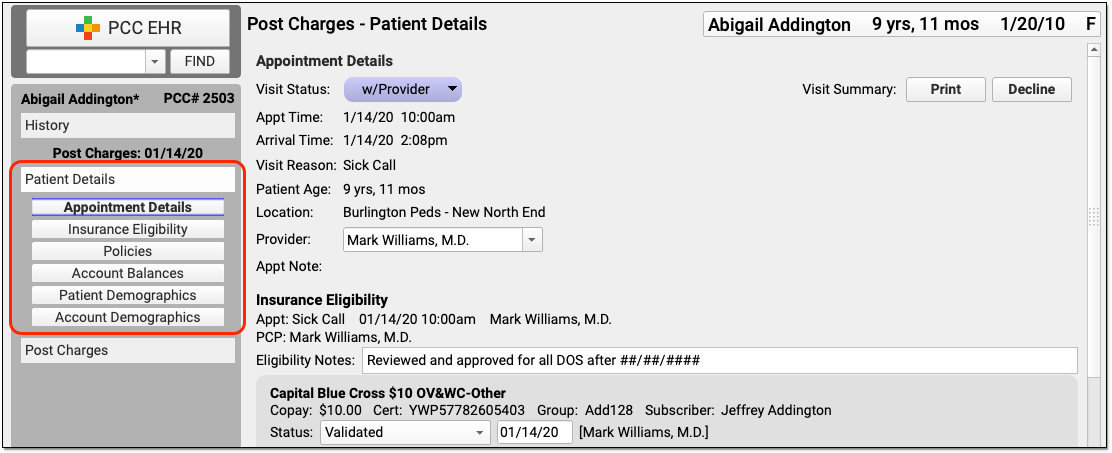
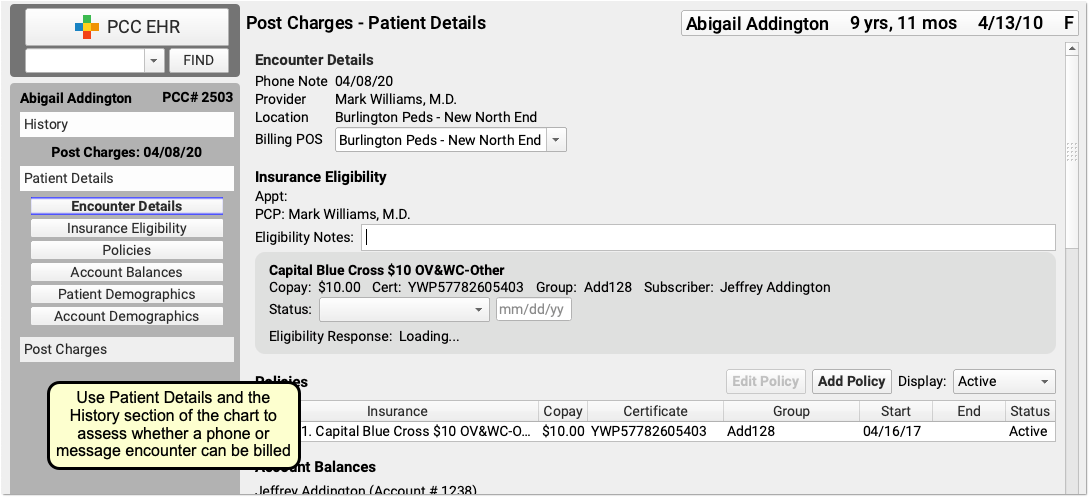
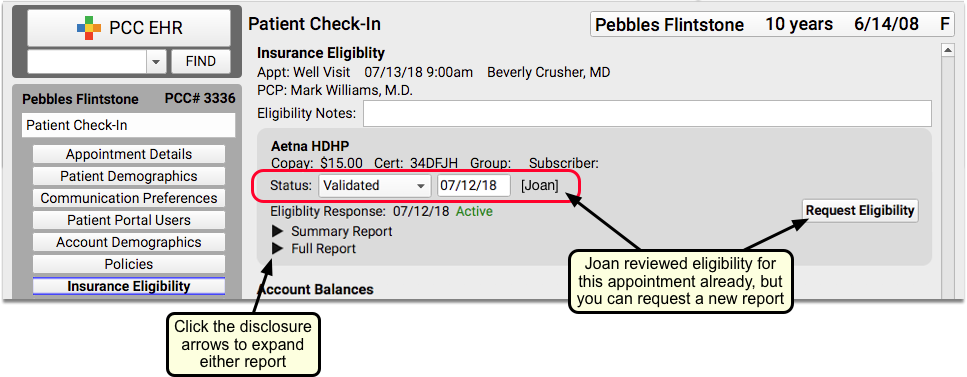
Review your practice’s Patient Details protocol to check eligibility, update insurance policies, or check demographic information.

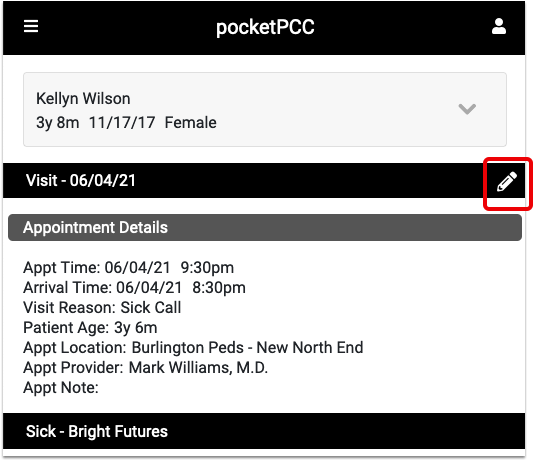
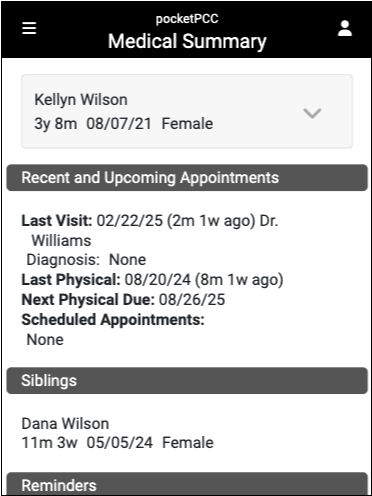
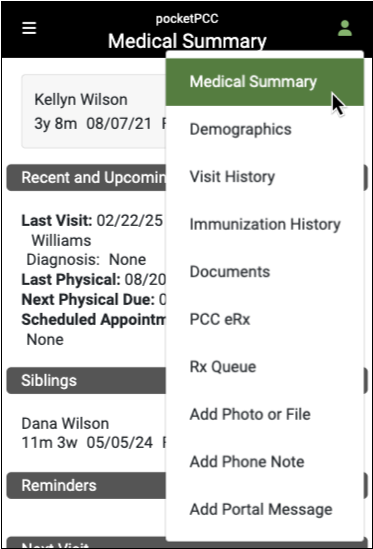
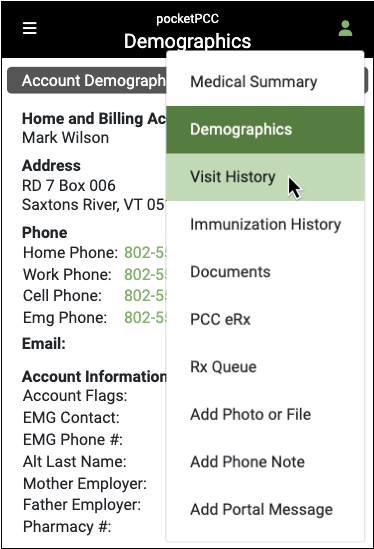
You can click “History” to visit the patient’s chart history or “Visit Note” to open a copy of the encounter’s chart note.

Click “Post Charges” to Open the Post Charges Protocol
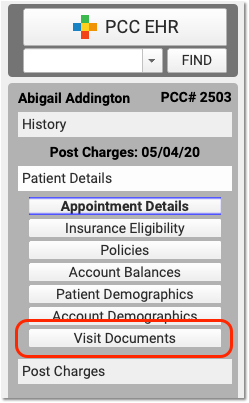
When you are ready to post charges, payments, and claim information, click on the “Post Charges” navigation button.
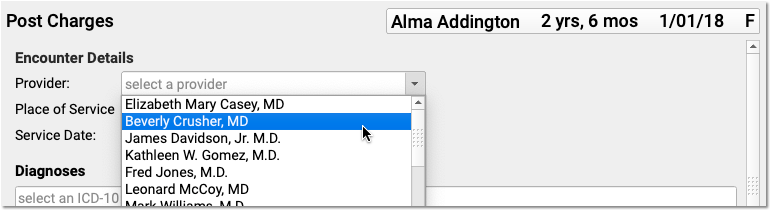
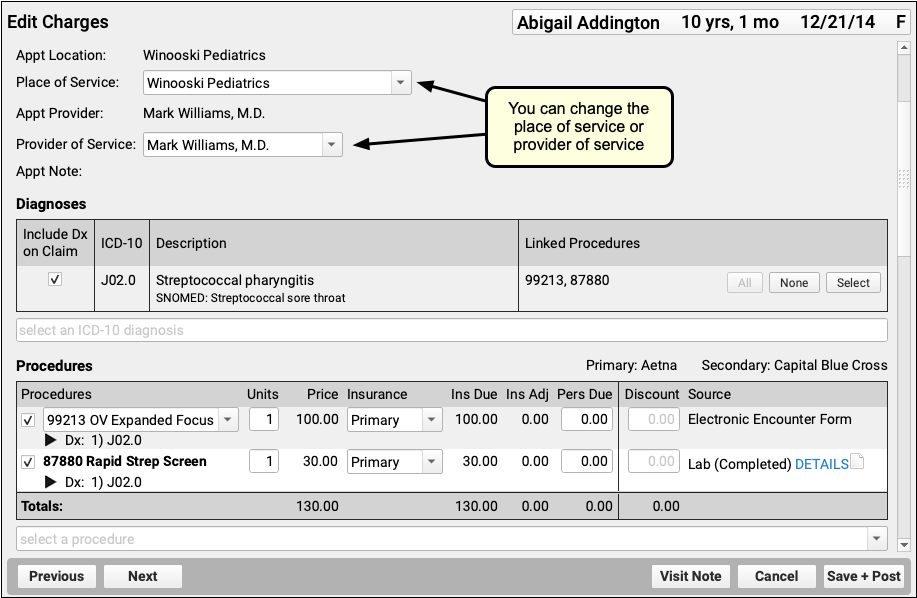
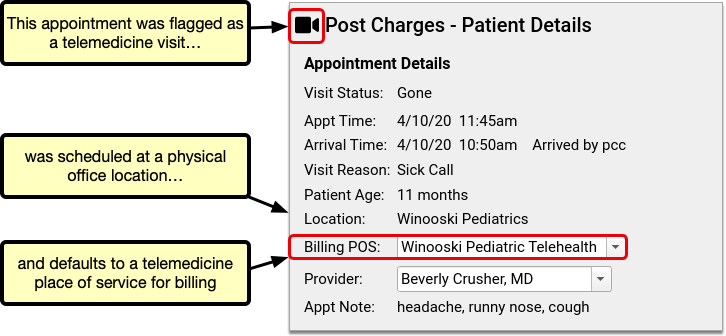
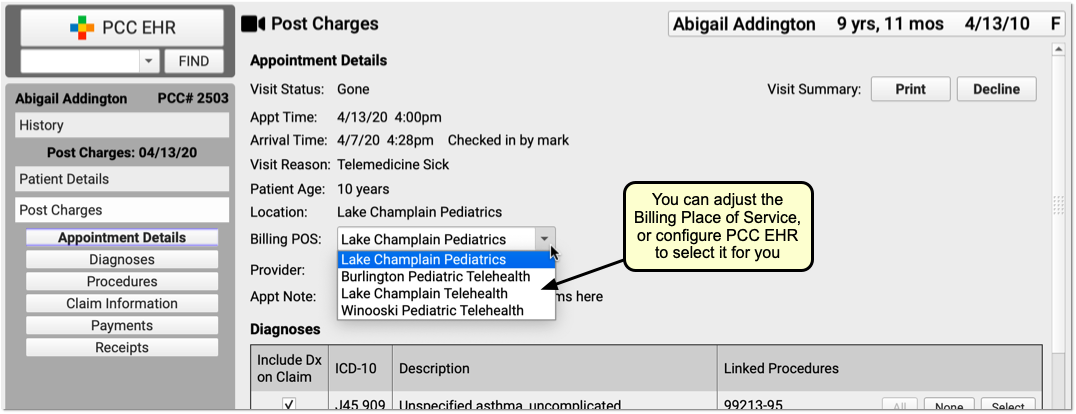
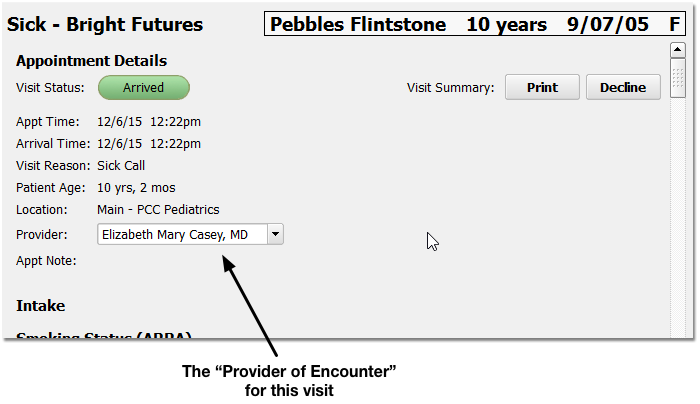
Review the Encounter’s Place of Service and Provider of Service
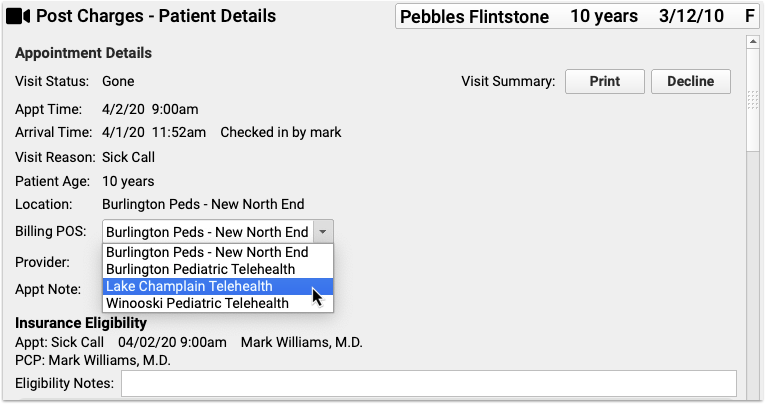
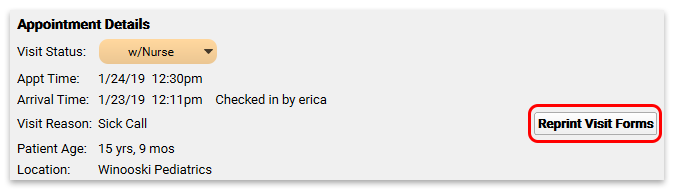
If you need to change the billing place of service or provider of service, you can do so in the Appointment Details component at the top of Post Charges.
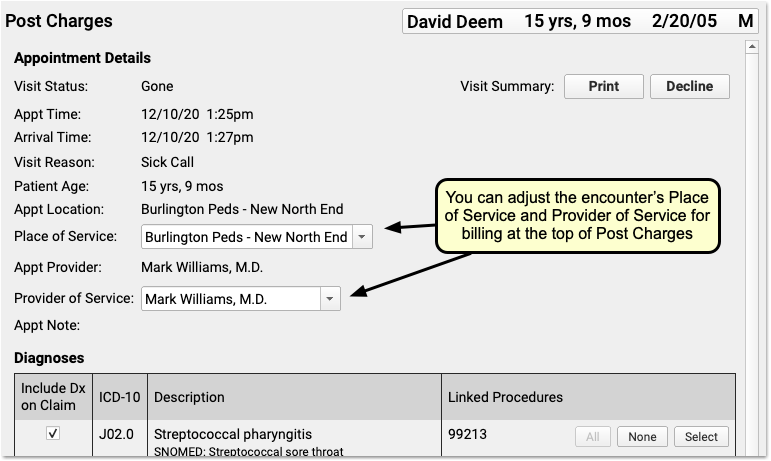
For example, if you are posting charges for a telemedicine encounter, you may need to change the billing place of service for some carriers. Also, sometimes an encounter is scheduled with a temporary or placeholder “Nurse” clinician and you must select the clinician who actually saw the patient. The changes you make here will not effect the scheduled Appointment Provider for the encounter.
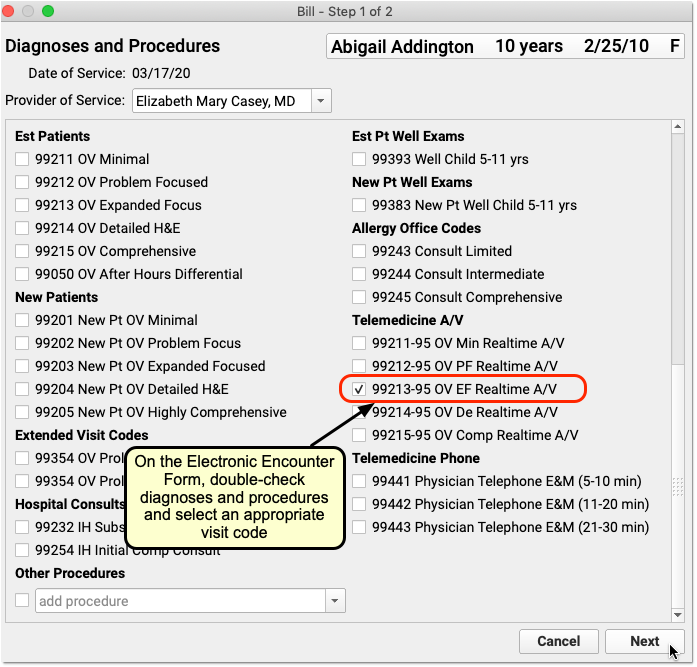
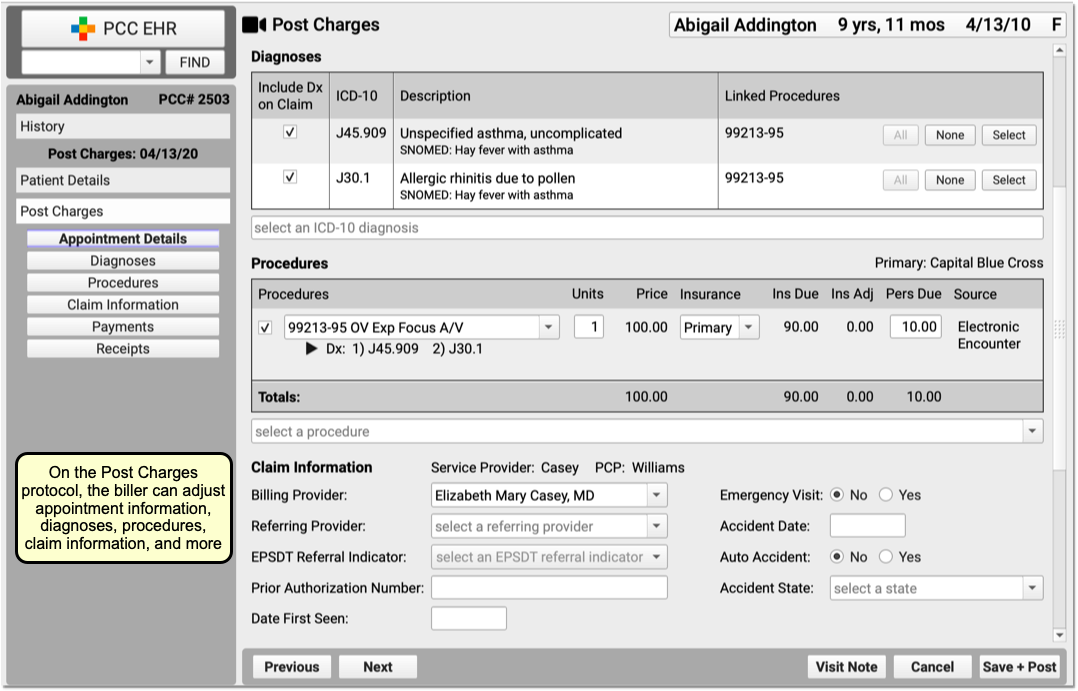
Review and Update Diagnoses and Procedures
Use the Diagnoses and Procedures components to review and update codes and linking for the encounter.
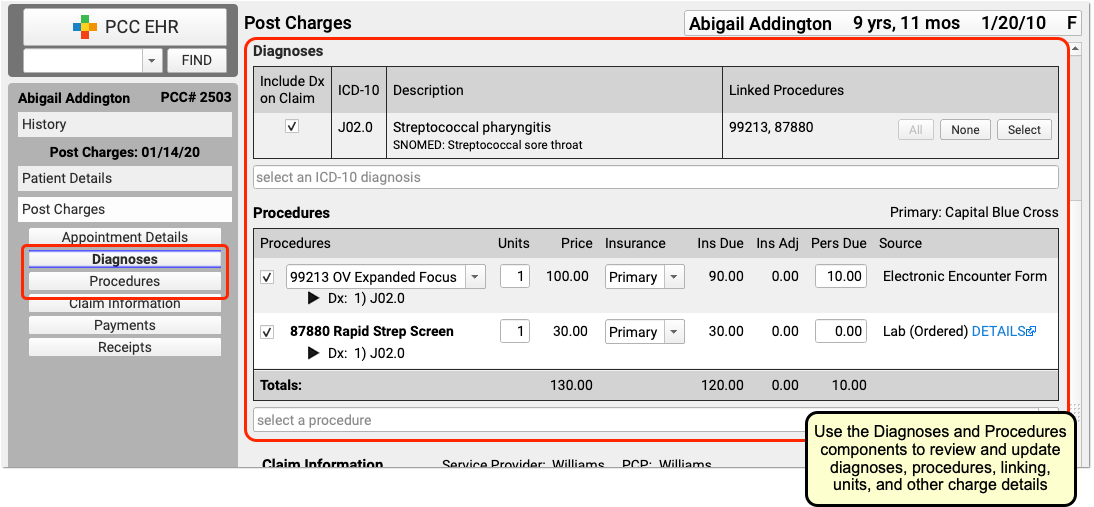
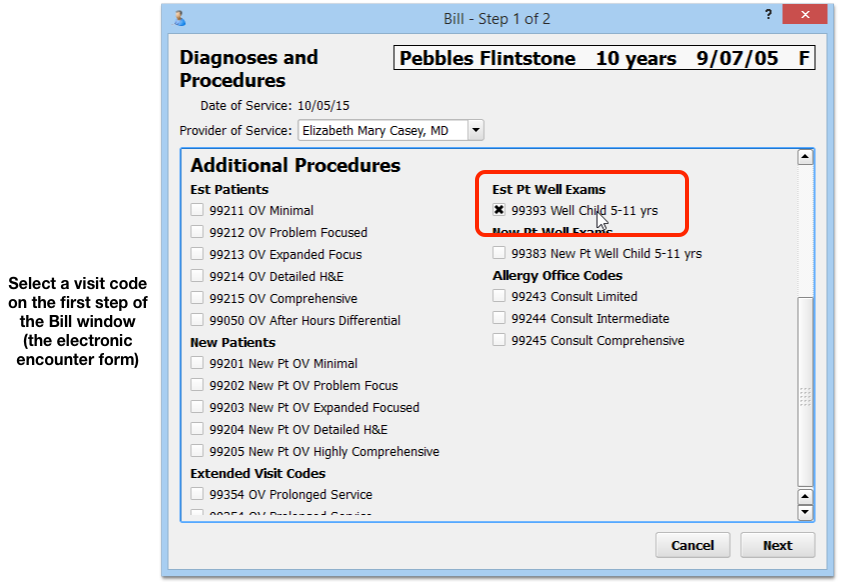
The Diagnoses and Procedures components display what the clinician selected in the Bill window (their “electronic encounter form”). If you need to add a modifier to a code, you can click on a procedure to select variations.
You can optionally add diagnoses or procedures that you need for billing.
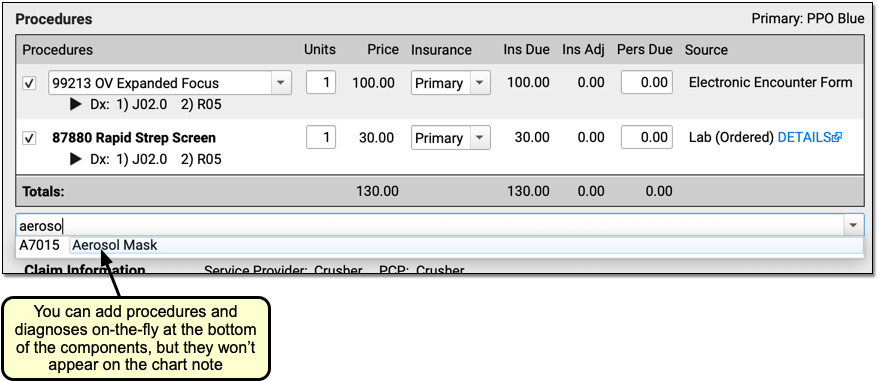
New Diagnoses and Procedures Will Not Appear on the Chart Note: While a biller can add diagnoses and procedures on the Post Charges protocol, those items will only appear in the billing record and on the claim. For most situations, the clinician should chart all procedures and diagnoses on the chart note.
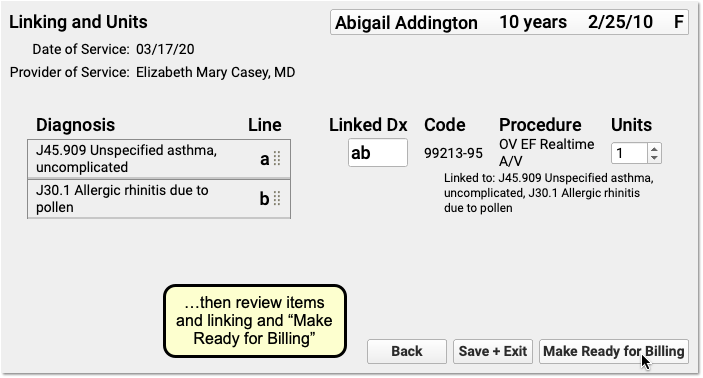
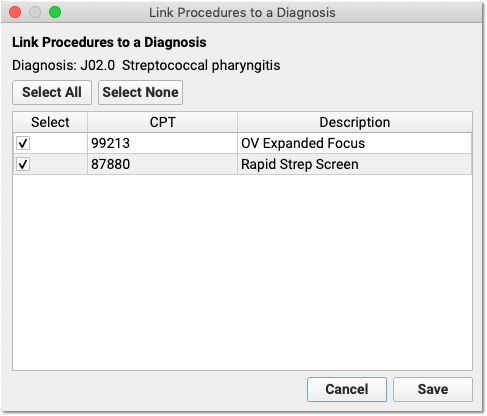
Adjust Linking and Other Procedure Details
You can adjust linking in either the Diagnoses or Procedures components. You can click to link or unlink all procedures, or open a selection window.
In the Procedures component, you can set which diagnosis is primary for each procedure.
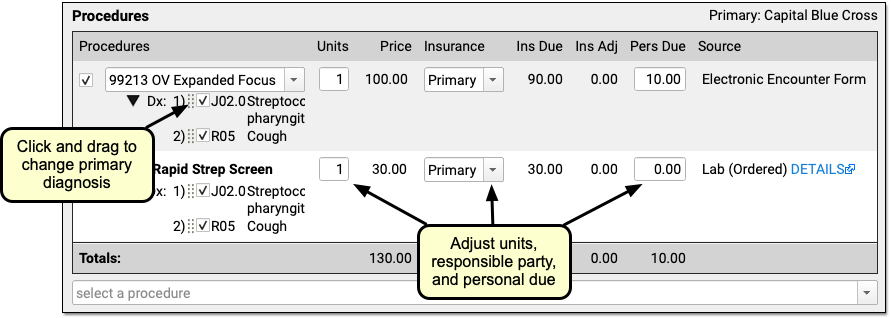
You can adjust the number of units, switch to a secondary insurance or “Self Pay”, and change the amount due personal (to adjust the copay on a charge, for example).
Complex Billing Configuration Available: As you work, you may see due amounts change based on your selection and your practice’s configuration. PCC supports configurations for price schedules, copay rules, capitated plans that adjust off charges immediately, and Medicaid plans (where nothing reverts to personal due). Your practice can customize the billing behavior of any procedure for any insurance policy. The correct amounts and adjustments will appear in the Procedures component automatically.
Select a Billing Provider or Enter Additional Claim Information
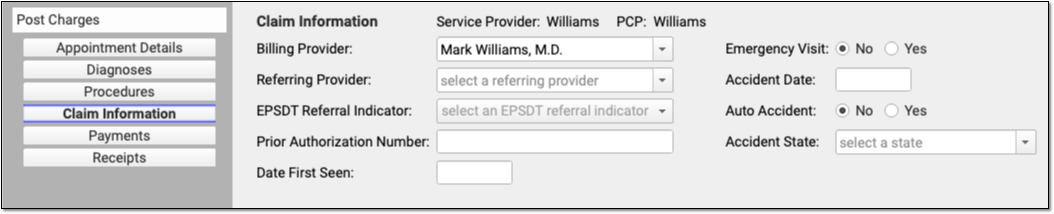
If an encounter needs to be billed under a different clinician’s supervision, is related to an accident, or has additional details that should appear on the claim, you can enter that information in the Claim Information component.
Who Are the Service and Billing Providers?: PCC EHR automatically indicates that the provider scheduled for the patient is the Service Provider. You can adjust who saw the patient in the Appointment Details component. If the encounter should have a different billing provider, you can adjust that here in the Claim Information component. See below for more details.
Review Personal Balances and Today’s Payment
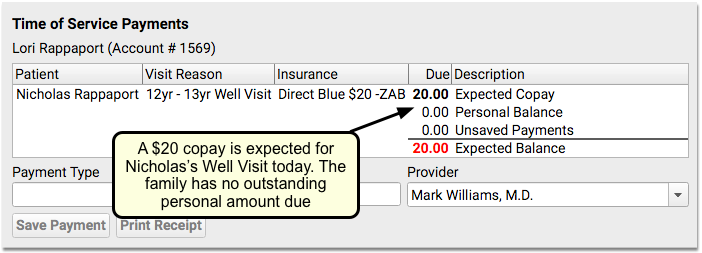
What amount is due personal for this encounter? Did the family pay part of their balance today? Use the Payments component to review personal due totals and enter additional payments.
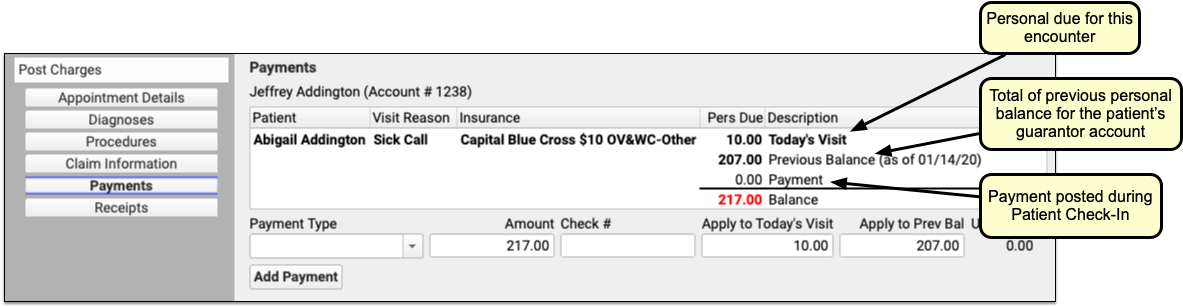
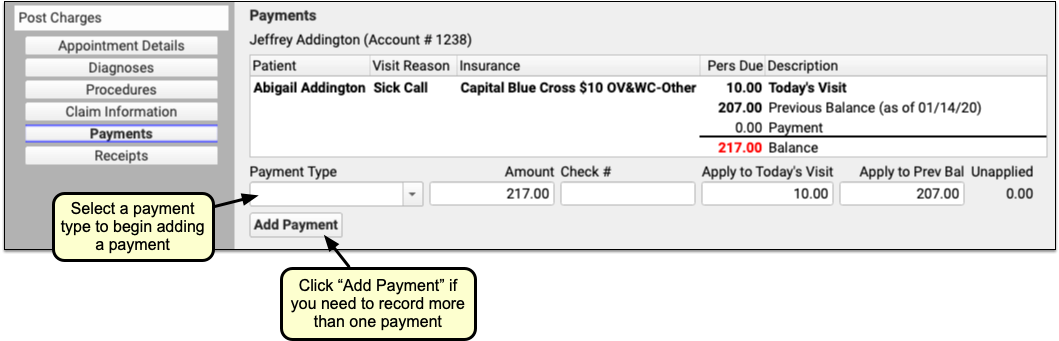
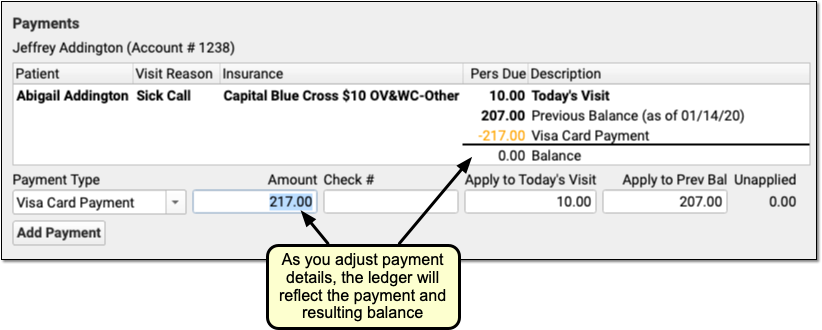
If today’s procedures result in a personal balance, you’ll see the total for the patient at the top, next to “Today’s Visit”. If the patient’s billing account has a previous balance, you’ll see that as well. If the family already paid the copay today, you’ll see that TOS payment on the screen.
Why Do I Have a Previous Balance?: As you post a charge and enter payments, you may see a previous balance. That balance could be for charges for any patient who shares the same billing account. You can review details for the personal balance on the Patient Details protocol.
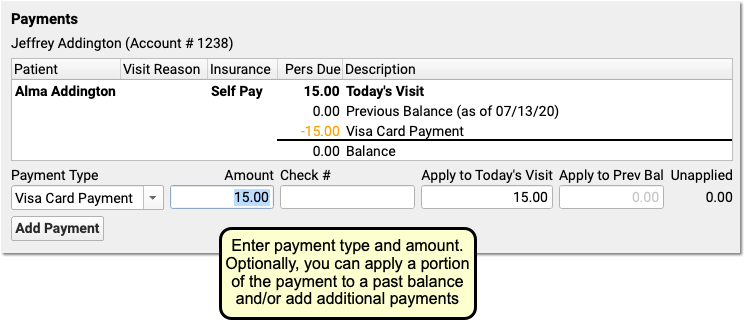
Enter Additional Payments or Adjustments for the Encounter
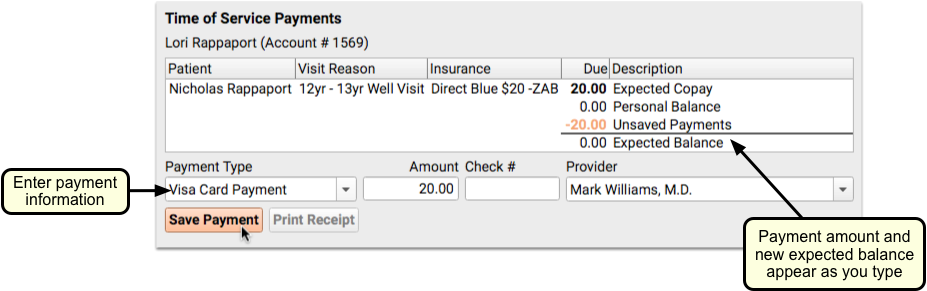
Select a Payment Type to begin entering a payment.
PCC EHR enters the amount due in the Amount field for you. You can adjust that amount if the parent is not paying the full amount today. You can optionally adjust how much will be applied to today’s visit or the account’s previous balance.
If you select a time of service discount as your payment type, you can optionally enter a percentage as the amount and PCC EHR will do the math for you. Once you enter a discount, PCC EHR will update the Procedures component to illustrate the amount that was discounted for each charge.
As you enter payment or discount information, the ledger in the Payments component will update to reflect the payment and the new resulting balance.
Note that payments and discounts are not saved until you click “Save + Post”.
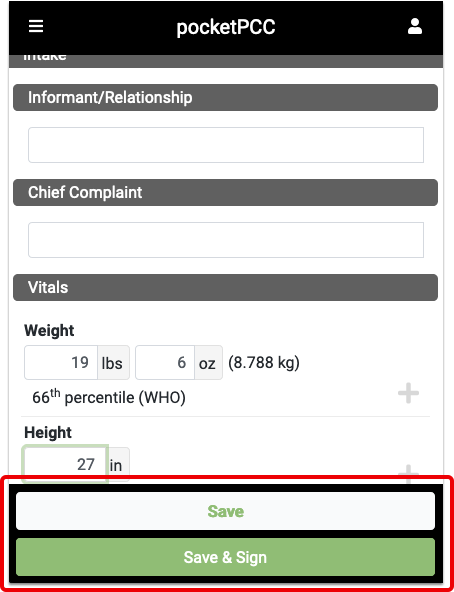
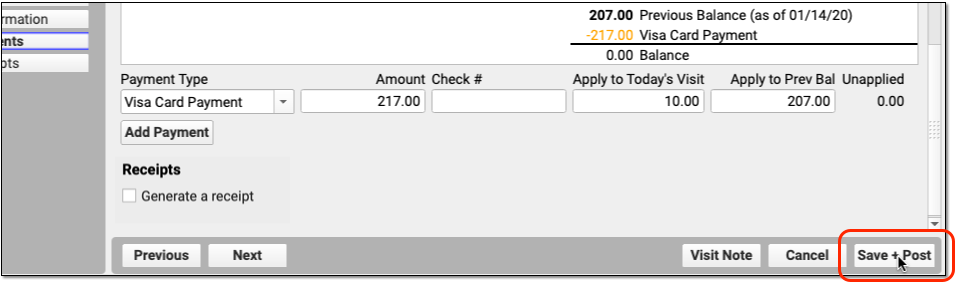
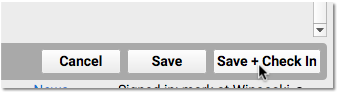
Click “Save + Post” to Finish Posting and Queue Up a Claim
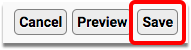
When you finish reviewing visit information, procedures, diagnoses, linking, claim information, and payments, click “Save + Post” to post the charges. (If you want a receipt right away, you can first click “Generate a Receipt”.)
The Schedule queue will display that the encounter’s charges are now posted.
What Happens Next?: As soon as you post charges, PCC queues up a claim. Later, your practice can generate claims in the Claims tool, which will review claim information for errors and then send claims electronically.
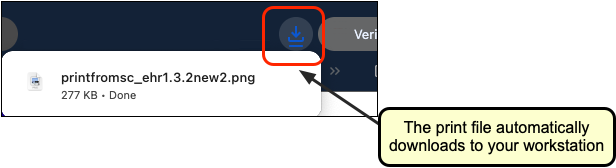
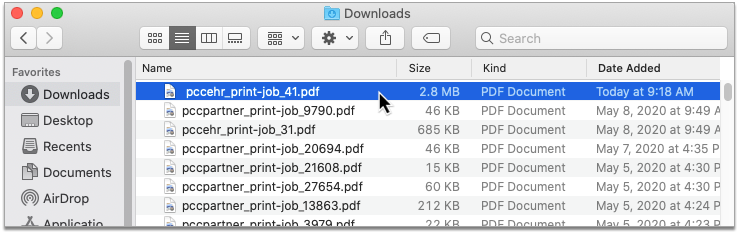
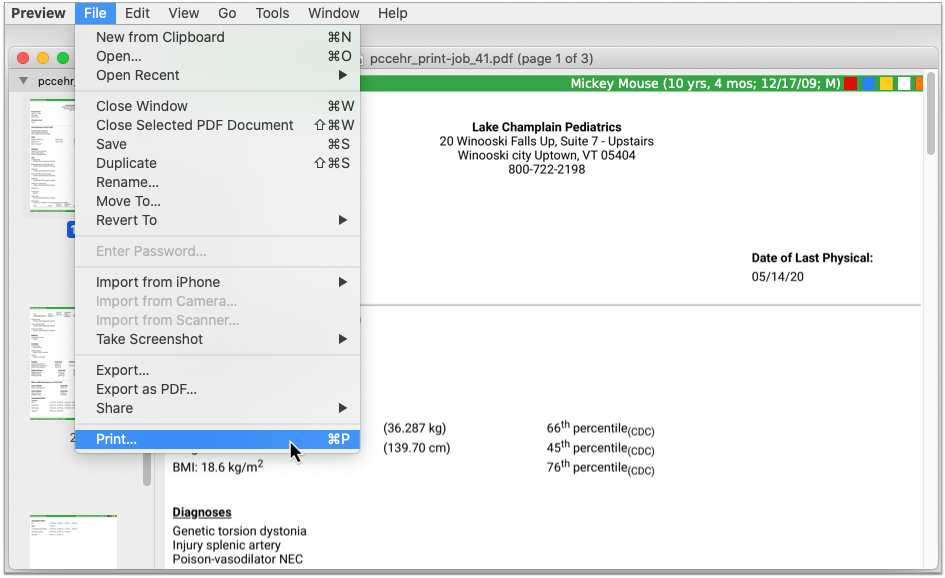
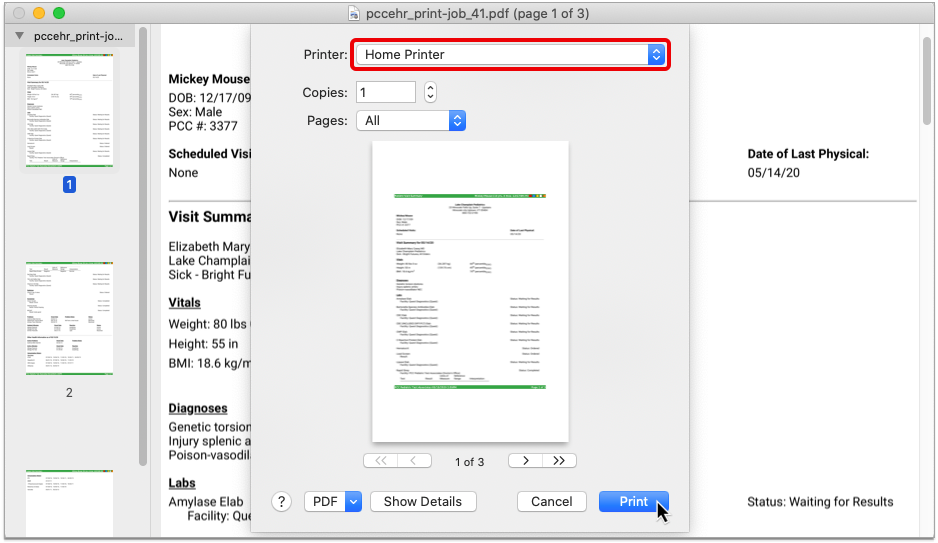
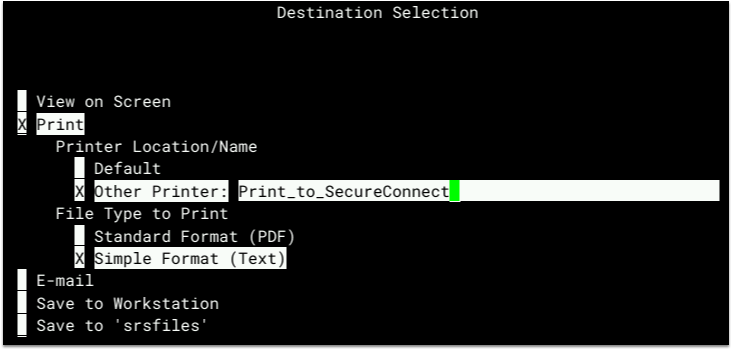
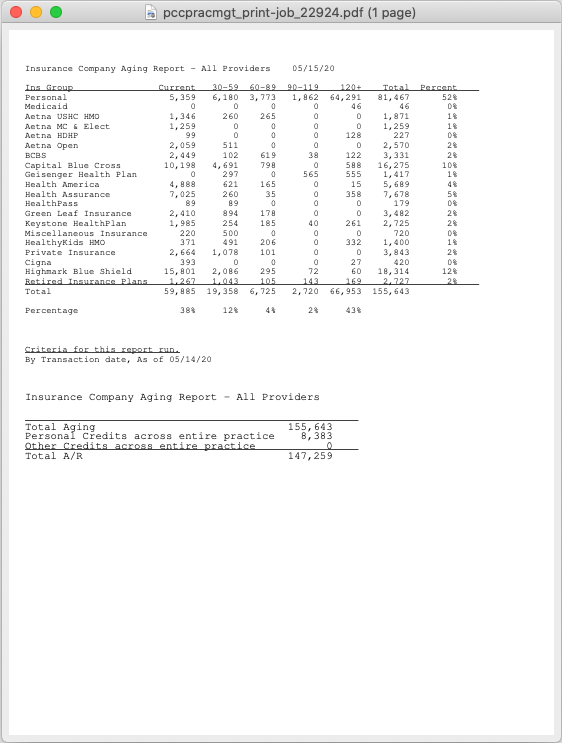
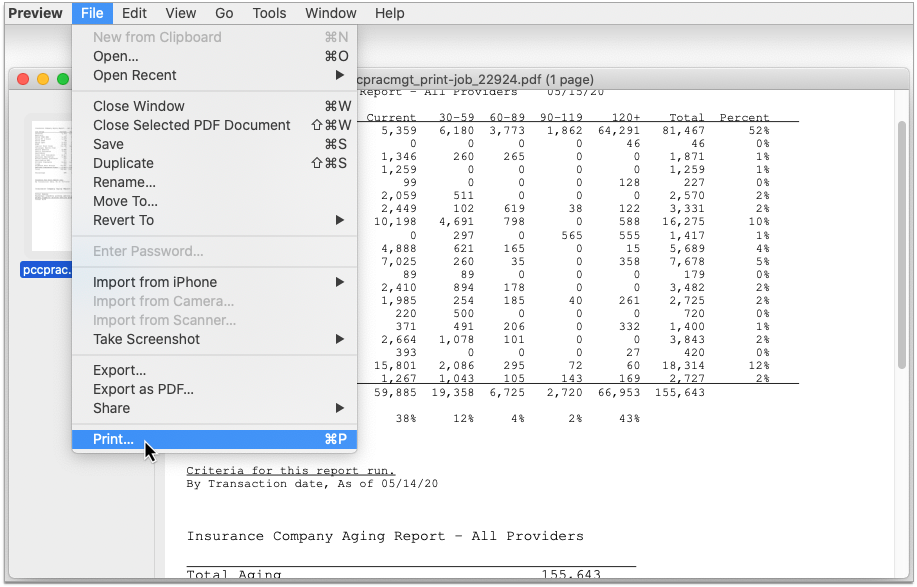
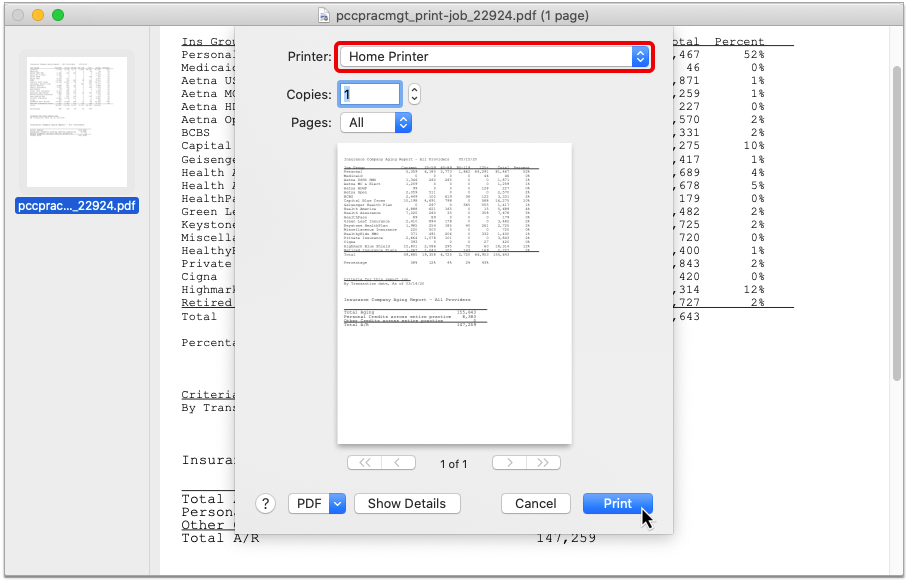
Optional: Print a Receipt
Does the family need a receipt for today’s visit? You can click the “Generate a Receipt” checkbox before you save charges, or click the “Posted” billing status to return to Post Charges and click “Generate a Receipt”.
Your practice can also print receipts during Patient Check-In or in the Payments tool.
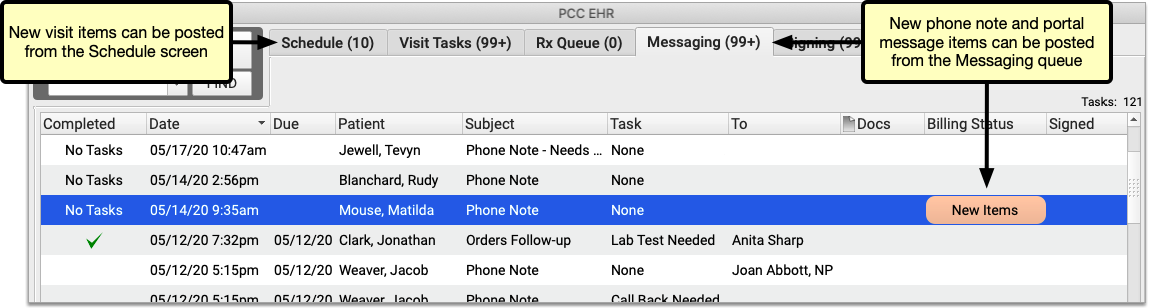
Return to an Encounter and Post More Charges and Payments Later
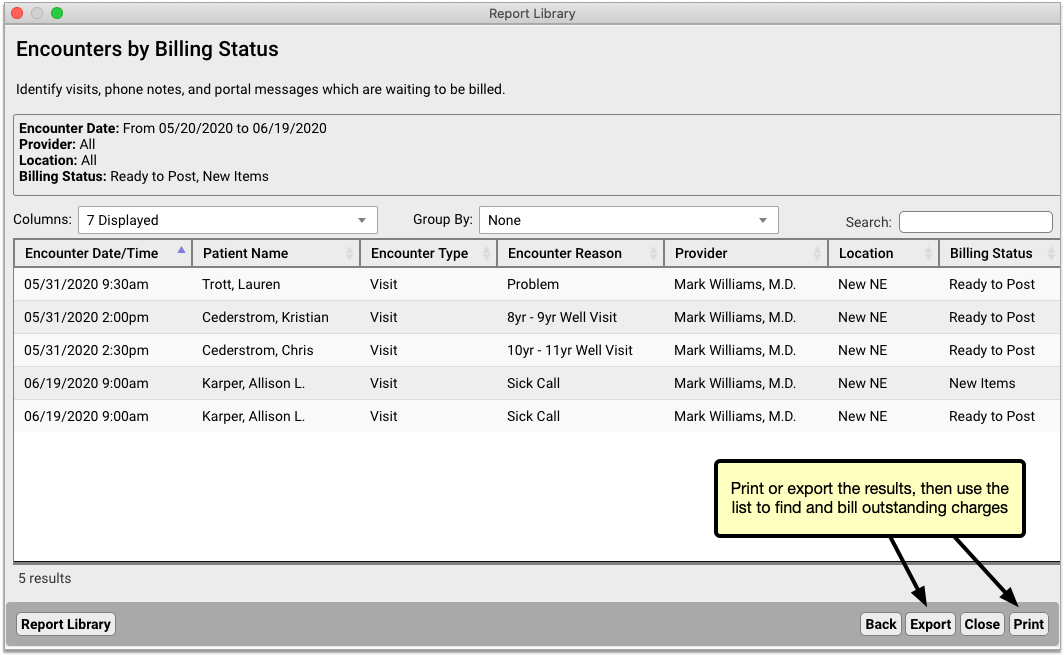
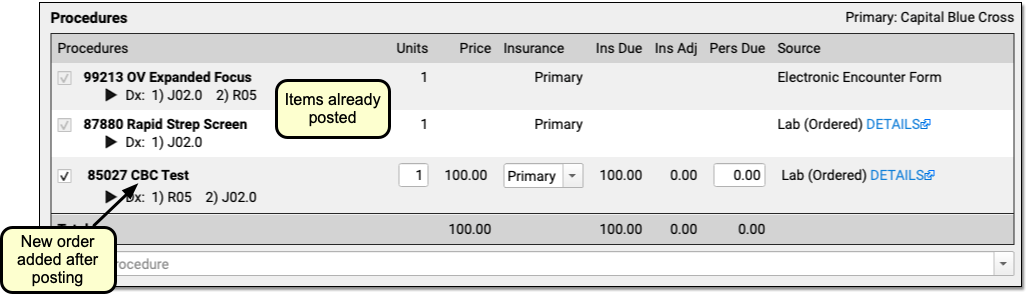
If a clinician returns to the chart note and adds additional diagnoses or procedures, you can spot that in the Billing Status column. (You can also use reports to find all visits with unposted charges.)

Click “New Items” to reopen the Post Charges tool and add the additional items to the claim.
You can review and enter any new procedures or diagnoses, adjust linking, add new payments, and click “Save and Post” to adjust the queued claim.
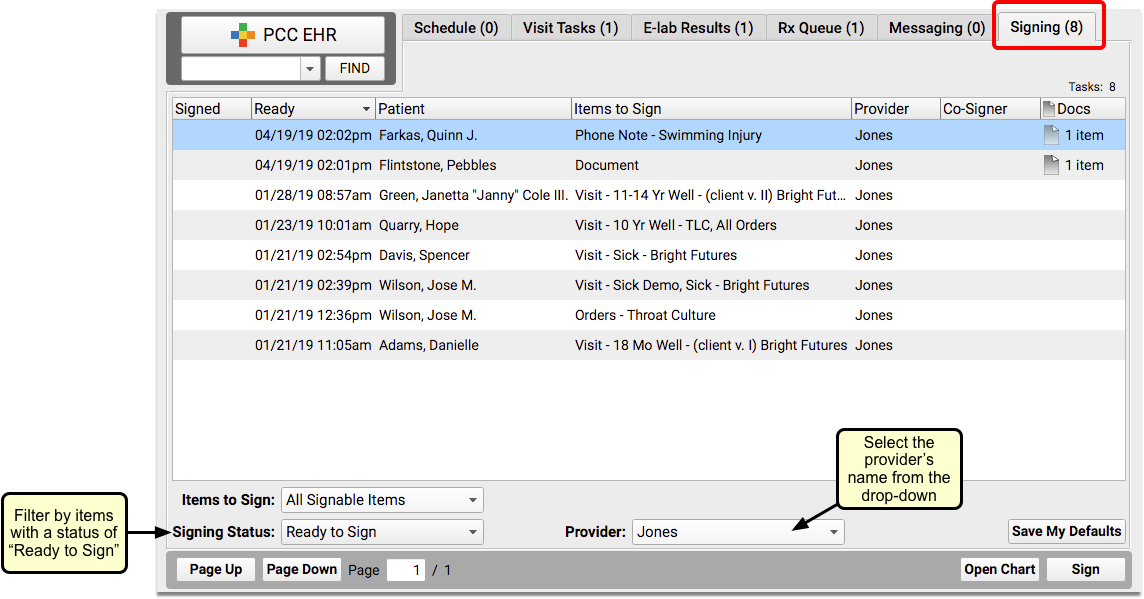
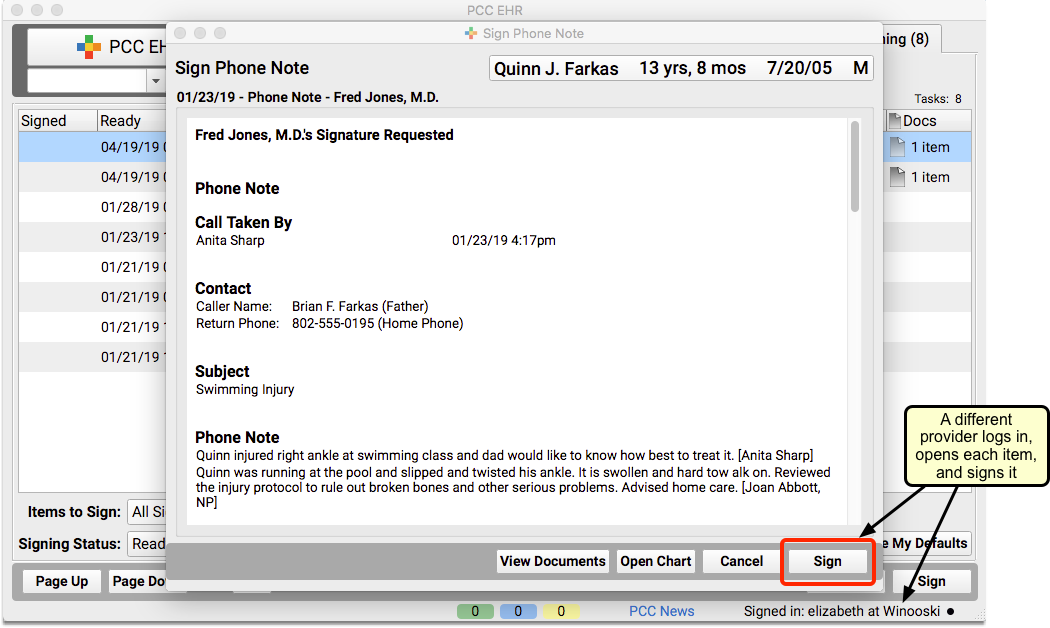
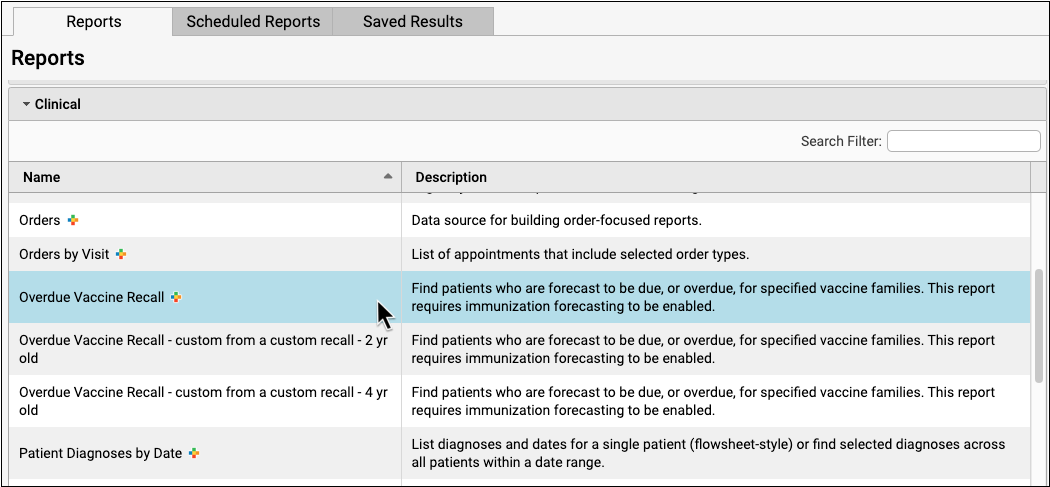
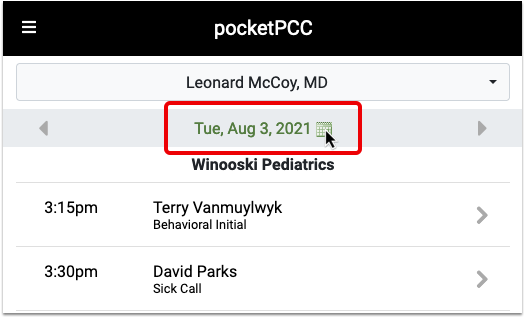
When is an Appointment Ready to Post?
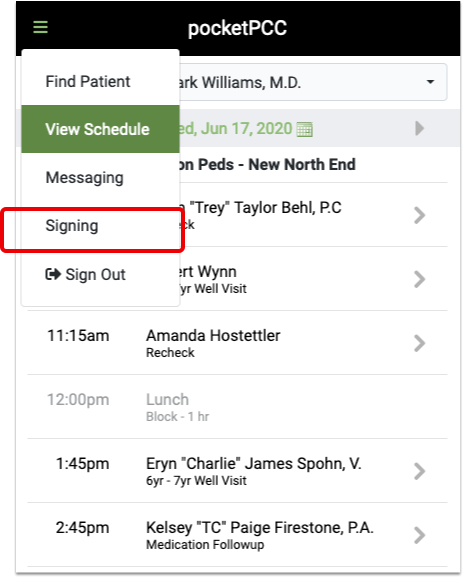
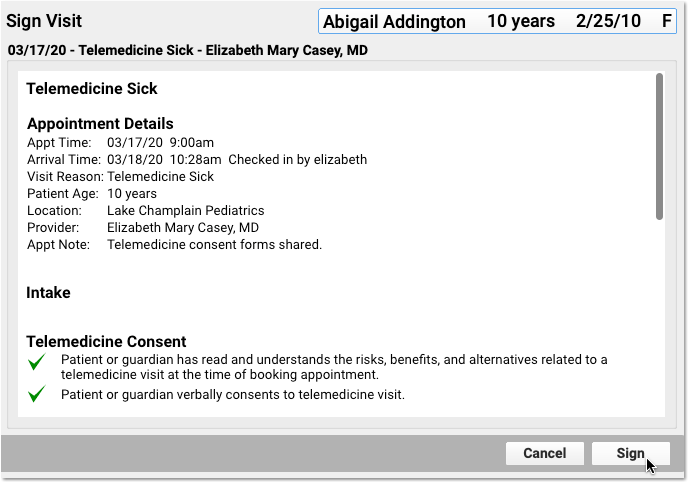
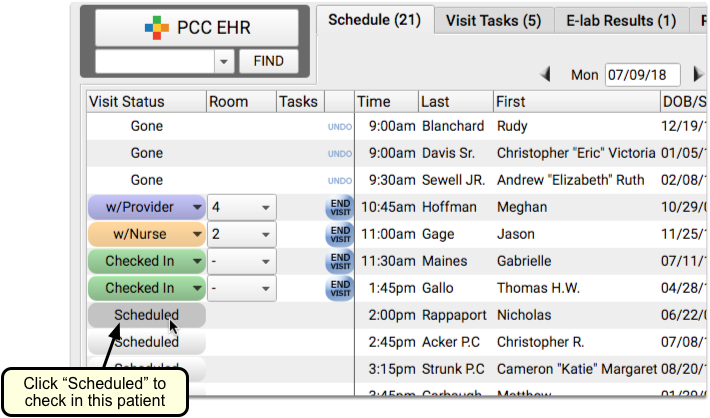
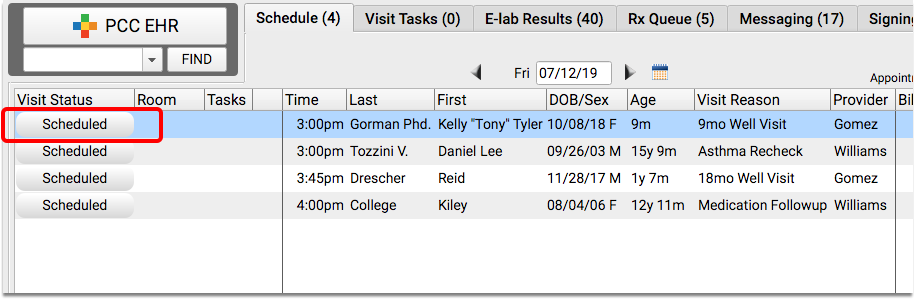
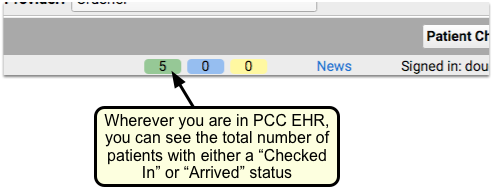
As you review the Schedule screen, how can you tell that an appointment is ready to post? Use the Billing Status and Signed columns to identify which appointments are ready to post and who has signed the appointment’s chart note.
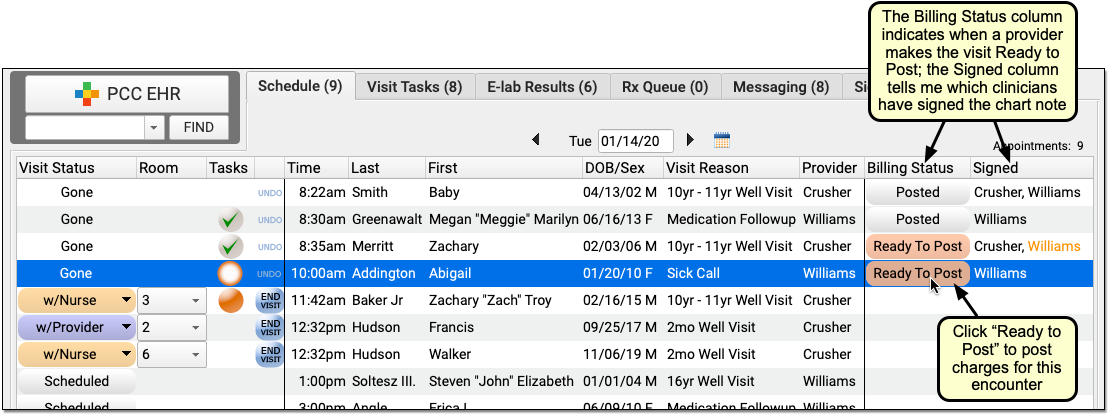
When a clinician finishes adding diagnoses and procedures to a chart note and then completes the electronic encounter form, they click “Make Ready For Billing”. That updates the status for the appointment to “Ready to Post”.
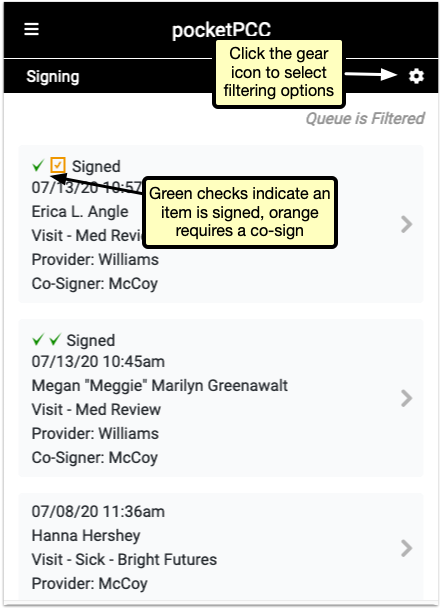
You may also want to review whether or not the clinician has signed the chart note, and check whether it has been co-signed, if required. While you can enter charges for an encounter that has not been signed, your practice’s billing policy may indicate that you wait for the chart note to be signed beforehand. An orange name indicates that a chart note requires co-signing.
For more information, see Prepare an Encounter for Billing.
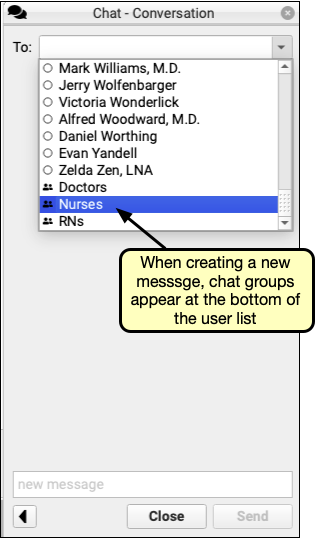
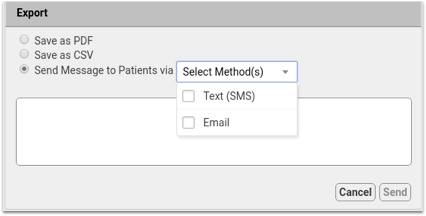
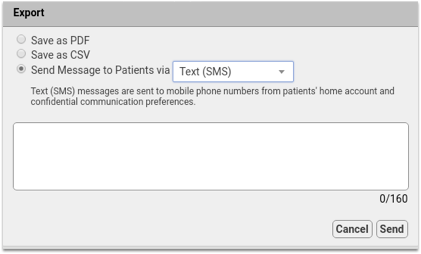
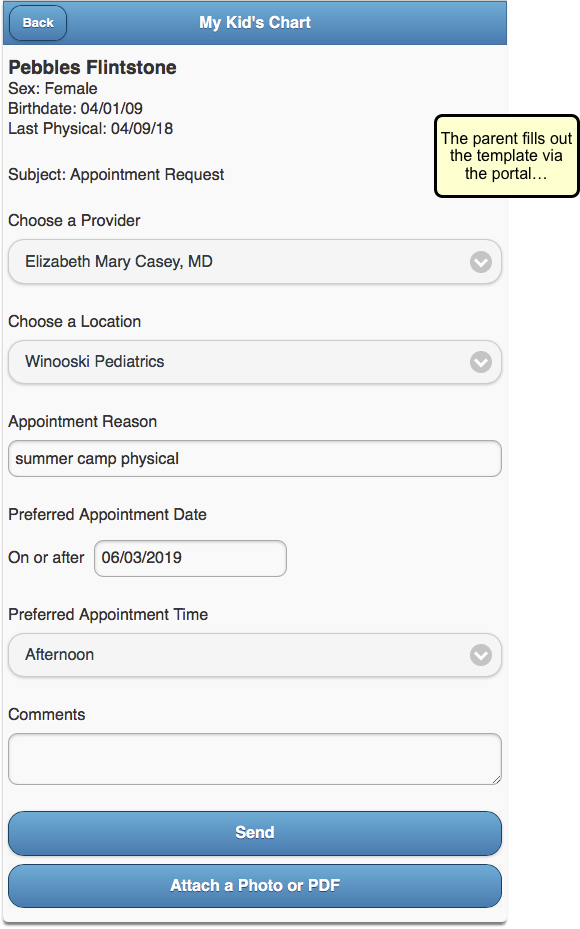
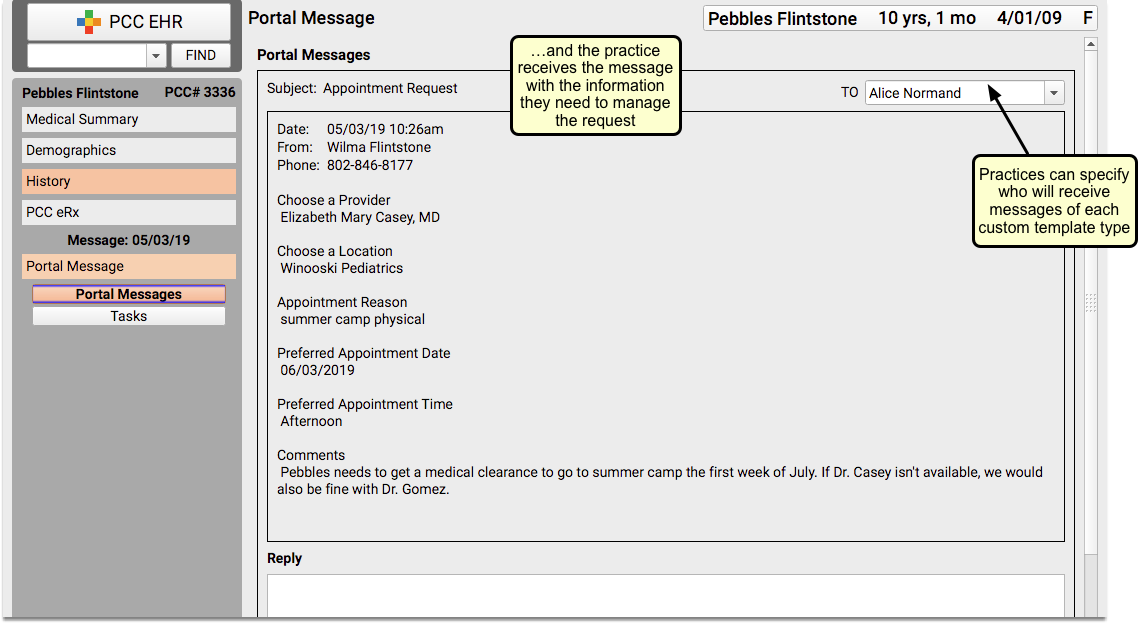
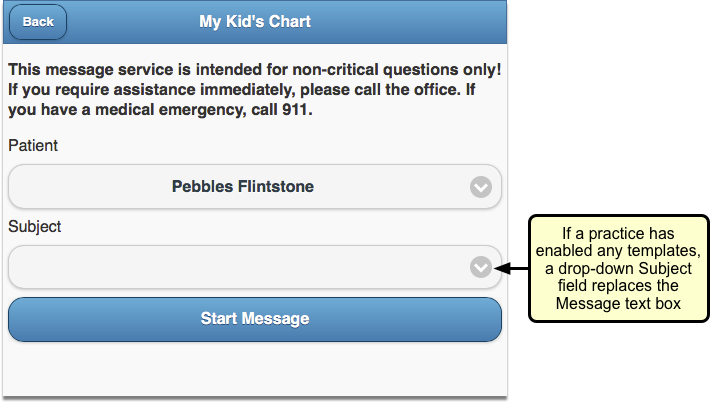
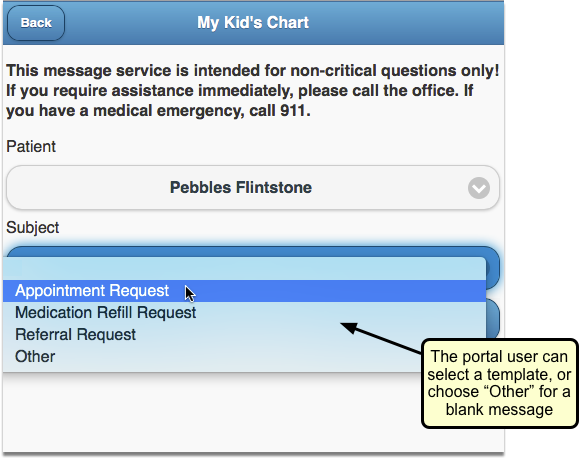
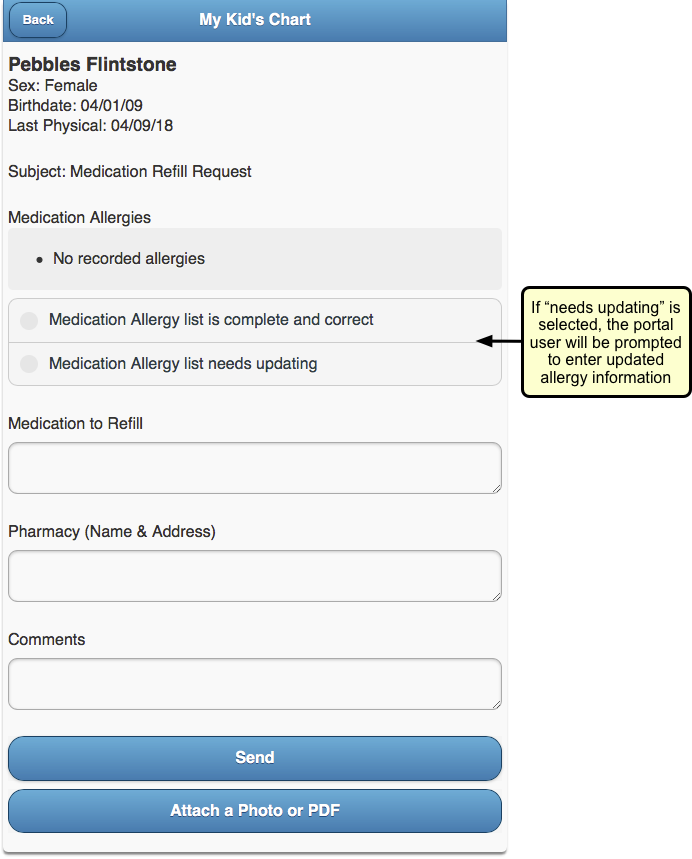
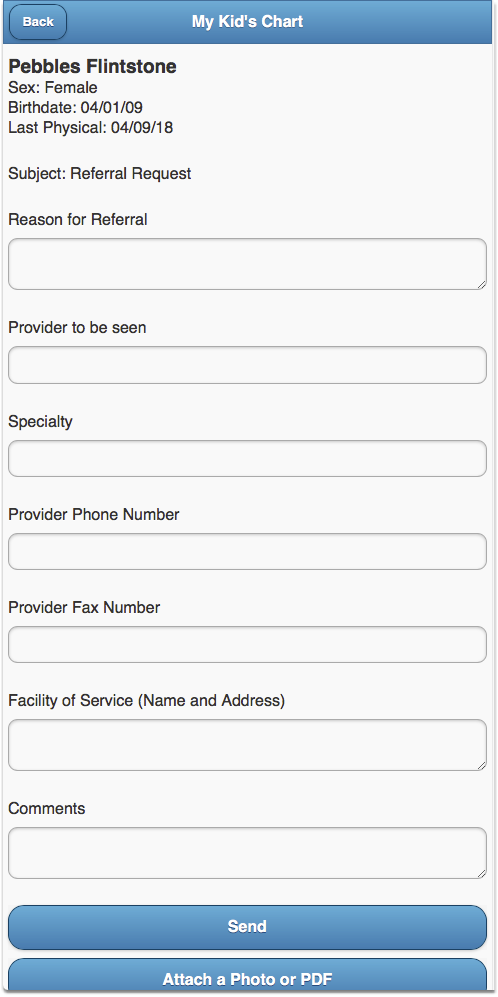
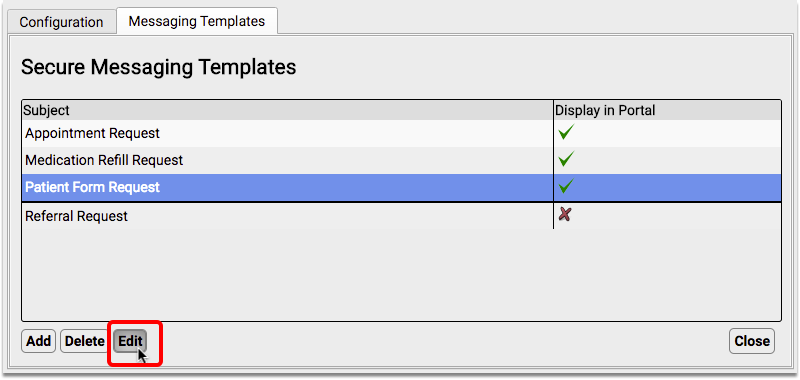
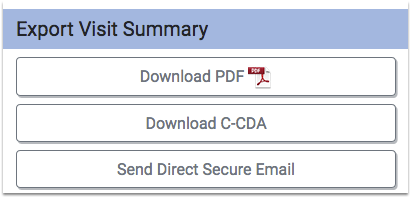
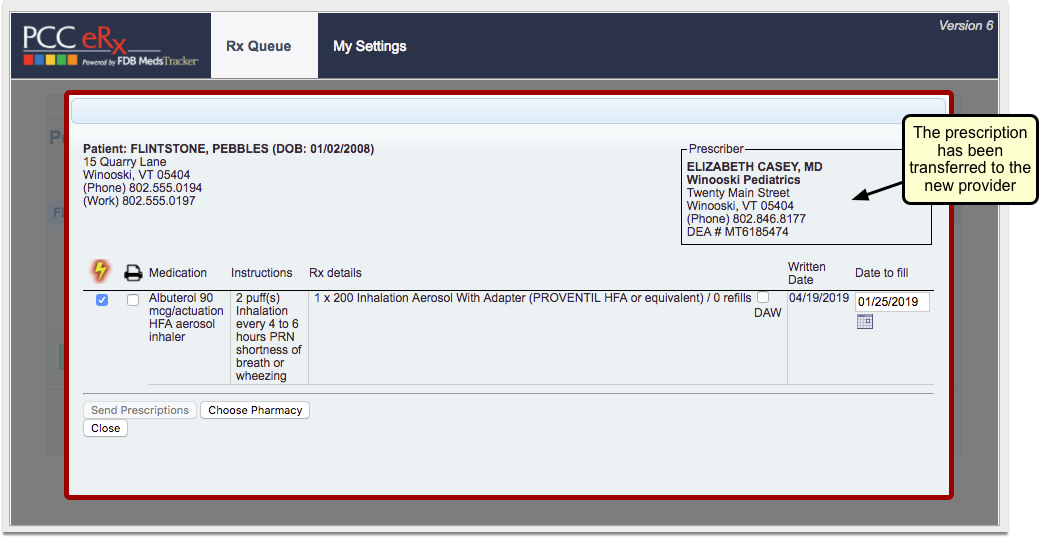
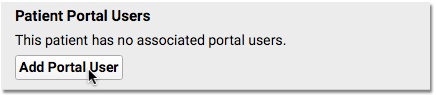
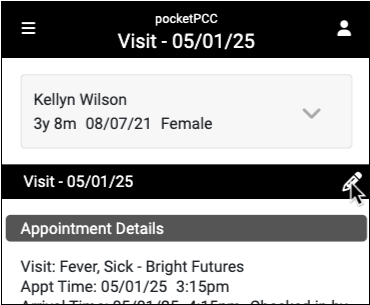
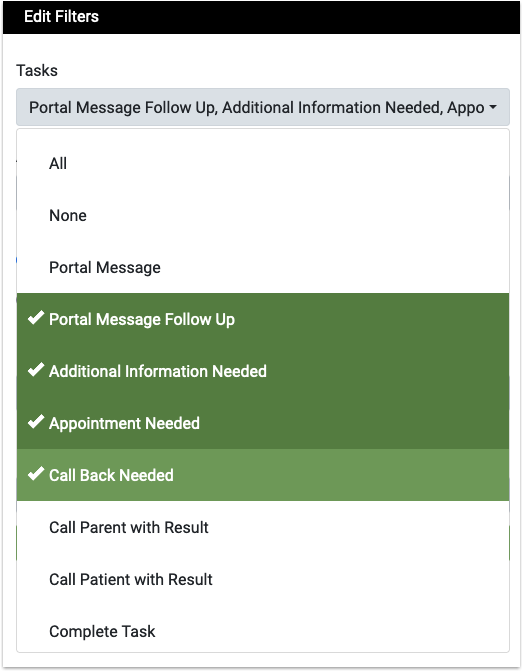
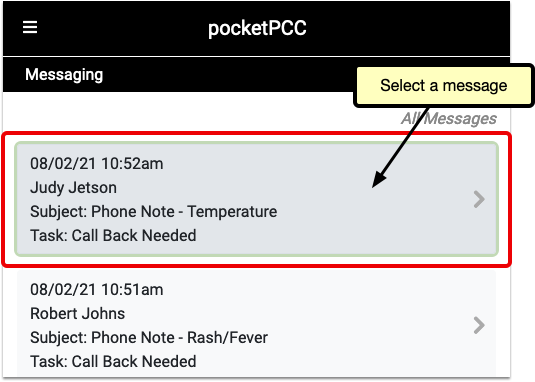
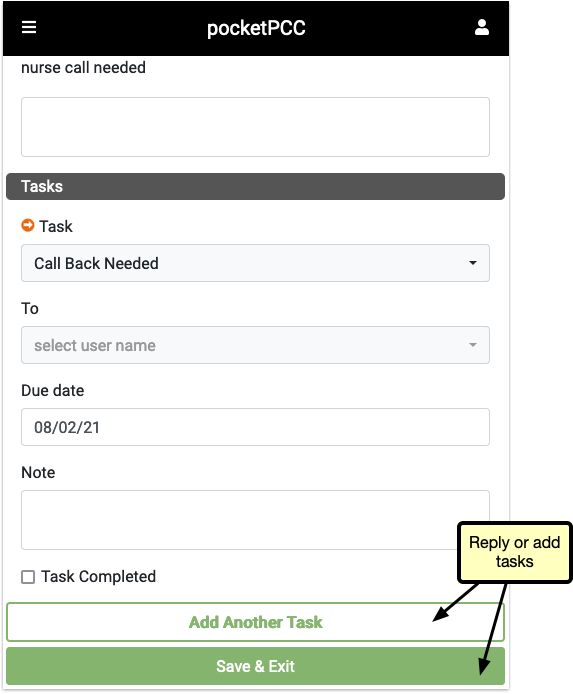
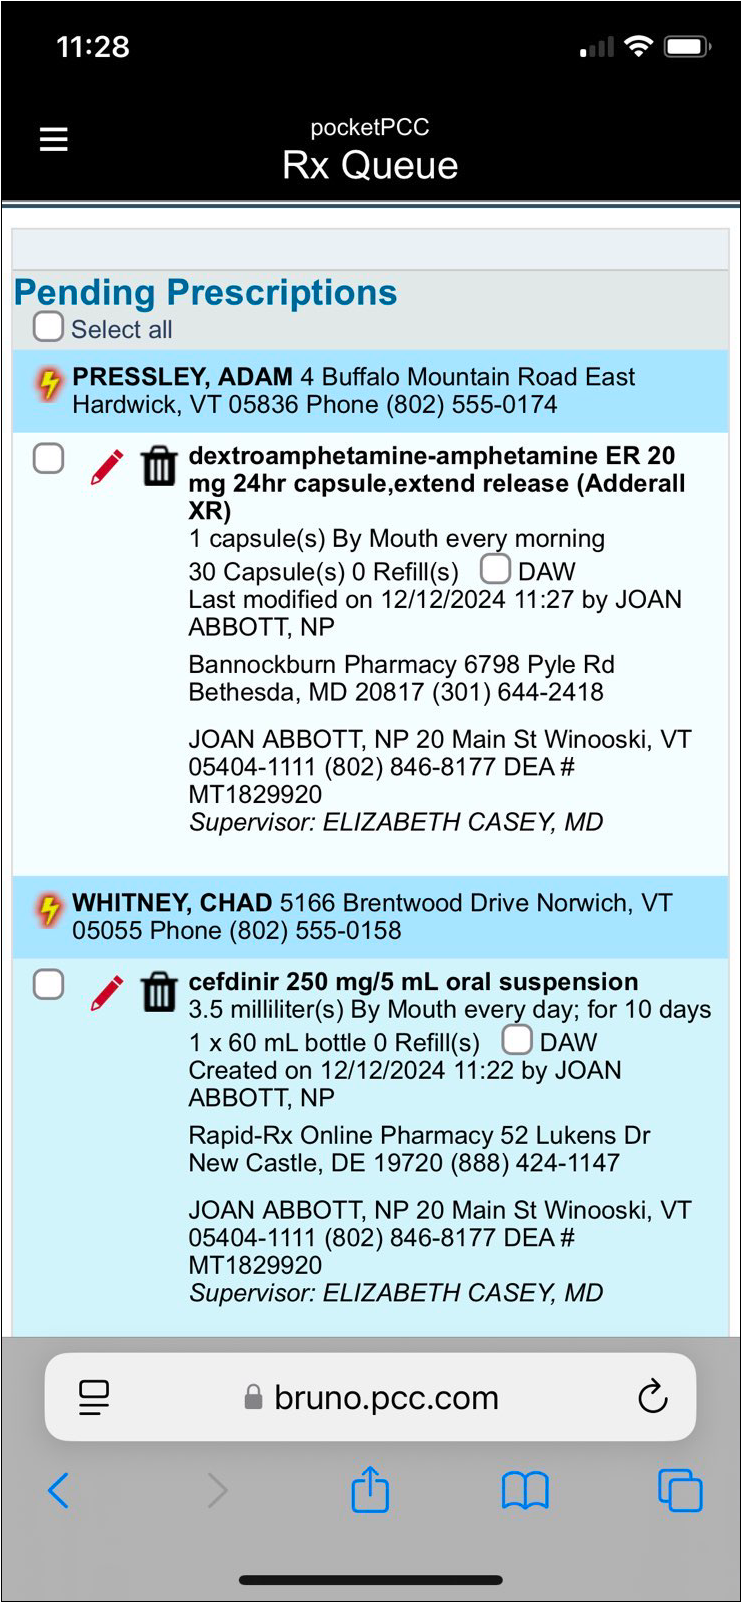
Post Charges for Phone Note and Portal Message Encounters
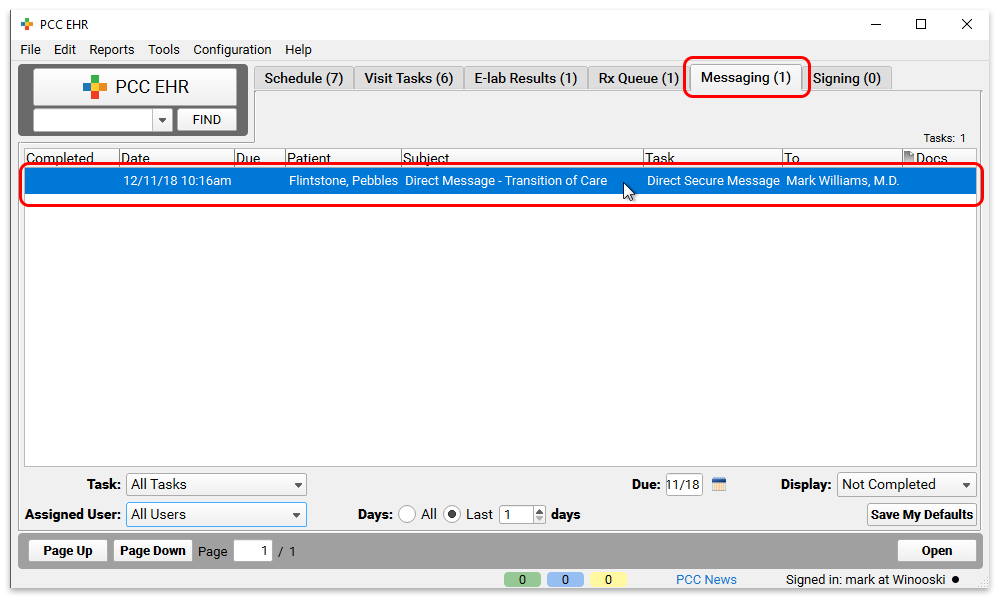
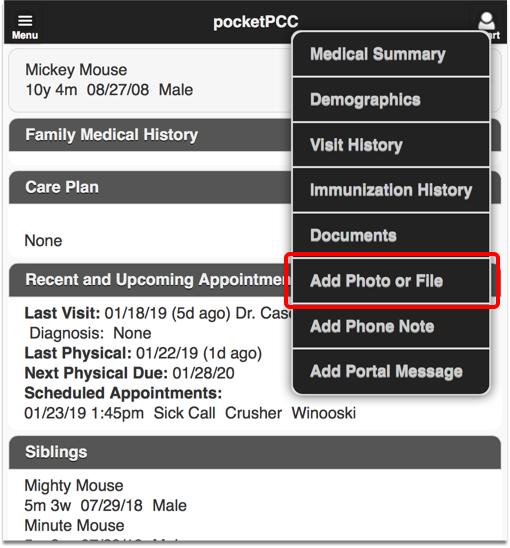
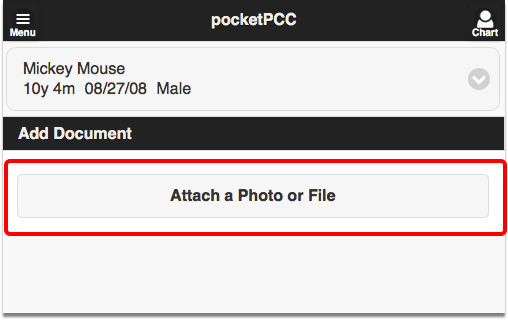
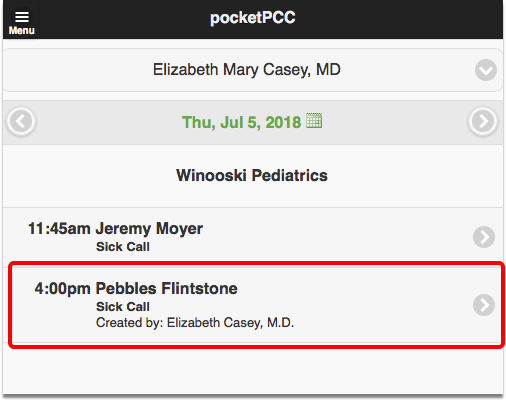
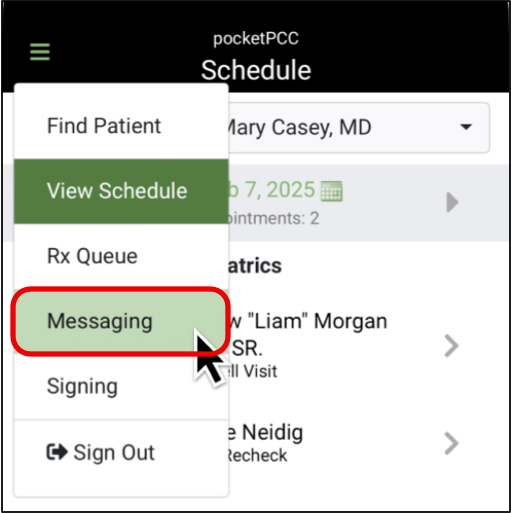
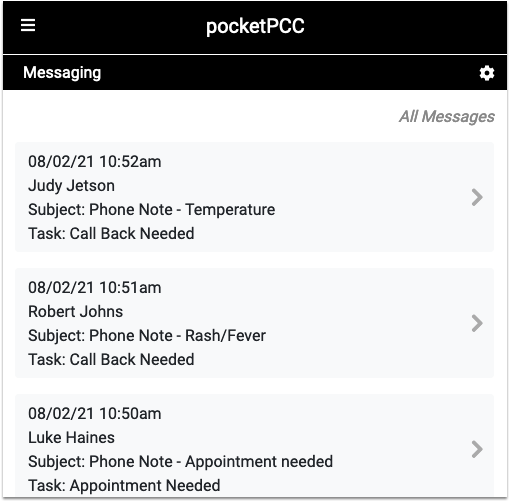
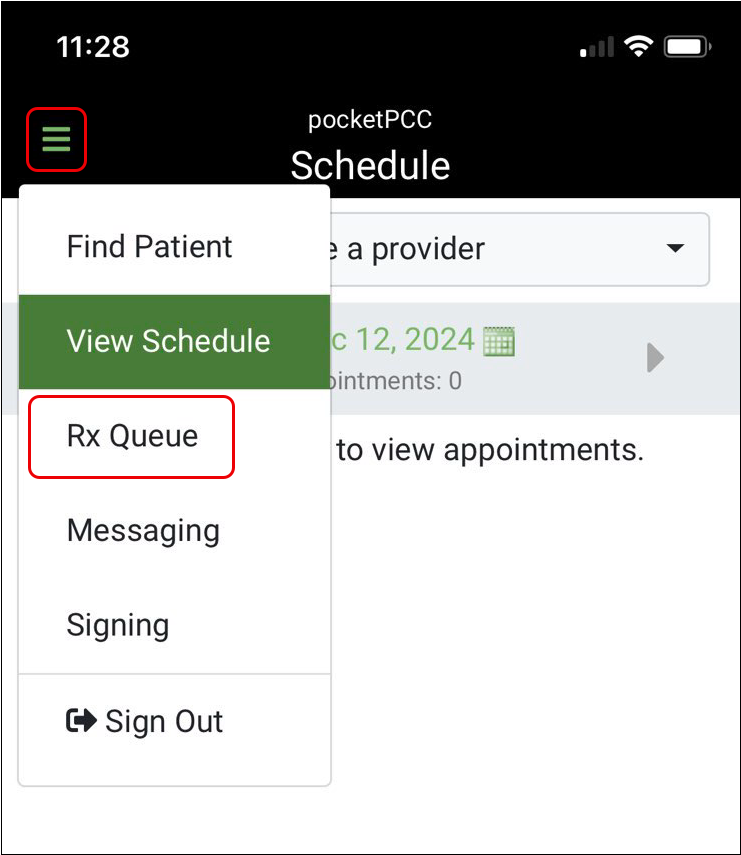
Clinicians can create orders and make phone notes or portal messages ready for billing, just as they would an office visit. Billers can Post Charges for these encounters from the Messaging queue in PCC EHR.
To post charges for a billable phone note or portal message encounter, open the Messaging tab in PCC EHR and click Ready to Post.
Then post charges as you would for a scheduled appointment, as described above.
To learn more, read Bill for Phone Notes and Portal Messages as Telemedicine Encounters.
Post Charges for Hospital Visits and Other Charges with No Appointment
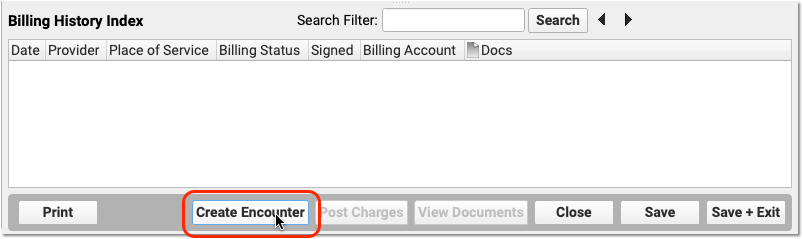
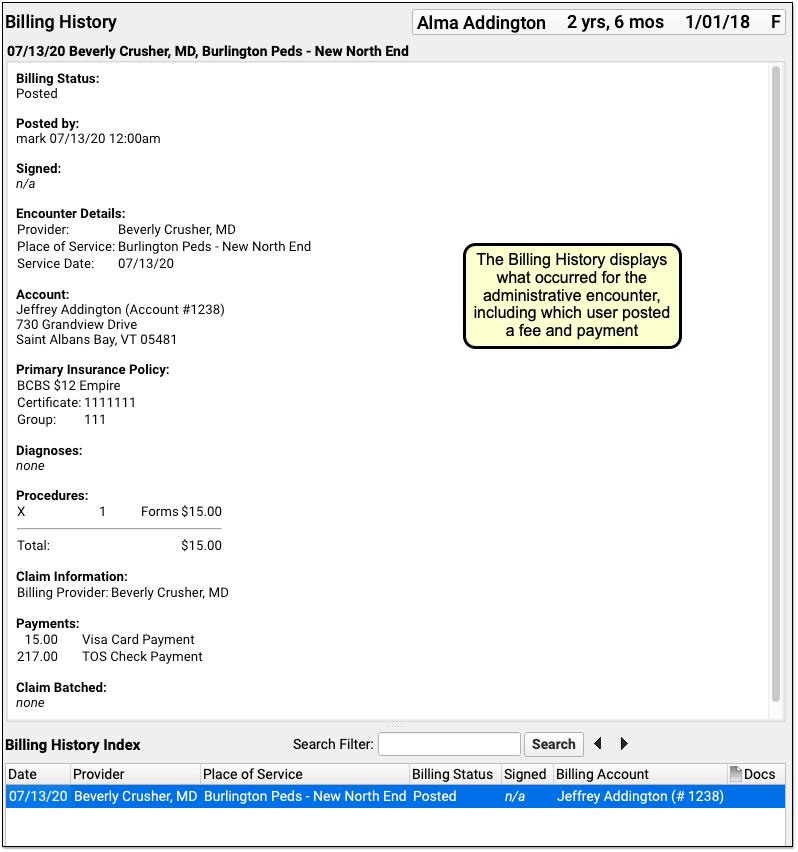
When you need to post charges for an encounter that does not have a scheduled appointment, such as a hospital encounter or a billing-only encounter, open the patient’s chart and visit their Billing History.
To learn more, read Post Hospital Charges in PCC EHR or Post an Administrative Fee Without an Appointment in PCC EHR.
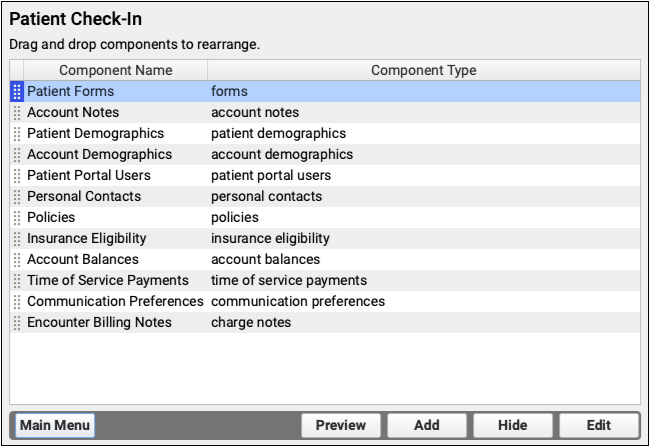
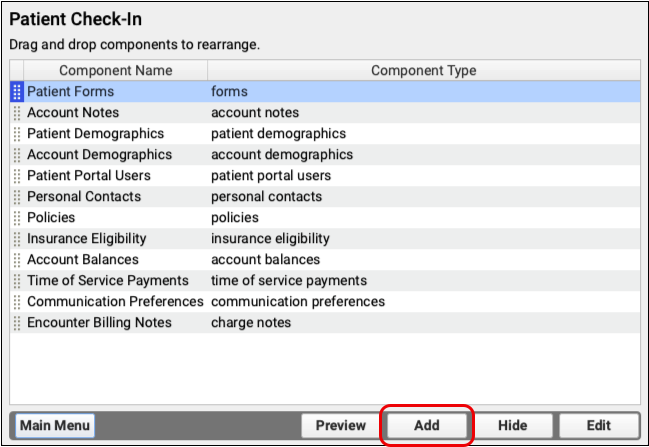
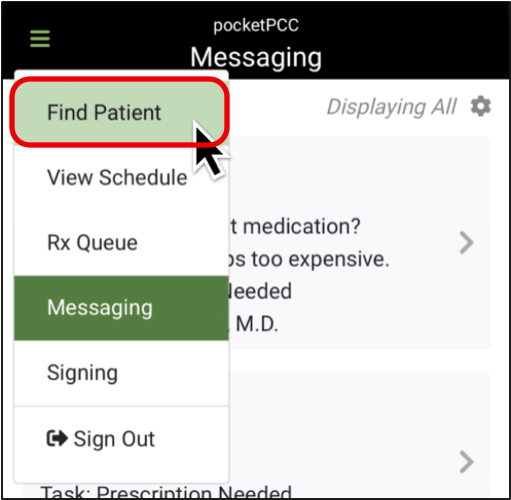
Review and Update Patient and Encounter Information as You Post Charges
As you post charges, you have many tools available to review and update patient information or research what happened during the encounter. You can post charges for some appointments in seconds. For other appointments, you may need to update insurance information, review encounter history, look back at the chart note, and more. The sections below will show you how to find the information you need to post charges and perform other billing tasks.
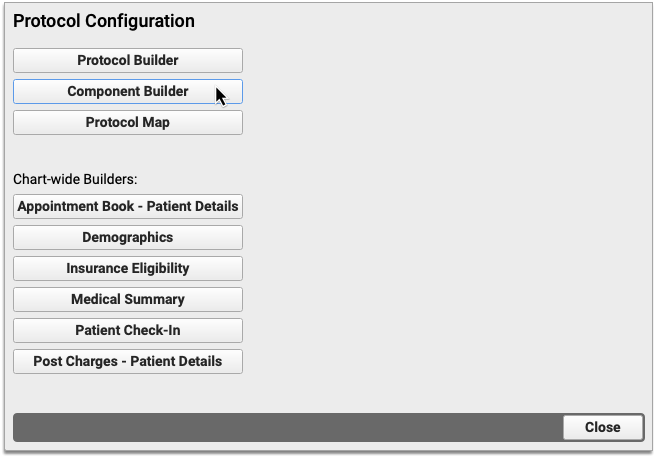
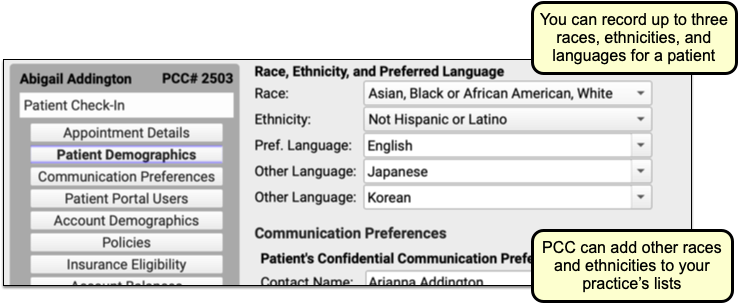
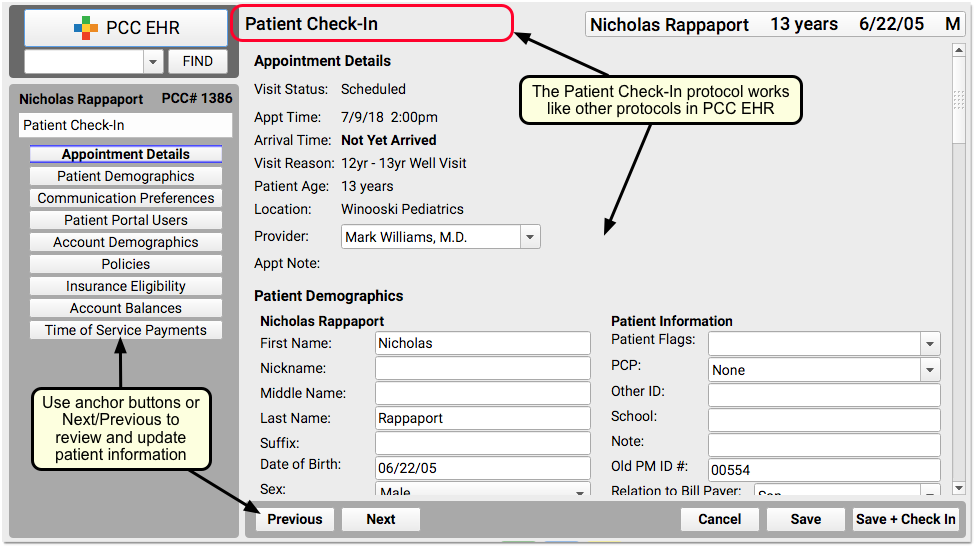
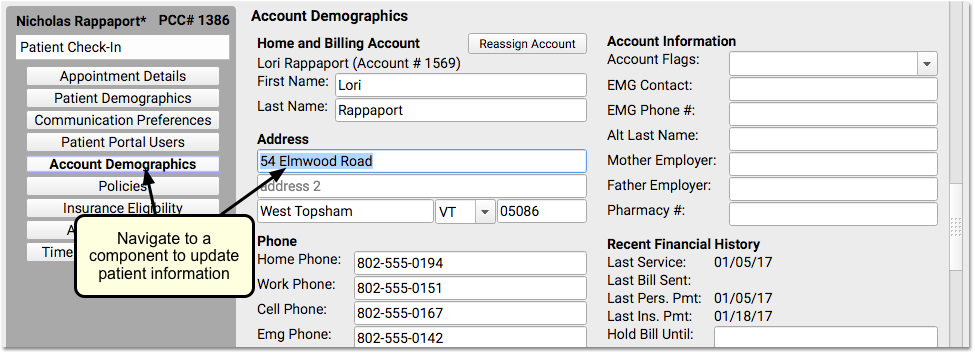
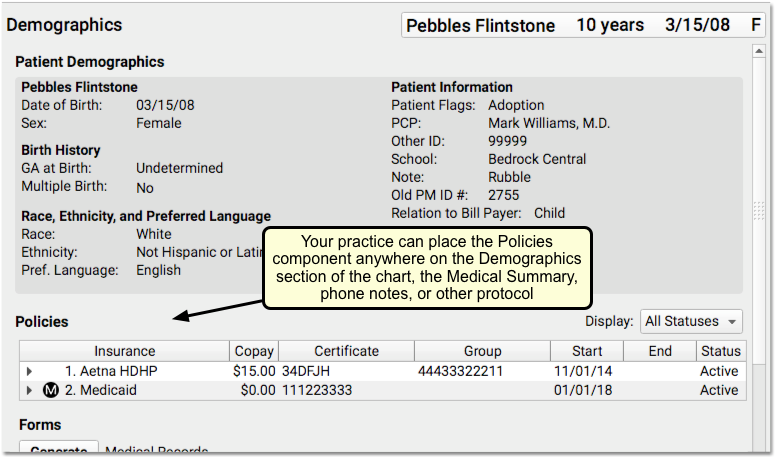
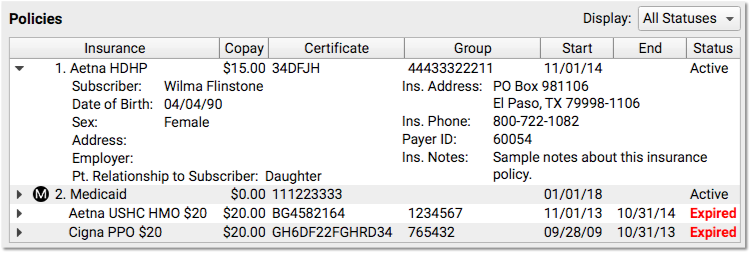
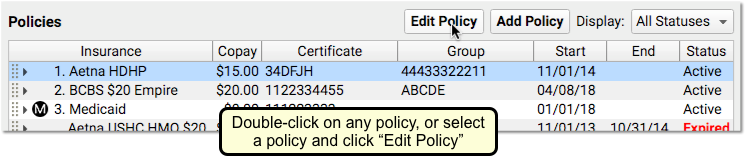
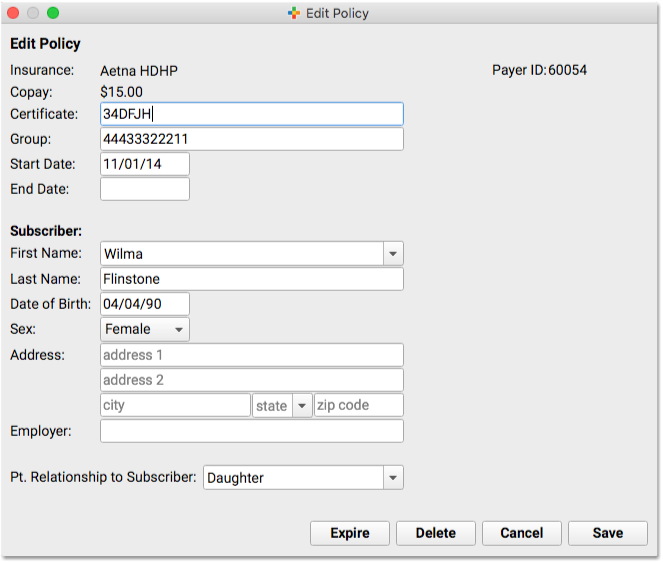
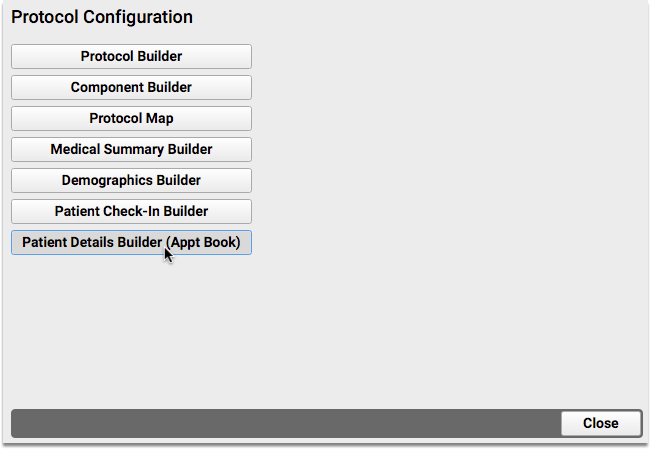
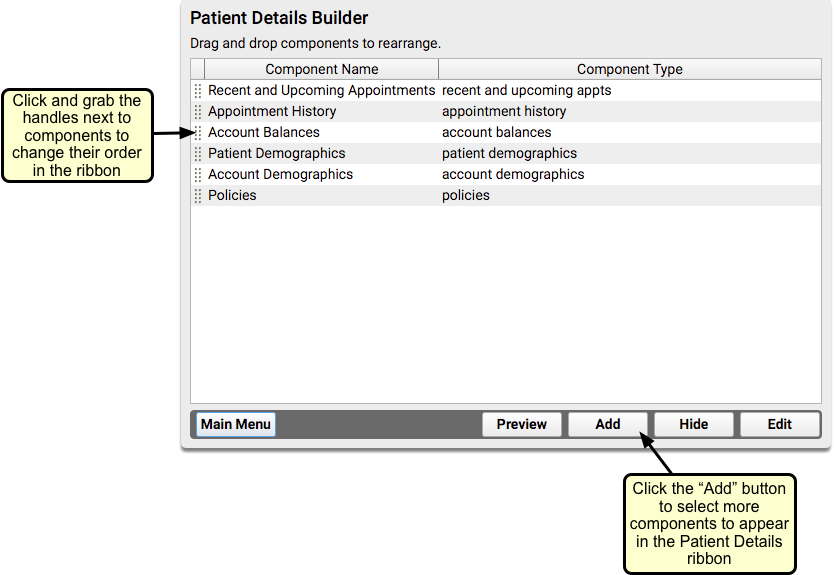
Review the Patient Details Ribbon: Insurance, Demographics, and More
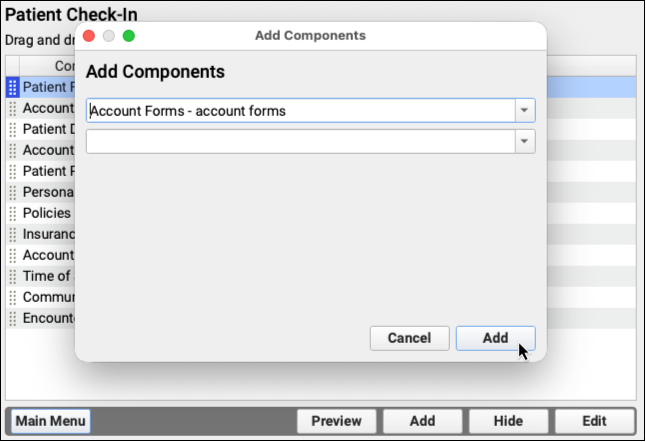
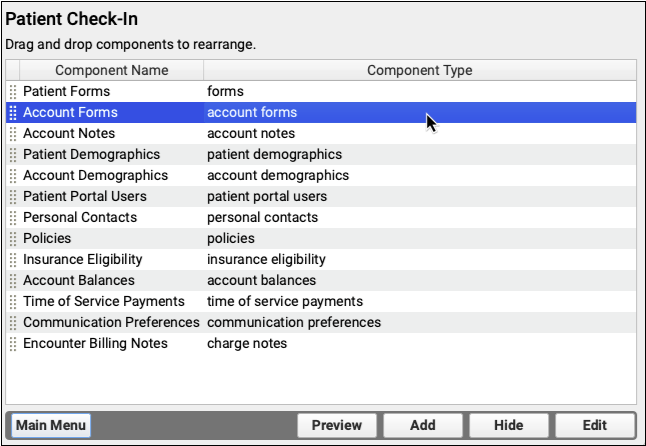
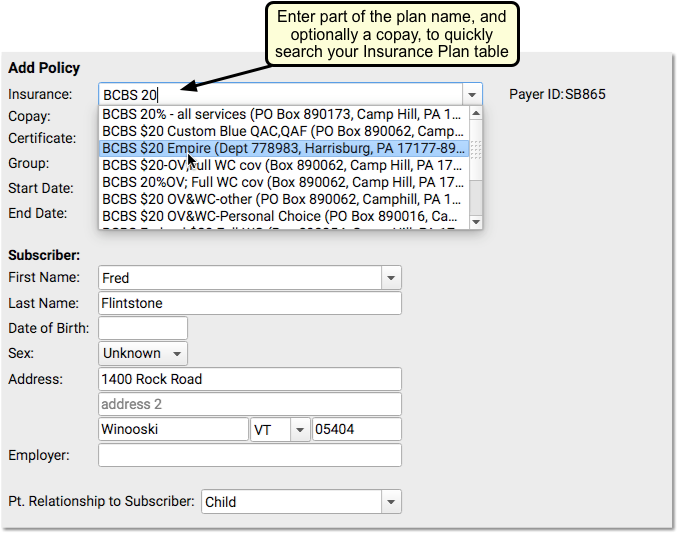
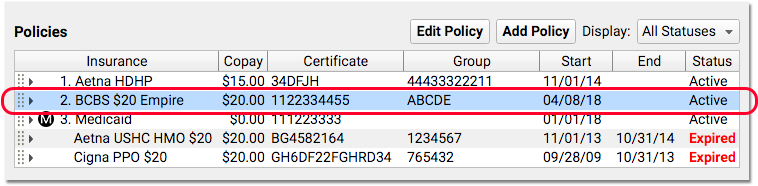
Use your practice’s customizable Patient Details protocol to review and update eligibility, insurance policies, demographics and more.
Use the navigation buttons to jump to any section of the protocol. If you’d like to add other PCC EHR components to the protocol read Configure Your Practice’s Patient Details Protocol for Post Charges, or contact PCC Support for help.
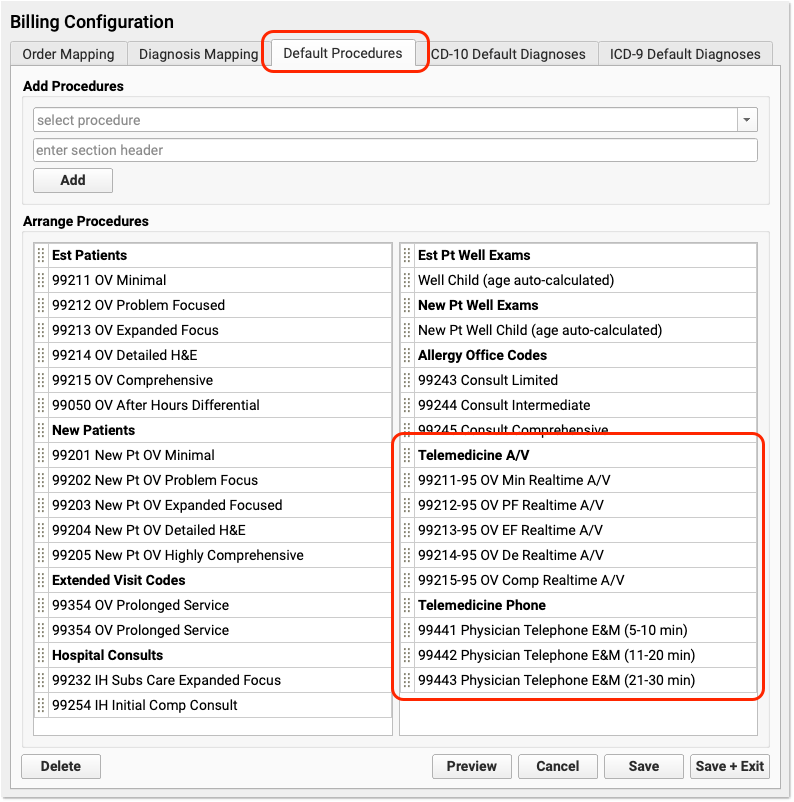
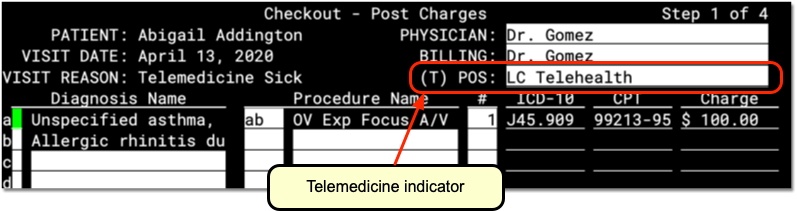
Adjust Billing Place of Service or Provider of Service for Telemedicine and Other Situations
If you need to change the billing place of service or provider of service, you can do so in the Appointment Details component at the top of Post Charges.
For example, if you are posting charges for a telemedicine encounter, you may need to change the billing place of service for some carriers. Also, sometimes a claim is billed out under a supervising provider of service. The changes you make here will not effect the scheduled Appointment Provider or location for the encounter.
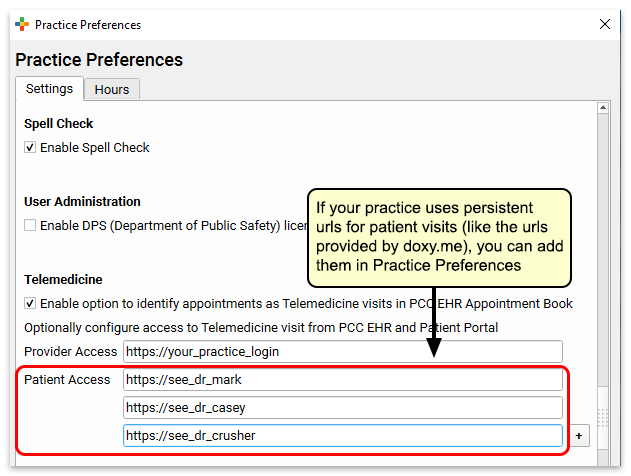
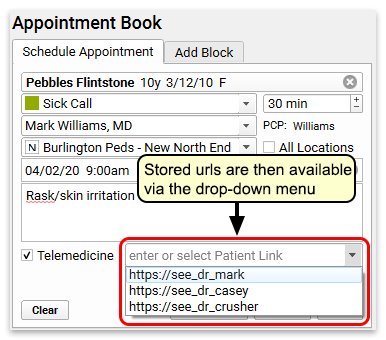
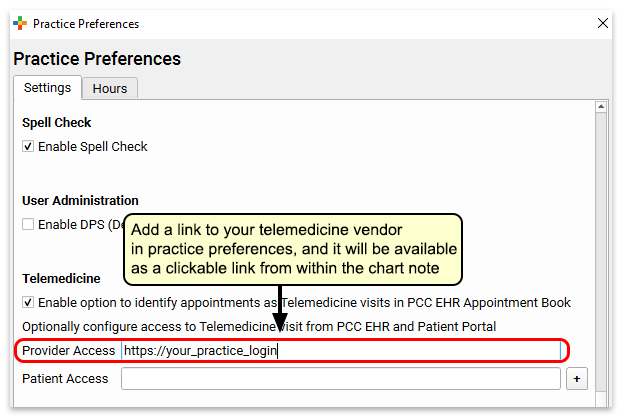
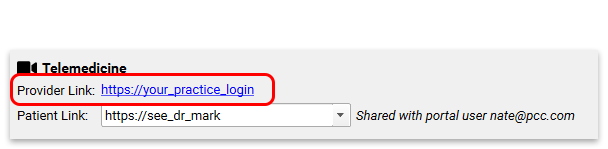
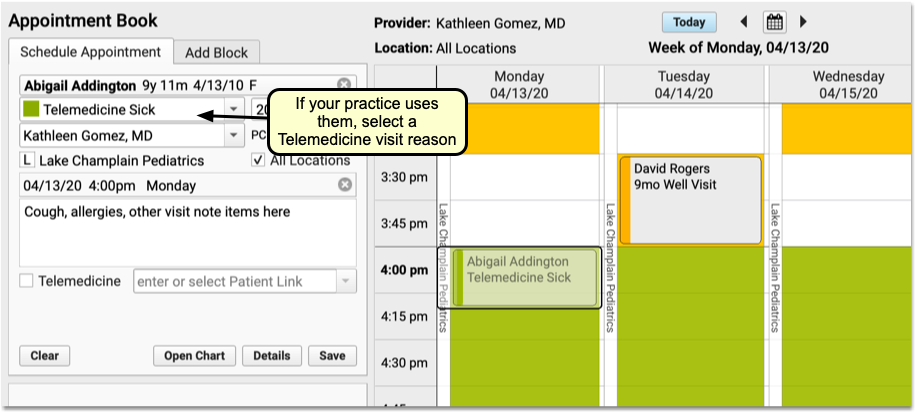
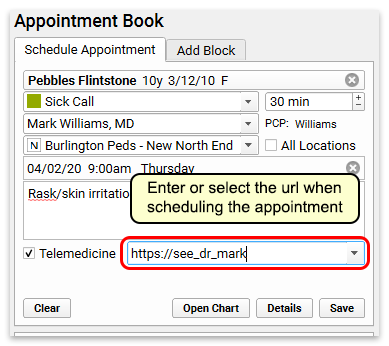
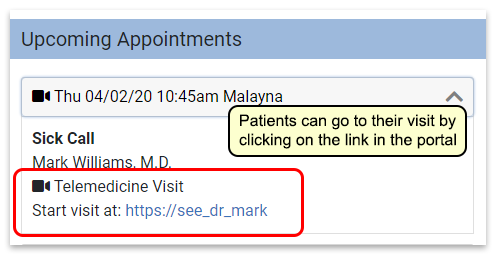
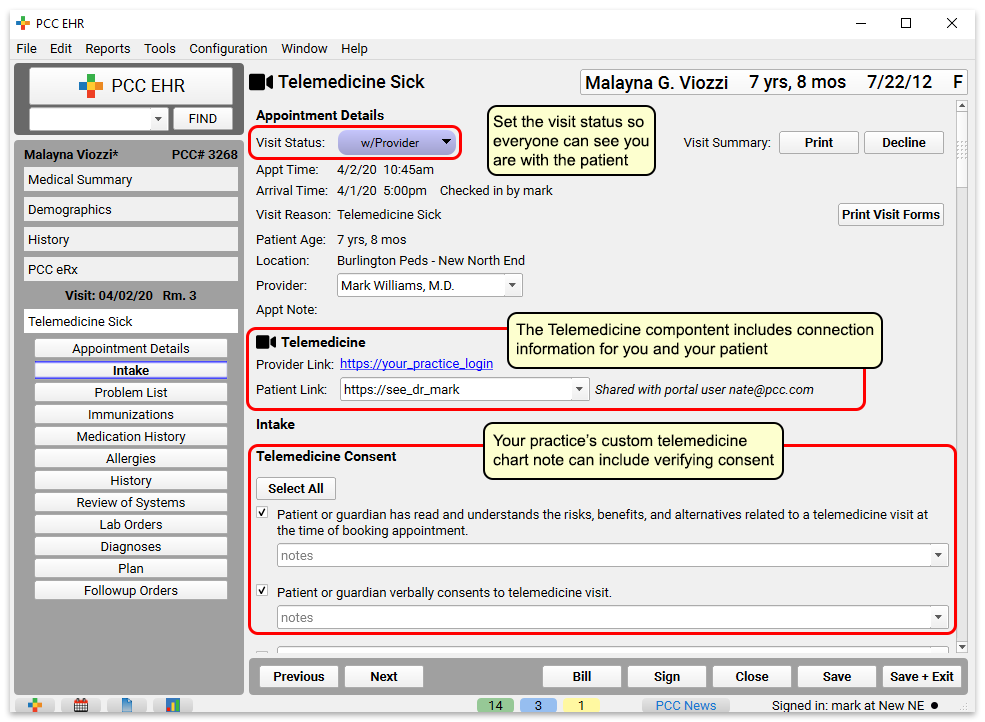
Schedule for One Location and Provider, Change Later For Billing: When you schedule and perform an encounter, especially a telemedicine visit, it makes sense to use your office location—then doctors can see their whole schedule, and your practice can see what’s happening at a glance. When it’s time to bill, however, some carriers require a special telemedicine place of service. Additionally, you might schedule for a “Flu” provider for a flu clinic, and then change the billing provider of service.
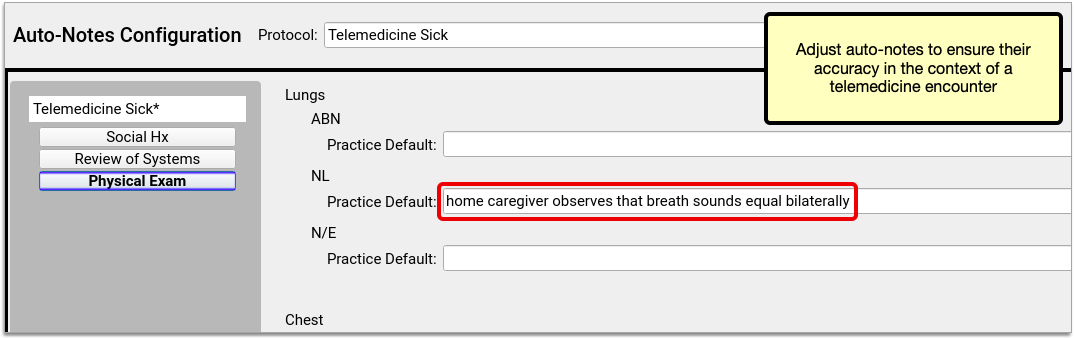
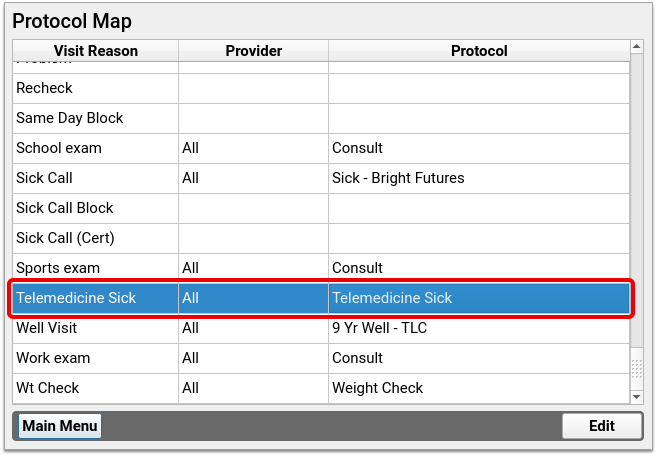
To learn more, read or watch Schedule, Chart, and Bill for a Telemedicine Encounter (Video, Article).
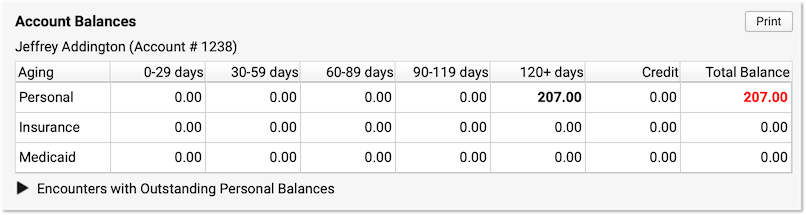
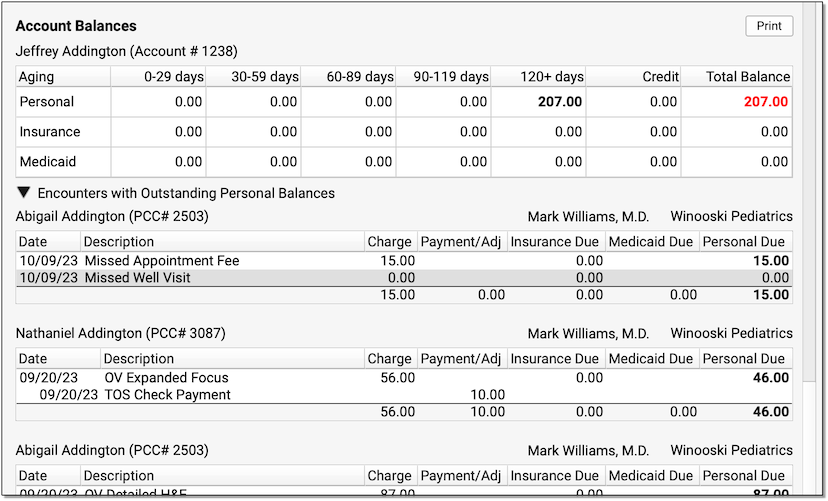
Research Previous Personal Balances
As you post charges, you may notice a “Previous Balance Amount” line in the Payments component ledger. The amount is the total of any past, unpaid charges for all patients who share the same Billing Account.
You can review details for the personal balance on the Patient Details protocol.
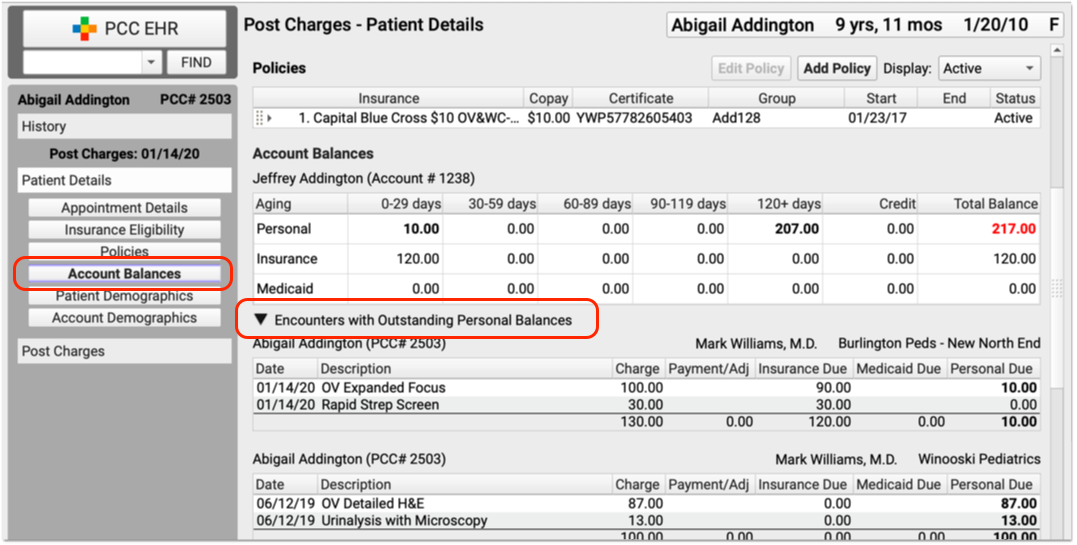
Click the disclosure triangle for “Encounters with Outstanding Personal Balances” to review details of all encounters with unpaid personal balances.
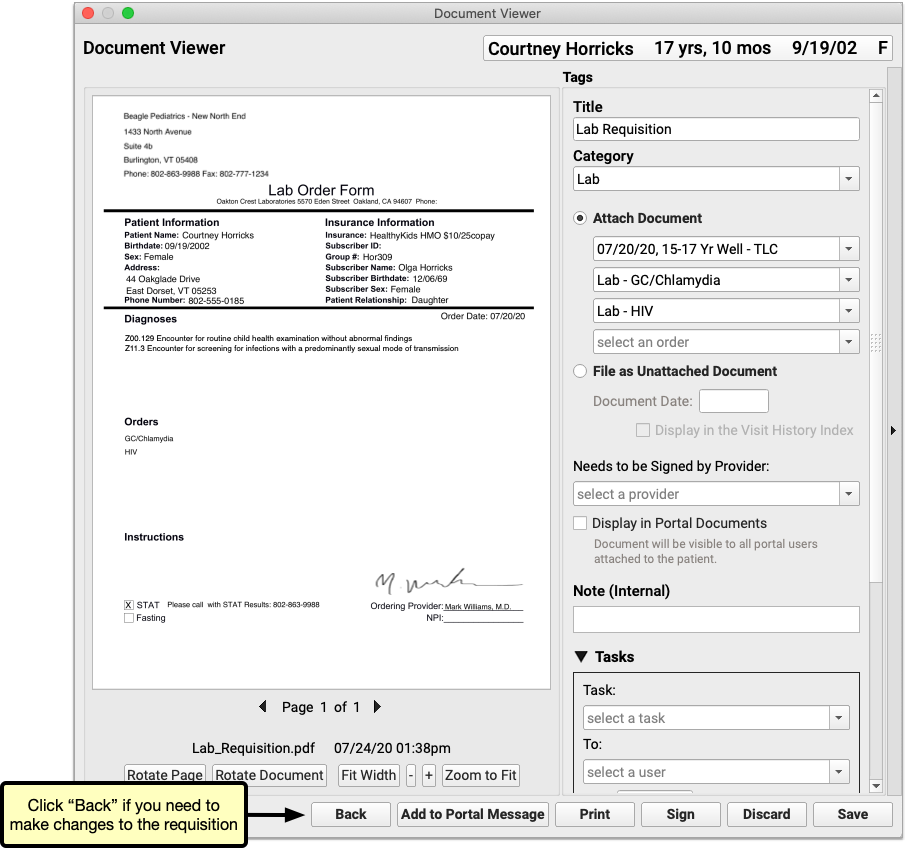
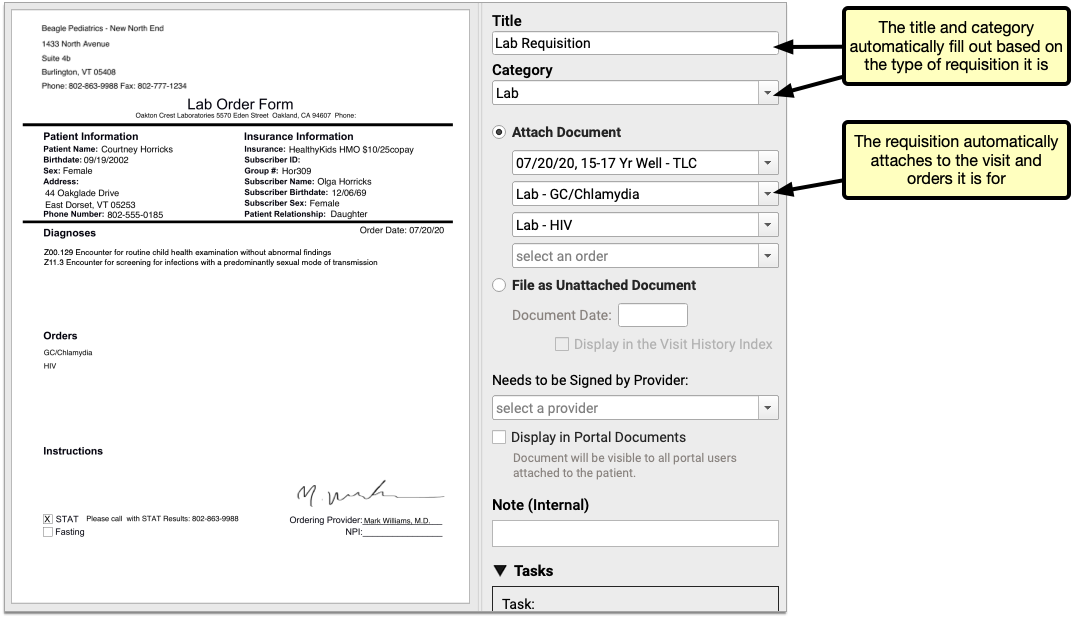
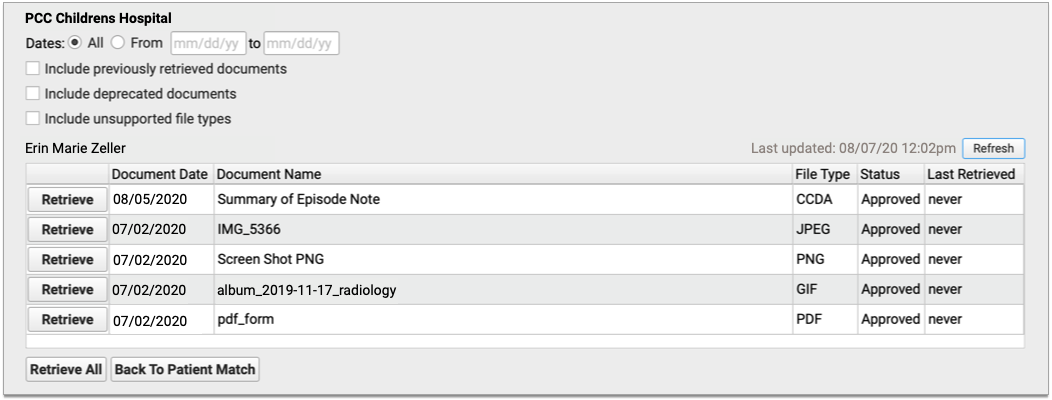
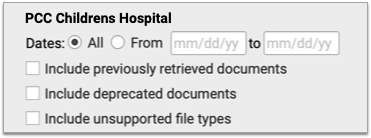
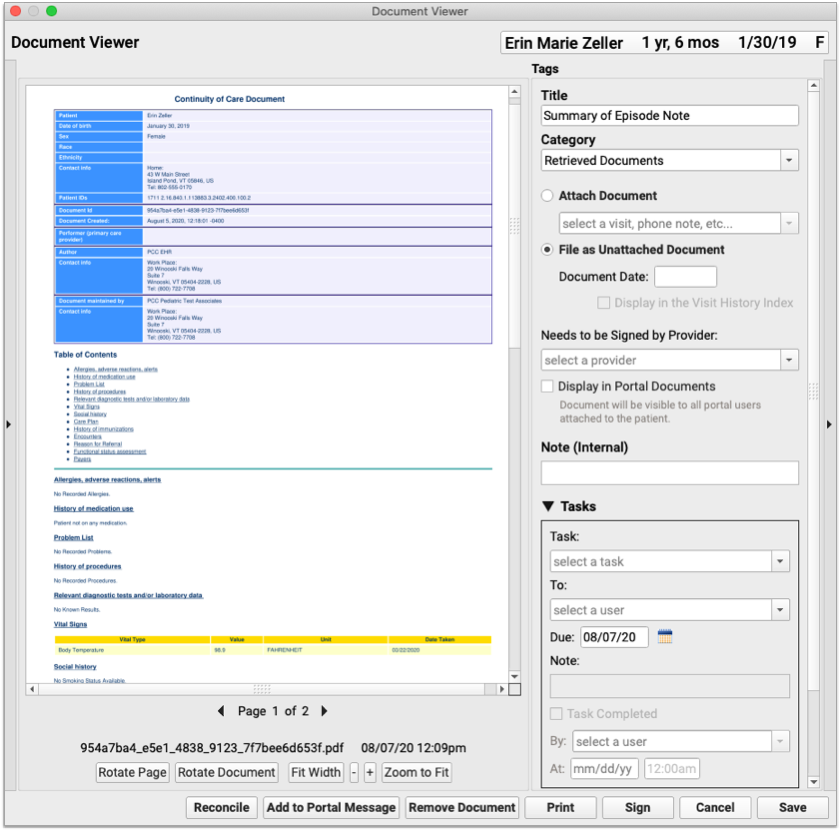
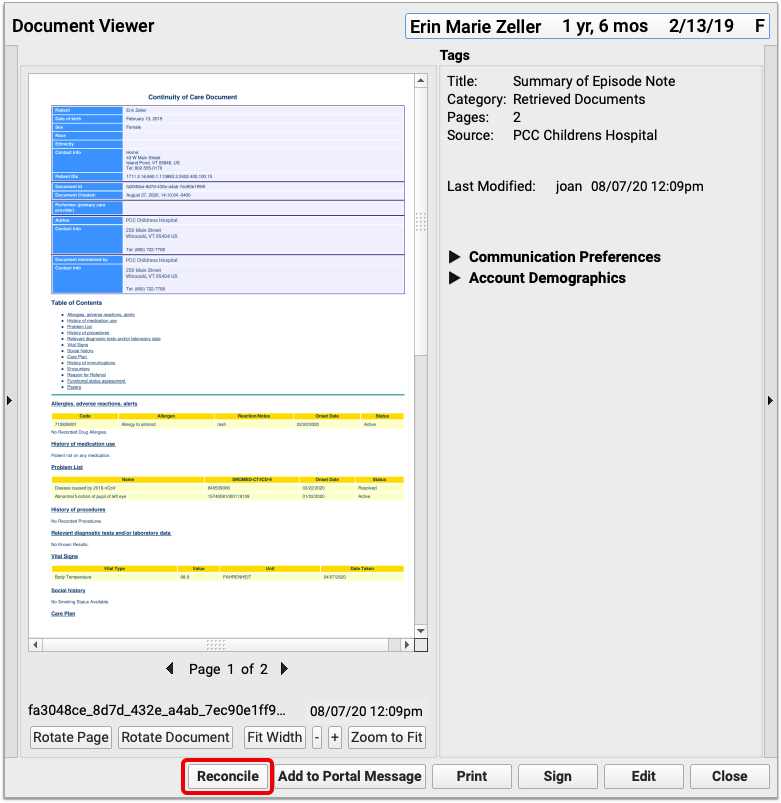
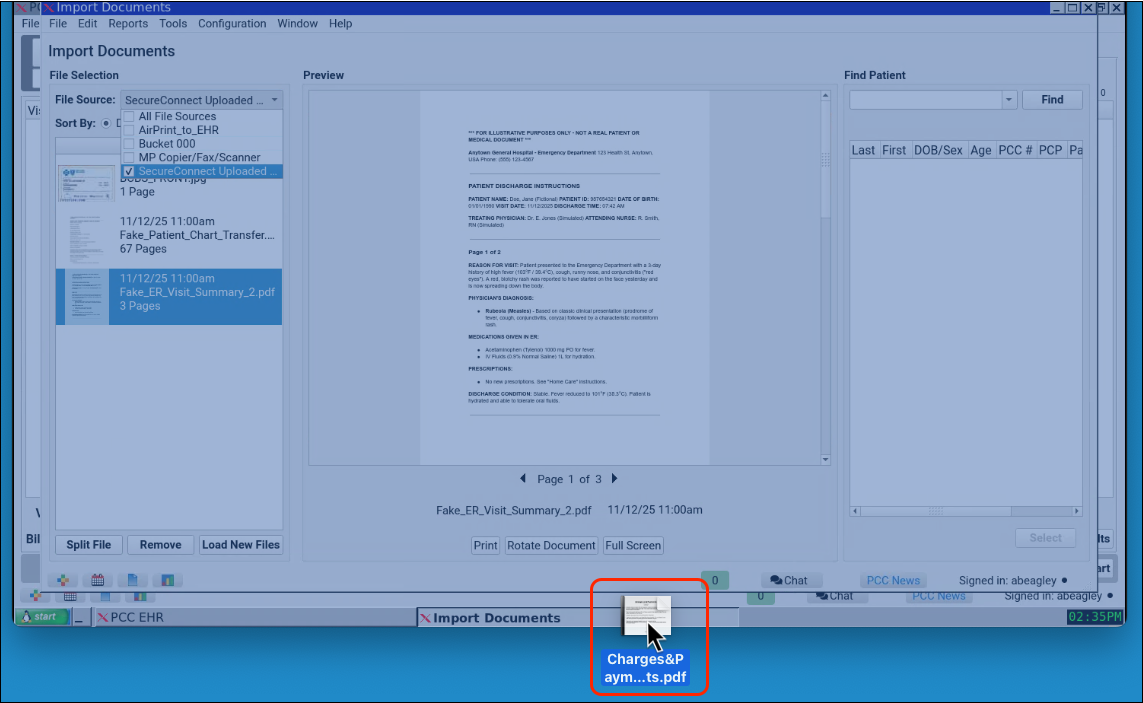
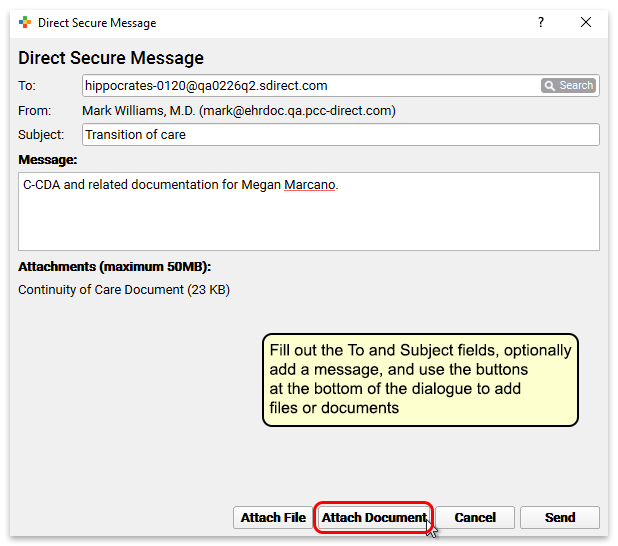
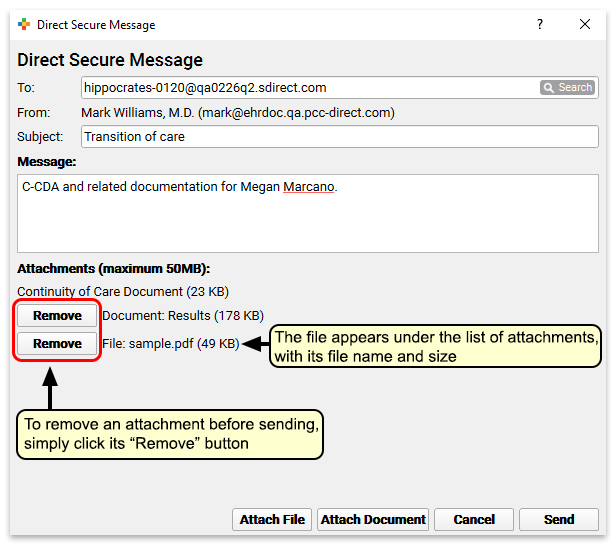
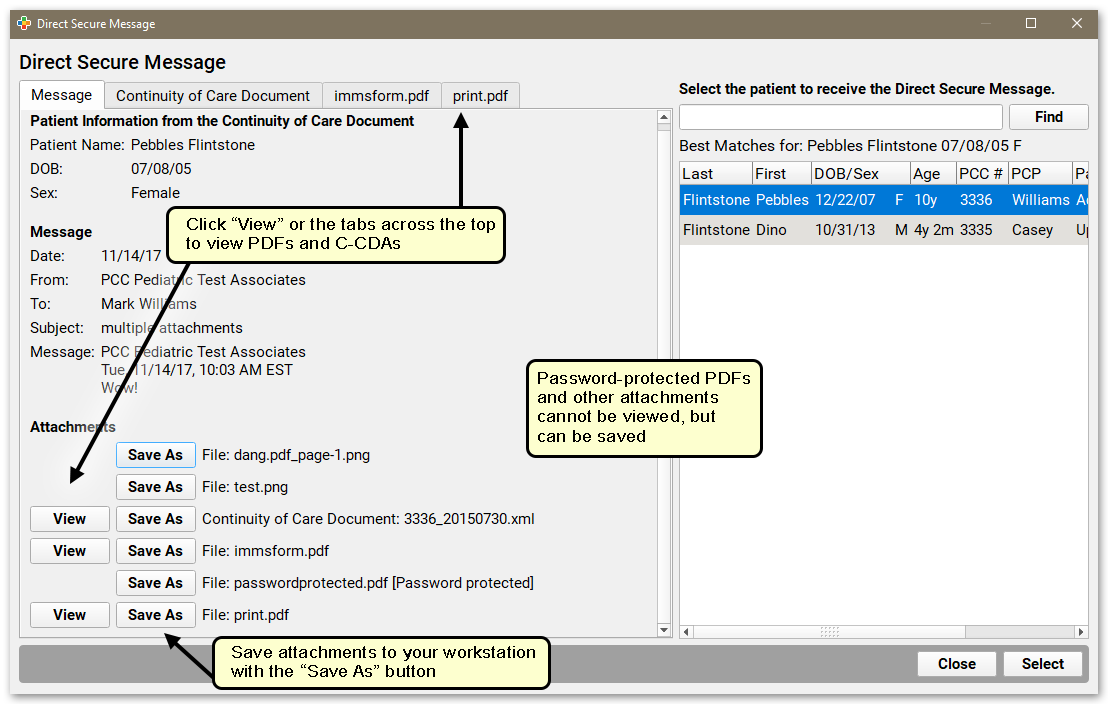
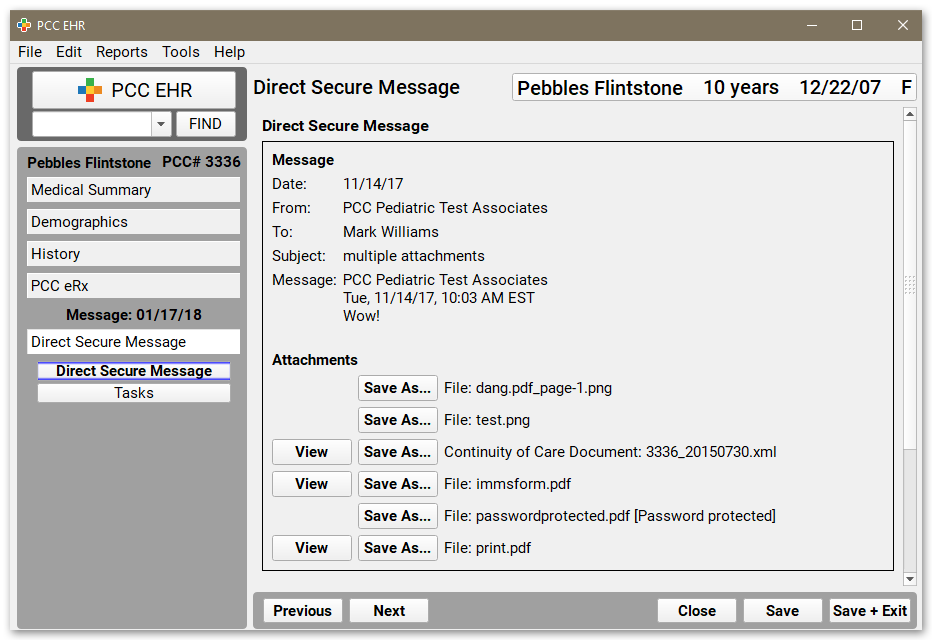
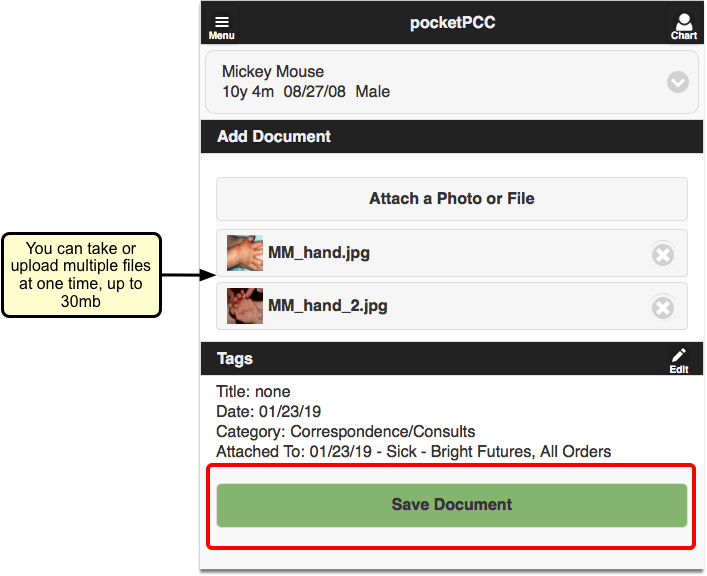
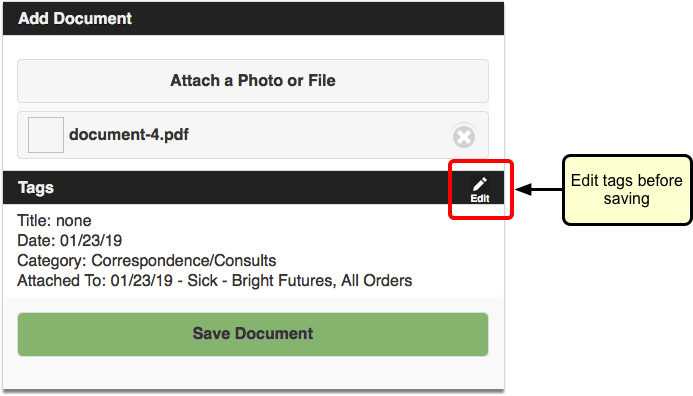
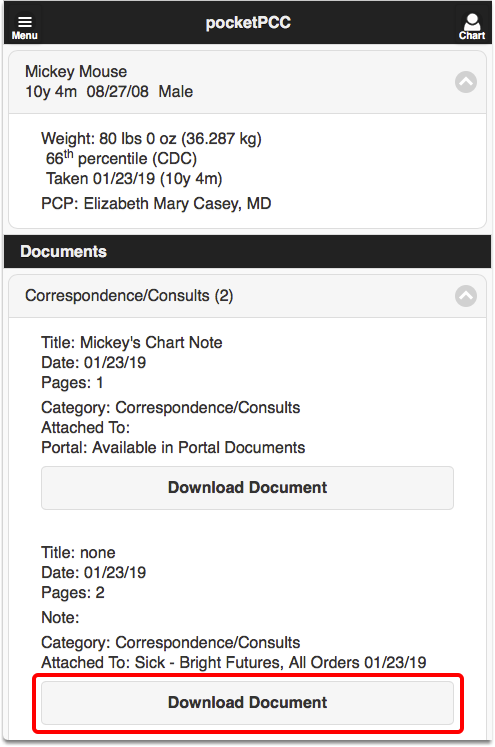
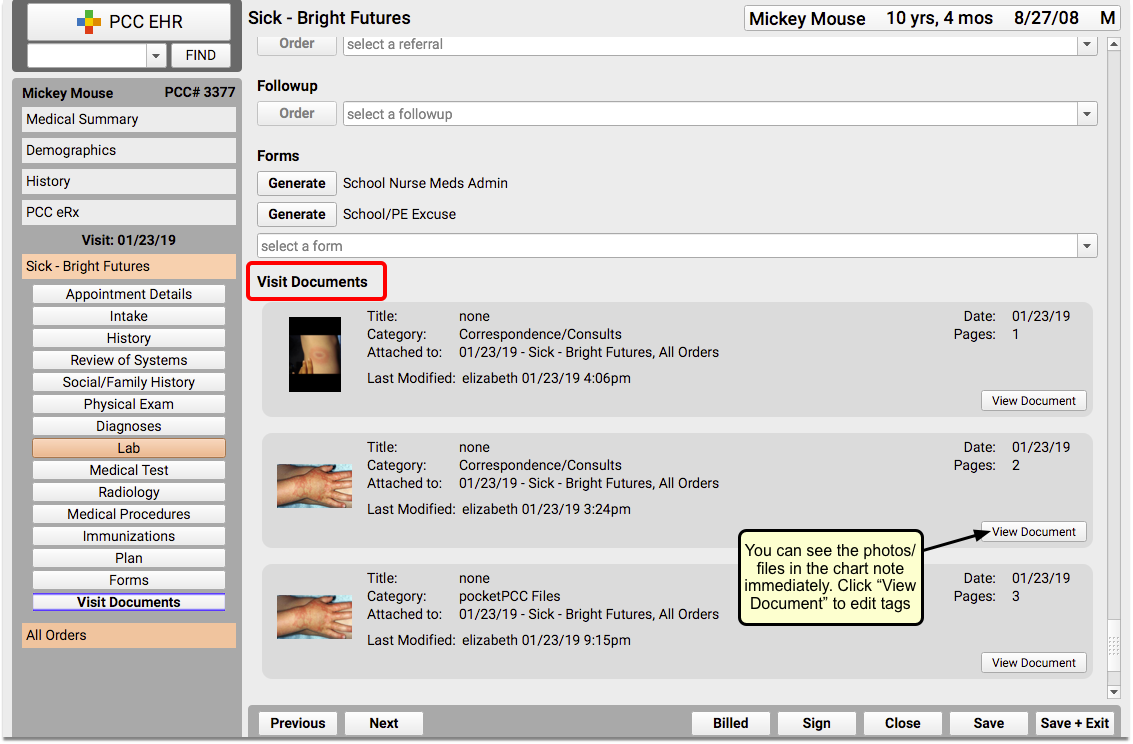
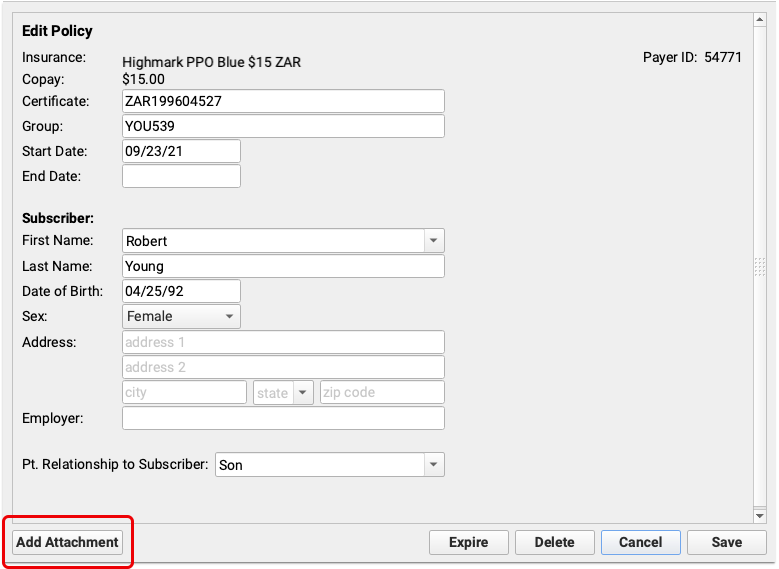
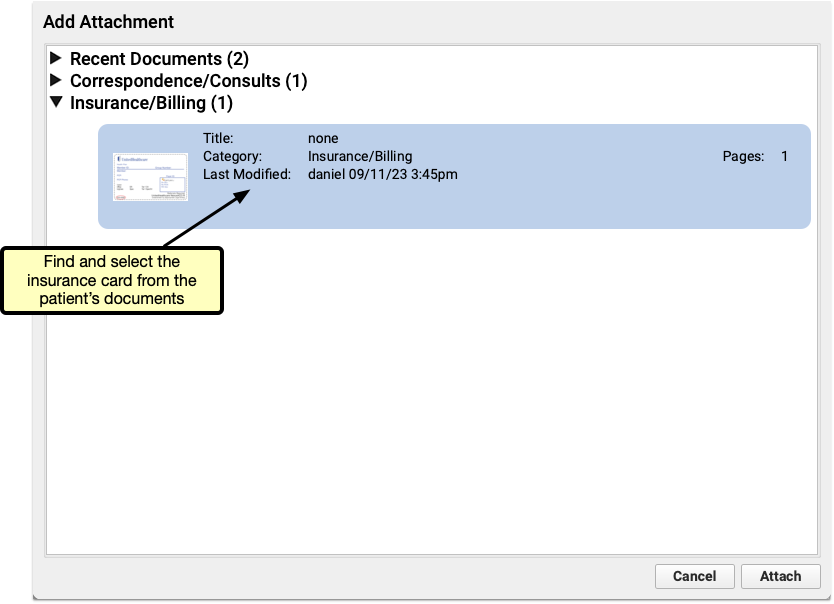
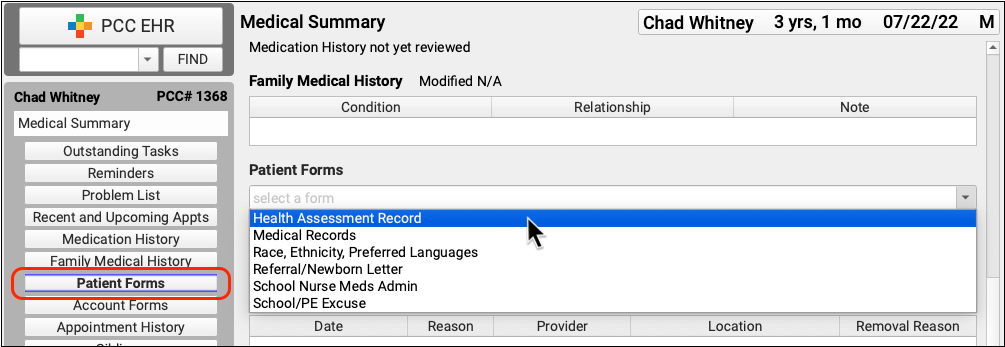
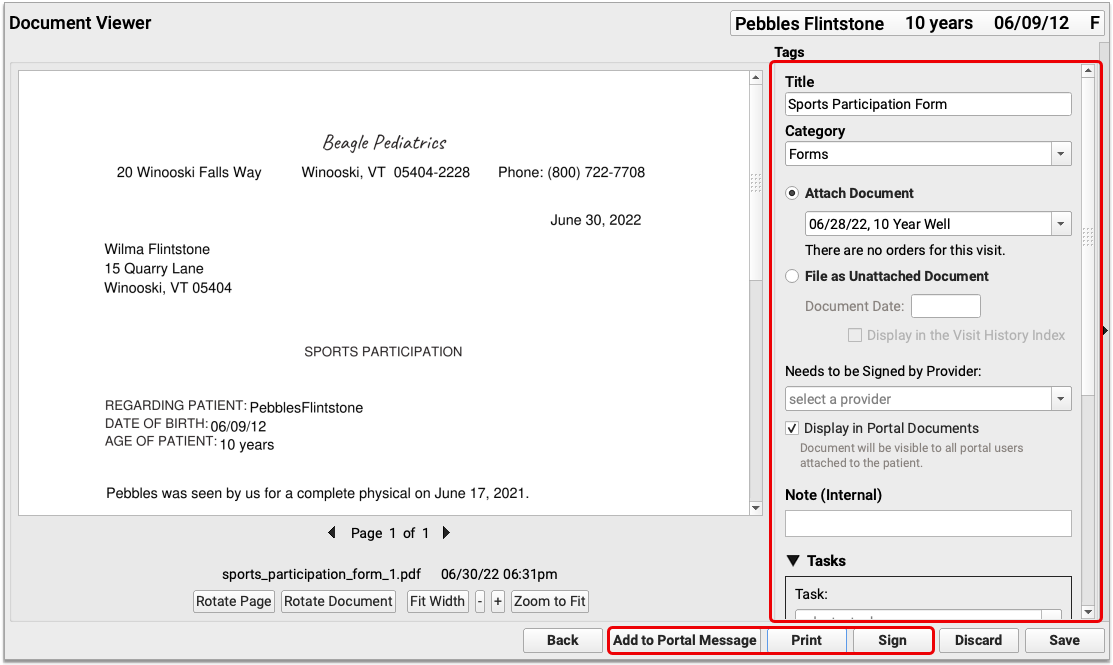
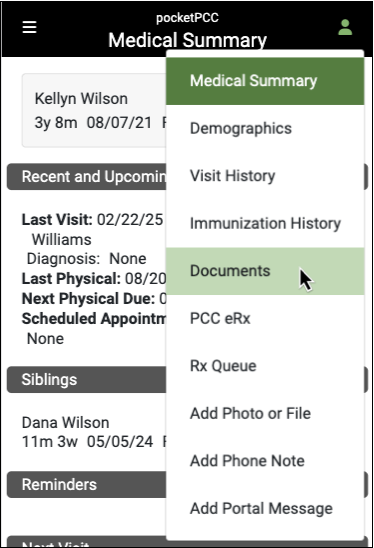
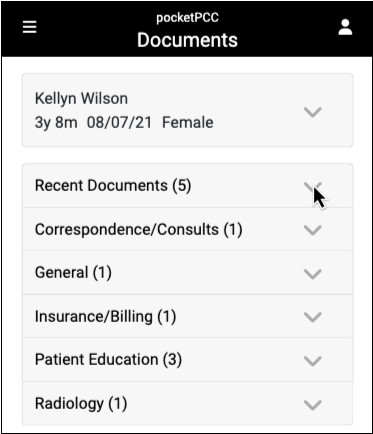
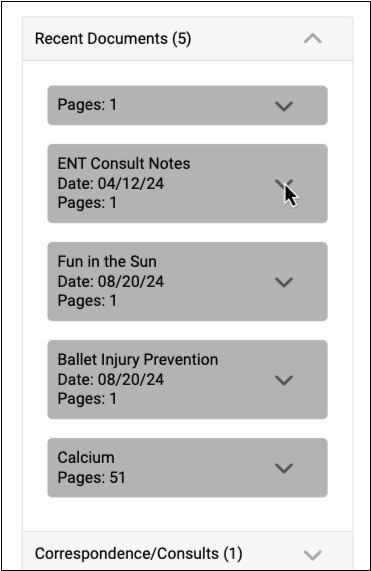
Open Documents Attached to the Encounter
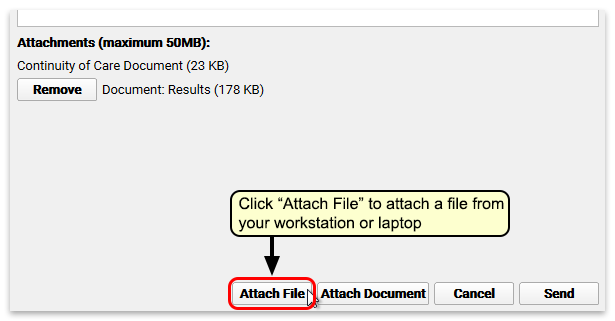
Did the front desk scan the insurance card, a form, questionnaire, or some other item? Is lab information attached to an encounter? You can review any documents attached to an encounter in the Post Charges workflow.
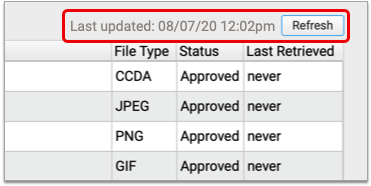
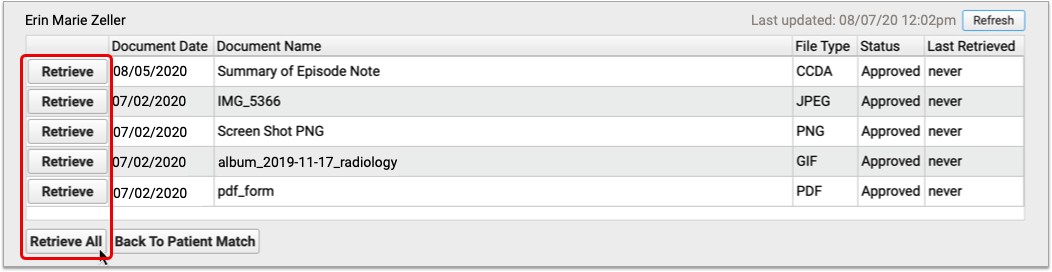
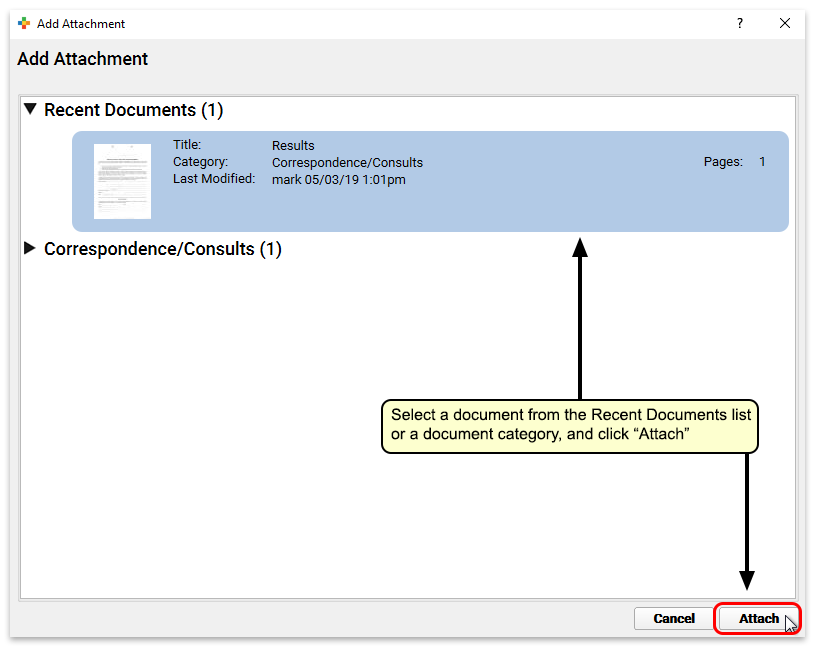
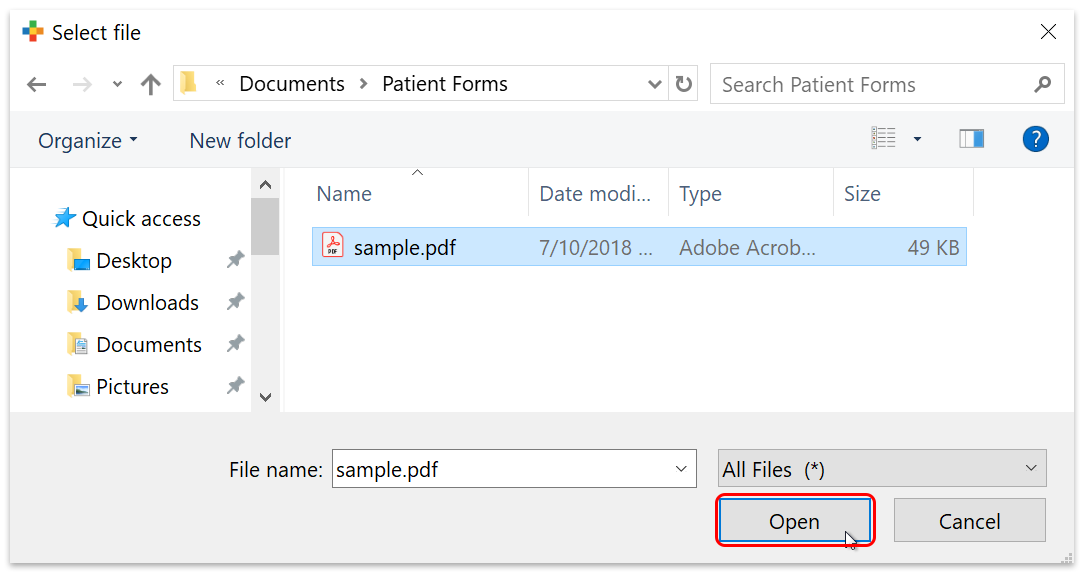
To jump to attached documents, click the “Documents” navigation button on the Patient Details protocol. (If there are no documents attached to the encounter, this button will not appear.)
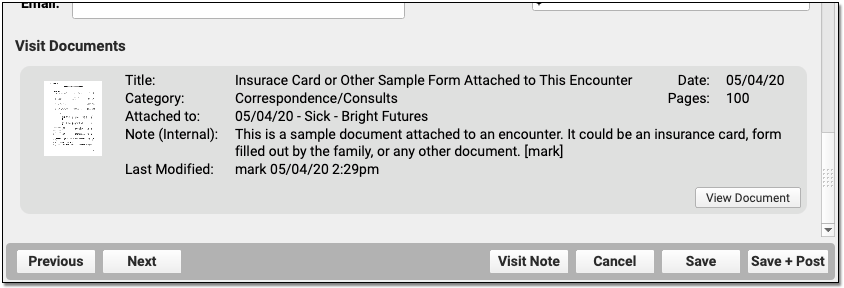
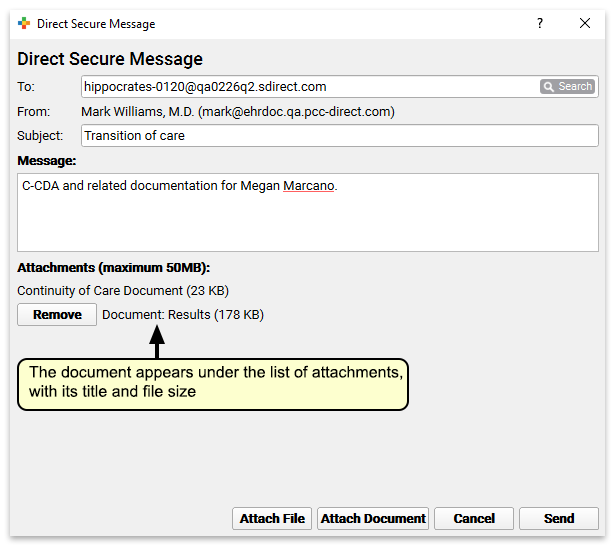
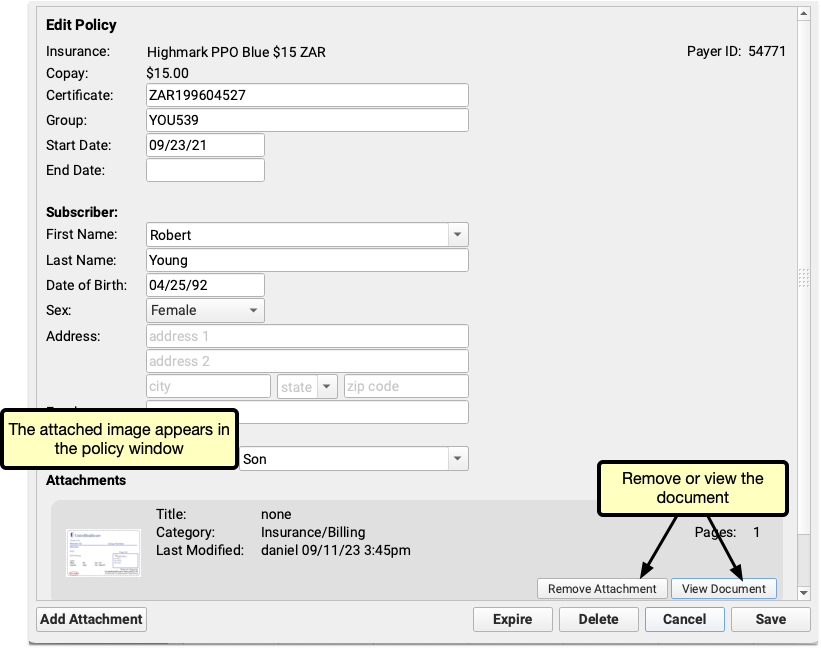
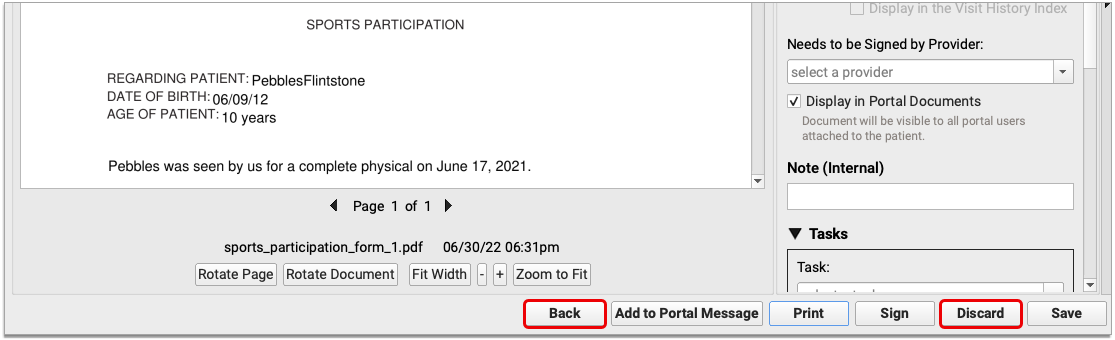
If a document is attached to the encounter, it will appear at the bottom of Patient Details. Click “View Document” on a document to open it.
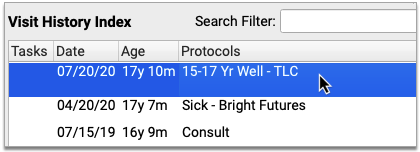
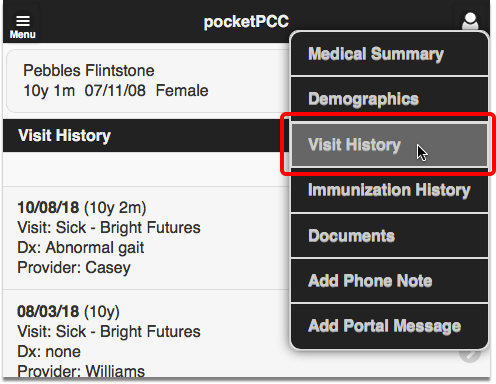
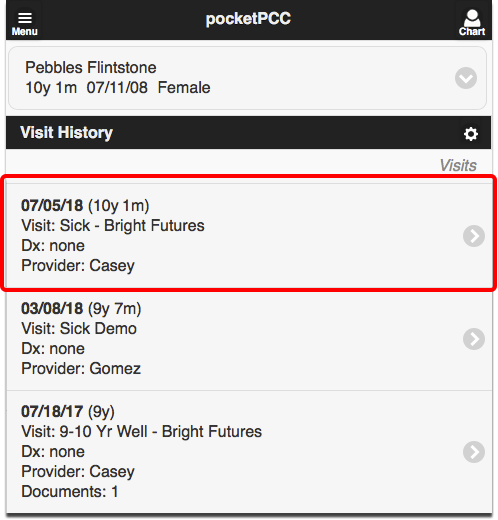
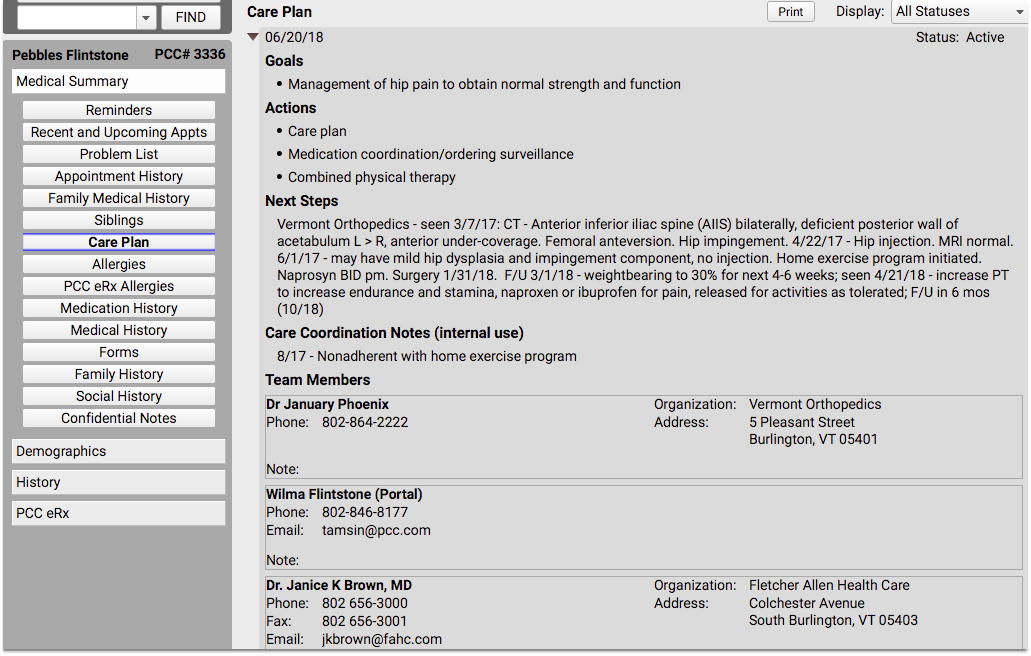
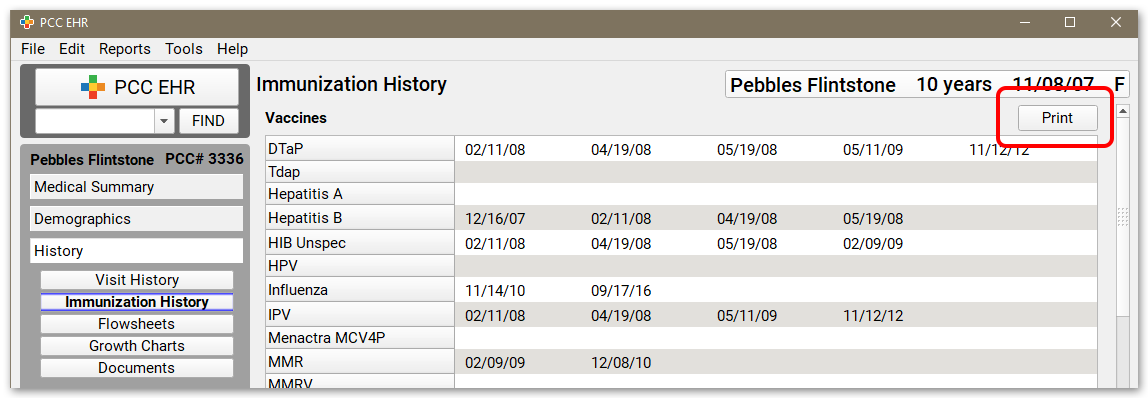
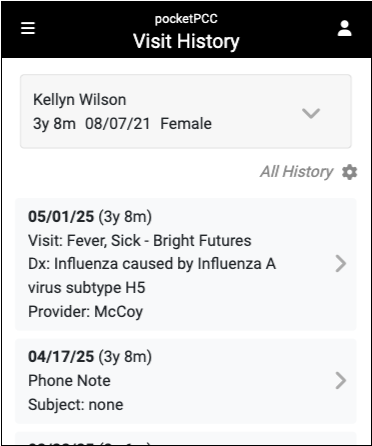
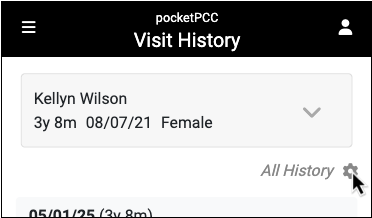
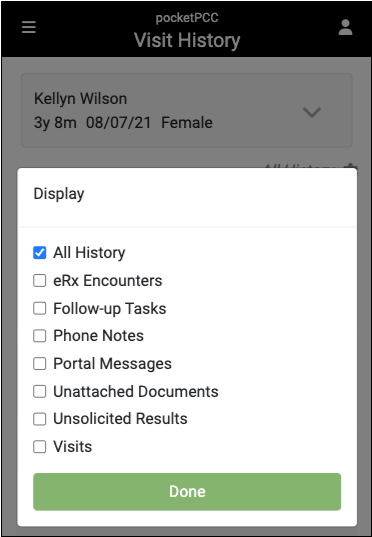
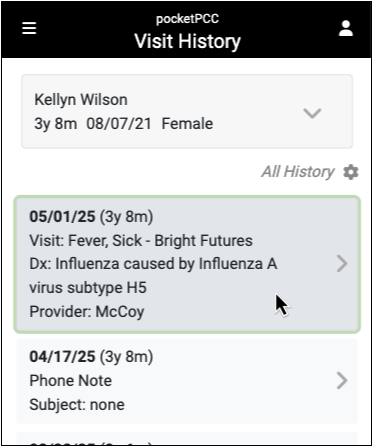
Review the Patient’s Visit History
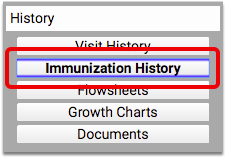
As you work in Post Charges, click “History” to visit the patient’s chart history and review previous chart notes or other encounters.
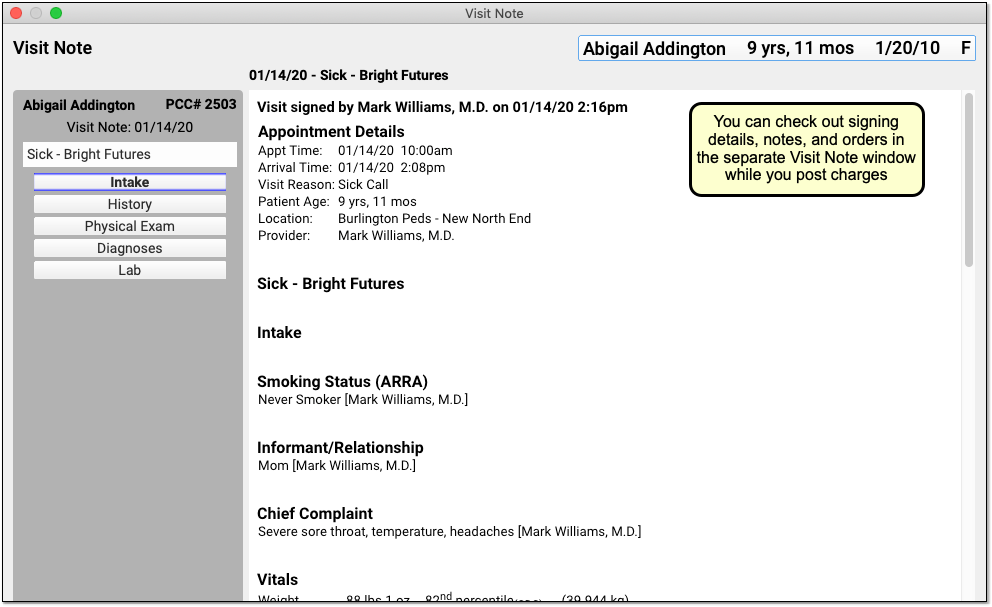
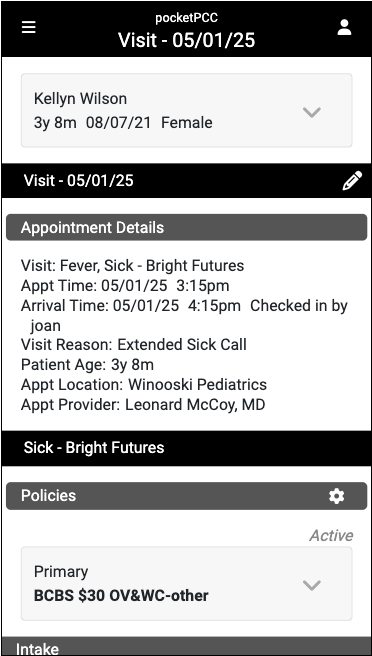
Open Today’s Visit Chart Note in a New Window
Click “Visit Note” in the lower-right corner of Post Charges to open a copy of the encounter’s chart note in a separate window.
You can keep the window open, side-by-side with Post Charges, so you can review it as you update diagnoses and procedures.
Review and Update Diagnoses and Procedures As You Post Charges
The Diagnoses and Procedures components display what the clinician selected in the Bill window when they prepared the encounter for billing. As you post charges, you can adjust linking, add items, and perform other functions.
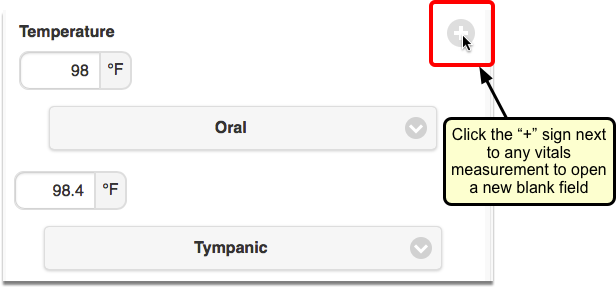
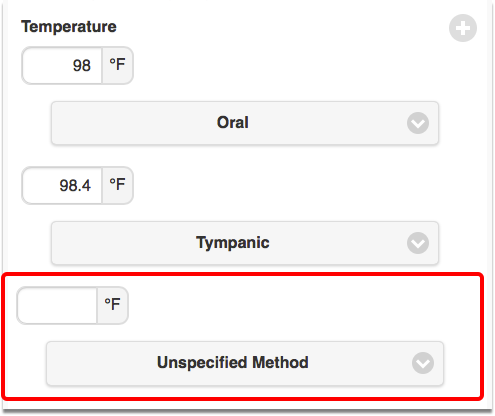
Add Diagnoses and Procedures to an Encounter
You can optionally add diagnoses or procedures that are needed for billing.
For example, a biller might identify a missed supply code or administrative code and add it when they post charges.
New Diagnoses and Procedures Will Not Appear on the Chart Note: While a biller can add diagnoses and procedures on the Post Charges protocol, those items will only appear in the billing record and (depending on your configuration) on the claim. For most situations, the clinician should chart all diagnoses and procedures on the chart note.
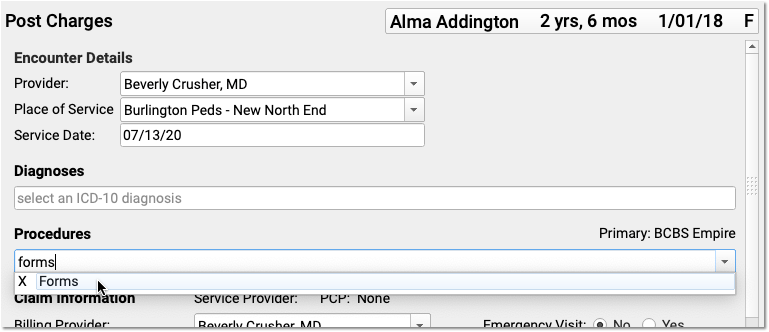
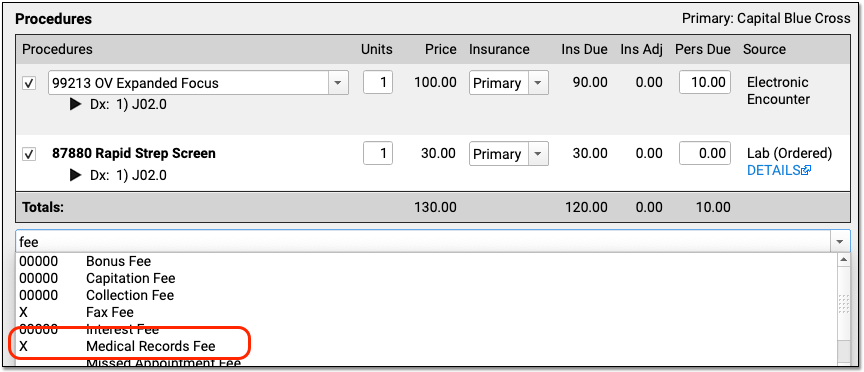
Add Administrative Fees to an Encounter, Form Fees, or Other Billing Procedures
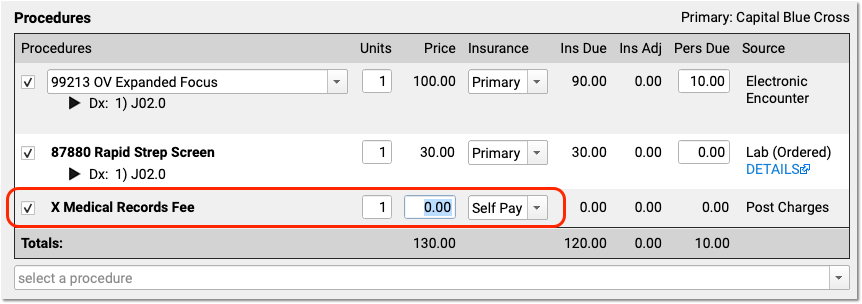
As you post charges for an encounter, you can add any procedure code or billing procedure, including administrative fees.
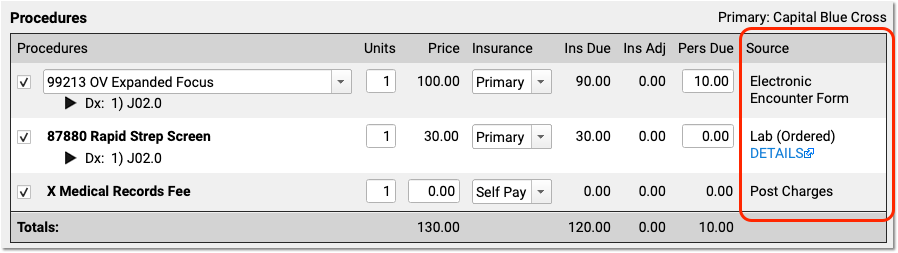
Your practice can configure procedures with unique billing behaviors. For example, the Medical Records fee above will automatically not appear on the claim. Also, your practice can configure a set price for a procedure, or have a default price of $0.00 so that the biller can enter the total fee.
Adjust Claim, Copay, Units and Insurance Billing Behavior for Procedures
In the Procedures component, you can set whether or not a procedure appears on the claim, adjust the number of units, or change the copay amount for a procedure.
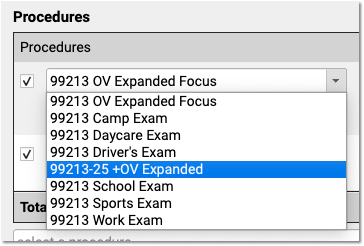
Add a Modifier to Visit Code, or Pick a Different Version of a Procedure Code
When you need to add a -25 or other modifier to a code, click on the procedure in the Procedures component.
PCC EHR automatically displays all the procedures that have the same base code. If you are posting a complex visit that requires a modifier, you can pick the modified code and PCC EHR will update the prices accordingly.
In addition to adding a modifier, your practice can use this to specify a different version of the code that you track for billing purposes. For help setting up and configuring your practices procedures, codes, and prices, contact PCC Support. You can also read Edit Your Practice’s Prices and Procedure Billing Codes or watch a video tutorial.
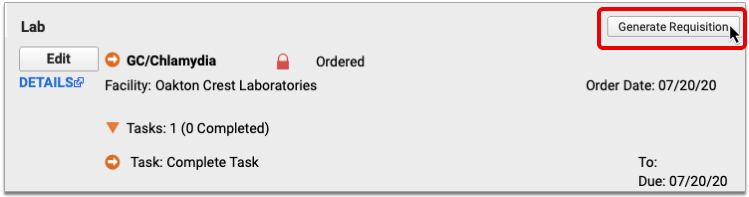
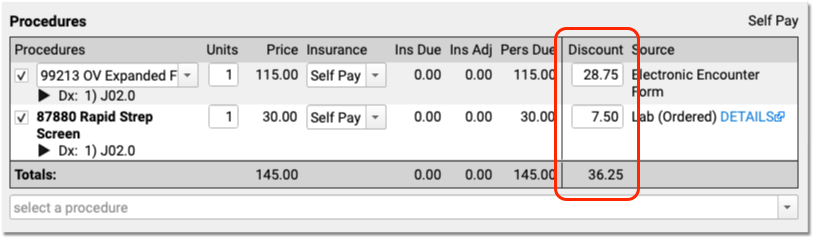
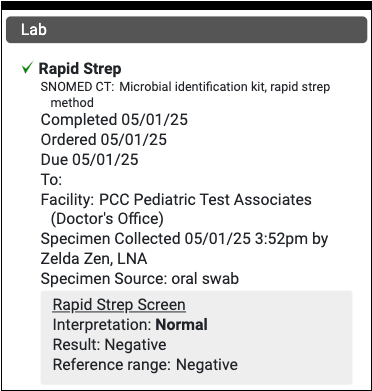
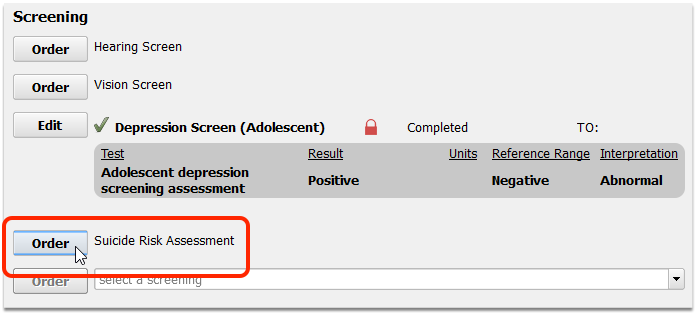
Review the Source of Procedures and Review Procedure Order Details
How did each procedure end up in Post Charges? Use the “Source” column in the Procedures component to explain the origin of each procedure. For example, the clinician may have selected it (on the Bill window, the encounter’s “Electronic Encounter Form”), it might come from an order, or you may have added it manually in Post Charges.
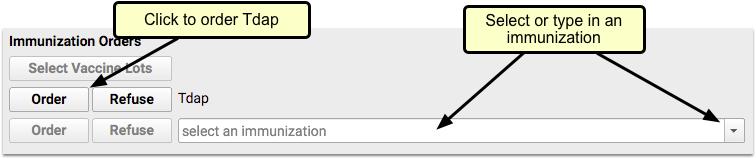
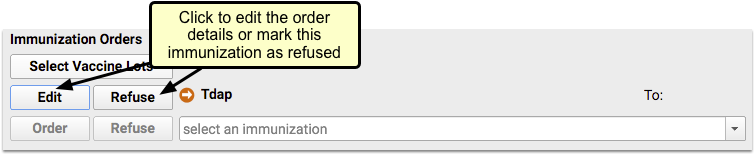
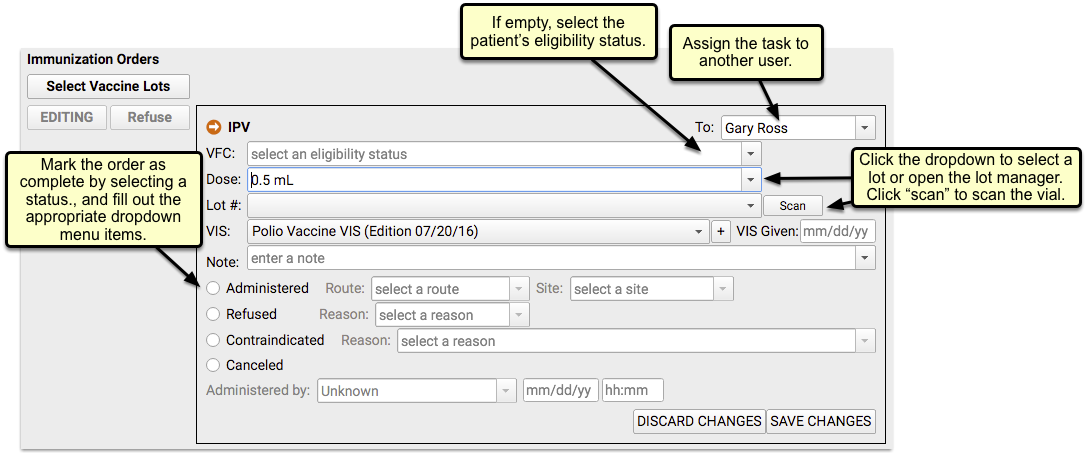
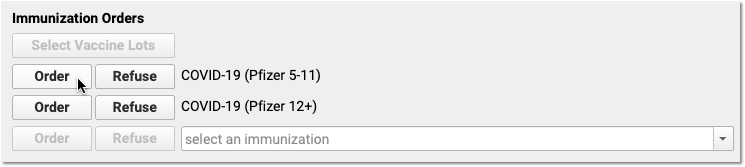
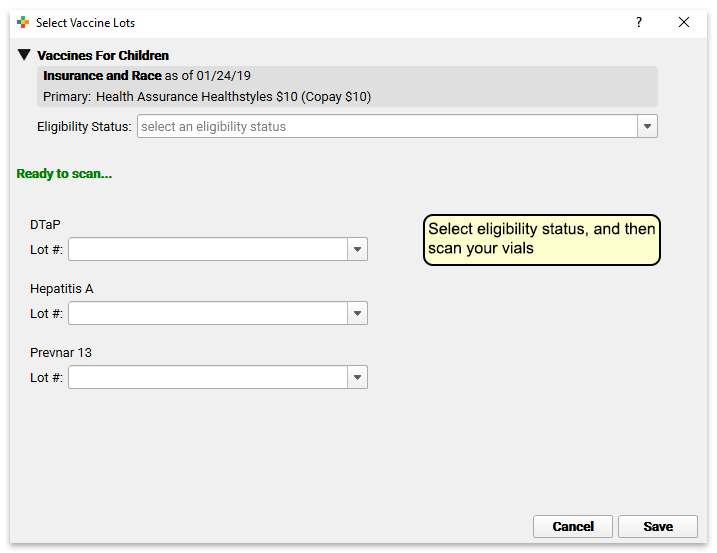
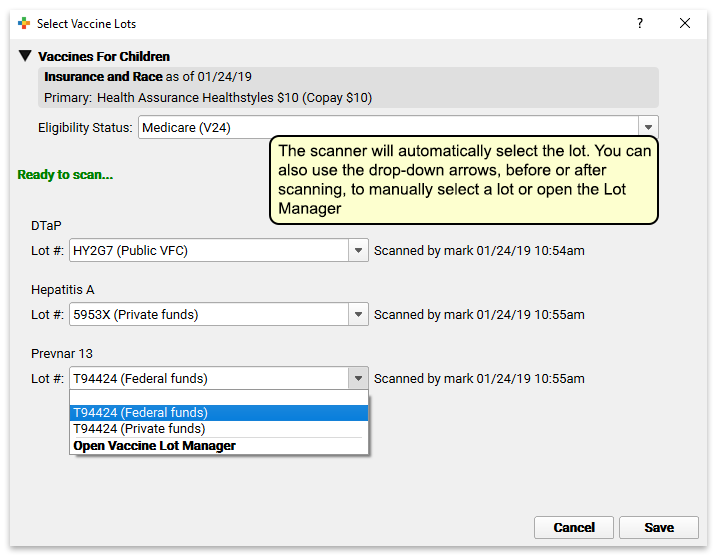
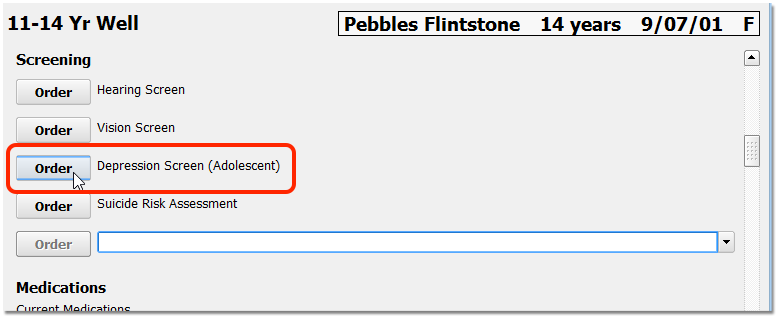
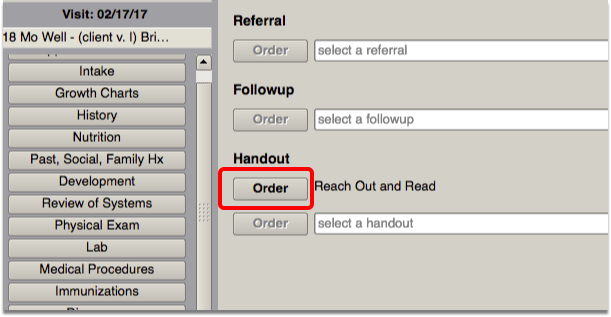
When a clinician creates an order for an immunization, screening, or other service, PCC EHR can automatically add appropriate procedure codes to the electronic encounter form. The clinician manually selects a visit code (and sometimes other codes) on the electronic encounter form. Then the clinician makes these codes “Ready For Billing”, which causes them to appear in Procedures in the Post Charges protocol. Finally, the biller can also manually add procedures before they queue up the claim.
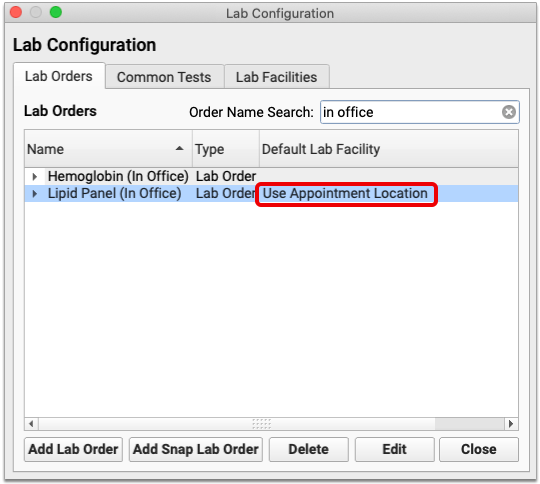
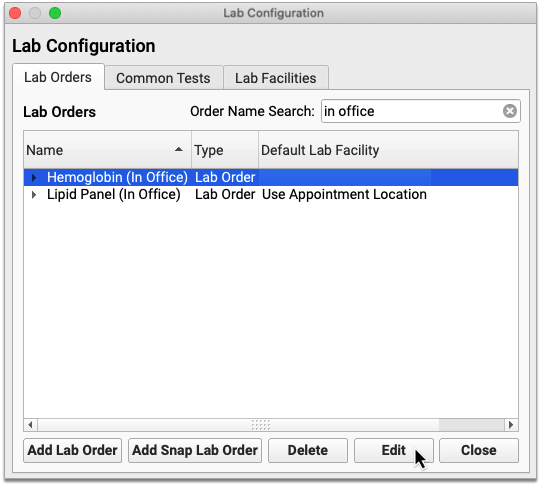
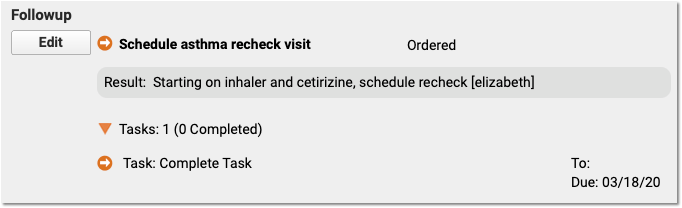
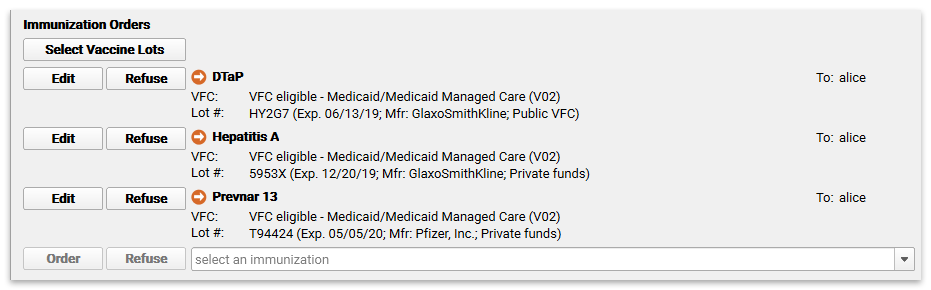
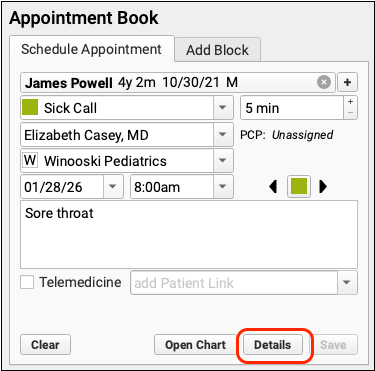
For some orders, you can click on the “Details” link, as shown in the image above, to learn more about the order that led to the billing procedure code.
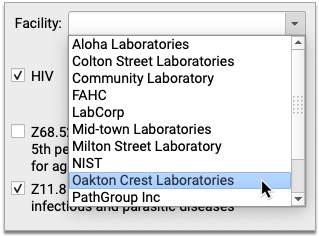
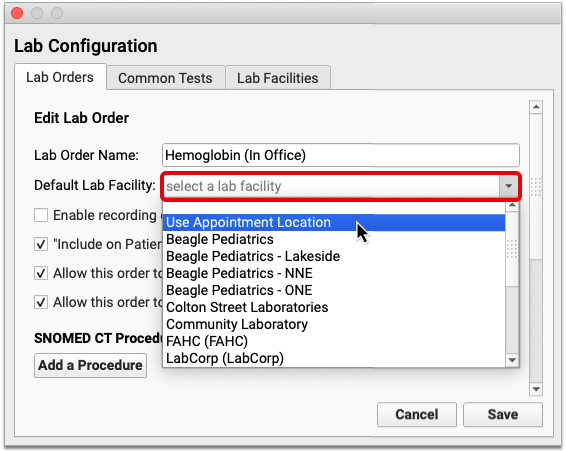
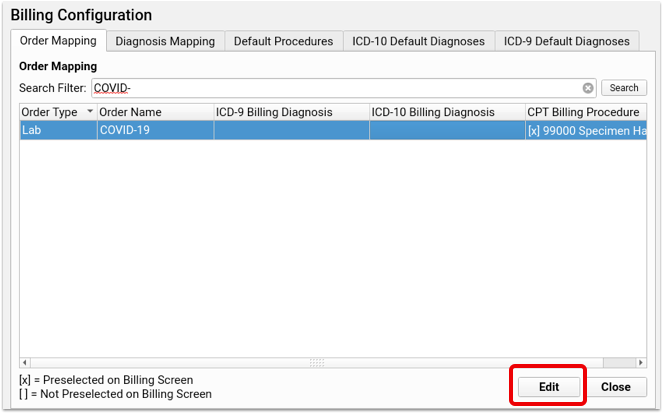
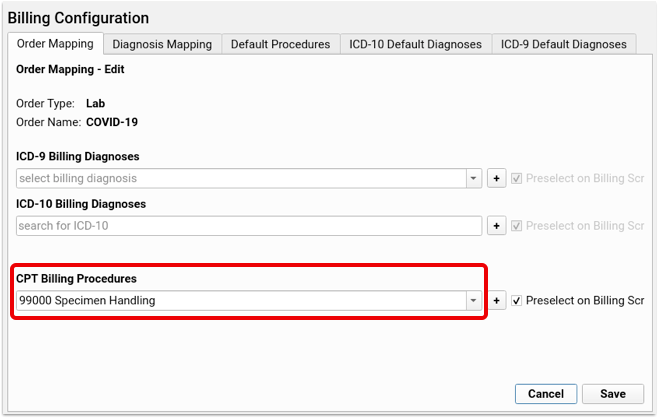
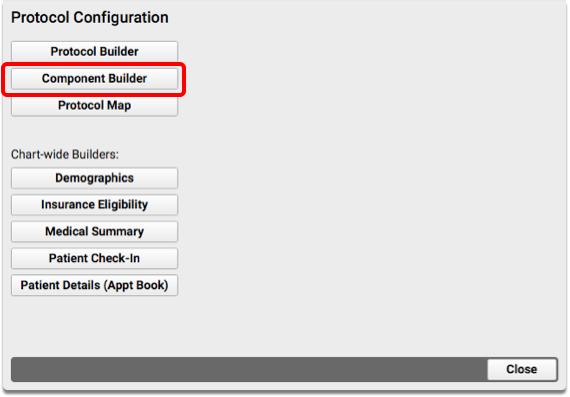
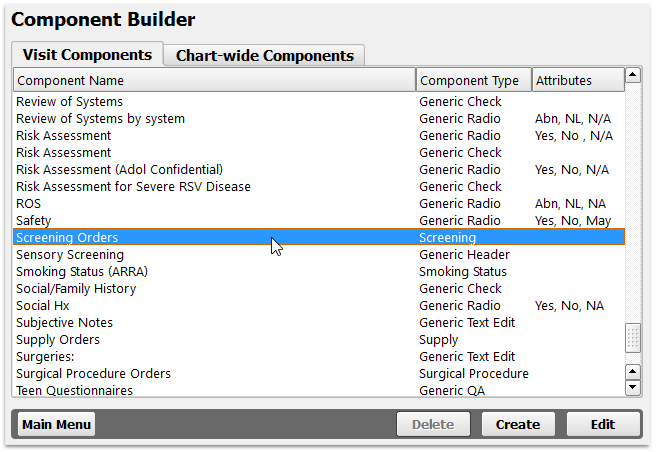
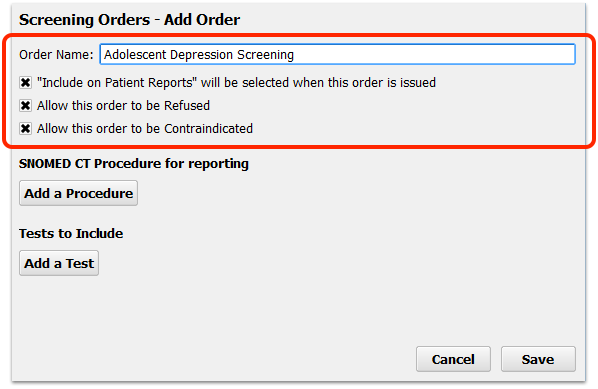
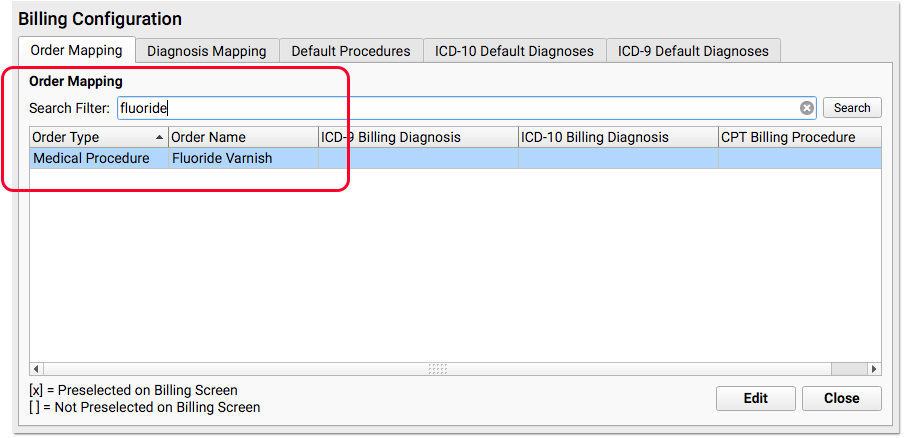
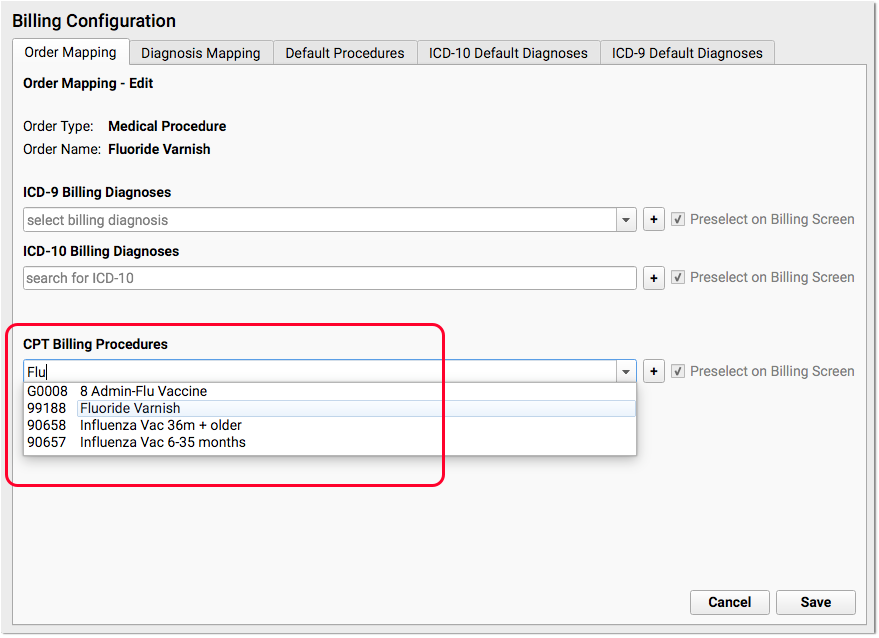
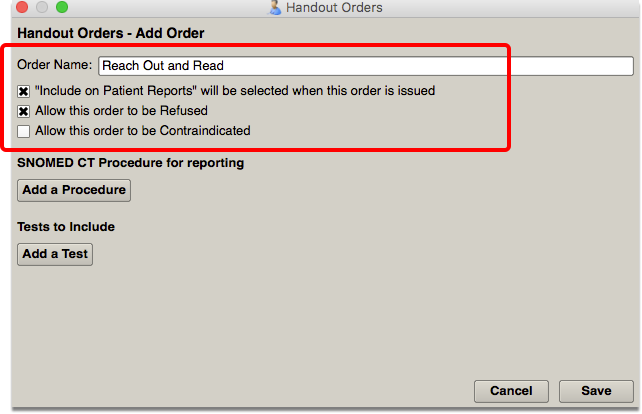
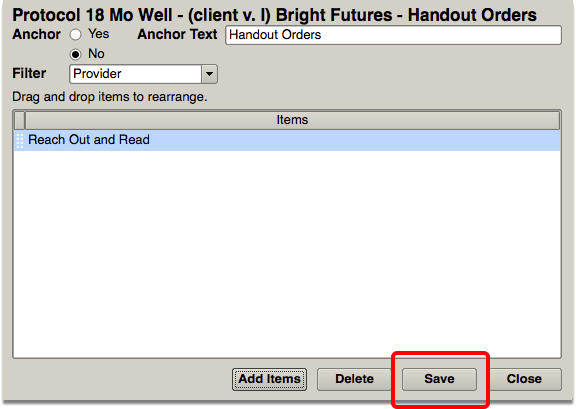
Configure Orders to Trigger Specific Procedures: Your practice can customize exactly which procedure codes should automatically be added to the encounter form for each lab, screening, or other order. See Configure PCC EHR Billing and the Electronic Encounter Form to learn more.
Post a Procedure With No Linked Diagnosis
On a claim, all procedures must be linked to one or more diagnosis. If you attempt to post a procedure that is not linked to a diagnosis, PCC EHR will stop and ask you to link before continuing.
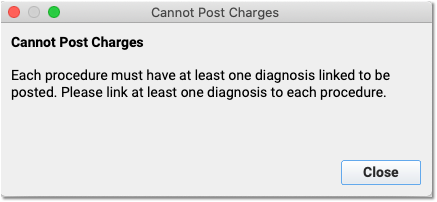
If your practice uses a procedure for an administrative fee or other non-standard purpose, you can configure that procedure with fewer than five characters (#####), and Post Charges will allow you to post the procedure without a linked diagnosis.
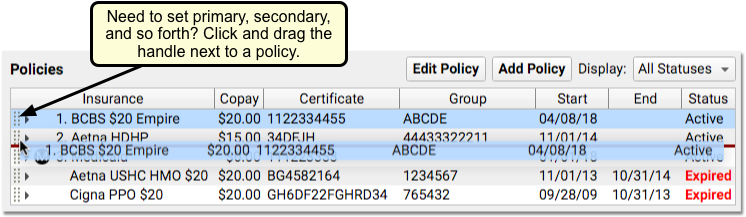
Change the Order of Procedures On An Insurance Claim
Some payers may require the E&M code to appear first, or have other requirements for the claim. Your practice may want to sort the CPTs so they appear in a certain order.
PCC Support can adjust the claim processing for each payer and set a priority order for procedures so they appear in the correct order on the claim. Contact PCC Support to configure your claims.
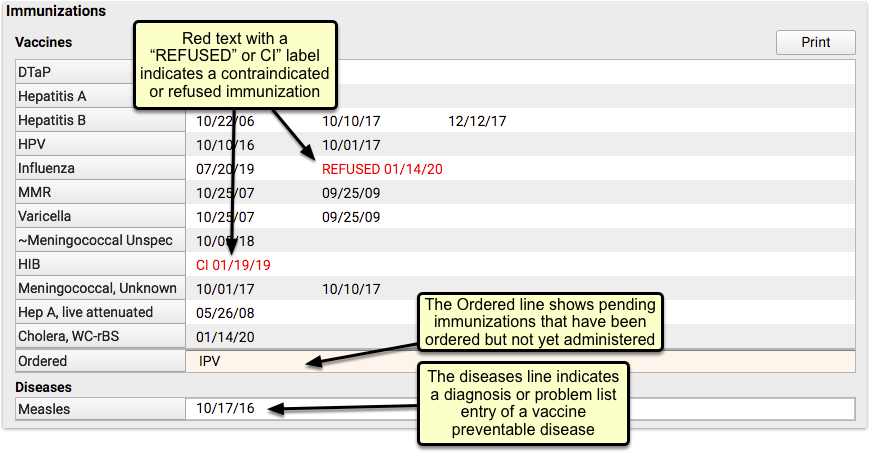
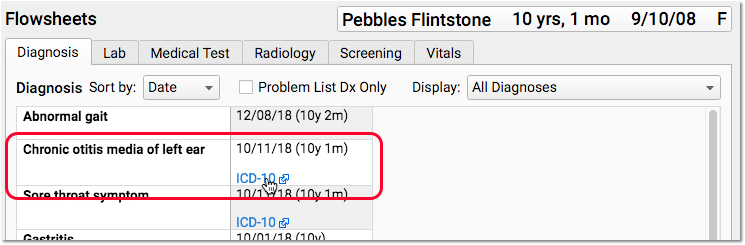
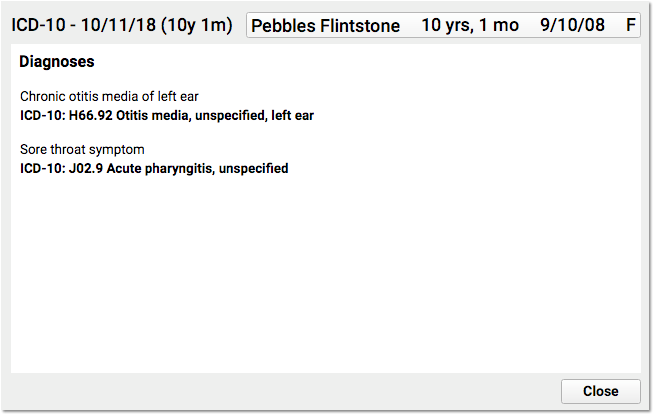
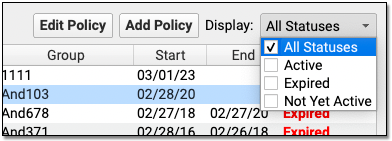
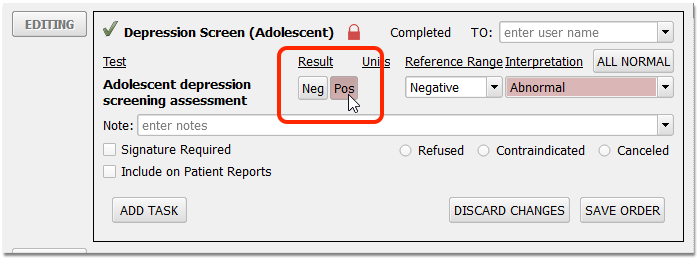
Review and Fix Invalid Codes
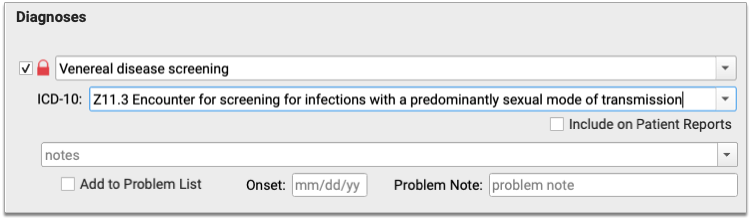
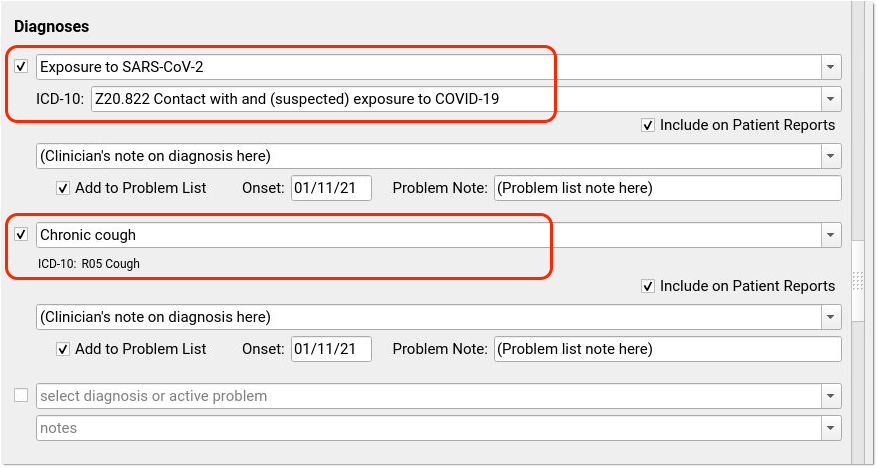
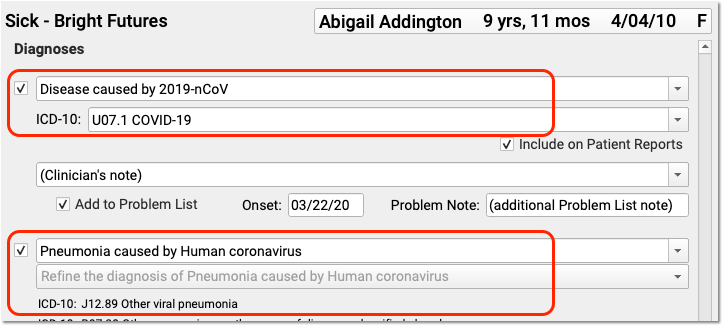
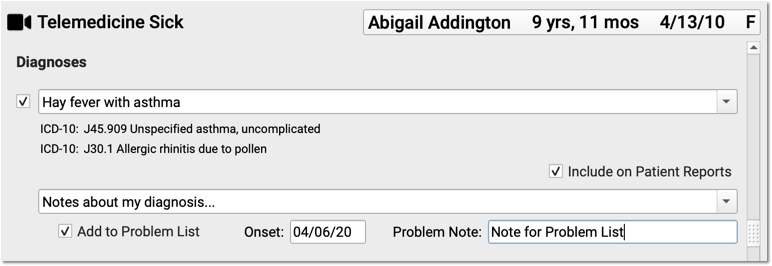
When you post charges, and an ICD-10 code is expired (or not yet in effect), PCC EHR will warn you and prevent posting. The diagnosis will appear in red text and include an explanation in parentheses. For example, this screenshot was taken in December of 2020:
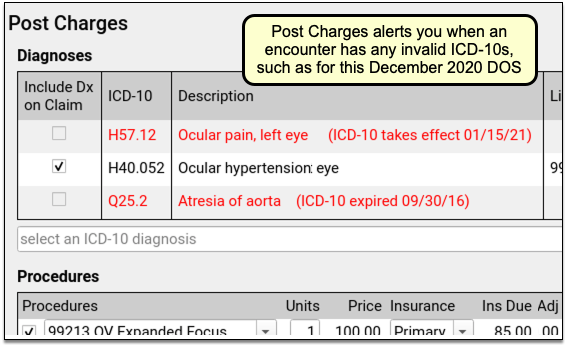
PCC EHR will not allow you to post charges with diagnoses that are invalid for the date of service. You can immediately add the correct code into the Diagnoses component, link and post the charges, and queue up a claim.
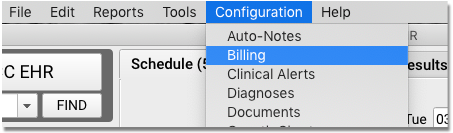
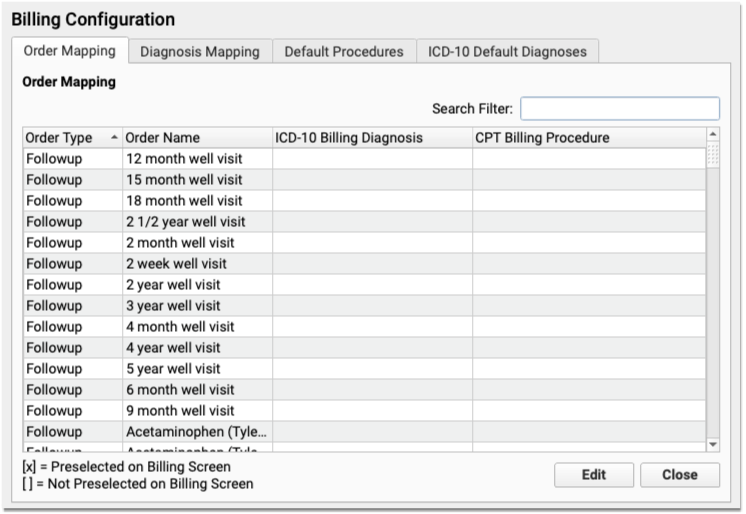
Fix Your Diagnosis Configuration: If an invalid ICD-10 appears on the Post Charges screen, you can fix the problem so it doesn’t appear again. For example, you might have an order that is configured to trigger the old diagnosis, or an expired ICD-10 might be manually mapped to a SNOMED description. You can fix these issues in the Billing Configuration tool. In Billing Configuration, you can only map ICD-10 diagnoses that are valid or will be valid in the future; expired ICD-10s are not available for mapping.
Procedure Code (CPT) Validation: Your practice can create and use non-CPT procedures and charges, such as administrative fees. PCC does not validate procedure codes when you post charges. Instead, your PCC server reviews and validates CPT billing codes when your practice processes and submits claims. As claims are processed, billing codes are evaluated against your system’s list. If a claim would include an invalid billing code, or a valid code that is invalid for the date of the encounter, it holds back the claim and adds it to the Needs Correction list.
Add a New Procedure or Update a Price
If you can’t find the correct procedure code, or you need to make a change to your practice’s price, you can update the configuration before you post charges for the encounter.
See Edit Your Practice’s Prices and Procedure Billing Codes or watch a video tutorial.
Adjust Claim Information as You Post Charges
As you post charges, use the Claim Information section if you need to change the billing provider, enter accident information, or add other details that will appear on the claim.
Appointment Provider, Provider of Service, Billing Provider, Rendering Provider, and Provider of Billing
PCC EHR automatically selects the scheduled Appointment Provider as the Provider of Service for an encounter when you post charges. The Provider of Service will normally appear on the claim. In the claim specification, the Provider of Service is called the “Rendering Provider”, and is also equivalent to the “Encounter Provider” term used for evaluating Clinical Quality Measures.
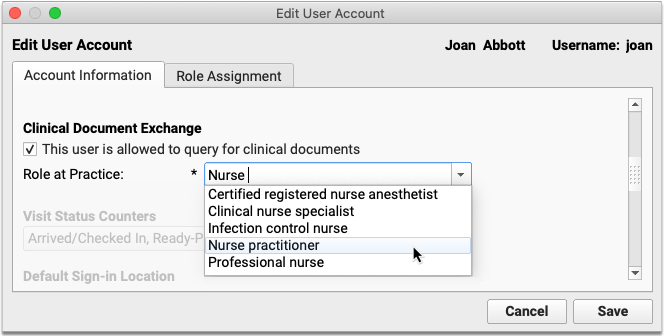
If an encounter was scheduled for a placeholder “Nurse” or “On Call” provider, for example, you can use the Appointment Details component to change the Provider of Service and indicate who saw the patient.
If the encounter needs to be billed under a different provider than the Provider of Service, you can change the “Billing Provider” in the Claim Information component. The Billing Provider will then appear on the claim as the Rendering Provider, overriding the Provider of Service.
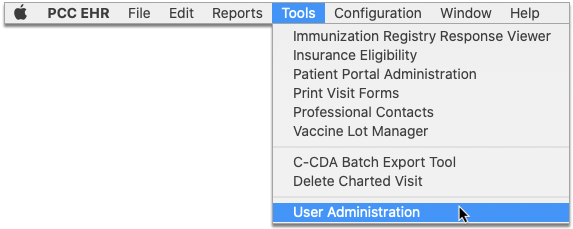
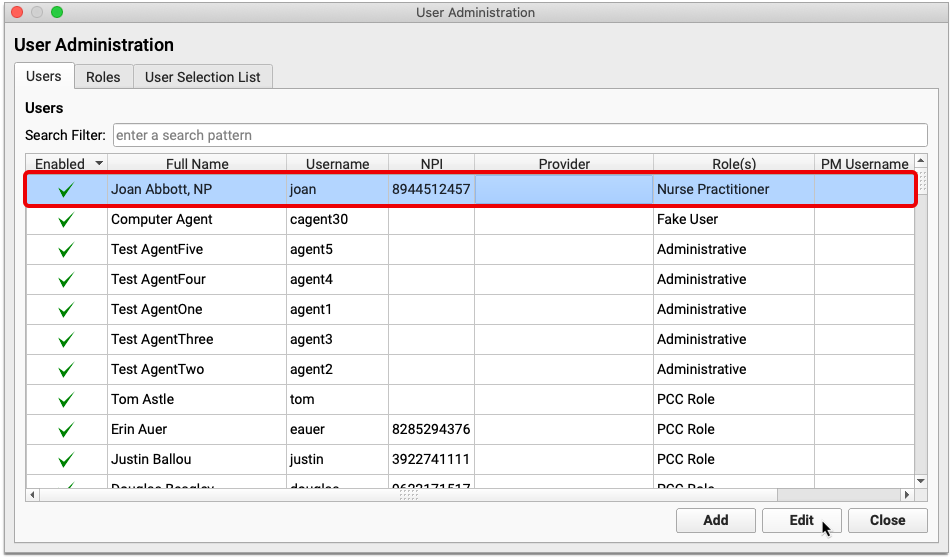
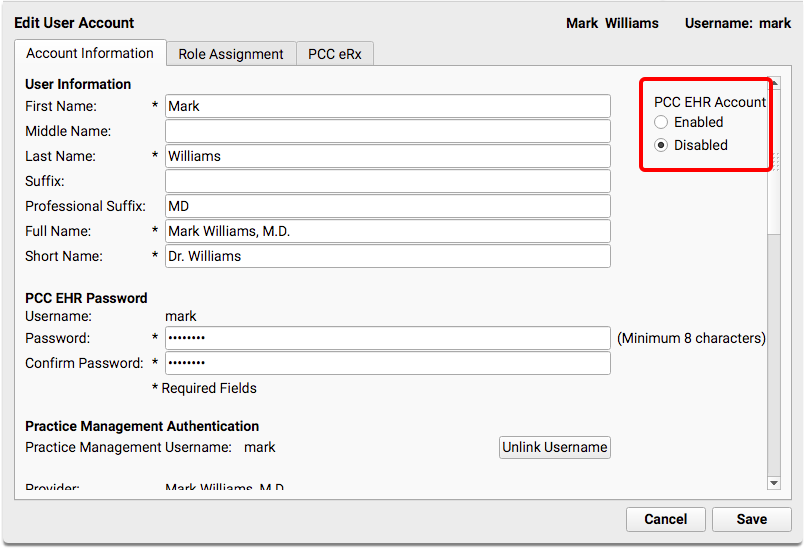
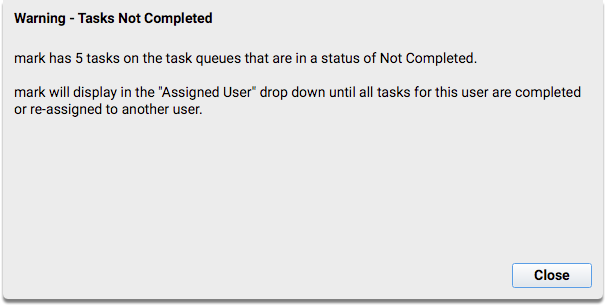
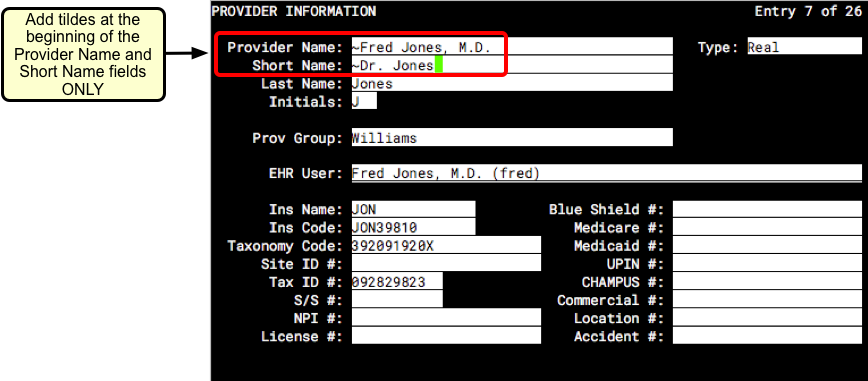
Your practice can use the Providers Table (found in the Tables tool) to mark a provider as “Not Real”. The Post Charges screen will then prompt the user to select a Billing Provider.
Your practice’s information, usually the name of your business, appears on the claim as the “Provider of Billing”, along with your practice’s Type 2 NPI. If you encounter an insurance carrier that requires you to display the rendering provider in the “Provider of Billing” section of the claim, or you have other special configuration needs for making sure the right clinician appears on the claim, PCC can handle configuration changes.
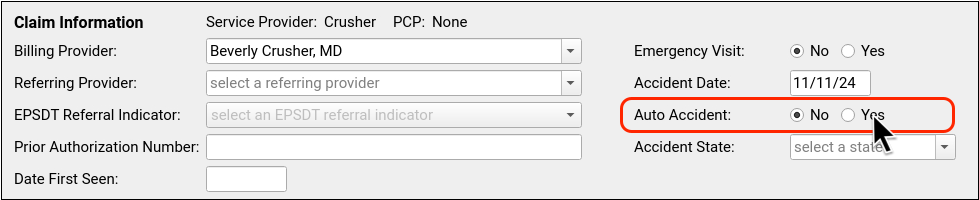
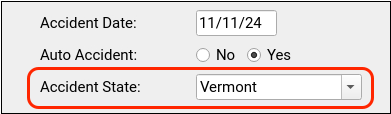
Enter Accident Information
If an encounter is related to an accident, enter accident information in the Claim Information section.
As accident claims are rejected without a location, when you indicate that an encounter is related to an accident PCC EHR will automatically enter the state of your practice’s office or care center location.
Review Payments as You Post Charges
As you post charges, you can review balances, time-of-service payments, and enter a new payment. Read below to learn more about payments, receipts, and the live ledger found in the Payments component.
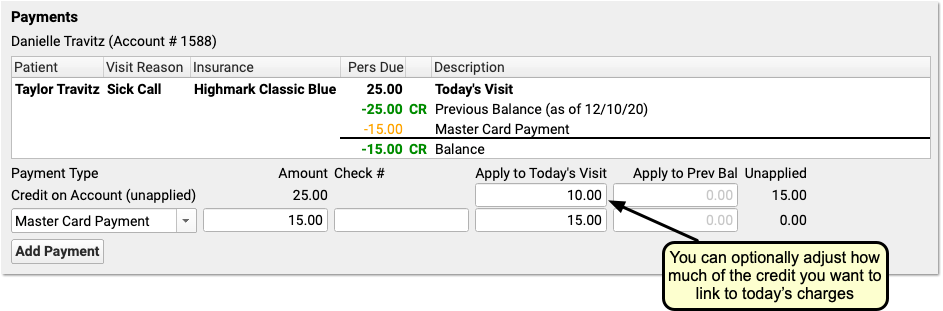
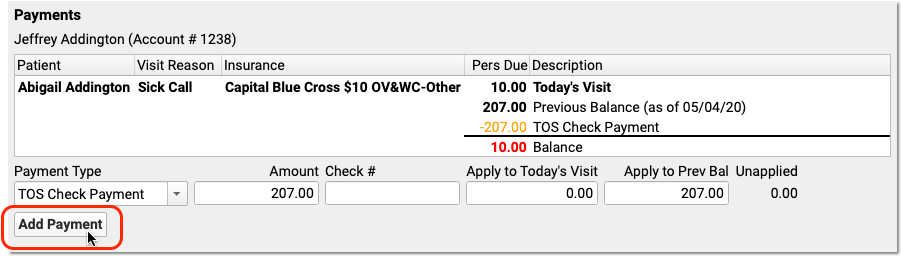
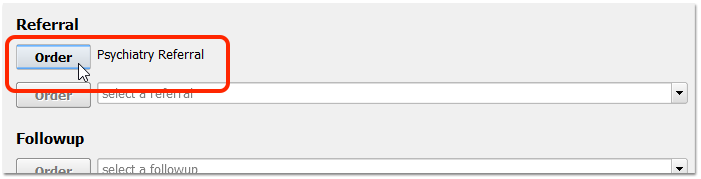
Adjust How a Payment is Applied
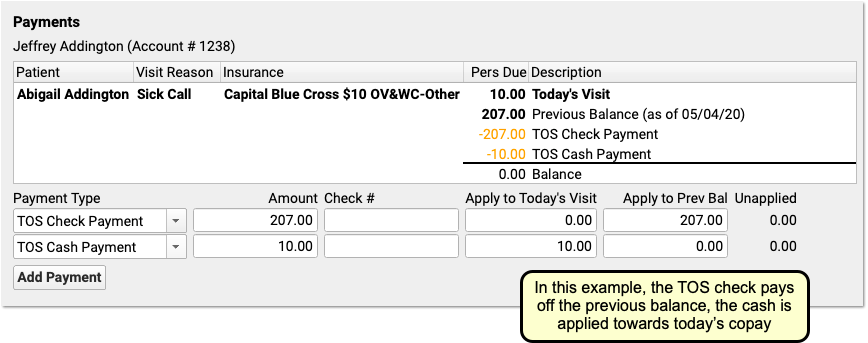
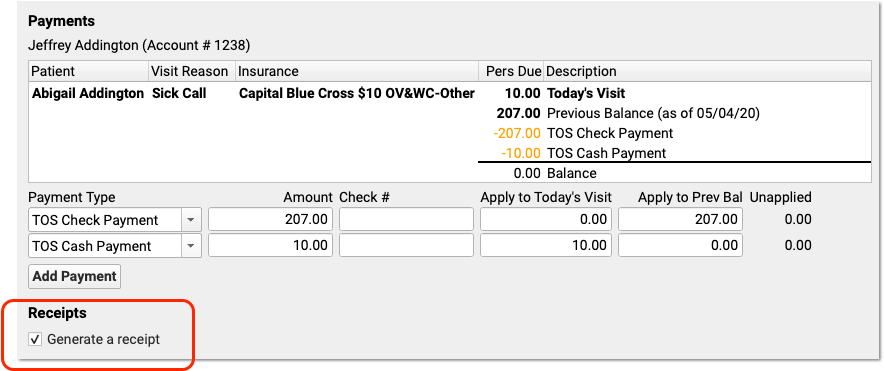
For each payment, you can adjust what portion of the payment will apply to today’s visit or the past due balance.
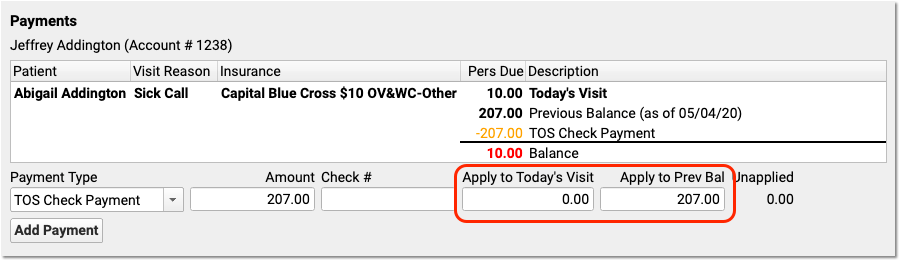
In the above example, the user designated that the $207 check should fully apply to past-due balances and not to today’s required copay.
How are Payments Applied to Multiple Past-Due Balances?: If there are many unpaid previous balances, PCC will begin by applying payments to the oldest charges first. It will link the payment to charges in turn. Later, your practice can optionally unlink and relink payments in the Payments tool.
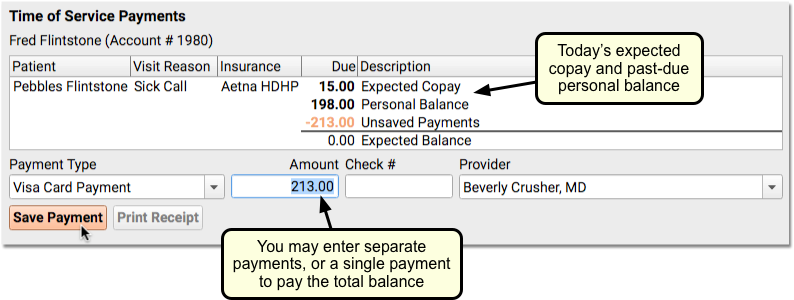
Add Multiple Payments
When a parent pays with multiple payments, you can add each payment and then adjust which payments apply to today’s encounter and which apply to past-due balances.
After you enter details for one payment, click “Add Payment” to create additional payment lines.
For each payment, you can select a payment type, enter an optional check number, and adjust what portion of the payment will apply to today’s visit or a past-due balance.
As you enter payments and make changes, the ledger in the Payments component will display the end result of your actions. The payments will not be posted or saved until you click “Save and Post”. All payments will appear on the receipt.
Enter Time-of-Service Discounts
As you post charges, you can enter a discount amount or discount percentage. There are two ways to enter a discount amount.
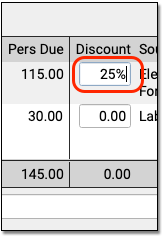
First, you can enter discounts for any procedure in the Discount column in the Procedures component.
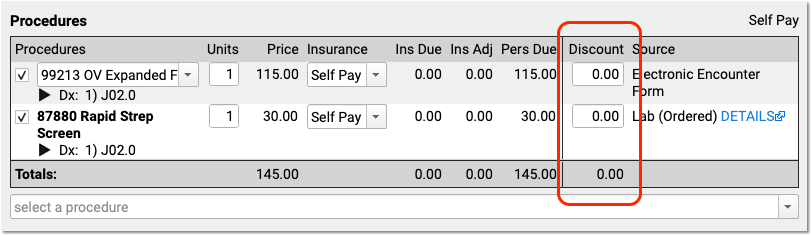
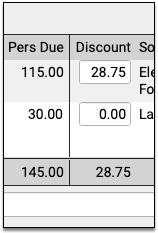
If you type a percentage, PCC EHR will automatically calculate the discount amount.
The Payments component below will automatically fill out the details of the discount for you.
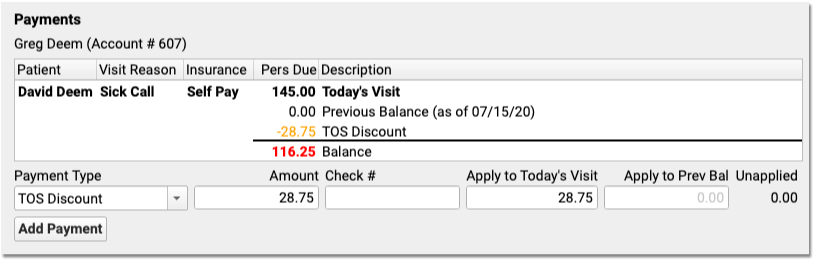
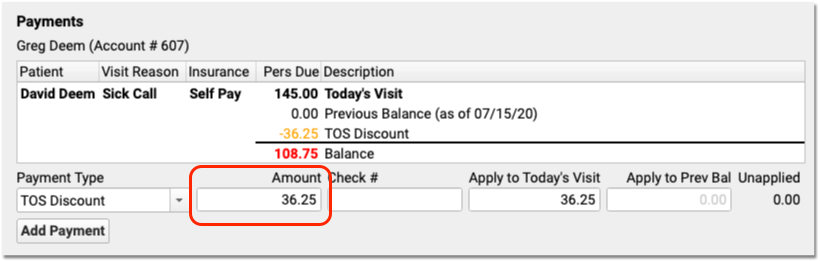
Alternatively, if you want to apply a discount towards all charges in the encounter, you can skip the Procedures component. In the Payments component, select a discount as the “Payment Type” and enter a percent or an amount.
The Discounts column in the Procedures component will automatically update with the discounted amounts. If you enter an exact discount amount instead of a percentage, PCC EHR will apply the discount to the procedures in order, starting from the top.
You can adjust discount amounts in either component, make other changes to the charges, or add additional payments for the remaining balance. Click “Save + Post” to finish posting the charges, payments, and discounts.
The Billing History section of the patient’s chart will display the discount along with other time-of-service payments or adjustments.
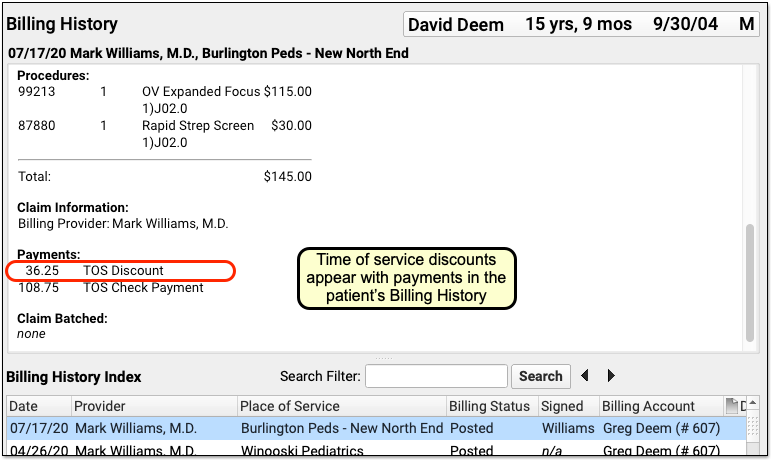
How Much Can I Adjust Off With a Time-Of-Service Discount?: Time-of-service discounts are for the amount due to the personal billing account of the patient, not for charges pending an insurance payer. You can only discount up to the total amount due personal on a charge.
Receipts Display Only Services and Payments: Discounts occur for a variety of reasons, some of which involve PHI or administrative decisions. Therefore time-of-service discounts do not appear on the printed receipt. The Post Charges receipt only displays the billed services and any payments. To create a complete account history (including discounts), use the Account History in the patient’s chart.
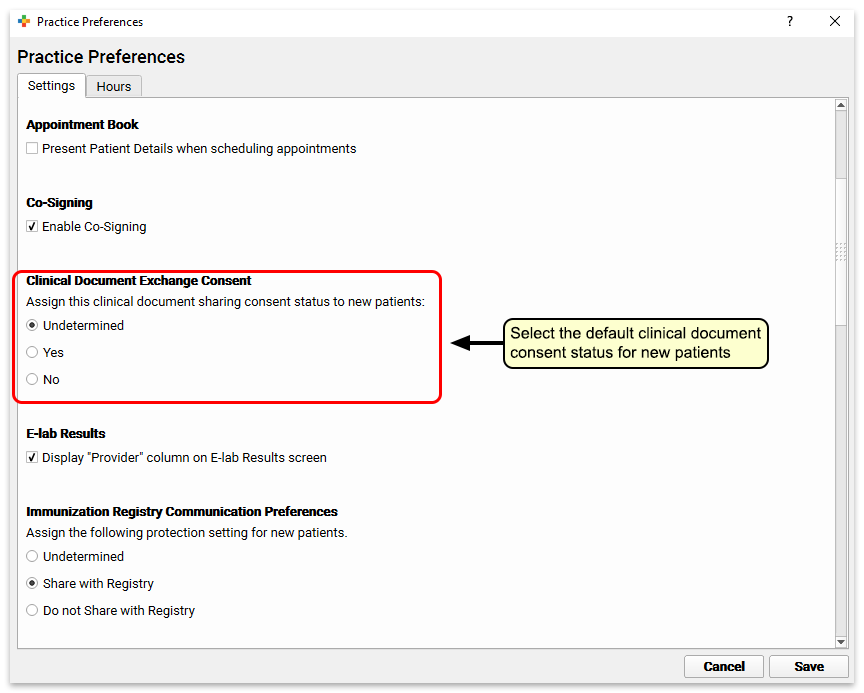
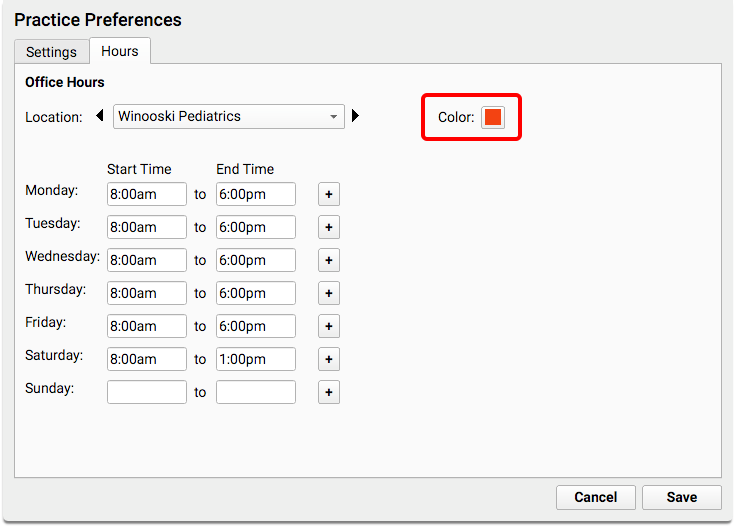
Configure Your Practice’s Default TOS Discount Type
When you enter a discount in the Procedures column while posting charges, PCC EHR automatically creates the Discount line in the Payments component for you.
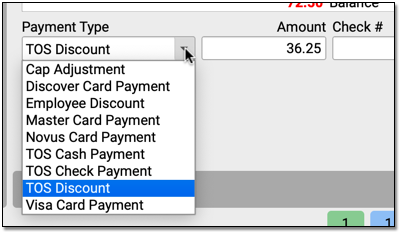
If your practice has many different types of discounts or adjustments that you apply at the time of service, you can change the discount to a different type with the drop-down menu in the Payments component.
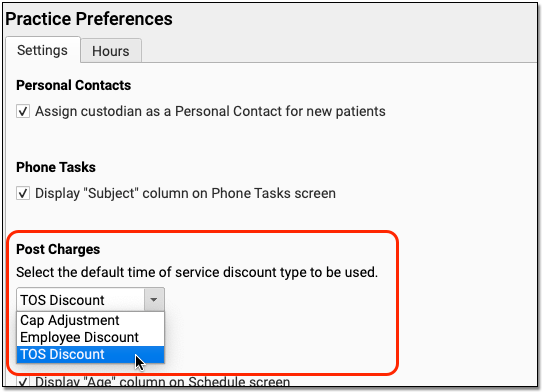
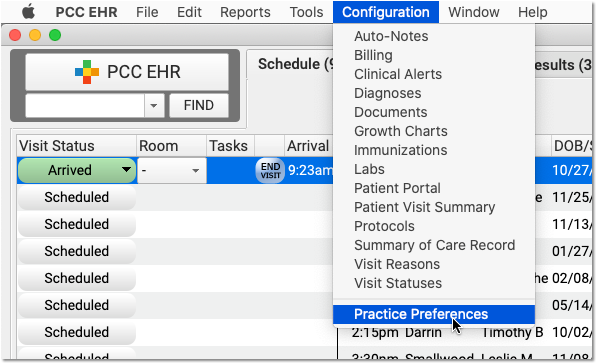
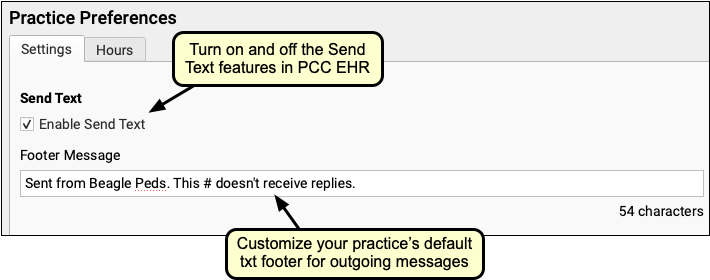
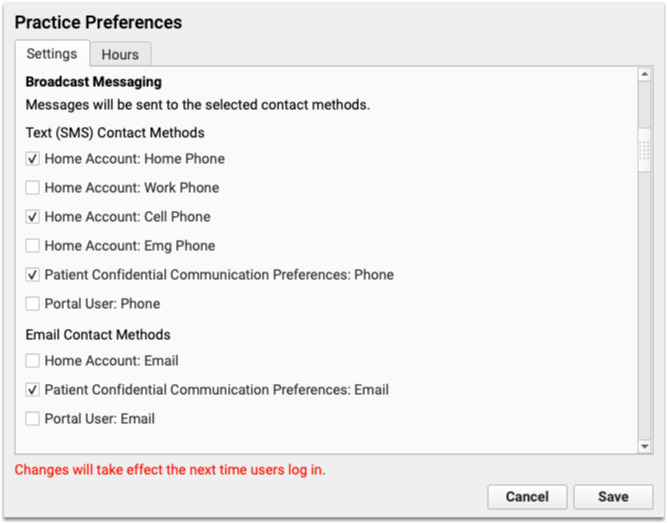
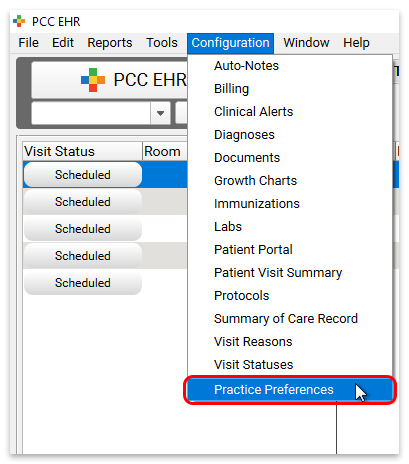
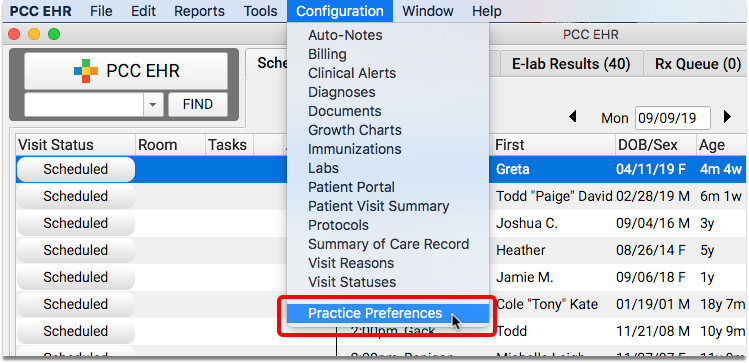
Use the Practice Preferences configuration tool to adjust your practice’s default TOS Discount. During your PCC 8.13 update, PCC copied your practice’s default TOS discount from the charge posting configuration in Practice Management. You can review and update this default in PCC EHR, and pick from any payment type in your PCC system that is marked as an “Adjustment” and is configured for charge posting.
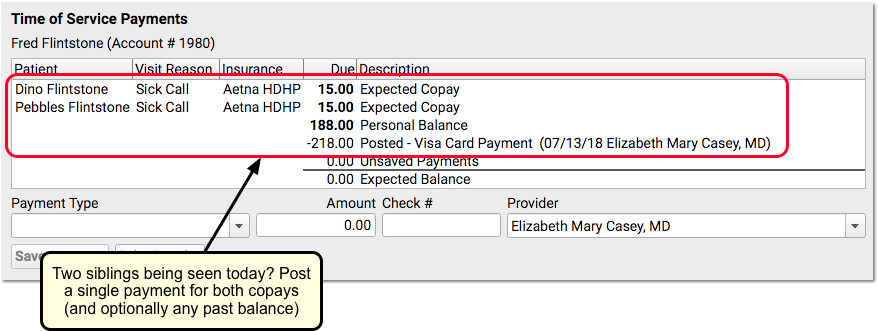
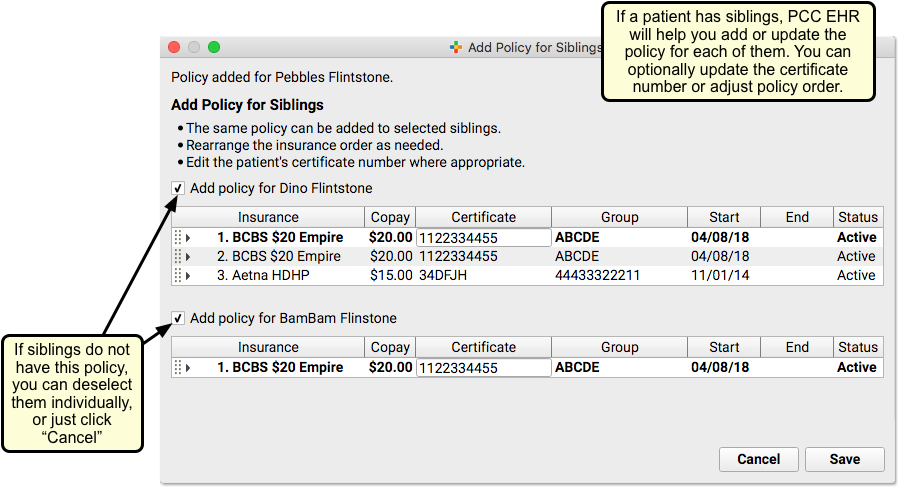
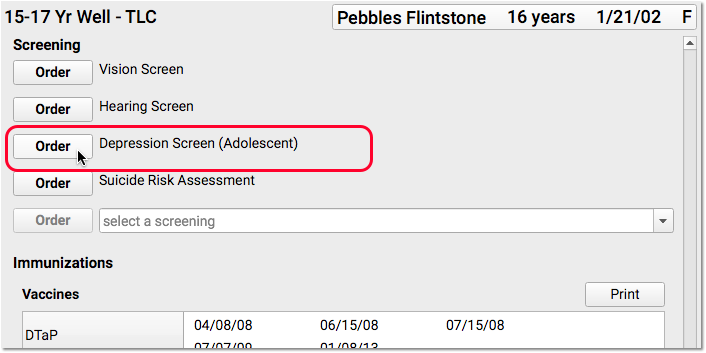
Understand Payments Made for Siblings or Multiple Patients Who Share a Billing Account
As you post charges for a series of visits for patients with the same billing account, the Payments component will track your progress and let you know what amounts have already been posted for the account.
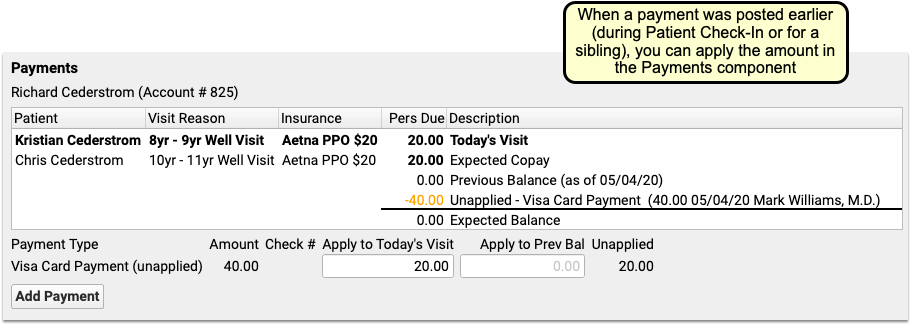
If you post the total of both copays for sibling patients during Patient Check-In, or do so when you post charges for the first sibling, the payment amount will appear in the ledger and you can adjust how much to apply to the encounter’s charges.
In example in the screenshot above, the $40 payment appeared in the Payments component, and the ledger was already showing that the family’s balance is $0.00. The user enters $20 into the “Apply to Today’s Visit” field to directly link that portion of the payment to this encounter’s charges. When they post charges for the sibling, they can apply the remaining $20.
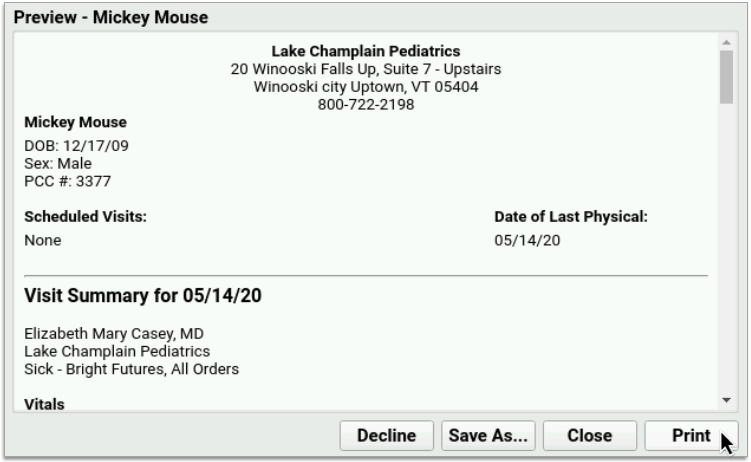
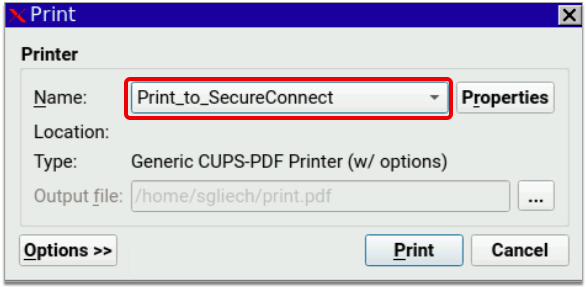
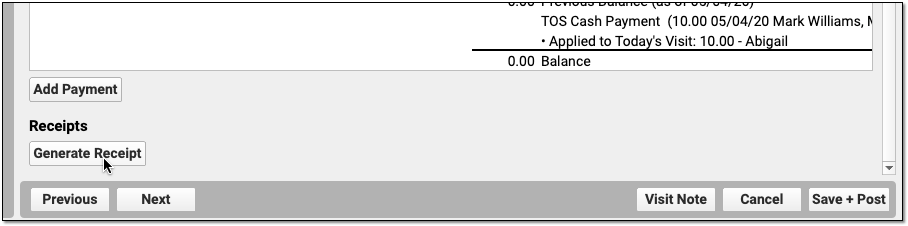
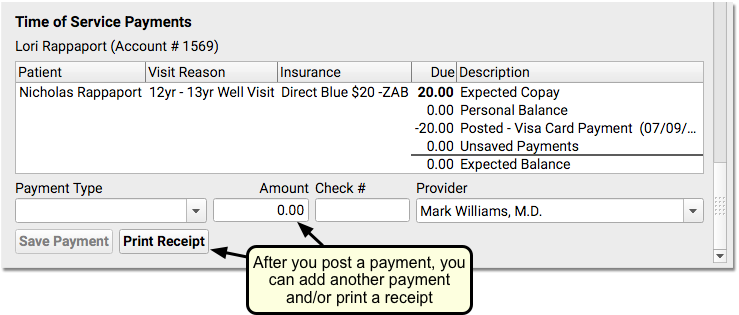
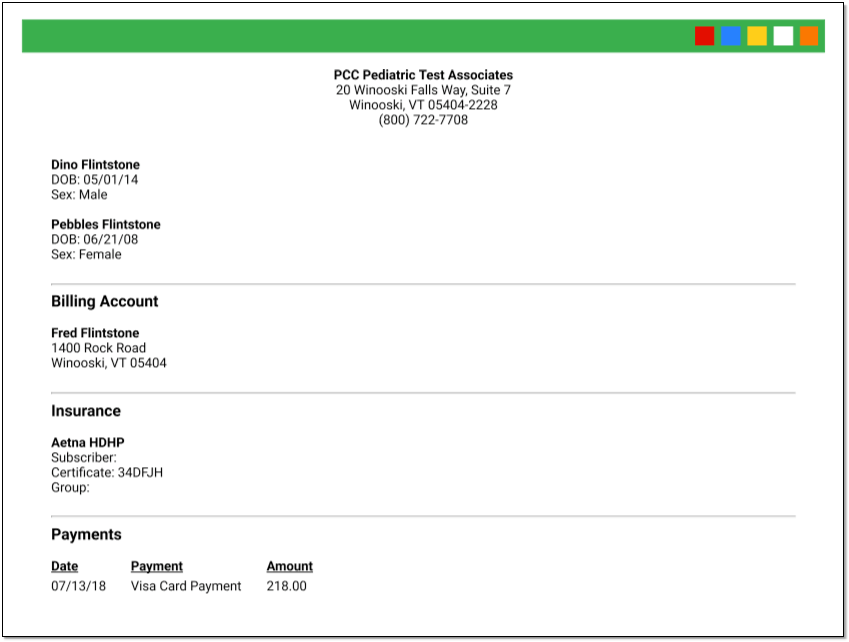
Generate a Receipt for Today’s Payment
Your practice can generate receipts at many different times during a visit and the post charges process.
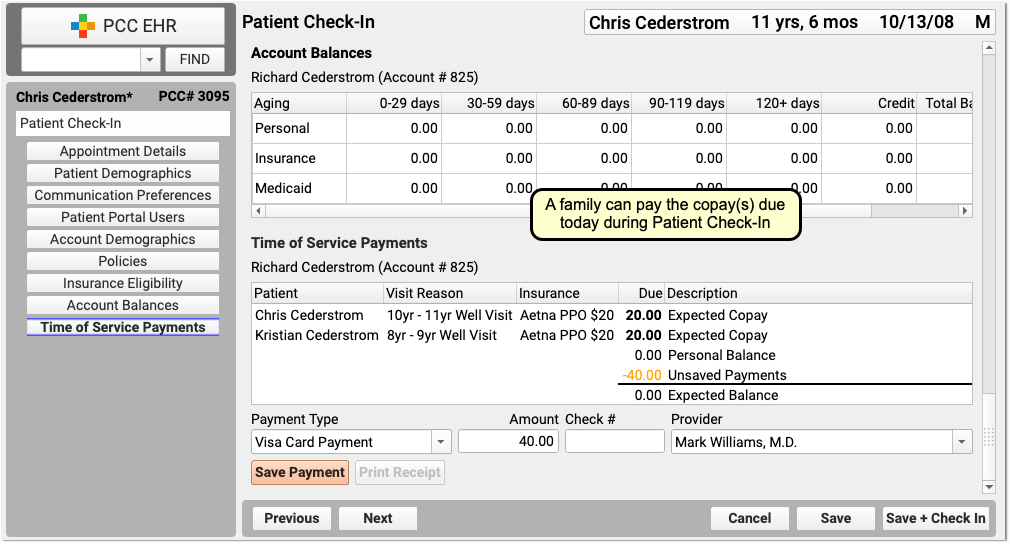
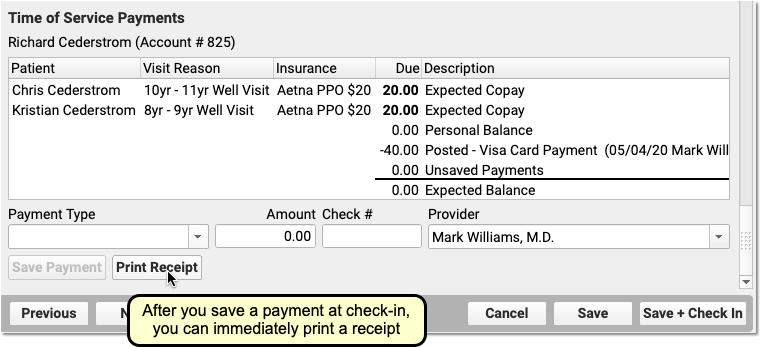
First, if your practice collects a copay or other payment during Patient Checkin, the front desk can generate a receipt for the payment right away.
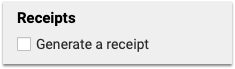
Next, if you’d like a receipt to print out as soon as you save and post charges and payments, check the “Generate a Receipt” checkbox.
After you save and posted charges, you can return to the Post Charges protocol for an encounter at any time and click “Generate a Receipt” to print another receipt.
Finally, you can generate a receipt for a single payment or multiple payments in the Payments tool.
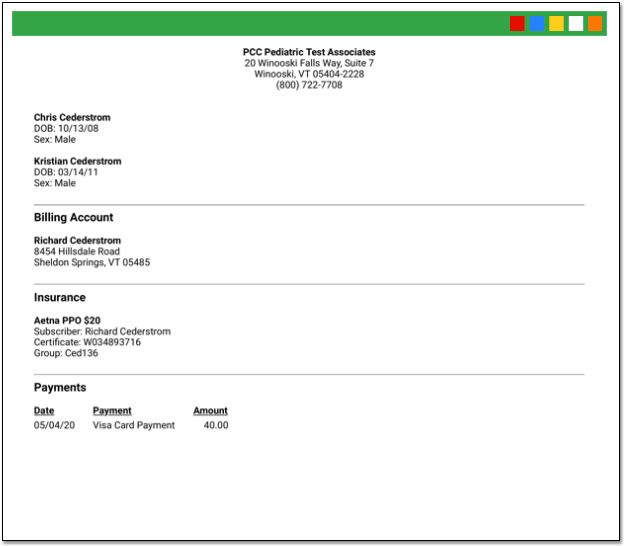
Differences Between the Patient Checkin Receipt and Post Charges Receipt: When you generate a receipt from Post Charges, you will see more visit information including procedures and diagnoses. When you generate a receipt from Patient Checkin, you will only see the amount paid.
Apply a Past Credit to Today’s Charges
When you post charges, PCC EHR will display any credits on the patient’s Billing Account in the Payments component.
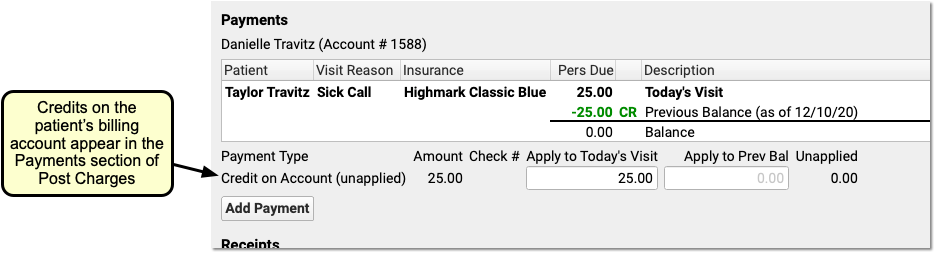
By default, the full credit will be applied towards any personal (non-insurance) charges for today. Optionally, you can adjust the amount you wish to link to today’s charges.
You might do this in order to apply only the amount of a copay, for example, or if only part of the credit should be applied.
When you are finished reviewing charges and payments, click Save and Post. PCC EHR will link the payment from the past directly to the charges that have a personal amount due.
Add More Diagnoses, Procedures, or Payments After You Post Charges
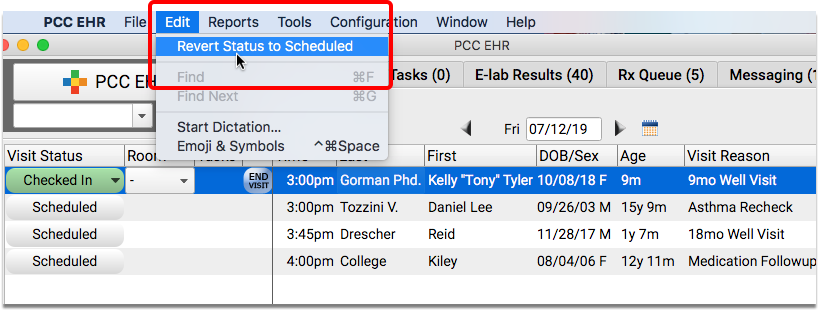
You can click on the “Posted” status to return to Post Charges to review what was posted and/or add additional diagnoses or procedures.

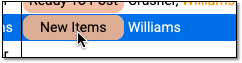
If a clinician returns to the chart note, adds diagnoses or procedures, and updates the Electronic Encounter Form, the Billing Status will display “New Items”.
Click “New Items” to reopen the Post Charges tool and add the additional items to the claim.
You can review and enter any new procedures or diagnoses, adjust linking, add new payments in the Payments component, and click “Save and Post” to adjust the queued claim.
Be aware that since charges and payments may have already been posted, the ledger in the Payments component will first display only totals and amounts for any new unposted charges for this encounter. Charges and payments you already posted are summarized below.
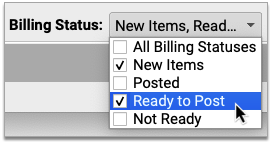
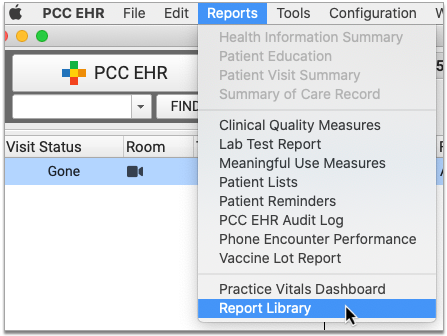
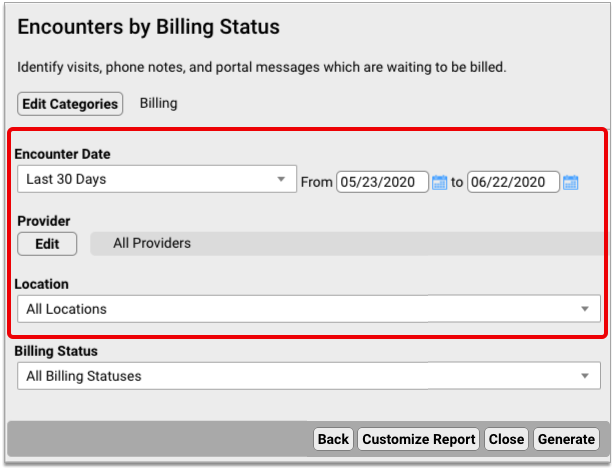
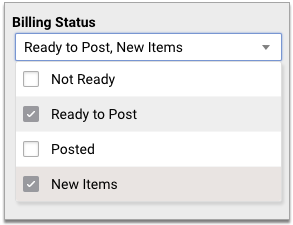
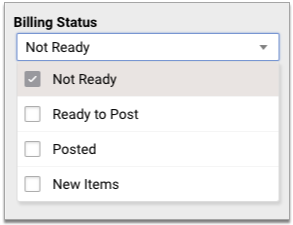
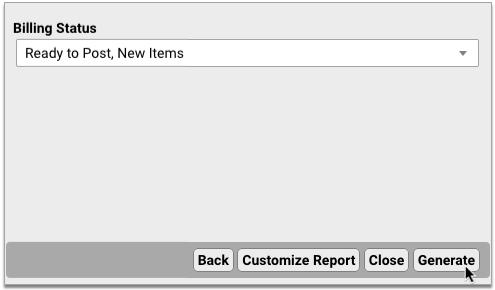
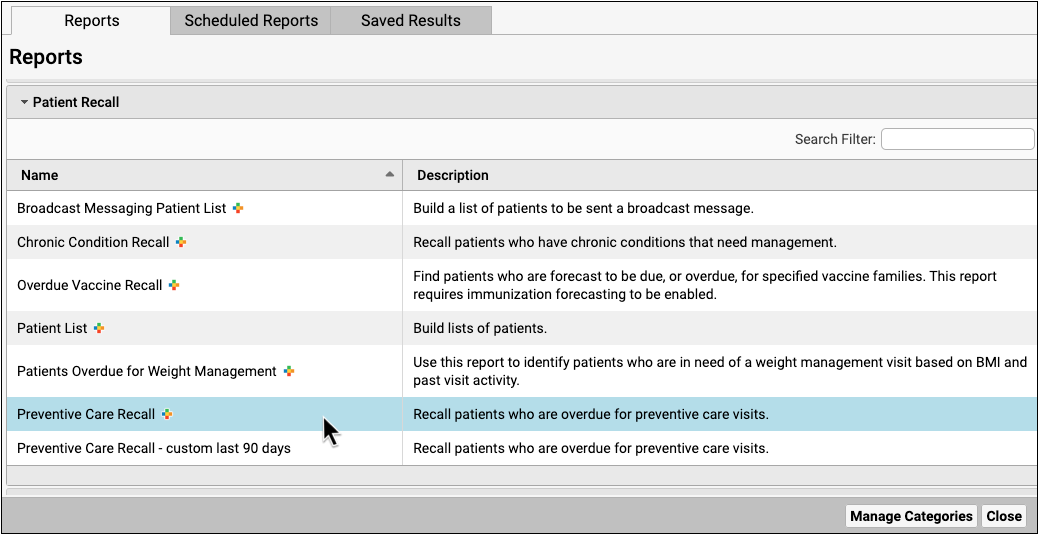
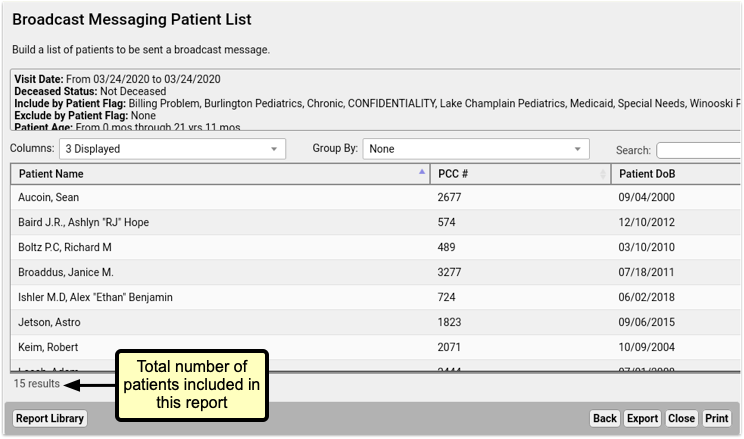
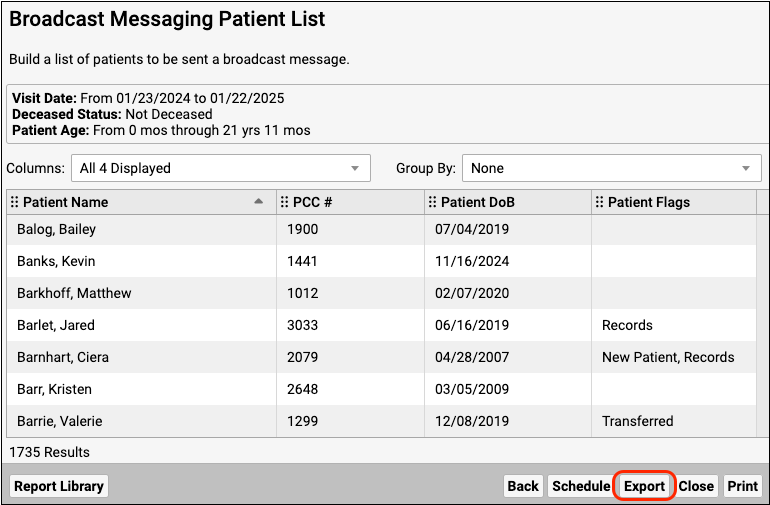
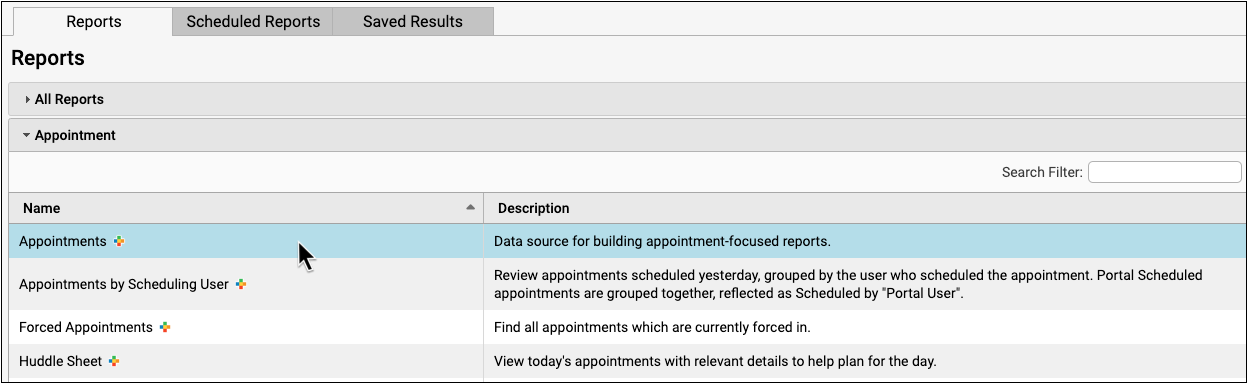
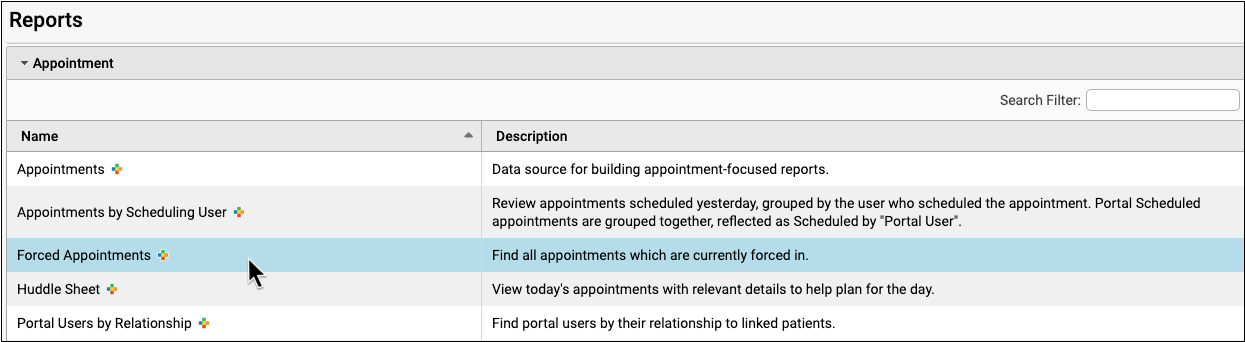
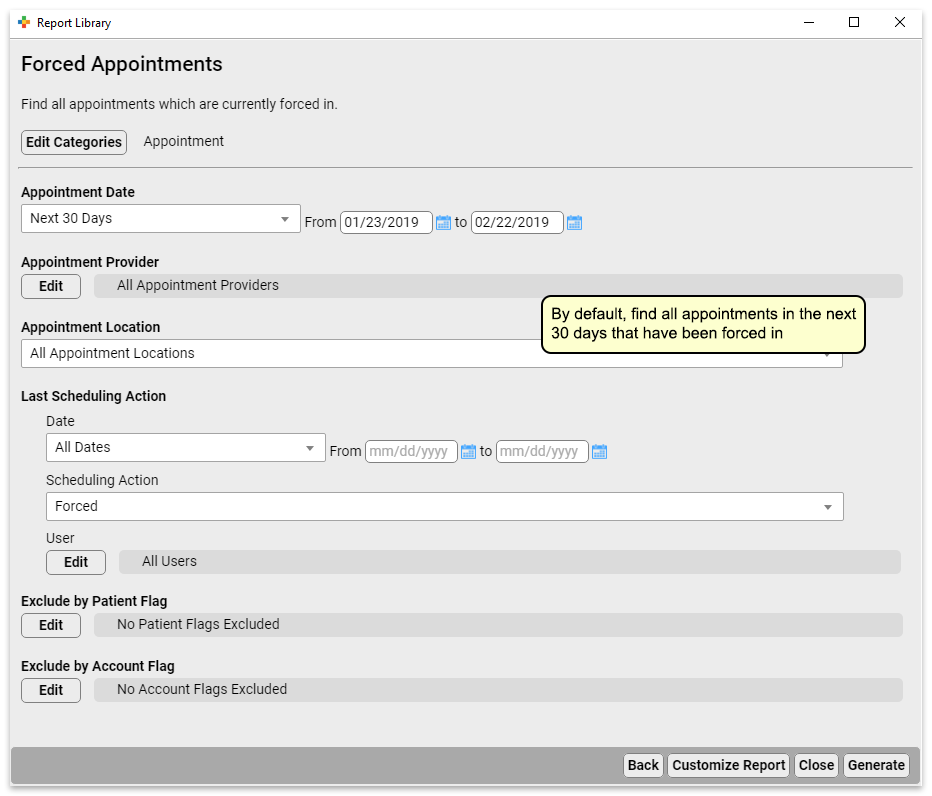
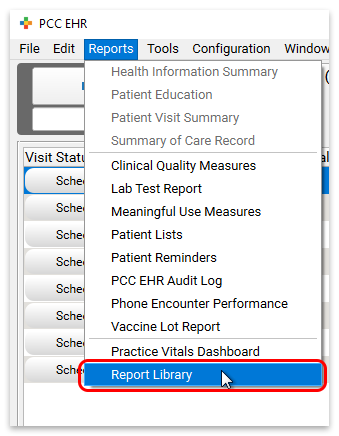
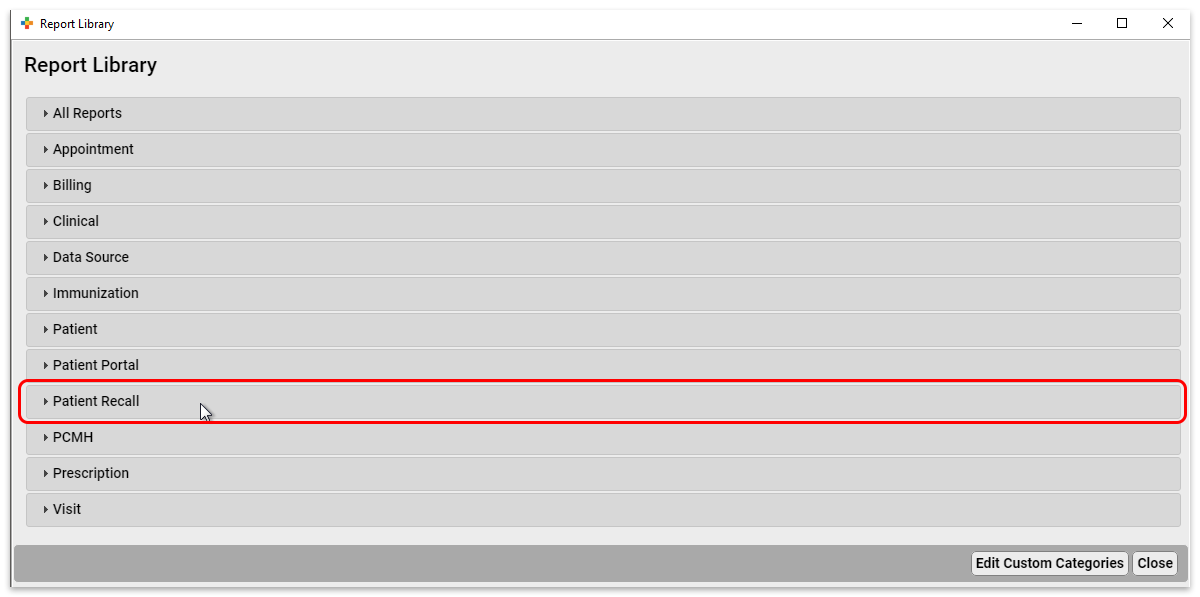
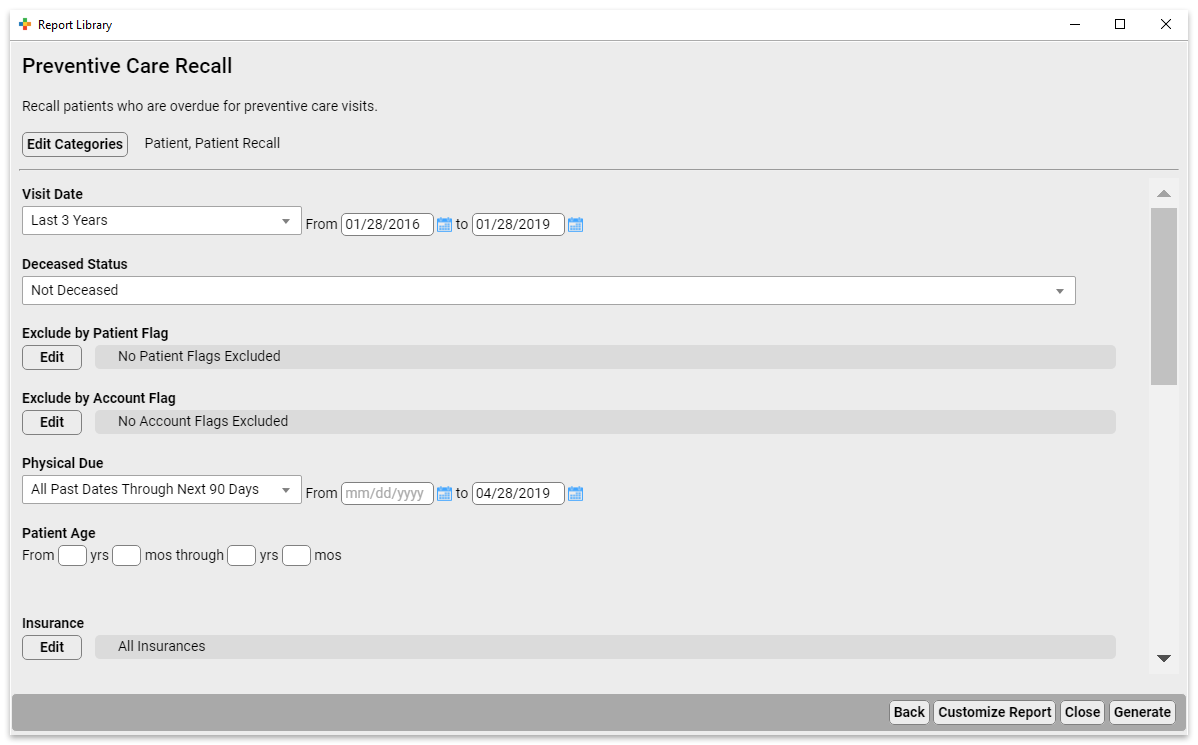
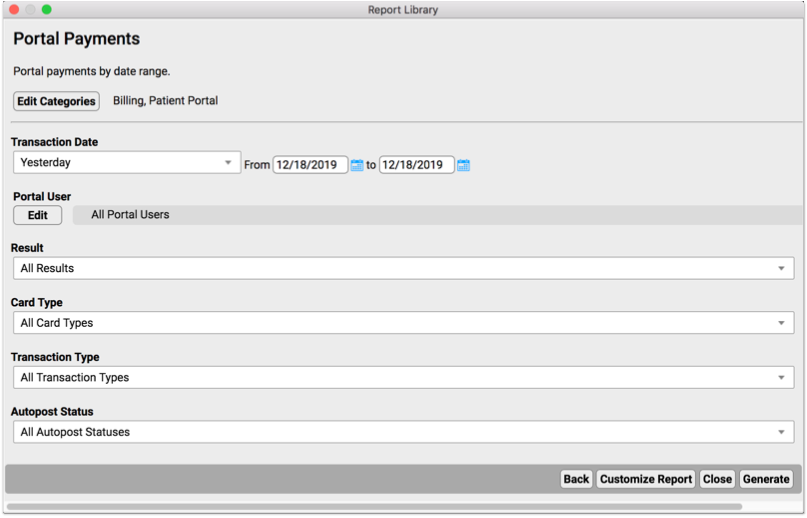
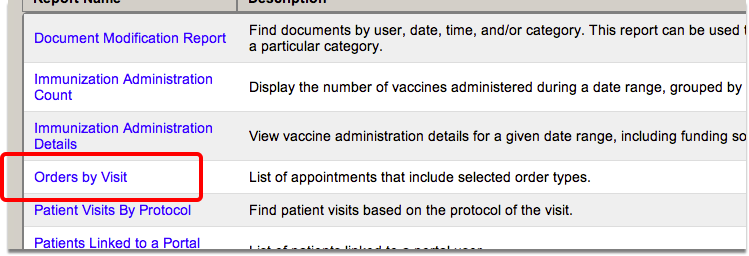
How to Find New Items: While you can easily spot the “New Items” on appointments for today, what about visits in the past? Use the Visits By Billing Status report in the PCC EHR report library to find all appointments that may include “New Items”.
Edit or Delete Charges or Update Encounter Details for the Claim
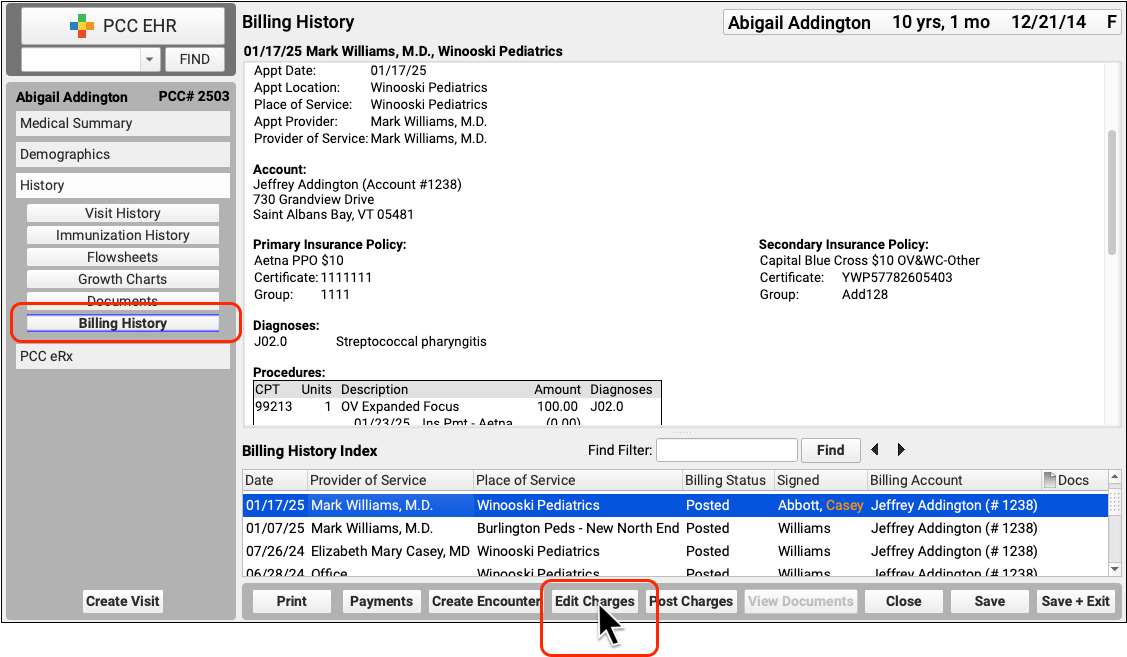
If you need update posted charges or other billing information for an encounter, visit the “Edit Charges” screen.
You can reach Edit Charges from the Billing History section of a patient’s chart. You can also jump there from the Unpaid Encounters worklist, found in the Insurance Balances tool.
See Edit Encounter Charges and Other Claim Information and Resubmit a Claim to learn more.


