Mark an Appointment As Missed or Canceled
When a patient doesn’t show up for a visit or your practice needs to cancel an appointment, you can change the appointment’s status in PCC EHR and report on it later.
Contents
Mark an Appointment as Missed or Canceled in the Patient’s Chart
You can mark an appointment as missed or canceled in the Appointment History component within a patient’s chart.
Open the Patient’s Chart
Use the search box in the top left corner of the PCC EHR window to search for the patient whose appointment you need to mark as missed or canceled.
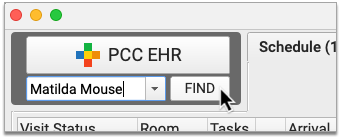
Select the patient from the search results to open their chart.
Find the Appointment History Component
Find the Appointment History component within the patient’s chart. Usually it appears in the patient’s Medical Summary.
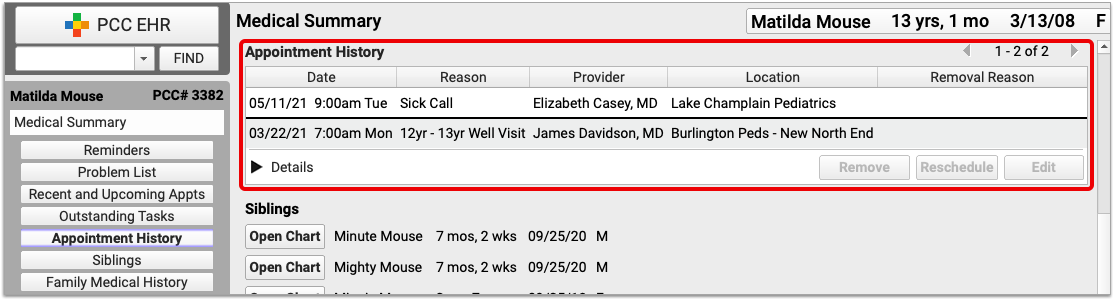
Where is the Appointment History Component?: The Appointment History component can be configured to appear in patient charts and other places in PCC EHR. If you can’t find the Appointment History component, speak to an administrator at your practice and ask to have it added, or contact PCC Support for help.
Find the Appointment and Mark It Missed or Canceled
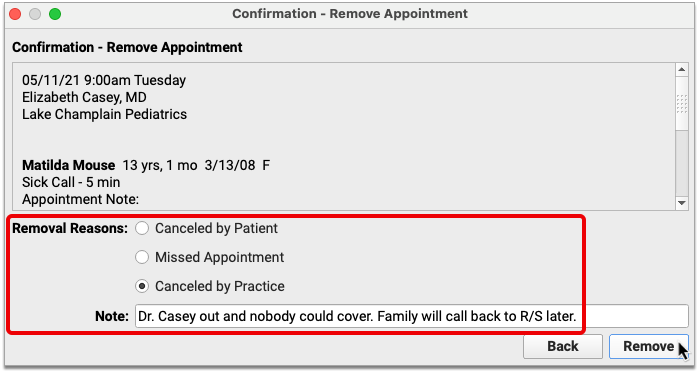
Within the Appointment History component, find and select the appointment you want to mark as missed or canceled.
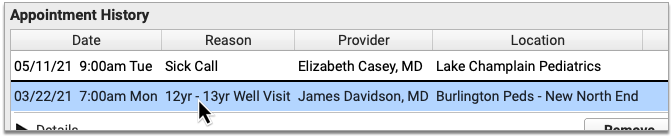
Click the “Remove” button, then choose a reason for removing the appointment.

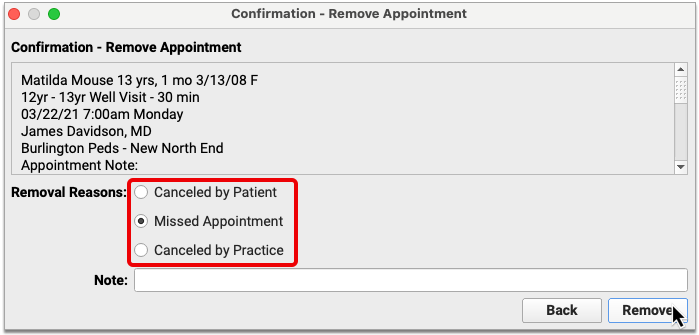
Optionally leave a note, then click the “Remove” button to finish marking the appointment as missed or canceled.
Missed and canceled appointments do not appear on the schedule screen in PCC EHR, and also get removed from the Appointment Book.
You can report on missed and canceled appointments in the PCC EHR Report Library.
Mark an Appointment as Missed or Canceled in the Appointment Book
It’s easy to mark appointments as missed or canceled when working in the Appointment Book.
Open the Appointment Book
Find the calendar icon in the bottom left corner of your PCC EHR window and click it to open the Appointment Book.

You can also open an Appointment Book window from the File menu in PCC EHR.
Go to the Day of the Appointment
Once in the Appointment Book, go to the day of the appointment that was missed or needs to be canceled.
You can advance the calendar view one week or day at a time by using the arrows at the top of the Appointment Book window.
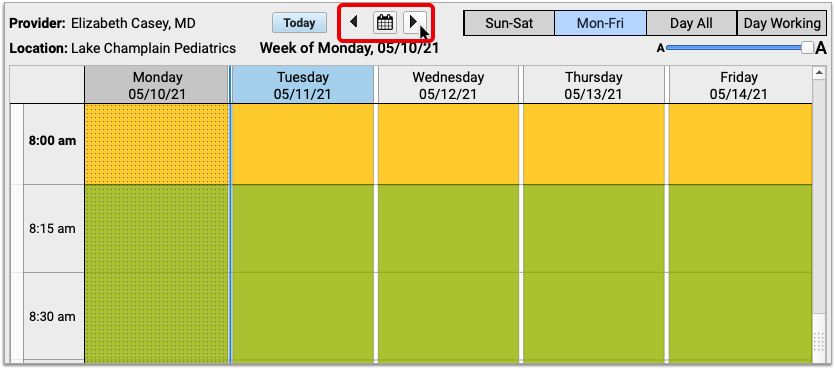
You can also click on the calendar icon at the top of the Appointment Book and use it to select the day you want to view.
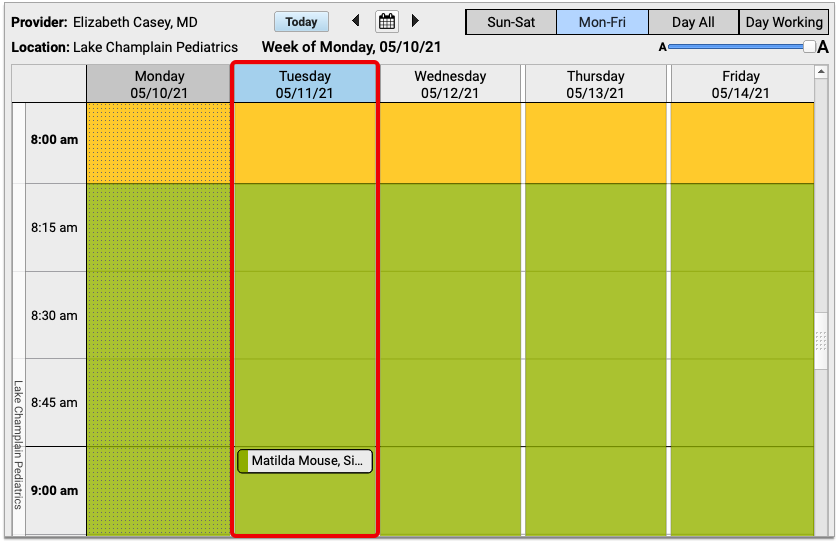
Find the Appointment in the Schedule
Once on the right day in the Appointment Book, locate the appointment you need to mark as missed or canceled.
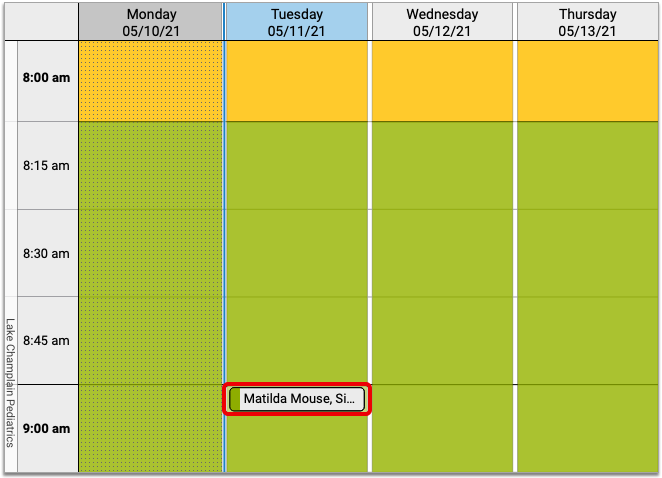
Depending on how you are viewing the schedule, you might need to scroll up and down or from side to side in order to find the appointment.
Select the Appointment and Mark it Missed or Canceled
Click on the appointment with your mouse.
Once selected, details about the appointment appear on the left edge of the Appointment Book window, along with buttons which allow you to take actions.

Click the “Remove” button, then choose a reason for removing the appointment and optionally leave a note.
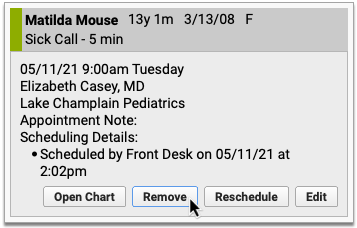
Click the “Remove” button to finish marking the appointment as missed or canceled.
Missed and canceled appointments do not appear on the schedule screen in PCC EHR, and also get removed from the Appointment Book.
You can report on missed and canceled appointments in the PCC EHR Report Library, or look up any patient’s missed and canceled appointments in the Appointment History component in their chart.
Report on Missed and Canceled Appointments
You can generate lists of missed and canceled appointments in the PCC EHR Report Library, then use them to post missed appointment fees or to identify patterns of cancellation at your practice.
Build a Custom Report for Missed and Canceled Appointments
You can create custom reports to identify missed and canceled appointments.
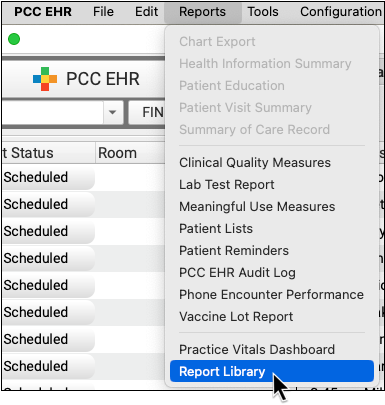
Open the Report Library
Open the Report Library from the Reports menu in PCC EHR.
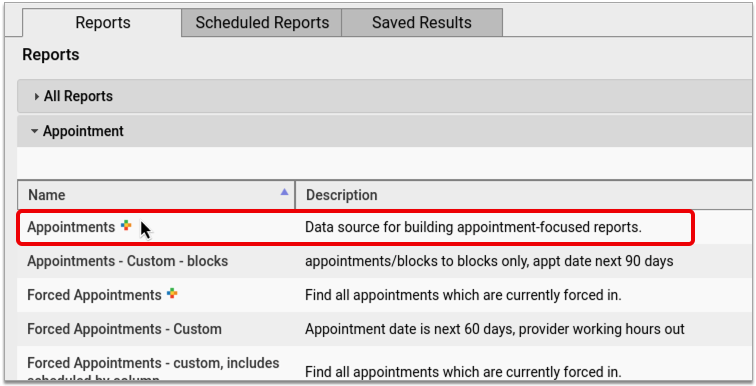
Open the Appointments Report
Once in the Report Library, select the “Appointment” category, then open the “Appointments” report.
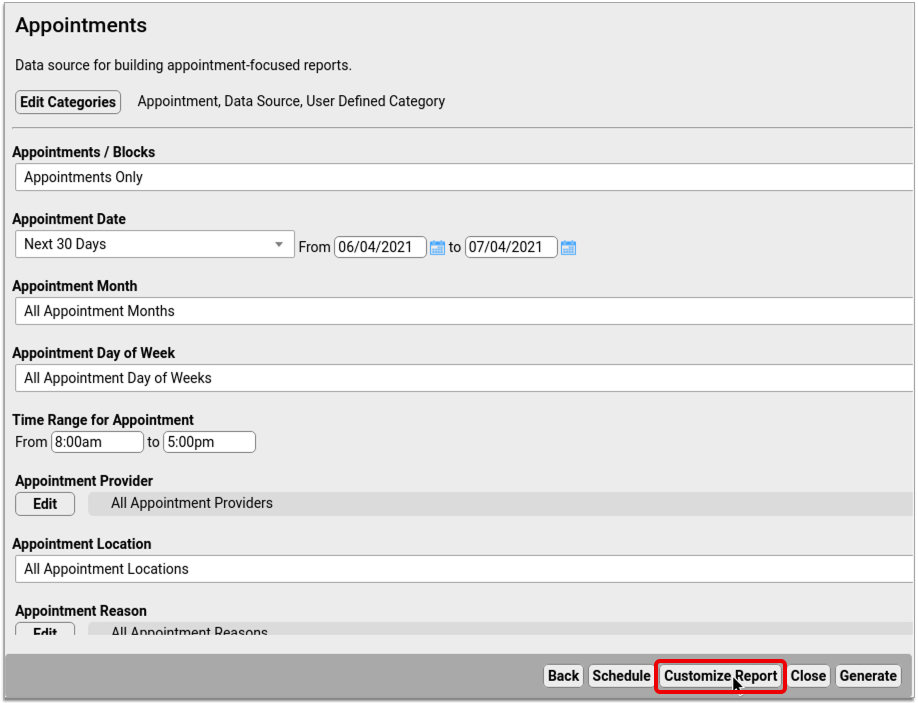
Customize the Appointments Report
In the Appointments report, click the “Customize” button at the bottom right of the window to begin setting up a custom report for missed and canceled appointments.
Set Up the Report to Find All Missed and/or Canceled Appointments
Set up a basic report that will allow you to find all missed and canceled appointments.
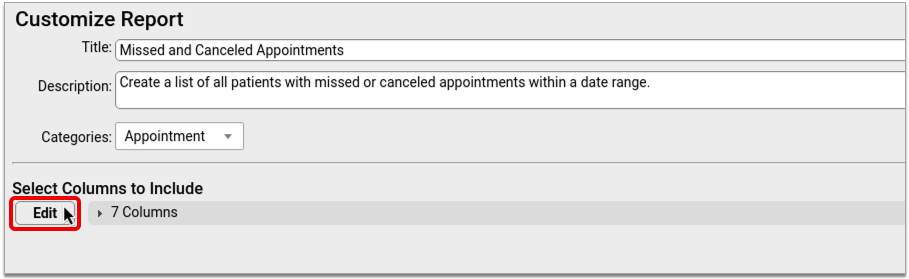
First, the report a unique title, description, and category so that you can find it again later.

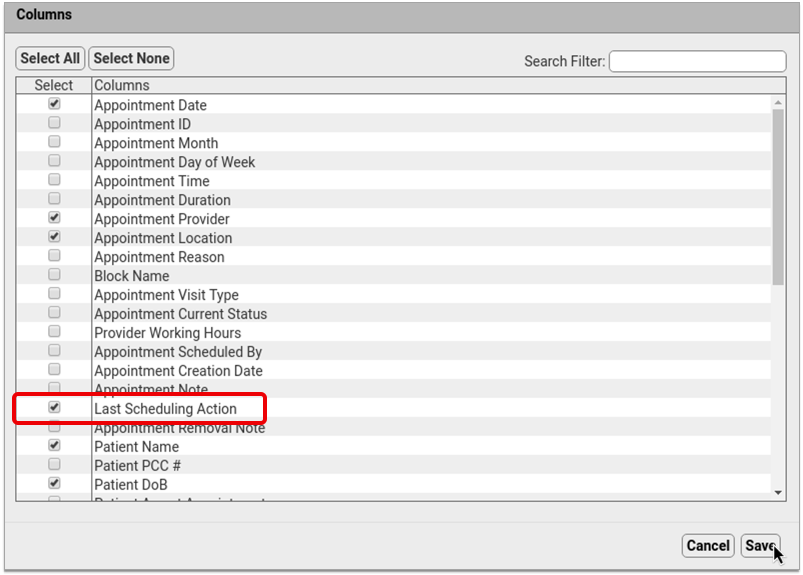
Click the “Edit” button in the “Select Columns to Include” section, then select the columns you want to see on the final report. At a minimum, you should make sure to include the “Last Scheduling Action” column.
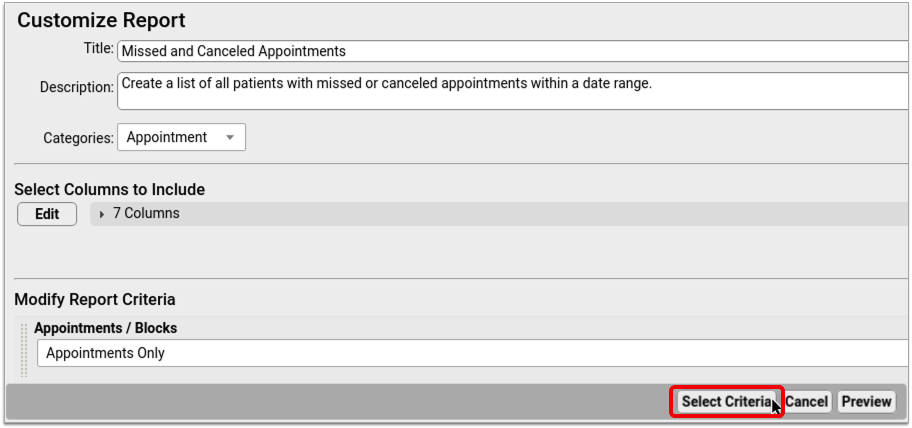
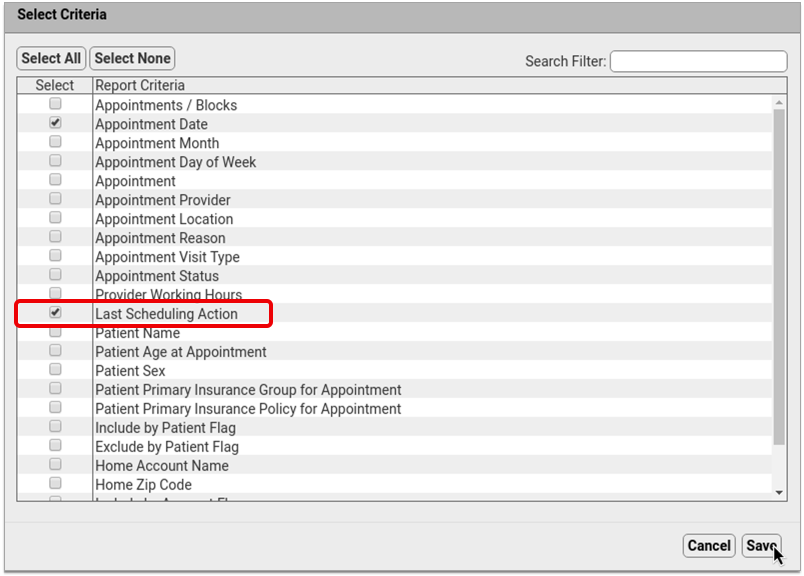
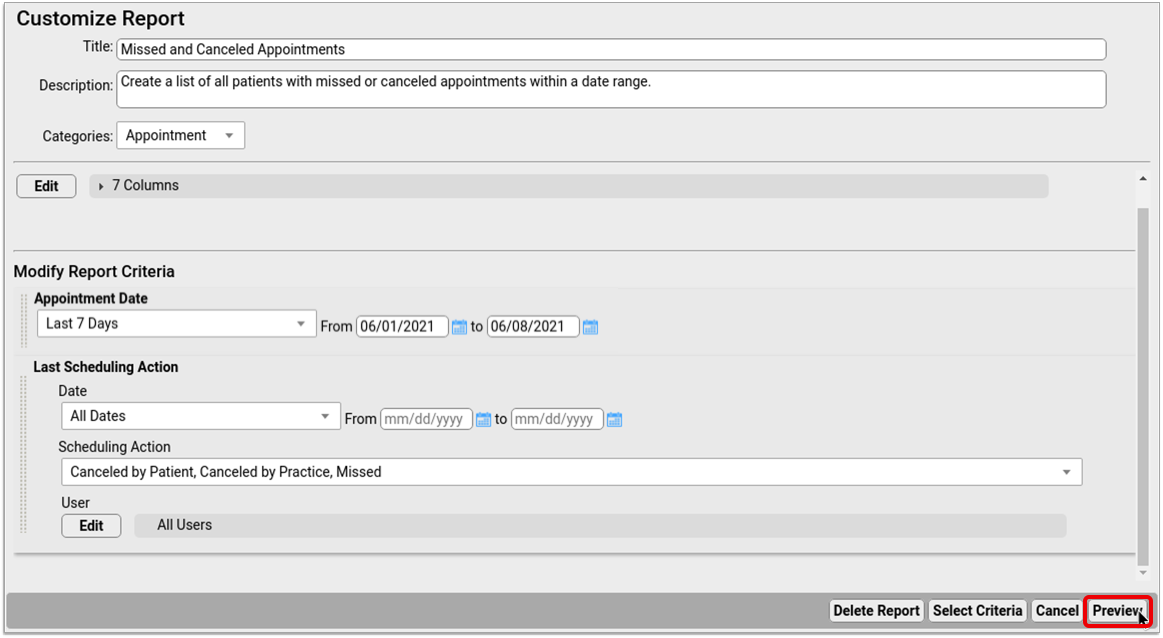
Once you have picked and saved the columns for your report, click the “Select Criteria” button and choose the report criteria. At a minimum, your report should include the “Appointment Date” and “Last Scheduling Action” criteria.
Once you select the criteria, set up their default values. These settings will be used as a default whenever you generate this report.

These criteria will allow you to find all missed and/or canceled appointments within a selected date range.
Add More Criteria for More Granular Reporting: You can include additional criteria in your report if you want to be able to filter the results in a more granular fashion. For example, if you want to be able to generate a list of all missed or canceled appointments for a particular provider, visit reason, or location, select those criteria from the list now to add them to your report settings.
Preview Your Custom Report and Adjust the Output
After setting up criteria for your custom report, click the “Preview” button to see how the report will look once generated.
In the preview screen, open the “Columns” drop-down list and select whichever columns you want to display on your report by default. Be sure to include the column called “Last Scheduling Action”.
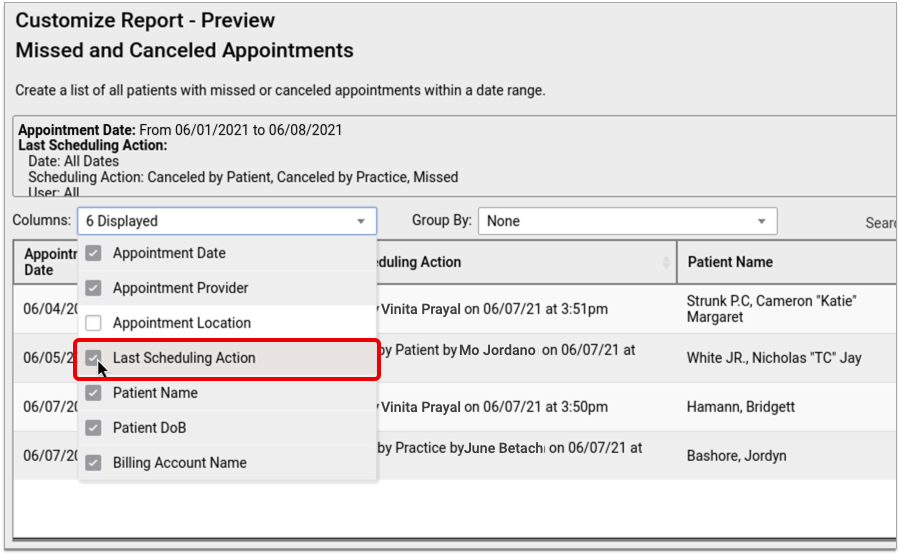
If you want to make other changes to the way your report looks when you generate it, do that now. You can click, drag, and drop columns to rearrange them, group your results, or re-sort the list by clicking on column headers.
The display settings you choose now will be the default for this report.
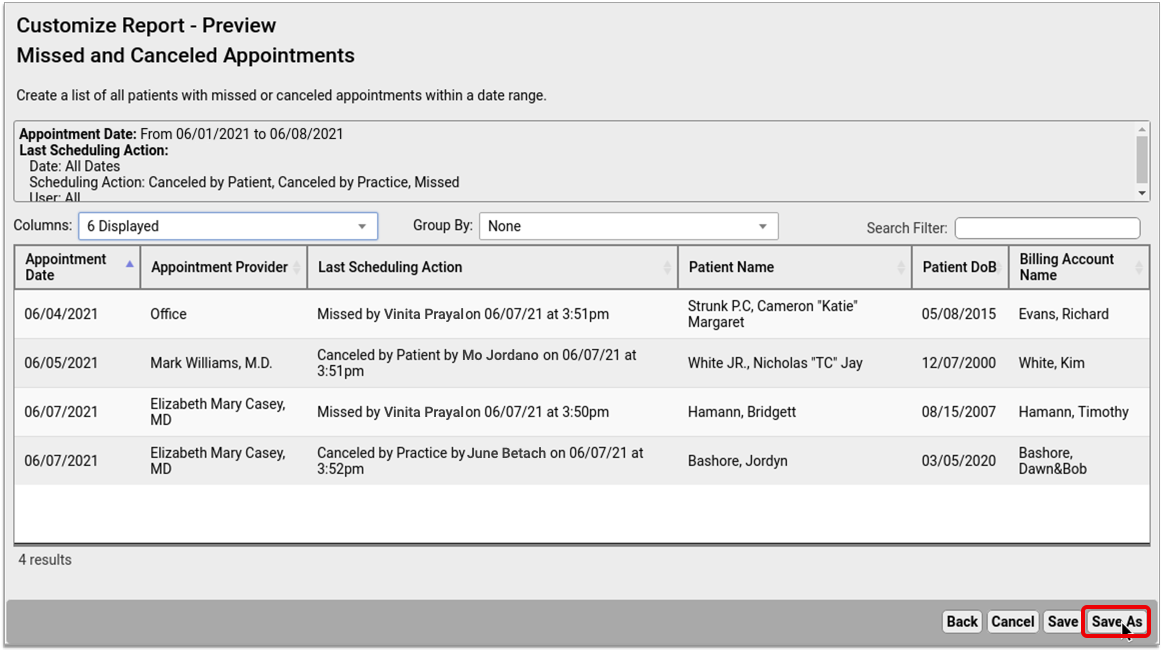
Save Your Custom Report
Click “Save As” to save your custom report.
Generate Your Custom Missed and Canceled Appointment Report
Once you create a custom report for missed and canceled appointments, you can generate it at any time in the Report Library in PCC EHR.
Find Your Custom Missed and Canceled Appointments Report in the Report Library
In the Report Library in PCC EHR, find your custom report for missed and canceled appointments.

If you don’t know which specific category the report is in, you can find it under “All Reports”.
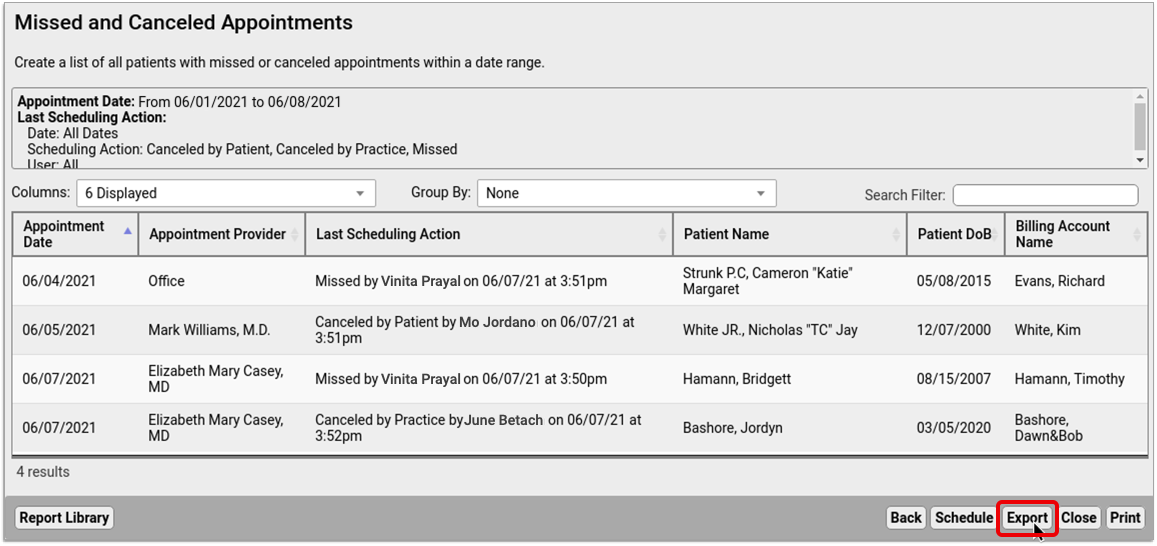
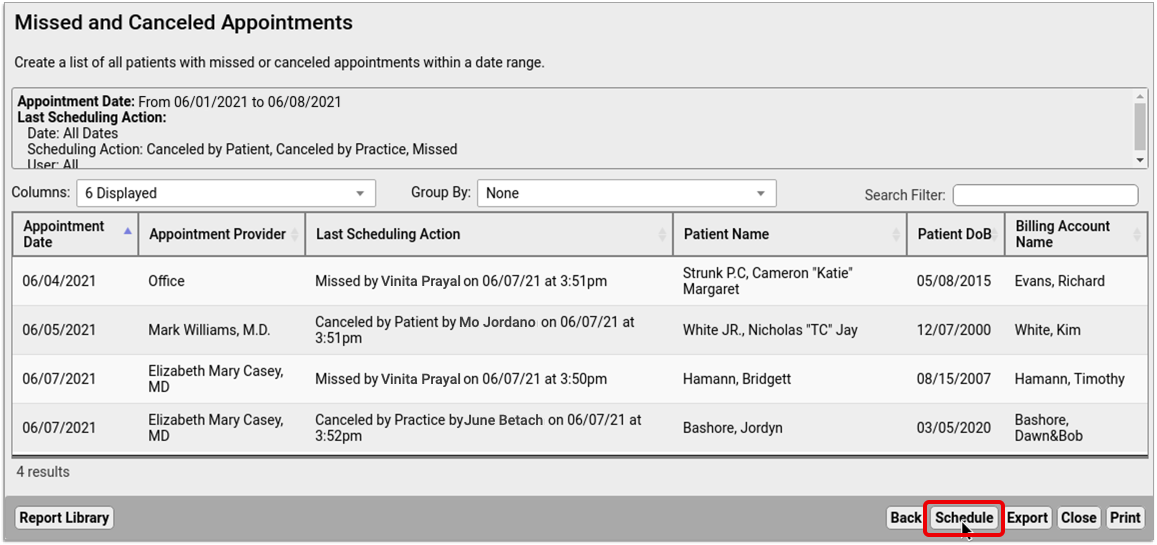
Generate the Report and Review the Results
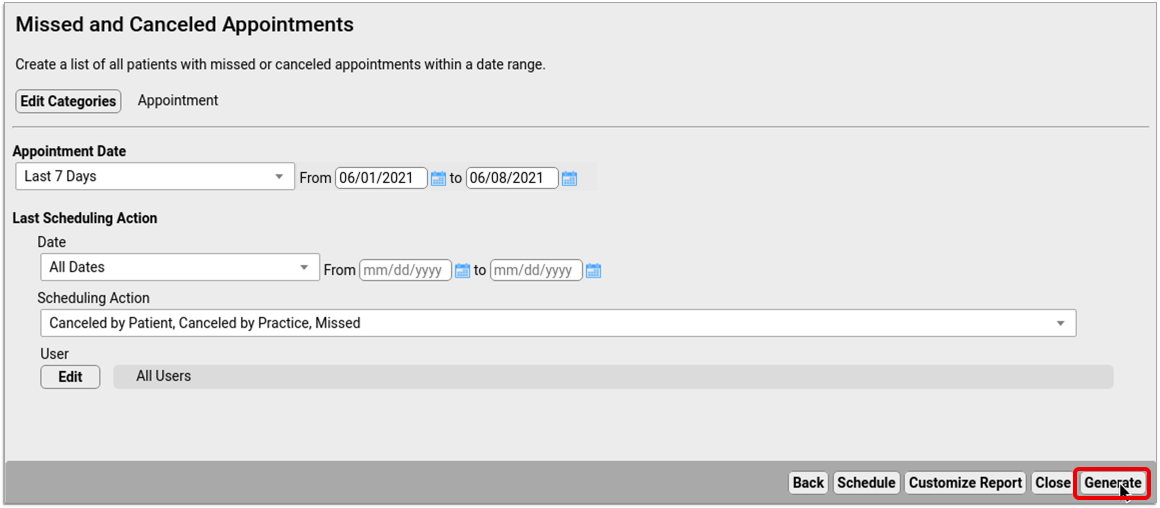
In the report criteria screen, pick a date range of appointments to report on, then click the “Generate” button.
There might be a pause while the results generate. Once the results appear on the screen, check that the list contains the information you need.

You can sort on a certain column, reorder the columns, or group the results to suit your purpose.
If you need to change the report settings, click the “Back” button, make adjustments to the criteria, then re-generate the report.
Optionally Export the Results and Save Them to Your Workstation
Once you are happy with the way your report results are organized on the screen, you can export the list from PCC EHR and save it on your local workstation.
Click the “Export” button, then choose an output format.
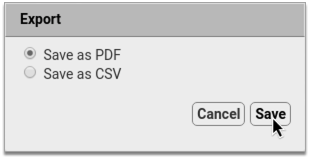
Click the “Save” button, then choose where to save the report file on your local workstation.
Optionally Print the Results
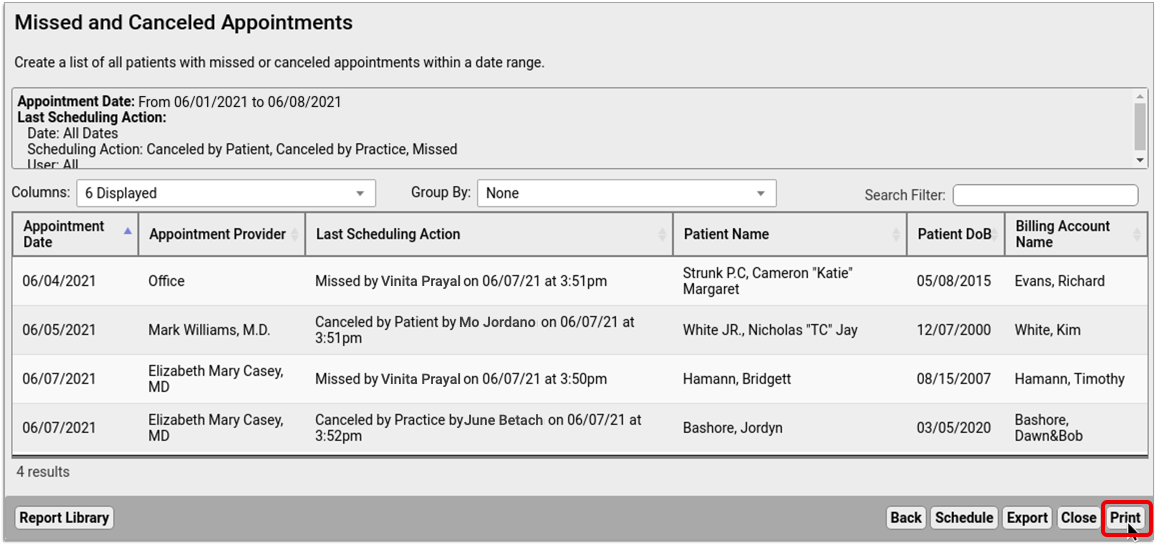
If you need to be able to scribble on the report and make notes in pencil or pen, you can print the list out of PCC EHR.
Click the “Print” button, then choose a printer.
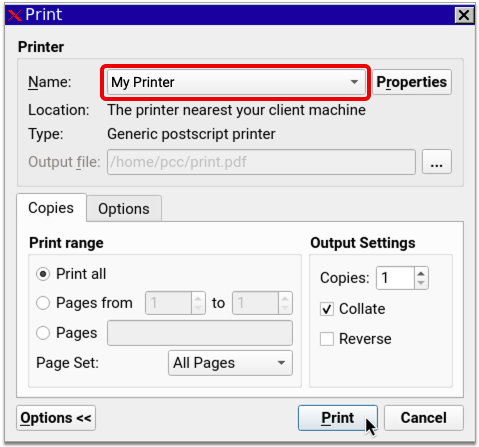
Click the “Print” button to finish sending the report to your printer.
Optionally Schedule the Report to Run Again at a Later Date
If you like your report and plan to use it routinely, you can schedule it to run automatically at set intervals.
Click the “Schedule” button at the bottom of the report results window, then choose a name, the frequency with which you want to run the report, and the time of day at which you want it to generate.
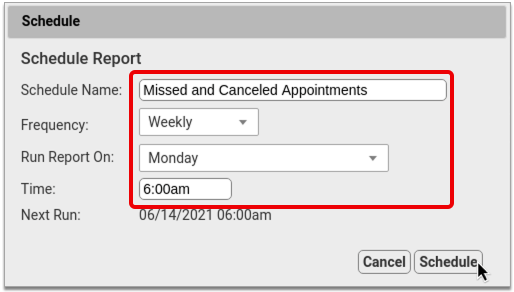
Click “Schedule” to finish scheduling the report to run at regular intervals. You can find the results of scheduled reports in the “Saved Results” tab of the Report Library.