Generate Forms in PCC EHR
Your practice can generate visit forms, excuse letters, camp forms, and other forms in PCC EHR. Whether you print forms on paper, or create electronic copies in the patient’s chart and send them via the patient portal, PCC EHR can create the form you need.
Contents
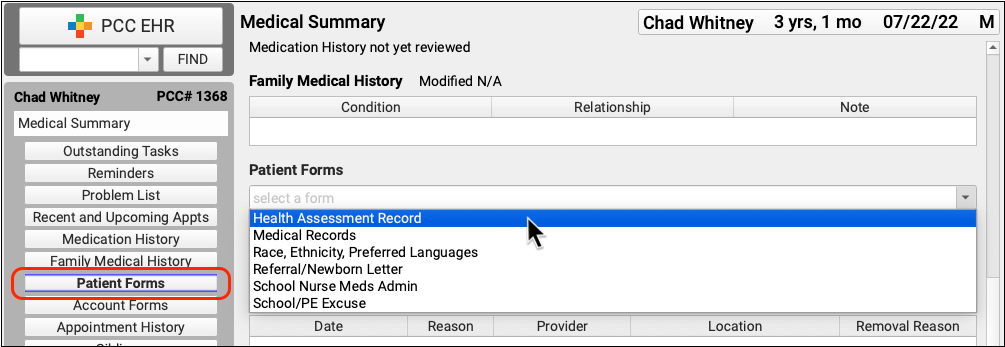
Generate a Patient or Account Form
Use the Forms component to generate forms for a particular patient. The Patient and Account Forms components can be added to any protocol in PCC EHR. The Account Forms component is available when the Forms Configuration tool is enabled. To learn more about enabling the Forms Configuration tool, see Enable the Forms Configuration Tool.
Select a Form
Select a form in the Patient or Account Forms components in the patient’s chart to generate the form.
Enter Free Text if Prompted
If the form contains free text fields, respond to the prompts.
If you always add the same text to your free text prompts, consider creating a snap text entry for this field.
To learn more about Snap Text, read Expand Short Text into Common Phrases.
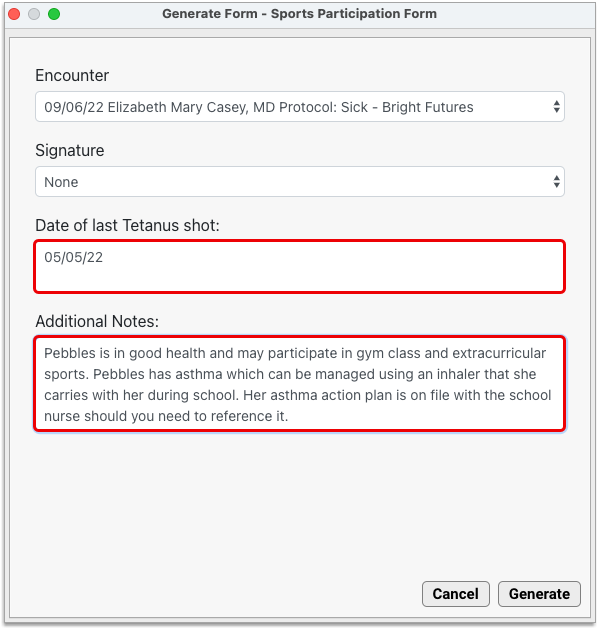
Select Encounter Data If Prompted
Some forms require additional input. If needed, select the visit, phone note, or portal message that contains the data you want to use to fill out the form. If prompted, select a provider to sign the form, and fill in free text prompt fields when applicable.
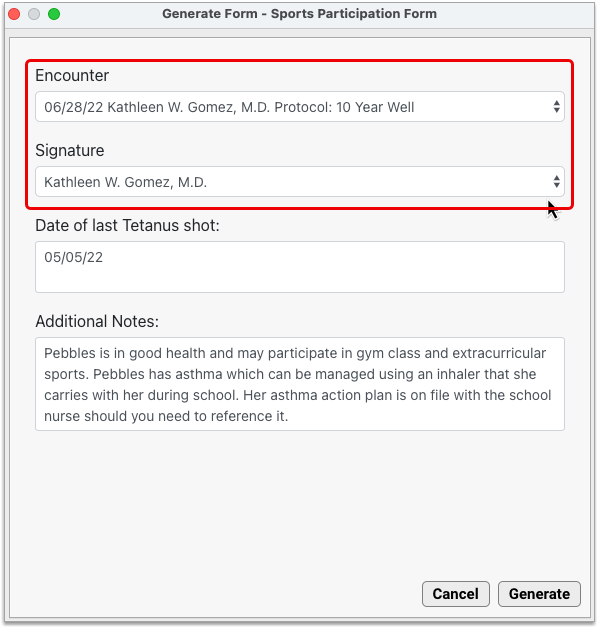
Signature Permissions: Your practice can restrict which staff members can generate a provider’s signature on forms. When a user doesn’t have permission to generate a provider’s signature, all variables except the signature image will auto-fill as expected. The signature area will remain blank to accommodate a wet signature. To learn more about configuring provider signatures, read Configure Provider Signatures.
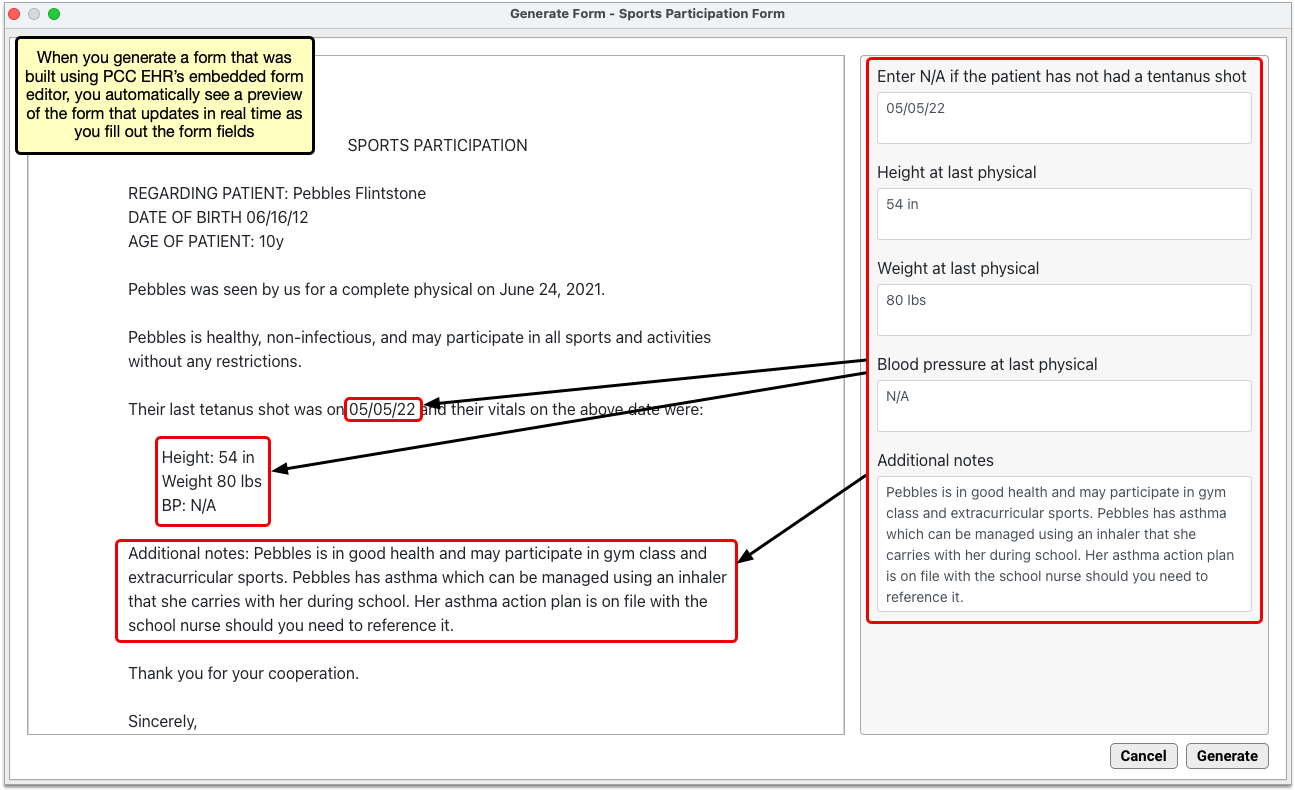
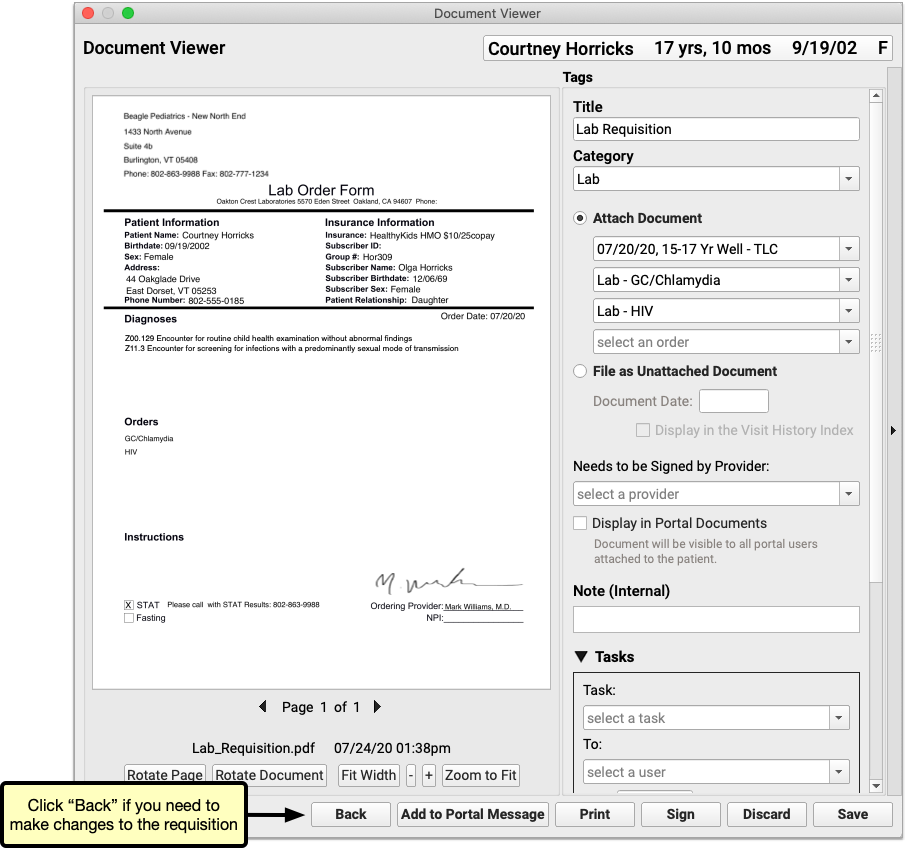
Optionally Preview the Form
If the form was built using the Forms Configuration tool, you can preview it in real time as you fill it out.
If the form was built as a PDF, you must finish generating it in order to see it filled out.
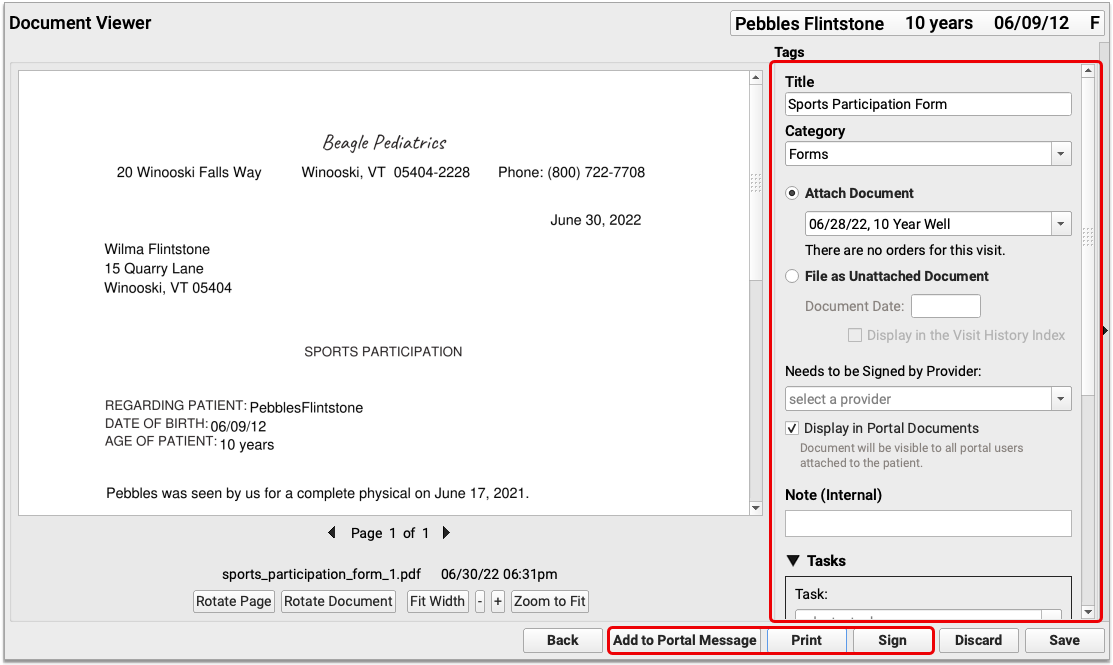
Save the Form
Once fully generated, you can save the form to the patient’s chart, share it through the patient portal, print out a hard copy, add tasks, sign it, and more.
Forms Automatically Populate Information: PCC form letters can include variable placeholders which automatically fill in information about your practice, the patient, or a particular visit. If you generate a form letter from a visit, phone note, or portal message, PCC EHR can fill in the form letter using details from that encounter. If your practice has multiple locations, your forms can fill in practice information based on your working location.
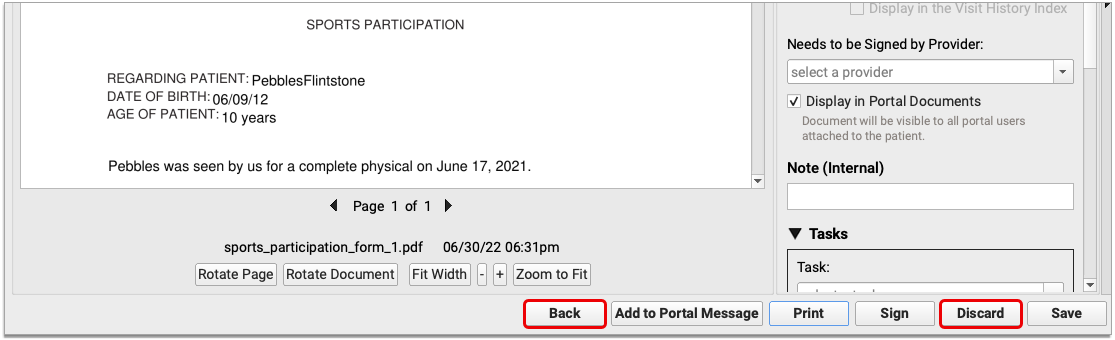
Optionally Edit or Discard the Form
If you need to make changes to the generated form, click the “Back” button. To discard the form without saving it, click the “Discard” button.
Work with Your Saved Document
Once you are happy with the generated form, you can take the same actions with it as you would any other document in PCC EHR. To learn more about how to work with documents, read the article Work with Documents in a Patient’s Chart.
Generate Immunization School Forms in PCC EHR
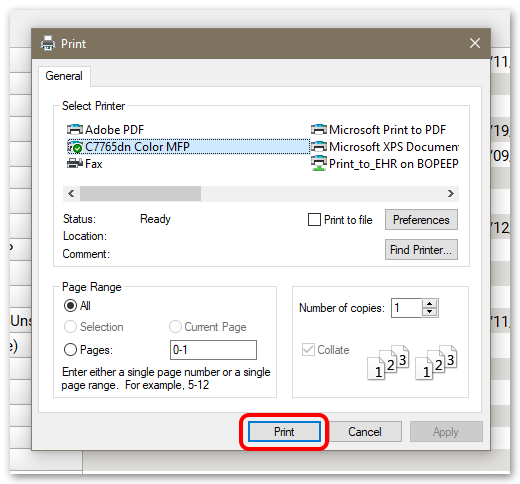
Click “Print” at the top of a patient’s Immunization record to generate your practice’s customizable school form.
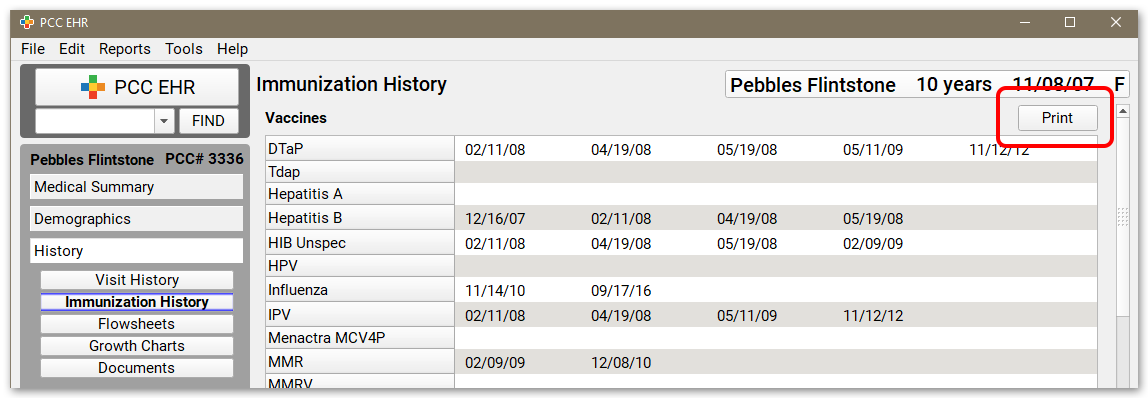
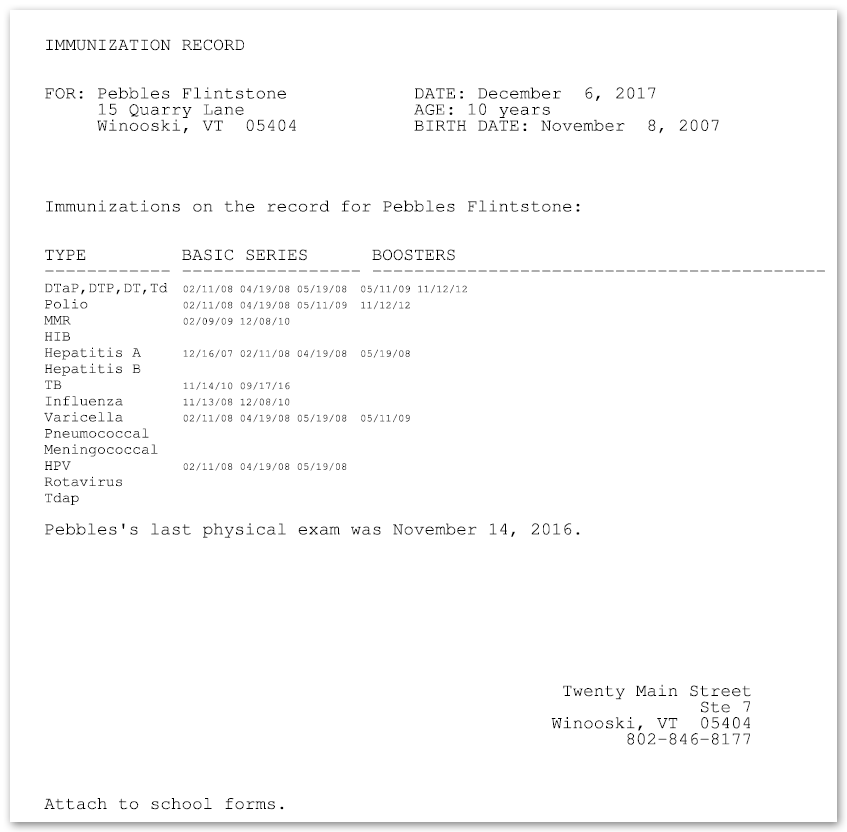
If your office has multiple school form formats, you can select the one you want before printing.


If you don’t see the school form you expect, get in touch with PCC Support at support@pcc.com or 802-846-8177 or 800-722-7708. They can help you customize and configure your school form(s) so they are available and print correctly from PCC EHR.
Families Can Generate an Immunization School Form in the Patient Portal: Families can access their patient’s immunization record and generate a school form from the patient portal. For more information, read the My Kid’s Chart User Guide.
Generate Lab and Radiology Requisitions in PCC EHR
After you create lab or radiology orders and document diagnoses in a patient’s visit protocol, you can generate a requisition form.
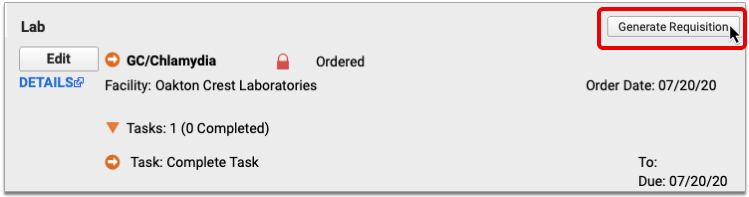
To learn more about how to configure and generate lab and radiology requisitions, read Generate Outbound Lab and Radiology Requisitions.
Print a Batch of Visit Forms for the Day
You can use the Print Visit Forms tool to print a batch of visit forms for all of a day’s encounters. For more information on printing visit forms, read Print Visit Forms.
There are several workflow alternatives to printing visit forms, including the Huddle Sheet report, patent pre-check-in, and patient portal documents. Reach out to PCC Support at 802-846-8177 or 800-722-7708 to learn more.
Add and Configure a New Form in PCC EHR
You can add, edit, or remove forms from PCC EHR without assistance with the Forms Configuration tool. Read Configure Forms in PCC EHR to learn more.
If you need assistance, contact PCC Support at support@pcc.com or 802-846-8177 or 800-722-7708.