Submit Claims
Use the Claims tool to prepare and submit claims to insurance companies and other payers, work on claims that could not be submitted, and review a log of submissions.
Video: Watch Submit Claims to learn more.
Contents
Prepare and Submit Claims
When you are ready to prepare and submit claims to payers, use the Claims tool in PCC EHR.
Open Claims
Open the Claims tool from the Tools menu in PCC EHR.

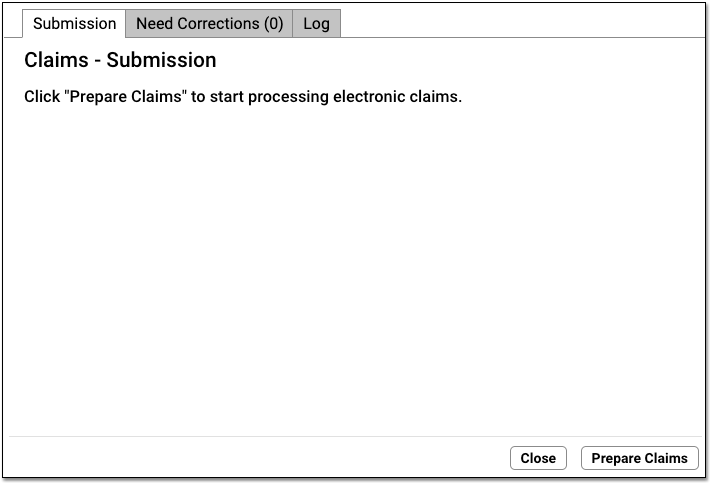
Click “Prepare Claims”
Click “Prepare Claims” to begin preparing your claims.

Your PCC system will review all charges that are ready to be turned into a claim.
What Makes a Charge Ready to Be Turned Into a Claim?: Encounter charges are ready to be turned into a claim as soon as you post them into PCC’s system. You can also queue up a claim later, when you use the Edit Charges feature in the Billing History in the patient’s chart.
Claim Scrubbing and Preparation: As your PCC system reviews charges and prepares outgoing claims, it removes duplicates; verifies patient, charge, and payer information; and checks over other details, such as whether billing codes are valid for a given date of service. Next, it determines which payer or clearinghouse-specific configuration will be used to format the claim.
Review Claim Processing Results
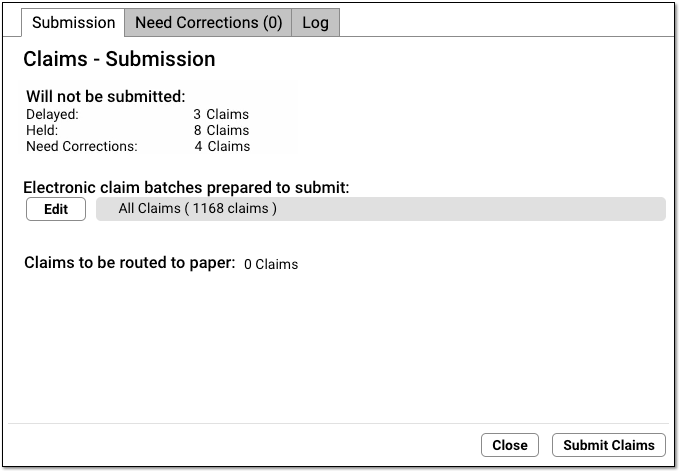
When it finishes preparing, the Claims tool displays how many claims will be submitted and routed to paper. It also lists how many claims will be held, delayed, or need corrections.
Use the reference below to learn more about each of the sections and totals.
-
Selected Batches:
- Claims are grouped into batches. By default “All batches” will be selected. (See the next step for more information.)
-
Prepared Claims:
-
Claims prepared to submit: Prepared claims that will be sent electronically when you click “Submit Claims”.
-
Claims prepared to route to paper: Prepared claims that will be moved over to a paper holding batch when you click “Submit Claims”. You can print these claims later on the “Paper Claims” tab.
-
-
Claims That Will Not Be Submitted:
-
Claims held: Claims held due to a Claim Hold.
-
Claims delayed: Claims delayed due to your practice’s claim delay, usually a few days.
-
Claims need corrections: Claims that contain one or more problems that prevent the claim from being submitted. These claims will not leave your system until you correct the problems.
-
Optional: Select Specific “Batches” to Submit
If your practice divides up billing responsibility by payer, or you have another less common workflow need, you might wish to submit only a portion of the prepared claims.
Click Edit, and then select which batches you wish to submit.

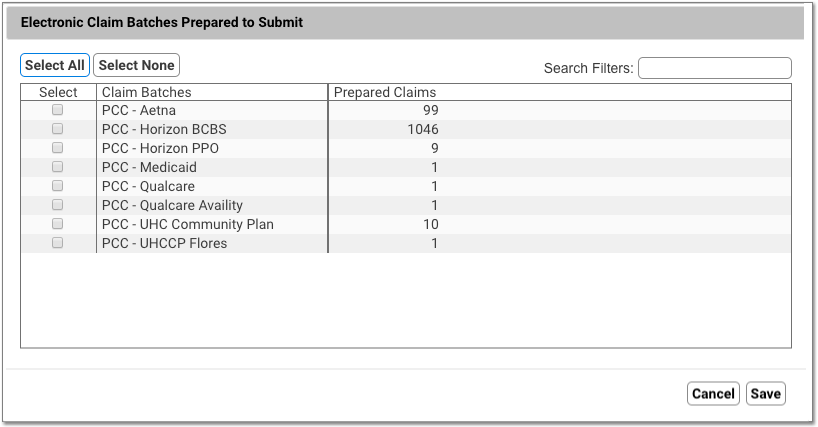
What is a Batch?: A batch represents an under-the-hood custom claim configuration on your PCC system. All the claims in a batch use the same claim configuration, so a batch might be named for a large group of payers. If your practice has an unusual claim configuration need, PCC’s EDI configuration specialists sometimes create a custom batch. Your list of batches may also reflect claim clearinghouses or other entities.
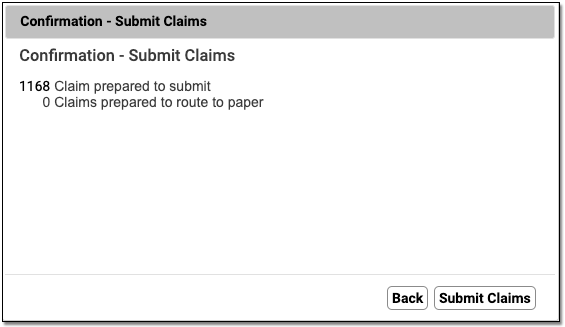
Click “Submit Claims” and Confirm
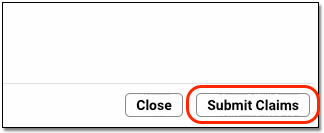
When you are ready to send the prepared claims, click “Submit Claims”. Then click “Submit Claims” again to verify and proceed.
Submitting claims can take several minutes, especially when you have a large number of claims, as PCC re-verifies claim information.
Review Results
When claim submission is finished, you can review how many claims were submitted and routed to paper.
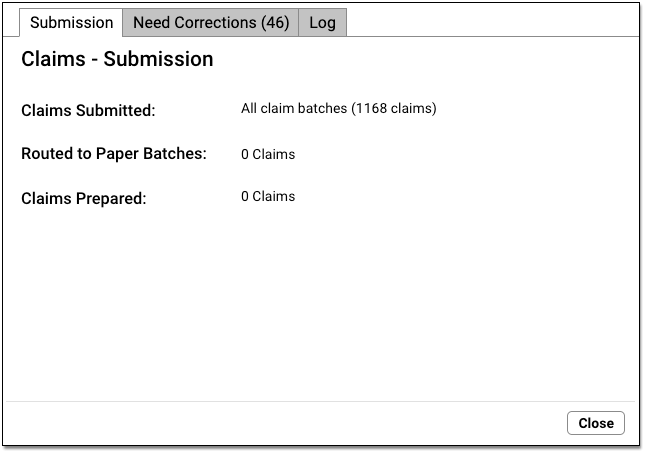
Click “Close” to close the window.
Additional Prepared Claims: If you prepared claims and then only selected and submitted certain claim batches, you can now select additional batches and submit them.
Print Paper Claims
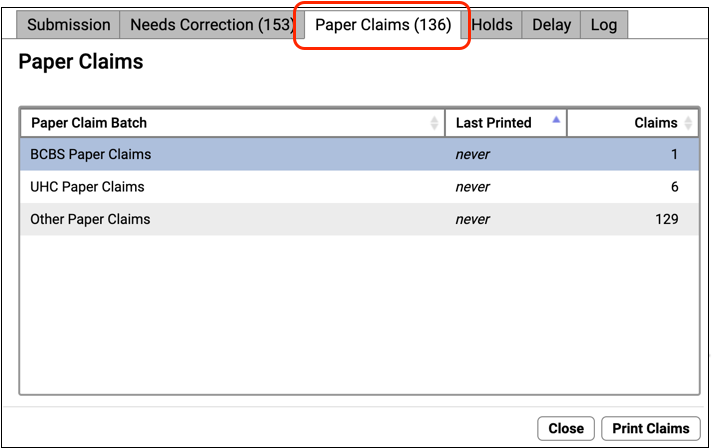
If some claims can not be sent electronically and need to be printed, they will be “routed to paper”.
Visit the “Paper Claims” tab to print batches of claims that were routed to paper.
To learn more about paper claims, read Print Paper HCFA Claim Forms.
Follow Up on Claims that Need Corrections
If a claim can not be submitted, you can find an explanation of the problem on the Needs Correction tab. See the sections below to learn more.
These claim errors must be resolved before the claim can go out.
Optional: Review Log
When you are finished submitting claims, you can use the Log tab to review the record of what occurred during claim processing.
Work on Claims that Cannot Be Submitted
When you prepare and submit claims, your PCC system checks for claim errors. If a claim is missing an insurance ID number or the policy isn’t active for the date of service, for example, PCC will hold back the claim.
Review claims with these issues on the “Needs Correction” tab in the Claims tool.
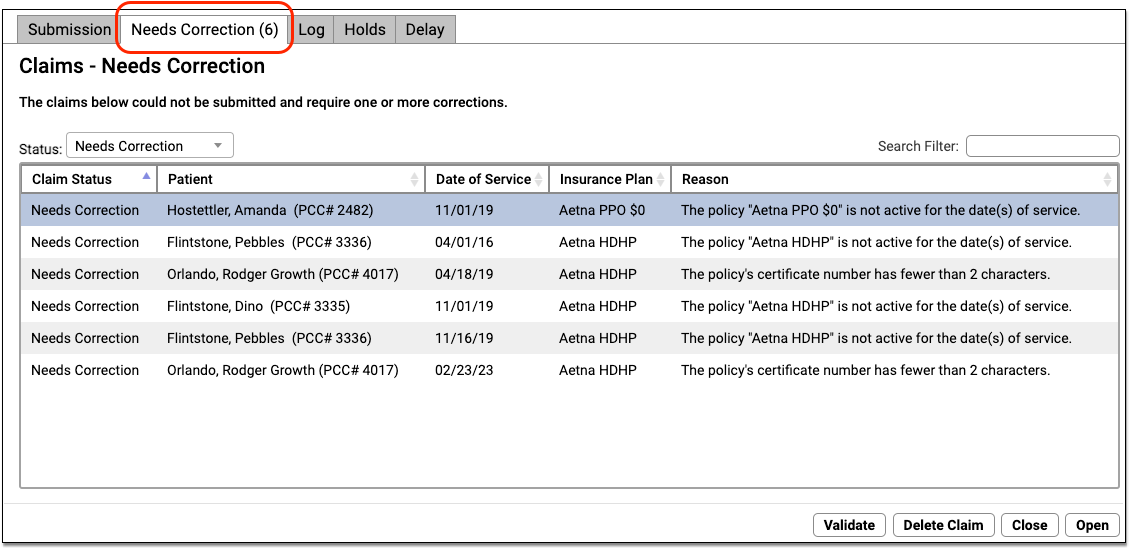
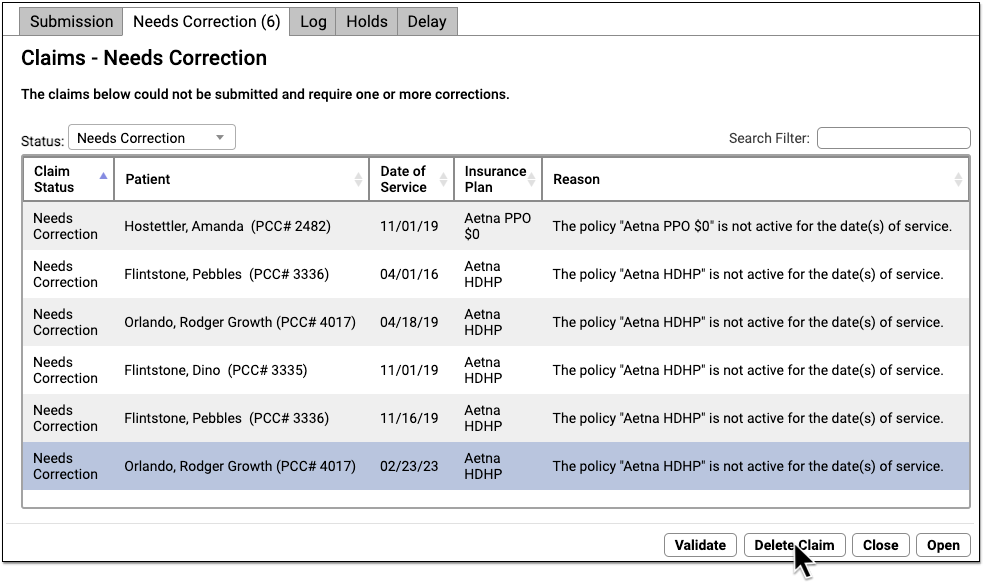
For each claim, you can review the patient, the date of service, the insurance plan, and the reason the claim could not be submitted. You can use the Search Filter to find specific claims or issues affecting multiple claims.
These claim errors must be resolved before the claim can go out. For example, you may need to update patient, account, or charge information. As these claims have yet been submitted, you do not need to file a “corrected claim” or include a payor claim control number. You can fix the problems and then return to the Submission tab to prepare and submit claims again.
Review Details and Resolve Claim Problems
Double-click on a claim to work on it.

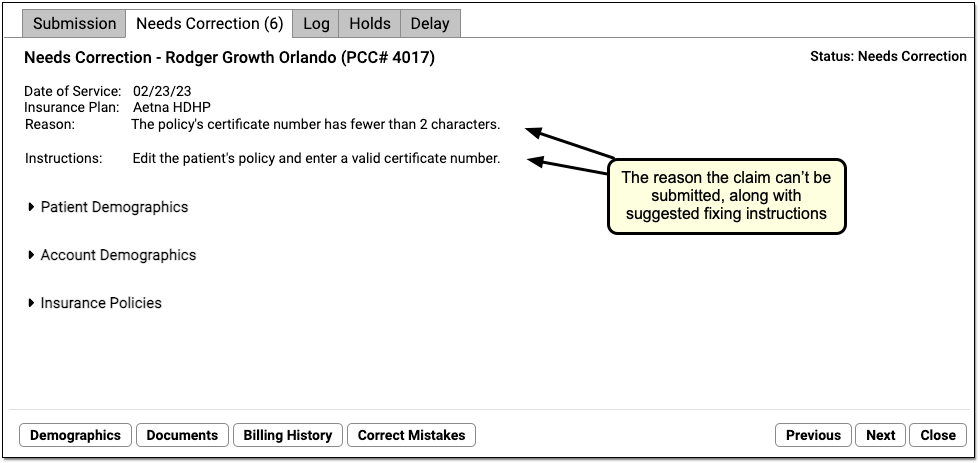
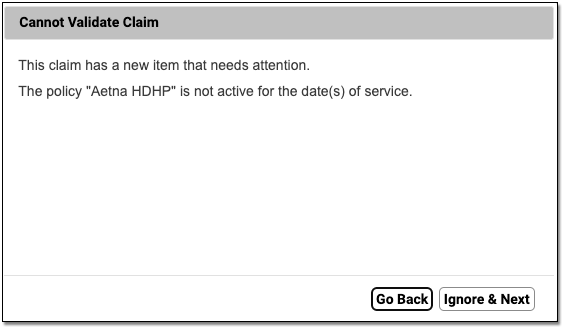
You can see encounter details and the reason the claim cannot be submitted. The window also displays suggested instructions for correcting the issue.
To get a better understanding of the problem, you can click a disclosure arrow to review patient, account, and policy information.
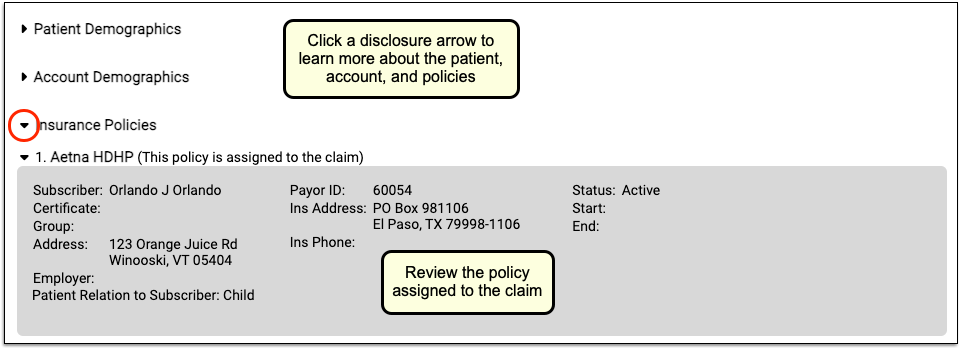
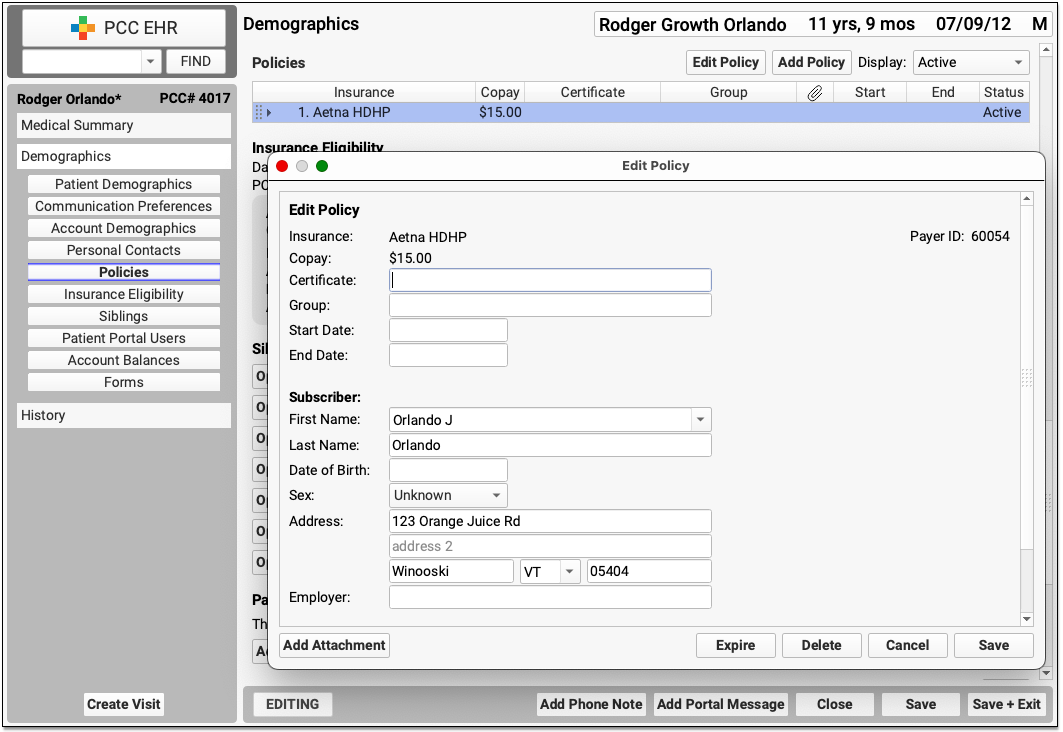
Use the buttons at the bottom of the screen to open different tools and resolve the issue. You can jump to the patient’s demographics, for example, if you need to edit certificate numbers or start and end dates for the policy assigned to the claim.

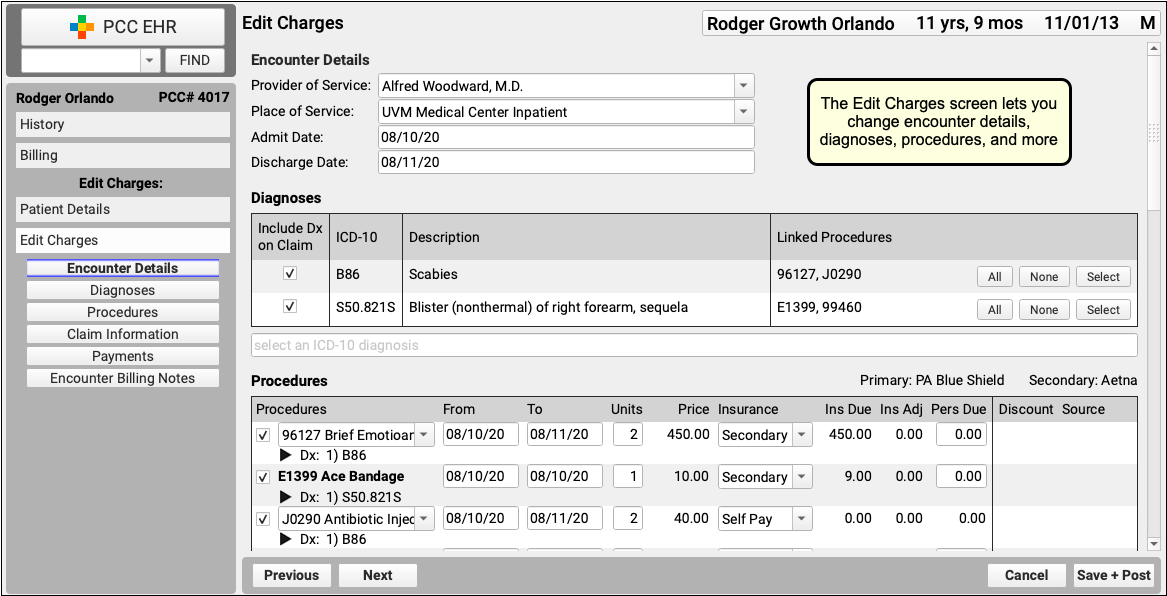
If you need to edit any aspect of the encounter, change the responsible party, or generate a new claim, click “Edit Charges”.

When you are finished making corrections, you can click “Close” or “Next” to continue on to the next stuck claim on your system. PCC EHR will revalidate the claim and check if you have resolved the issue. If there is something else wrong with the claim, PCC EHR will let you know.

If in the process of fixing the problem you generate a new claim, you can delete the old one that is waiting on the Needs Correction tab.

Read Claim Error Reference to learn about each possible claim processing error and how to fix it.
Validate a Claim Needing Corrections
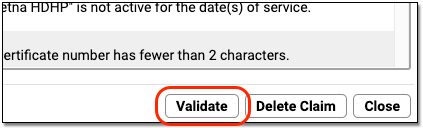
After you update the patient and/or charge record, click “Validate” to recheck all claim information.
If there are additional problems with a claim, you will see the newly discovered issue in the “Reason” column. If a claim is now ready to submit, the Status will change to “Validated”.
You can filter the list of claims on the Needs Correction tab to see claims that need corrections or are validated.

Re-prepare and Submit
After you fix the problems with claims on the Needs Correction tab, you can prepare and submit claims on the Submission tab. Clean claims will then be processed and sent, and the Needs Correction tab will refresh with any new issues that need your attention.
Delete a Claim
If you fix an issue and need to generate a new claim for an encounter, you may need to delete the old claim. For example, after you generate a claim for a different insurance policy, you can select the old claim on the Needs Correction tab and click “Delete Claim”.
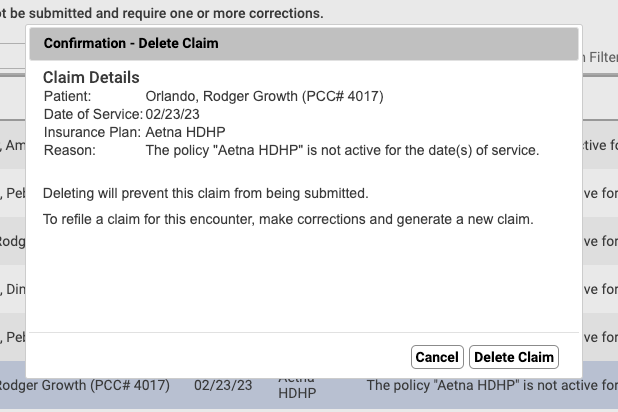
Deleting a claim on the Needs Correction tab will only remove the claim. The charges will remain on the account.
Where Do I Change the Responsible Party for Charges and Generate a New Claim?: If a claim is pending the wrong insurance policy, you can open the encounter in the Billing History in the patient’s chart and use Edit Charges to update the responsible party for each charge. See Change the Responsible Party and Copay for Charges.
Review Claim Submission Session Logs
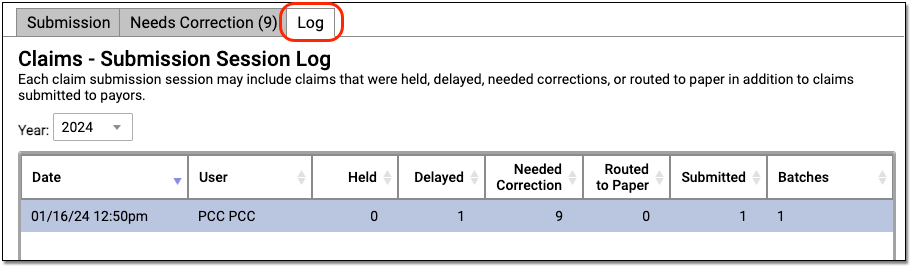
When you use PCC EHR to submit claims, you can use the “Log” tab in the Claims tool to review the details of a claim submission. You can also review which claims were held, delayed, needed corrections, or were routed to paper.
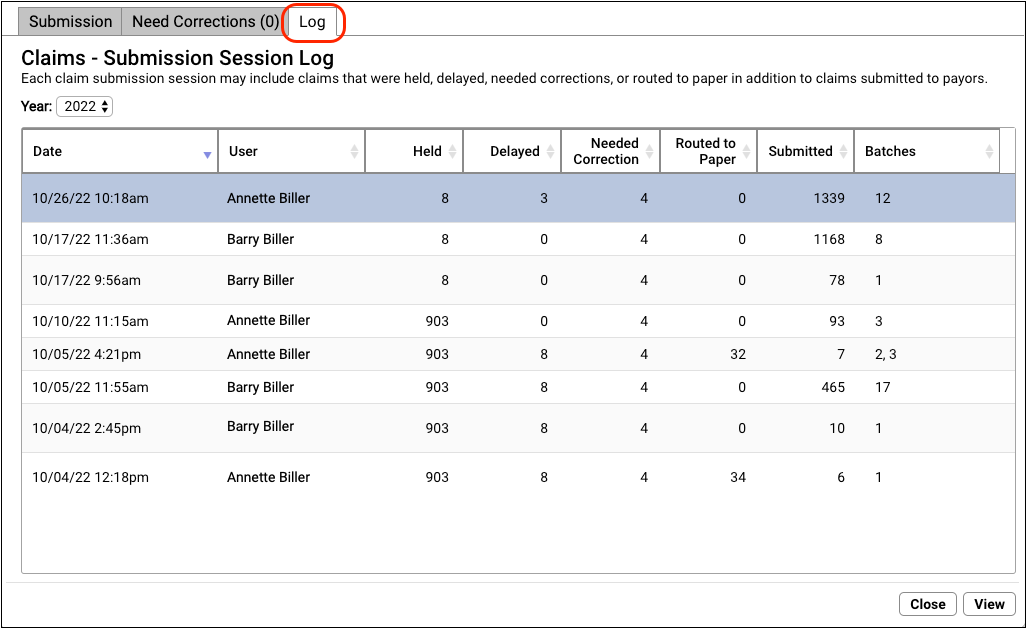
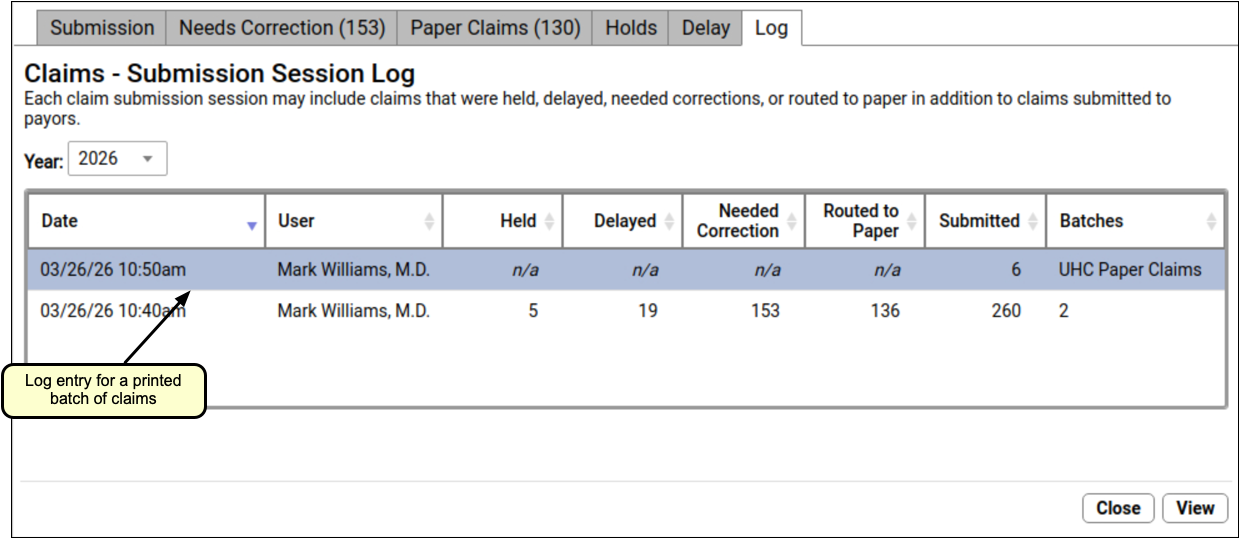
The Log tab displays a record of all claim submissions run from PCC EHR, filtered by year. In addition to date and time, you can see which user at your practice submitted the claims and how many claims were held, delayed, needed corrections, were routed to paper, and were submitted. If only some batches were submitted, you can see how many under the Batches column.
Where's My Log?: The Log tab displays claim submission sessions submitted from PCC EHR. If you prepare claims but do not submit, the Claims tool will not add a record to the Log tab. Also, if your practice sometimes uses the previous Practice Management tool to process and submit claims, those submissions will not appear in the logs.
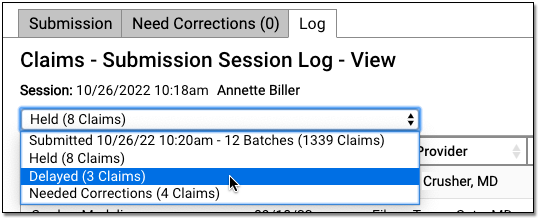
Double-click on a session log to see more information.

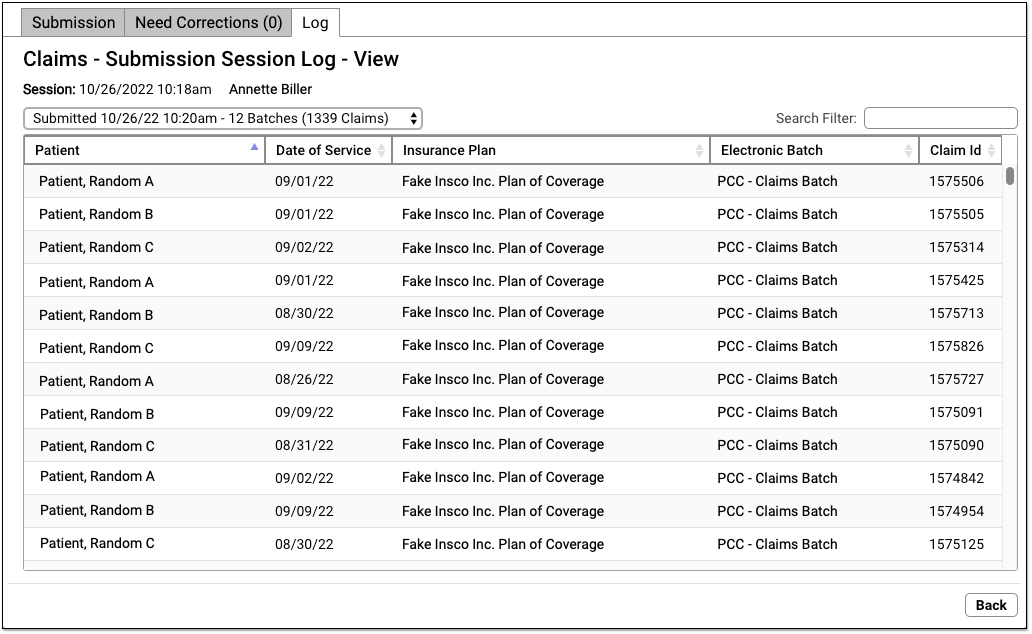
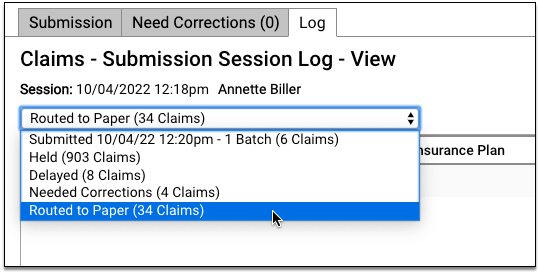
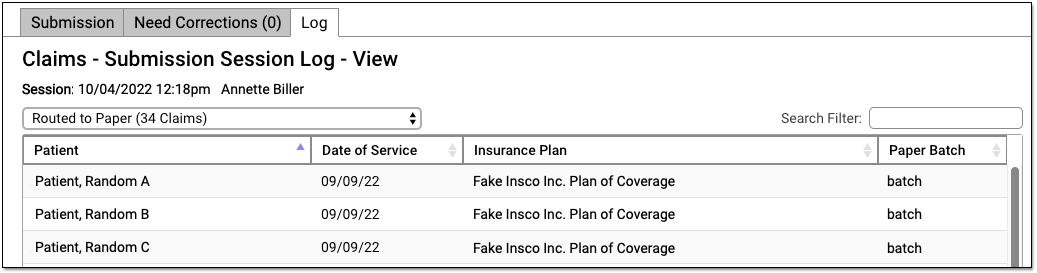
On the “Claims – Submission Session Log – View” screen, you can review details about each claim that was processed during the claim submission. If the user prepared and submitted multiple batches during the same session, they can use the drop-down menu in the upper-left to select and review each submission.
Use the Search Filter to find claims by name, date of service, insurance plan, batch, or claim ID.

Review Held Claims
To see details about all claims held due to a claim hold, select “Held” in the session drop-down menu.

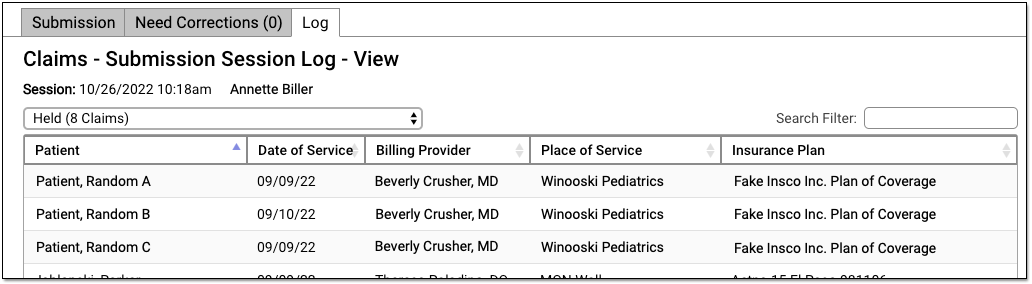
Your practice can configure custom claim holds based on dates of service, billing providers, and insurance plans.
Review Delayed Claims
If your practice uses a customizable claim delay, select “Delayed” from the session drop-down menu to see claims that were delayed.
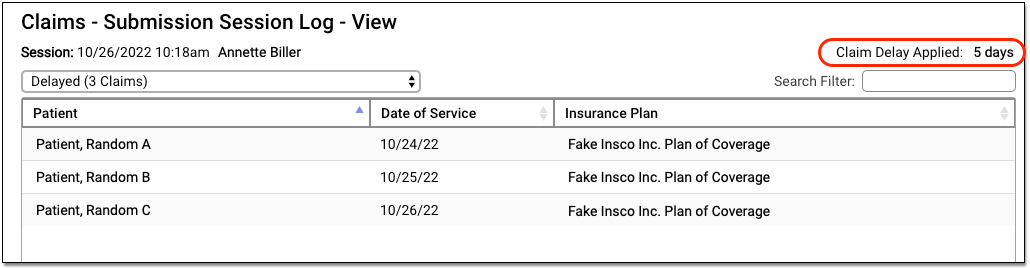
You can review the details of claims that didn’t go out because the claim delay period had not yet passed. The claim delay period is displayed in the upper-right corner. Typically, practices ask PCC Support to configure a claim delay period of a few days, in order to ensure enough time has passed for charges to be reviewed before claim submission.
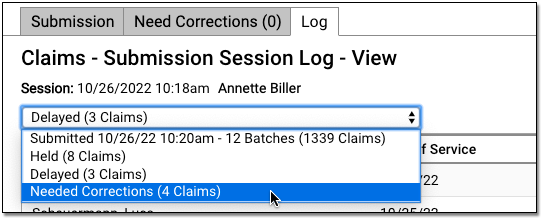
Review Claims that Need Corrections and Can Not Be Submitted
If PCC’s claim processing found problems with claims that prevented them from being submitted, you can review these issues by selecting the Needed Corrections option.
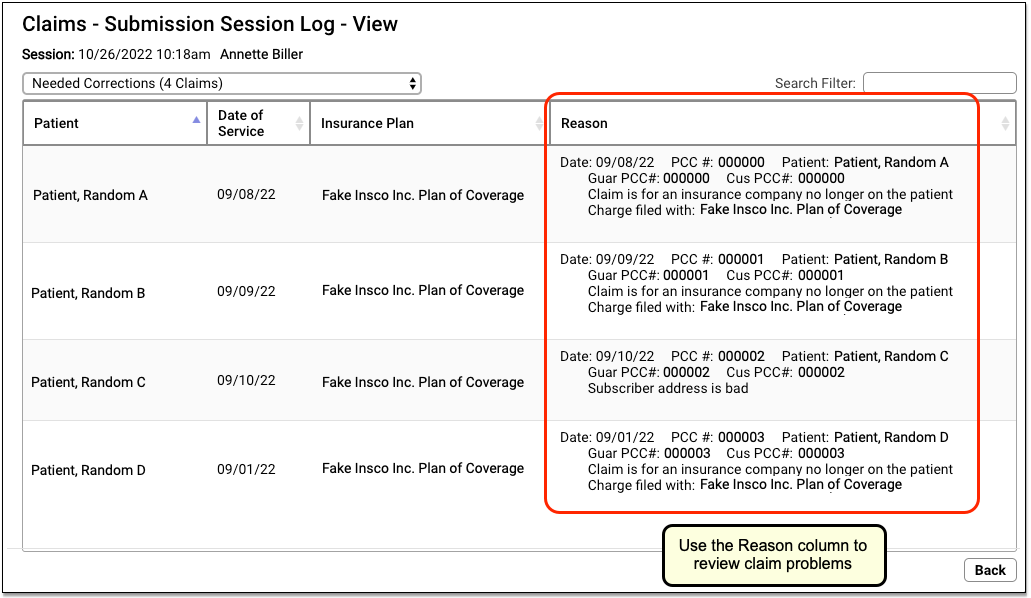
You can see all claims that could not be submitted at the time of the submission. You can use the Needs Correction tab to work on these claims, but this log lets you review what the system found at that time. See Work on Claim Errors and Rejections and Claim Error Reference to learn more.
These issues must be resolved before the claims can go out. For most problems with an outgoing claim, a biller updates patient, account, or charge information. If this alters the responsible party for the encounter, they may need to edit the insurance information for the charges, generate a new claim, and delete the old claim. See the sections above to learn more.
Review Claims Routed to Paper
If some claims needed to be routed to a paper batch for printing, you can select “Routed to Paper” to review details.
To generate and print paper claims, use the “Paper Claims” tab. Read Print Paper HCFA Claim Forms to learn more.
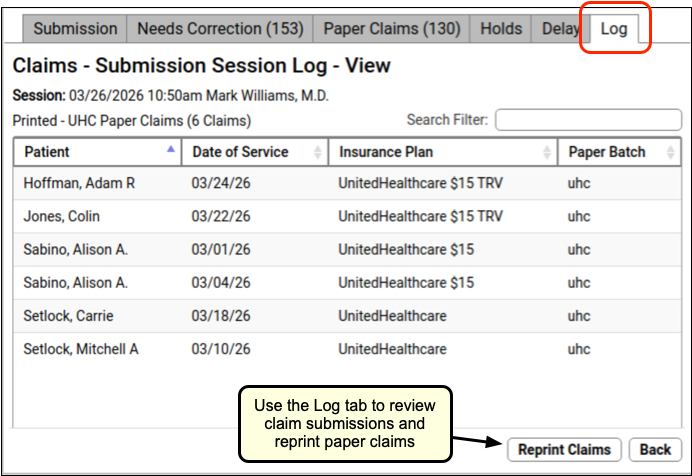
Review Printed Batches of Paper Claims
When claims have been routed to paper and printed through the Paper Claims tab, a log entry will appear showing that activity.
You can open the log to view a record of all claims printed. You can also click “Reprint Claims” to print the batch again. You might wish to do this if the print job failed, for example.