Generate Personal Account Bills
Use the Bills tool in PCC EHR to generate personal bills for families. Use the Payments tool to print a single account statement.
Video: Watch Generate Personal Account Bills, Print a Single Account Statement, and Print Bills for Any Group of Accounts to learn more.
Billing Codes and Descriptions Include Confidential Information: When you print or export billing records, including receipts, bills, and histories, the output includes procedures and diagnoses from patient encounters. These codes and descriptions may reflect clinical information that was marked confidential in the chart.
Contents
Generate Bills
Follow the procedure below to generate personal statements for families.
Open the Bills Tool
When you are ready to send out personal bills, open the Bills tool in PCC EHR.

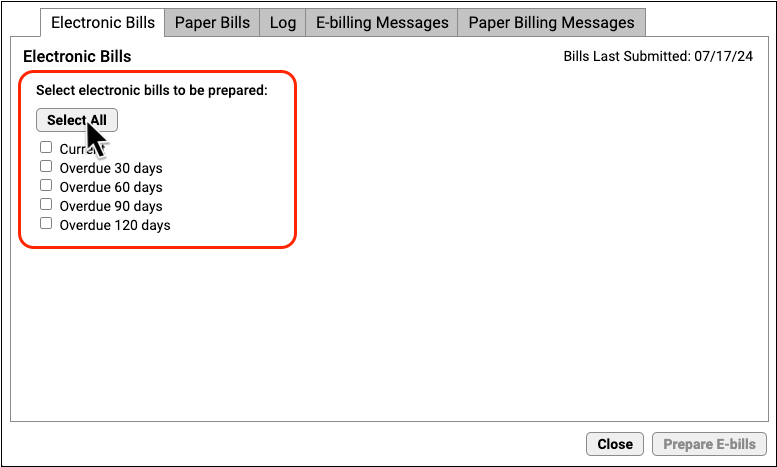
Select Electronic Bills or Paper Bills
If your practice sends some or all bills out electronically to a printing service, select whether you are sending e-bills or printing paper bills.

Electronic Bills are Printed By a Third Party: An electronic bill refers to when your practice electronically sends bill files to a third party, OSG (formerly “Diamond Health”), for printing and mailing to families.
Paper Bills Require a Bills Printer: If your practice generates paper bills, you must have a printer available to print the bills. You may need to contact PCC Support to select which printer your practice will use to print bills or else set your individual user printer settings in the Practice Management window before you open the Bills tool. Contact PCC Support for more information.
Select Age of Bills to Send
Optionally adjust which bills you wish to generate, based on age of the oldest balance on the bill. Or click “Select All”.
For example, your office may wish to send current bills to your electronic printing service but print 90+ or 120+ bills manually.
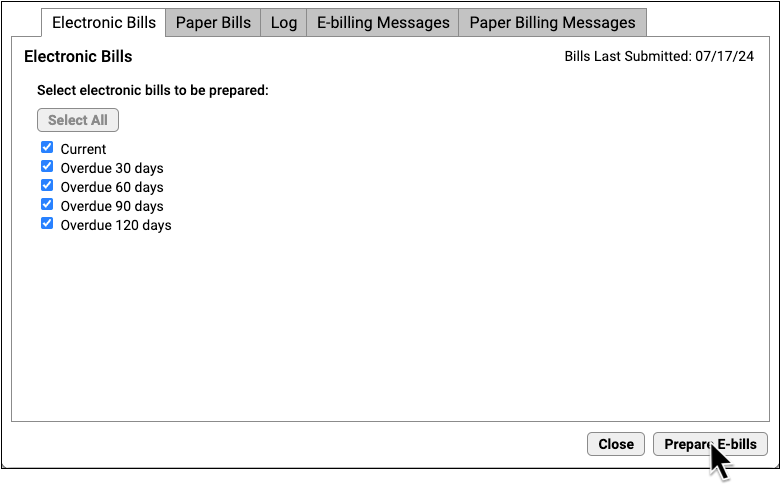
Click Prepare E-bills
Click “Prepare E-bills” (or “Prepare Bills”) to process account balances and prepare bills. They will not be sent yet.
Review Totals
Review the total number of prepared bills.
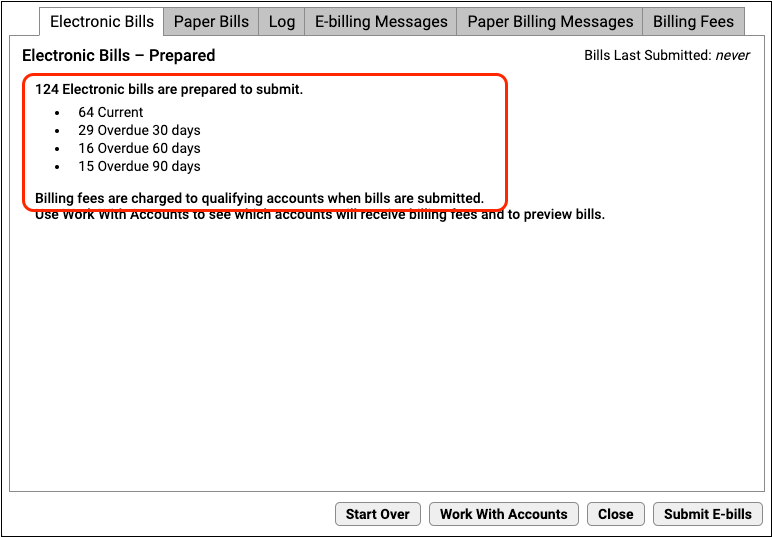
Automatic Billing Fees: If your practice automatically charges a billing fee for overdue accounts, the number of prepared bills will also indicate how many will be charged a fee. For more information, visit Automatically Charge Billing Fees for Overdue Accounts.
Optionally, Work With Accounts
Optionally, click “Work With Accounts” to see all families for whom a bill was prepared.
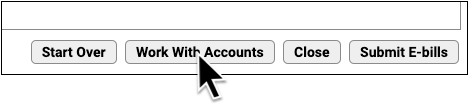
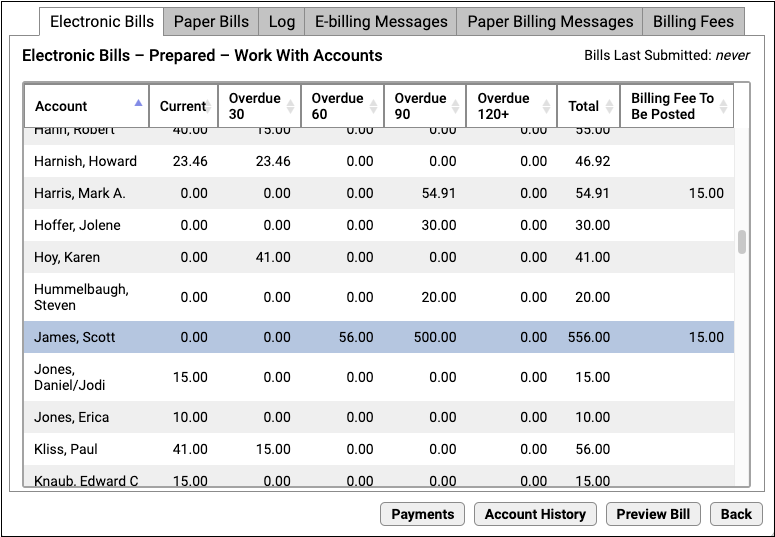
You can review the list, sort, and search. To dig deeper, you can select an account and click “Payments” or “Account History” to review account details, contact the family, and even collect payment over the phone.
If You Work With Accounts, You Will Next Re-Prepare: If you use the Work With Accounts screen, the Bills program will prompt you to Start Over and re-prepare bills, as total amounts due may have changed.
Click “Submit E-bills” To Send Bills
When you are ready to send bills to your third-party printing service, click “Submit E-bills”. If you are printing bills at your practice, click “Submit Bills”.
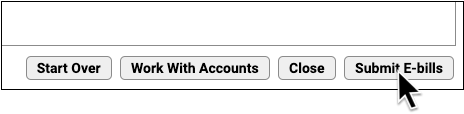
When bills are sent, the account’s individual bill cycle and “Last Bill Sent” date will be updated, indicating that they have received a bill this month.
Automatic Billing Cycle: Your PCC system tracks when you last sent each account a bill. Your practice can configure a billing cycle so a family won’t receive more than one bill per billing period. With cycle billing, you can run bills every day and your system will only generate bills for accounts that either had their last bill sent more than 28 days ago (for example) or have new personal charges due on their account. To learn about your practice’s cycle billing settings, contact PCC Support.
Print a Single Account Statement
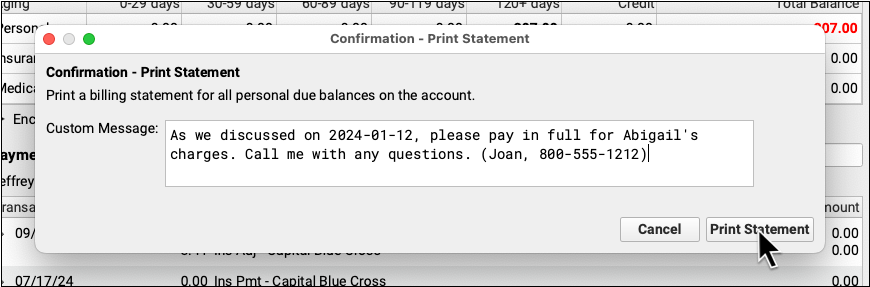
When you need to generate a single bill for an account, open the Payments tool, find the family, and click “Print Statement”.

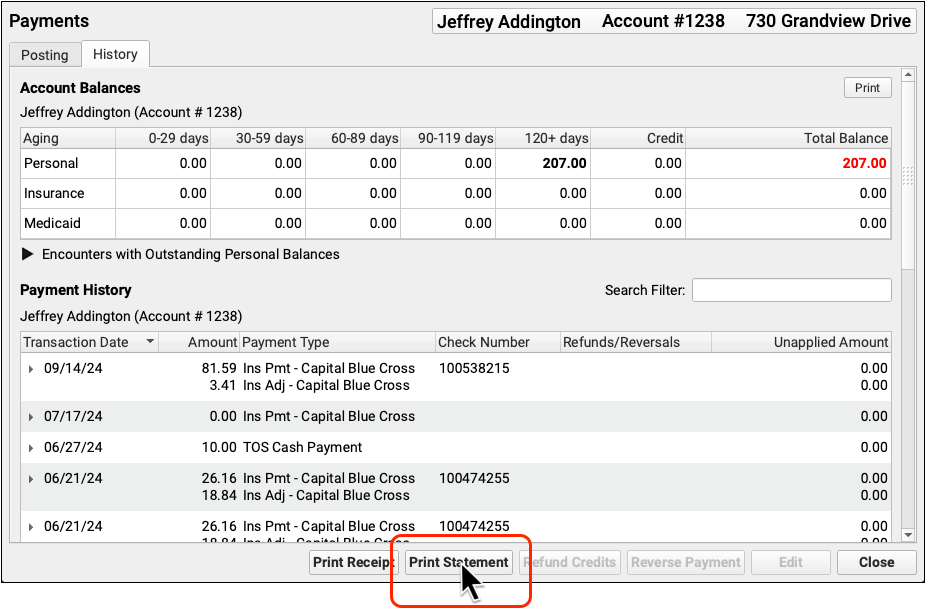
If your practice’s custom paper bill includes room for an account note, you can enter one and it will appear on the bill.
You can print the bill or use your workstation’s print window to save it as a PDF.
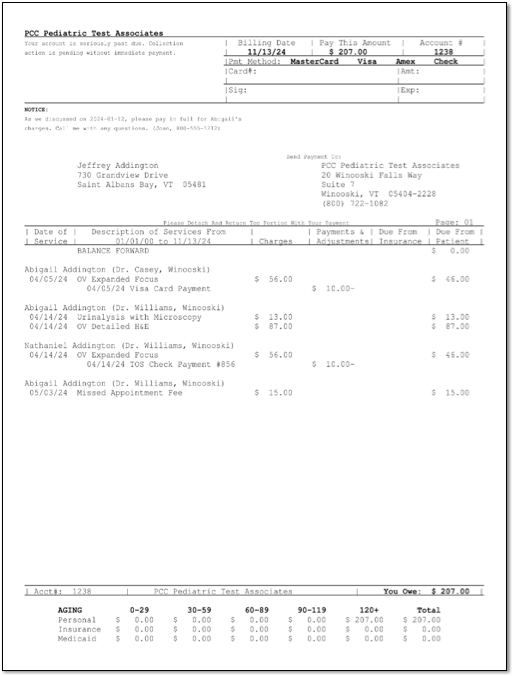
Printing a statement updates the family’s “Last Bill Sent” date. If your practice uses a billing cycle (such as 28 days), then when you next run bills, a new bill will not be generated within the cycle unless the family has new charges. For more information, read Generate Personal Account Bills.
Custom Message Tips: The custom message you enter when you generate a single statement is not saved; it appears only on the bill you are generating. Your practice can use Snap Text to define useful re-usable custom messages for bills. Use the Bills tool to define your age-based practice-wide billing messages that appear on every bill.
My Bill Looks Different: The single bill form printed from PCC EHR is not the same format as bills printed by a third-party printing service. The “Print Statement” button prints the default paper bill form on your PCC system.
Print Bills for Any Group of Accounts
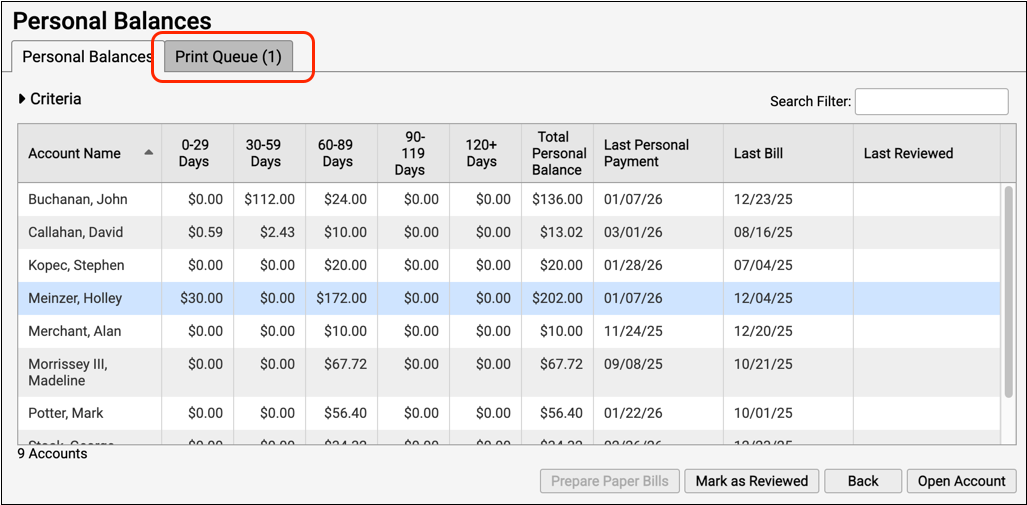
Do you need to generate bills for all accounts with a specific status? Or customize your billing run for overdue accounts? Use the Personal Balances tool to create bills for any group of accounts, based on your criteria.
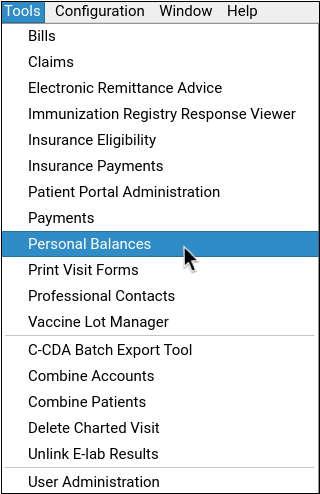
Open Personal Balances
Open the Personal Balances tool from the Tools menu.
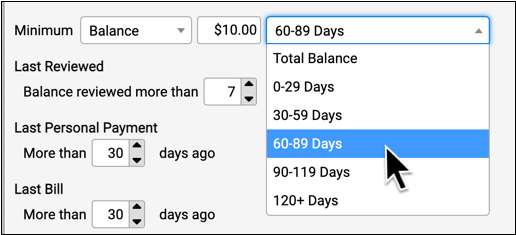
Select the Criteria for Bills You Need to Print
Adjust the criteria in order to select those accounts for which you need to send bills.
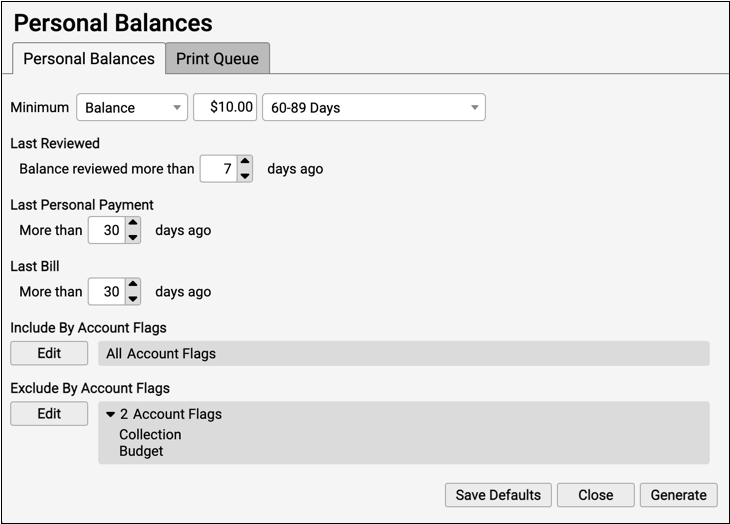
For example, you may wish to print your practice’s 60-90 day overdue bills.
You can also indicate a minimum balance, select accounts by account status, and more.
One Bill a Month: In order to prevent sending a family a bill more often than once a month, you can use the “Last Bill” setting to indicate the number of days that need to have passed for an account to be included on the list.
Click Generate and Review the List of Accounts
Click “Generate” to produce a list of accounts that match your criteria.

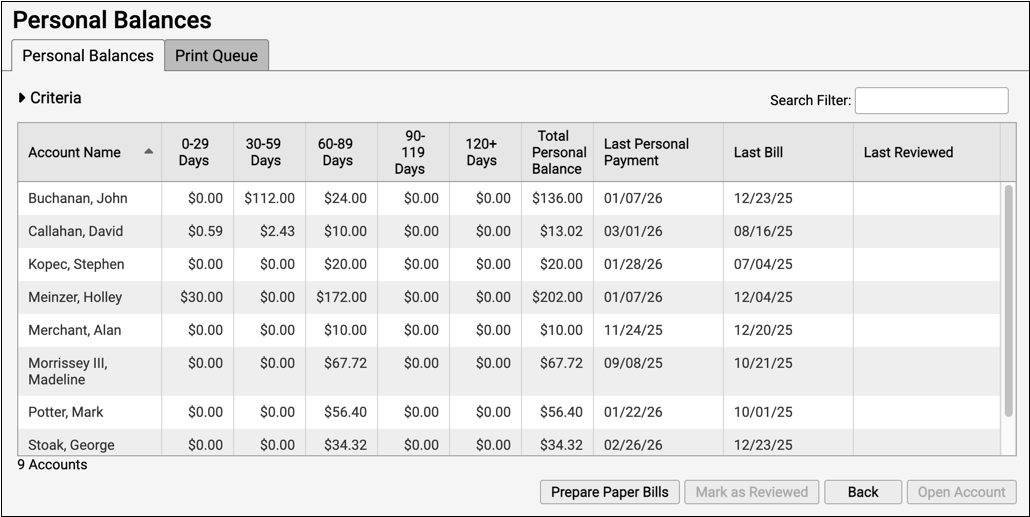
You can sort and search the list to review the accounts and make sure you wish to print a bill for them.
Optionally, Work With Accounts, Post Payments, and More
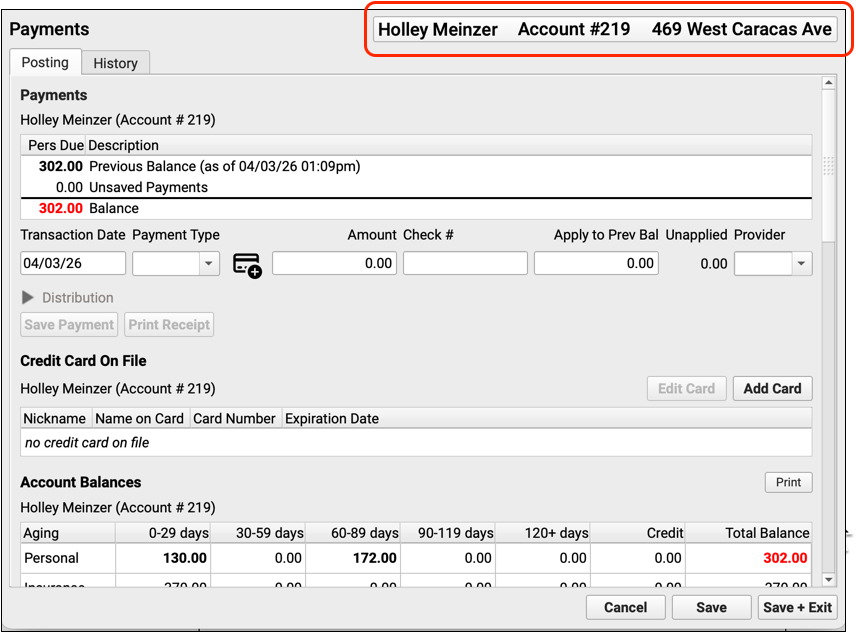
Before you generate bills, you could select an account and click “Open Account” to review more details, including a list of outstanding charges, in the Payments tool.
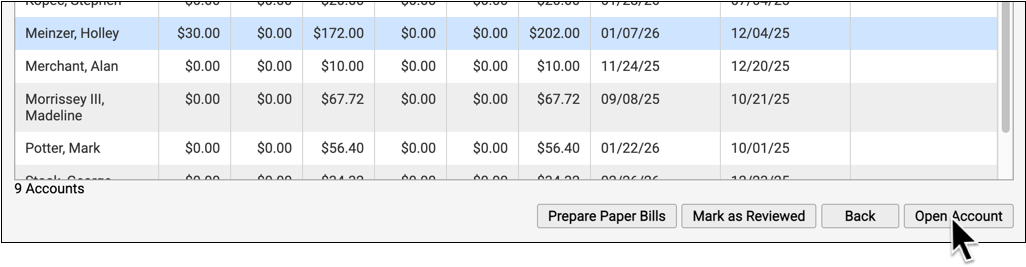
You might decide to contact the family about their balance and post a payment. After working the account, you can return to Personal Balances and recreate the list of accounts that need a bill.
Click “Prepare Paper Bills”
When you are ready to generate bills for the accounts listed, click “Prepare Paper Bills” .

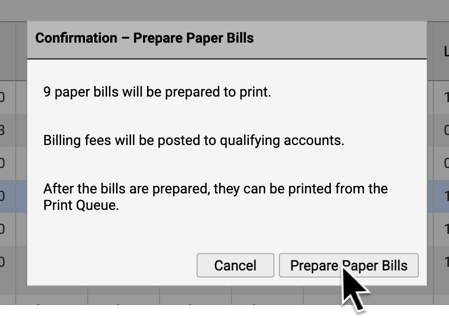
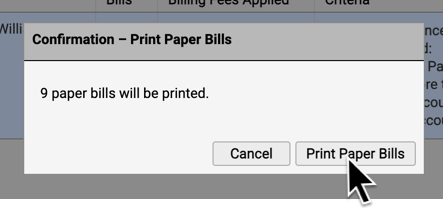
Review the expected number of bills and click “Prepare Paper Bills” to continue. PCC EHR will create the bills, post an automatic billing fee (if your practice uses one and accounts match the criteria), and add the finished batch of bills to the Print Queue.
Visit the Print Queue
When your system is finished preparing bills, you will see there’s a batch waiting to be printed on the Print Queue tab. Visit the Print Queue to view prepared bills and print them.
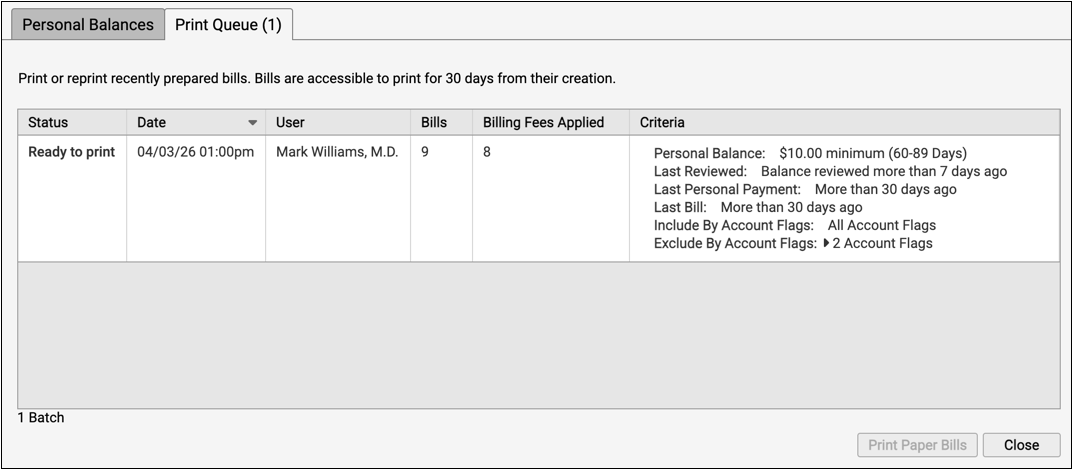
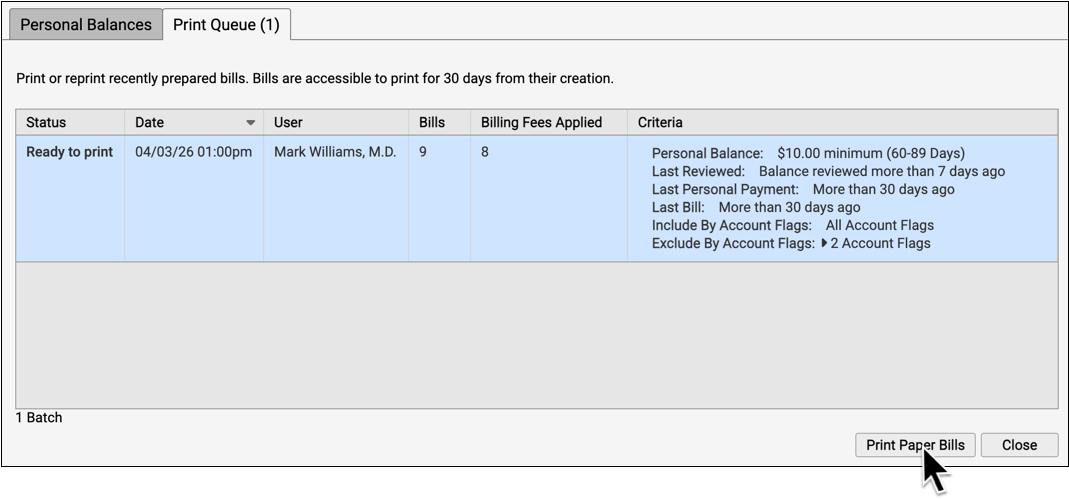
Select the Prepared Bill Batch and Print
Select a batch of prepared bills and click “Print Paper Bills” to send them to your printer.
Did We Print a Bill for This Account?: Bills generated manually through Personal Balances do not show up in the Log tab of the Bills tool. Instead, you can review whether an account received a bill in the Account History (for any dependent patient) as well as by checking the Last Billed date for the account, found in Demographics.
Automatically Charge a Billing Fee for Overdue Accounts
To learn how to configure an automatic billing fee based on your practice’s financial policy, see Automatically Charge a Billing Fee for Overdue Accounts.
Work Unpaid Personal Balances
You can work down a list of accounts with unpaid personal balances using the Personal Balances tool.
Review a Log of Bills
You can review a log of all bill submissions. Read Review the Bill Log to learn more.
Customize the Messages that Appear on a Personal Bill
Your practice can customize the messages that appear on your bills. Read Customize the Messages on Personal Bills to learn how.