Adding and Managing Patient Portal User Accounts
Parents and patients can use PCC’s patient portal, My Kid’s Chart, to access their medical records. Your practice manages the login account, and grants secure access to each patient’s records. Read the sections below to learn how to create and configure patient portal accounts.
Contents
Review and Update Portal Users in a Patient’s Chart
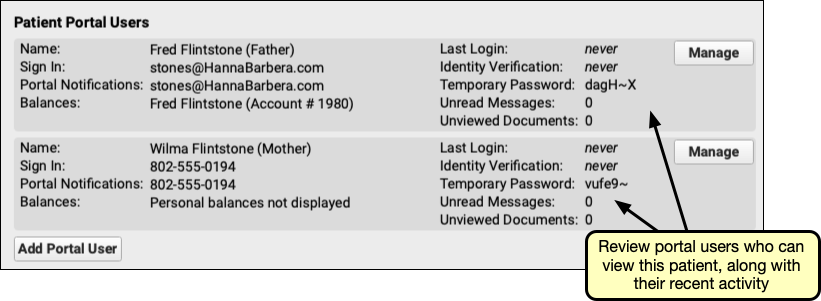
You can use the Patient Portal Users component in PCC EHR to quickly review portal information and see if mom, dad, or another guardian has access to the patient’s records through the patient portal (My Kid’s Chart).
The Patient Portal Users component is in the Patient Check-In ribbon by default, but your practice can add it to phone notes, visit protocols, or wherever it will be useful for your workflow.
In addition to reviewing and updating portal access, you can use the Patient Portal Users component to understand how the family is using the patient portal. You can see the time of last login and if there are unread messages from your practice or documents they have not reviewed yet. You can also see if a billing account for personal balances is assigned for the user.
If a patient has passed your practice’s emancipation age, you will see a message letting you know that the user does not actually have access to a patient’s records.

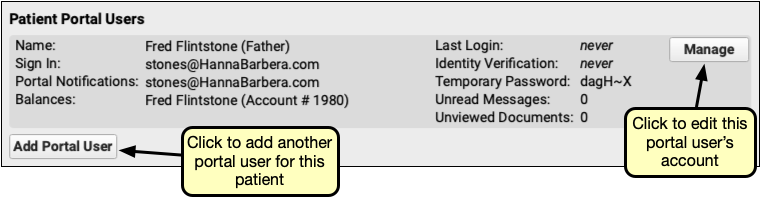
You can jump straight to the Patient Portal Administration tool from the Patient Portal Users component, if you need to add a new portal user, or manage an existing user’s portal account, just by clicking either the “Add Portal User” or the “Manage Portal User” button.
Add Portal User
At the bottom of the Account Demographics click the “Add” button under Home and Billing Account’s Portal User. If you’ve added both a Home and Billing account, each will have their own, labeled “Home Account’s Portal User” or “Billing Account’s Portal User”. Click “Add” to create a portal user to link to the selected account.
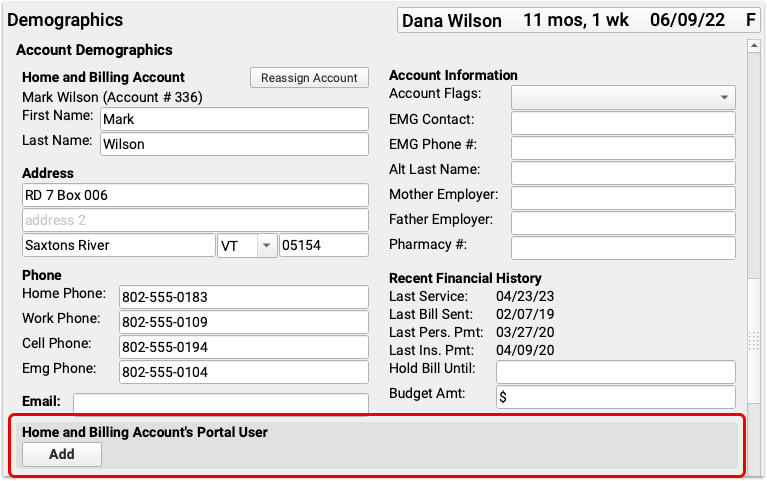
The “Add” button creates a new patient portal user for the selected account. The portal user’s name is filled in automatically. Select a phone or email address to use as the Portal Sign-In. The phone or email you select here will be used to sign in to the patient portal.
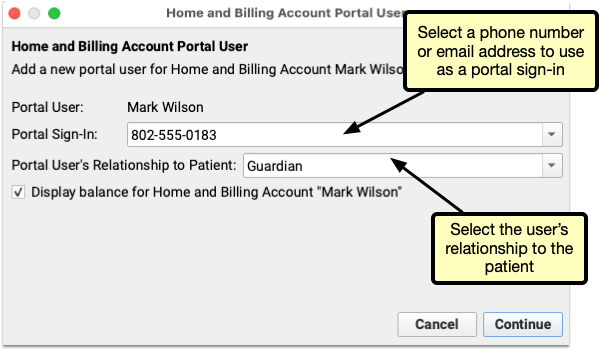
Click “Continue” to create the portal user.
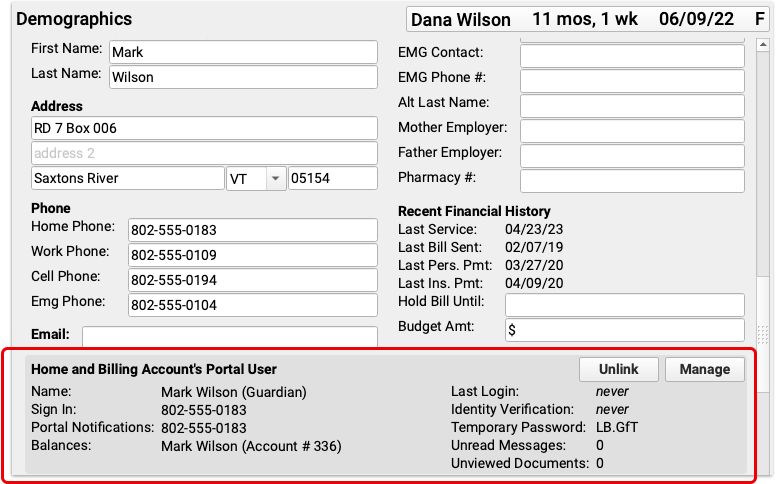
The portal account you selected appears in Account Portal User section. If needed, use the “Unlink” button to remove the portal user from this account.
In some cases siblings will share a Home or Billing Account, but not be connected to the same patient portal user.
The Account Portal User section will indicate this situation with the text “Patient… is not connected to this account’s portal user. Manage portal user to add this patient”.

Clicking “Manage” will open the Patient Portal Administration and automatically connect this patient to the portal user.

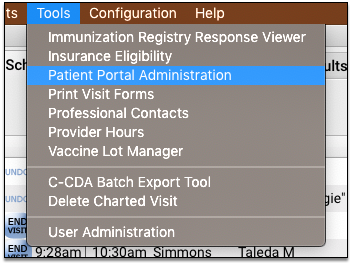
Open Patient Portal Administration from the Tools Menu
If needed, a Patient Portal account can be created for users other than the PCC EHR Home or Billing account, such as a second parent or other guardian. Unlinked Patient Portal accounts can be created through the Patient Portal Administration, found under PCC EHR’s Tools Menu.
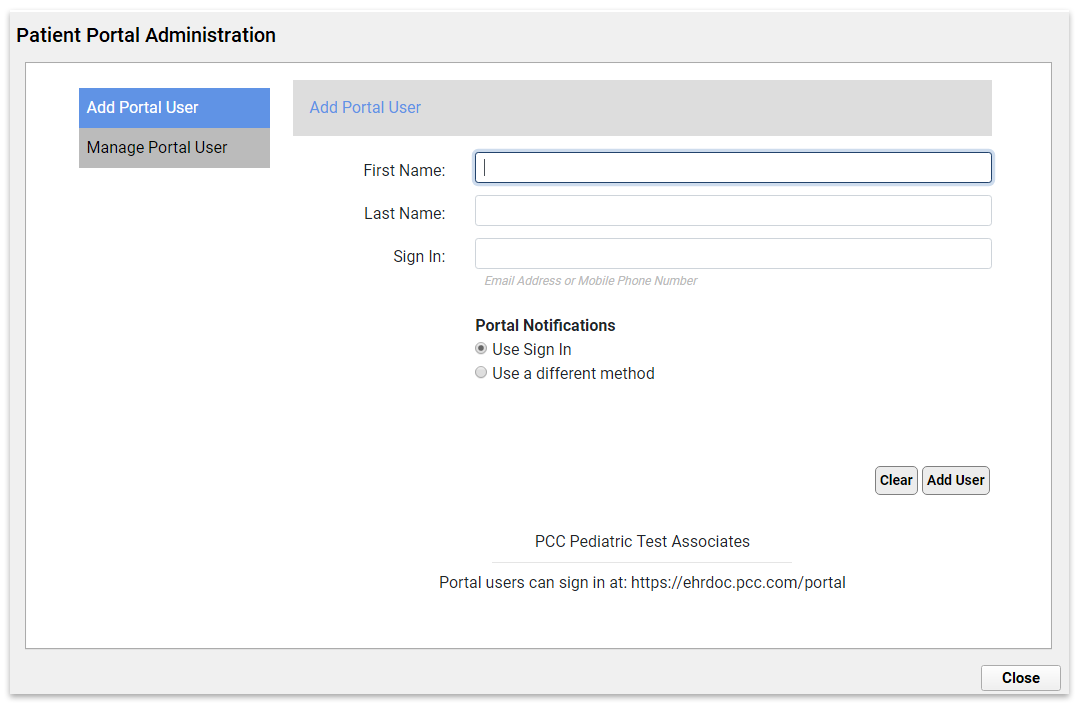
To find a specific portal user, click on the “Manage Portal User” option and search by name, email address, or phone number.

Click on the “select” link to choose an account to work with.
Can't Find It?: If you are not able to open the Patient Portal Administration tool in your Tools menu, contact your office manager. They can use the User Administration tool in PCC EHR to grant you a role with patient portal administration privileges.
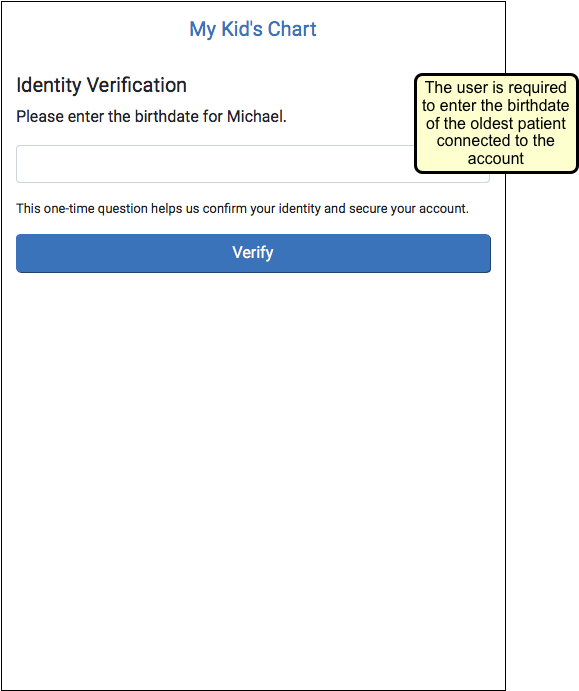
Portal User: Identity Verification
User verification helps to prevent email errors and preserves confidentiality.
Each newly enrolled portal user will need to verify the birthdate of the oldest (living) patient on their account before they can access the portal. They will only need to do this the first time they sign in, unless your practice resets their password.

The portal user will get three attempts to choose the correct birth date from their phone’s date selection tool. If they enter the wrong date three times, they will receive a message stating that the answer is incorrect (even if they have finally entered the right date), and they will be locked out of the account for 15 minutes.
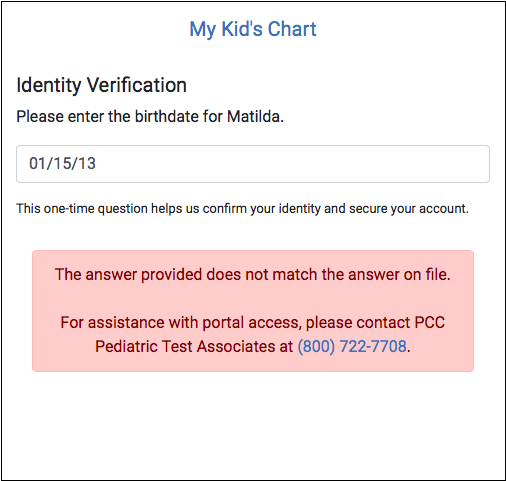
The portal user can either wait the 15 minutes and try again, or they can call your office and ask to have their password reset so that they can try again immediately.
Manage a Portal User’s Account
When you need to make changes for a patient portal user, the quickest way to access their account is by clicking “Manage Portal User” from the Patient Portal Users component.

You can check their verification status, reset their password, edit their contact information, delete their account, grant permission to view patient records, and manage or associate a billing account.
Alternate Method: If you are not in the Patient Portal Users component, you can get to the same screen from the Tools menu, as described above.
Track Your Portal Users’ Identity Verification Status in PCC EHR
You can track the status of your portal users’ verification process in both the Portal Administration tool and the Patient Portal Users component, with the “Identity Verification” field.
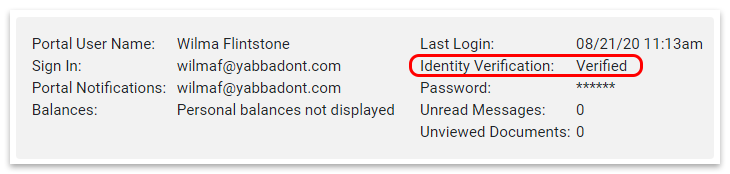
There are five possible statuses that may appear within this field:
-
Never: displays when there have been no attempts to verify
-
Verified: displays when the portal user has successfully verified their account, and created a new password
-
Incomplete: displays when the verification process was successful, but the user did not continue on and create a new password
-
Failed: displays when the portal user’s most recent attempt to verify was unsuccessful
-
Never - requires connected patients: displays when there are no patients connected to the portal user (rare)
Reset a Portal User’s Password / Help a Locked Out Portal User
If a portal user forgets their password or gets locked out of their account, they can call your office to have their password reset.
You can reset a portal user’s password in the Patient Portal Administration tool.
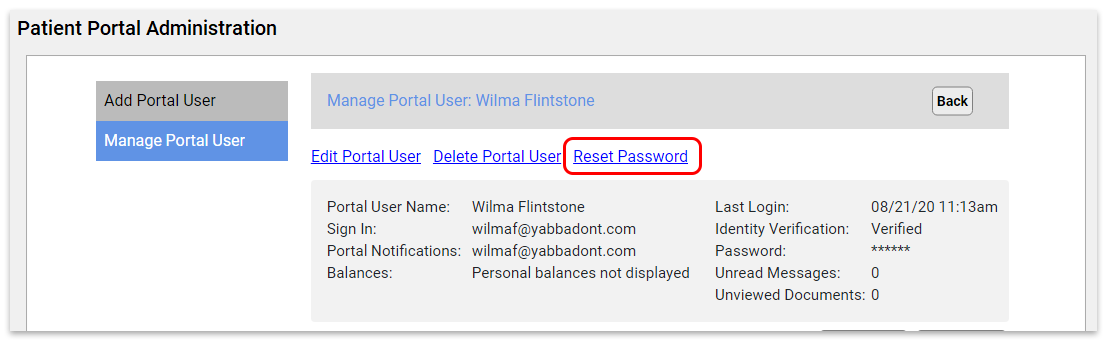
If you reset the password, the portal user will need to go through the identity verification process again, which will require them to enter the birthdate for the oldest child on the account.
Add/Remove Permission to View a Patient’s Records
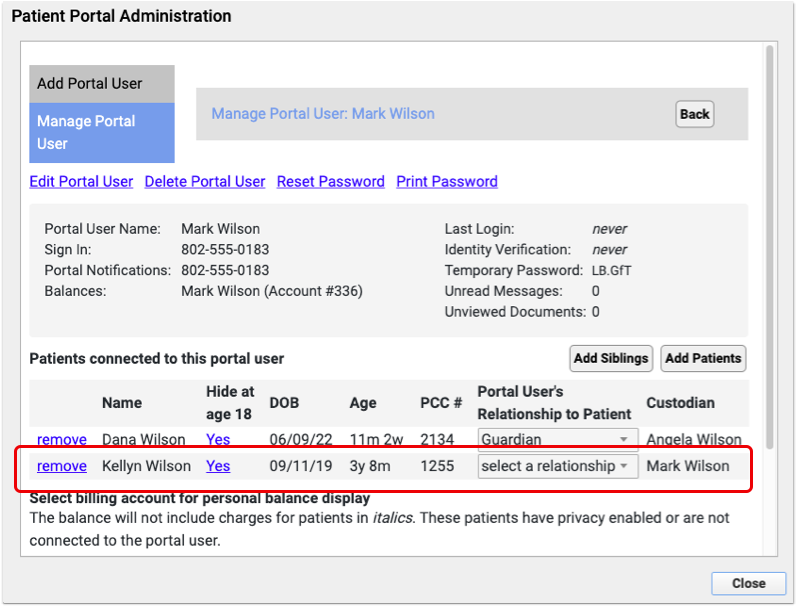
While managing a portal user, click “Add Patients” to grant the user access to a patient’s medical records. Then, search for the patient by name.

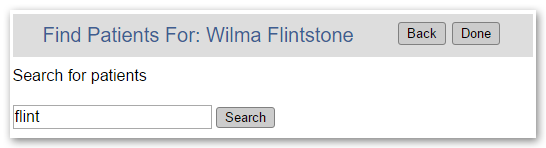
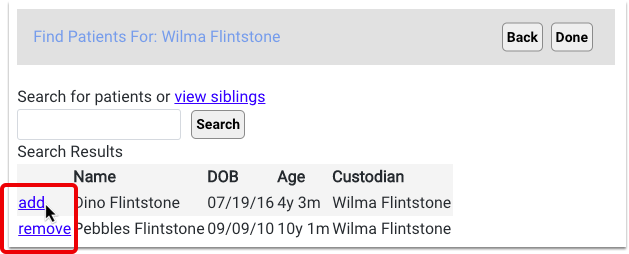
From the search results, click “add” to add permissions for one or more patients. Then click “Done”.
You can add additional patients, or click “Add Siblings” to add a sibling, which will provide a list of patients who share a home or billing account with currently connected patients.
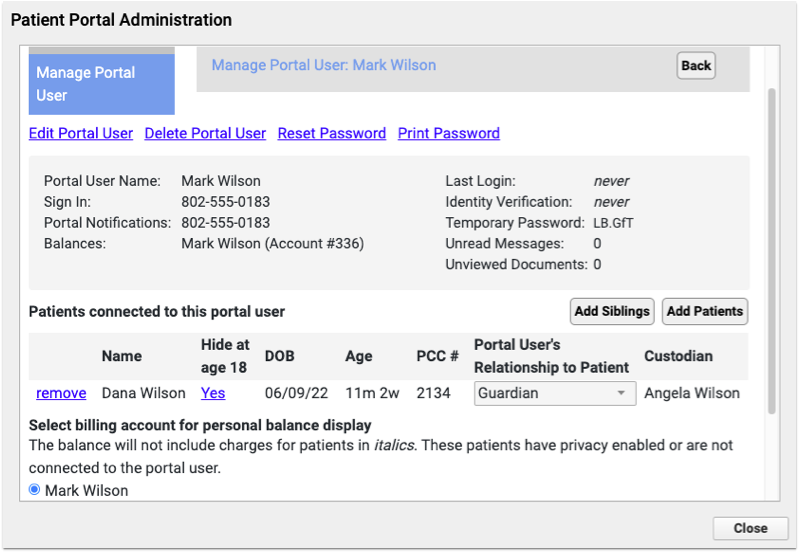
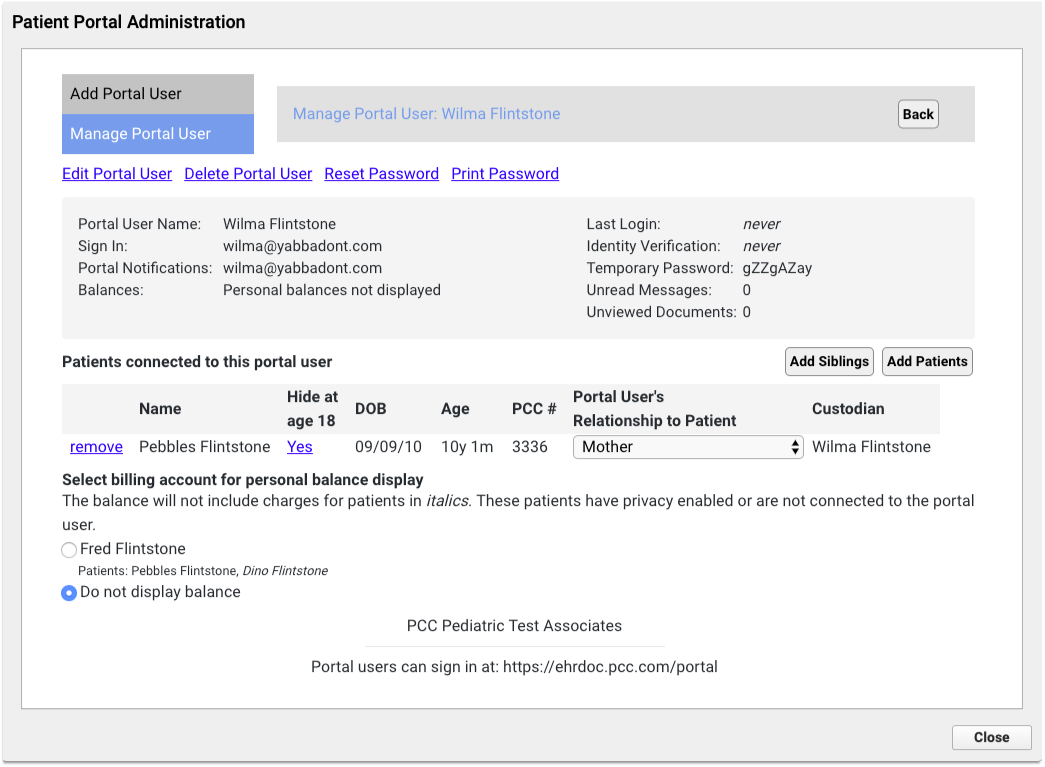
The Manage Portal User screen will display a list of all patients that an account user may access.
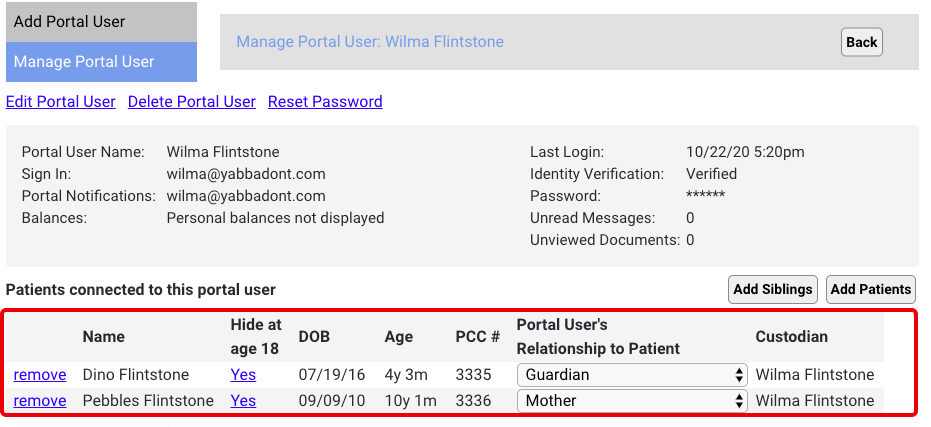
Click “remove” to remove access to any patient.
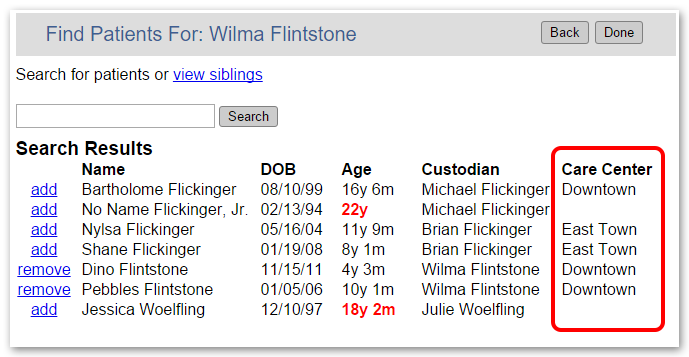
Patients From Different Care Centers?: If your office is part of a large, multi-office practice that uses PCC’s Care Centers feature, you will see which care center a patient is assigned to when you search. Use that information to help you connect the correct patient record to the portal user account.
Display Personal Balance and Associate Billing Account
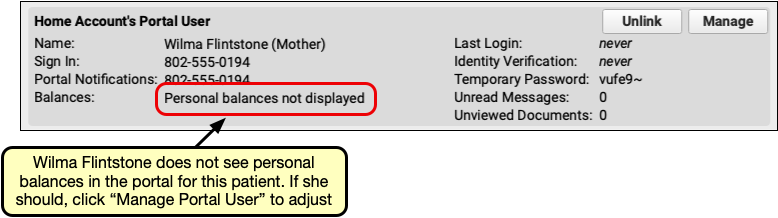
You can decide for each portal user whether it is appropriate to show the personal balance for the patient(s) they are connected to in the portal.
When you set up or edit a portal user’s account, you can select a billing account that is associated with the patient(s) who the portal user is connected to.
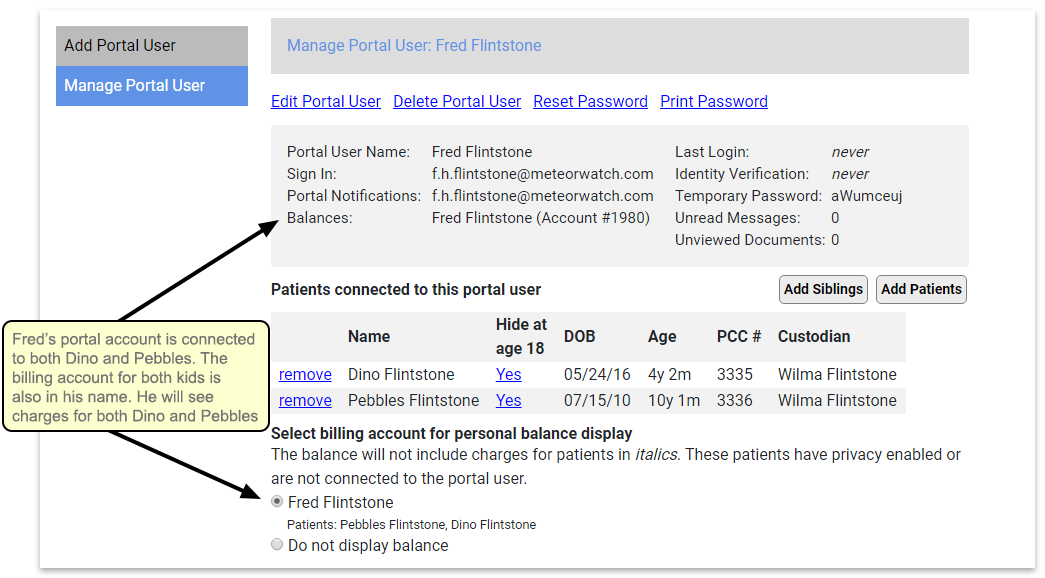
The selection defaults to “Do not display balance”. Users will only see the balance if the portal administrator decides to change the selection.
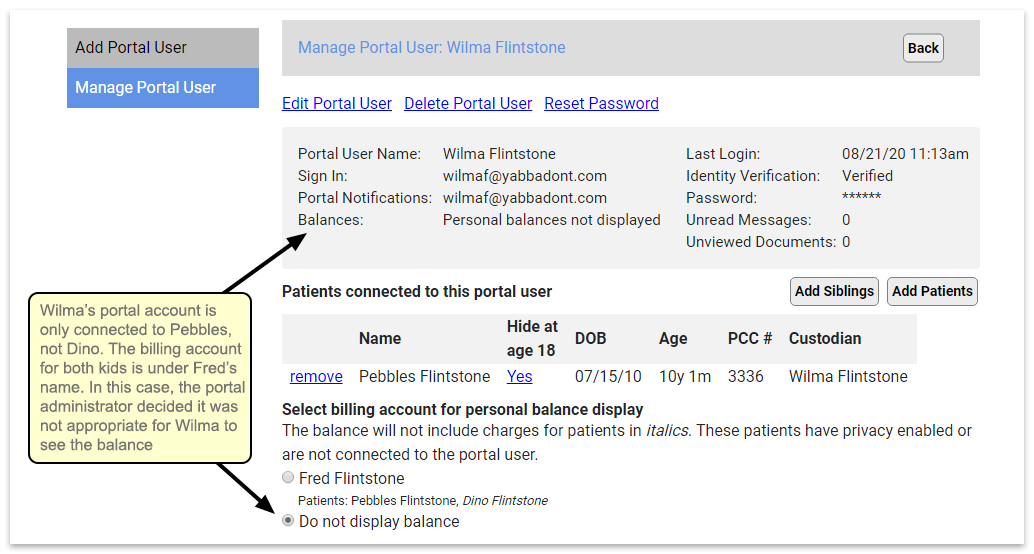
In the above example, the portal administrator decided not to have Wilma’s portal account include personal balance information, since the billing account was in Fred’s name. If the practice chose to show balance information, Wilma would only see the charges that were outstanding for Pebbles, since Dino’s name is in italics (indicating that his information will not be visible to Wilma).
NOTE: If you do not wish to display Personal Balance for any portal users, and you do not plan to accept payments through the portal, you can use the Configuration tab to turn off this feature for your practice.
Privacy and the Patient Portal
Depending on your state or region’s regulations, emancipation age can vary. PCC can handle whatever age your patients’ medical records become their own. For more detailed information about patient privacy in the portal and elsewhere in PCC EHR, read the Patient Privacy Features Overview article.
Automatic Privacy When the Patient Reaches Emancipation Age
When a patient reaches the age of emancipation set by your practice, their record will automatically become private. The “Privacy Enabled” message will appear beside their name.
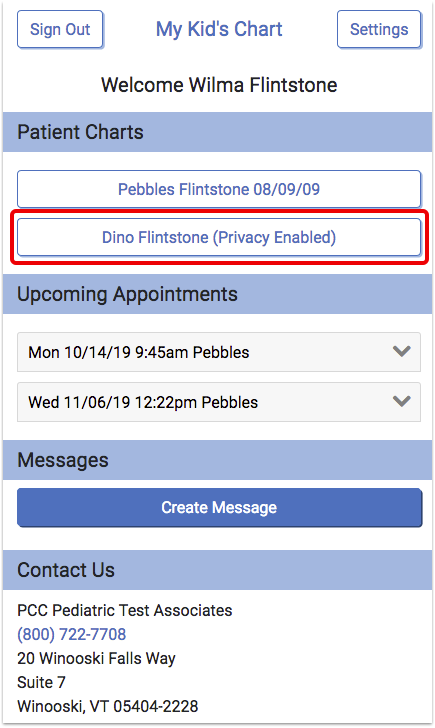
Users will still be able to see the patient’s name, and send a message to the physician in relation to the patient, but they will have no access to medical information.


Here are some issues to keep in mind:
-
-
Messages Are Still Available: If your practice uses the Messages feature of My Kid’s Chart, parents will still be able to send your office messages and questions in relation to connected patients, even after they turn eighteen. Your staff should keep this in mind when responding to incoming questions on the Messaging queue in PCC EHR.
-
18, 16, or 21?: Age eighteen is the My Kid’s Chart default emancipation age, but your practice can set your emancipation age to whatever is applicable for you, based on your state or region’s regulations.
-
Grant Access to Adult Patient Records
Your practice can use the Patient Portal Administration tool to grant individuals the right to access a patient’s information after they are over the emancipation age. Do this for the patient themselves if they use My Kid’s Chart, or when special circumstances apply for an adult patient with a guardian.
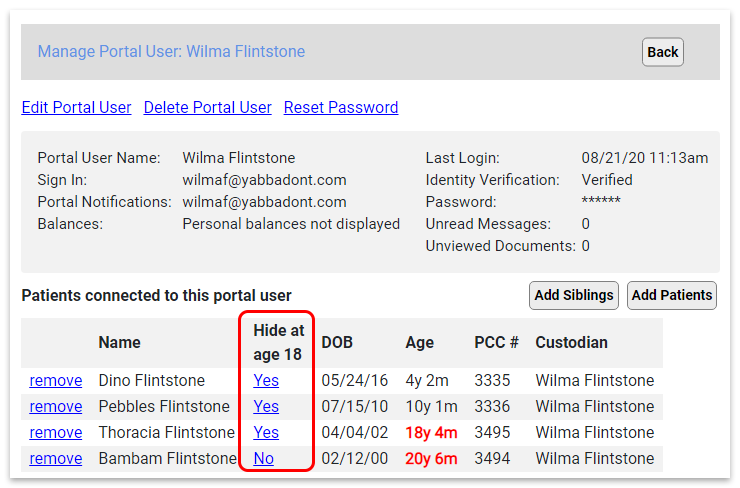
In the example above, the My Kid’s Chart user Wilma Flintstone has four patient records attached to her account. However, as shown by the “Hide at age 18” column, when three of these children reach eighteen, Wilma will no longer have access to their medical records (Thoracia has turned eighteen already). The exception is Bambam, an adult patient whose records will remain visible to Wilma.
The patient portal administrator can change the status for any of these patients by clicking in the “Hide at age 18” column.
When a patient who is over eighteen opens a new My Kid’s Chart account, your administrator should set this question to “No” for their account, so as not to hide their records from themselves.
Review Connected Patients: When working with a My Kid’s Chart user account, the Age column can help you know what to expect. If a user is over 18, the age will appear in bold red to indicate they are over your state’s emancipation age.
Audit a Patient’s My Kid’s Chart Record Access
If you need to find out who has accessed a patient’s record in your patient portal, you can review the Patient Portal reports from the Report Library.
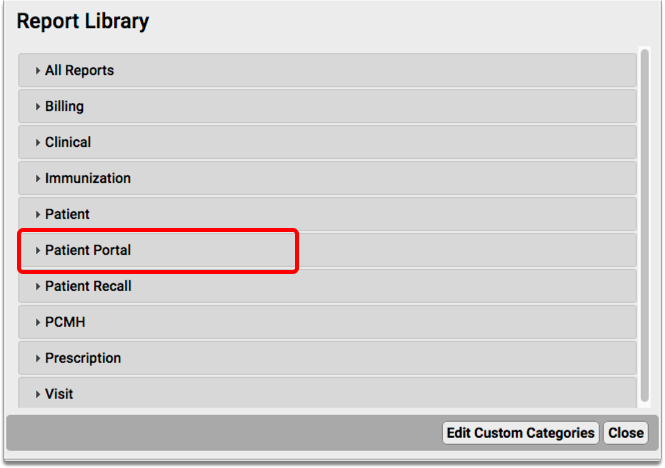
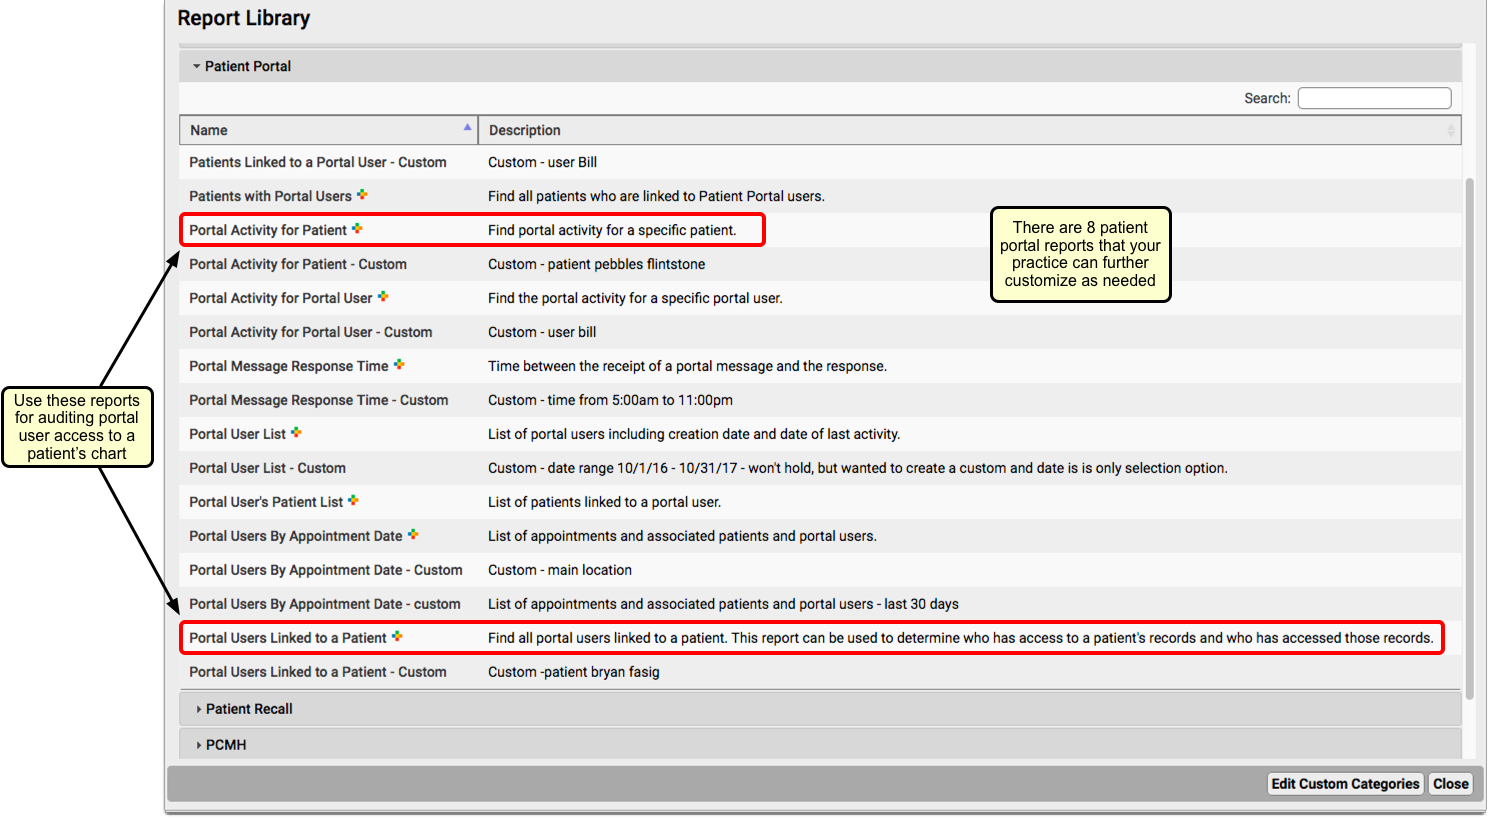
You can review all users who have accessed a specific patient’s chart or all patient charts that a specific user has accessed, as well as other information about patient portal activity. You can customize reports to work with your practice’s workflow.
For more information about running reports, read the PCC EHR Report Library article.
Keep in mind, if you believe a user has access to a patient record they should not, you can use the instructions in the sections above to add or revoke access to a patient’s record at any time.
If you need additional help with auditing access to patient records through your patient portal, contact PCC Support.