Create a Telemedicine Visit Protocol
In PCC EHR, you can create and customize chart note protocols for different visit types. PCC recommends you create a “Telemedicine Sick” protocol, along with other telemedicine-based protocols you expect to schedule. Those protocols can then be configured to appear automatically for telemedicine visits.
Sample Telemedicine Protocol: Take a look at a sample telemedicine protocol, shared by a pediatric practice that uses it every day: Telemedicine Sick Protocol was created by Dr. Seth Bokser at Tamalpais Pediatrics in Larkspur, California.
Watch the Video: For a video walk-through of this procedure, watch Create a Telemedicine Visit Protocol.
Contents
- 1 Open Protocol Builder
- 2 Clone an Existing Sick Visit Protocol
- 3 Name and Save Your New Protocol
- 4 Remove Unwanted Components from Your New Protocol
- 5 Customize the Remaining Components for Telemedicine
- 6 Open the Component Builder to Begin Creating Custom Telemedicine Components
- 7 Create a Telemedicine Consent Component
- 8 Create a Vitals Notes Component
- 9 Add New Telemedicine Components to Your Protocol
- 10 Display Telemedicine Consent Check Boxes in Your New Protocol
- 11 Preview Your Finished Protocol
- 12 Adjust Clinician Auto-Notes for Your Telemedicine Sick Protocol
- 13 Map Your Telemedicine Sick Protocol to a Visit Reason
- 14 Customize Other Chart Note Protocols for Telemedicine
Create a Telemedicine Protocol for Sick Visits
Open Protocol Builder
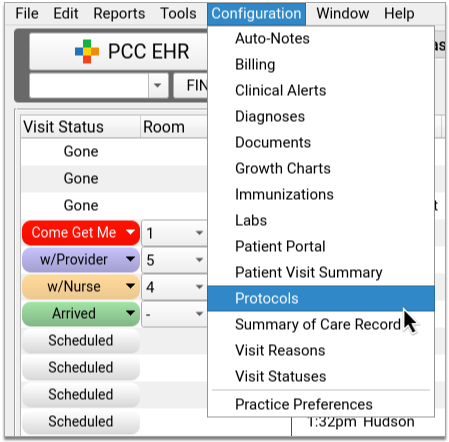
In the Configuration menu, select “Protocols” to open the Protocol Configuration tool. Then open the Protocol Builder.
Clone an Existing Sick Visit Protocol
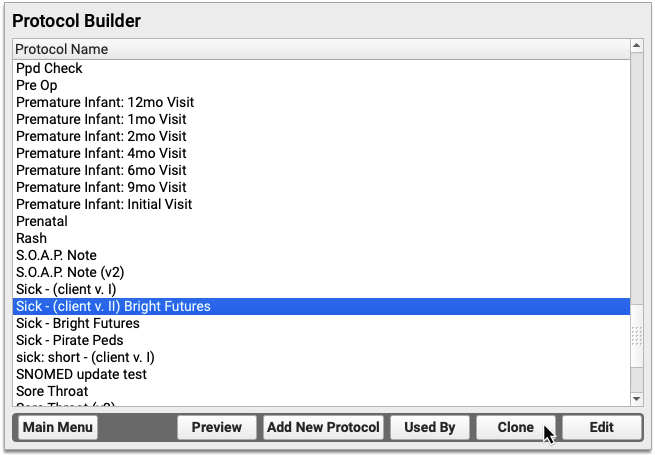
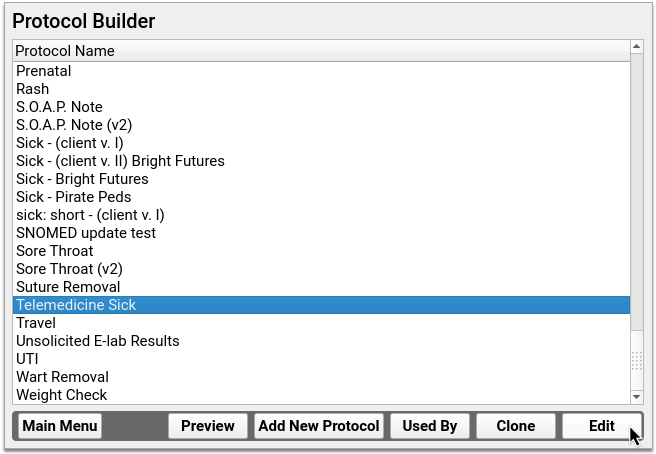
In the Protocol Builder, pick a sick visit protocol to use as a template for your new Telemedicine Sick protocol. Highlight your choice, then click “Clone”.
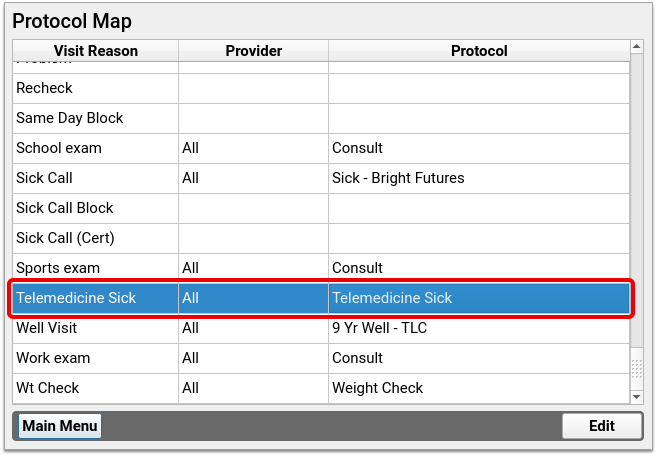
Choosing the Right Sick Protocol: If your practice has several sick visit protocols and you aren’t sure which one to choose, the Protocol Map tool can help you decide. The Protocol Map tool shows you how protocols are linked to the visit reasons your practice uses for scheduling. Use it to see which protocol most providers use to chart sick visits. Learn how to use the Protocol Map.
Name and Save Your New Protocol
Name your new protocol. Then click “Clone” to begin customizing its settings.
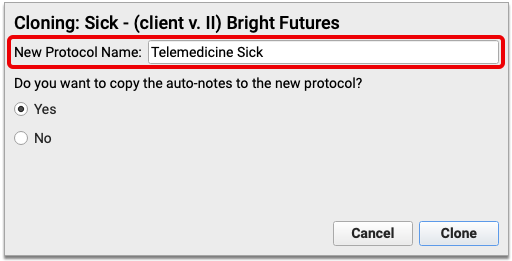
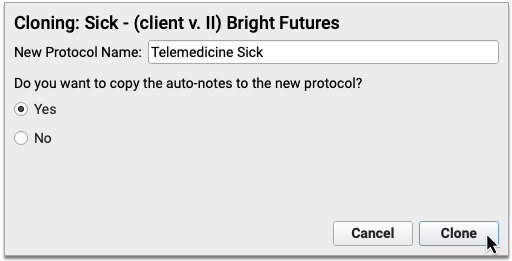
What About Auto-Notes?: If your practice relies on clinician auto-notes to chart sick visits, you can copy those auto-notes into your new protocol now. If you choose not to copy them now, they can also be added later. Choose “Yes” to copy auto-notes now, or “No” to skip this step. Any auto-notes you copy now will likely need to be adjusted later so that they are accurate in the context of a telemedicine encounter.
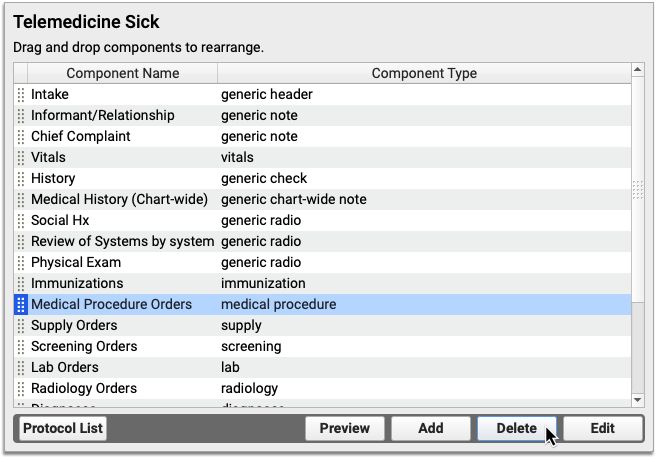
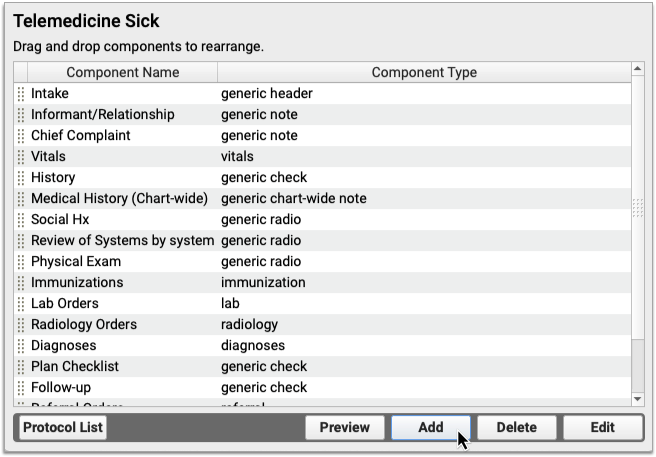
Remove Unwanted Components from Your New Protocol
Some components in your new protocol will not be useful for telemedicine encounters (e.g., Medical Procedure Orders). Highlight unwanted components and click “Delete” to remove them.

Will I Use Orders Components During Telemedicine Visits?
Yes! You might need to issue orders even though the patient you are seeing isn’t physically in your office. Here are a few components you might want to keep in your Telemedicine Sick protocol:
-
Immunizations: Keep the Immunizations component in your protocol for quick reference to your patient’s Immunization History and Immunization Forecasting details.
-
Lab Orders: Keep the Lab Orders component in case you want to order external lab tests during a telemedicine visit.
-
Radiology Orders: Keep the Radiology Orders component in case you decide to send a telemedicine patient to get an x-ray.
-
Follow-Up Orders: Use Follow-Up Orders to keep track of your what your patients need after their telemedicine visits.
-
Referral Orders: You might decide during a telemedicine visit that your patient needs to be seen by another provider. Use Referral Orders to document this decision in the patient’s chart.
Customize the Remaining Components for Telemedicine
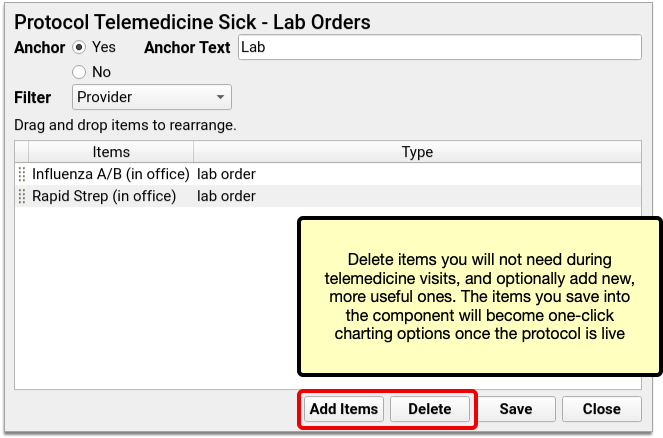
The components you kept in your new protocol will need to be customized for telemedicine.
Review each component by selecting it from the list and clicking the “Edit” button. Delete unwanted items or add new ones, then save your changes. The items you save into each component will become available for one-click charting once the protocol is live.
To learn more about customizing components inside a protocol, read Create and Edit a Protocol.
Open the Component Builder to Begin Creating Custom Telemedicine Components
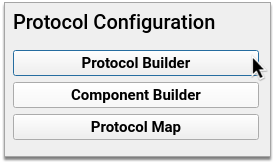
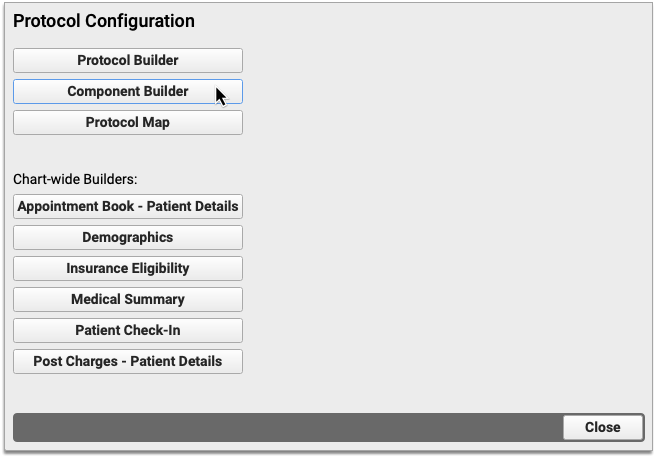
Use the Component Builder to create custom components for your new telemedicine protocol.
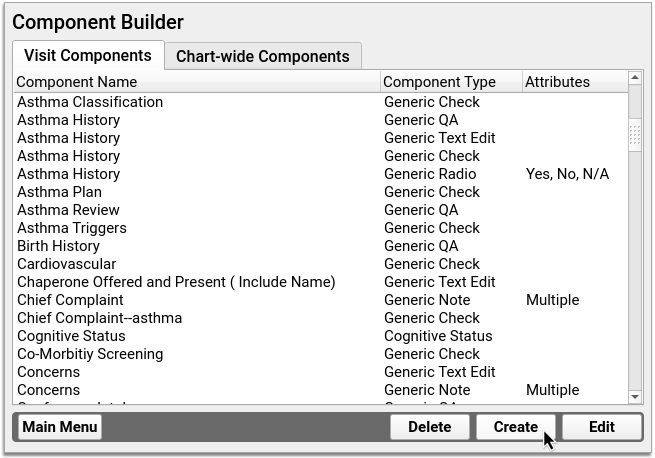
Open the Component Builder from the main Protocol Configuration menu.
Create a Telemedicine Consent Component
Create a custom check box component to chart patient and caregivers’ consent to telemedicine services.
On the Visit Components tab of the Component Builder, click “Create” to create a new component. Pick a name for your component (e.g., Telemedicine Consent) and set the component type to Generic Check. Click “Save”.
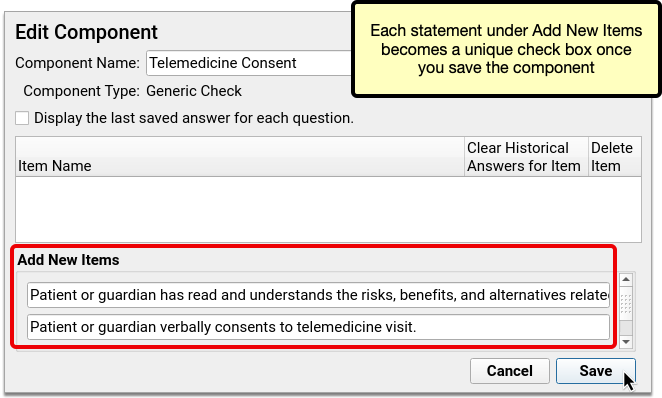
Create telemedicine consent statements in the fields under “Add New Items”. Each field becomes a unique check box once you save the component.

Click “Save” to finish creating your Telemedicine Consent component.
Sample Telemedicine Consent Statements
Your practice should share a telemedicine consent form with patients and families, and solicit verbal consent to telemedicine services during each visit. You should chart that at the top of the chart note.
Here are two sample telemedicine consent statements your practice could use as part of a consent form.
-
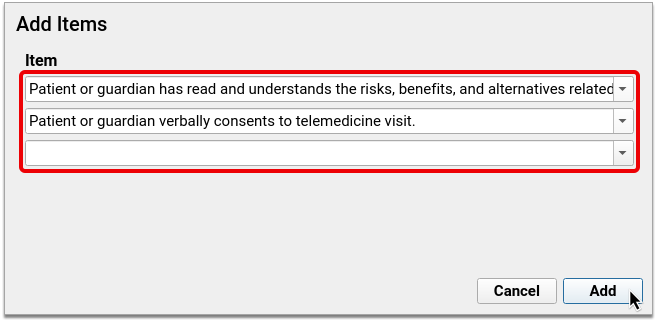
Acknowledgment of Telemedicine Consent Policy: “Patient or guardian has read and understands the risks, benefits, and alternatives related to a telemedicine visit at the time of booking appointment.”
-
Consent to Telemedicine Visit: “Patient or guardian verbally consents to telemedicine visit.”
State and Payer Requirements: Your state and insurance payers might require you to document certain kinds of consent information during telemedicine visits. Check with these entities to make sure you understand whether you are required to obtain special consent for telemedicine care, and how to document it in chart notes.
Create a Vitals Notes Component
Vitals might be reported by patients or caregivers during telemedicine visits. Create a Vitals Notes component to document how telemedicine vitals were collected, and by whom. The vitals themselves can be charted the usual way in PCC EHR’s built-in Vitals component.
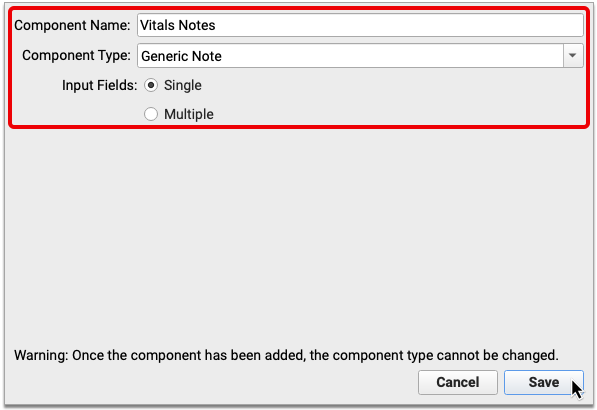
In Component Builder, make sure you are in the Visit Components tab. Click “Create”. Pick a name for your new component (e.g., Vitals Notes). Set the component type to Generic Note and the input field to Single. Click “Save”.

I Already Have a Vitals Notes Component: If your practice already has a Vitals Notes component, there is no need to create a new one from scratch. Repurpose the existing one for your Telemedicine Sick protocol.
Should I Chart Telemedicine Vitals in PCC EHR's Built-In Vitals Component?: If you want to calculate BMI and percentages, and see telemedicine vitals in Growth Charts and Flowsheets, chart them in PCC EHR’s built-in Vitals component. If you are concerned that telemedicine vitals are too inaccurate to be included in Growth Charts and Flowsheets, consider recording them in the Vitals Notes box instead. Vitals recorded in the notes box will appear in the final chart note, but will not be included in Growth Charts and Flowsheets.
Add New Telemedicine Components to Your Protocol
Return to the Protocol Builder and edit your Telemedicine Sick protocol.
Click “Add” to begin adding your new components to the protocol.
Select your telemedicine consent component from the drop-down. Once you do, a second, blank drop-down field will appear. Use that second drop-down to select your Vitals Notes component. If there is already a Vitals Notes component in your protocol, you will not be able to add it a second time.
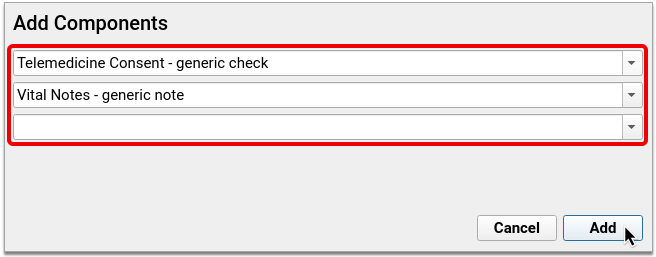
Click “Add” to finish adding the components to the protocol.
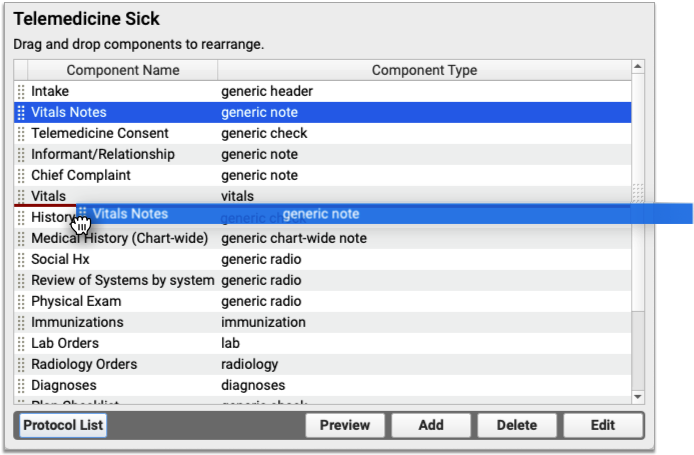
Once they have been added, click and drag the components to rearrange their sequence in the protocol.
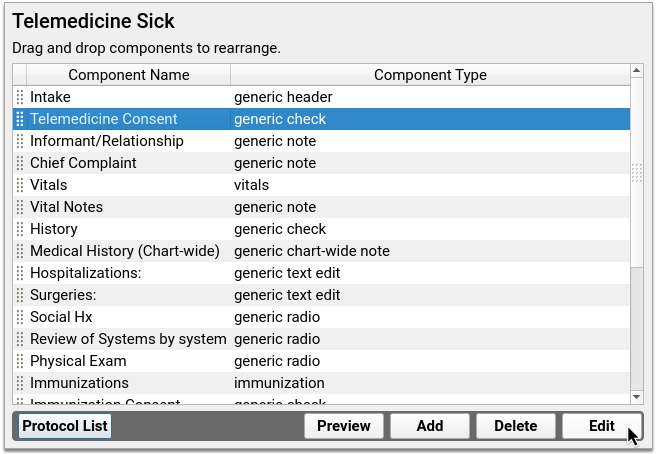
Display Telemedicine Consent Check Boxes in Your New Protocol
In the Telemedicine Sick protocol, highlight the Telemedicine Consent component and click “Edit”.
Click “Add Items”.
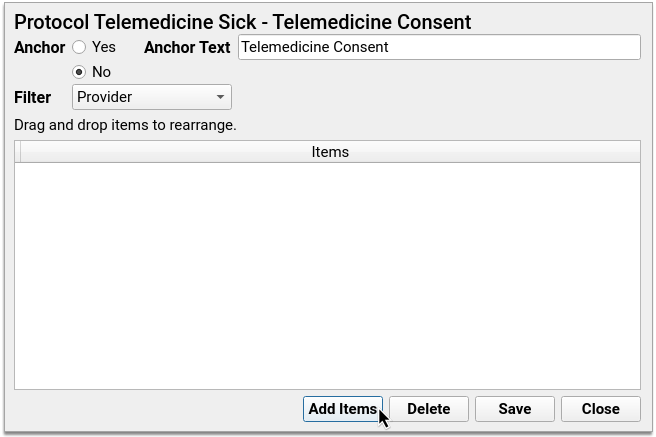
Click the drop-down arrow and select a consent statement. Once you do, another, blank drop-down field will appear. Use that blank field to select another consent statement. Repeat this until all consent statements have been added to the list.
Click “Save” to finish adding the items to the component, then save again to close the component.
Preview Your Finished Protocol
Click “Preview” to see what your protocol will look like once it is live.
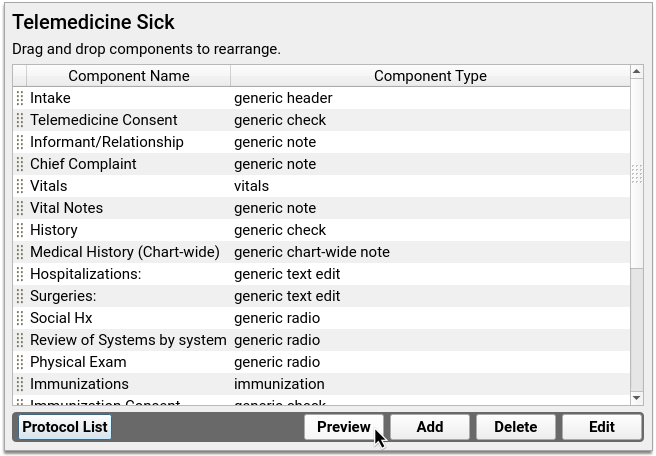
Test the look, flow, and function of components by clicking buttons, checking off boxes, and typing inside text fields. When you are done, click “Close” to exit the preview.
If you want to make more changes, do so now. Otherwise, close Protocol Configuration.
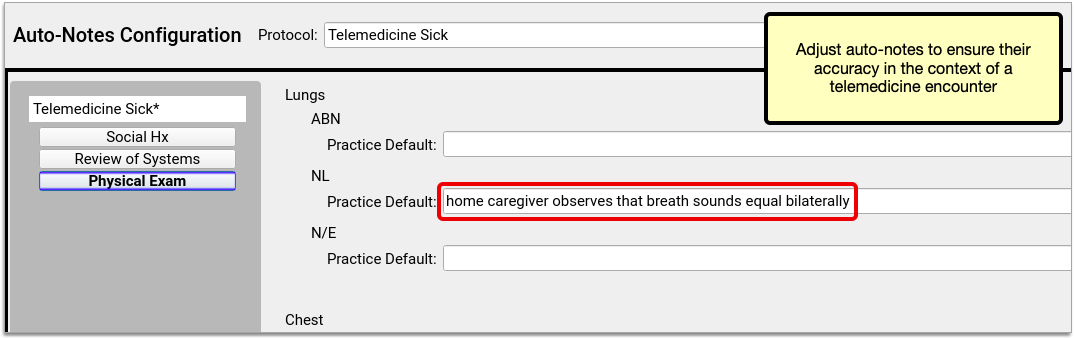
Adjust Clinician Auto-Notes for Your Telemedicine Sick Protocol
If you copied clinician auto-notes into your new protocol, you might need to adjust the statements so that they are accurate in the context of a telemedicine encounter.
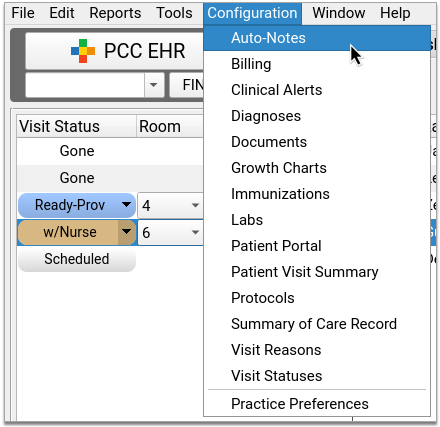
Open Auto-Notes from the Configuration menu.
Select “Telemedicine Sick” from the Protocol drop-down and select “Practice Defaults” from the User drop-down.

Review and edit the statements to make them accurate for telemedicine encounters. If an individual user at your practice has custom auto-notes set up for sick visits, switch the User drop-down to their name and adjust those statements too.
For an in-depth look at how to use and configure auto-notes, read Use Auto-Notes to Insert Your Standard Text in a Chart Note Field.
Map Your Telemedicine Sick Protocol to a Visit Reason
Use the Protocol Map tool inside Protocol Configuration to link your Telemedicine Sick protocol to telemedicine sick visit reason(s). Once linked, your new protocol will become the default chart note for appointments scheduled as telemedicine sick visits.
Learn how to use the Protocol Map.
Customize Other Chart Note Protocols for Telemedicine
Sick visits aren’t the only kind of appointment you see via telemedicine. Use the tips in this article to customize other types of chart note protocols for telemedicine too, such as ADHD follow-up protocols, well visit protocols, and more!