Securely Retrieve Clinical Documents from Hospitals and Other Providers
Watch a Video: Watch Clinical Document Exchange: The Initiator Role to learn how to configure your PCC system to submit requests and retrieve clinical documents.
Contents
Initiate a Query for Patient Records
If a new patient transfers to your practice, or if you know that an existing patient has received care at another healthcare facility, you can request and retrieve their records on demand within PCC EHR.
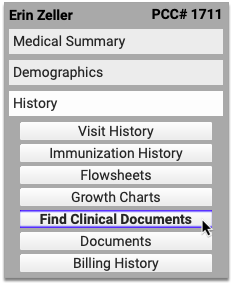
Open the patient’s chart and navigate to the History component. Click on “Find Clinical Documents”.
If the patient has default organizations configured, PCC EHR immediately begins querying them for records.

If the patient does not have default organizations configured, or you want to query organizations which are not part of the patient’s defaults, click the triangle beside the Healthcare Organizations to Query header.
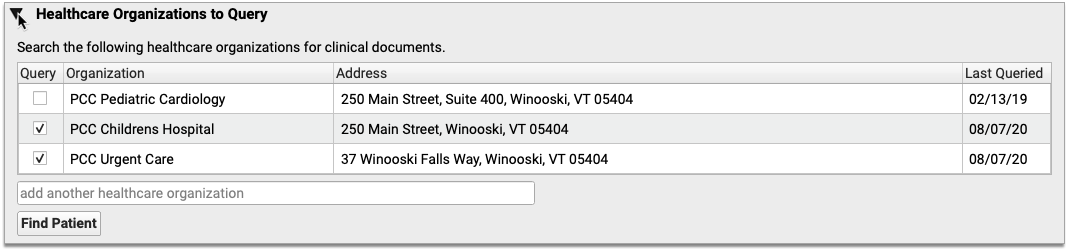
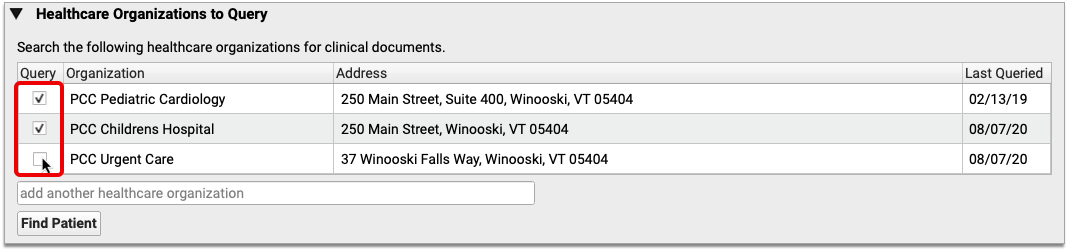
The triangle reveals a list of healthcare organizations that your office has historically queried for the patient. Check marks appear beside the patient’s default organizations.
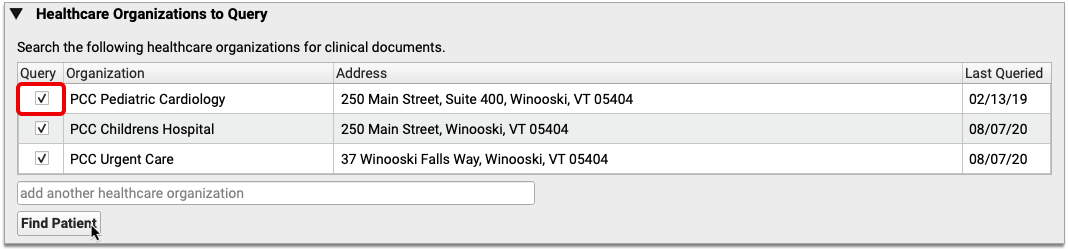
To query an organization that is on the patient’s list but is not a default, check the box beside it and click the “Find Patient” button.
If you want to query an organization that is not on the patient’s list, search for it by name or address and add it to the patient’s list.

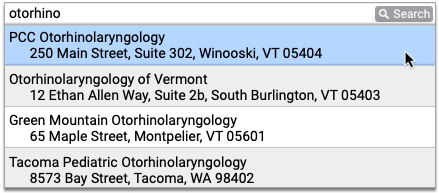
Search Results Only Show Organizations You Can Query: Search results include healthcare organizations that both match your search terms and have adopted the Carequality interoperability framework.
After you add the new organization to the patient’s list, click the “Find Patient” button.
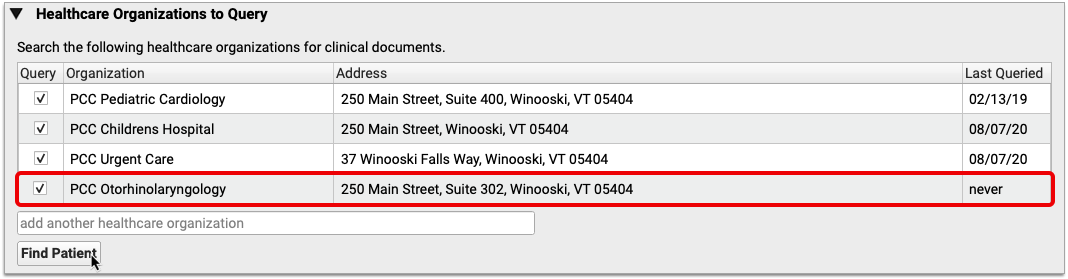
The “Find Patient” button initiates a query to all of the selected organizations for patients whose name, date of birth, and sex match yours. Each organization returns patient match results in its own table.
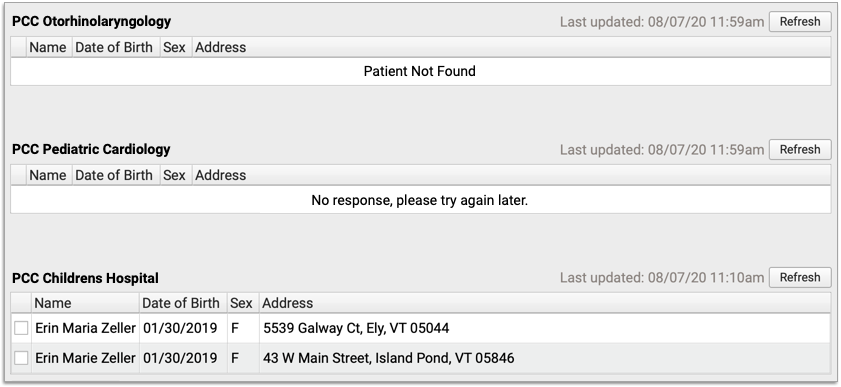
Patient Not Found: If an organization does not have any records that match your patient’s demographic criteria, the query will return a message that says “Patient Not Found”. If the request times out, you will receive a message that says “No response, please try again later.”
Select your patient from the query results, then click “Find Documents”.

Found documents display in a table beneath the organization and patient they are associated with.
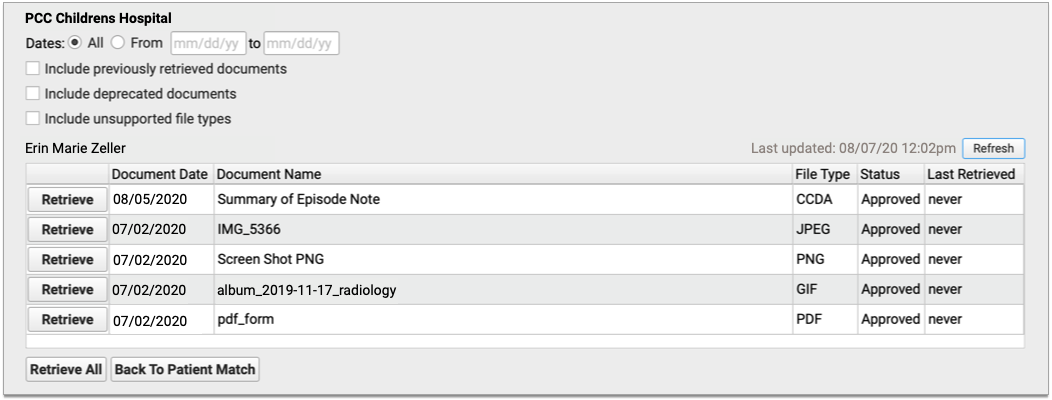
You can filter the list of found documents by date. You can also expand the results to include previously retrieved documents, deprecated documents, and documents are of an unsupported file type.
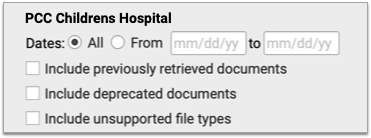
Deprecated Documents and Unsupported File Types: Deprecated documents are flagged by the source organization for being out of date. Unsupported file types are documents that cannot be retrieved and imported into PCC EHR due to their file format.
If you want to run the query again, click the “Refresh” button in the top-right corner of the results table. The time stamp in the top-right corner of each table shows the last time a query was performed.
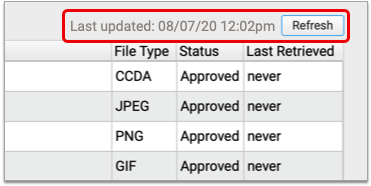
Query Results Remain Visible All Day: Clinical document queries persist on the Find Clinical Documents screen until 11:59 p.m. and can be seen and refreshed by all users who have query permissions. After midnight, the Find Clinical Documents screen clears its queries, leaving a blank slate for users who access it the next day.
View and Manage Retrieved Documents
Once you have determined that there is a document for your patient at a queried healthcare organization, you will need to import it in order to view its contents and save it to PCC EHR.
Click the “Retrieve” button beside the document you wish to import. If there are multiple documents and you want to import all of them, you can click the “Retrieve All” button beneath the table.
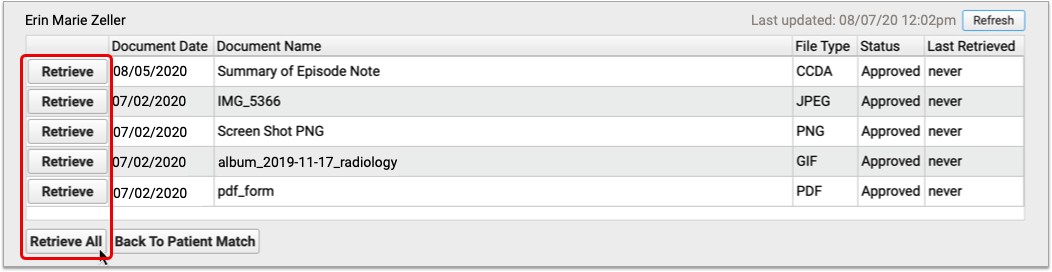
Wrong Patient? Try Again: If you realize at this point that you have requested documents for the wrong patient, you can cancel your search by clicking the “Back to Patient Match” button beneath the table.
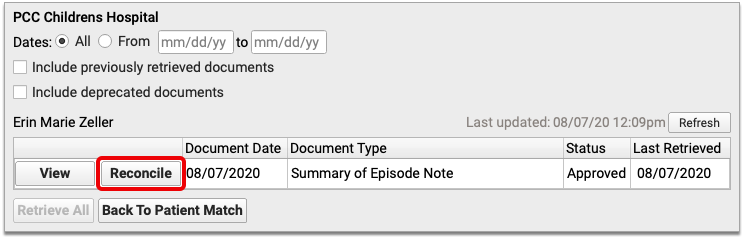
Once you retrieve documents, the “Retrieve” button is replaced by “View” and “Reconcile” buttons. The “View” button appears for all document types. The “Reconcile” button only appears for CCDA documents.

You can open a retrieved document by clicking the “View” button.

Once open in a Document Viewer window, you can see the document’s contents and other information about it, such as its title and source, the date it was last modified, and the name of the document category under which it is saved in the patient’s chart in PCC EHR. Retrieved documents are always saved into the Retrieved Documents category when you first import them.

Click the “Edit” button to modify the document’s title, re-assign it to a different category, attach it to a visit, send it to a provider for signing, share it to the patient portal, attach it to a portal message, annotate it, or create messaging tasks from it.

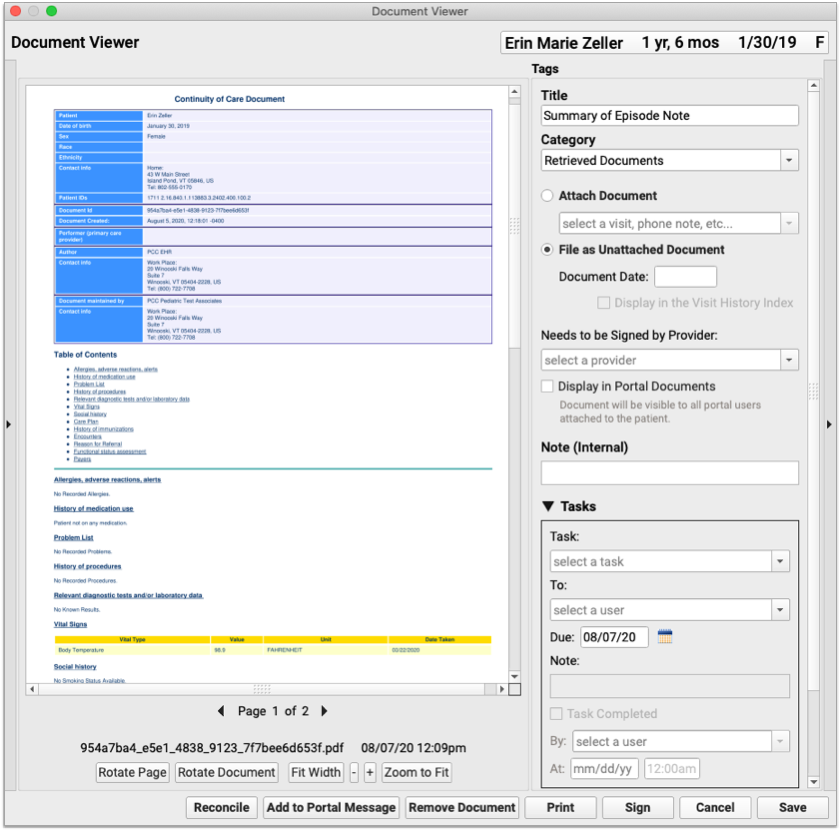
You can remove the document from the patient’s chart by clicking the “Remove Document” button.
Removed Documents Get Deleted Altogether from PCC EHR: Unlike other kinds of documents in PCC EHR which return to the Import Documents screen when you remove them from the patient’s chart, clinical documents retrieved from other healthcare organizations are deleted from your PCC system altogether when you click the “Remove Document” button. Documents deleted in error can usually be retrieved anew from the source organization, as long as the source organization has not deleted them.
You can find and edit retrieved documents anytime in the Documents section of the patient’s chart.
Reconcile Retrieved Documents
You can import Problems, Medication Allergies, and Medications from retrieved documents into your patient’s chart in PCC EHR.
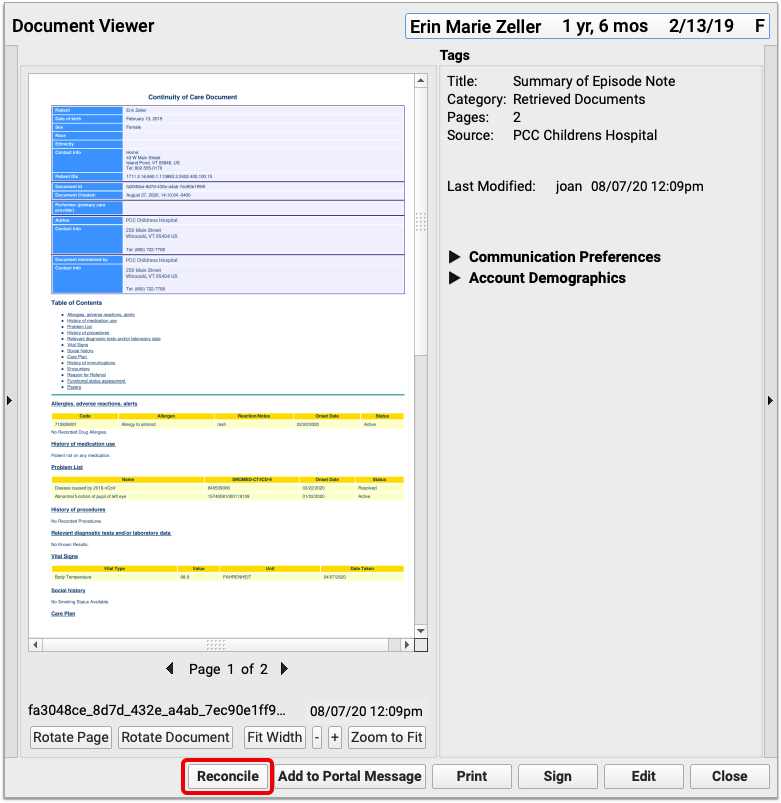
If you already have a retrieved document open in a Document Viewer window, click the “Reconcile” button to review and import its data.
You can also begin reconciling a document from the Find Clinical Documents screen within the History section of the patient’s chart, provided the document was retrieved the same day you are reconciling its contents.
The reconciliation window compares the Problems, Medication Allergies, and Medications in the retrieved document to those already in your patient’s chart. You can select which items, if any, you wish to import from the retrieved document.
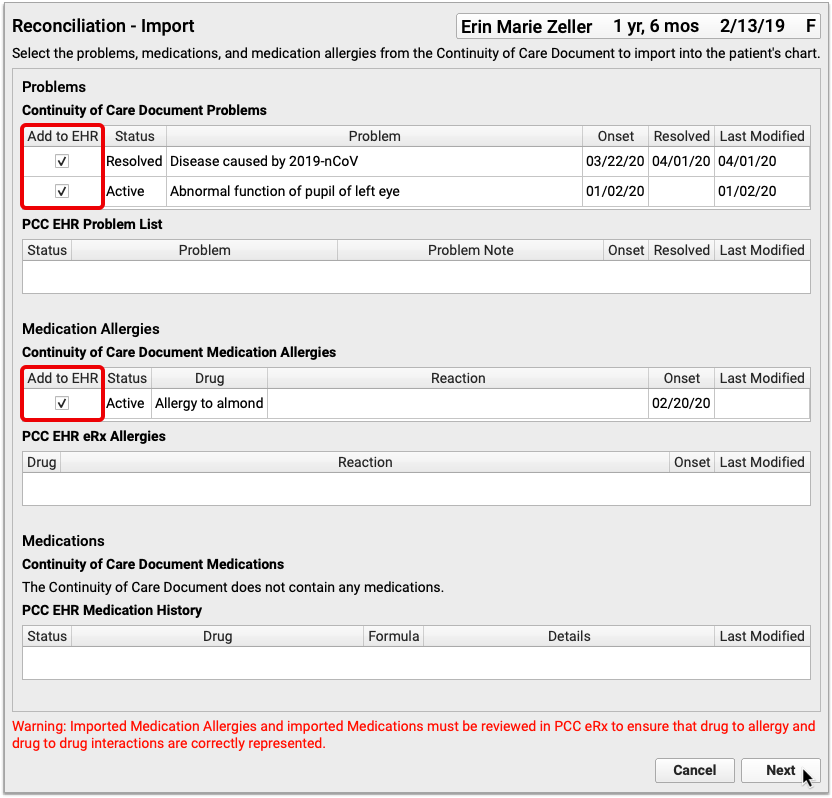
Once you have selected all of the items you wish to import, click the “Next” button.
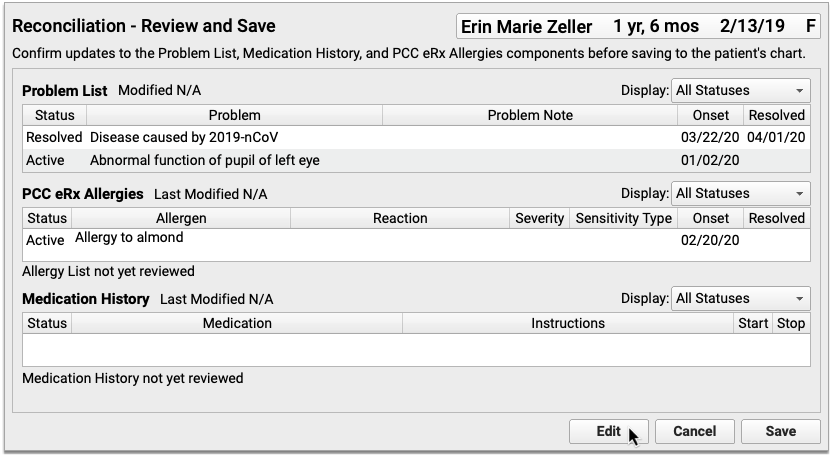
Review your changes. If you notice duplicate or outdated information in the preview, click “Edit” to make corrections.
The corrections you make in this window will be reflected in the patient’s chart once you complete the reconciliation.
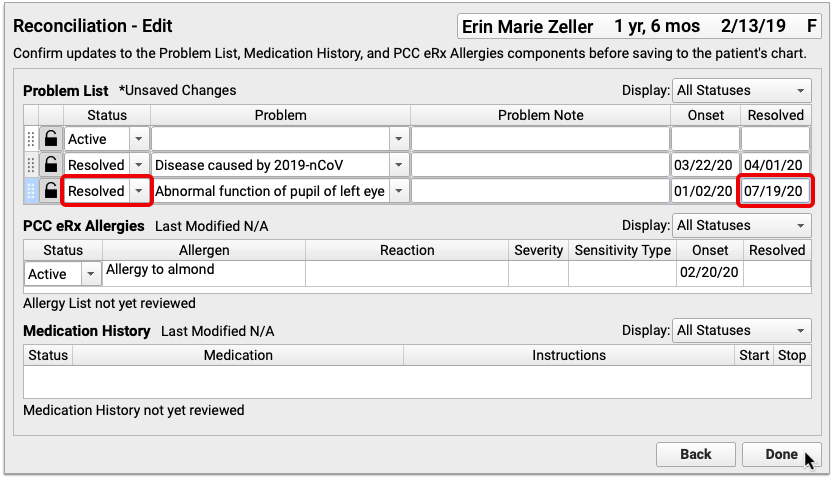
When you have finished making corrections, click “Done” to exit the editor. Then, click “Save” to finish reconciling the retrieved document.
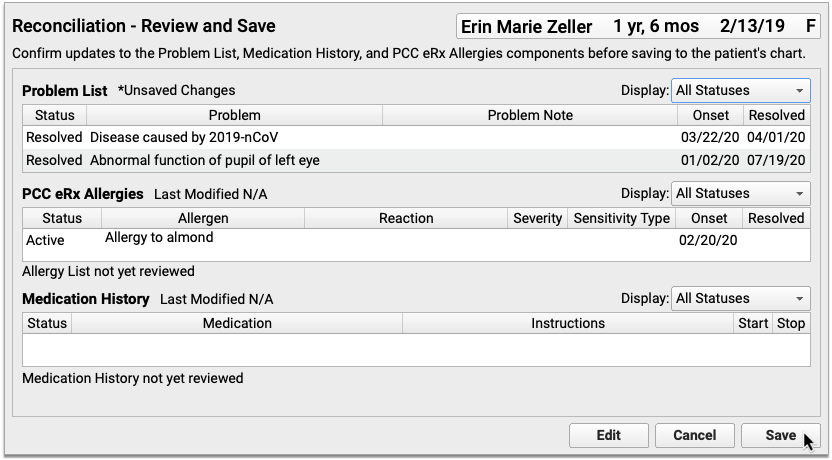
The patient’s Problem List, PCC eRx Allergies, and Medication History in PCC EHR will reflect the choices you made while reconciling the retrieved document.

Reconciled documents include a “Last Reconciled” date and user stamp.
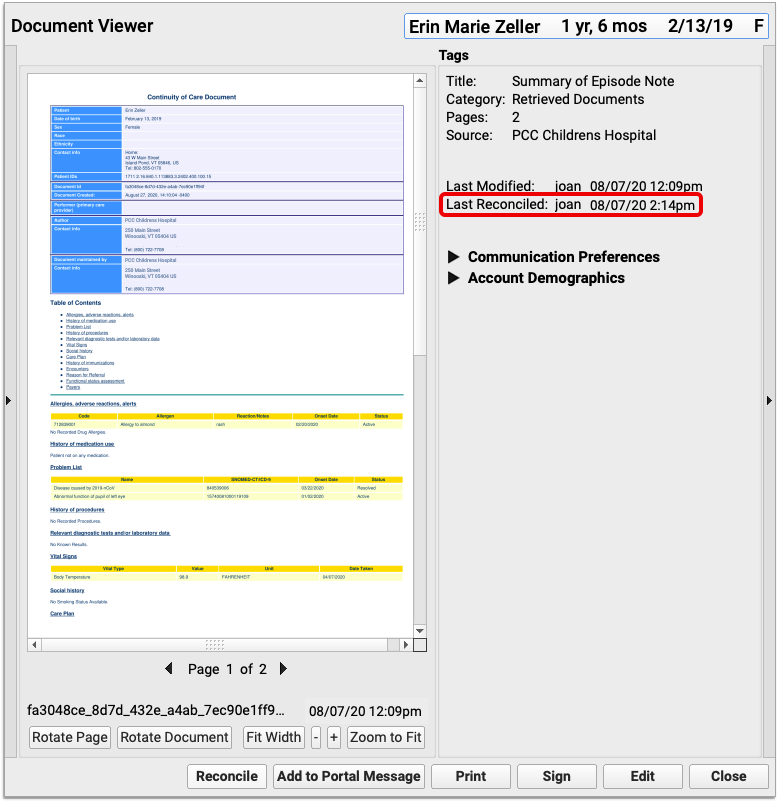
You can reconcile documents as many times as you need. The “Last Reconciled” date and user stamp updates each time a document is reconciled.
Manage Default Healthcare Organizations
You can set up default healthcare organizations for just one patient and for all patients at your practice.
Set Up Default Organizations for One Patient
You can manage a patient’s default healthcare organizations within the Find Clinical Documents section of their chart in PCC EHR.
On the Find Clinical Documents screen, click the triangle beside the Healthcare Organizations to Query header.
The triangle reveals organizations which have historically been queried for this patient.
Place a check mark beside organizations that should be queried by default for the patient, and uncheck those that should not.
You can add more organizations to the list using the “add another healthcare organization” search field.
As soon as you place a check mark beside an organization, it is considered a default for this patient. Default organizations are automatically queried when users open the Find Clinical Documents section of the patient’s chart.
Set Up Default Organizations for All Patients
If your practice frequently request records from a local hospital or urgent care clinic, and that organization has adopted the Carequality interoperability framework, you can set it up as a default healthcare organization to query for all of your patients.
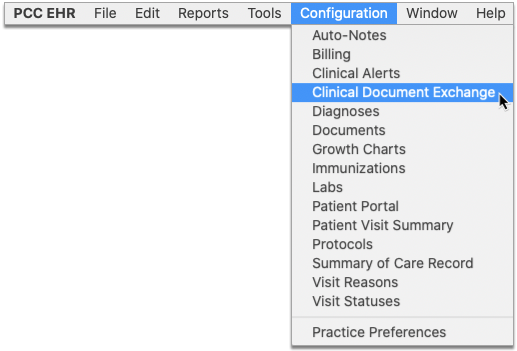
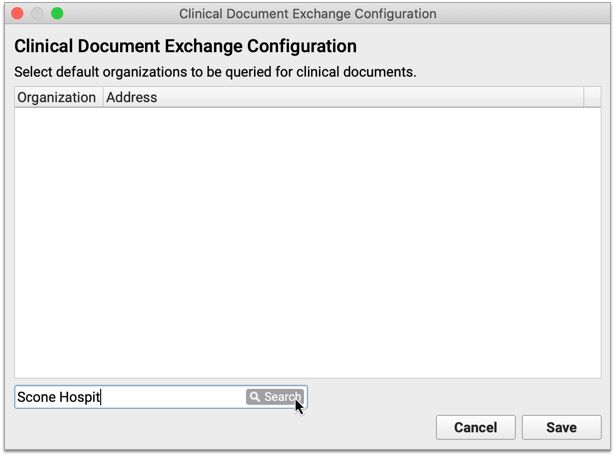
Click on the PCC EHR Configuration menu and select “Clinical Document Exchange”.
Use the search field to find a healthcare organization that you regularly request patient records from.
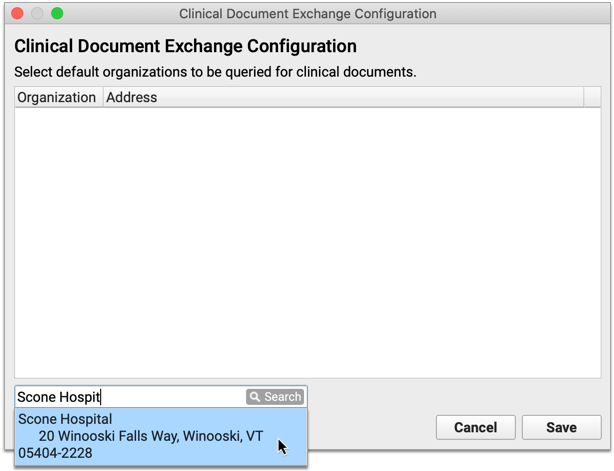
The search results include healthcare organizations that both match your search terms and have adopted the Carequality interoperability framework. Select an organization from the search results to add it to the list of healthcare organizations that should be queried by default for all patients.
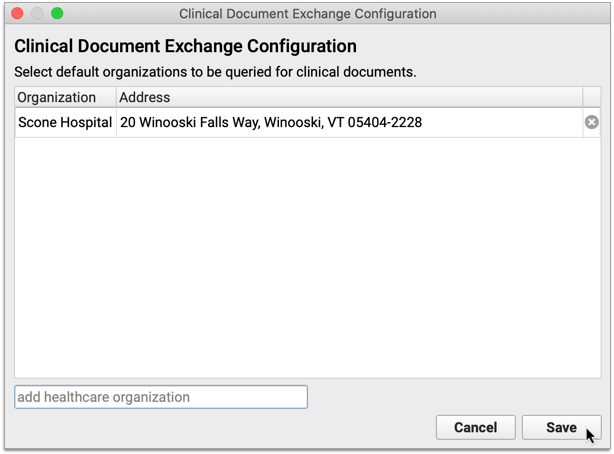
Repeat this process for as many organizations as you want to query by default for all patients. Click “Save” to save the configuration and close the window.
If an organization is no longer active with the Carequality network, an Inactive icon (red triangle with exclamation point) appears beside it in the Clinical Document Exchange configuration window.
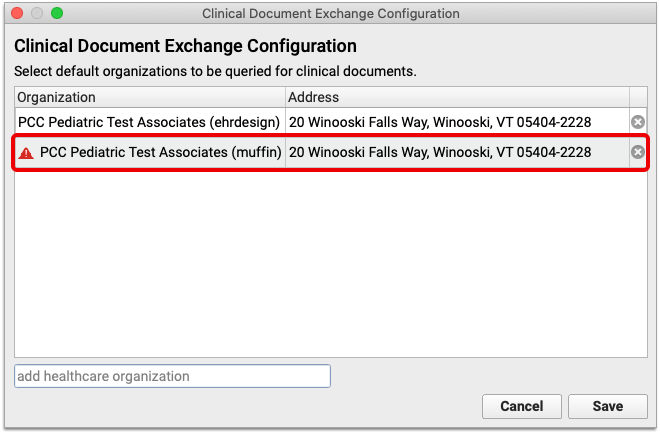
Inactive organizations are automatically hidden from patient charts, but they remain in the Clinical Document Exchange configuration list until you manually remove them by clicking the “x”.

Note: Sometimes organizations are marked inactive in the Carequality directory as the result of a name change or a change in ownership. Search for the new name of the organization to re-add it to your list of default organizations to query.
User Permissions
Allow Users to Retrieve Clinical Documents
Users require special permissions in order to query other healthcare organizations for patients’ clinical documents. Permissions are assigned on a per-user basis in PCC EHR.
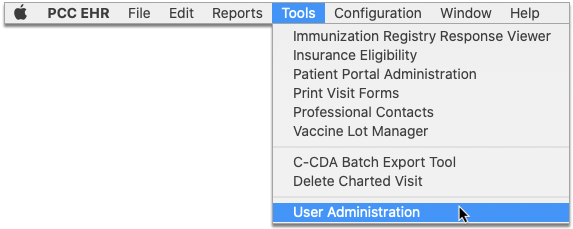
Open User Administration from the Tools menu in PCC EHR.
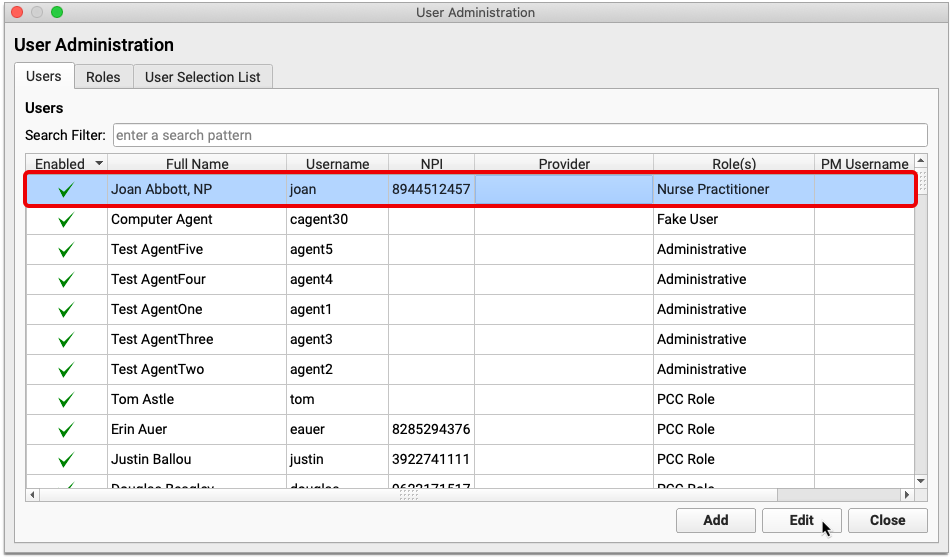
Select a user from the list and click the “Edit” button.
Under the “Clinical Document Exchange” header, check the box labeled “This user is allowed to query for clinical documents.”

Select a role for the user. The list of roles is defined by the Carequality interoperability framework and cannot be modified. Each user at your practice may only be assigned one role. Role assignment is required.
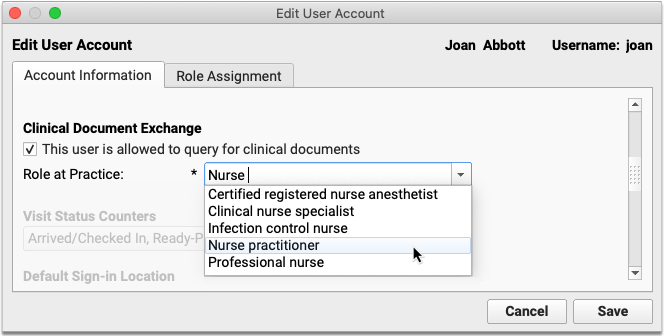
Once you have assigned permissions and a role to the user, click the “Save” button.
Repeat this process for all users at your practice who need to be able to query other healthcare organizations for patients’ clinical documents.
Users with Clinical Document Exchange permissions are able to see the “Find Clinical Documents” button within the History section of patient charts. The “Find Clinical Documents” button is hidden from users who do not have Clinical Document Exchange permissions.
Allow Users to Manage Practice-Wide Clinical Document Exchange Settings
Some users at your practice will require special permissions in order to manage your practice’s default healthcare organizations to query. These permissions are assigned on a per-role basis in PCC EHR.
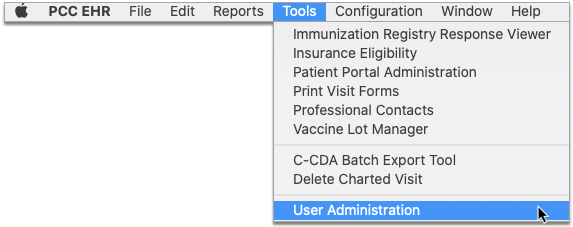
Open User Administration from the Tools menu in PCC EHR.
Click the “Roles” tab at the top of the window.
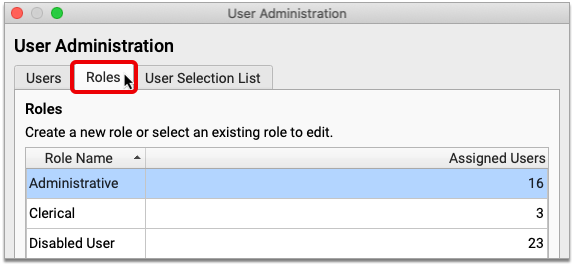
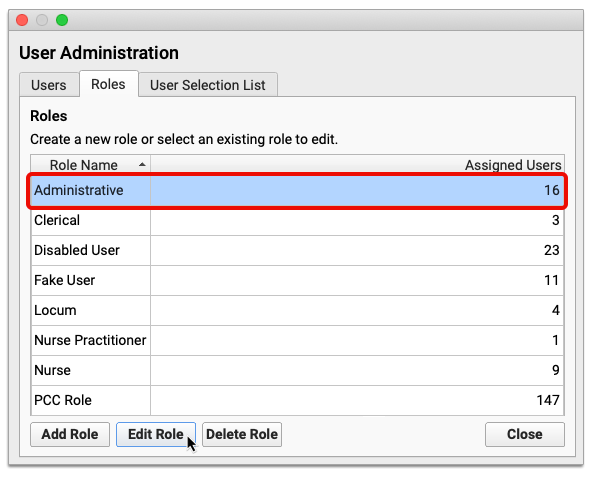
Select an existing role and click the “Edit Role” button.
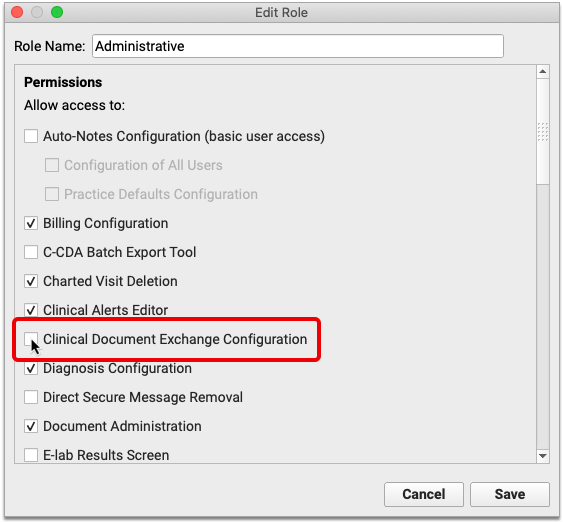
Check the box for “Clinical Document Exchange Configuration”, then click “Save”.
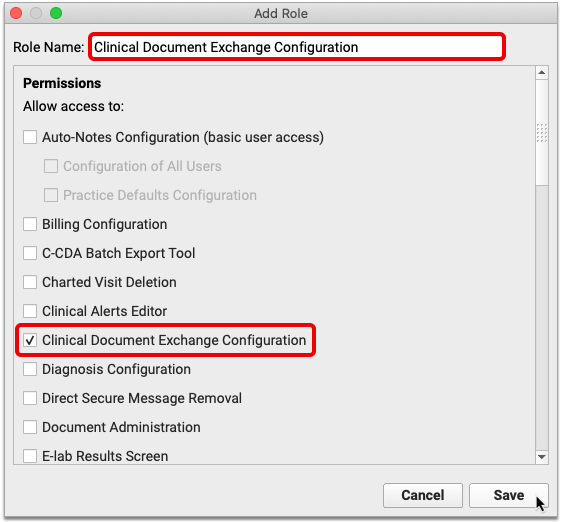
If you would rather create a new role to manage Clinical Document Exchange Configuration permissions, click “Add Role” instead of editing an existing one.
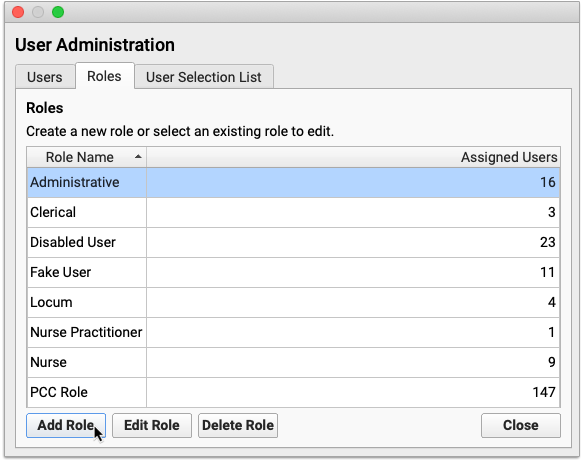
Name the role, check “Clinical Document Exchange Configuration”, then click the “Save” button.
Assign the new role to relevant users in PCC EHR.
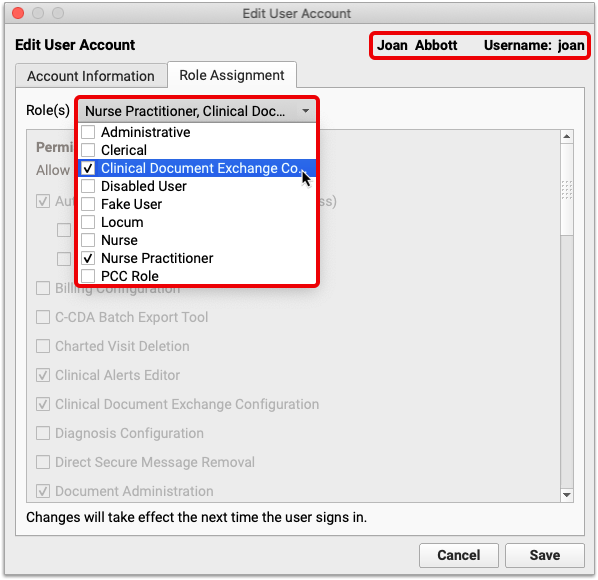
Users with Clinical Document Exchange Configuration permissions are able to manage your practice’s default healthcare organizations to query.
Close User Administration when you have finished assigning permissions. The new permissions will take effect the next time users log in to PCC EHR.