Installing Your Firewall
Contents
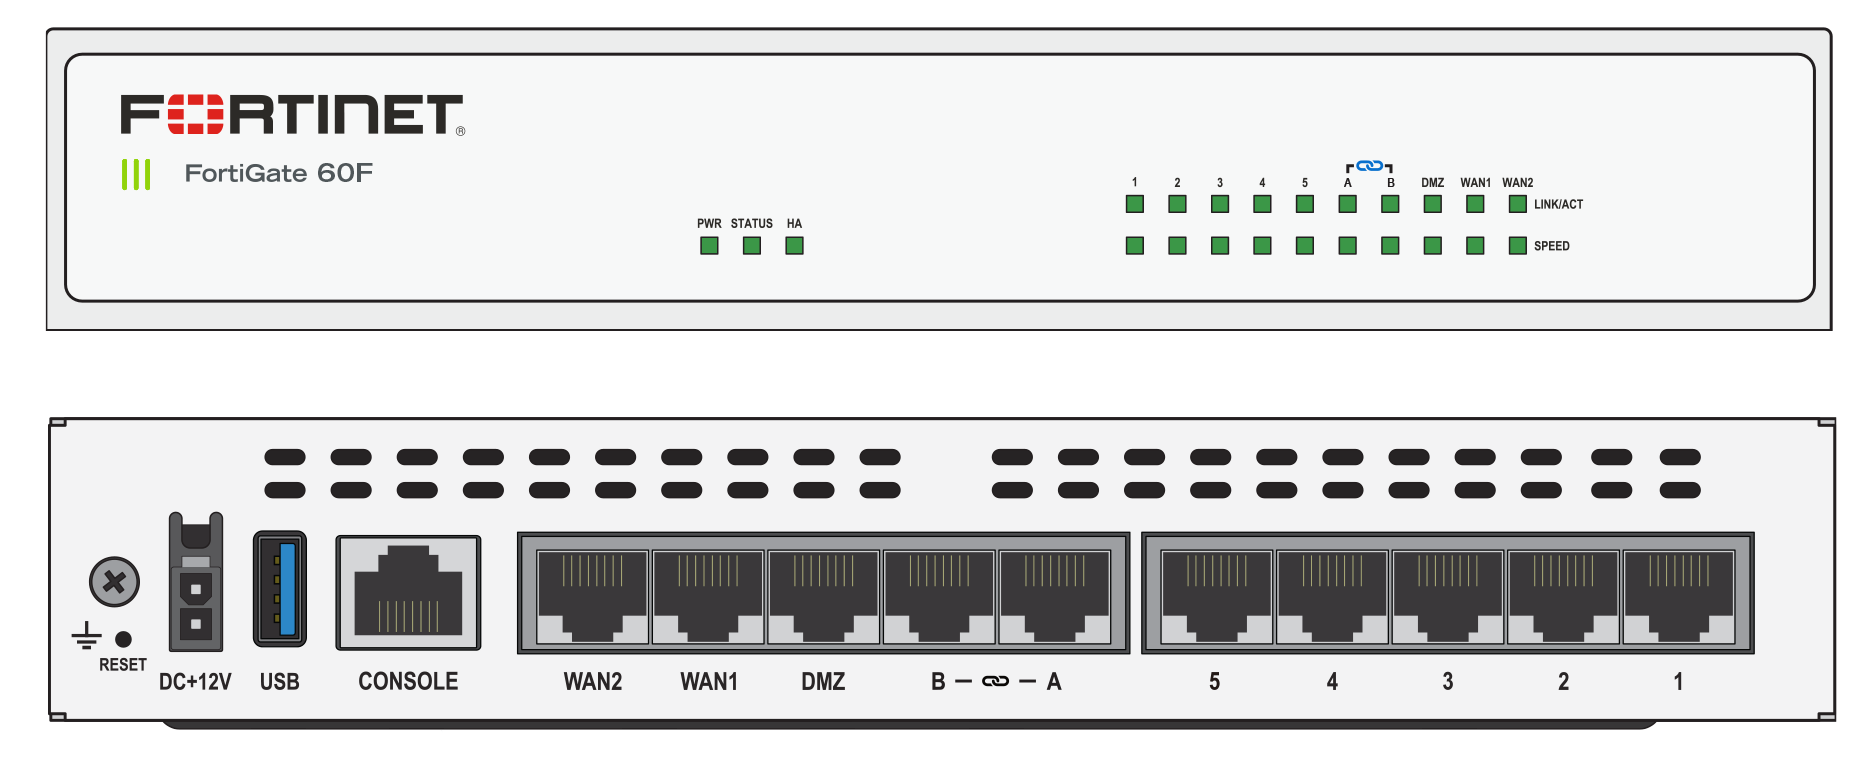
PCC uses a Fortinet Fortigate 60F (or related model) as a firewall in our clients’ offices to protect their networks.
Follow the instructions on this page to install your Fortigate firewall.
Follow the instructions on this page to install your Fortigate firewall.
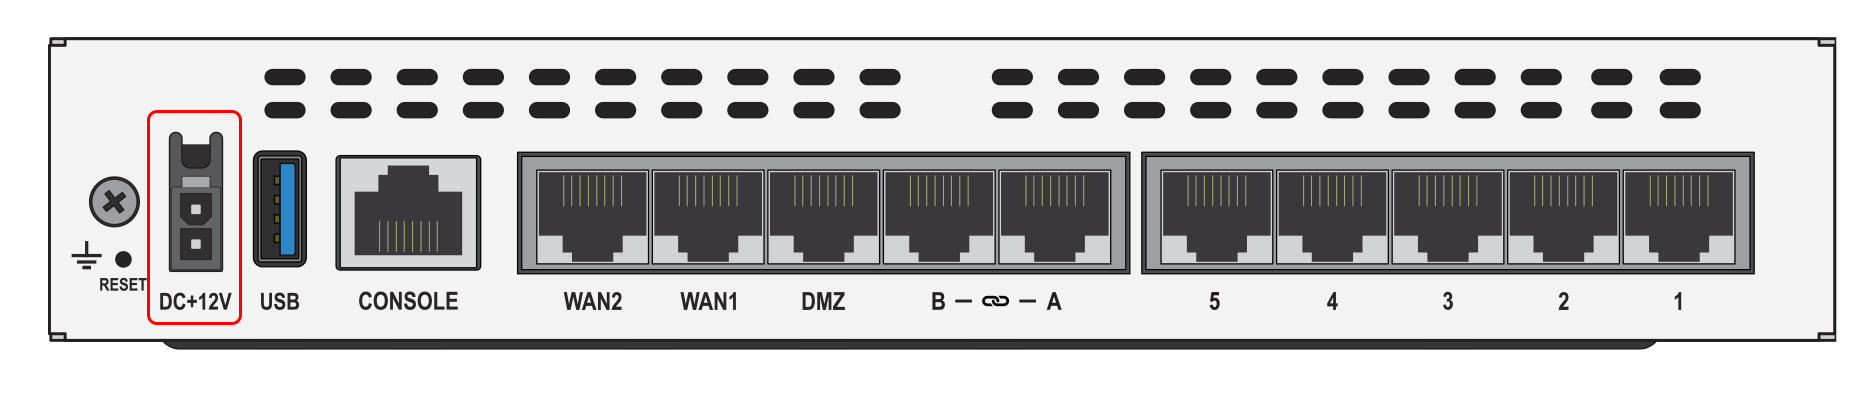
Connect Your Modem
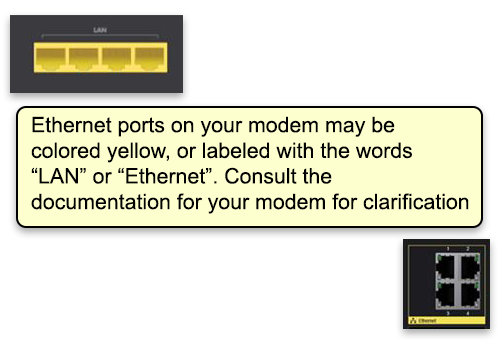
With the ethernet cable that came with your Fortigate firewall, connect your ISP’s modem to the “WAN1” port on the Fortigate.
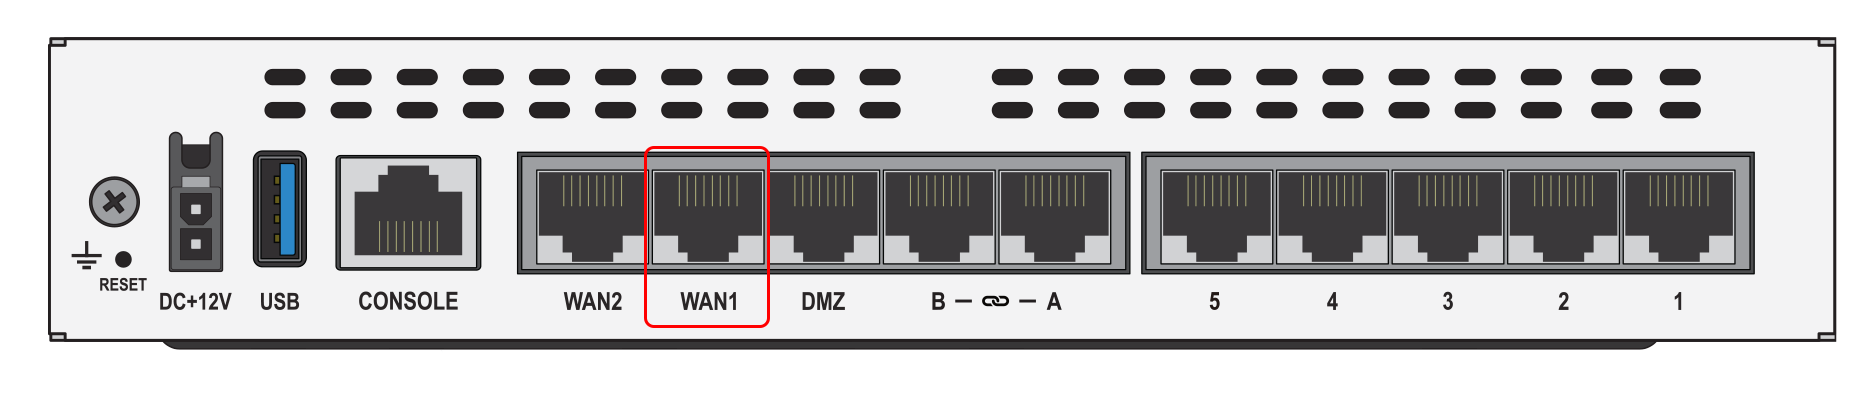
The ethernet ports on most modems are usually clearly labeled, but if you are unsure which port to use, contact your ISP.
Add Other Devices to Your Network
Now connect other networking equipment to the LAN ports on the back of the Fortigate. Use the ports labeled 1-5. All 5 of these ports are identical.
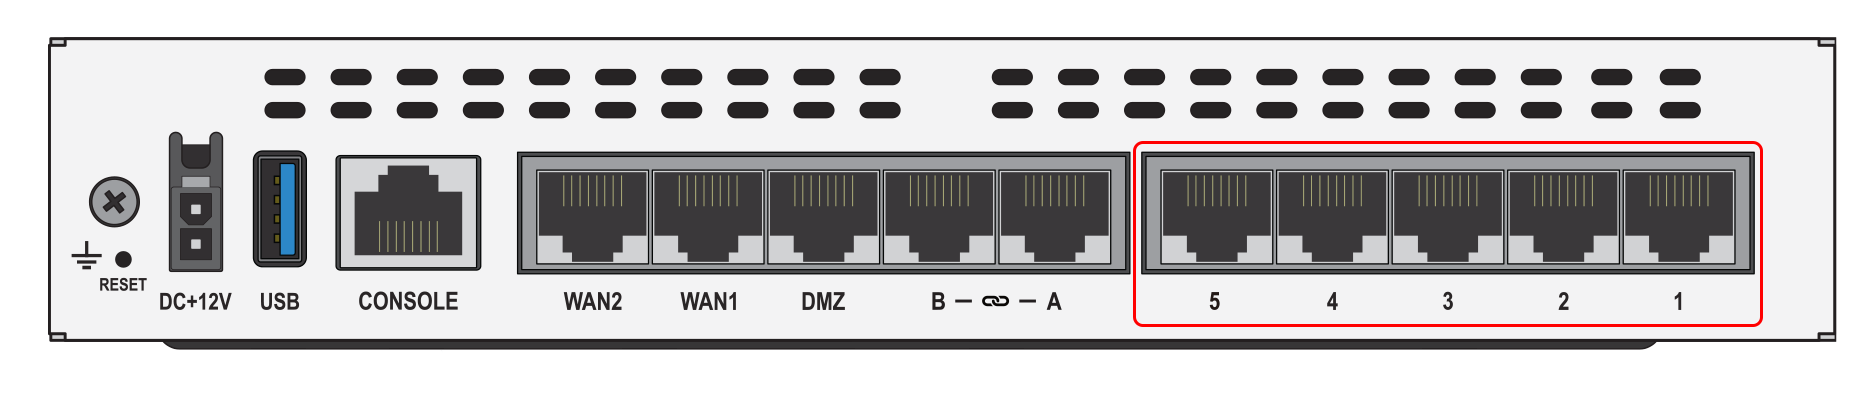
Ports A and B: Depending on your needs, PCC may have configured your router to also allow ports A and B to be used. Use these ports only if instructed to do so by PCC.
Connect Your Network Switch (optional)
Depending on the needs of your office, you may or may not use a network switch. If you use a switch, plug all devices, including the Fortigate, into the ports on the front of the switch. All ports work the same, and all ports communicate in both directions; you can plug any device into any port.

Connecting network devices via your network switch: If you are using a network switch, all the instructions below still apply. However, instead of plugging your other devices into your Fortigate firewall, plug them into your switch. The switch and your modem will be the only two devices connected to the Fortigate.
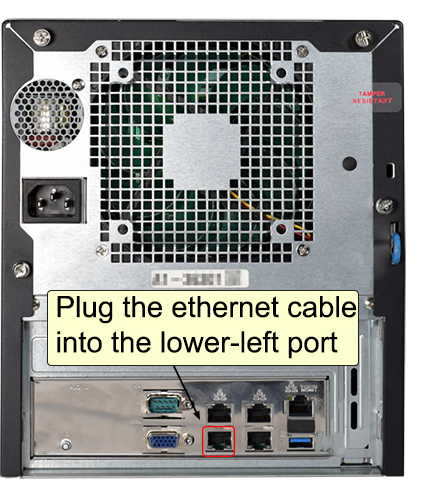
Connect Your Network Attached Storage
A Network attached storage (NAS) device is a RAID array of hard drives connected to your network that is used to store backups.
PCC is currently equipping our clients with the FreeNAS Mini E. To connect the Mini E to your firewall (or switch), use the lower-left ethernet port on the back of the Mini E.
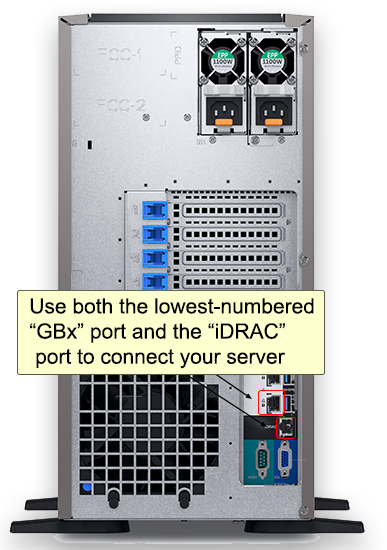
Connect Your Server
Your Dell server will need to be connected to your firewall (or switch) using two ethernet cables. Connect one using the “GB1” port, and the other using the “iDRAC” port.
Connect Wireless Access Points
Your wireless access points should already have been installed around your office by your local IT support. Connect them to free ports in your firewall (or switch).

Connect Your Fortigate Firewall to Power
Turn on your modem first: Your modem should be powered on before you plug in your firewall.
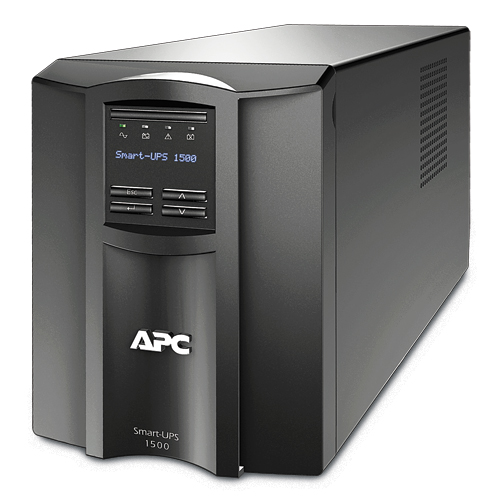
Connect the power supply to the back of the device and plug it into a UPS battery device.
Your UPS looks like this:
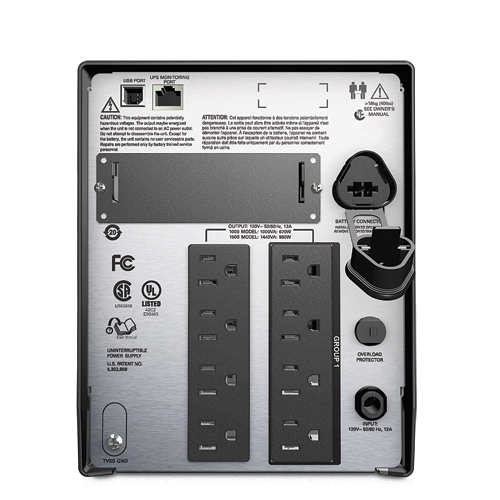
The “PWR” and “STATUS” indicators on the front of your Fortigate firewall should light up green if the cable is pluged in correctly.

Power cable clicks into place: The power supply connector has a locking tab that will click into place. You must press the tab if you want to remove the cable from the firewall for any reason.
Wait for Your Devices to Connect
Depending on how quickly you plugged everything in, the Fortigate firewall may still need time to start up before you can connect to the network. If after 5 minutes you are unable to connect, please contact PCC for assistance.
Call PCC for assistance: If you need assistance at any point in this process, PCC is here to help! Call PCC Support at 800.722.7708. If possible, have a photo of the back of your Internet modem and the back of the Fortigate firewall available.