Run Reports in the PCC EHR Report Library
The Report Library in PCC EHR is a suite of reports designed to give you access to information about your practice.
Contents
Run a Report
To run a report in the Report Library, select your report, set your criteria, and view the report results.
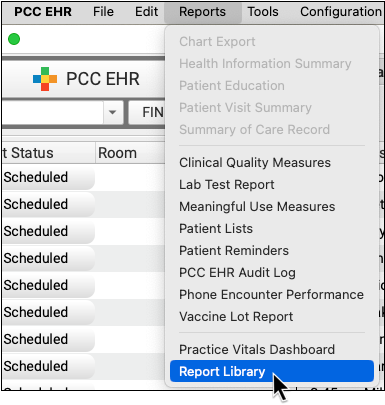
Open Report Library
Open the Report Library from the Reports menu in PCC EHR.
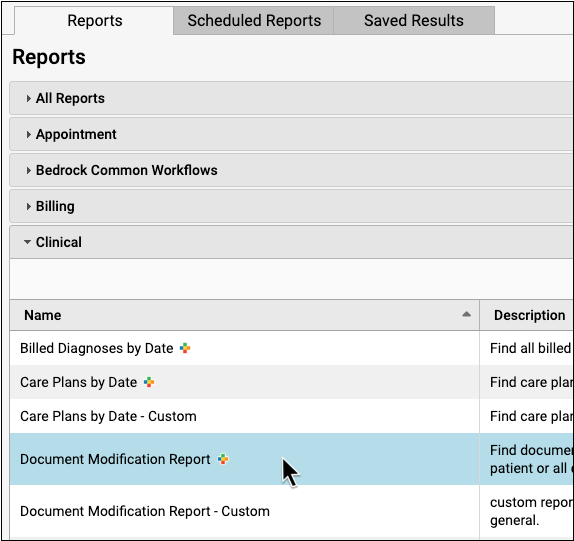
Open a Report
Click on a row to open a report.
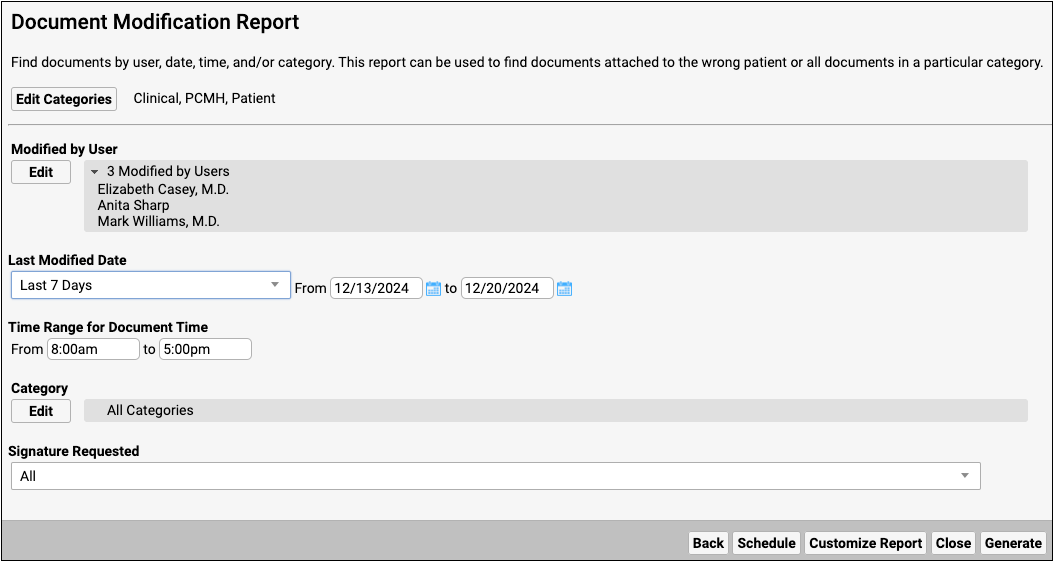
Set Report Criteria
Pick your desired date range and set other criteria.
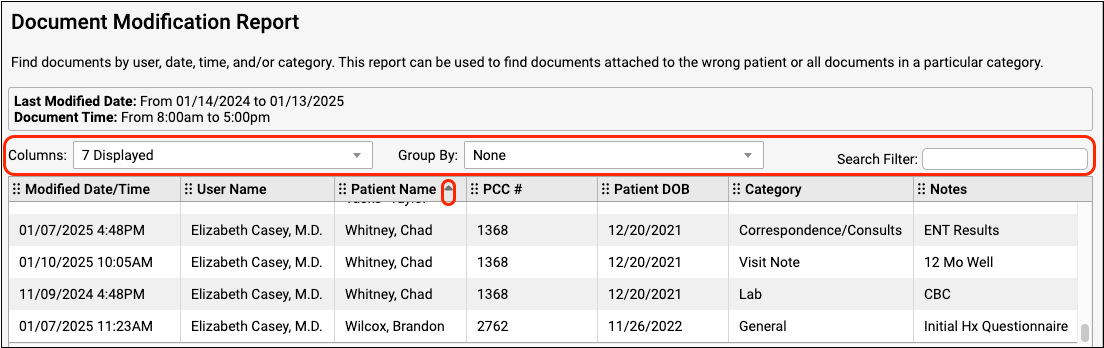
View the Report Results
Click “View Results” to run the report.

Review and Adjust Output
As you review report results, you can choose which columns to display. You can also sort and arrange results.
For more information on working with your report output, read Adjust Report Output.
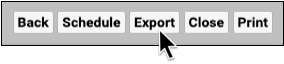
Export or Print
Export or print your report results.
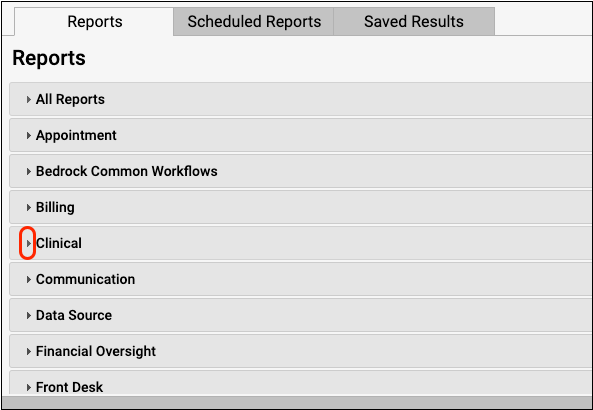
Work with Report Categories and Locate Reports
The Report Library organizes reports into categories that are accessible to users with specific roles.
Review Category Contents
Categories are nested lists of reports organized by their use. Reports can appear in more than one category. Select a category and click the disclosure triangle to browse.
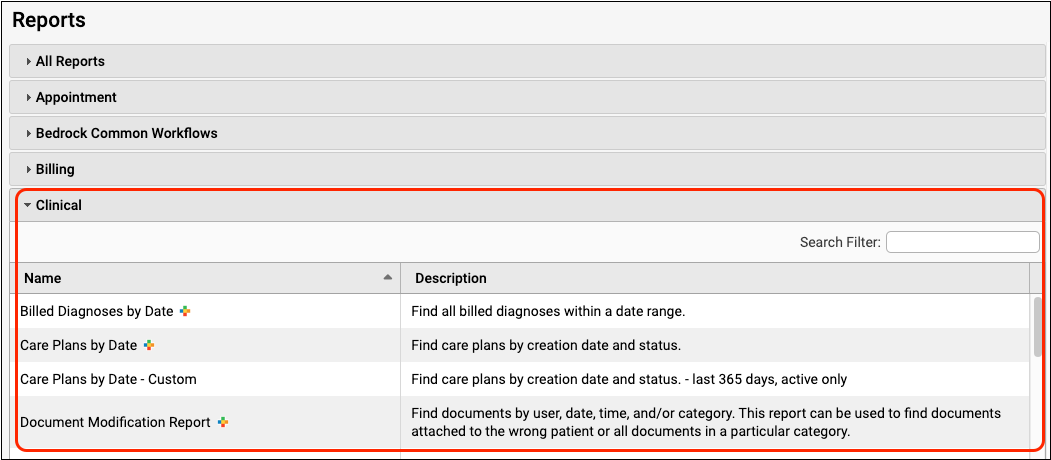
A colorful icon marks PCC’s built-in reports.
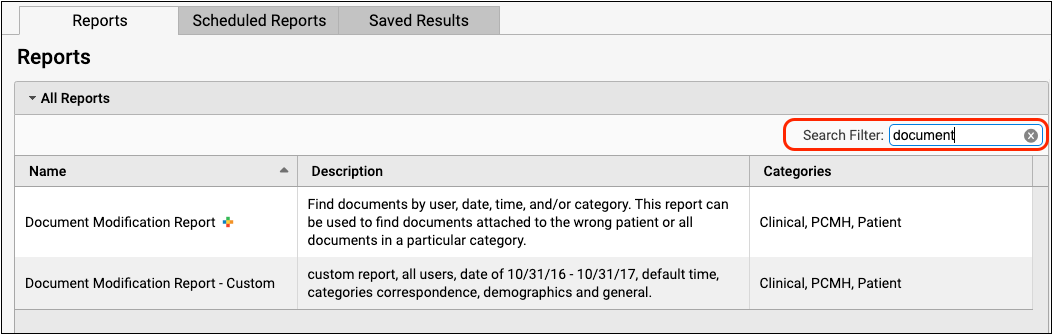
Search Categories
Use the Search field in any category to find a specific report by name or description.
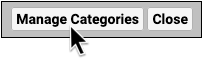
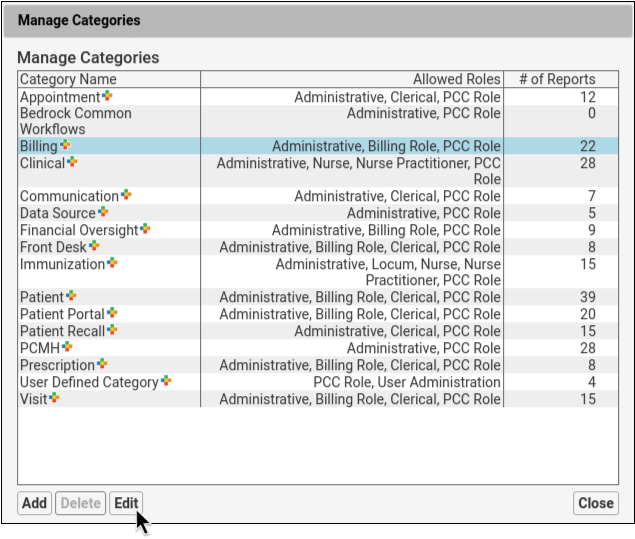
Manage Category Permissions
You can control which users have access to specific report categories by adjusting roles in the User Administration tool and by managing categories in the Report Library. To learn more, visit Restrict Access to Reports in the PCC EHR Report Library.
Special Categories
The All Reports category contains a list of all the reports in PCC EHR’s Report Library.
The Data Source category includes a number of built-in reports. These reports contain all the criteria available for a given set of data. For example, the Patient List report is equipped with all the account, demographic, scheduling, clinical, and billing criteria you might need to generate a specific list of patients. Data Source reports are often used as a starting point for custom reports or for isolating a very specific data set.
Choose Report Criteria
Report criteria, such as Provider and Location, define which information appears on a report. Selected report criteria will be included in the report output. Once generated, you can select which included criteria to display on the report. See the Adjust Report Output section of this article for more information on working with the report output.
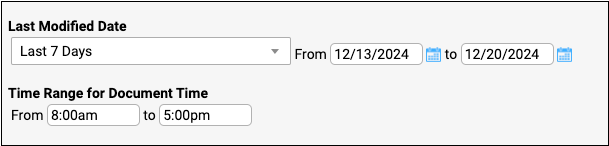
Pick Date Ranges
You can select a period of time from the Last Modified Date drop-down, enter dates manually in any free-text date field, or use the calendar icon when displayed.
Some financial reports run by transaction date or posting date.
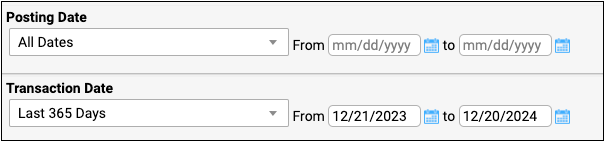
Posting Date: Posting date for both payments and charges is the date that information was entered into PCC. Some financial reports allow for sorting by posting date, available during customization. However, PCC recommends running financial reports by transaction date, rather than posting date.
Transaction Date: Transaction date is the date found on the check, EOB, or ERA. Transaction date is the most common default date range for PCC’s financial reports. Both payments and charges have transaction dates.
- The payment transaction Date is the date found on the check, EOB, or ERA.
- The charge transaction date is the Date of Service (DOS). This is the date on which the patient received care.
Include Criteria
Report criteria limit the data displayed in the report output.
You may wish to include by specific criteria when reporting on a narrow data set. When you select criteria such as Provider, Clinical Diagnosis, Location, or Include by Procedure, only the data that matches your selections will appear on the report output.

For example, if only one appointment reason is selected for inclusion, then the report will only display results for that one appointment reason.
Each criteria selection for inclusion builds on the previous selections. For example, if you include patient flags in addition to including account flags, the resulting output will display only results that contain any of the selected patient flags and also any of the selected account flags.
Exclude Criteria
You can exclude criteria to remove related results from your report. This is most useful when you are reporting on a wide data set but need to remove certain criteria, such as specific flags or procedures.
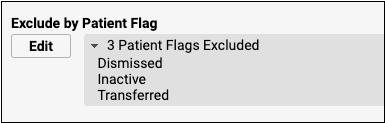
For example, if three patient flags are set to be excluded, patients with the selected flags will not display in your report output.
Each criteria selection for exclusion builds on the previous selections. For example, if you exclude patient flags in addition to excluding account flags, the resulting output will display only the results that contain none of the selected patient flags and also none of the selected account flags.
Example: Select Criteria to Report on Asthma Patients with a Flovent Prescription
To build a report of patients with specific diagnoses, use the Clinical Diagnosis field and include your chosen diagnoses.
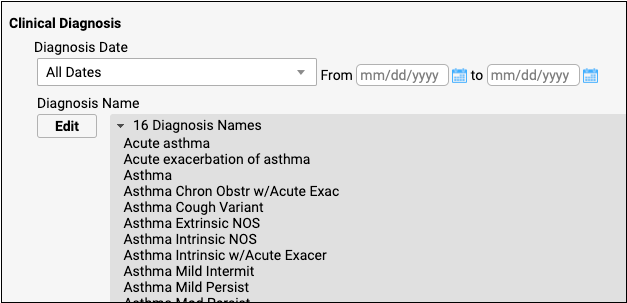
Your output will be a list of only the patients with these diagnoses.
To report on a subset of patients with the above diagnoses who also take a certain prescription, keep the diagnoses selected and then select a drug name from the Include by Prescriptions drop-down.
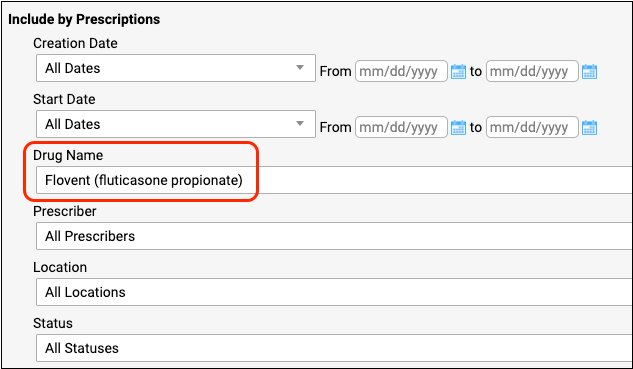
Your output will show only the patient population with the selected diagnoses who also take the selected prescription. Patients with the same diagnoses who take a different prescription will not display on the report.
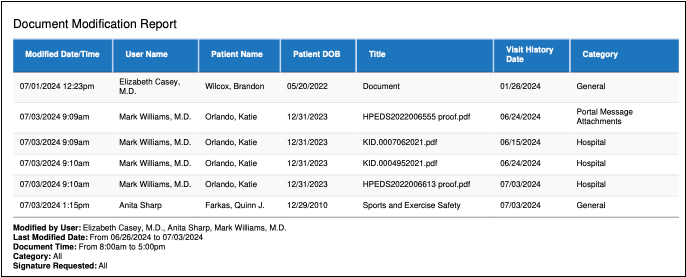
After you click “View Results” for a report, the results appear on the screen. Your report criteria appear above the report output, in the report criteria summary.
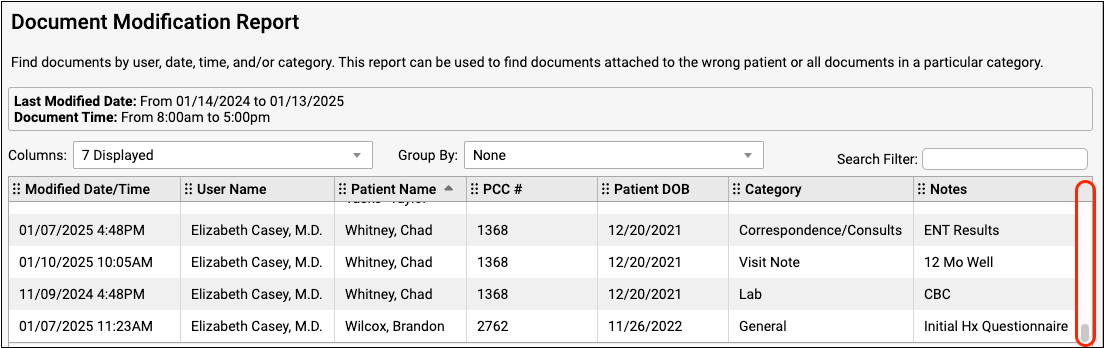
You can scroll through report data with your mouse or with the scroll bars on the far right of the screen.
The navigation buttons below the report allow you to navigate within, and close, the Report Library window.

- The Back button takes you to the previous screen so that you can select different report criteria and view the report results again. PCC EHR will remember your most recent criteria choices while you work with the report.
- To return to the Report Library home screen with the full list of reports, click the “Report Library” button.
You can use the Search Filter in the report to find specific information within the data.
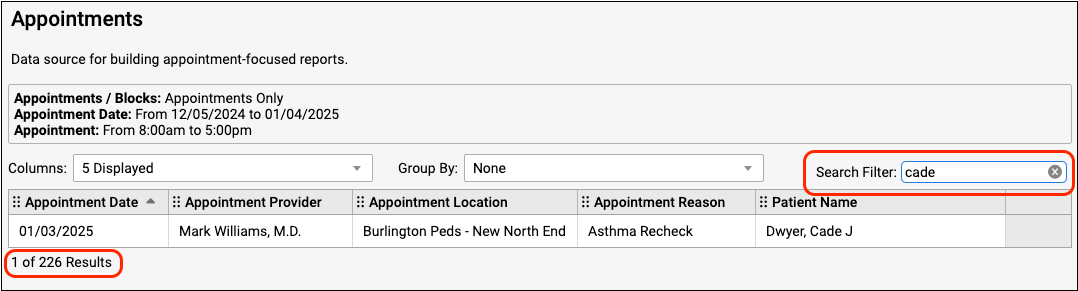
The results will display in the body of the report as you enter characters in the Search Filter. A tally of your search results out of the total displays below the search results.
20,000 Row Limit: Exports from the report output (View Results screen) in the Report Library are currently limited to 20,000 rows. If your output appears to be exactly 20,000 rows long, it may not contain all of the information that you are looking for. If this occurs, return to the report configuration screen and click “Export Report” to get your full report. Read the Export a Report section below to learn more.
Adjust Report Output
You can organize your report output to display the information most relevant to your needs.
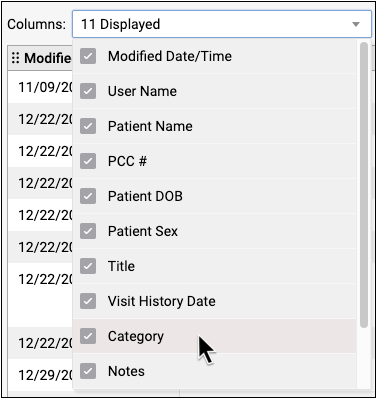
Arrange, Hide, or Show Columns
The criteria that you selected while creating your report will be included in the report output, but may not display automatically. Use the Columns drop-down in the report output to select which columns to display.
To move a column, click and hold the column header to select it, then move it to the desired location and release.

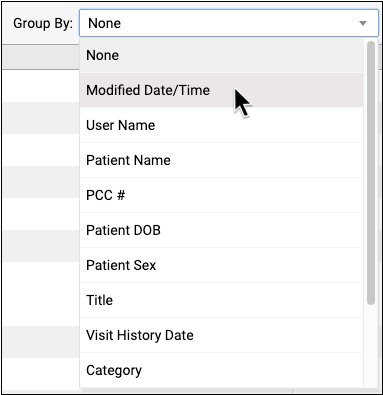
Group and Subtotal Report Output
Select “Group By” to sort your output into subgroups.
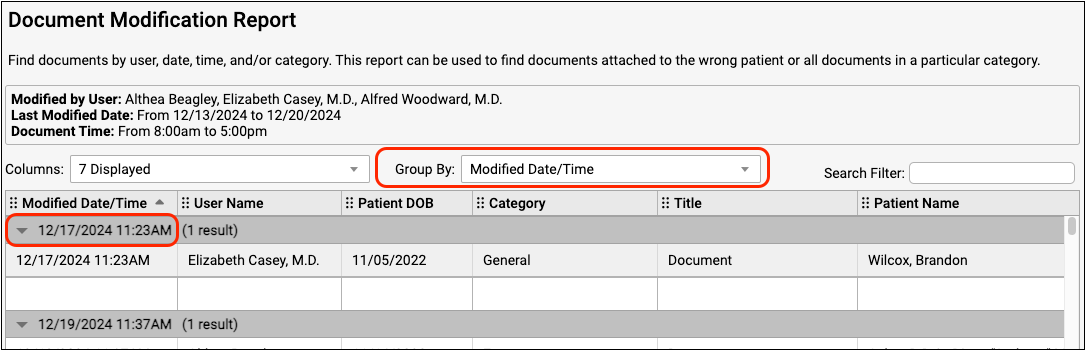
Some financial reports use aggregate data. You can organize this data for your practice by including columns during report customization and then grouping the report output.
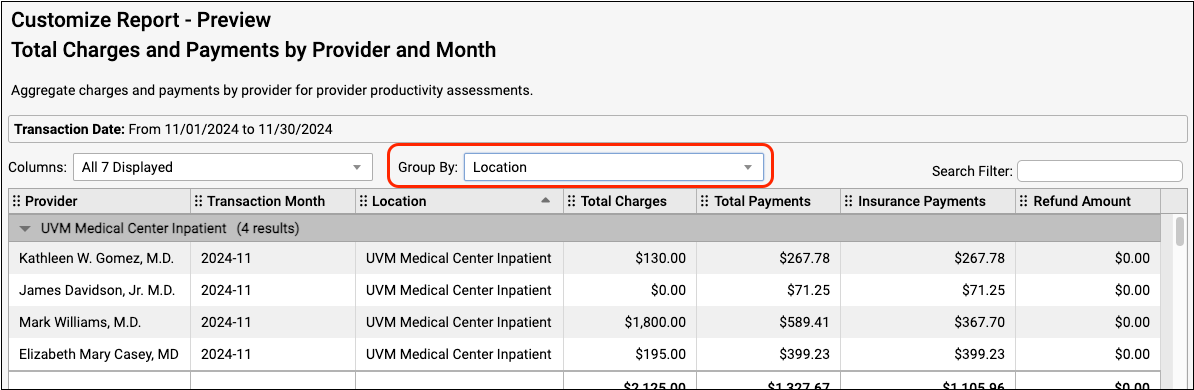
In this example, the user customized their financial report to display the Location column, then grouped the report output by location.
Numerical columns, when present, subtotal within a grouped section.
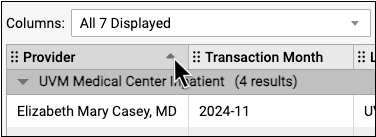
Sort Report Output
You can sort your report further by clicking on a column header. To sub-sort with other columns, hold the “Shift” key and click the column headers for your secondary sort, tertiary sort, and so on.
Open a Patient’s Chart from Your Report Results
Many reports that reference specific patient information also contain an Open Chart button. To open the patient’s chart from your report results, highlight a row and click the “Open Chart” button.
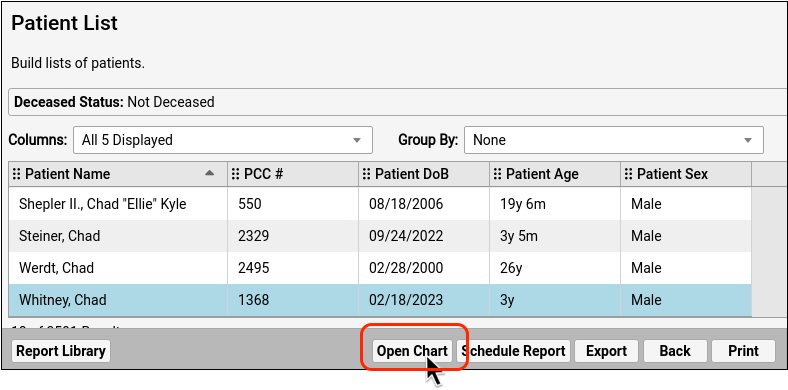
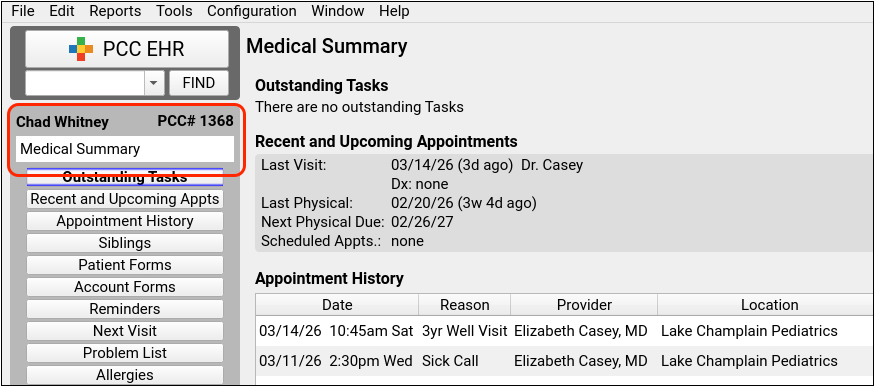
The following reports open to the patient’s Medical Summary:
- Broadcast Messaging Patient List
- Care Plan by Date
- Chronic Condition Recall
- Orders by Visit
- Patient Diagnoses by Date
- Patient List
- Patients Overdue for Weight Management
- Preventive Care Recall
The following reports open to the Demographics section:
- Appointments
- Appointments by Scheduling User
- Forced Appointments
- Huddle Sheet
- Patients by Portal Users
And the following reports open to the Immunization History section:
- Immunization Administration Details
- Overdue Vaccine Recall
- Patient Immunization Administration Summary
If you have unsaved chart notes already open on your main PCC EHR screen when you click the “Open Chart” button, you will be prompted to save or discard your work before the new chart is opened.
When you are previewing a custom report, save the report to access the Open Chart button.
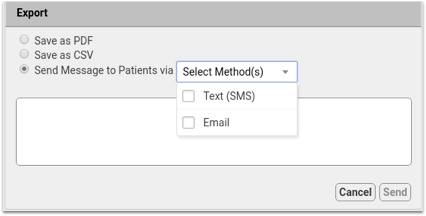
Export or Print a Report
There are a few ways to export reports in the Report Library. You can export to PDF, CSV, export a large data set, or send batch messages to patients via email or text message. The option to print is available from the results screen as well.
The type of export you pick will be informed by what you plan to do with your data. Use the following guidelines to pick the right kind of export for your purposes:
- Export a Curated Report: To work with a smaller report (less than 20,000 rows) that you have already made adjustments to in the results screen, choose “Export to CSV”. Please note, totals and sorting that use Group By do not transfer from the results screen to CSV.
- Export All Data from a Large Report: To work with all information in a larger report (over 20,000 rows) prior to viewing and making adjustments to the results, choose “Export Results” from the criteria selection screen. This method is best for large data sets, such as a patient recall list, or anytime you want a quick download of the numbers so that you can work with the CSV in a spreadsheet. Reports of any size can be exported with this method, and reports larger than 20,000 rows must be exported this way to capture all data during export. There is no row limit when exporting using the “Export Results” option. To learn more about exporting large data sets from the Report Library, read Export Large Data Sets.
- Export a PDF: For a digital version of the printed report, choose “Export to PDF”. The data on the exported PDF cannot be adjusted. This type of export may be useful for sharing smaller, already curated reports with colleagues or consultants.
- Send a Broadcast Message: Once you build a patient list in the Report Library, you can compose batch messages and text or email them to patients and families. To learn how, read Send Batch Messages to Patients and Families.
- Print Your Report: To print the report from the Report Library, click “Print”.
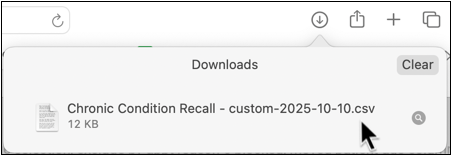
Export Reports to Your Browser While Working Remotely
When you are working remotely through SecureConnect and you need to export a report, click any “Export” button in the Report Library, choose your file type, and export as usual. The exported file will display in your browser’s downloads area, and in your downloads folder.

To export a PDF from the Report Library, use the Print to SecureConnect workflow.
Build a Custom Report
Custom reports allow your practice to select additional criteria and set which elements will display on a given report. Read Create a Custom Report for more information.
Schedule Reports
You can schedule reports, such as daily huddle sheets and monthly recall lists, to run automatically. To find out more about scheduling a report read Schedule Reports to Run Automatically.