Add New Patients and Accounts
Before you can schedule a patient, you need to create the patient and their family accounts on your PCC system.
Read the steps below to learn how to add new patients and accounts. Whenever you add either, you begin by attempting to find the patient (or the account) and then creating the new account from the search results screen.
Contents
Add New Patients and Family Accounts in PCC EHR
Read the procedure below to learn how to add new patients and families using the tools and screens in PCC EHR.
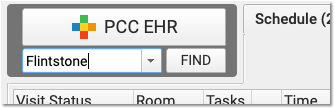
Attempt to Find the Patient
Before adding a new patient, you must first perform a search to make sure they do not already have a chart record.
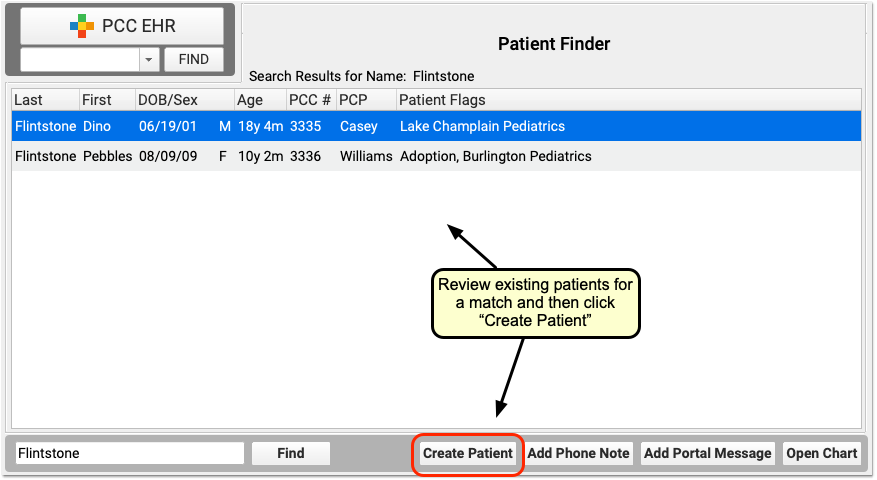
Click the “Create Patient” Button
After you search for a patient, review the search results for a match. If the patient doesn’t have a record, click “Create Patient” at the bottom of the Patient Finder results window.
Add a Patient While Scheduling: If you are scheduling in the Appointment Book, you can also add a new patient while searching in the Schedule Appointment tab.
Got a Fax or Form for a New Patient?: Sometimes your practice receives documents before a patient’s first appointment. As you import documents, you can create a patient on the fly, once you search for their name in the Import Documents tool.
Fill Out Basic Patient Information
On the Create Patient screen, you can fill out patient information and add family accounts. PCC EHR will auto-fill the patient name fields with the search text, including first, middle, alias, and last names (in that order).
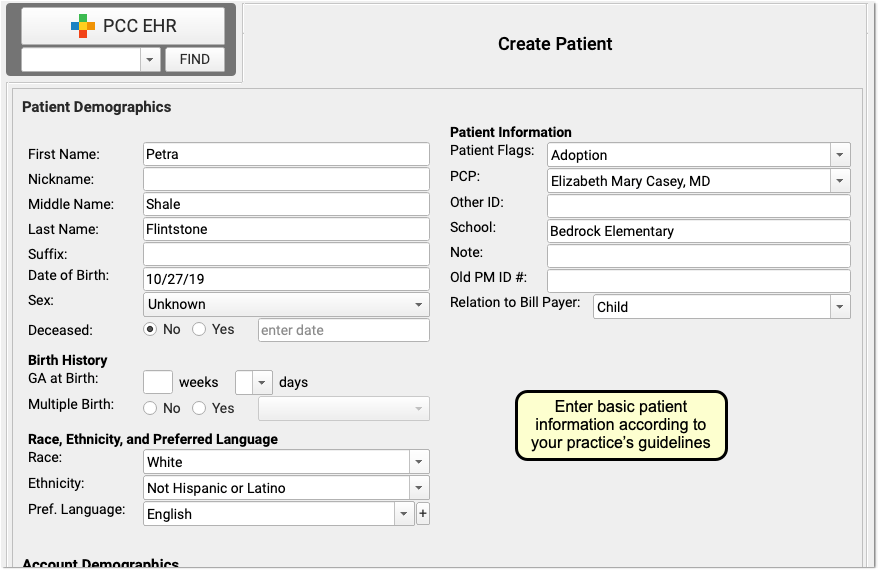
Follow Your Practice Standards: Some medical practices do not assign a primary care physician. Some practices have rules for how to record a patient’s full name. Others assign certain Patient Flags for new patients. You should follow the standards that your practice uses when entering data.
Customizable Fields: The four fields beneath the “PCP” field within the Patient Information section are customizable. Your office may use them for a special purpose.
Relation to Bill Payer: By default, PCC EHR will fill out the “Relation to Bill Payer” as “Child”. This prevents a common claim error later in billing. If the patient has their own Billing Account and their own insurance plan, or is covered by another individual, you should adjust this field. Note that Medicaid plans are configured to handle the claim appropriately (you do not need to change this field when a patient goes on Medicaid).
Click the “Assign Account” Button
You must add an account to the patient’s record when you create a new patient. You can add a single account as the patient’s Home and Billing Account, or add separate accounts.

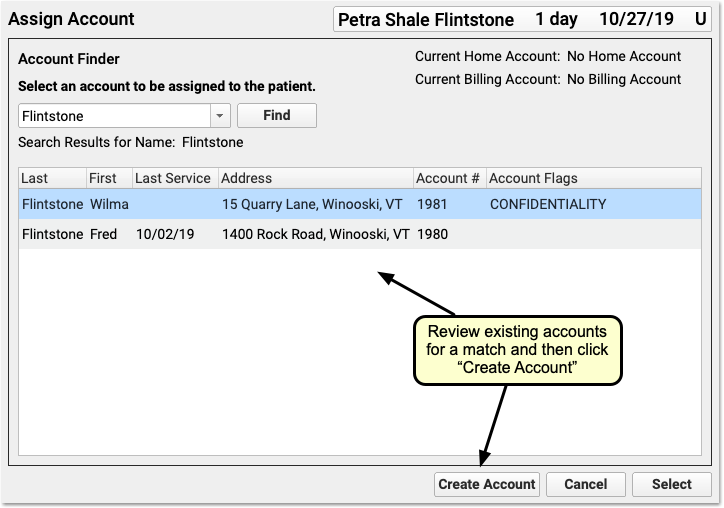
Find or Create the Account
First, search for the account. If the account does not already exist, you can click “Create Account”.
Fill Out Account Information
If you are creating a new account, fill out the family name and basic information and click “Save”.
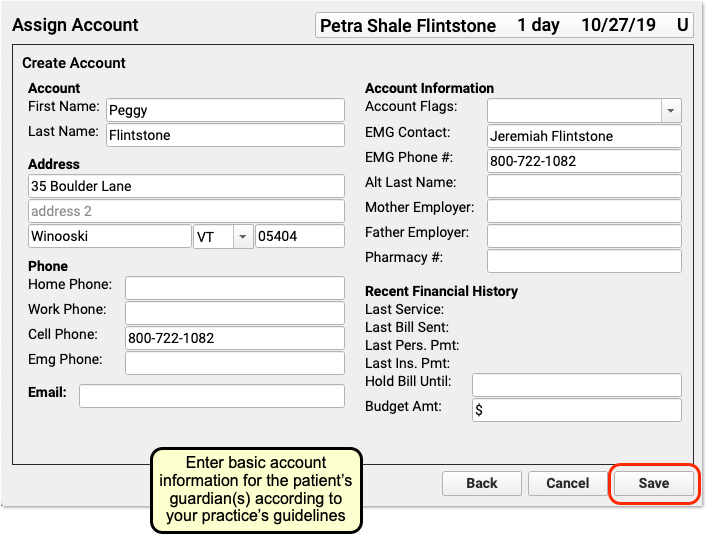
Your practice may have guidelines for what information you collect and what status flags you add when you create a new account.
For example, if your practice bills for home visits, remember to add the complete “Zip +4” Zip Code, as insurance carriers usually require all nine digits.
Verify and Optionally Add Another Account
After you select or create an account, you will be returned to the Create Patient screen. Verify that the selected account is correct.
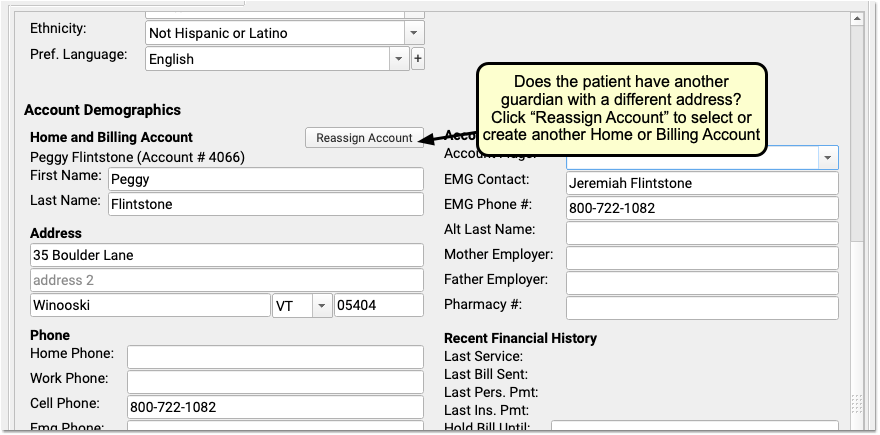
The Account will be added as the Home and Billing Account (Custodian and Guarantor). If you need separate accounts, click “Reassign Account” to find or create another account. Read the procedure below for more details.
Add an Insurance Policy for the Patient
As you create a new patient’s record, you can optionally add their insurance policy immediately with the Policies component.

The Account will be added as the Home and Billing Account (Custodian and Guarantor). If you need separate accounts, click “Reassign Account” to find or create another account. Read the procedure below for more details.
Click “Save”
When you are finished entering information for the new patient, click “Save” to create and open the patient’s chart.
Reassign or Add Another Account
At any time, you can change the Home (Custodian) and Billing (Guarantor) account(s) for a patient. If a child is adopted by a new household, a family now has two households, or another account change is made, click “Reassign Accounts” to change the patient’s accounts.
Edit the Demographics Section of the Patient’s Chart
Click “Edit” at the bottom of the Patient Demographics component and then click the “Reassign Account” button next to the currently associated account.
Search for the New Account
Search for the account. If the account does not already exist, you can click “Create Account”.
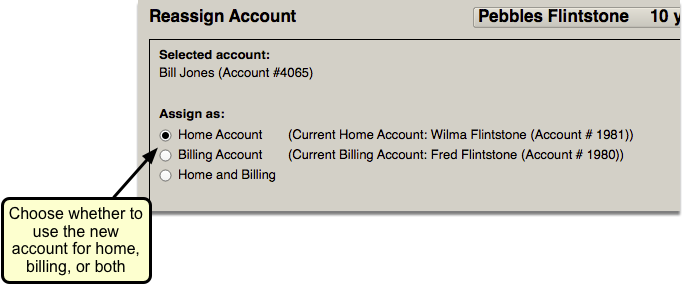
Assign the Account
Select whether the account is the patient’s Home Account, Billing Account, or both.
Blended Families and the Siblings Component
The Siblings Component shows other patients associated with the same home or billing account allows quick access to siblings and other patients who share a home or billing account. Care should be taken when assigning Billing and Home accounts.
In the case of blended families, patients who share a billing Billing or Home account appear in the Siblings Component. So if a parent appears as the billing account for their biological children and a step-child and the home account of just the step-child, both the step-child and biological children will be linked to each other in the siblings component.
