Send Chat Messages to Colleagues
Contents
PCC EHR includes a chat/instant messaging tool that lets you chat and send messages to other PCC EHR users.
Chat allows you to communicate quickly with the rest of the staff and clinicians at your office without having to log in to another program.
To watch a video about Chat, click here.
Send a New Message
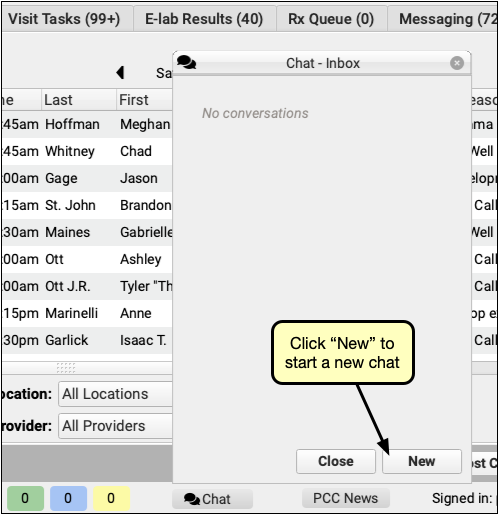
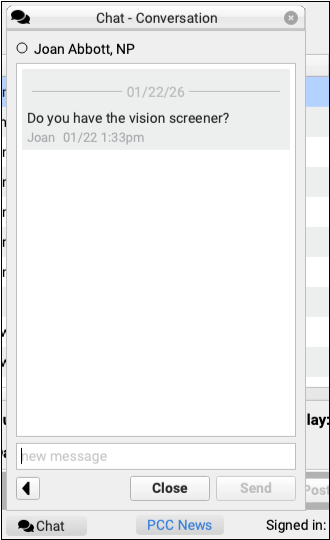
To send a message, click on the “Chat” icon at the bottom of the EHR window.

If you have any existing message threads you can find and open them here. Or, simply click on the “New” button to find any PCC EHR user at your practice.
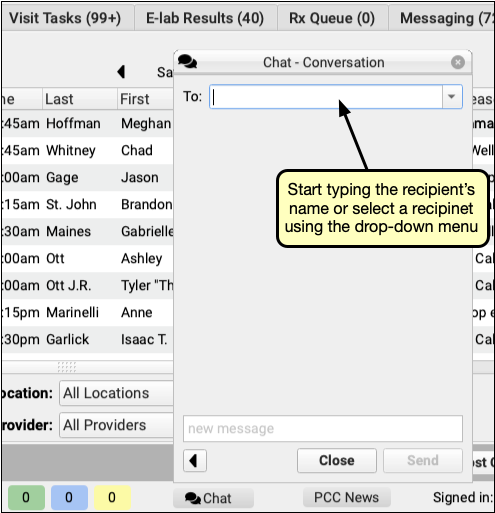
Use the “To:” field to search for the user you want, or select a user using the drop-down menu.
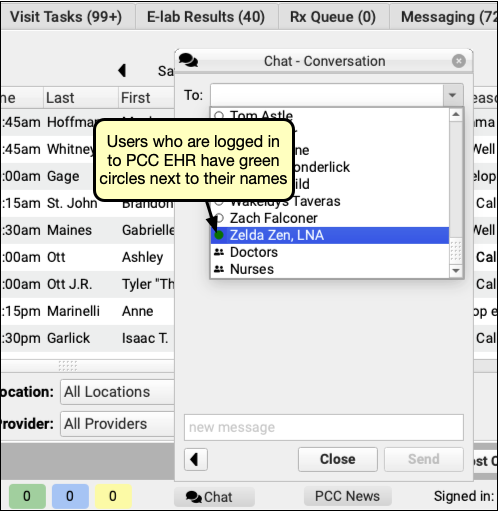
Who is on Chat?: The user list in Chat includes all active PCC EHR users. The order in which they appear is controlled by the settings in the User Selection List in the User Administration tool. If your practice uses Care Center functionality, users from your Care Center will always appear at the top of the list.
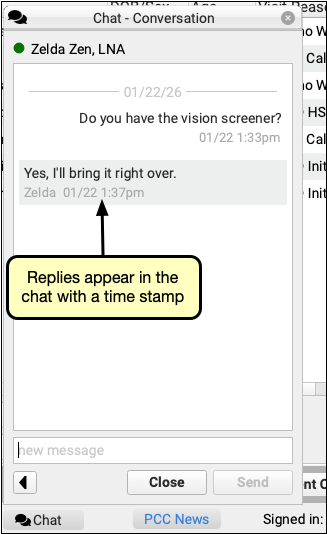
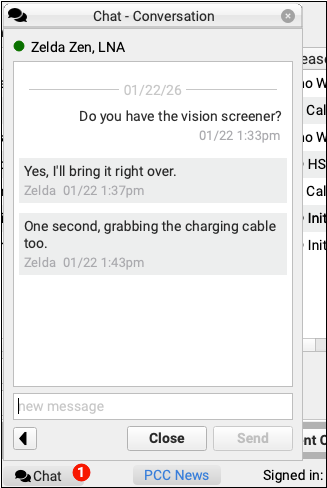
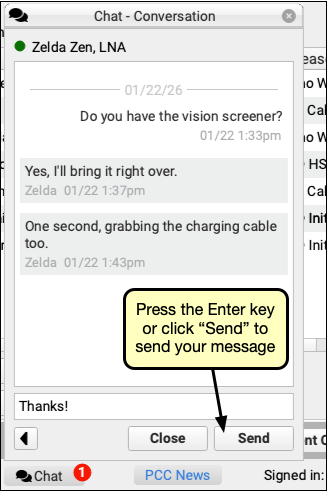
Then simply begin typing. Other users will be notified that they have a new chat message, and can respond. If you have the chat window open, it will automatically refresh as the conversation continues.
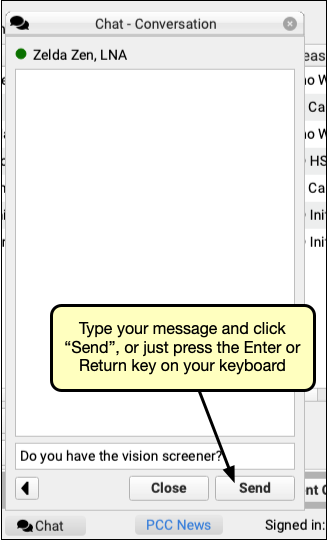
When you get a reply, it will appear instantly in the chat window. All chat messages are time stamped, so you can see exactly when they arrived.
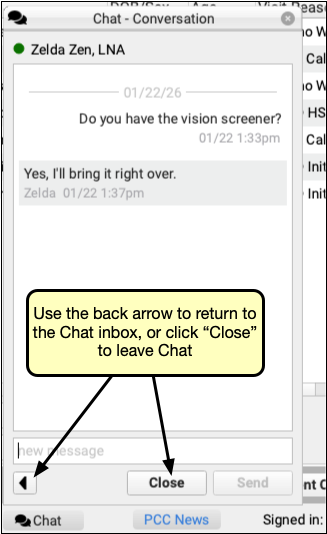
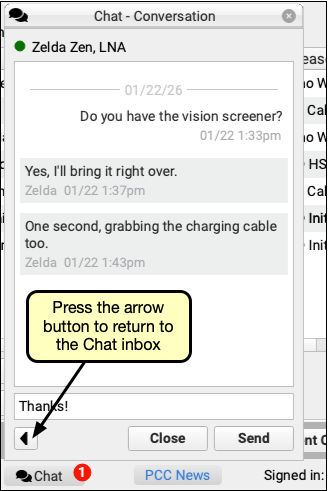
Close the chat using the “Close” button, or use the back arrow to return to the Chat inbox.
Receiving Messages and Message Notifications
When you have new messages, the Chat icon at the bottom of the PCC EHR window will indicate that you have messages waiting with a red circle.
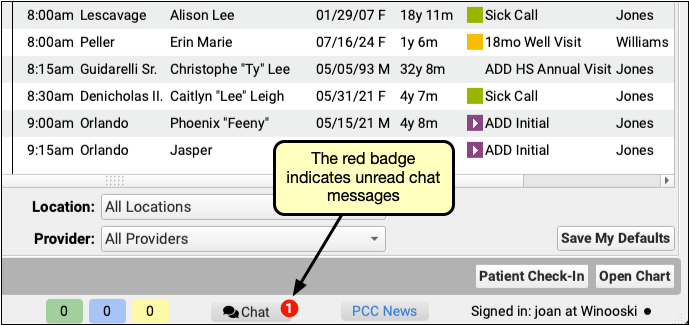
When you open Chat, you will see unread messages at the top of the of your Chat inbox in bold. Click a message to open the conversation and reply.
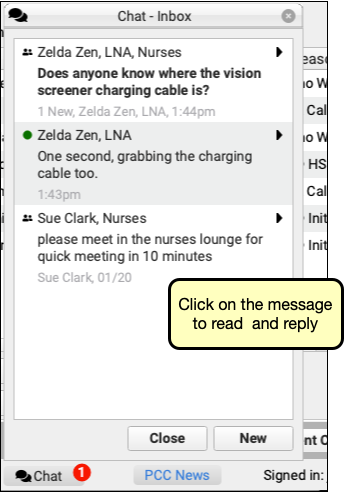
Reply to the message, and then either return to the Chat inbox, or close Chat and continue with your work.
Chat History is saved in PCC EHR: All chat messages are saved in PCC EHR. Scrolling back through a conversation will reveal the entire chat history between two users.
Chat with Groups of Users
You can create groups of users to send messages and converse with the full group of users, all at once.
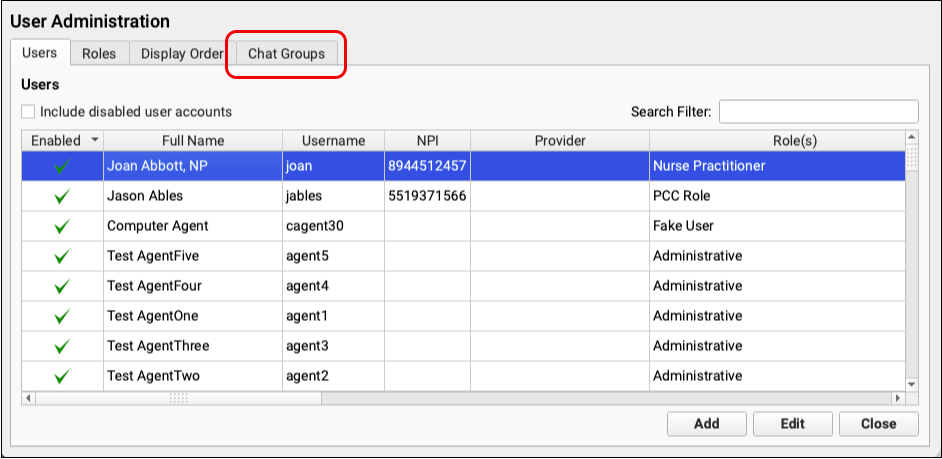
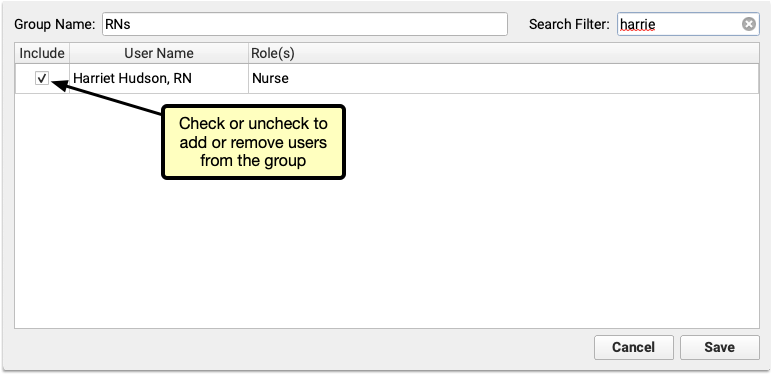
Create, manage and edit groups through the User Administration tool’s Chat Groups tab. Click “Add Group” to create a new group of users.
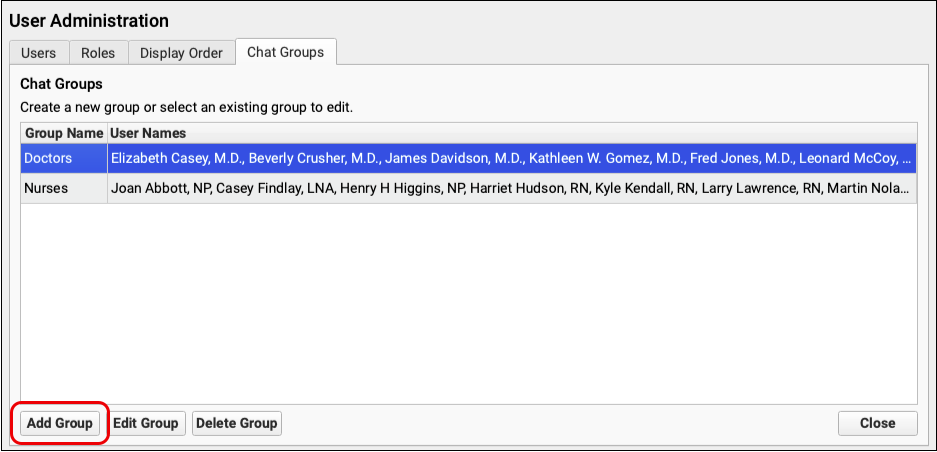
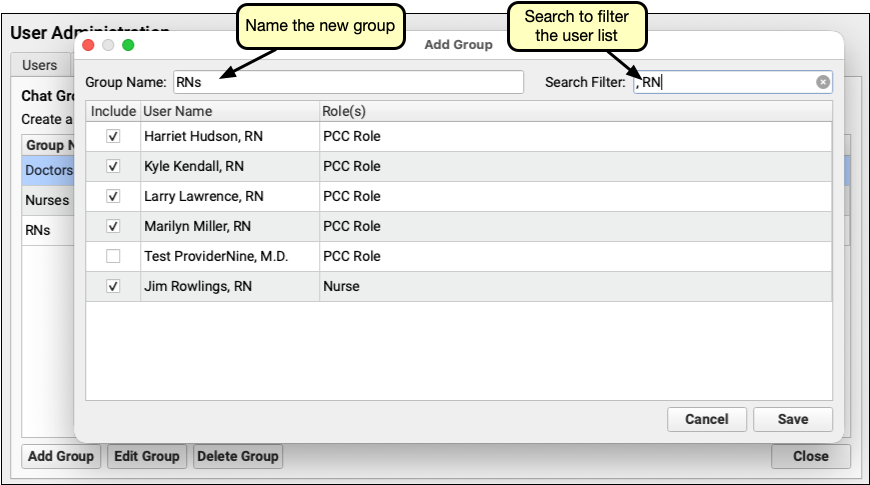
Check the box alongside each user’s name to add that user to the new group. Name the group at the top of the window and click save. Each group name can only be used once, so you won’t be able to duplicate group names, but to avoid confusion, be sure that your group names don’t match existing users. For example, if you have a user called “Nurse” make sure to name your group of nurses something like “Nurse Group” to differentiate the group from the individual.
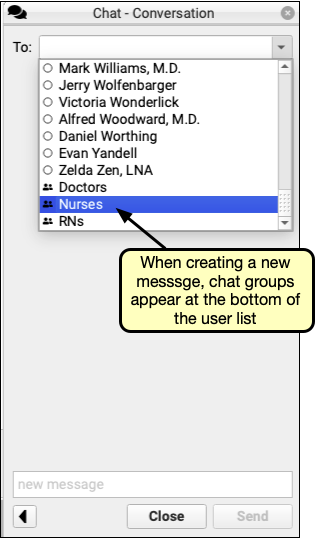
When you’ve created one or more groups, they’re available in the chat window’s “To” menu, at the bottom of the list of users.
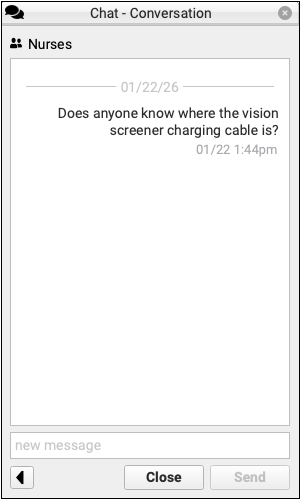
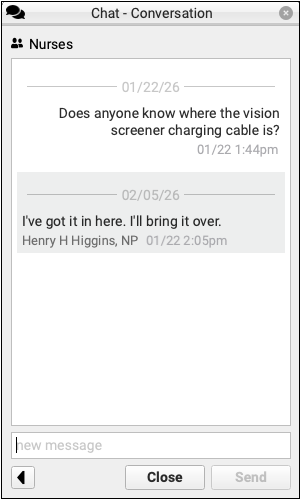
The message appears to the whole group, and any replies will be marked with the replying user’s name.
You can edit or delete groups at any time in the User Administration tool. To add or remove users, or rename a group, select the group in the Chat Groups tab and click Edit.
Check or uncheck the box to add or remove a user, then click Save.
When a user is removed from the group, they’ll still be able to see the message history, but will no longer see any new messages or have the option to send messages to the group.
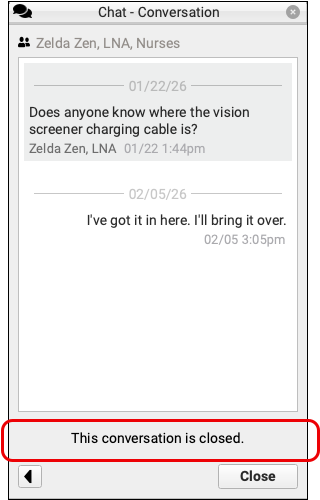
If your practice deletes a group, the same is true. Each user will be able to see the history of the conversation, but the option to send a message will be removed, and replaced with “This conversation is closed.”