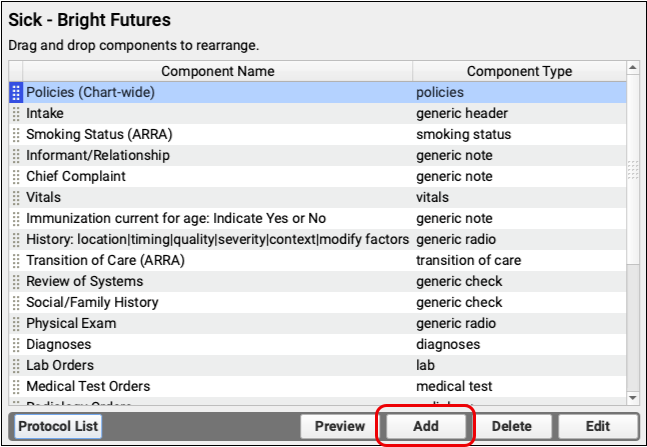
Components are the building blocks of protocols, which are used to create chart notes for visits, and other sections of the patient chart. By understanding the different component types and the available specialized components, you will be able create useful new sections for your chart notes and configure them.
Read the sections below to learn more about each component type and the various options available when creating or configuring. For more information about creating a new component, read the Component Builder article. For more examples of adding and configuring components in protocols, see the other Protocol Builder articles.
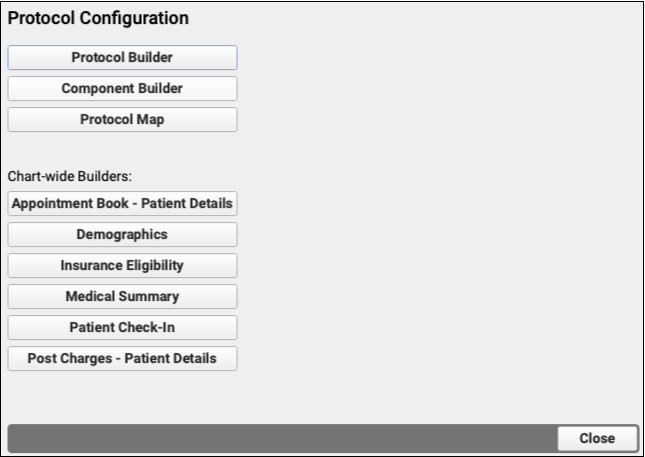
Chart-Wide Components
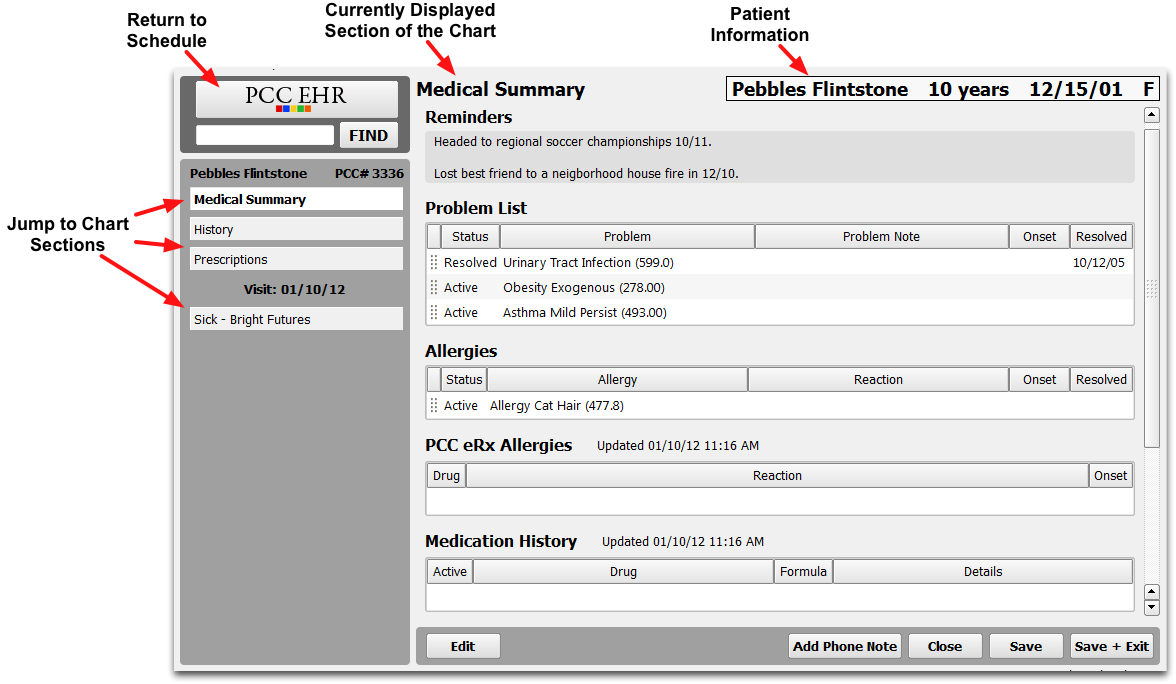
Many of the components in PCC EHR are “chart-wide” components, which means that they can appear in multiple places within the patient chart. When data is added or edited in one place, the same information is updated simultaneously wherever else that component appears.
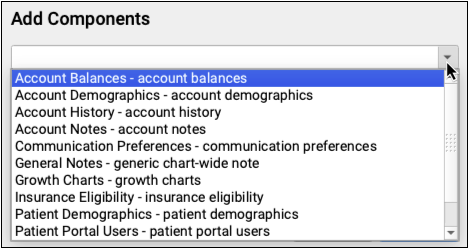
Chart-wide components can be added to the following sections of the patient chart:
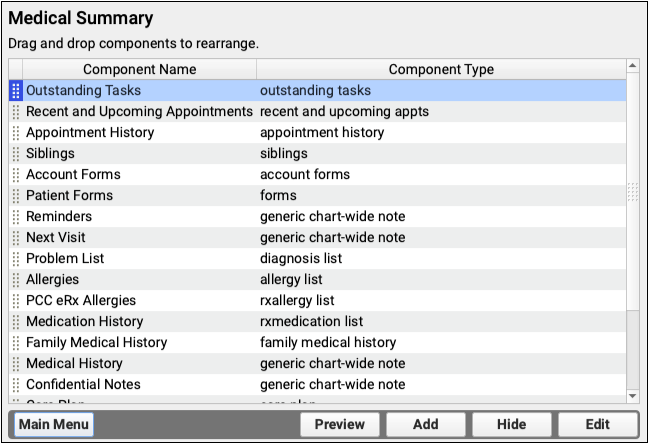
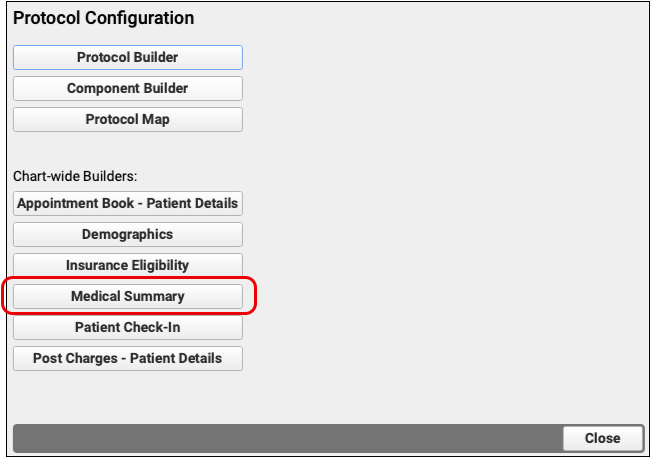
- Medical Summary
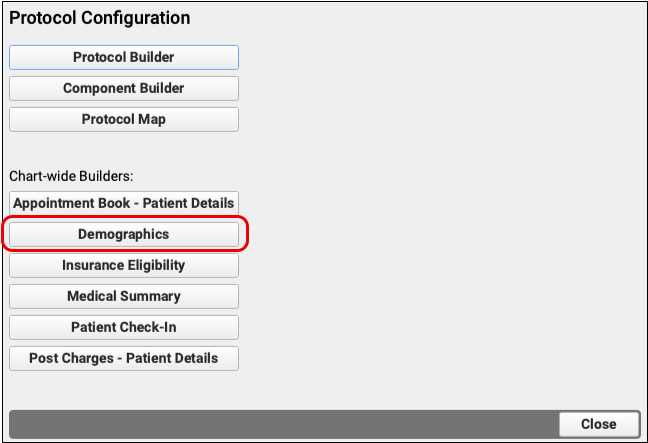
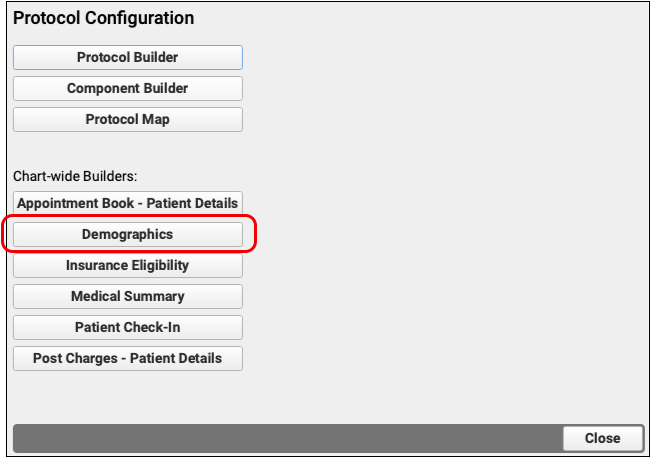
- Demographics
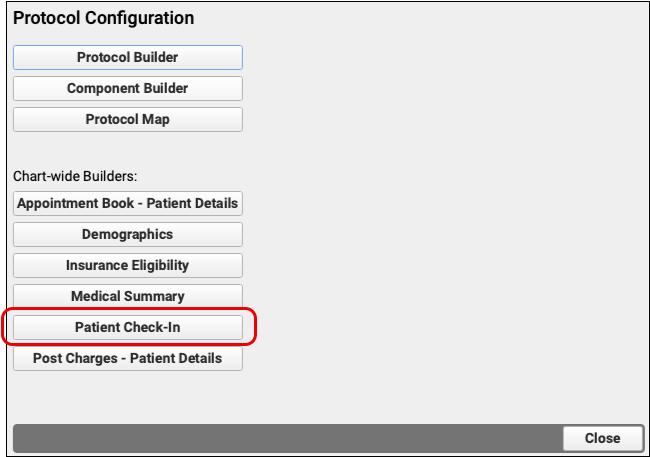
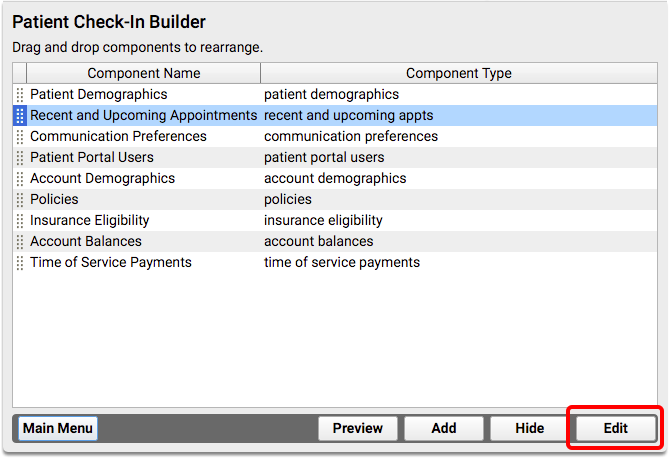
- Patient Check-In
- Patient Details (Appointment Book practices only)
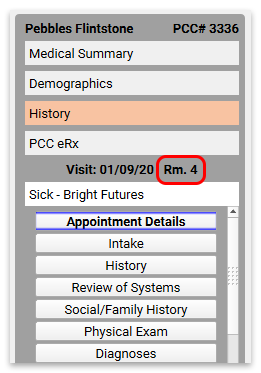
- Visit Protocols
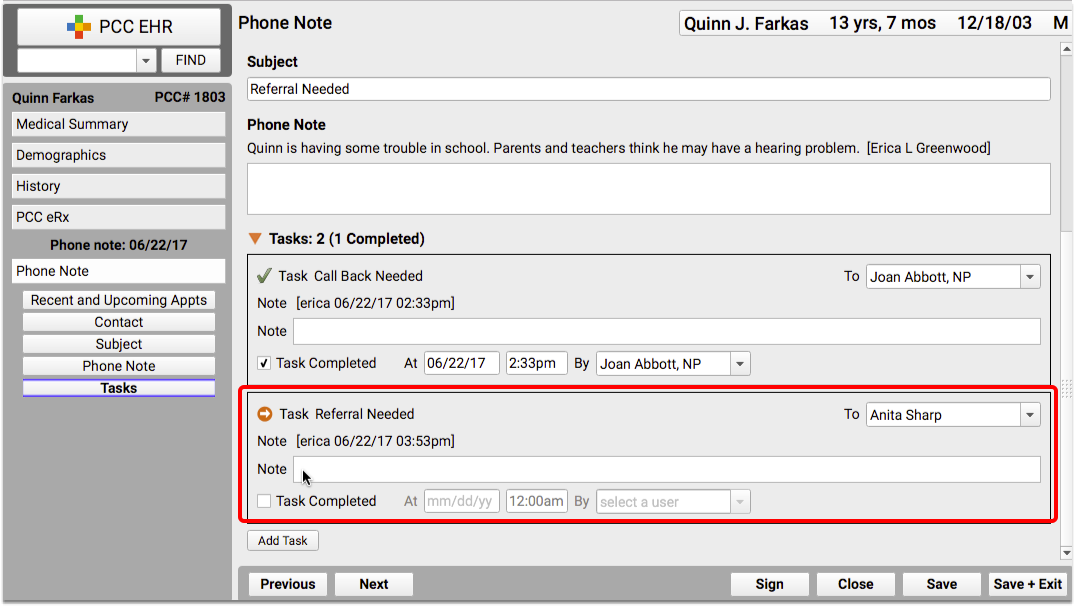
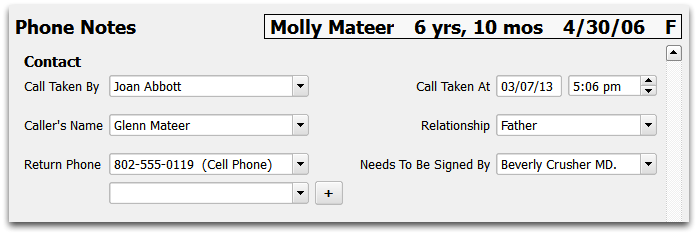
- Phone Notes
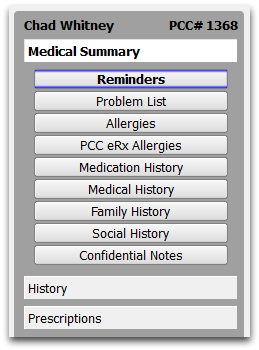
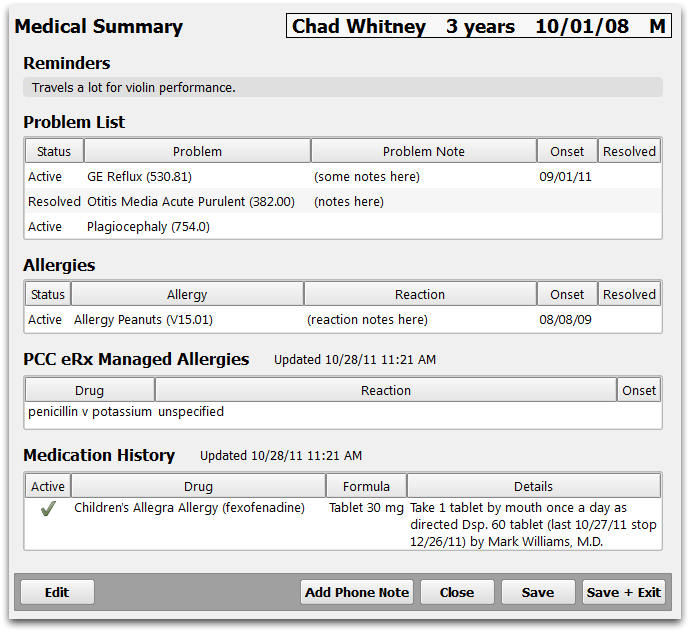
The Medical Summary and Demographics sections of the chart are made up exclusively of chart-wide components. You may find it useful to also include some of these components in visit notes, phone notes, or other places in the chart. For example, your practice may choose to include the Recent and Upcoming Appointments component on the Medical Summary, the Phone Note protocol, all well-visit protocols, and even on your Patient Check-In ribbon.
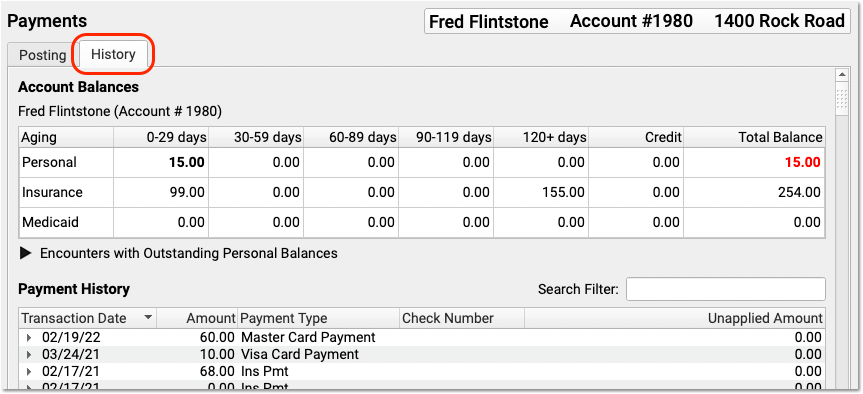
Account Balances
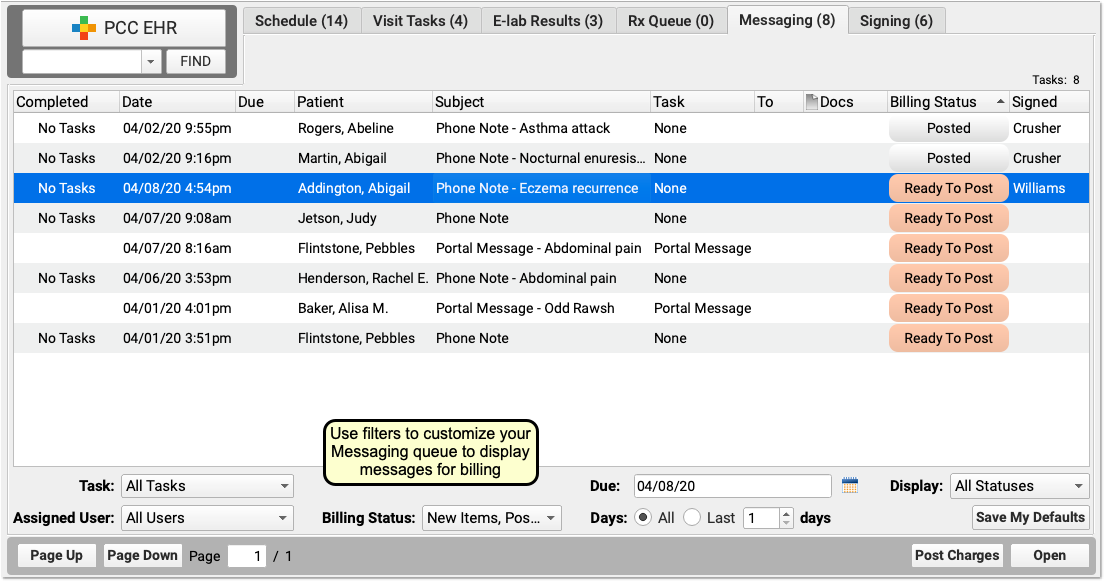
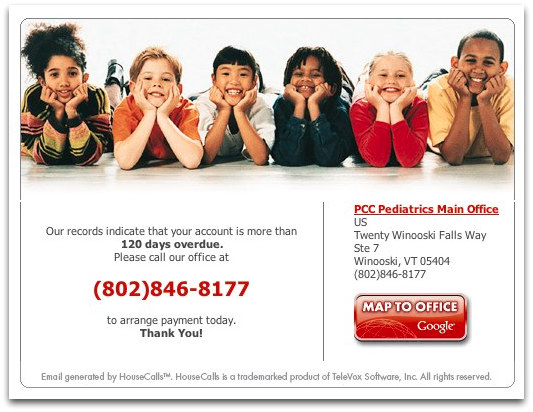
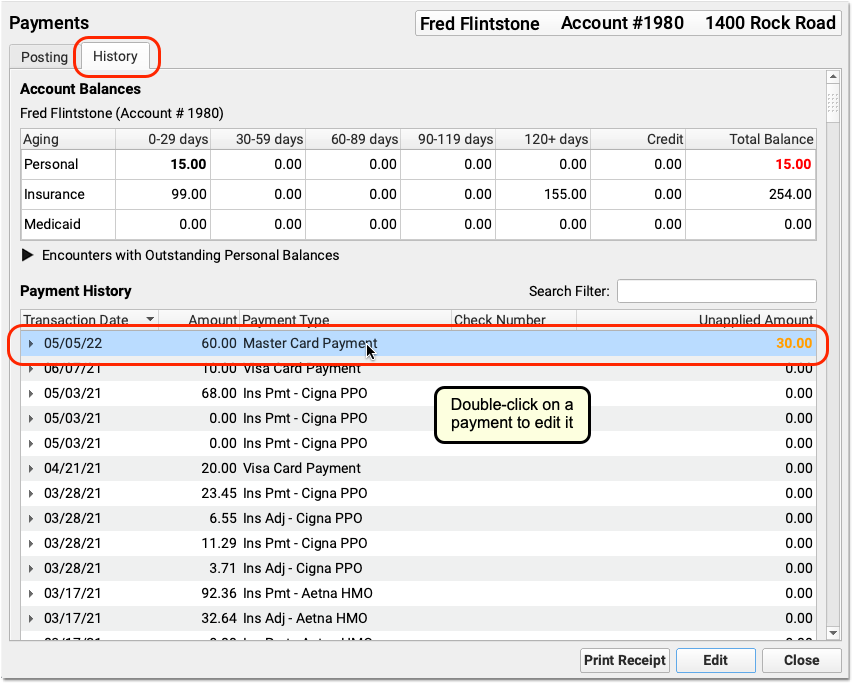
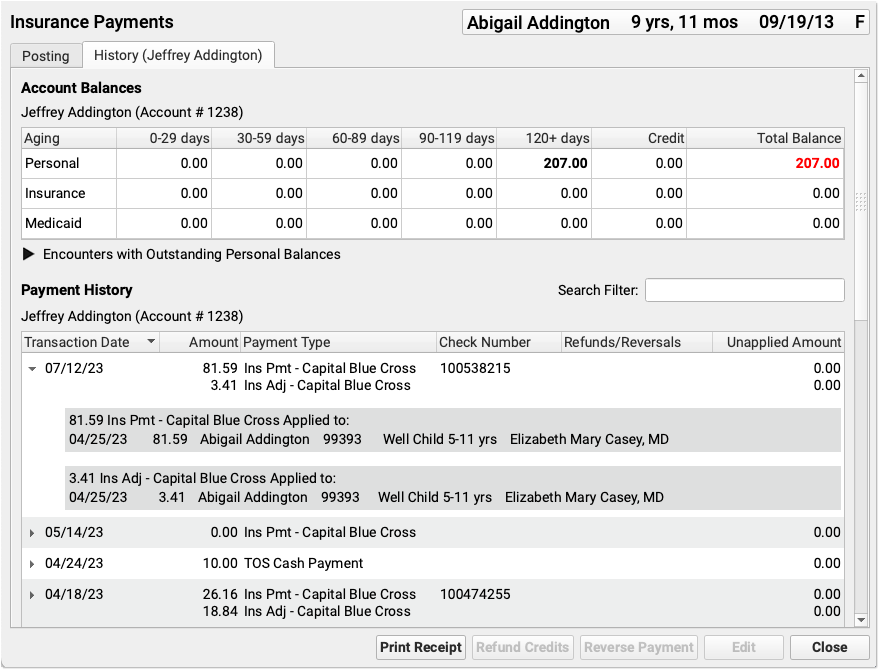
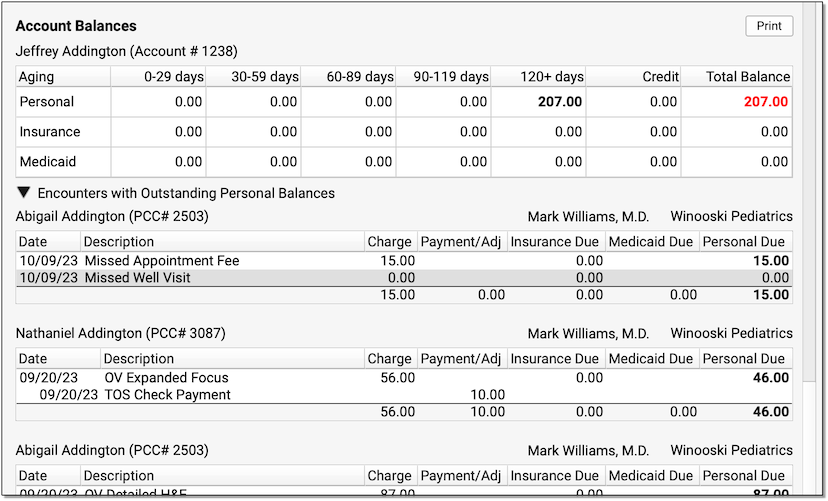
The Account Balances component shows an overview of outstanding personal charges for the patient’s billing account.
The balances are account-based, so you can see total overdue amounts for this patient and any siblings who share the same billing account.
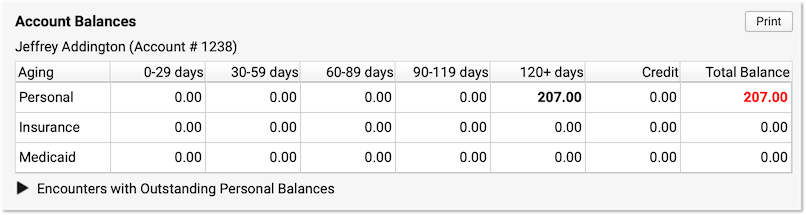
Unpaid balances are broken down into Personal, Insurance, and Medicaid charges. They are aged across aging categories (0-29 days, 30-59 days, etc.), with the total personal balance due displayed in red.
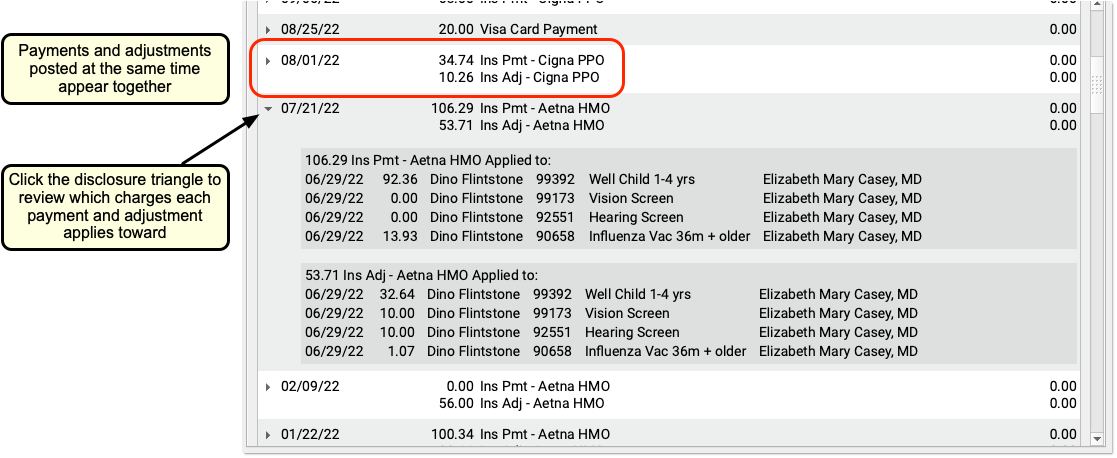
Click the disclosure triangle to view a summary of the charges that have an outstanding personal (non-insurance) balance.
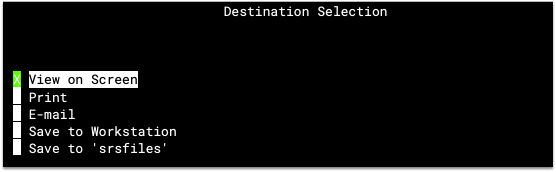
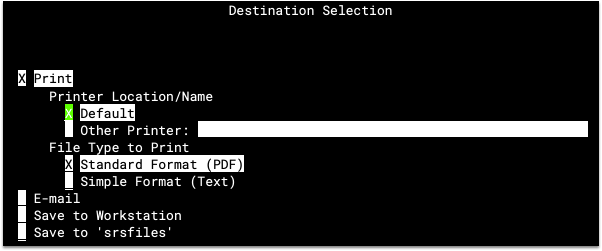
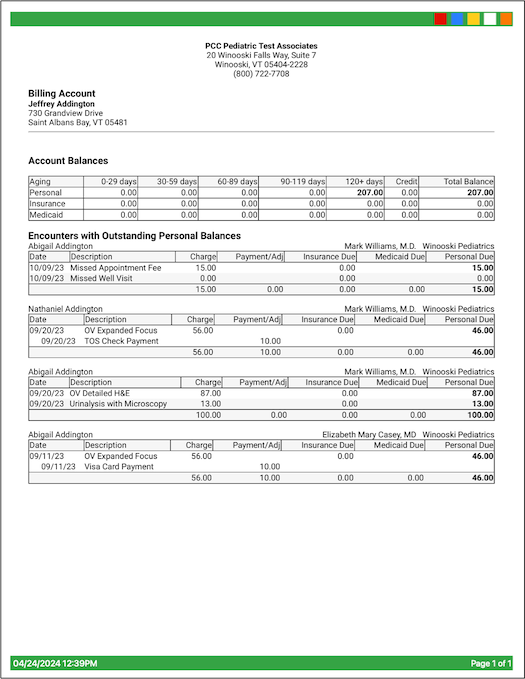
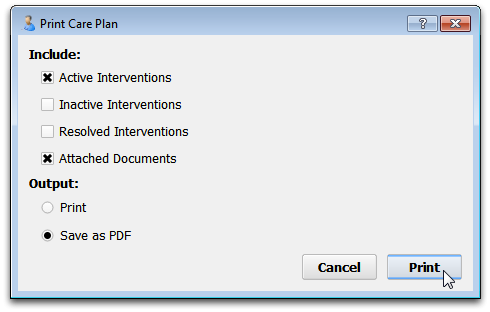
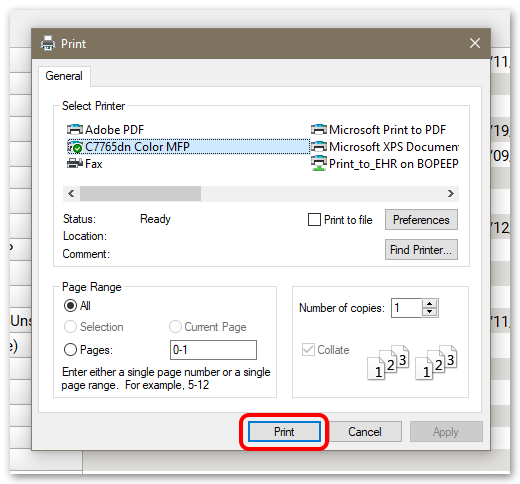
If you’d like to print a copy for the patient or family, click Print.
In addition to balance details, the printout includes your practice’s information as well as the date it was generated.
The Account Balances component appears in the Patient Check-In window by default, but you can add it to chart sections, chart notes, the Patient Details window, phone notes, or any location where it would be useful for your practice.
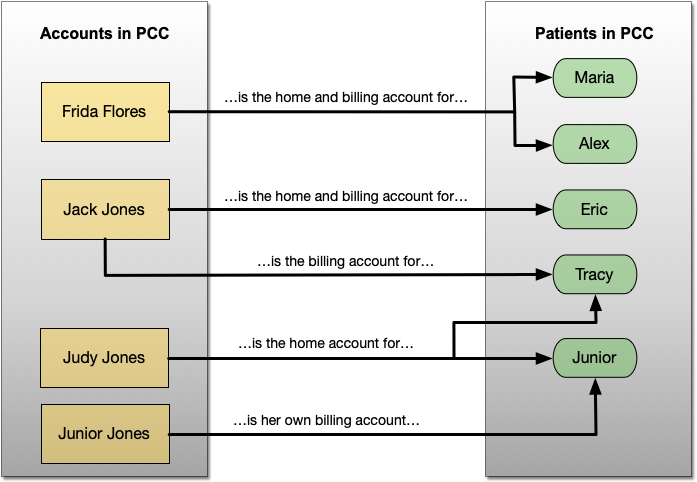
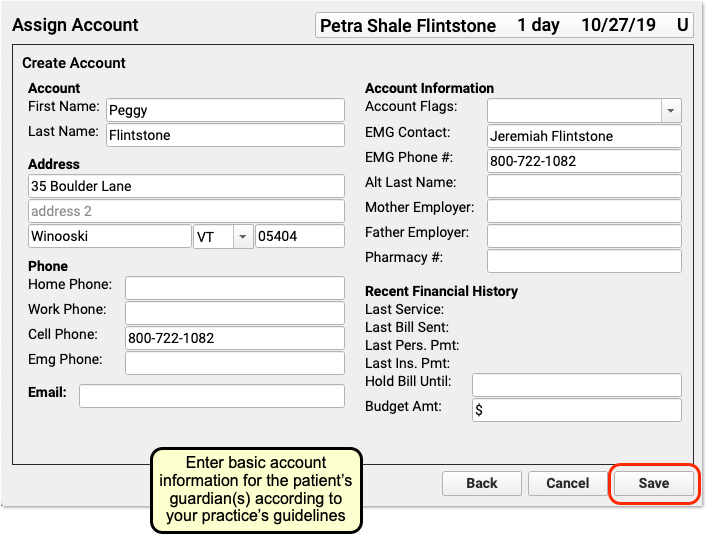
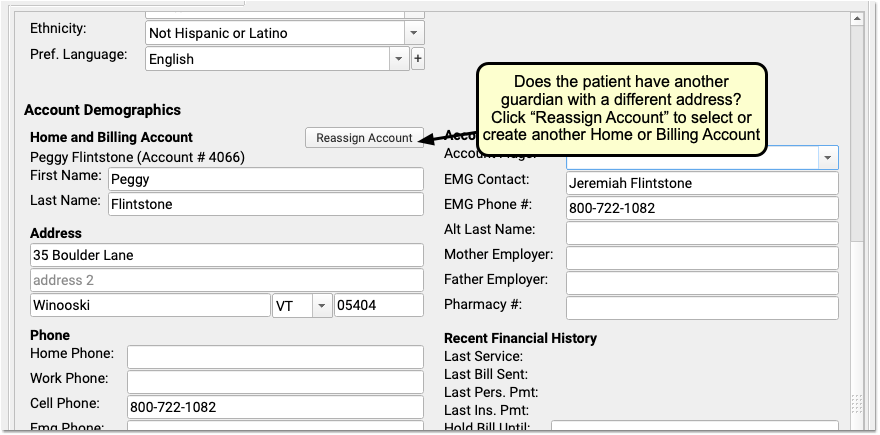
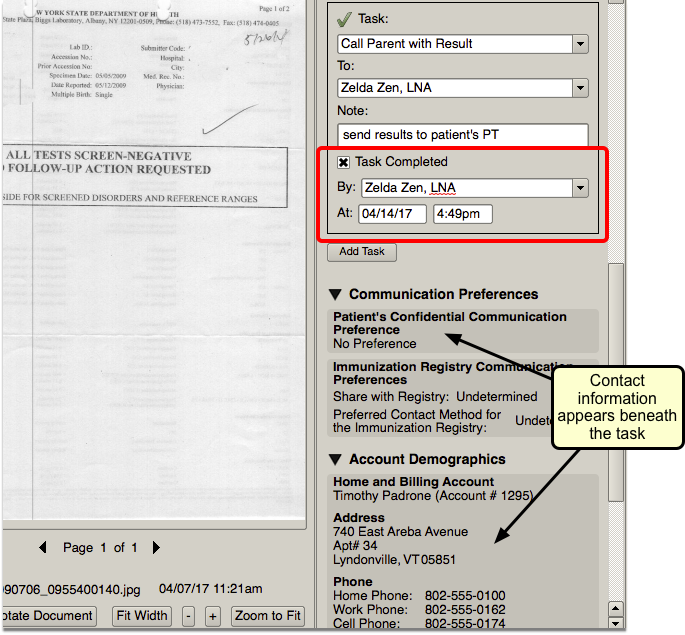
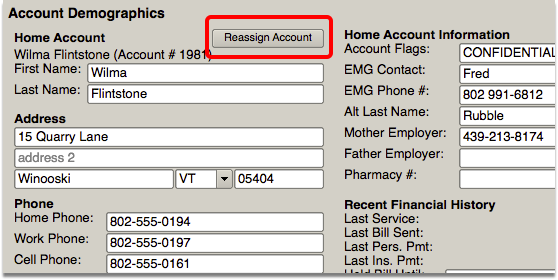
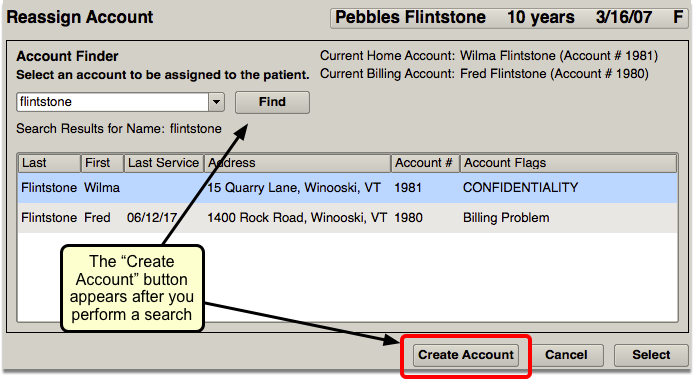
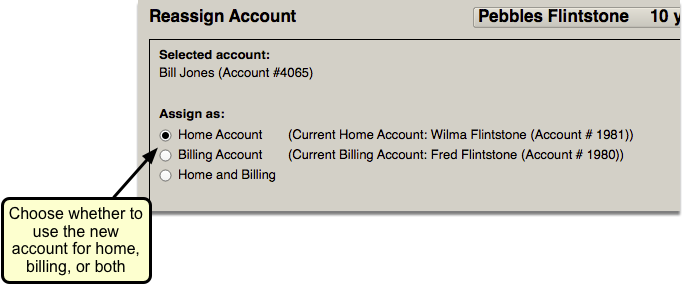
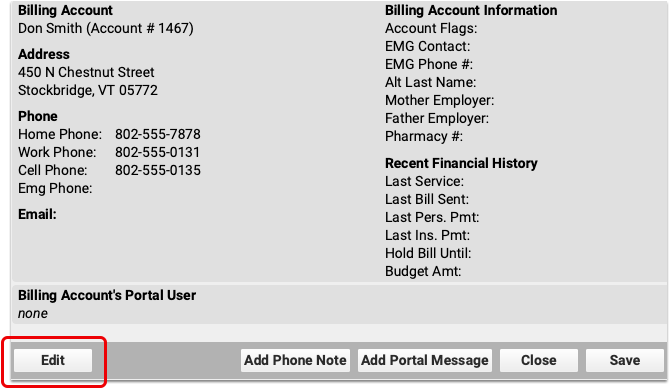
Account Demographics
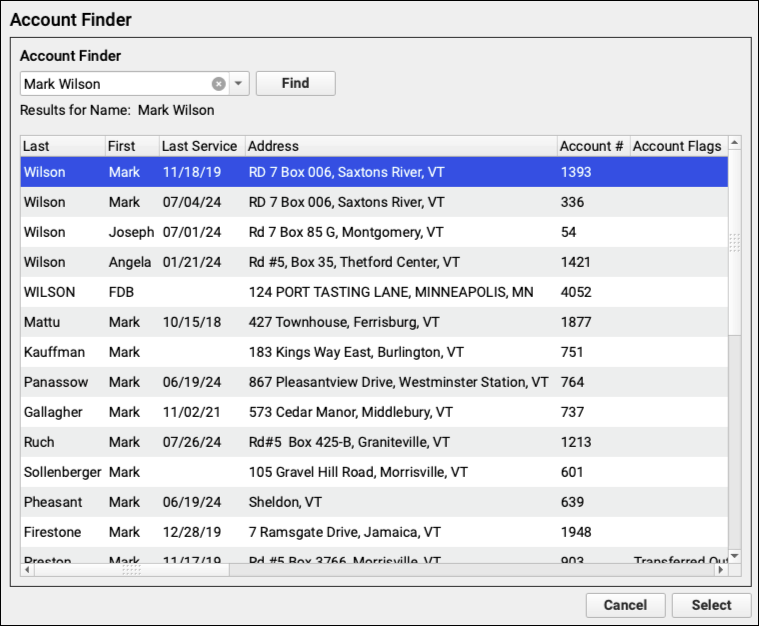
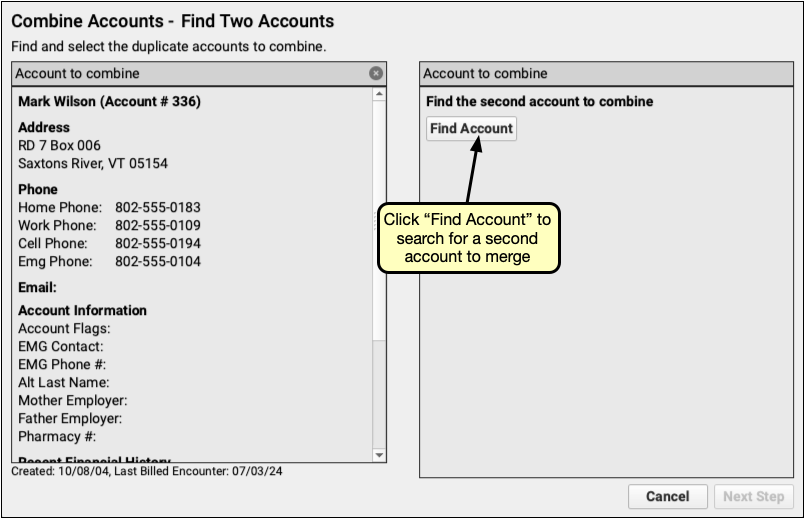
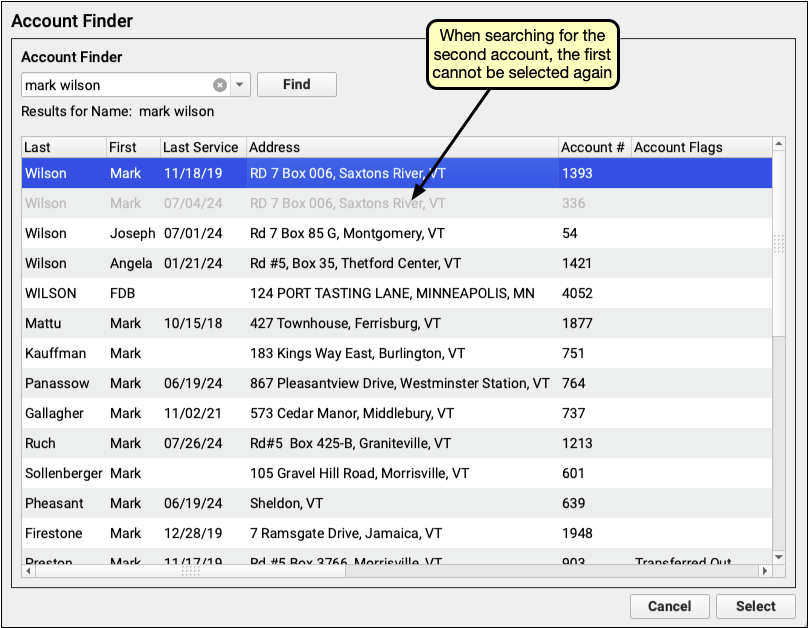
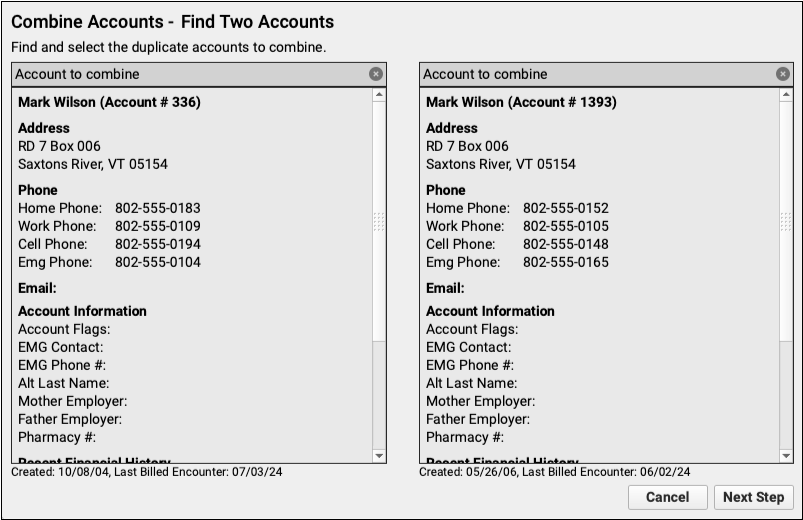
The Account Demographics component is used to keep track of a patient’s Home and Billing account(s).

Some patients may live with one parent, but the other is financially responsible, so they would have one Home account and one Billing account, whereas other patients might only have one account for both Home and Billing.
The Account Demographics component appears in the Demographics section of the chart by default, but you can also add it to the Medical Summary, the Patient Check-In ribbon, the Appointment Details ribbon (if your practice uses the Appointment Book), any visit protocol, and phone notes.
Learn about creating and assigning accounts in PCC EHR by reading the Add New Patients and Accounts article.
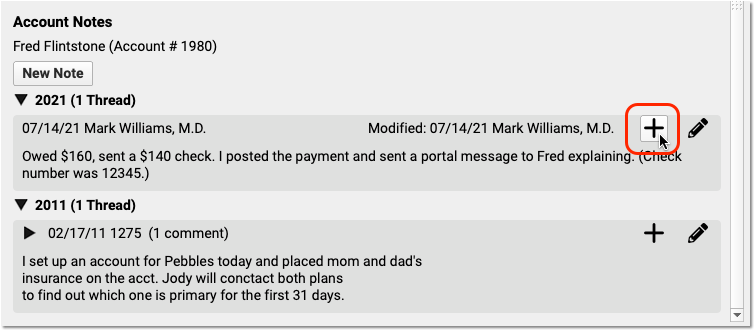
Account Notes
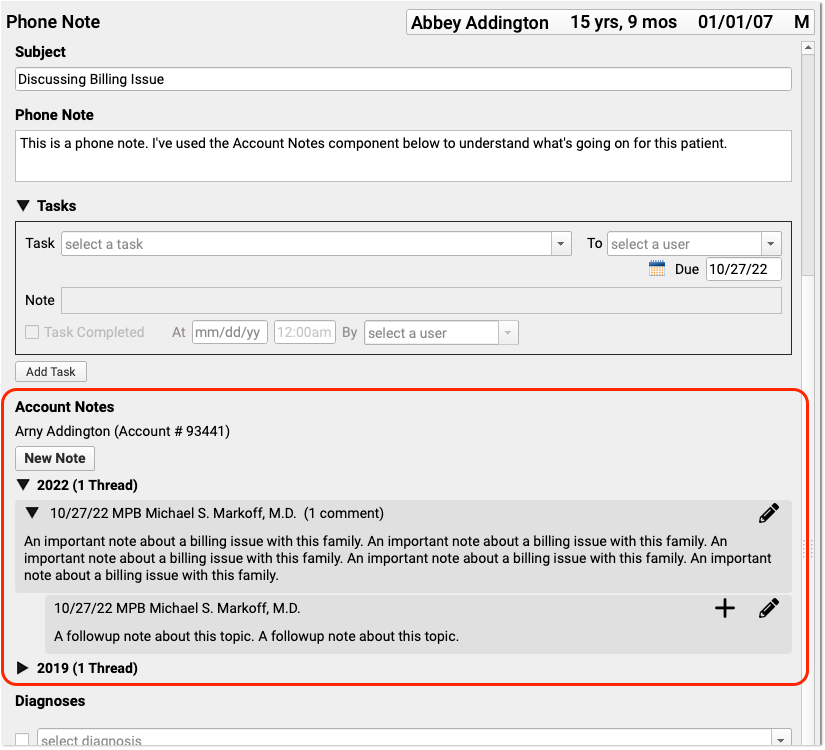
Use the Account Notes component to record details about an account or billing situation with a family.
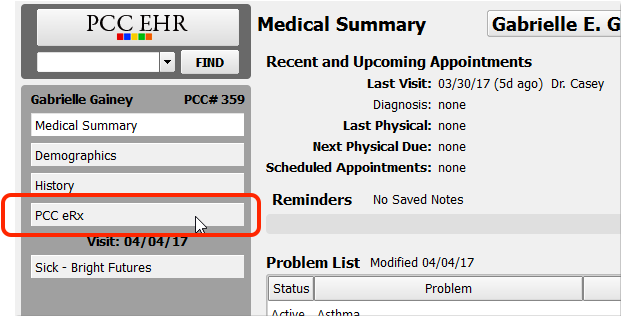
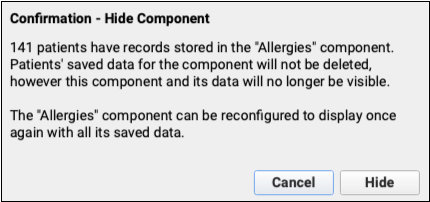
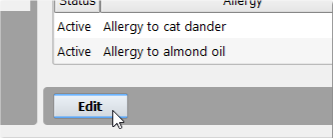
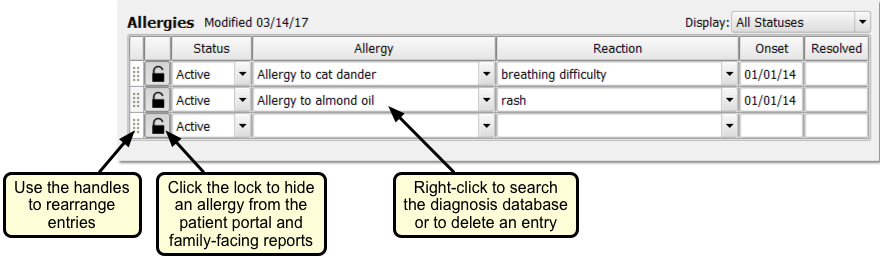
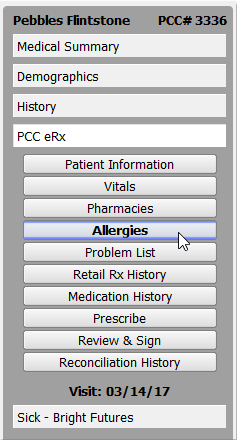
Allergies & PCC eRx Allergies
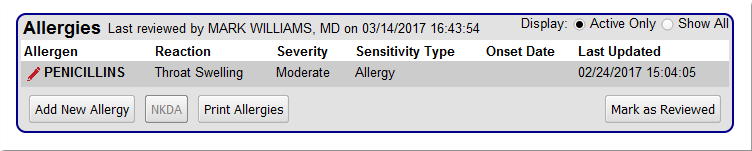
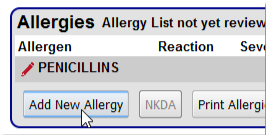
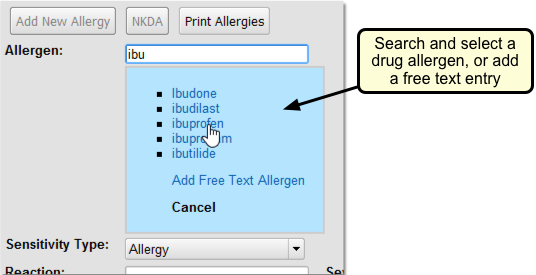
PCC EHR has two distinct allergy components, the Allergies component and the PCC eRx Allergies component.
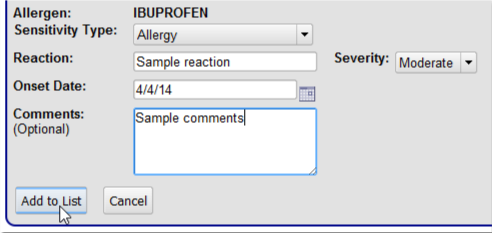
You can use the Allergies component to record any non-drug allergy. The PCC eRx Allergies component has special features for handling drug allergies.
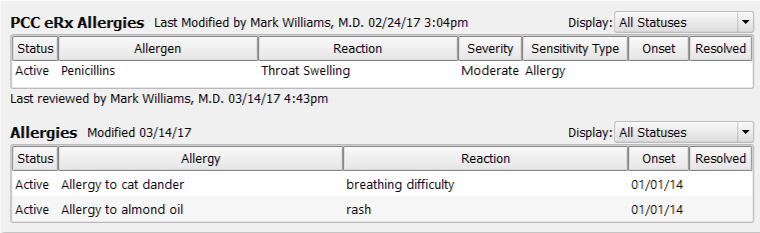
You can edit the Allergies component wherever it appears in the patient chart. The PCC eRx Allergies component is updated inside PCC eRx, the prescriptions section of a patient’s chart.
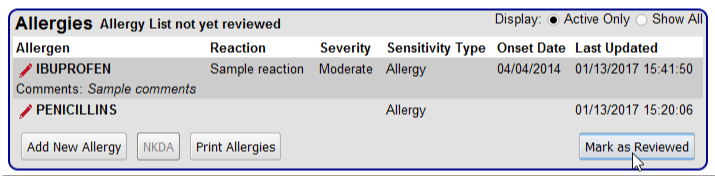
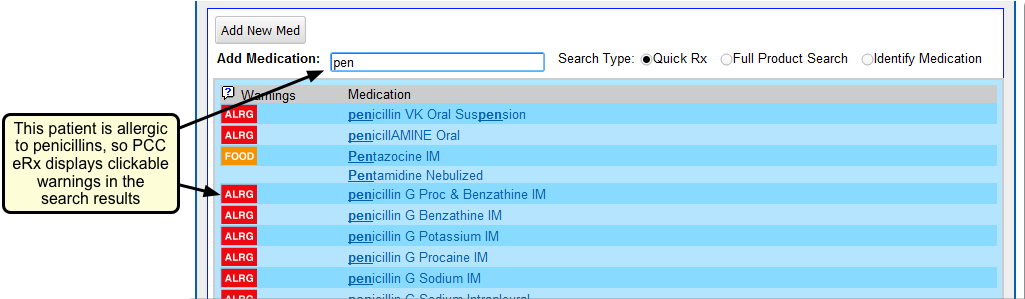
When allergies are up-to-date, PCC EHR can automatically warn you about drug allergies as you prescribe, create lists of patients based on allergies, and display custom alerts whenever you work with a patient’s chart.
Both the Allergies and the PCC eRx Allergies components appear on a patient’s Medical Summary by default, but you can also add either or both to the Demographics sections of the chart, the Patient Check-In ribbon, the Appointment Details ribbon (if your practice uses the Appointment Book), any visit protocol, and phone notes.
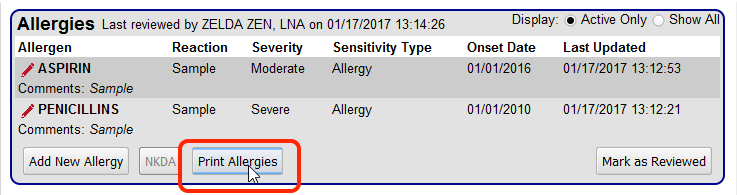
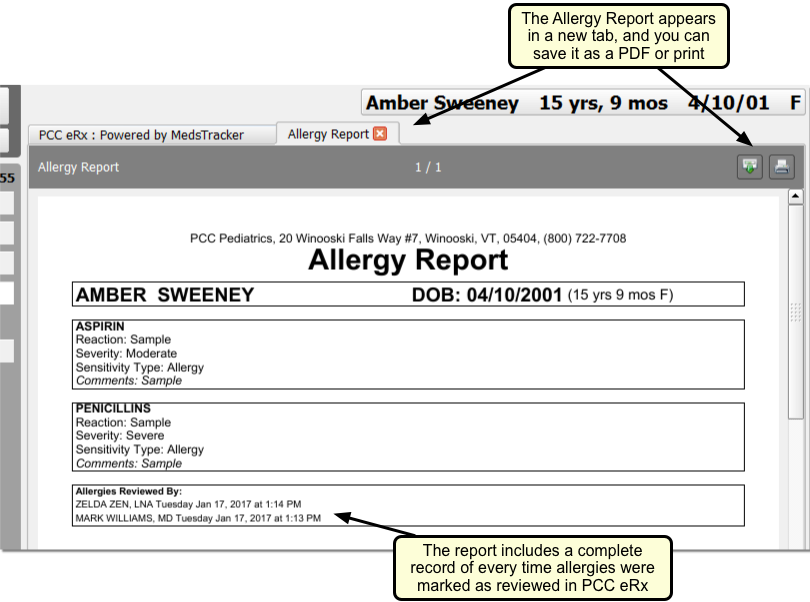
For more information about working with allergies in PCC EHR, read the Allergies article.
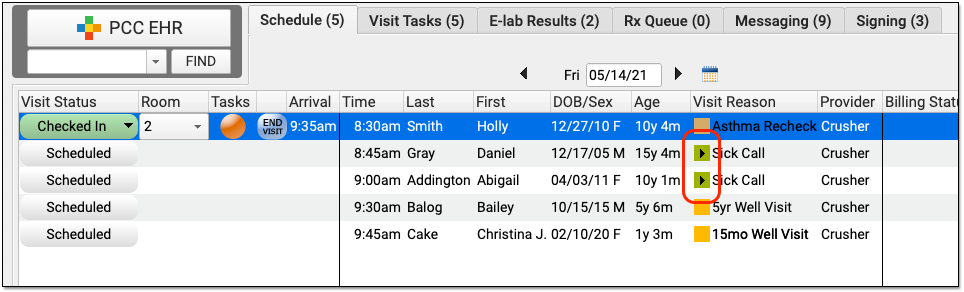
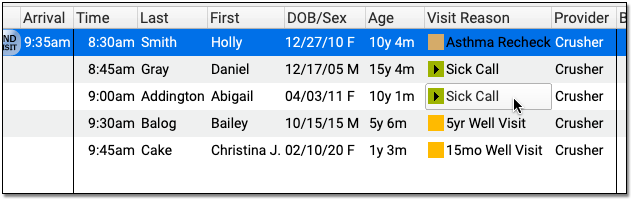
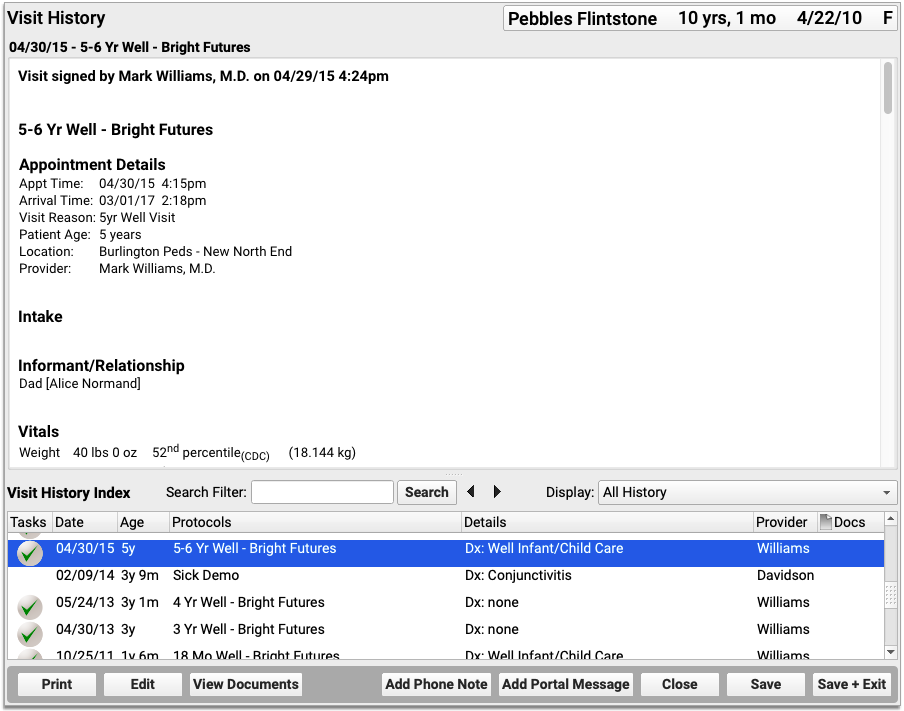
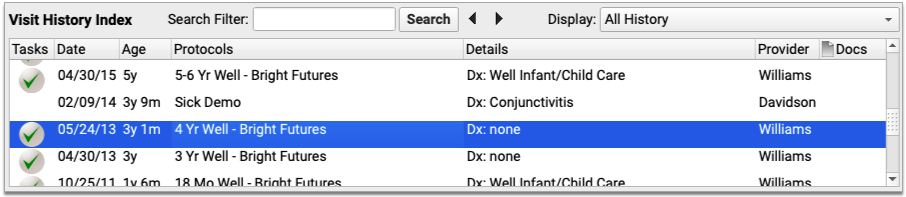
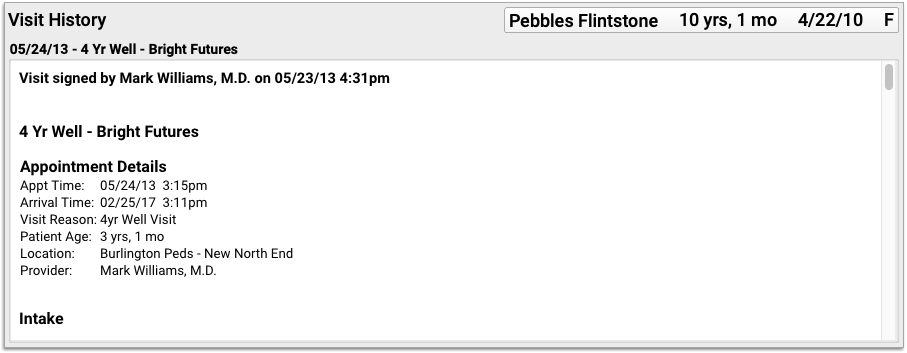
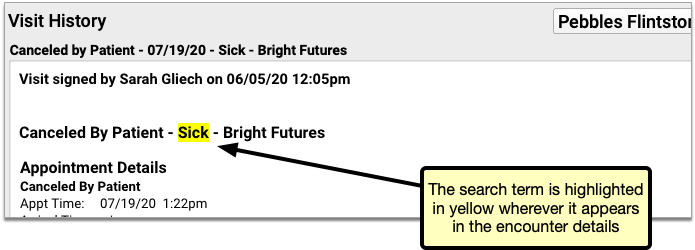
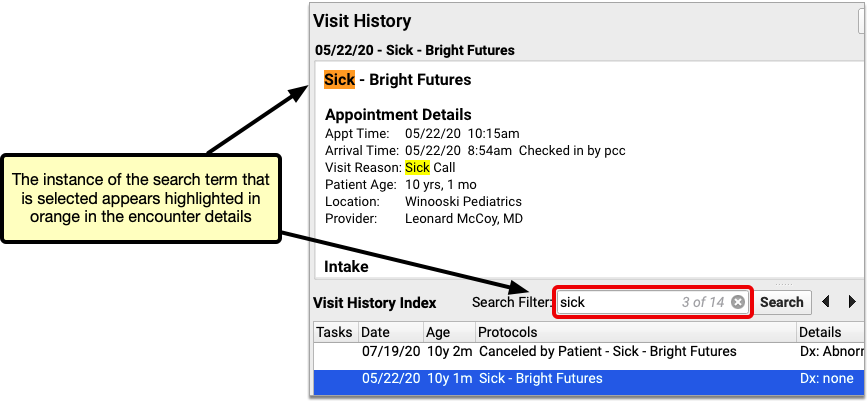
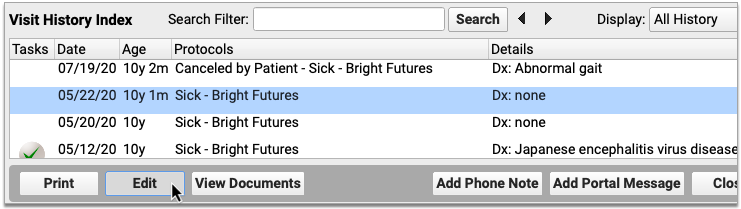
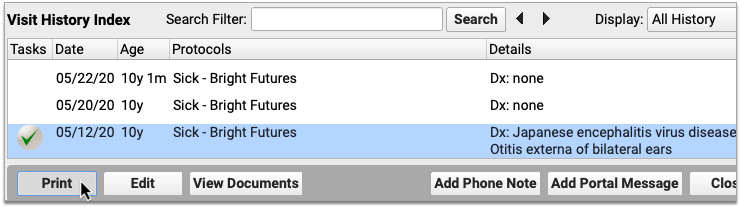
Appointment History
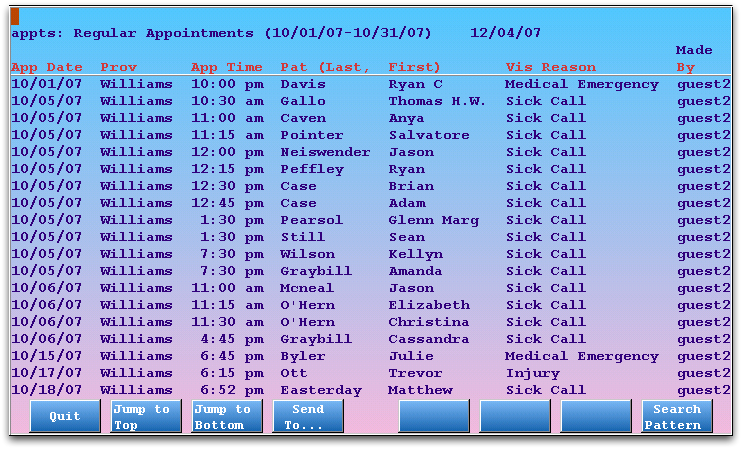
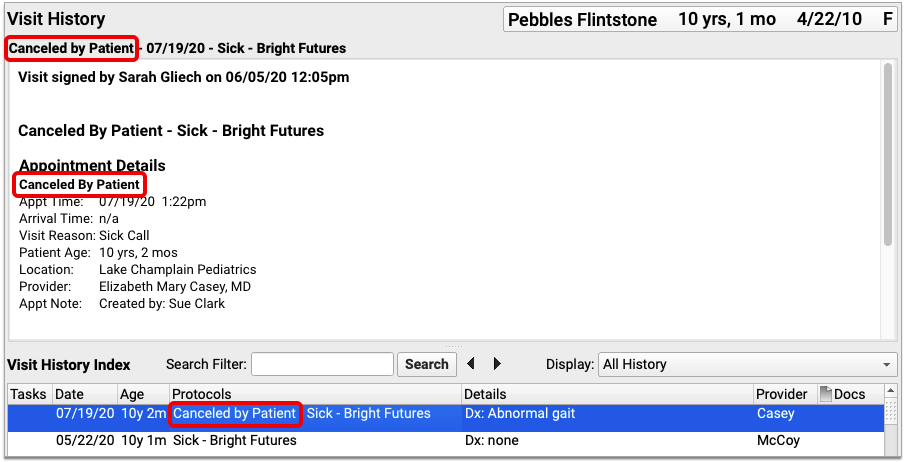
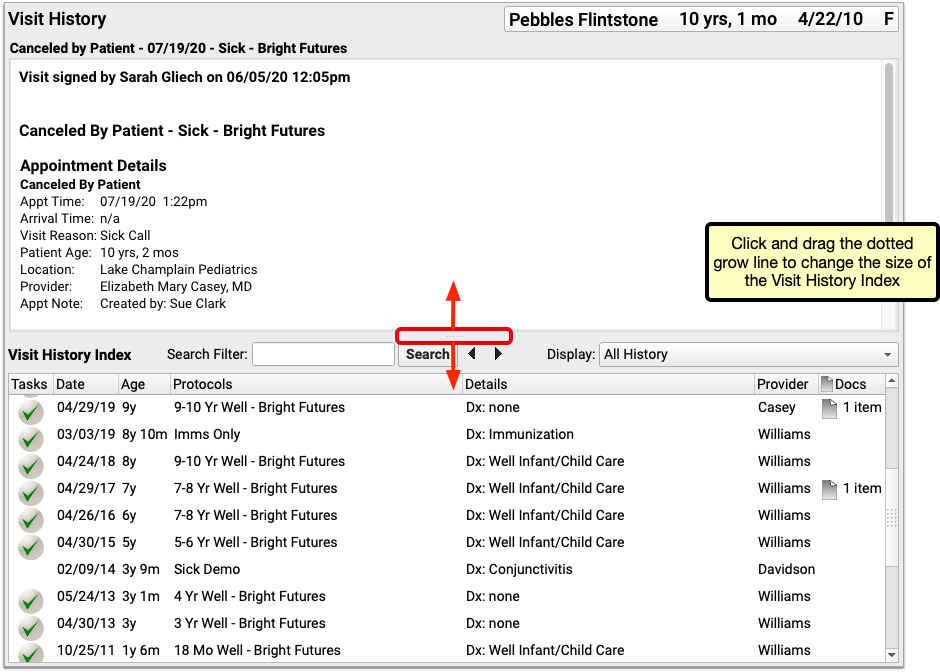
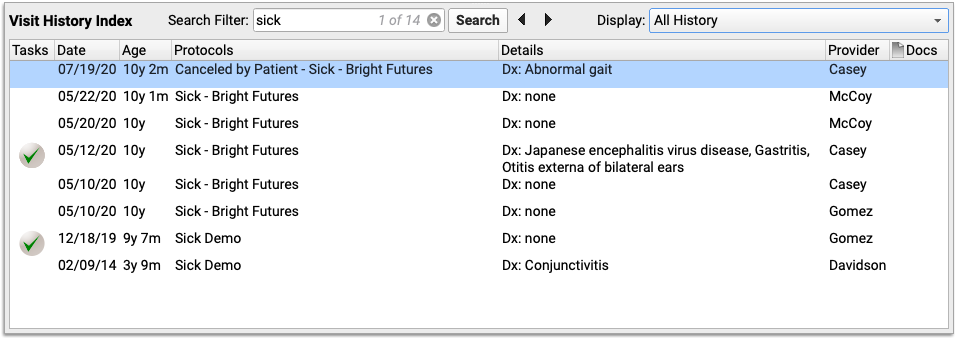
The Appointment History component is available for practices who use the Appointment Book. This component displays a list of appointments for a patient, both past and future, including canceled appointments.
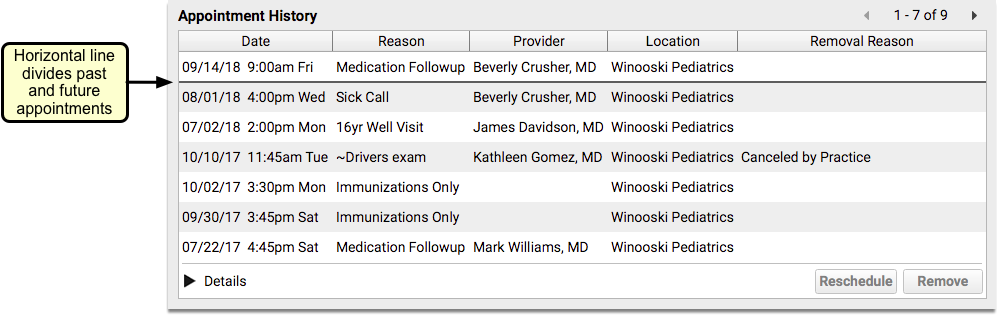
Details for each appointment can be viewed by highlighting the appointment and clicking the Details disclosure triangle.
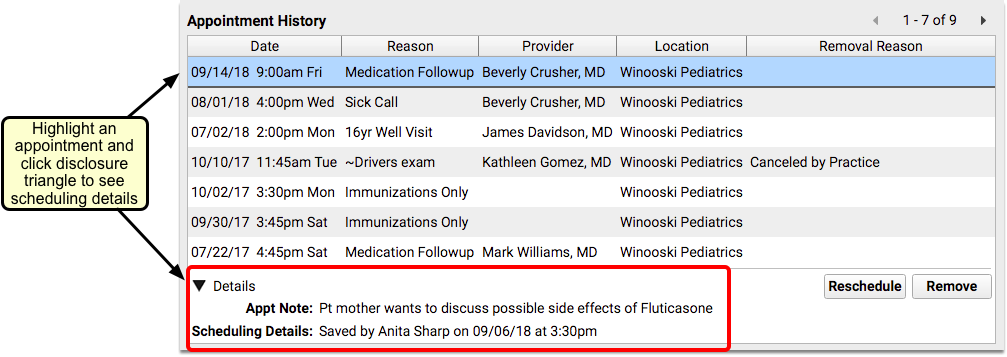
You can reschedule or cancel appointments directly from this component.
The Appointment History appears on a patient’s Medical Summary by default, but you can also add it to the Demographics sections of the chart, the Patient Check-In ribbon, the Appointment Details ribbon (if your practice uses the Appointment Book), any visit protocol, and phone notes.
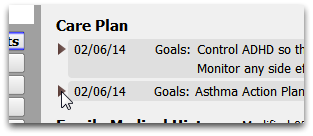
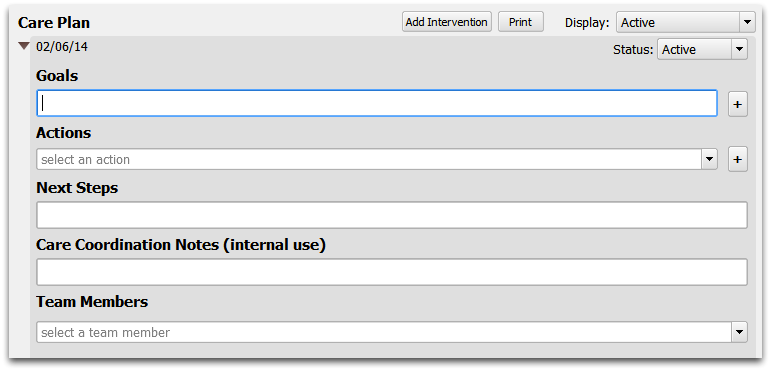
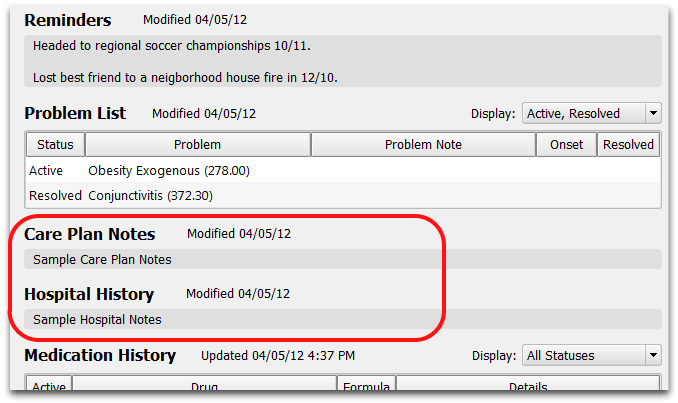
Care Plan
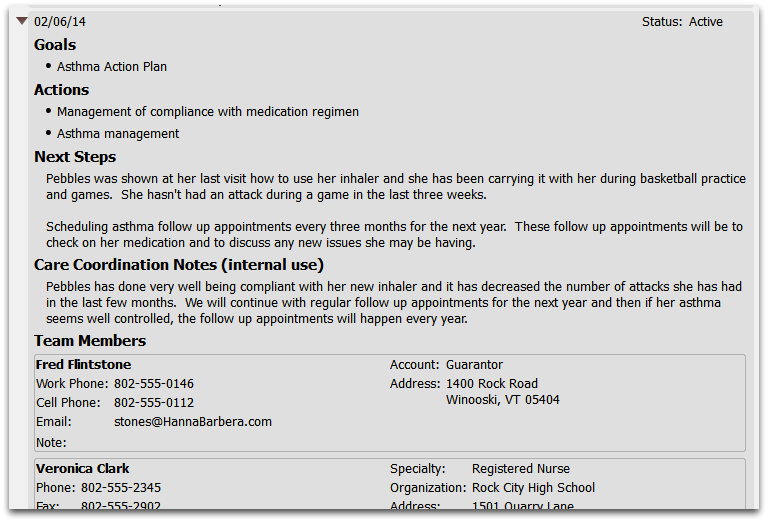
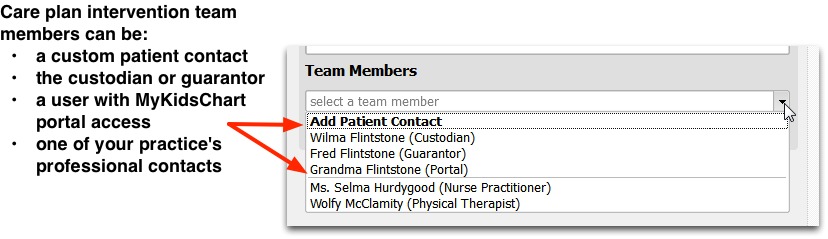
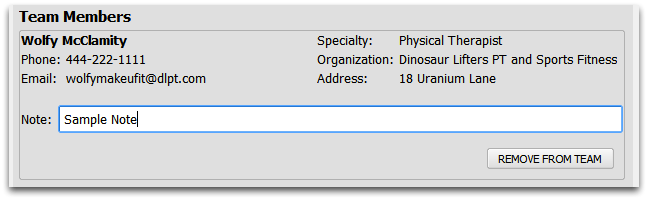
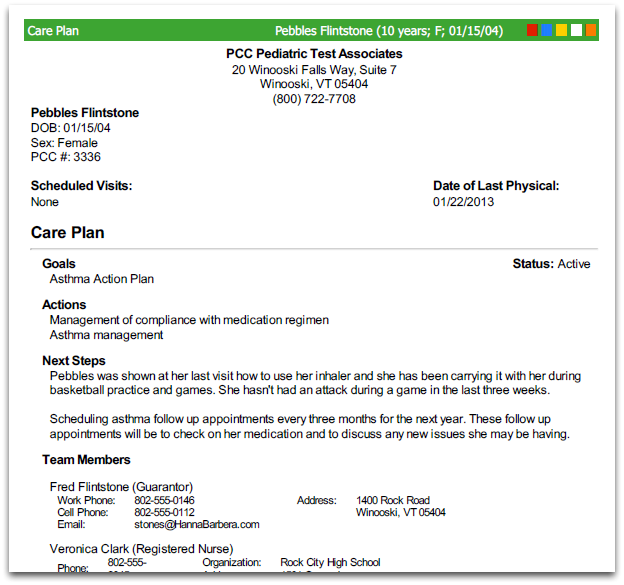
The Care Plan component can be used to manage a patient’s progress with a chronic condition, mental health issue, or anything that a patient regularly sees a specialist for.
Care plans can be reviewed and updated at each well visit, or as labs or reports come in from relevant specialists.
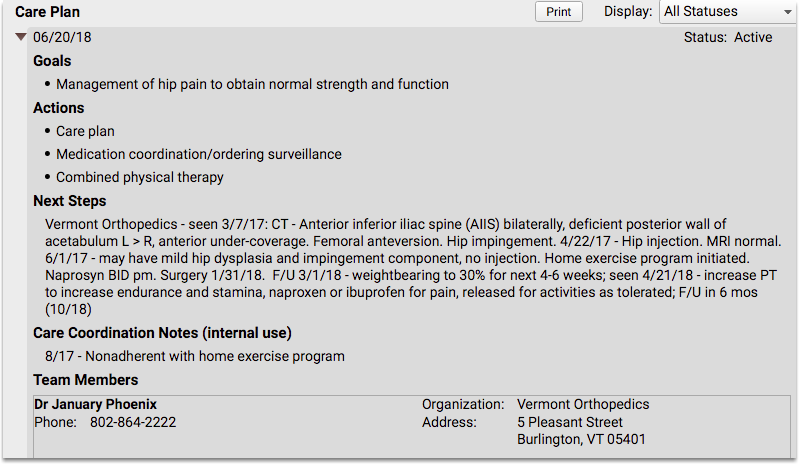
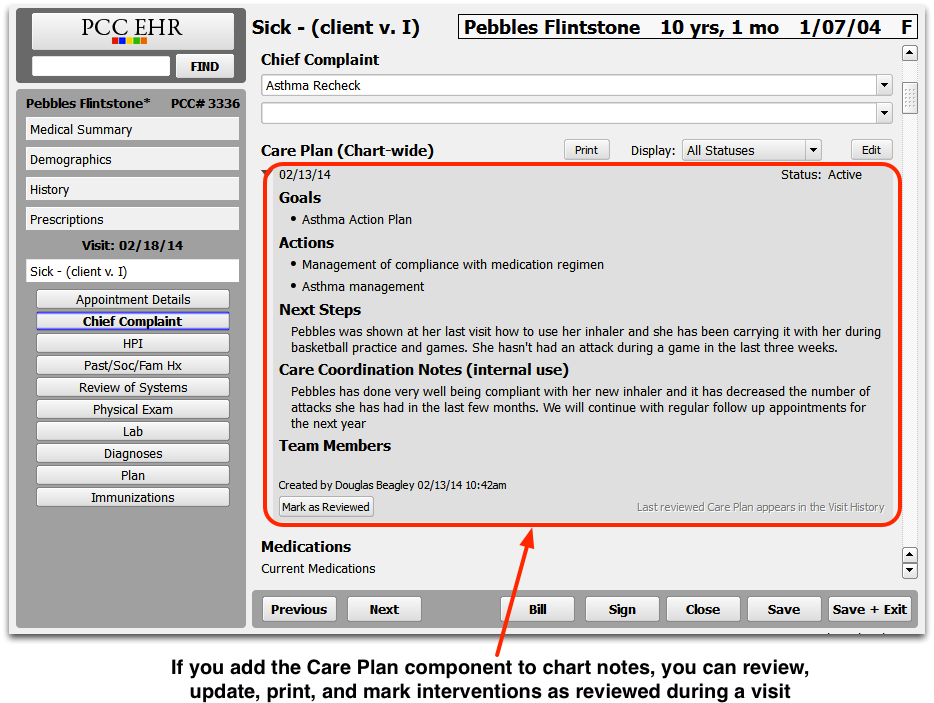
You can add a Care Plan to the Medical Summary or Demographics sections of the chart, the Patient Check-In ribbon, the Appointment Details ribbon (if your practice uses the Appointment Book), any visit protocol, and phone notes.
Care plans are a requirement for PCMH and are recommended by some payers. You can use it to meet the NCQA guidelines for meeting the requirements of PCMH.
For more information about using care plans, read the Use a Patient Care Plan to Improve Care for Chronic Patient Issues article.
Communication Preferences
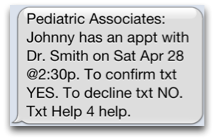
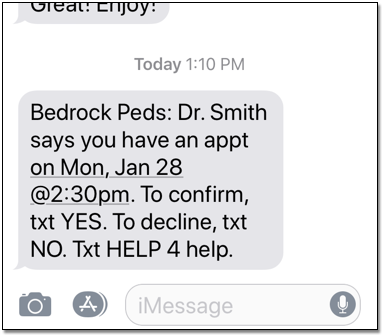
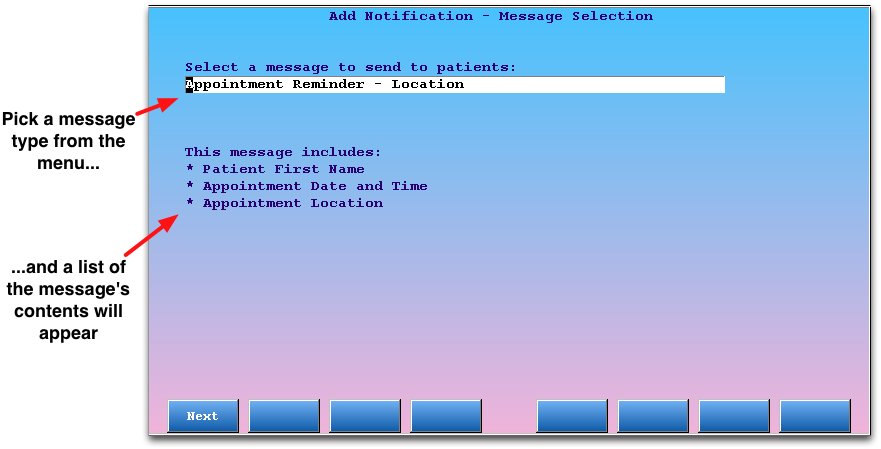
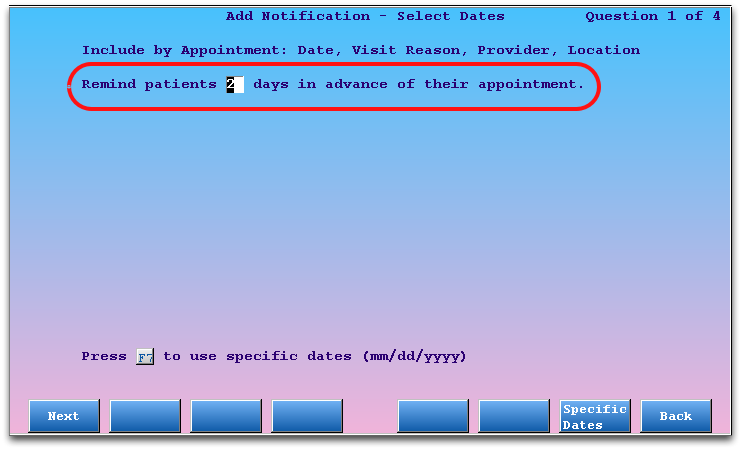
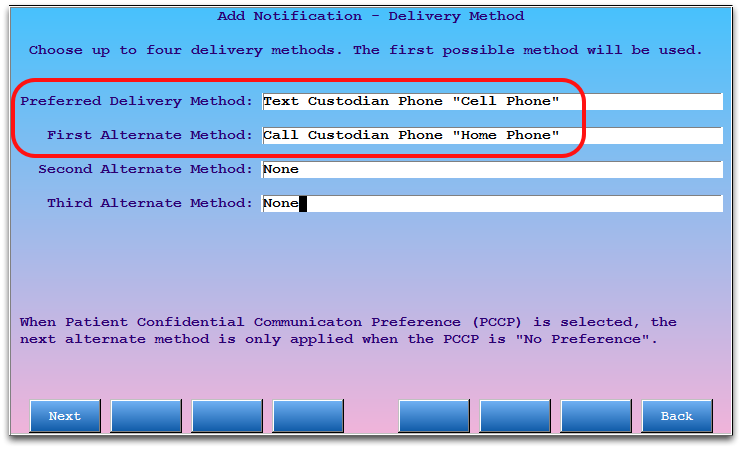
The Communication Preferences component is used to indicate how a family prefers to be contacted, and whether they wish for their data to be shared with immunization registries.
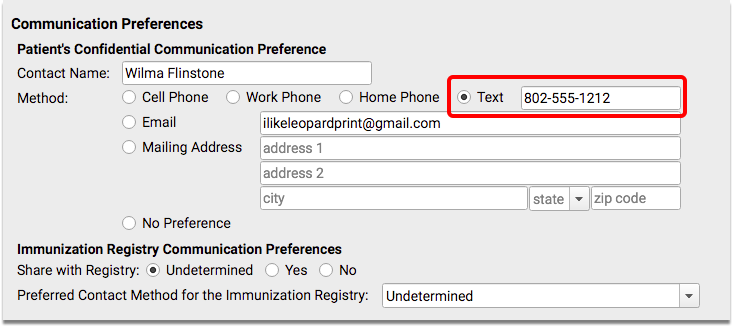
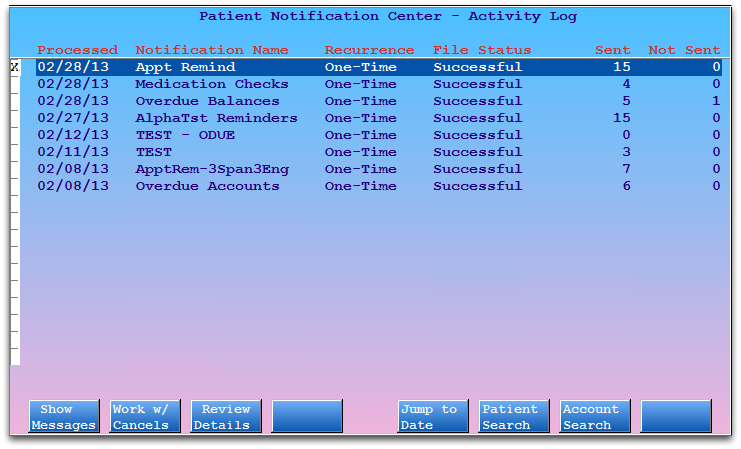
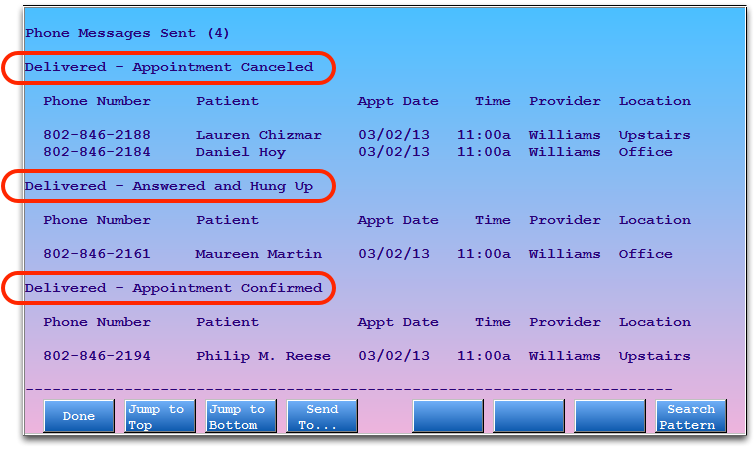
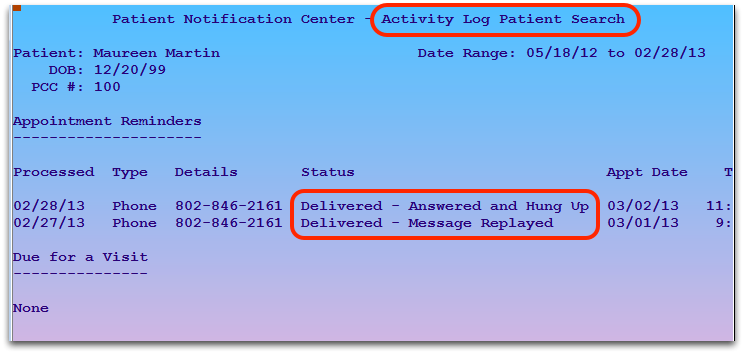
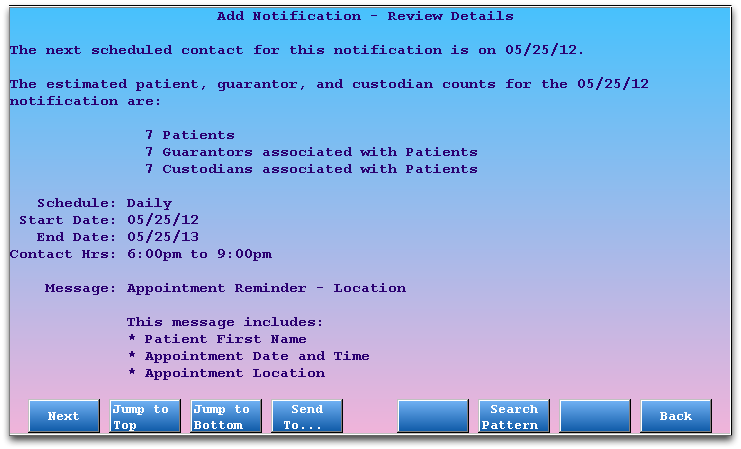
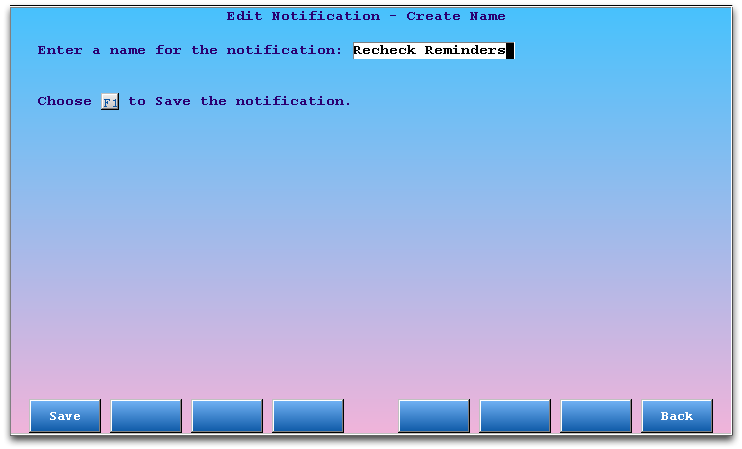
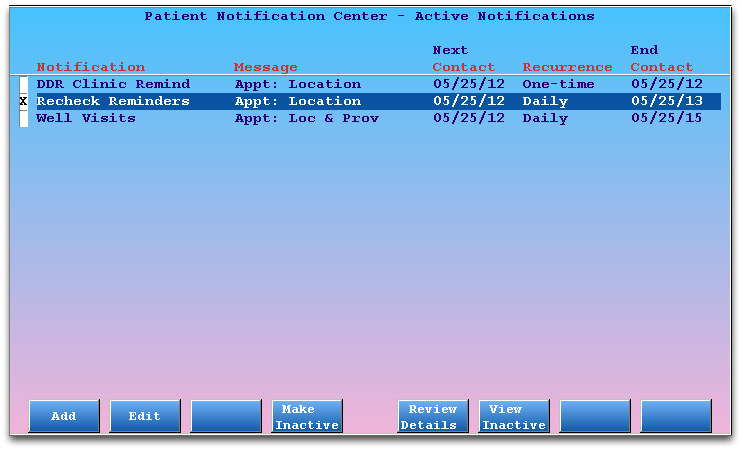
Patient Reminders and the Patient Notification Center both use the patient’s confidential communication preference.
The Communication Preferences component appears in the Demographics section of the chart by default, but you can also add it to the Medical Summary, the Patient Check-In ribbon, the Appointment Details ribbon (if your practice uses the Appointment Book), any visit protocol, and phone notes.
Confidential Notes
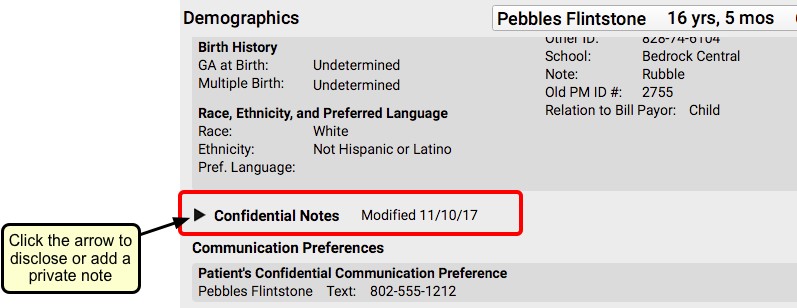
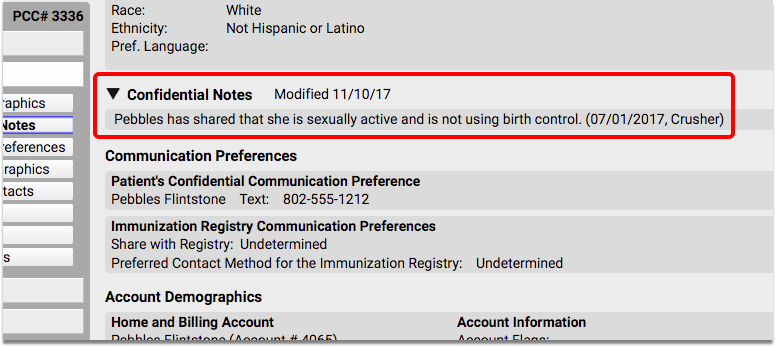
The Confidential Notes component provides a place in the patient’s chart where clinicians can write notes that are only meant to be seen by certain staff.
Information stored in the Confidential Notes component will not print out on any reports, including the Health Information Summary, Patient Visit Summary, or the Summary of Care Record. It will not appear anywhere in the patient portal.
The Confidential Notes component is collapsed by default, which means that any notes that have been written do not appear visibly on the screen when a chart is opened. The person reviewing the chart will have to click on the arrow to expand the note section, and read whatever has been written.
You can add the Confidential Notes component to the Medical Summary or Demographics sections of the chart, the Patient Check-In ribbon, the Appointment Details ribbon (if your practice uses the Appointment Book), any visit protocol, and phone notes.
You can copy a confidential note from one sibling’s chart to another’s. See the Siblings component overview below for more information.
For more information about using confidential notes, read the Confidential Notes and Other Confidential Fields article.
For more information about patient privacy and making certain items confidential, read the Patient Privacy Features article.
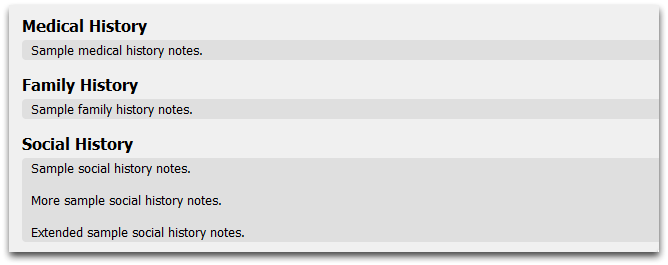
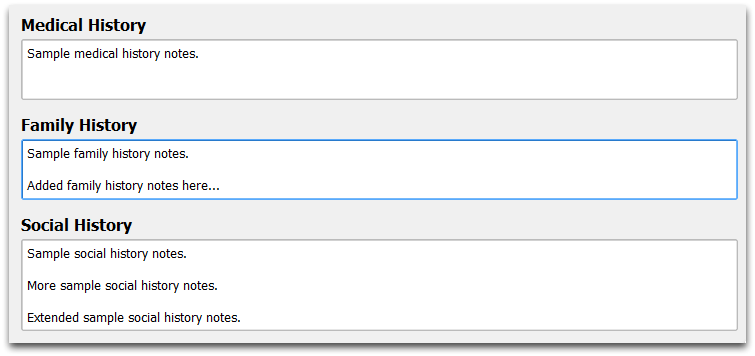
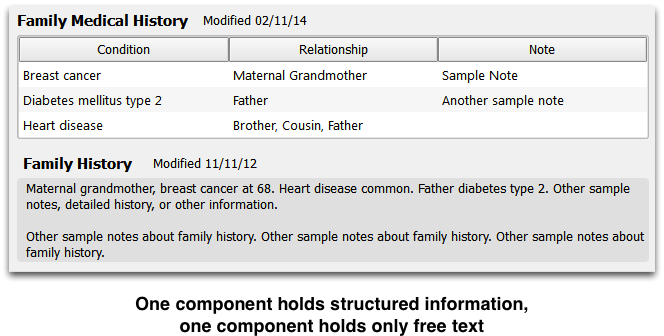
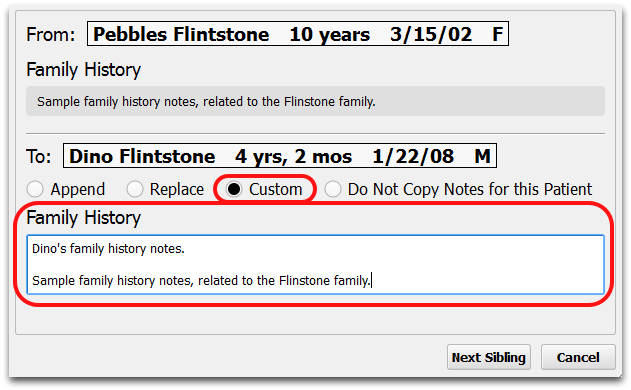
Family History
The Family History component is used to enter relevant family history for a patient.
You can add the Family History component to the Medical Summary or Demographics sections of the chart, the Patient Check-In ribbon, the Appointment Details ribbon (if your practice uses the Appointment Book), any visit protocol, and phone notes.

The Family History component is a simple entry field that expands as text is added.
You can copy family history from one sibling’s chart to another’s. See the Siblings component overview below for more information.
Family Medical History
The Family Medical History component is used to chart medical history for family members.
You can add the Family Medical History component to the Medical Summary or Demographics sections of the chart, the Patient Check-In ribbon, the Appointment Details ribbon (if your practice uses the Appointment Book), any visit protocol, and phone notes.
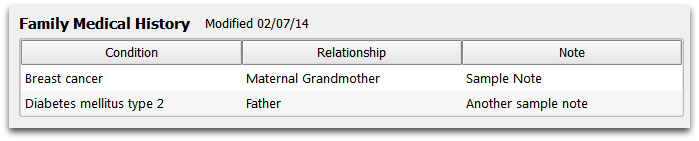
In edit mode, you can click on a blank field to add a new condition and relationship.
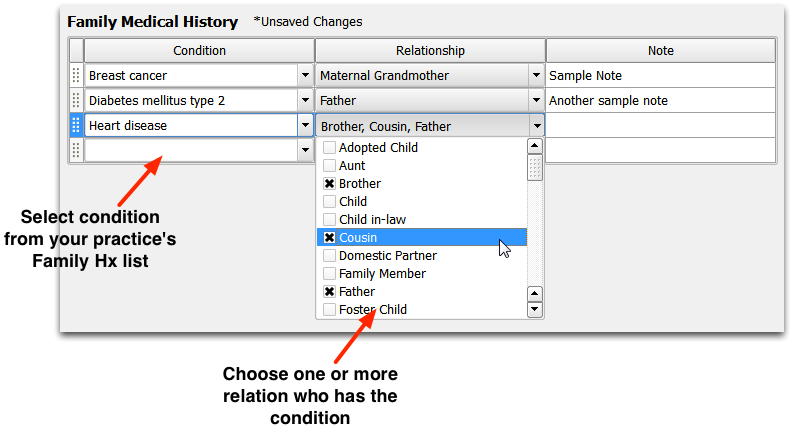
For each condition, you can select a diagnosis from your practice’s Family History list, or right-click to search the SNOMED diagnosis list. Next, you can indicate one or more family members who have the diagnosis, and enter notes. The relationship field comes from a standardized HL7 list of relationships.
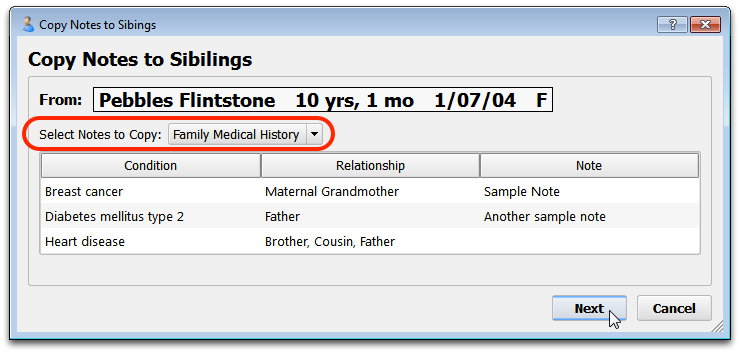
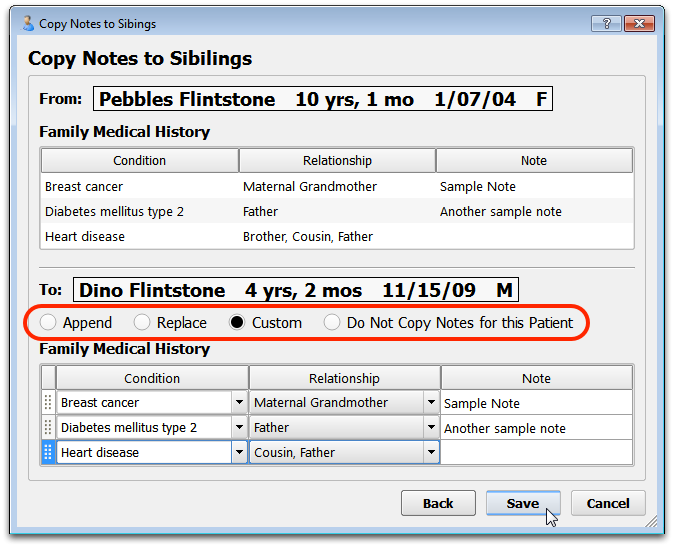
You can copy a family’s medical history from one sibling’s chart to another’s. See the Siblings component overview below for more information.
For more information about working with a family’s medical history, read the Family Medical History article.
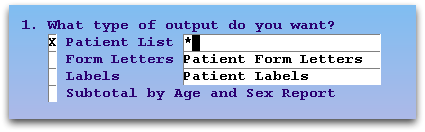
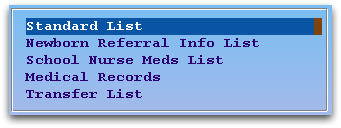
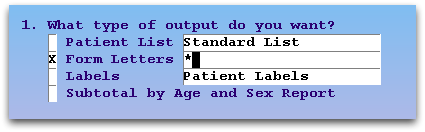
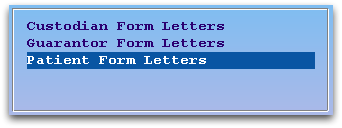
Forms (Patient and Account)
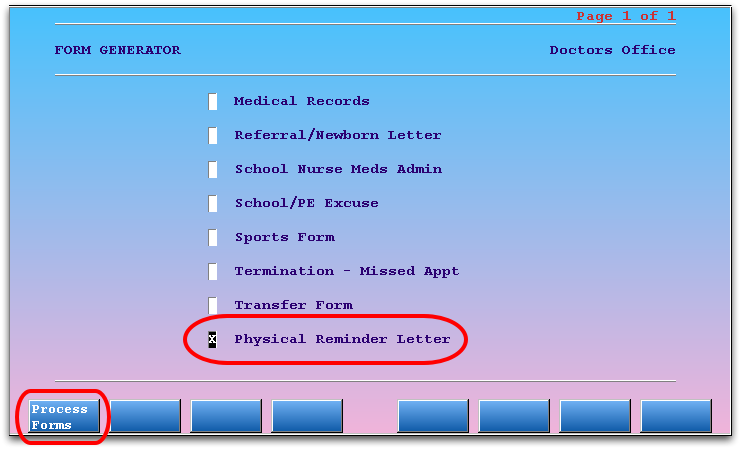
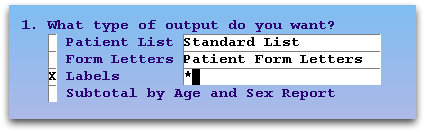
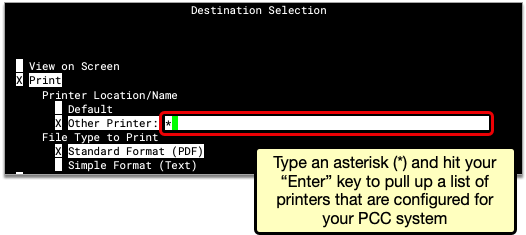
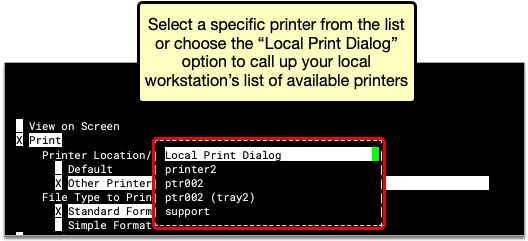
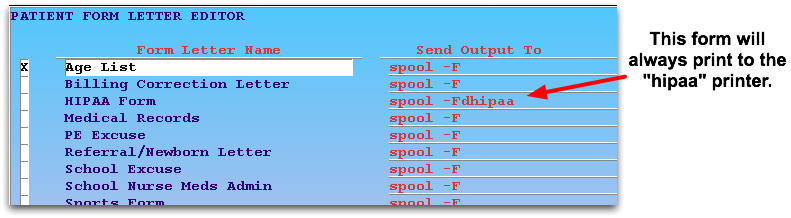
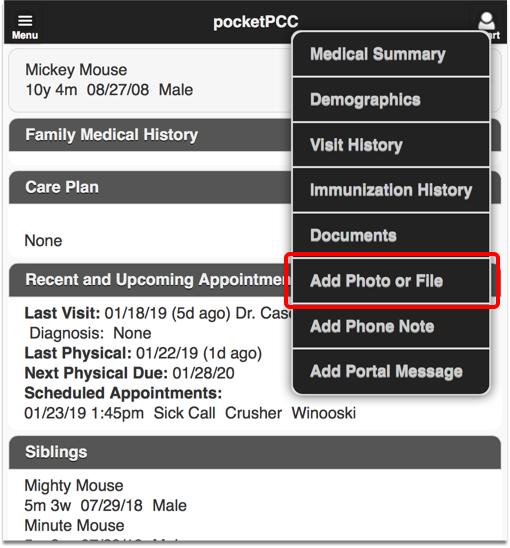
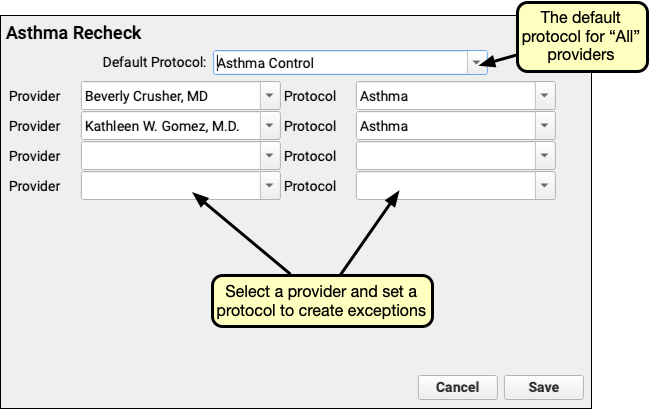
The Patient and Account Forms components can be used to generate patient and account forms in PCC EHR. This component can improve form letter workflow for practices by making sure the right forms appear on the right protocols.

You can configure which forms will appear by default for “one click” generating. You can choose to have different forms appear in different sections of the patient chart. The Patient and Account Forms components will always display a drop-down menu of all available forms.
The Patient and Account Forms component appears on a patient’s Medical Summary by default, but you can add this component to the Demographics sections of the chart, the Patient Check-In ribbon, the Appointment Details ribbon, visit protocols, phone notes, and portal messages.
To learn more about generating and configuring forms in PCC EHR, read the Generate Forms or Configure Forms articles.
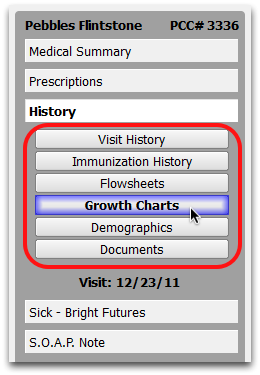
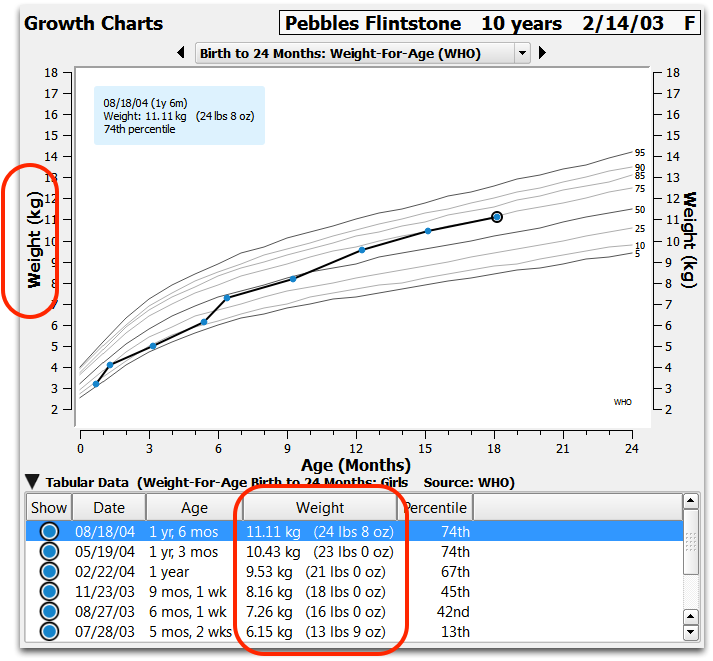
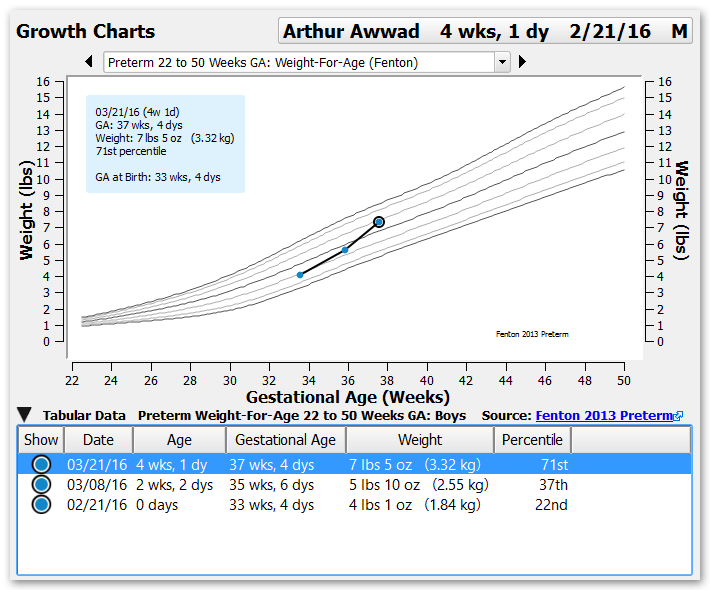
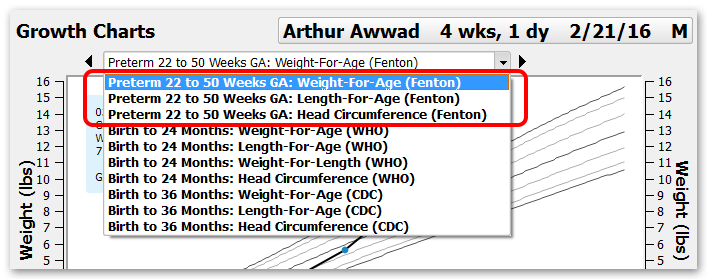
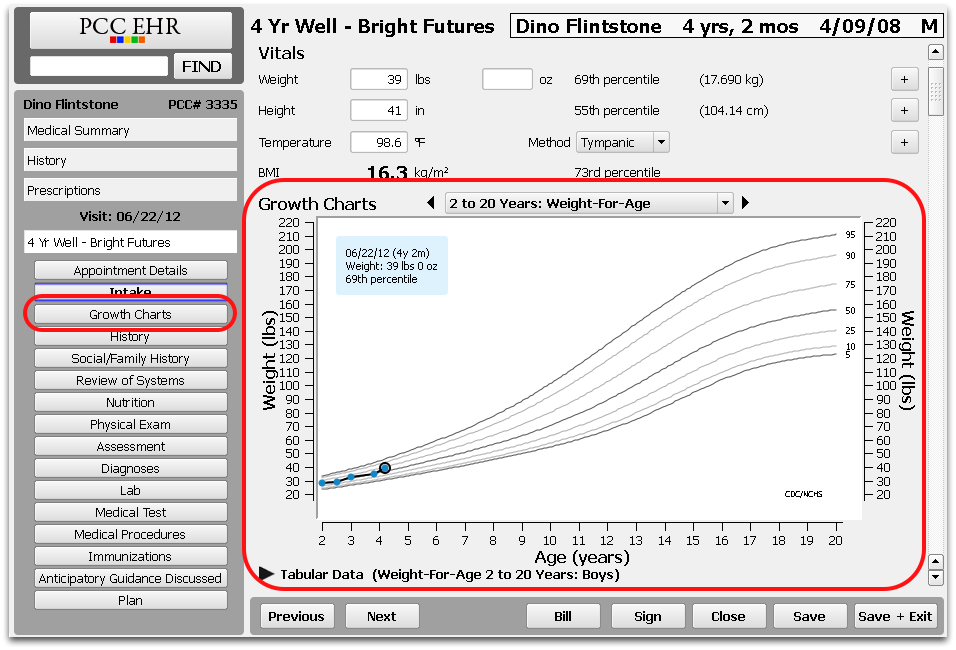
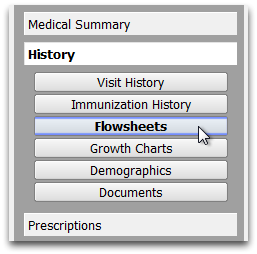
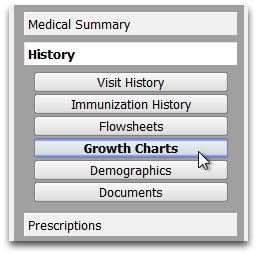
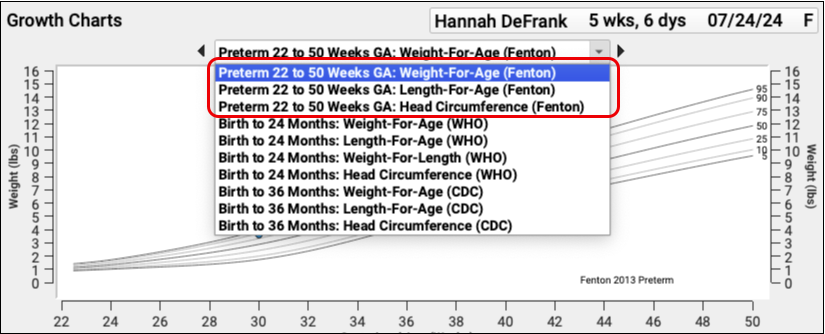
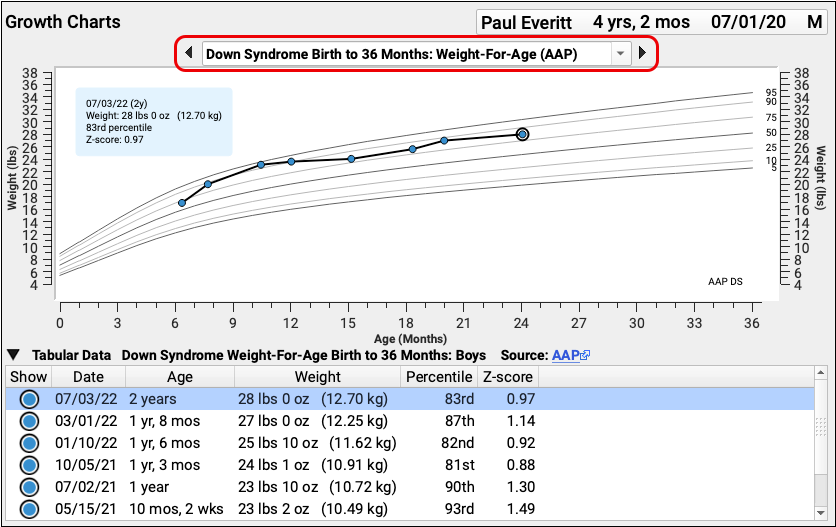
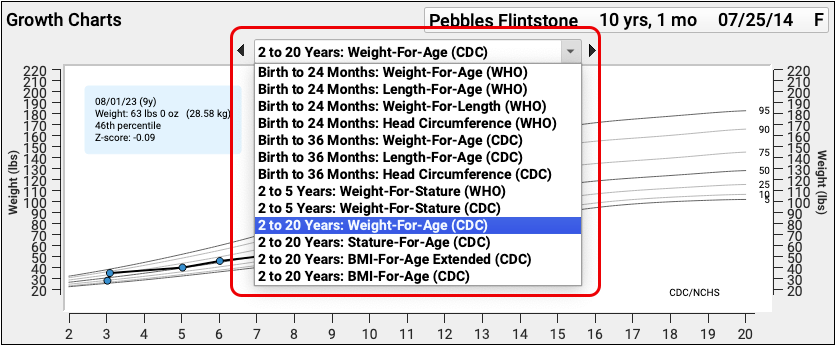
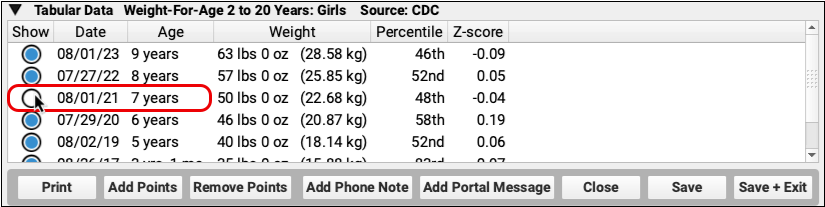
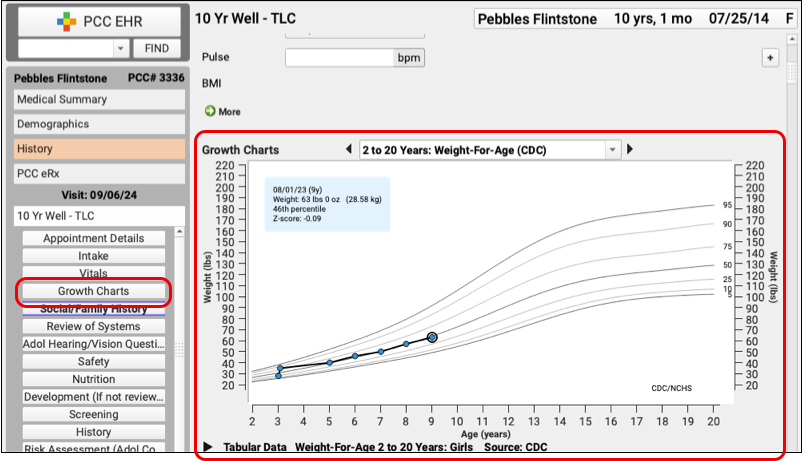
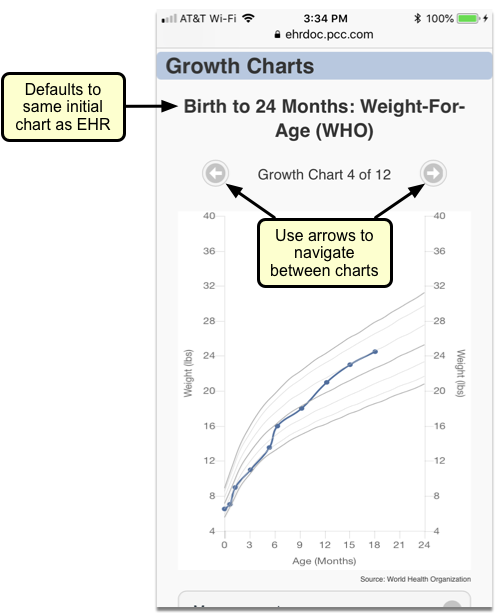
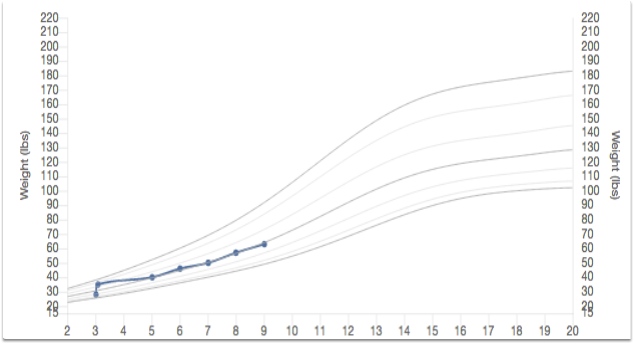
Growth Charts
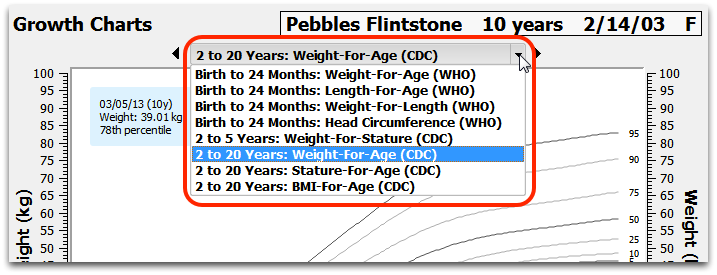
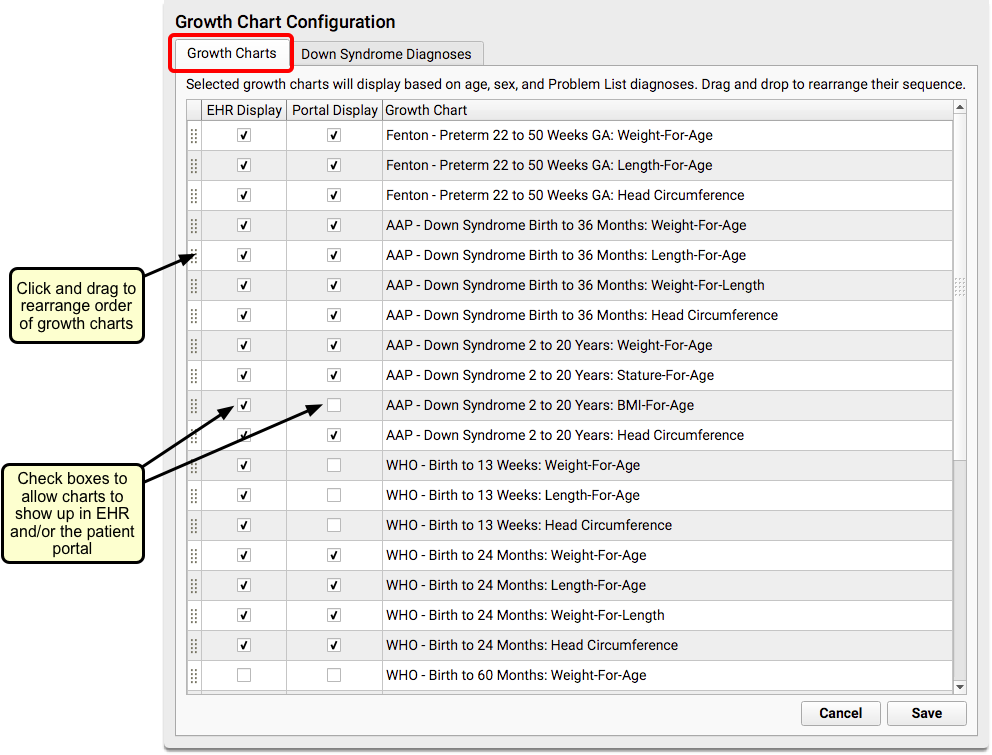
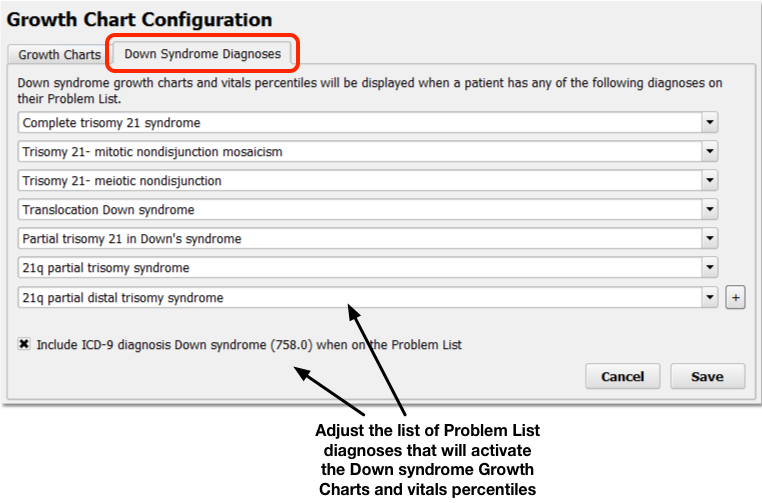
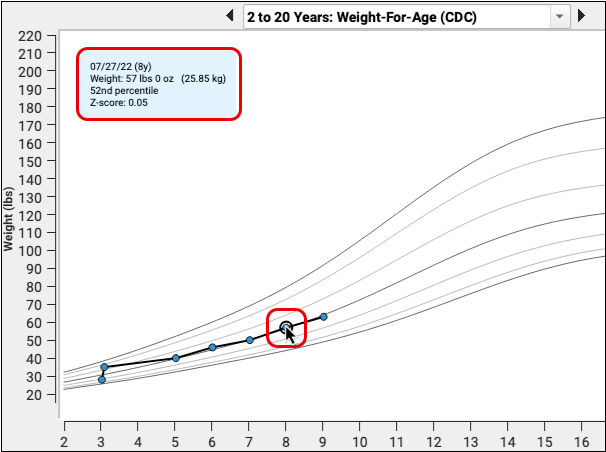
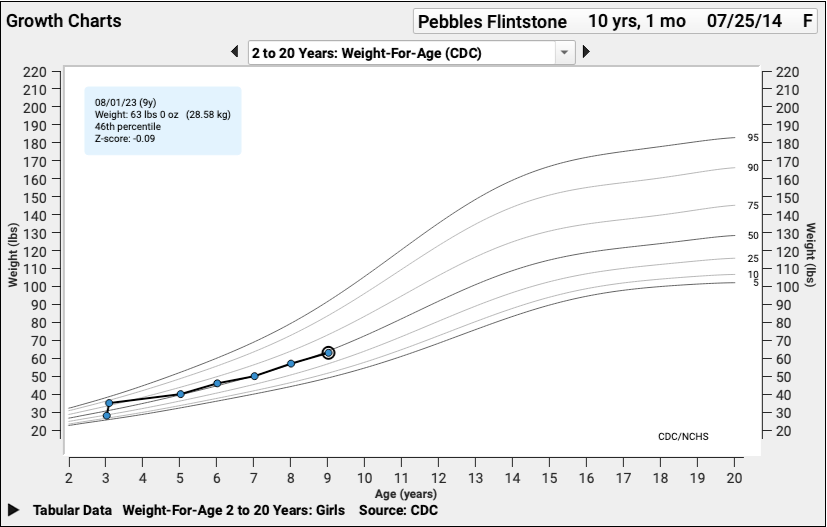
The Growth Charts component collects and displays vitals data across all of a patient’s visits. Different growth charts appear in the patient’s chart automatically based on their age, sex, and certain diagnoses.

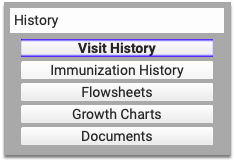
Growth Charts appear in the History section of a patient’s chart by default, but you can add them to the Medical Summary, Demographics section, the Patient Check-In ribbon, the Appointment Details ribbon (if your practice uses the Appointment Book), any visit protocol, and phone notes.
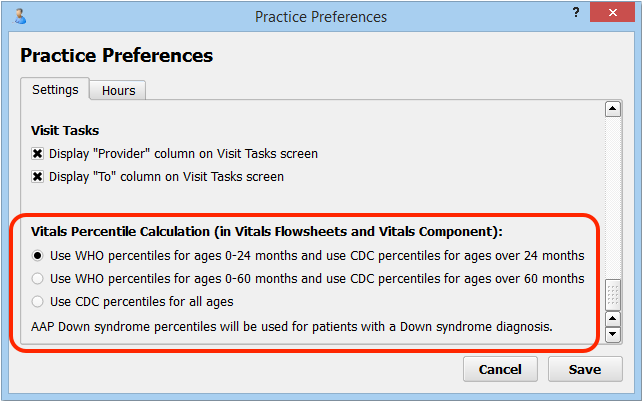
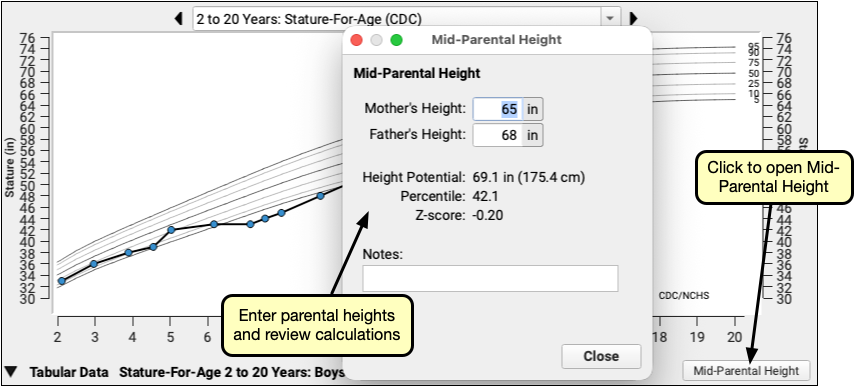
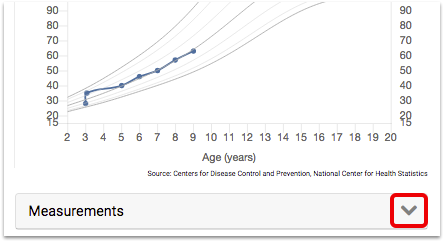
PCC EHR plots patient data on each chart and also indicates percentile averages with gray lines. Percentile ranges are specific to a patient’s age and sex, and come from the World Health Organization (WHO) and the Centers for Disease Control (CDC).
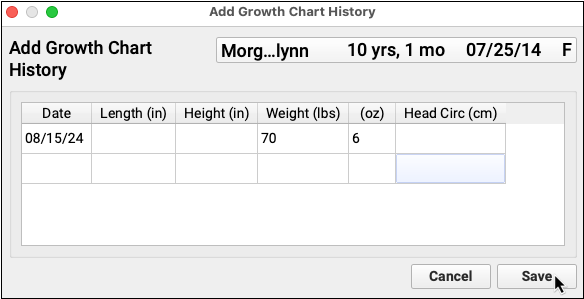
PCC EHR updates growth charts automatically when you enter vitals on a visit chart note.
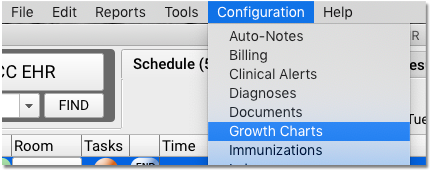
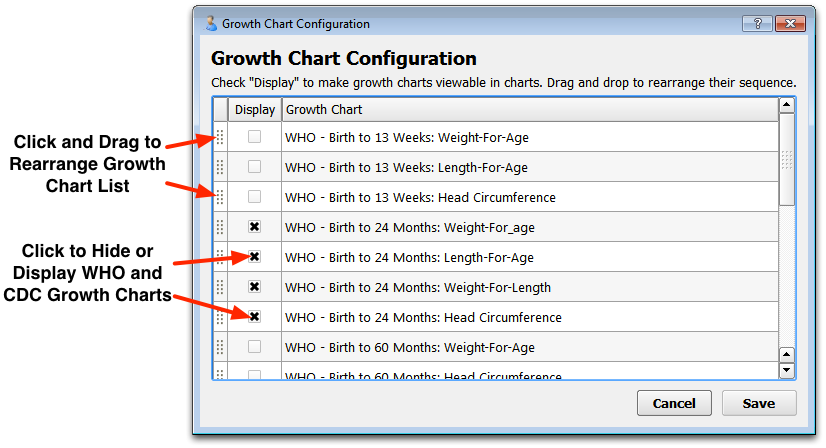
For more information about growth charts, read the Review a Patient’s Growth Chart and the Configure Growth Charts articles.
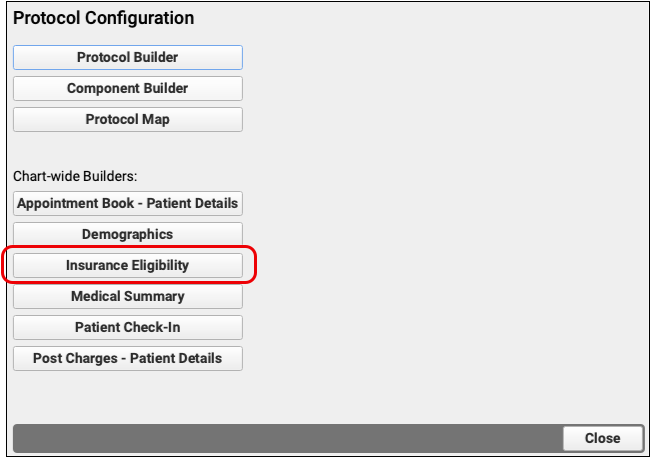
Insurance Eligibility
The Insurance Eligibility component primarily functions as an encounter-specific component. A more limited version is available on any protocol, however, for use when checking eligibility before a patient has an encounter.
See Insurance Eligibility below.
Medical History
The Medical History component is used to enter relevant medical history for a patient.
You can add the Medical History component to the Medical Summary or Demographics sections of the chart, the Patient Check-In ribbon, the Appointment Details ribbon (if your practice uses the Appointment Book), any visit protocol, and phone notes.
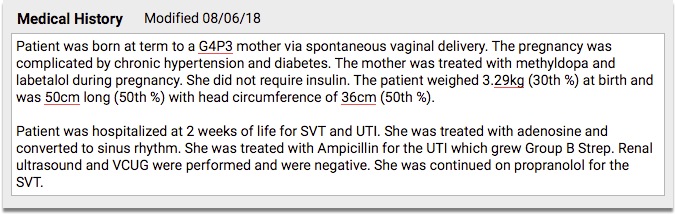
The Medical History component is a simple entry field that expands as text is added.
You can copy medical history from one sibling’s chart to another’s. See the Siblings component overview below for more information.
Medication History
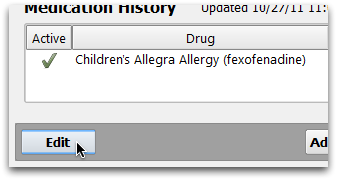
The Medication History component shows all of a patient’s prescribed and reported medications.
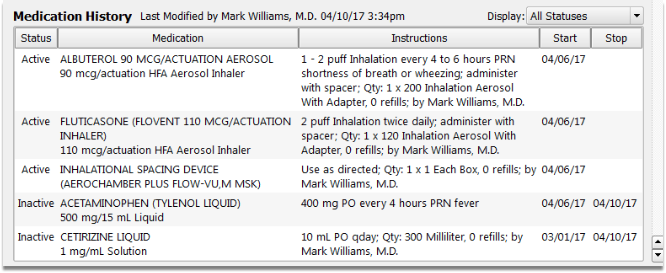
Each medication is displayed along with its dosing statement and instructions, as well as the start and stop date of each prescription.
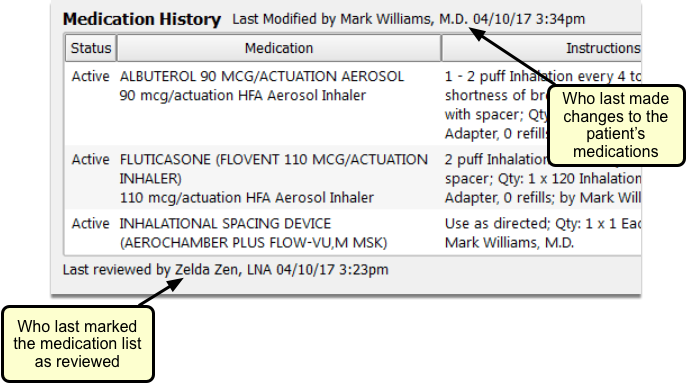
At the top of the list, you can see when the patient’s medications were last updated, and beneath the list you can see when it was last marked as reviewed.
The Medication History appears on a patient’s Medical Summary by default, but you can add this component to the Demographics sections of the chart, the Patient Check-In ribbon, the Appointment Details ribbon (if your practice uses the Appointment Book), any visit protocol, and phone notes.
To learn more about working with a patient’s medication history, and how it interfaces with PCC’s prescribing tool, PCC eRx, read Review and Update Medication History.
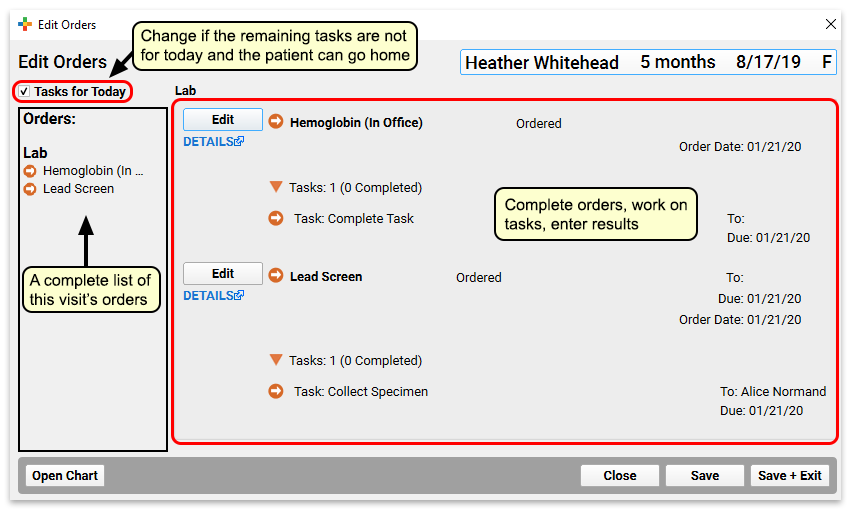
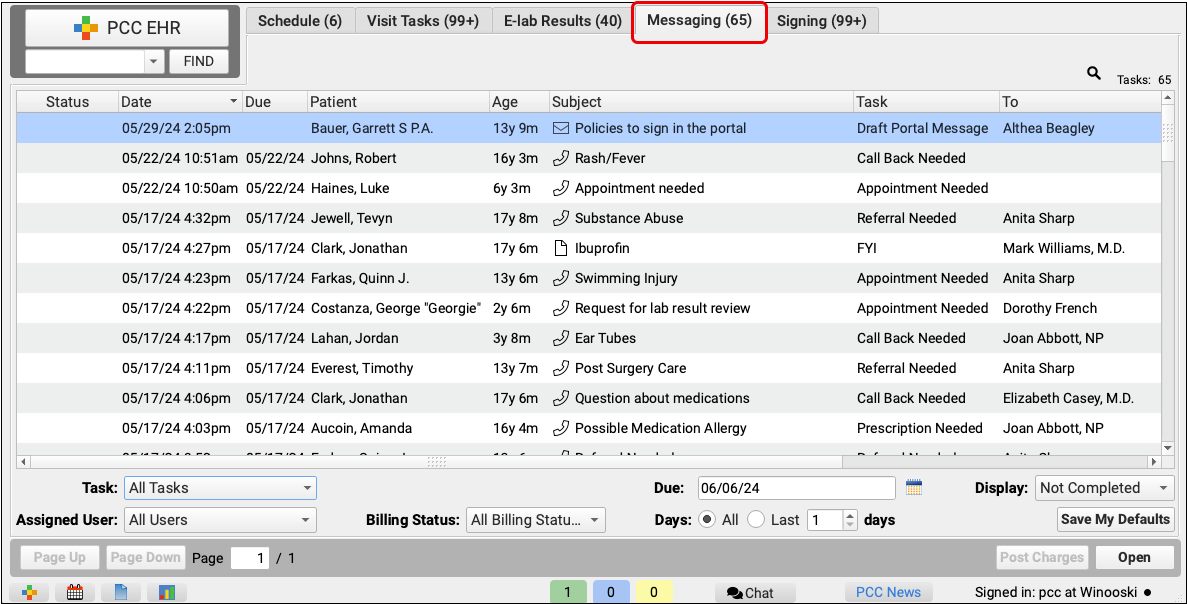
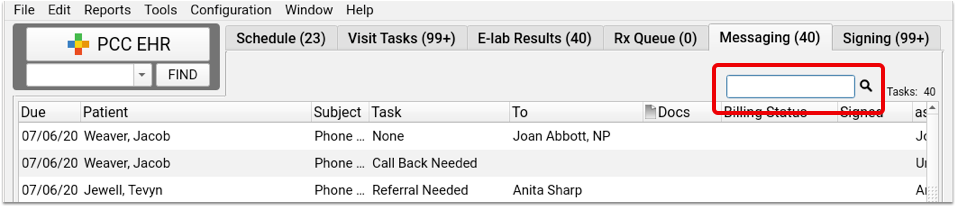
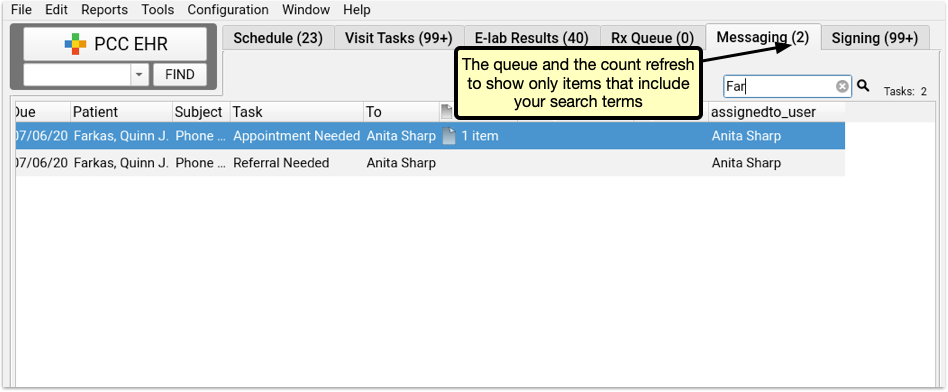
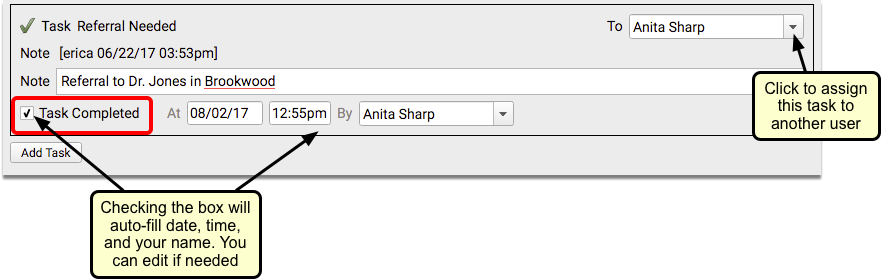
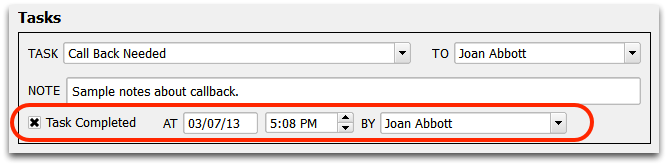
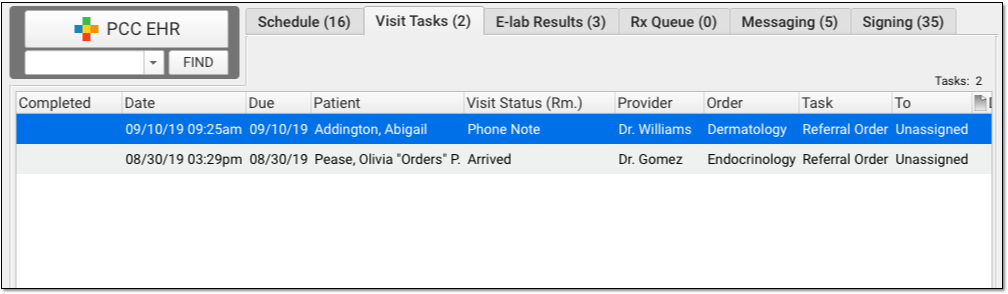
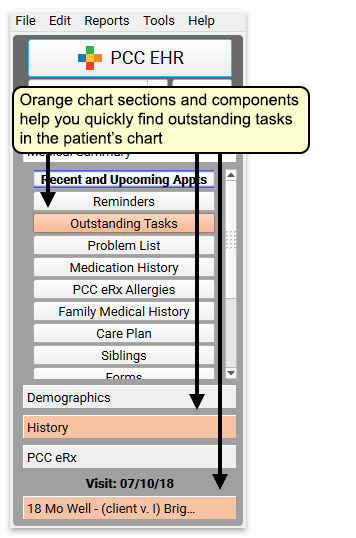
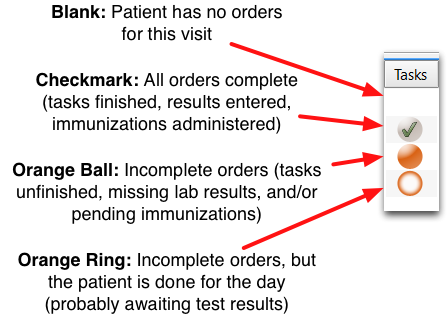
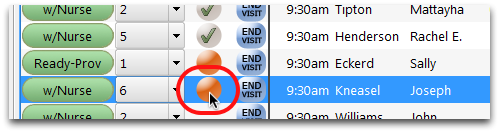
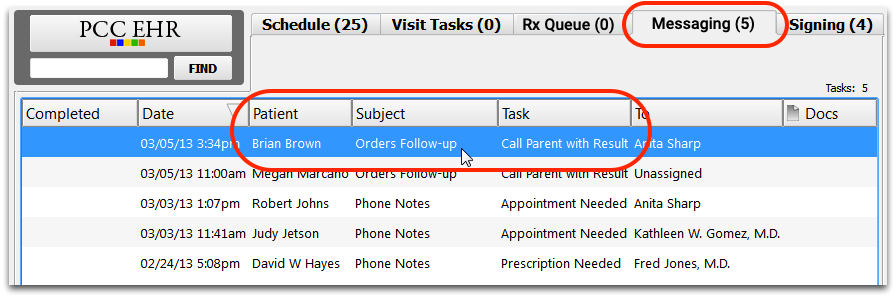
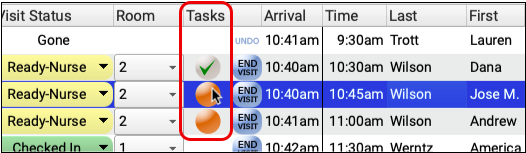
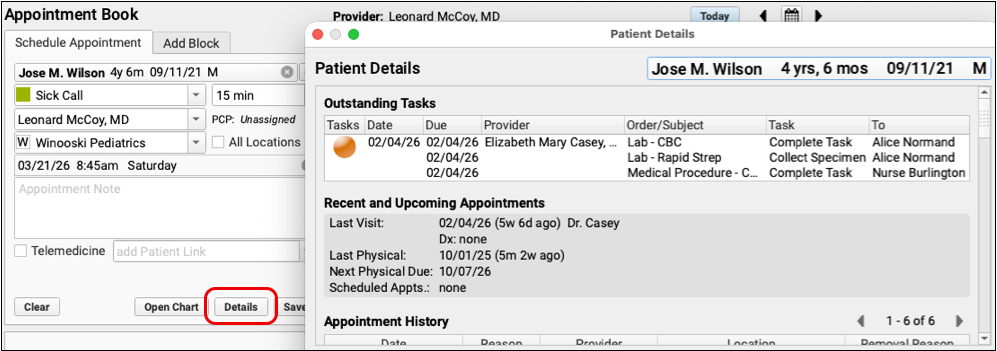
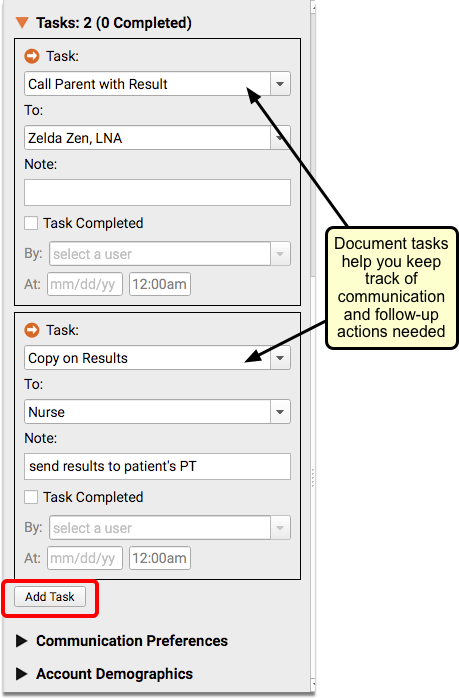
Outstanding Tasks
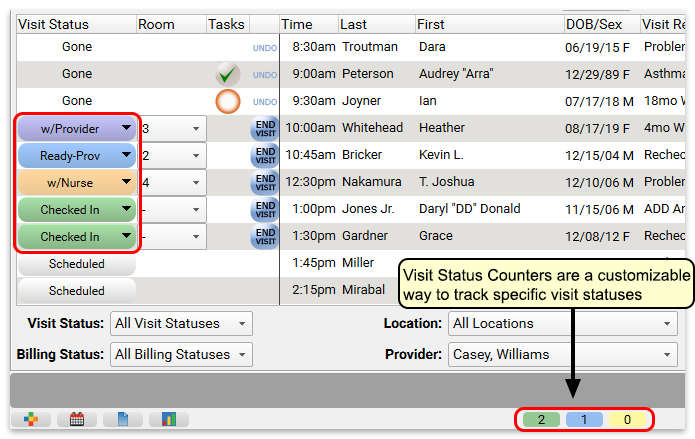
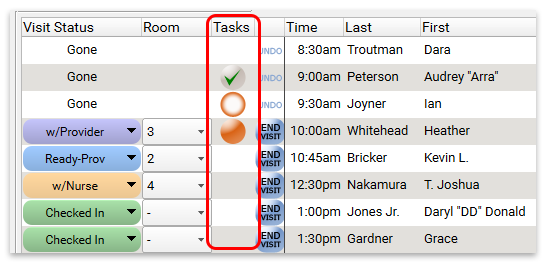
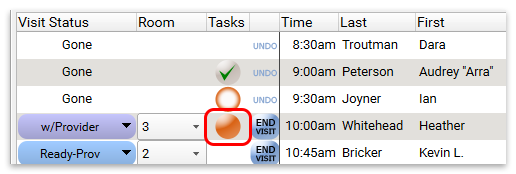
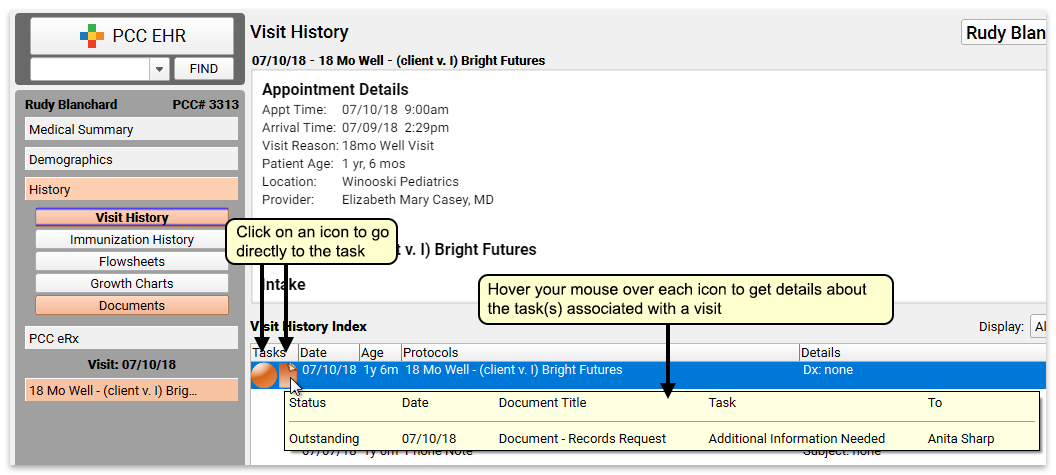
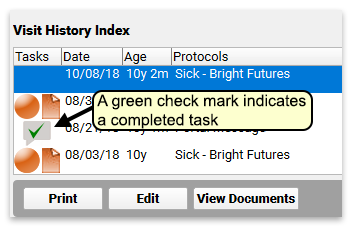
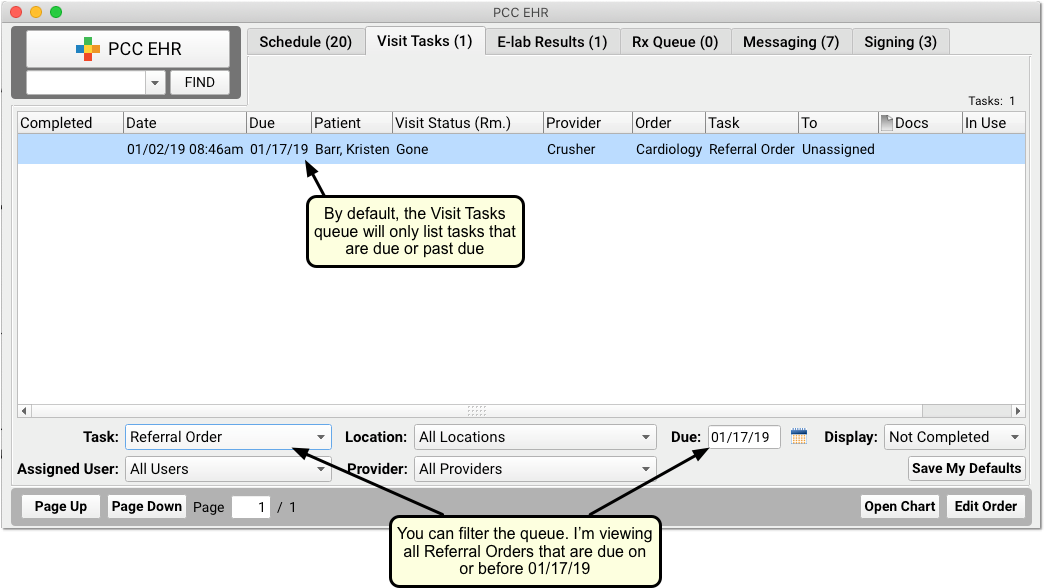
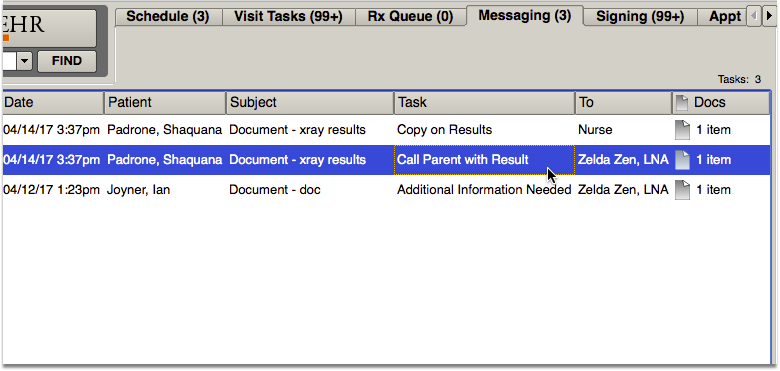
The Outstanding Tasks component shows all outstanding tasks for a patient. Icons are used to indicate if the task is attached to an order, phone note or document.
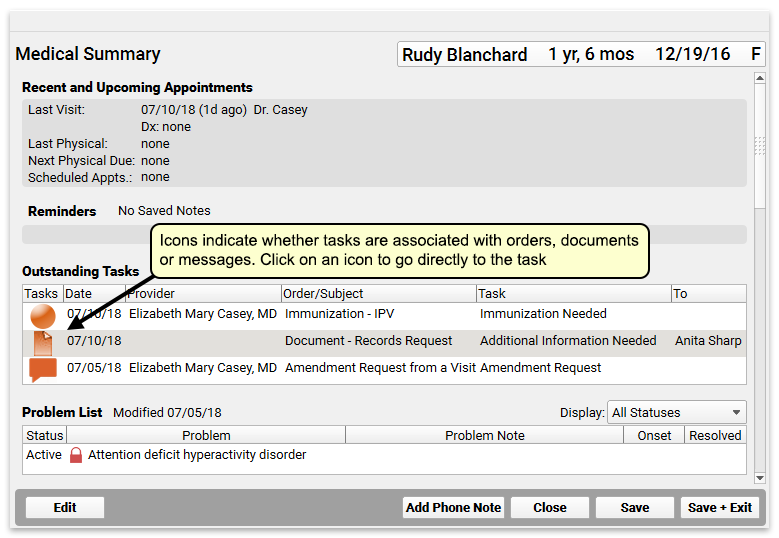
Outstanding Tasks appear on a patient’s Medical Summary by default, but you can add this component to the Demographics sections of the chart, the Patient Check-In ribbon, the Appointment Details ribbon (if your practice uses the Appointment Book), any visit protocol, and phone notes.
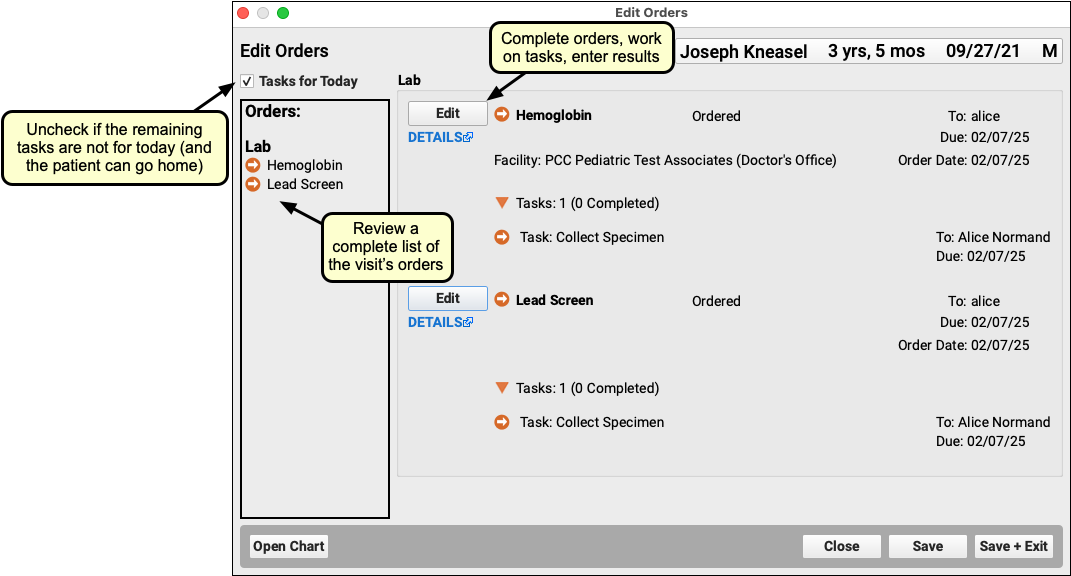
To learn more about completing tasks in PCC EHR, read Fulfill Orders and Complete Tasks
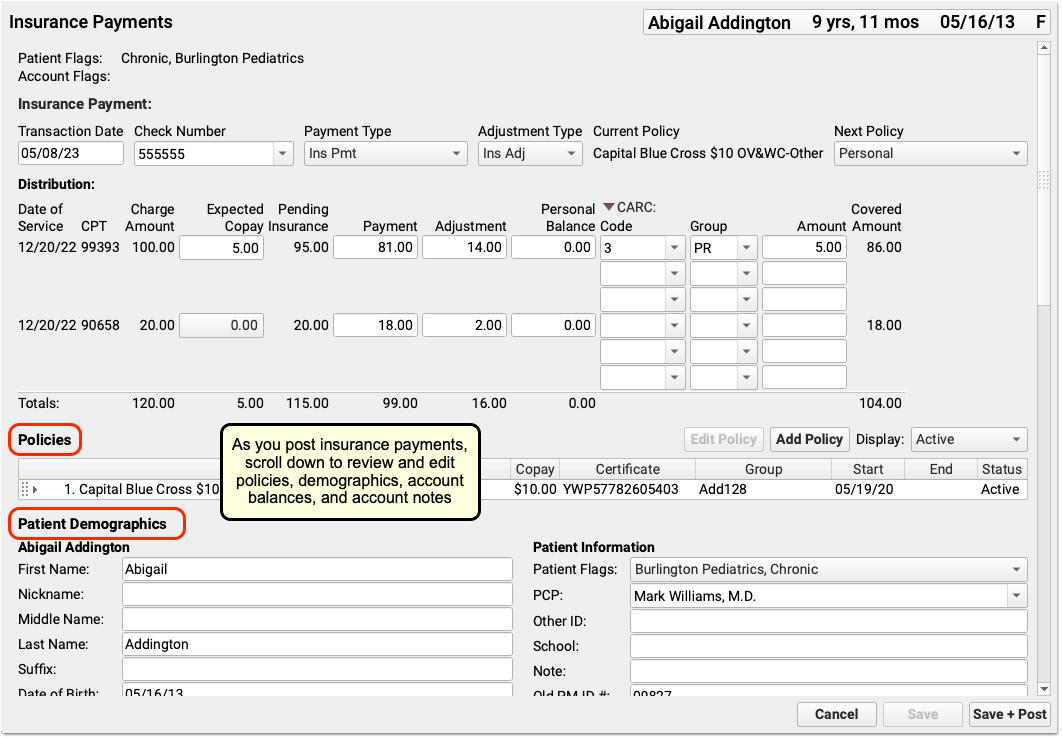
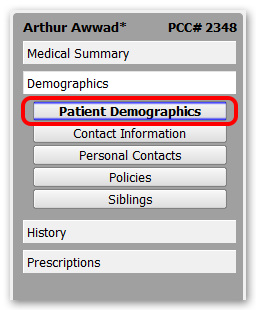
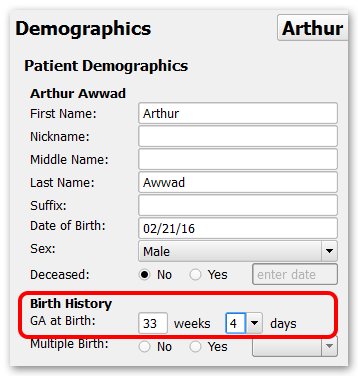
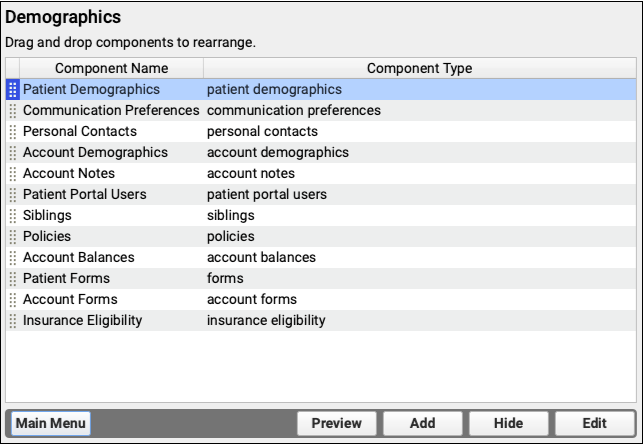
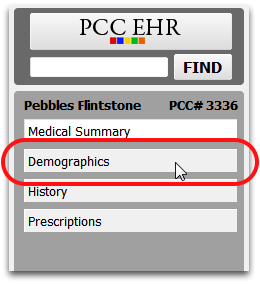
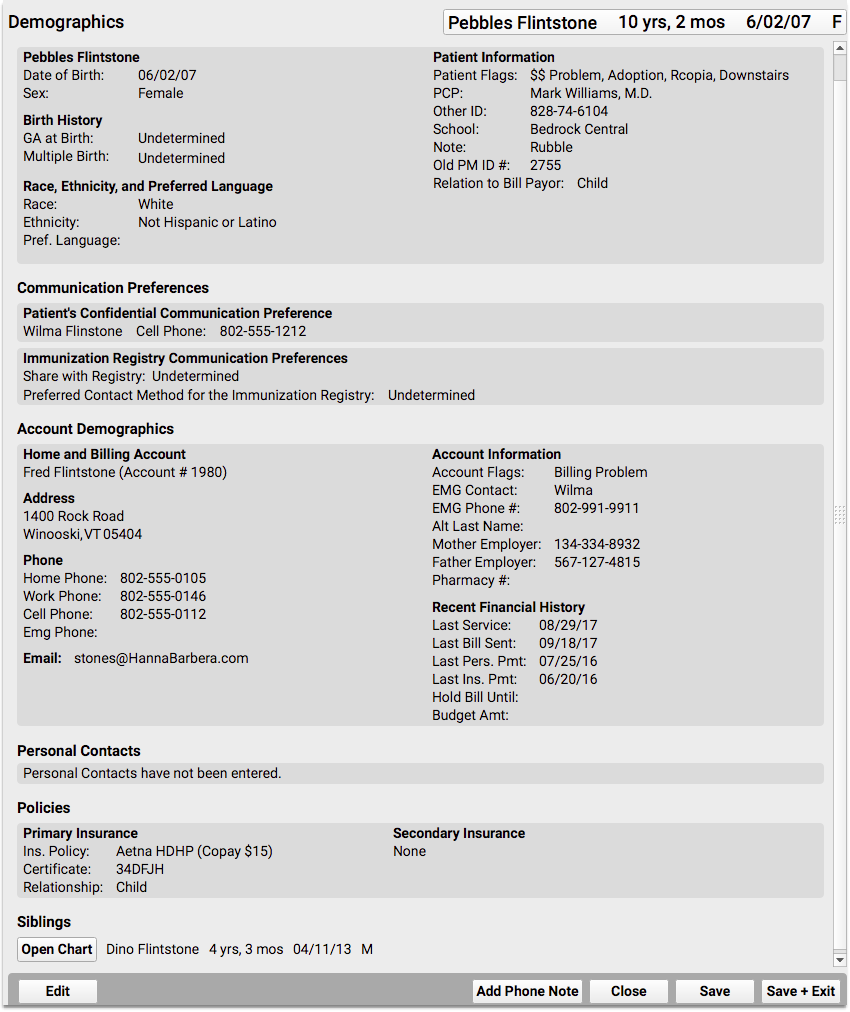
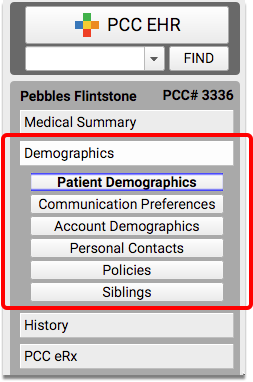
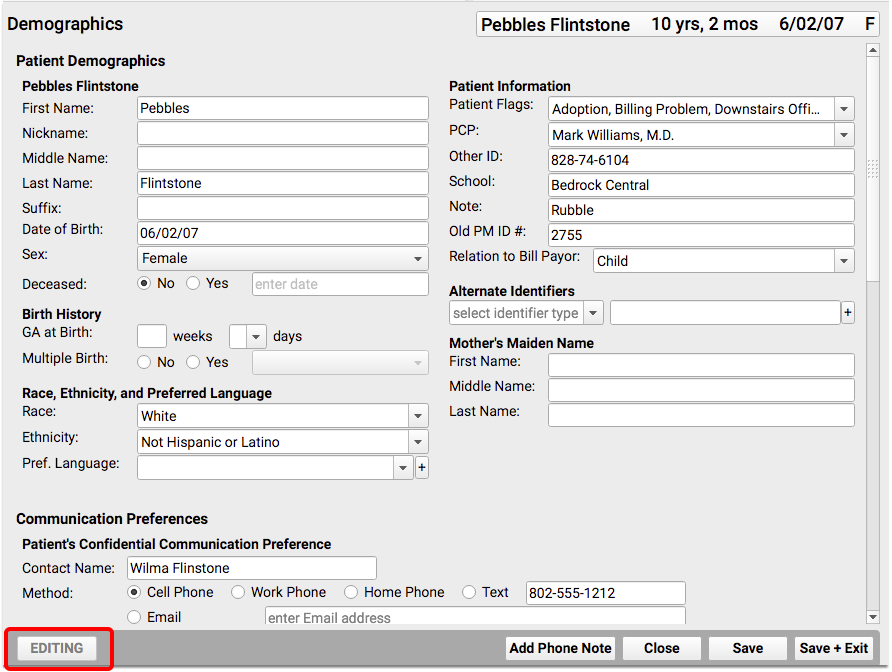
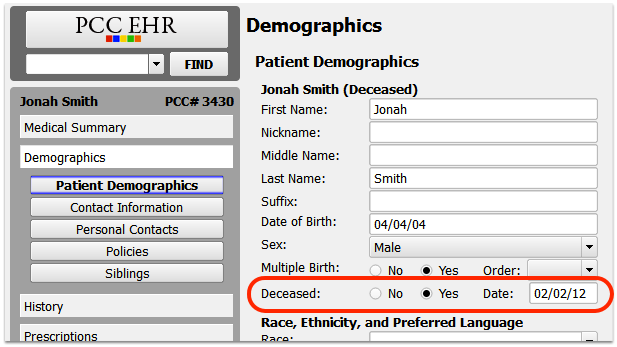
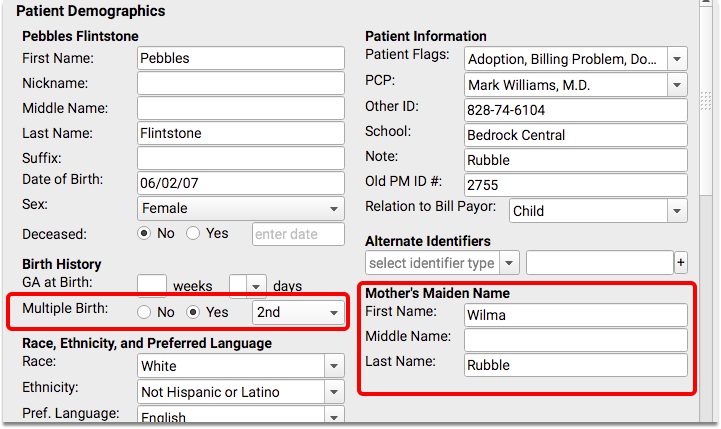
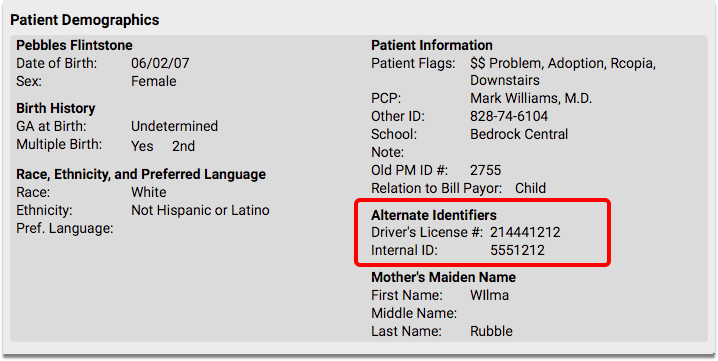
Patient Demographics
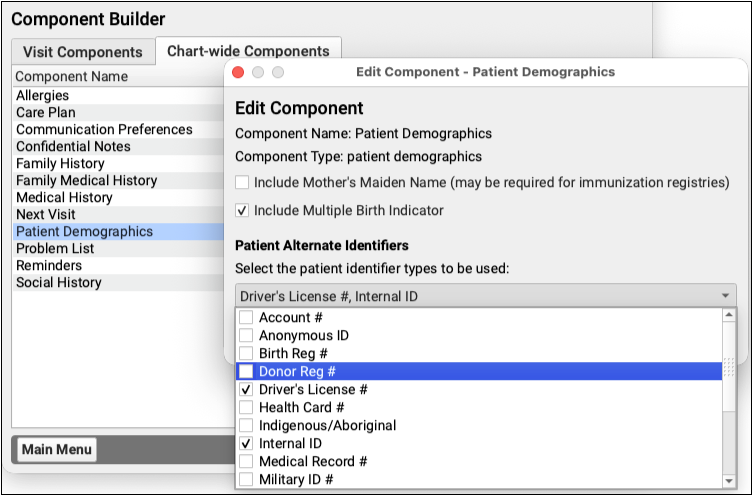
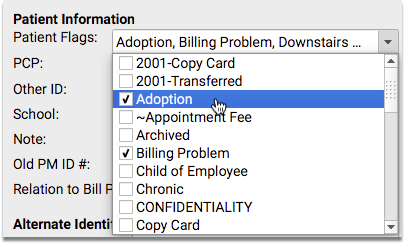
The Patient Demographics component displays important patient information, including unique identifiers, birth history data, patient flags associated with the patient, the name of their primary care physician, and other demographic data.
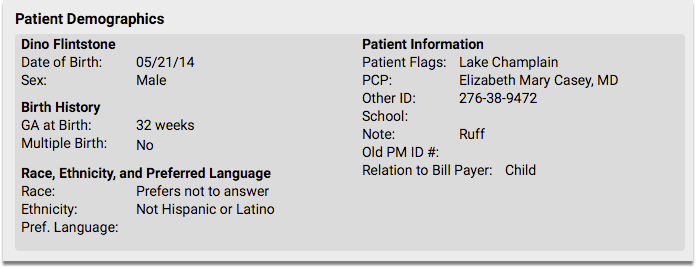
The Patient Demographics component appears in the Demographics section of the chart by default, but you can also add it to the Medical Summary, the Patient Check-In ribbon, the Appointment Details ribbon (if your practice uses the Appointment Book), any visit protocol, and phone notes.
Learn about updating patient demographic information in PCC EHR by reading the Review and Update Patient and Family Demographics article.
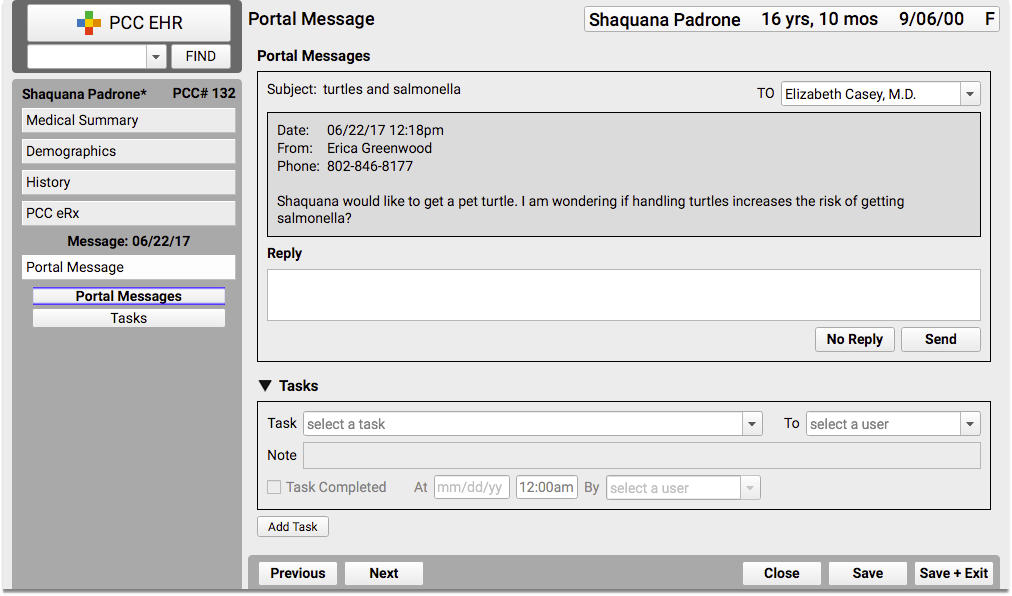
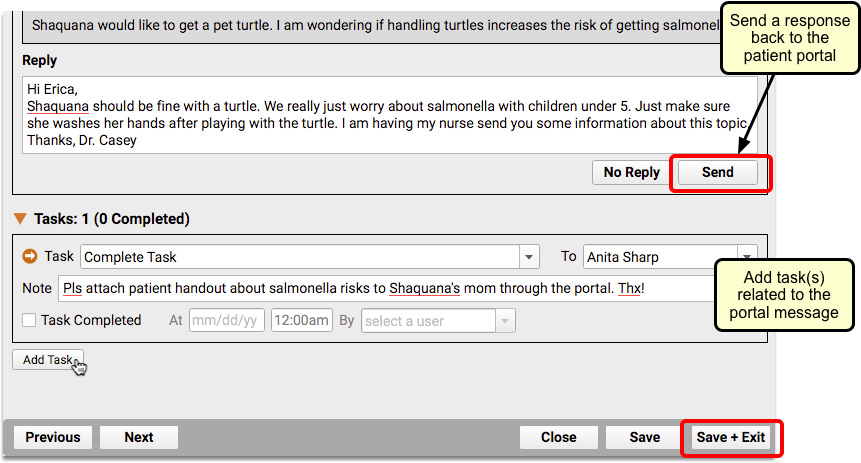
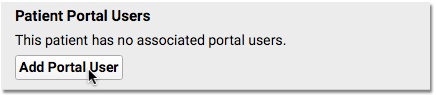
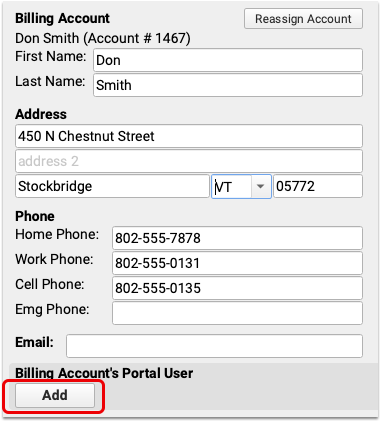
Patient Portal Users
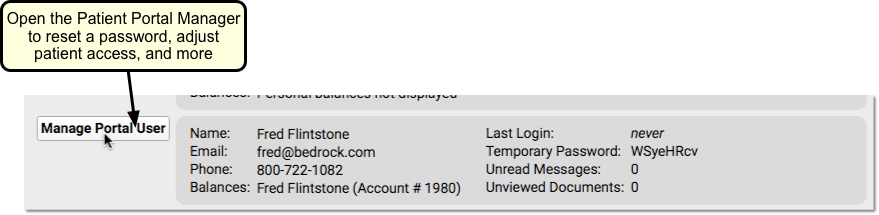
The Patient Portal Users component can be used to quickly review portal information and help the family with patient portal access.
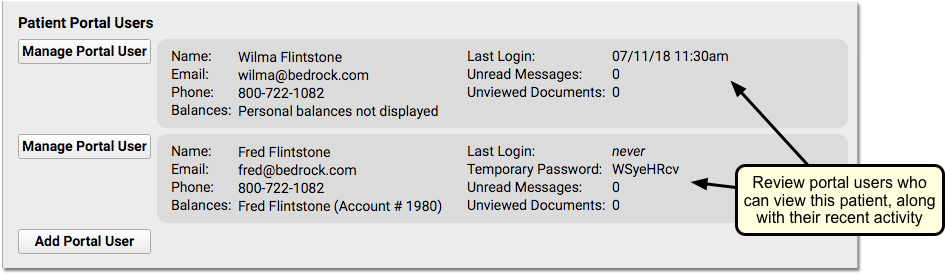
You can see if mom, dad, or another guardian has access to the patient’s records. If the patient has no portal account users, you can click “Add Portal User” to jump into the Patient Portal Manager.
If the family has not logged in, doesn’t have a linked billing account, or needs their password reset, you can click “Manage Portal User” to open up the Patient Portal Manager and help the family with their accounts.
For more information, read Patient Portal User Account Administration.
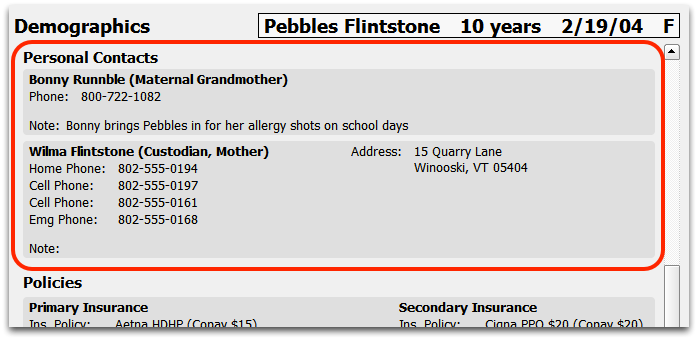
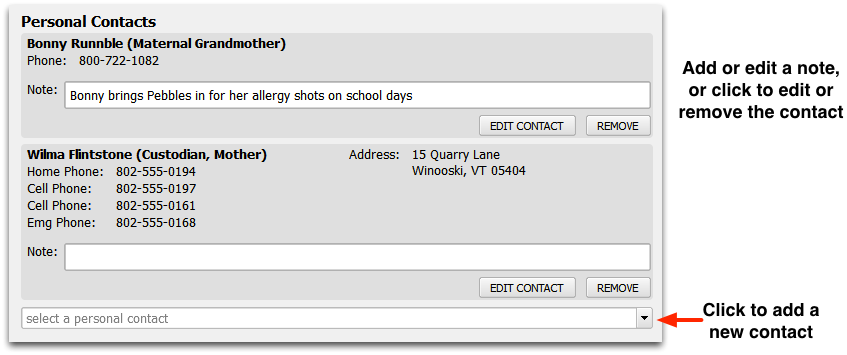
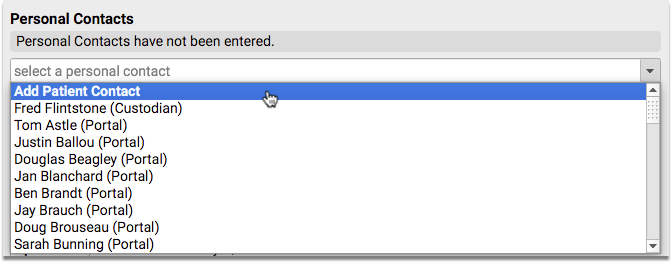
Personal Contacts
The Personal Contacts component can be used to list contact information for a patient’s family members, guardians, or other relations.
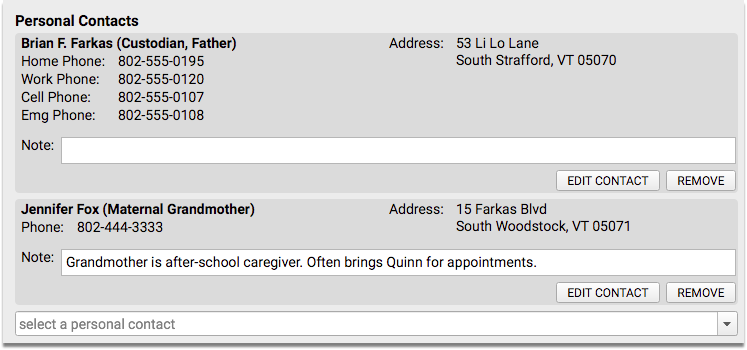
The Personal Contacts component appears in the Demographics section of the chart by default, but you can also add it to the Medical Summary, the Patient Check-In ribbon, the Appointment Details ribbon (if your practice uses the Appointment Book), any visit protocol, and phone notes.
Learn about updating personal contact information in PCC EHR by reading the Review and Update Patient and Family Demographics article.
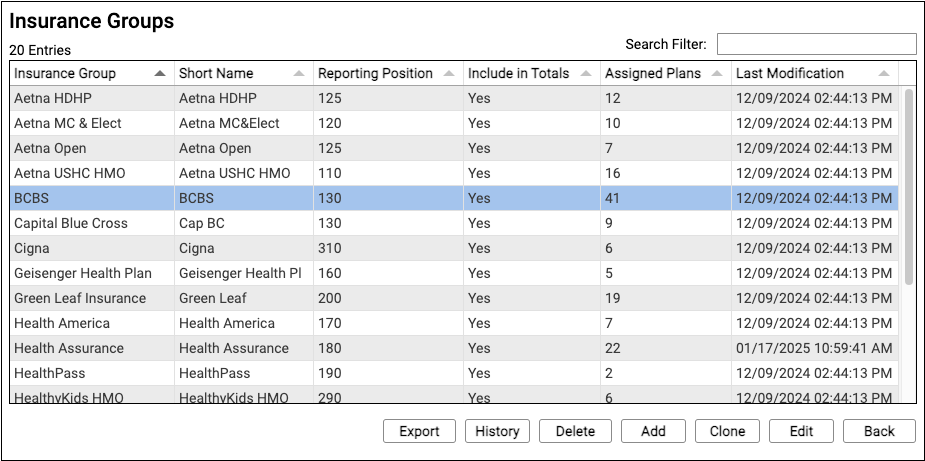
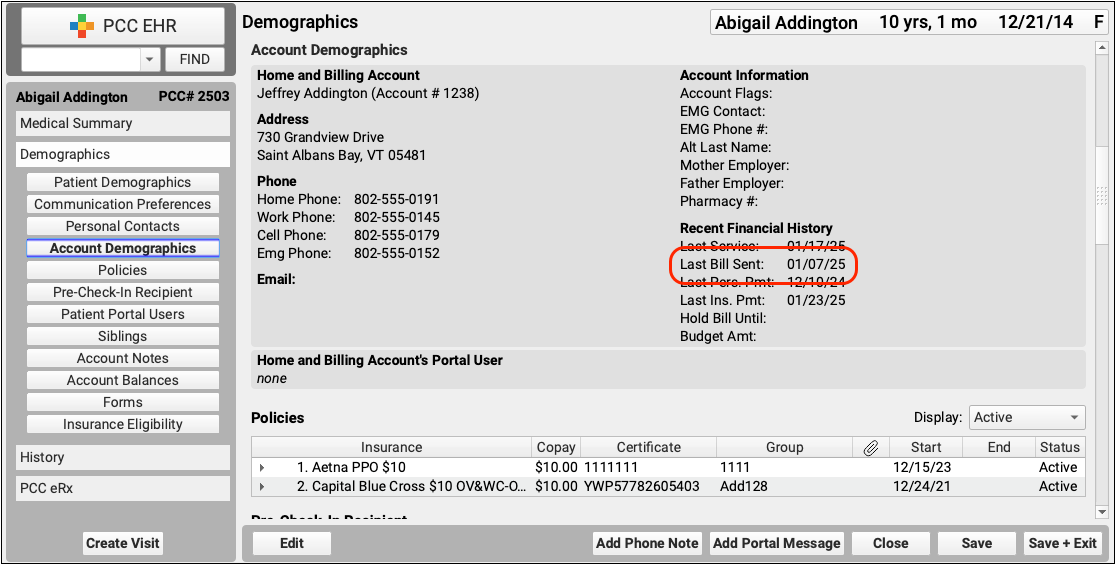
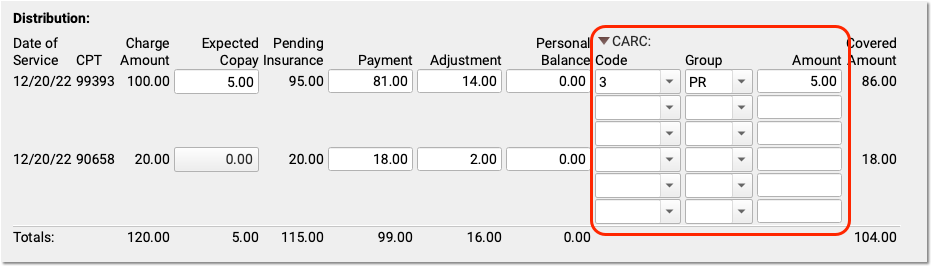
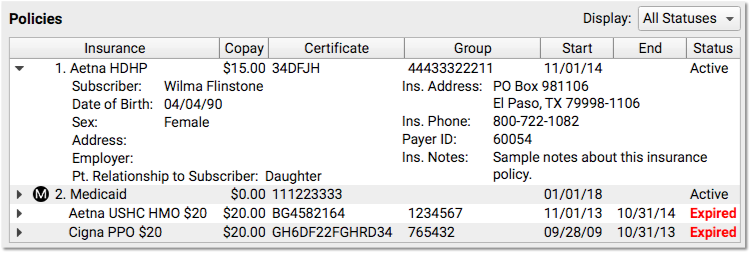
Policies
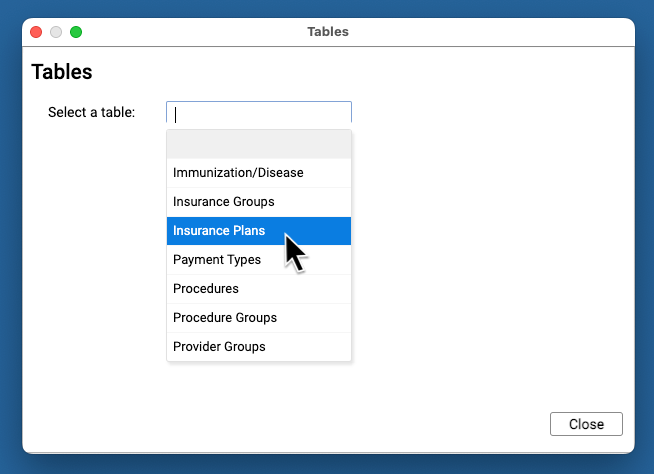
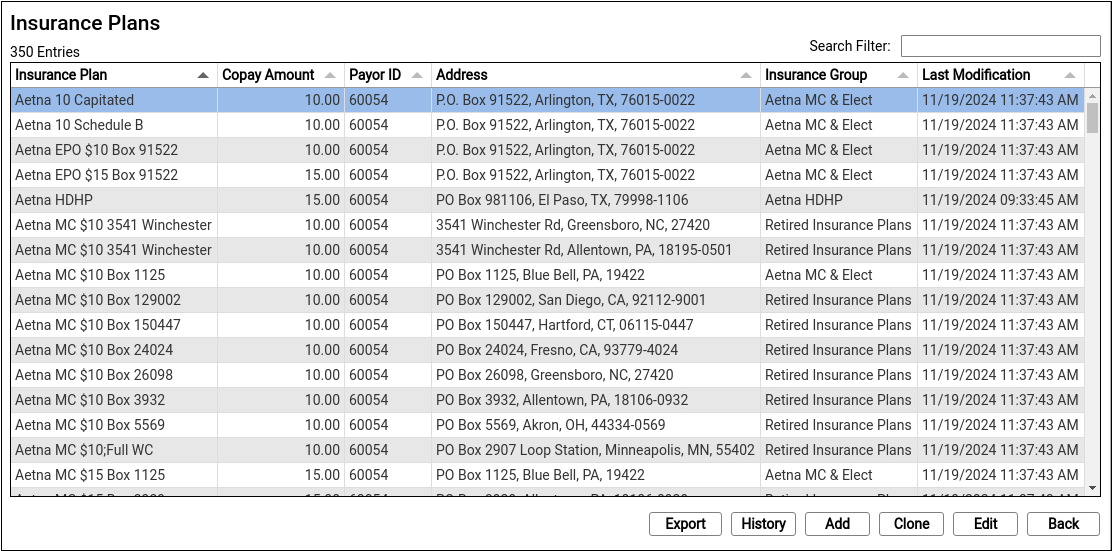
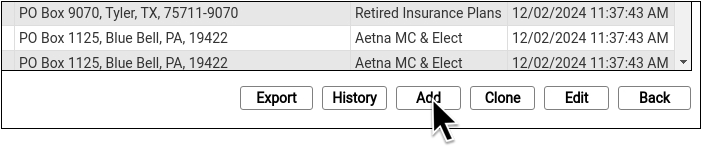
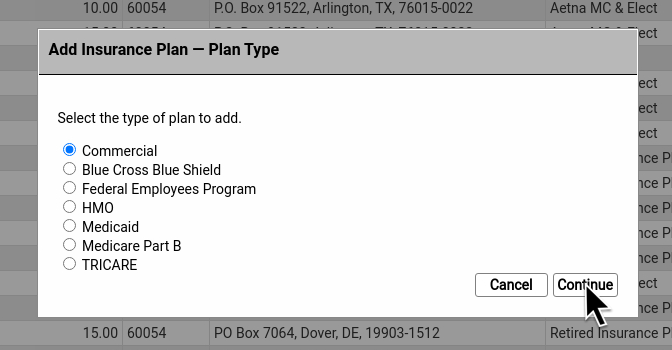
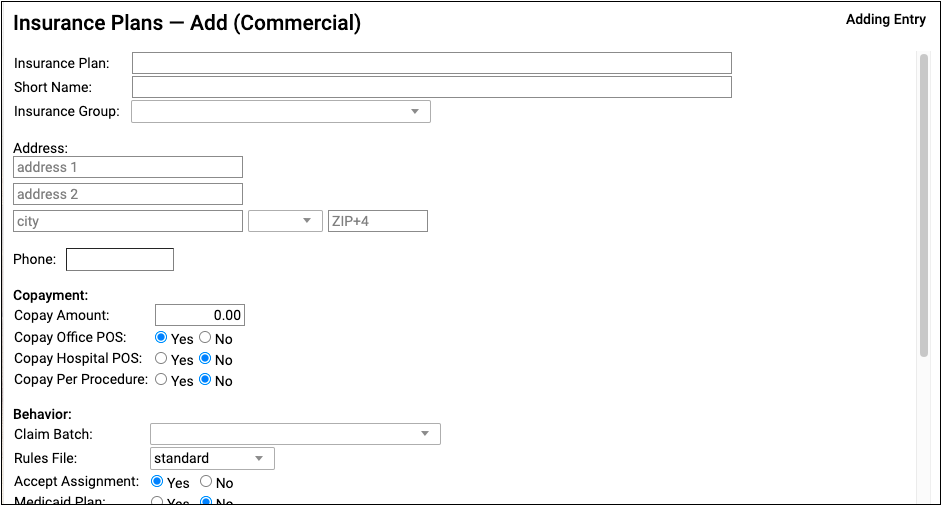
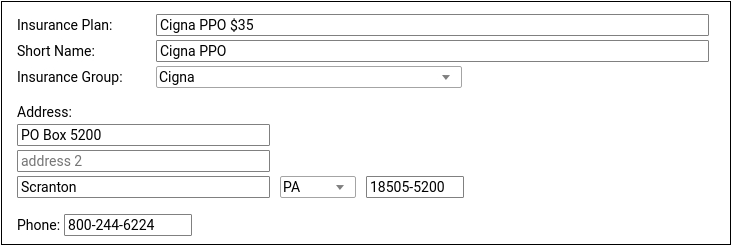
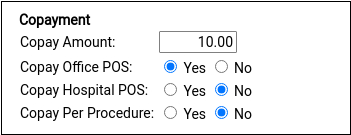
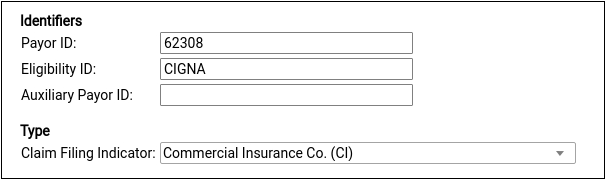
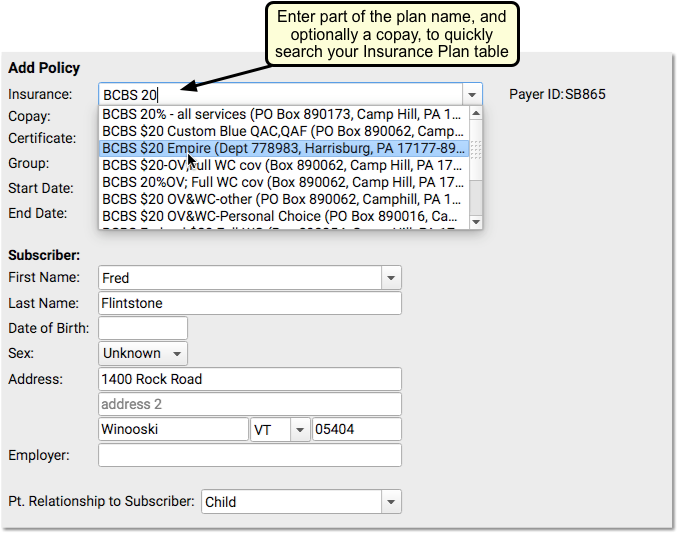
The Policies component is used to add, update, and work with a patient’s insurance policies and medicaid plans in PCC EHR.
The patient’s primary policy appears at the top, with a “1”, and any secondary or tertiary policies appear as well. All active policies are displayed by default.
For full policy information you can click the disclosure triangle to the left of each policy.
The Policies component appears in the Demographics section of the chart by default, but you can also add it to the Medical Summary, the Patient Check-In ribbon, the Appointment Details ribbon (if your practice uses the Appointment Book), any visit protocol, and phone notes.
Learn about creating and managing a patient’s insurance policies in PCC EHR by reading the Update Patient Insurance Policies article.
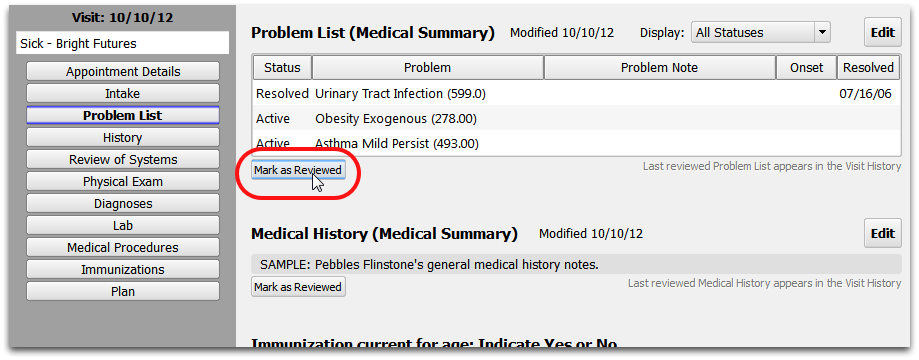
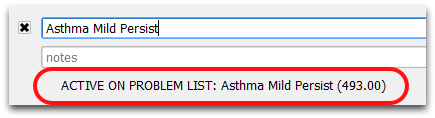
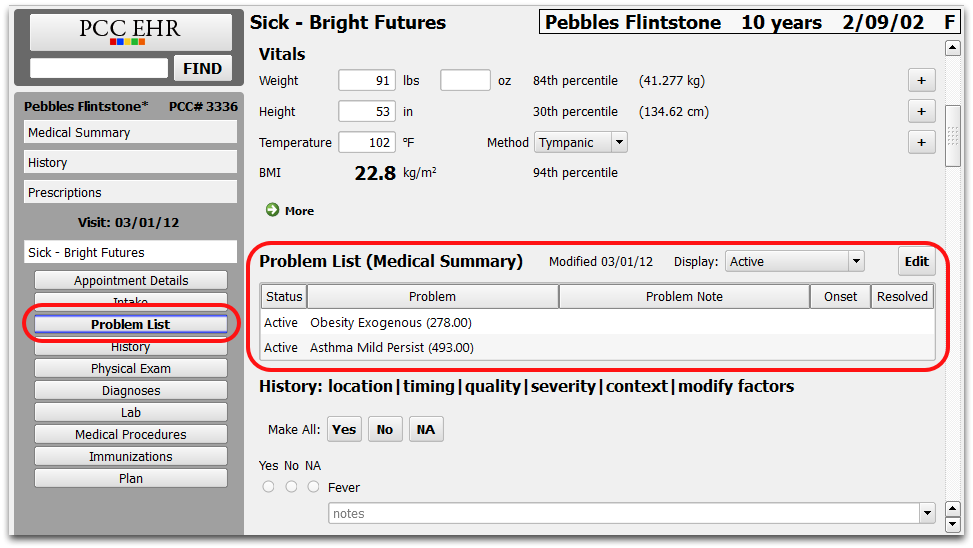
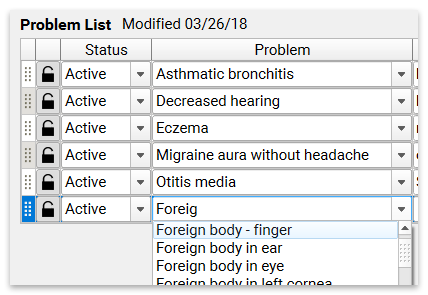
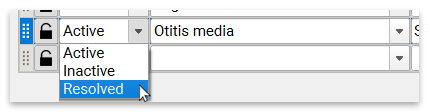
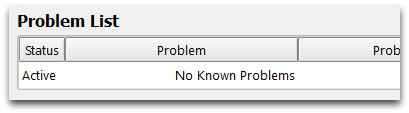
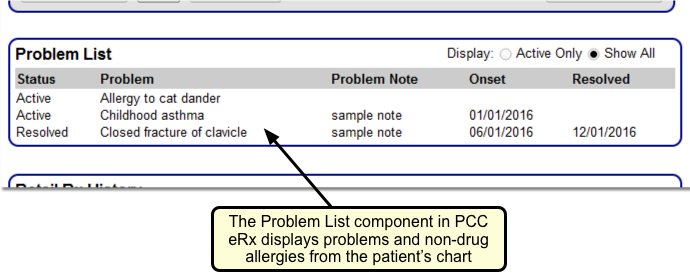
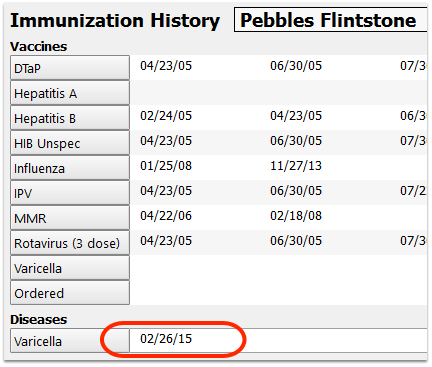
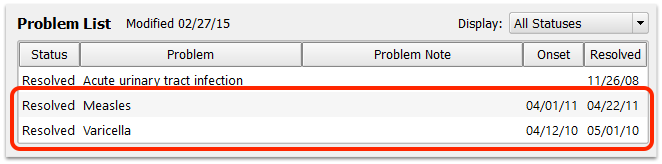
Problem List
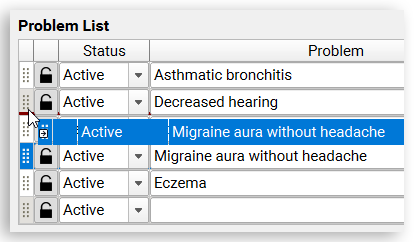
The Problem List component shows a list of issues for a patient. The list is created using SNOMED-CT diagnosis descriptions.
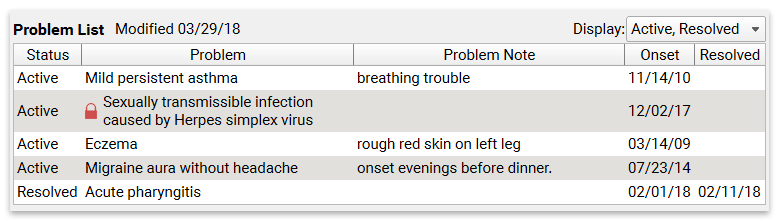
The Problem List appears on a patient’s Medical Summary by default, but you can also add it to the Demographics sections of the chart, the Patient Check-In ribbon, the Appointment Details ribbon (if your practice uses the Appointment Book), any visit protocol, and phone notes.
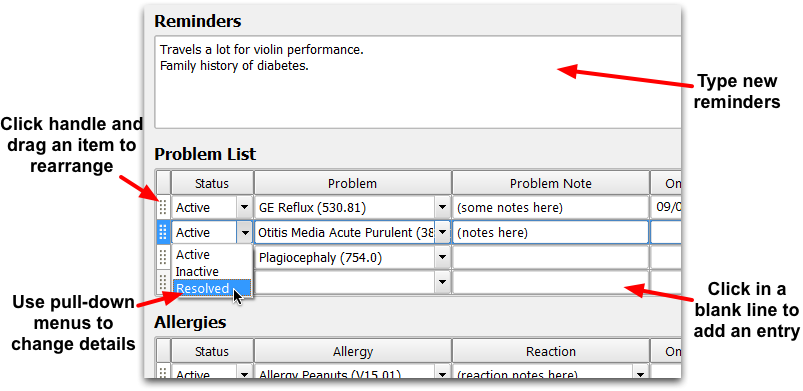
You can add or remove problems, and rearrange problems.
You can add problems directly to the Problem List component, or while charting the diagnosis during a visit.
For more information about working with a patient’s problem list, read the Problem List article.
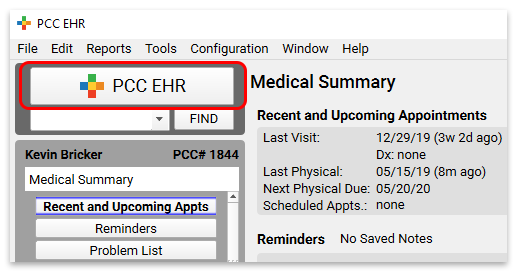
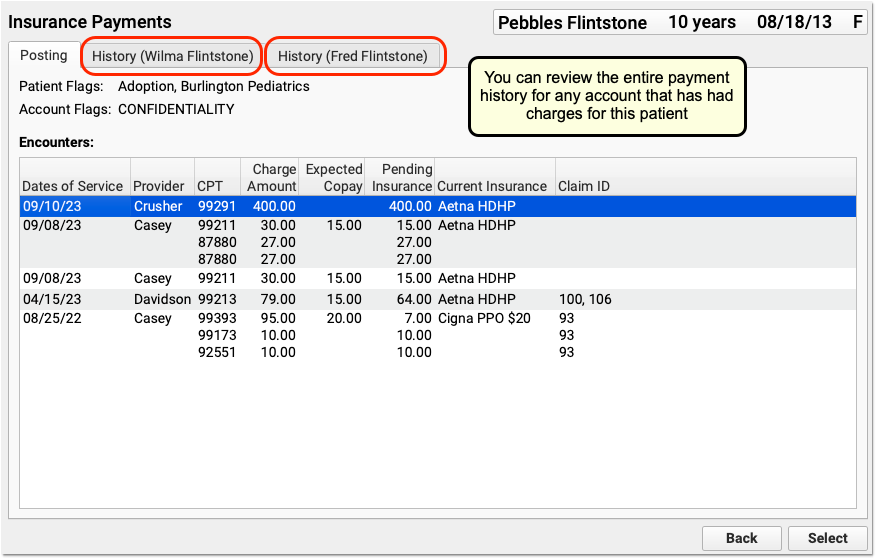
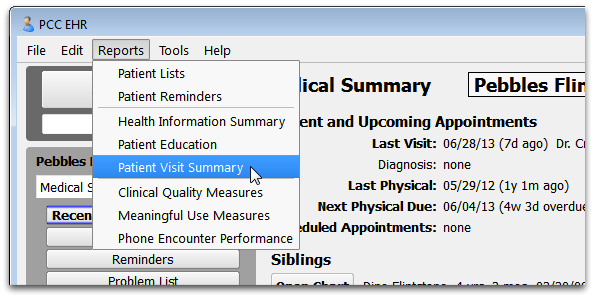
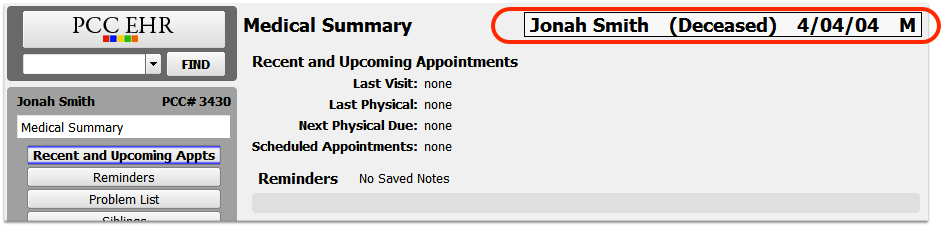
Recent and Upcoming Appointments
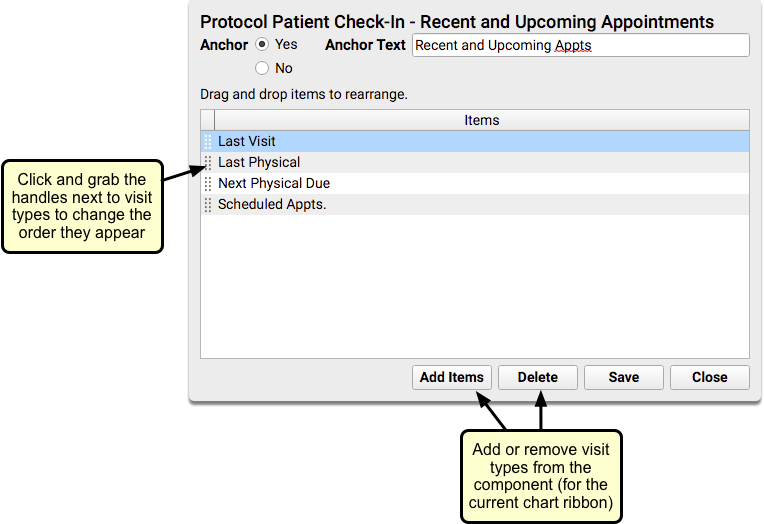
The Recent and Upcoming Appointments component displays read-only information about a patient’s appointments at your practice, including their most recent well child visit, and when they are next due for a physical.
You can add the Recent and Upcoming Appointments component to the Medical Summary or Demographics sections of the chart, the Patient Check-In ribbon, the Appointment Details ribbon (if your practice uses the Appointment Book), any visit protocol, and phone notes.
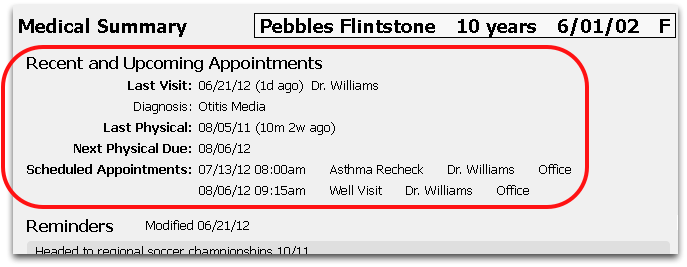
The component can display the last visit (including diagnoses), last and next physical dates, and any upcoming scheduled appointments. You can display or hide each of these items wherever the Recent and Upcoming Appointments component appears, to best suit your office’s workflow needs.
Reminders
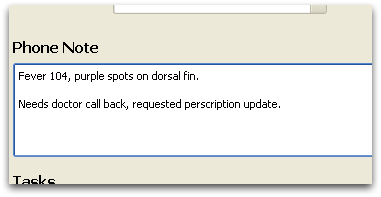
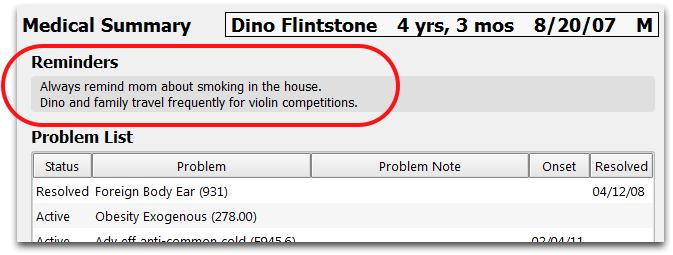
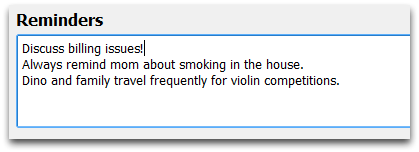
The Reminders component can be used to note important issues related to a patient that everyone who opens the chart should see.

If the patient needs something done during a follow-up visit or has a pressing concern or issue, you can use the Reminder text field to help your office coordinate care around that issue.
You can see when the reminder was last updated by checking the modification date next to the component name.
You can add the Reminders component to the Medical Summary or Demographics sections of the chart, the Patient Check-In ribbon, the Appointment Details ribbon (if your practice uses the Appointment Book), any visit protocol, and phone notes.
You can also copy reminders from one sibling’s chart to another’s. See the Siblings component overview below for more information.
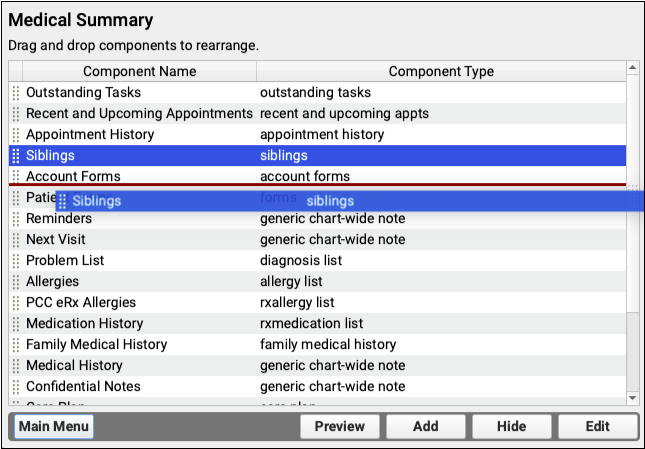
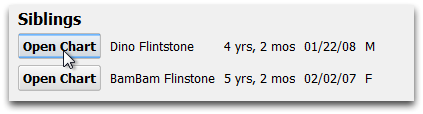
Siblings
The Siblings component includes a list of patient siblings and a button for opening their chart.
You can add the Siblings component to the Medical Summary or Demographics sections of the chart, the Patient Check-In ribbon, the Appointment Details ribbon (if your practice uses the Appointment Book), any visit protocol, and phone notes.
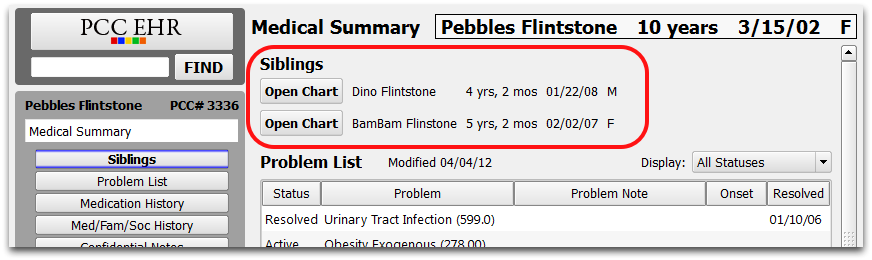
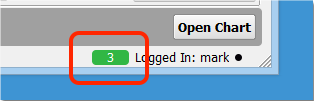
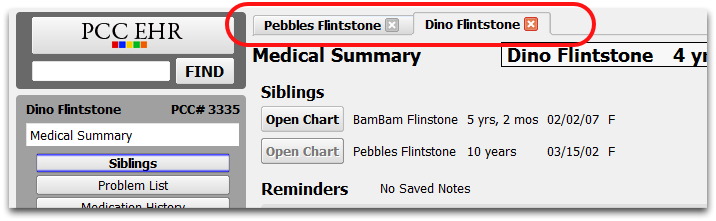
Click “Open Chart” to open a sibling’s chart side-by-side with the current chart. You can open up to four sibling charts at once.
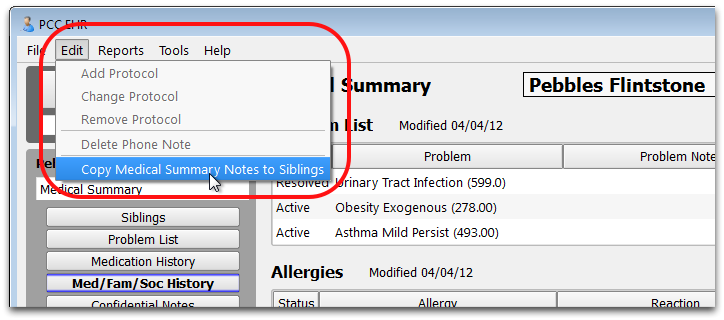
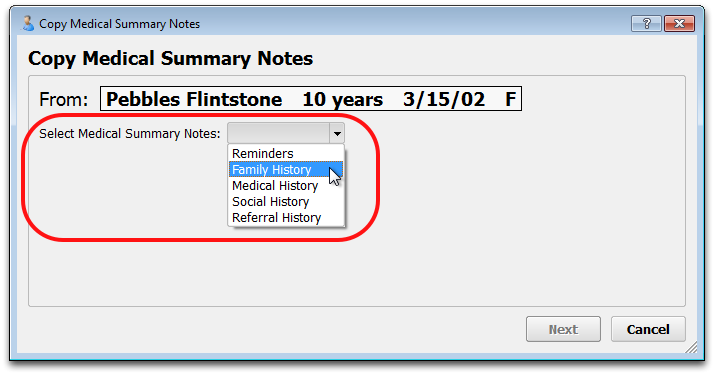
Some chart-wide components, such as Reminders, Social/Family/Medical History, and Confidential Notes, may contain information that should be added to a sibling’s chart as well.
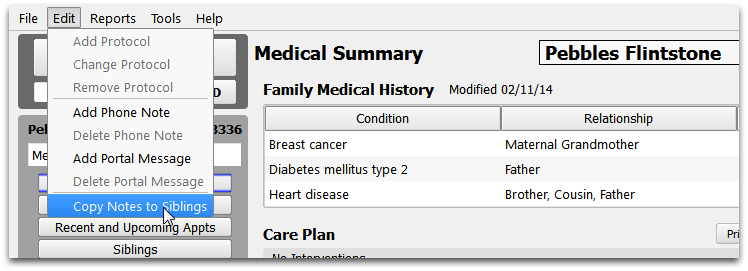
When you want to copy a note field to a sibling, right-click on the note and select “Copy (Component Name) to Siblings”.

For more detailed instructions on copying information to sibling charts, read the Medical Summary article.
For more information about working with multiple sibling charts, read the Review and Edit Sibling Charts article.
Social History
The Social History component is used to enter relevant social history for a patient.
You can add the Social History component to the Medical Summary or Demographics sections of the chart, the Patient Check-In ribbon, the Appointment Details ribbon (if your practice uses the Appointment Book), any visit protocol, and phone notes.

The Social History component is a simple entry field that expands as text is added.
You can copy social history from one sibling’s chart to another’s. See the Siblings component overview above for more information.
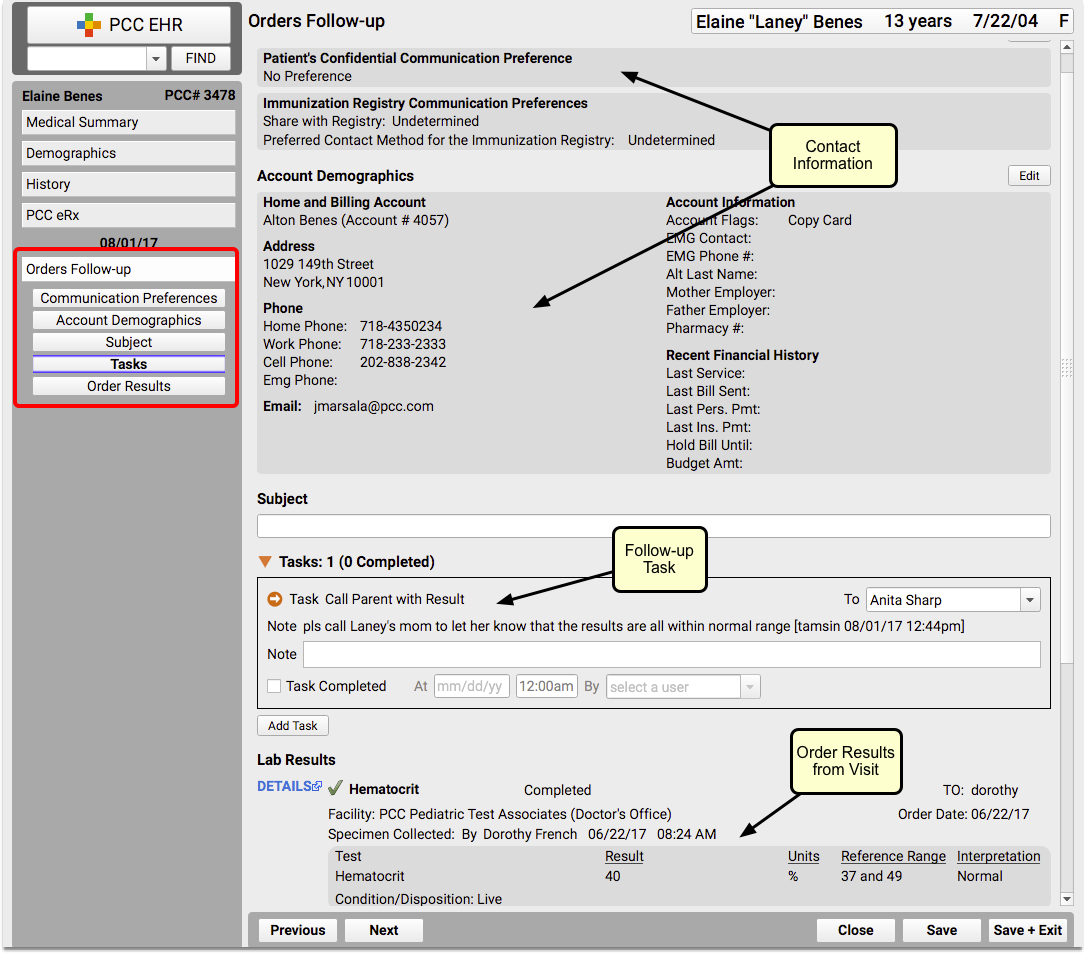
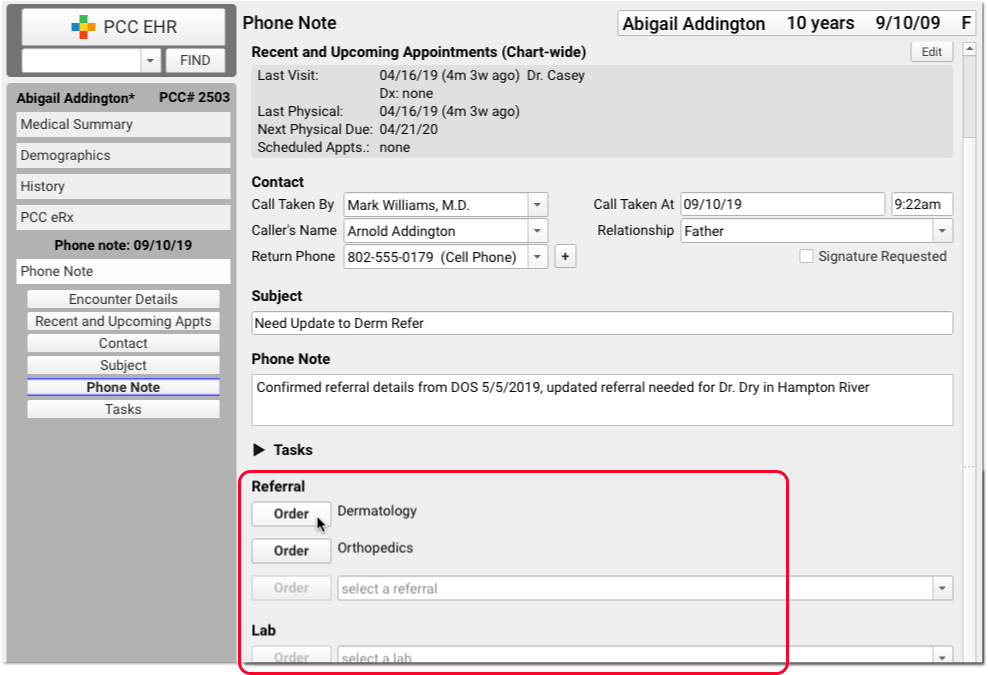
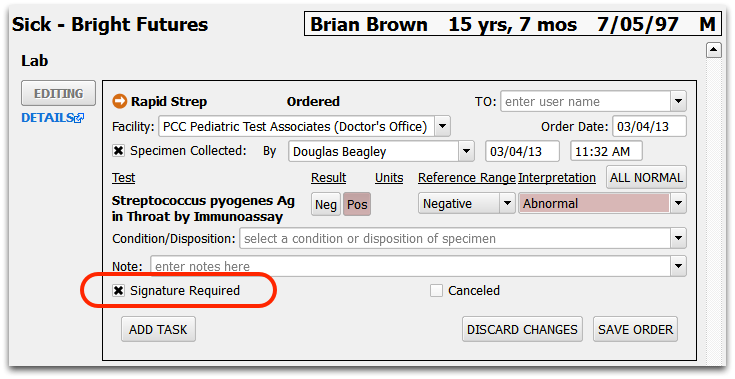
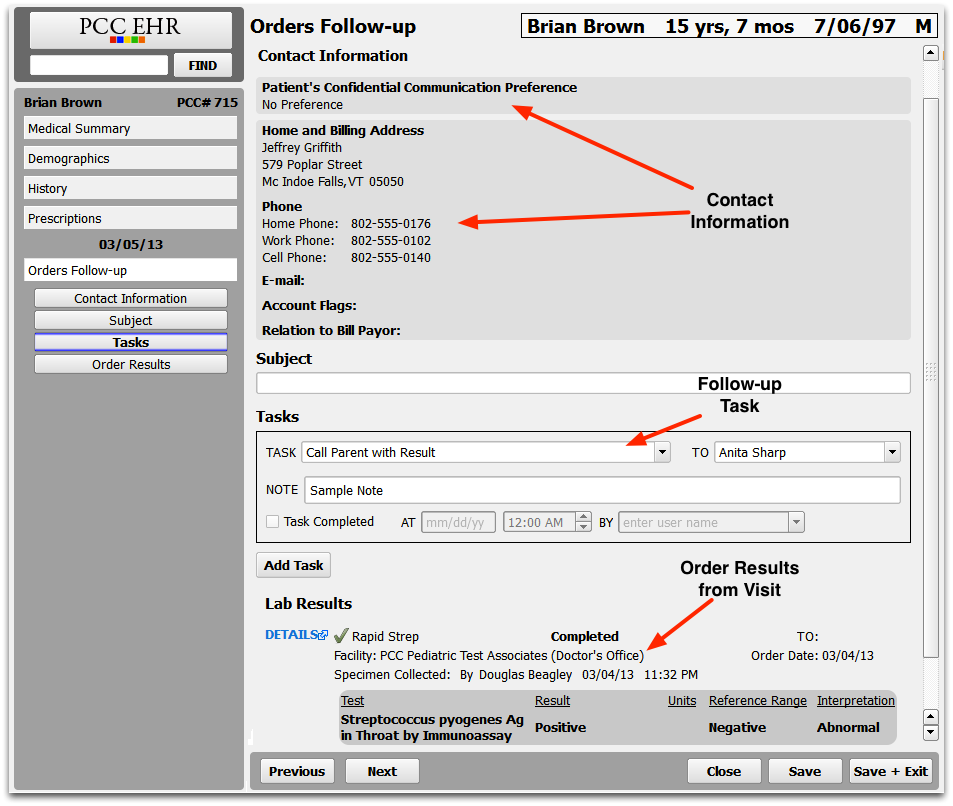
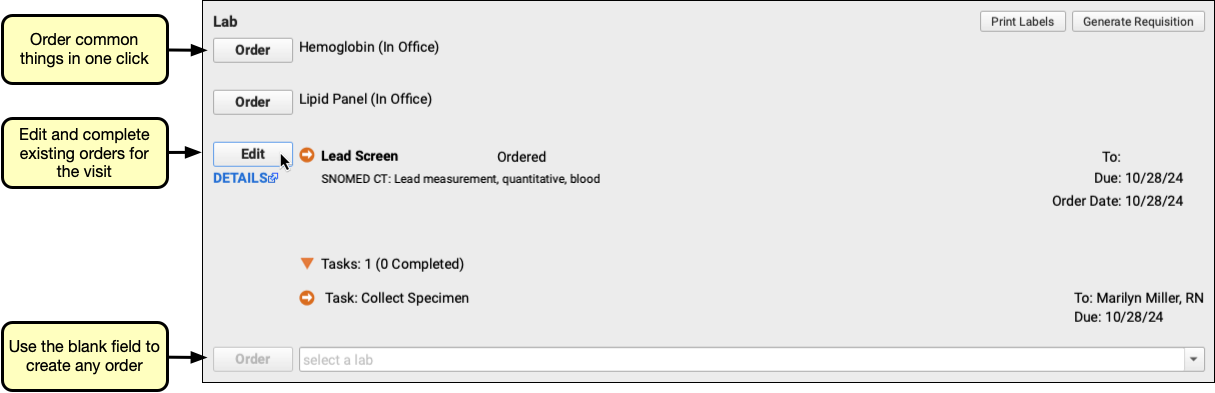
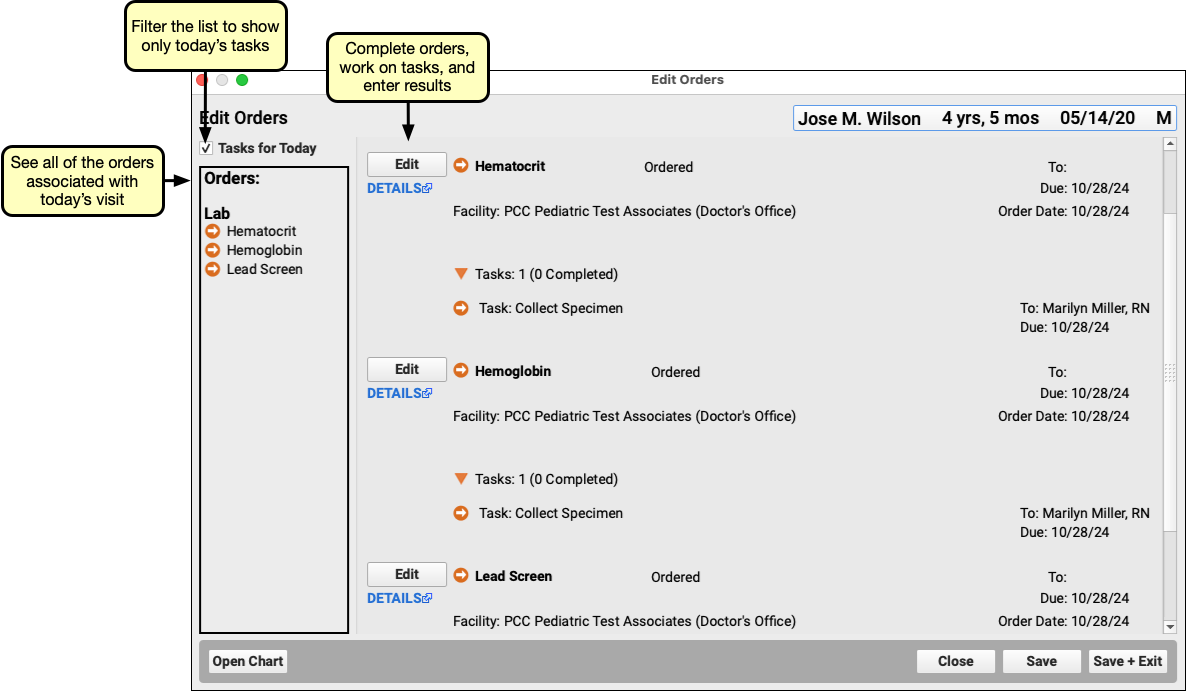
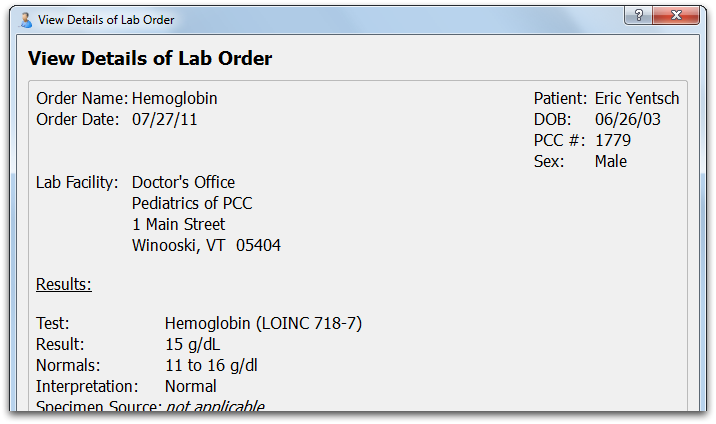
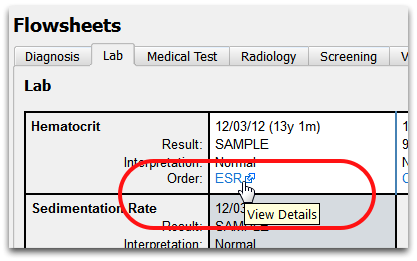
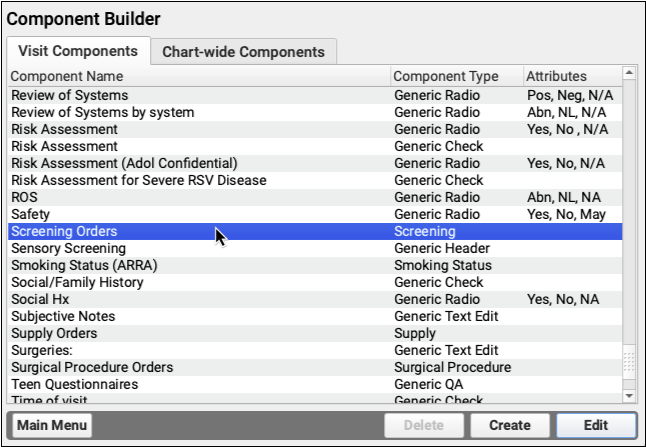
Order Components
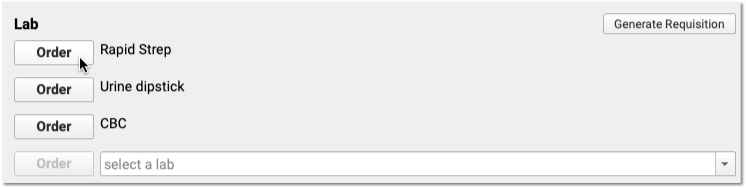
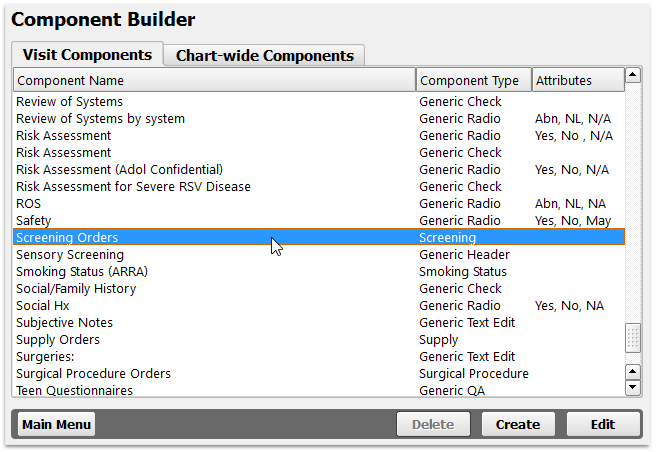
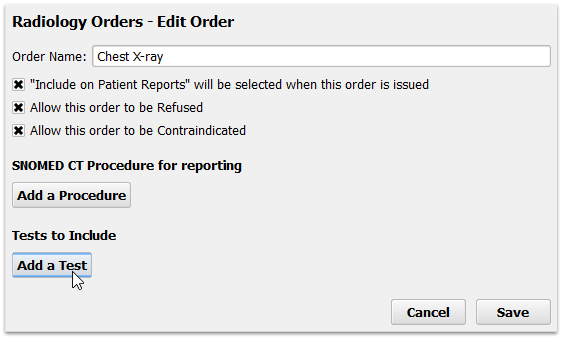
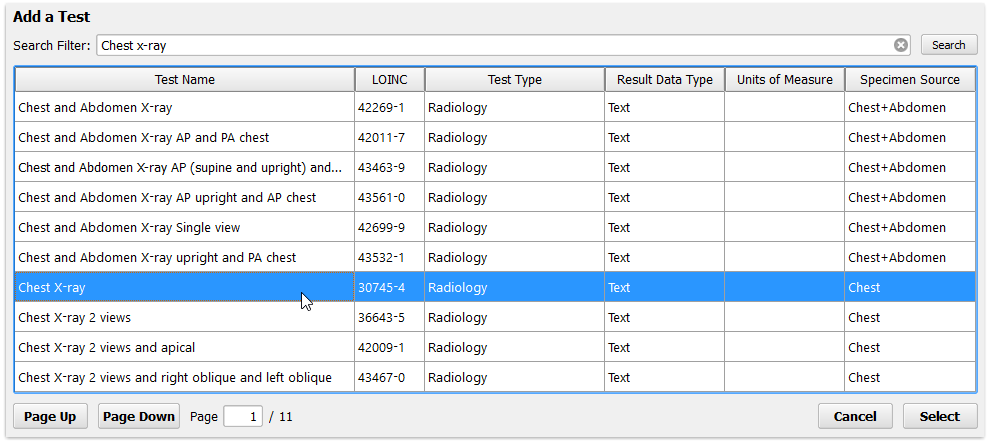
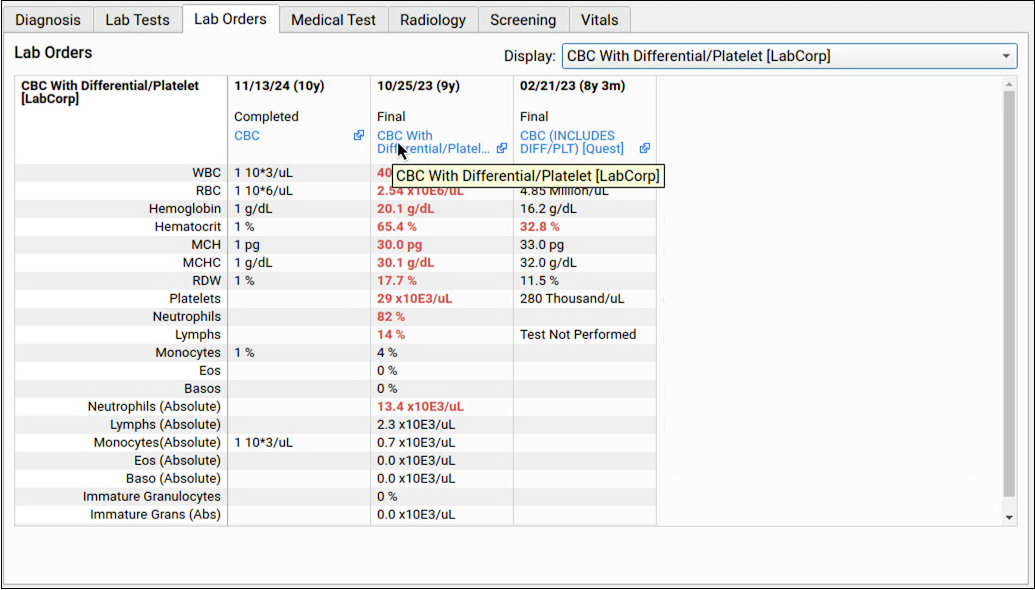
PCC EHR includes the following order components: Follow-Up Orders, Handout Orders, Lab Orders, Medical Procedure Orders, Medical Test Orders, Radiology Orders, Referral Orders, Screening Orders, Supply Orders, and Surgical Procedure Orders.
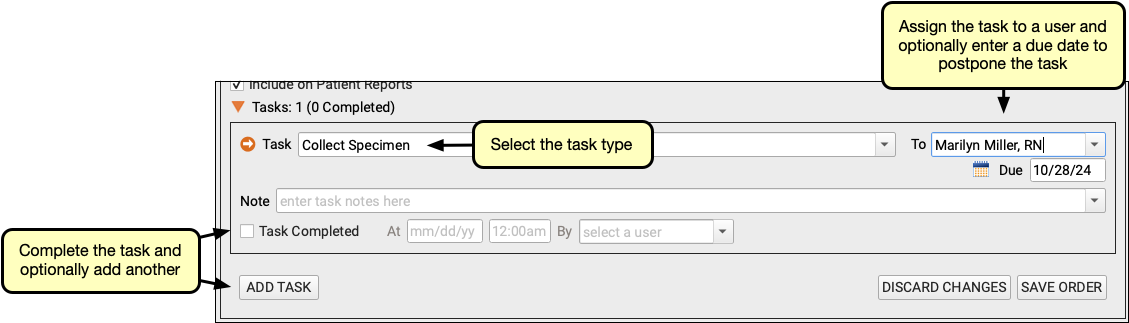
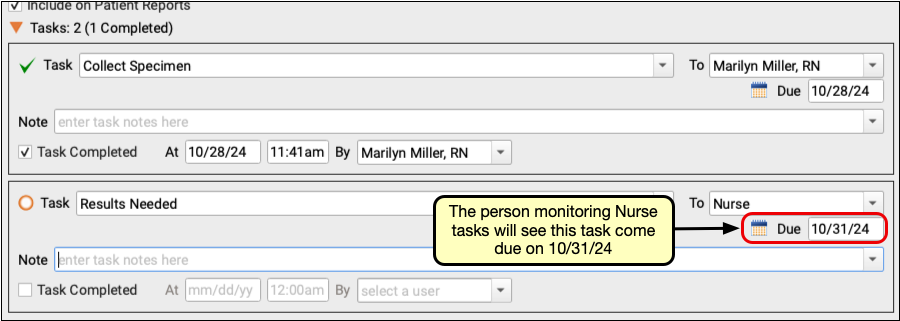
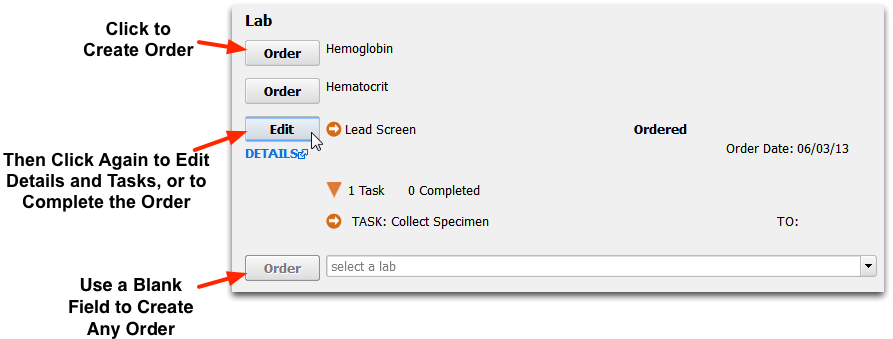
Each of these pre-configured components have buttons for creating orders that may trigger tasks. They incorporate all of PCC EHR’s tools for completing orders and tasks.
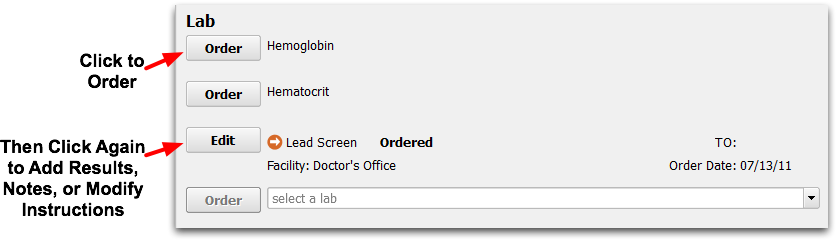
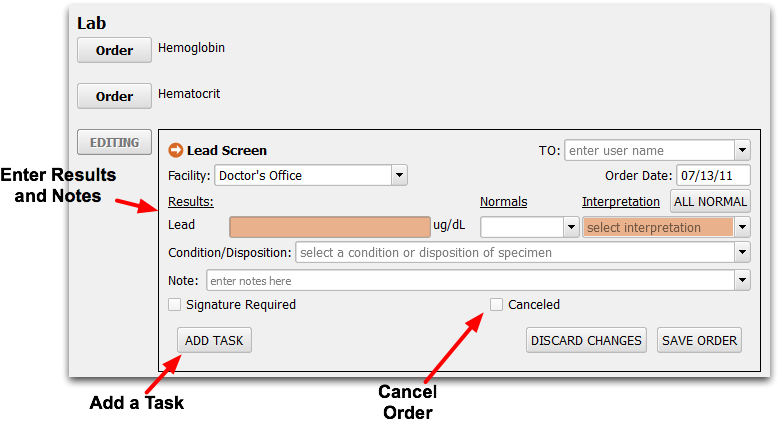
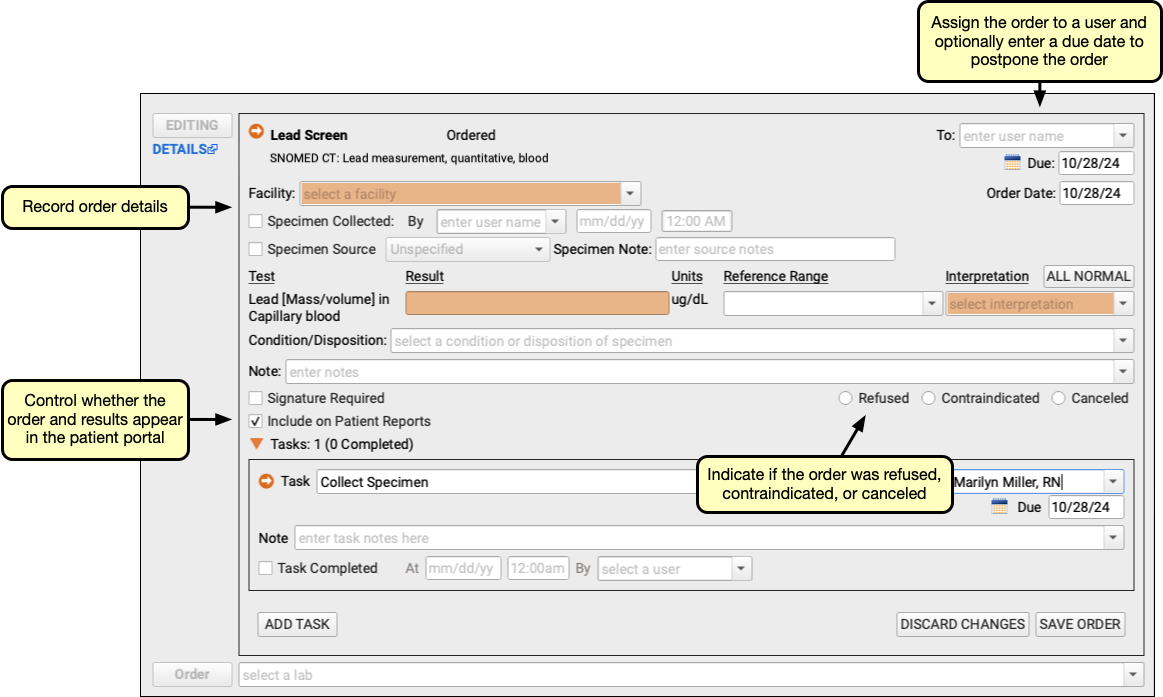
After you click “Order” in one of these components while charting, you can edit and complete the order, either in the chart note or elsewhere in PCC EHR.
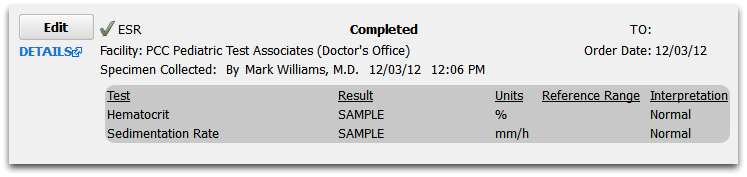
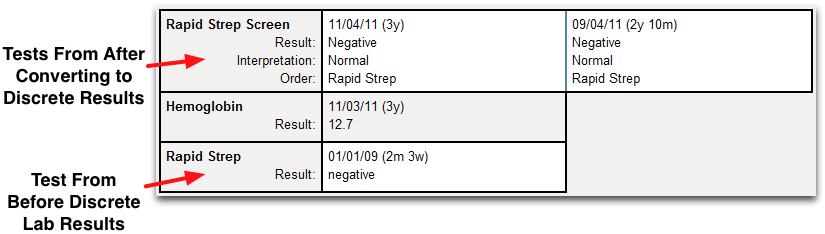
Orders may include discrete LOINC result fields, they can include notes, have tasks added to them, and they can be marked with various statuses (Signature Required, Refused, etc.)
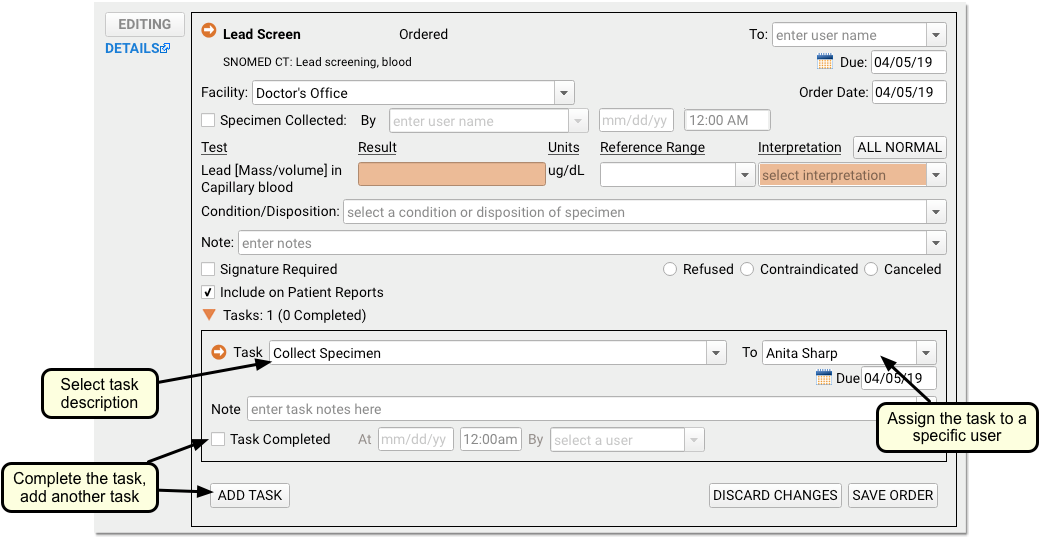
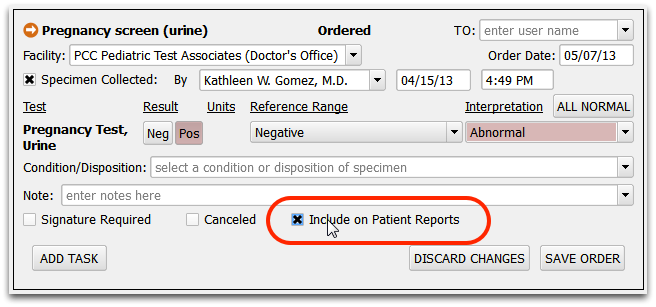
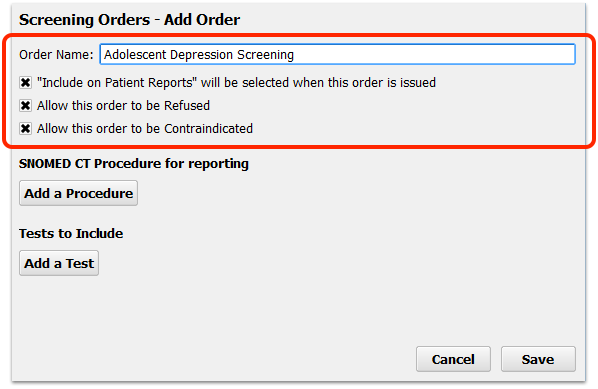
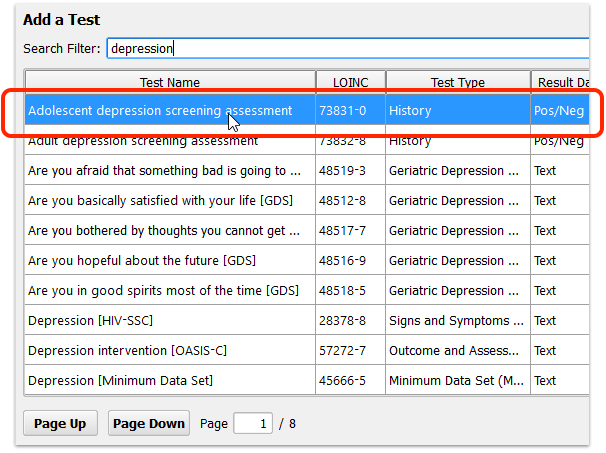
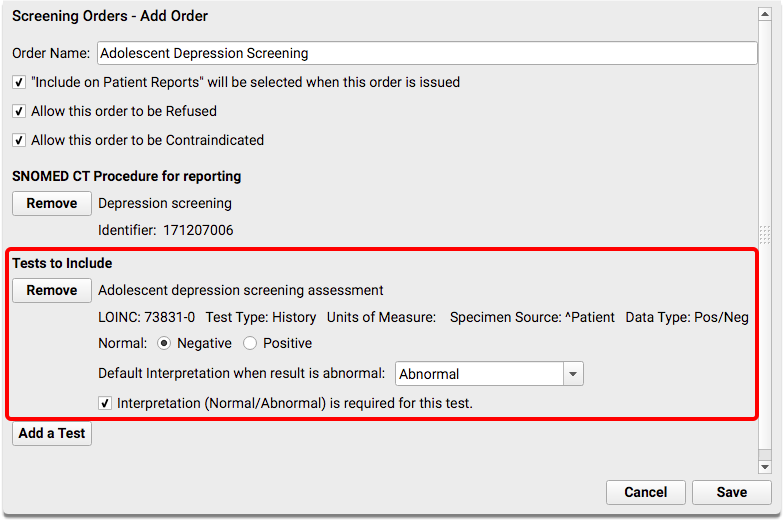
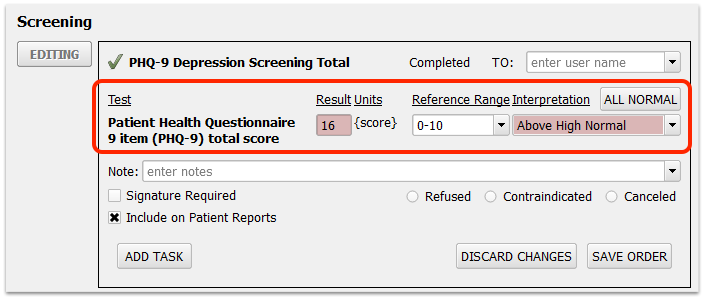
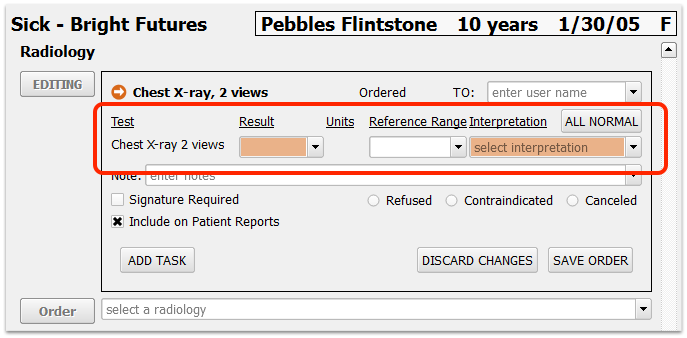
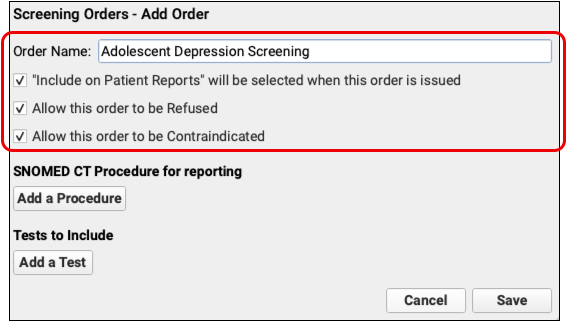
Here is a Depression Screening order, seen while the user is editing it.

This order includes a discrete LOINC test (Adolescent depression screening assessment) that requires a result to be complete. Currently, no clinician signature is required, the order is not refused, contraindicated or canceled, and the order is allowed to appear on patient reports (and in the patient portal). The user can change any of these settings. Your practice can define default behaviors for these settings in the Component Builder.
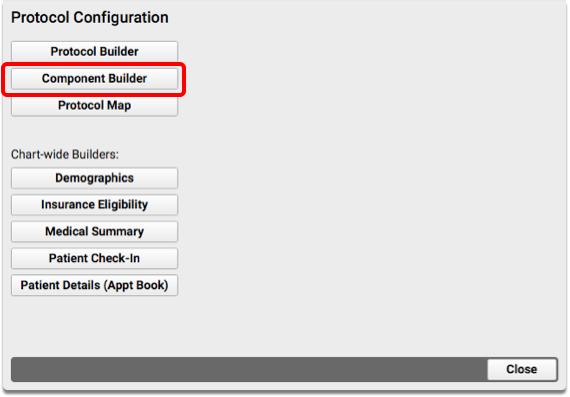
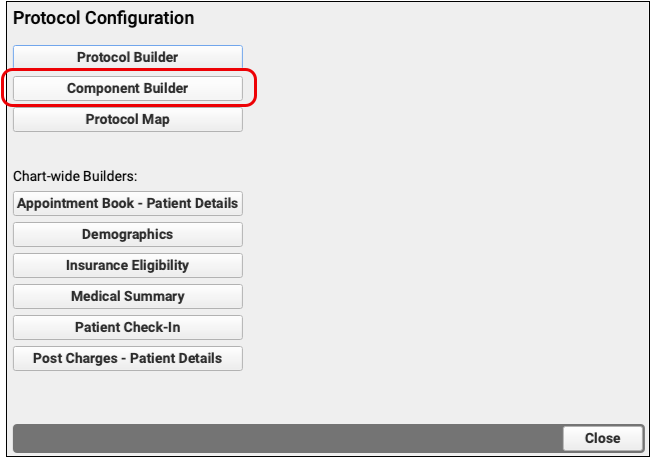
Use the Component Builder to add new procedures, handouts, referrals, and other items that can be ordered and can trigger tasks.
To read more about orders in PCC EHR, review the Orders Overview article.
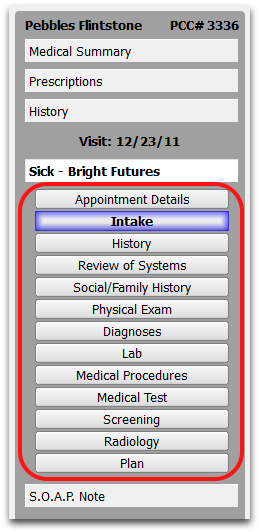
Encounter-Specific Components
PCC EHR has several pre-defined components for accomplishing specific tasks while charting a patient encounter.
Each of these pre-configured components contains fields filled out for specific needs. For example, the Vitals component data populates PCC EHR’s growth charts.
Can I Edit These Components?: You can’t create new components of these types. However, you can:
- Use the Protocol Builder to add any of the specialized components to your protocol.
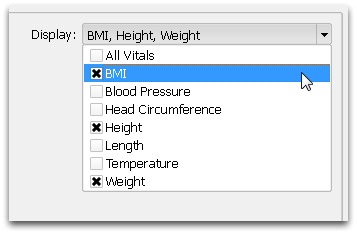
- Use the Protocol Builder to determine exactly which items appear within the component for that specific protocol. Your protocols can display exactly the vitals that you collect for a specific age, for example.
- Use the Component Builder to adjust other behavior for components. For example, you can clear out the answer memory for a component in the Component Builder.
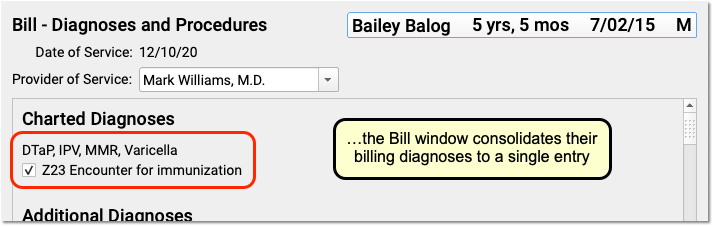
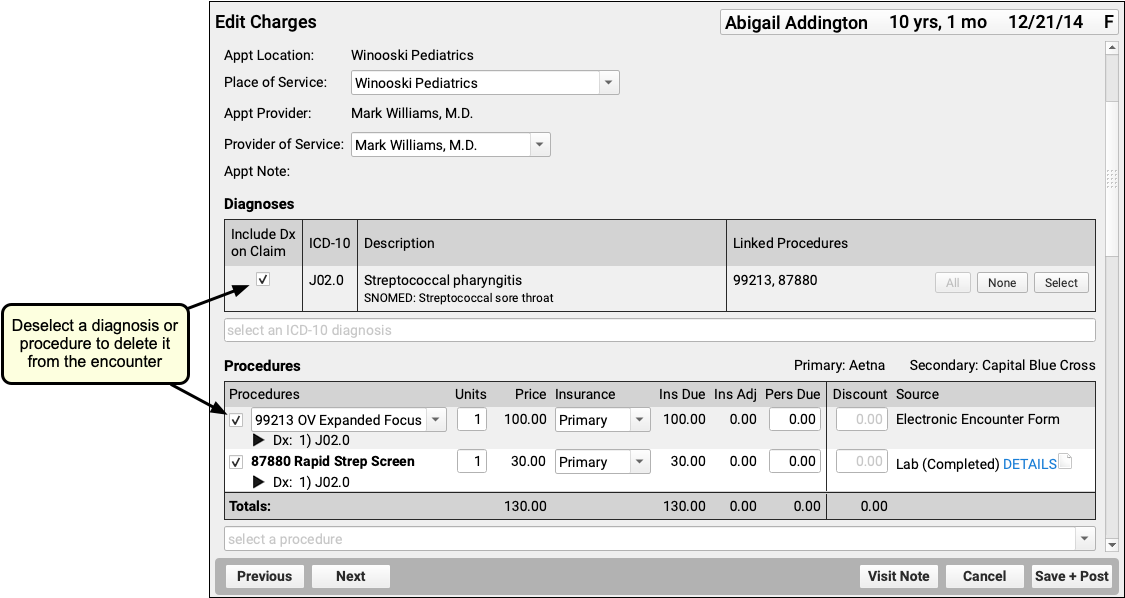
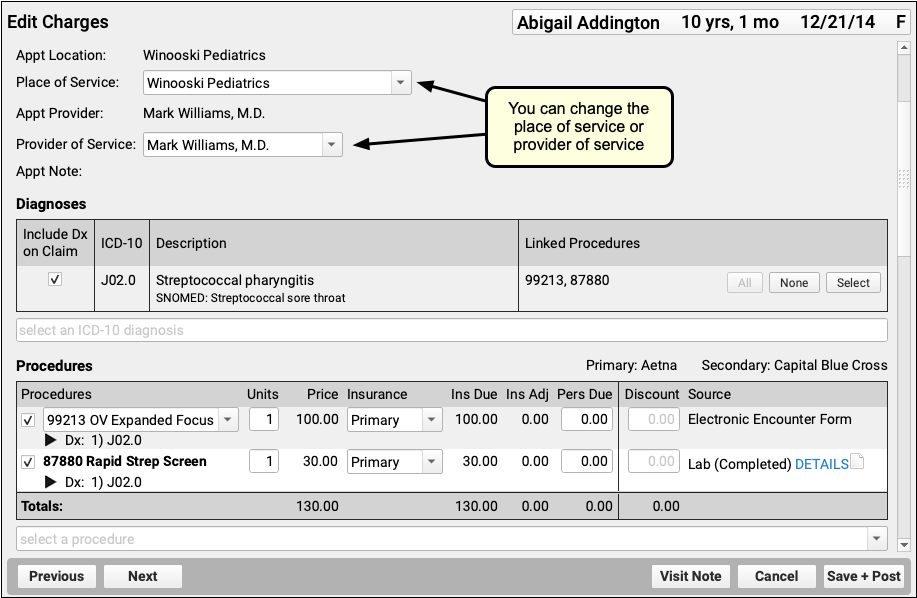
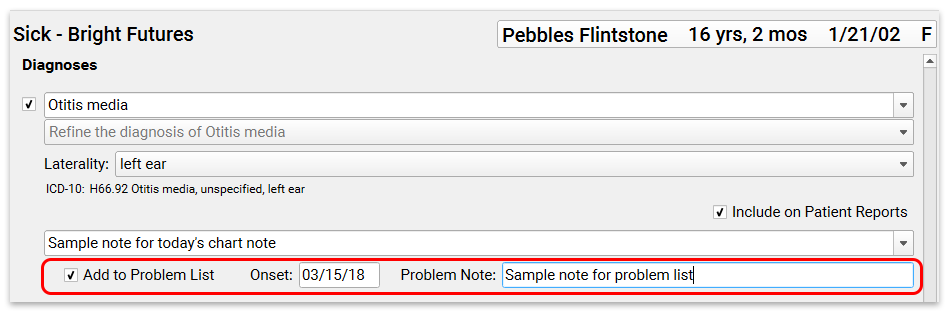
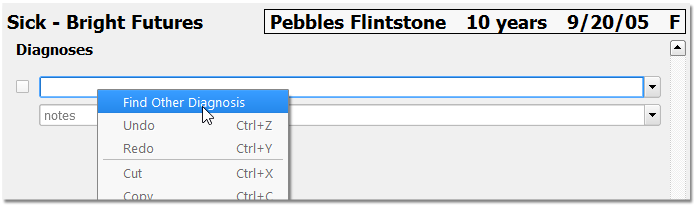
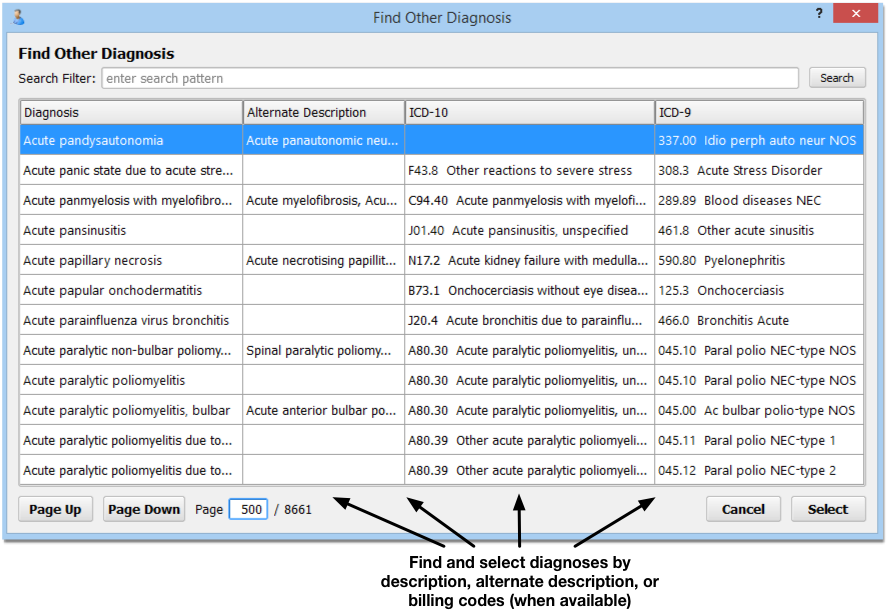
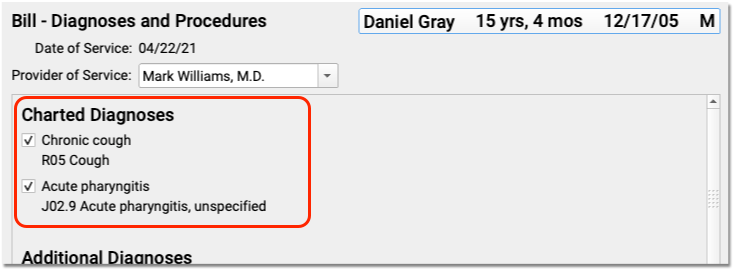
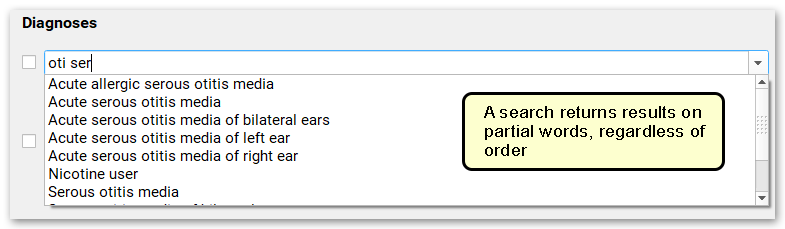
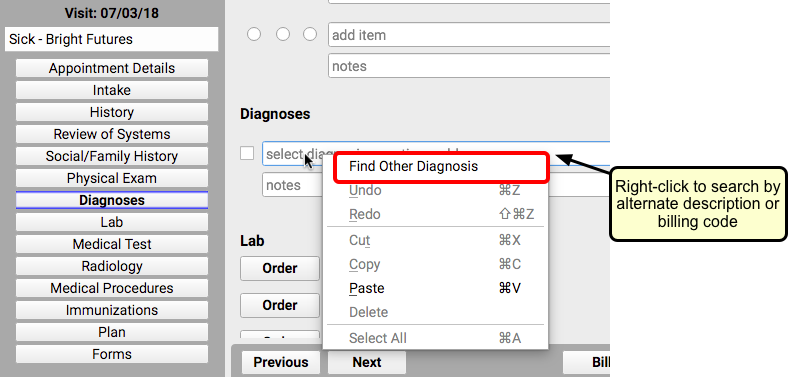
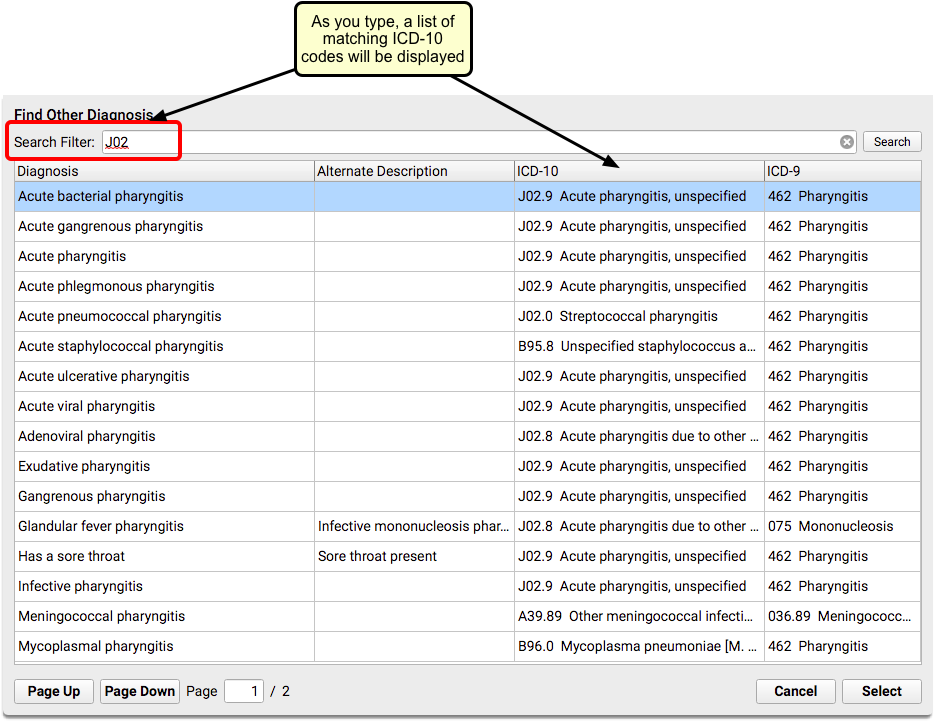
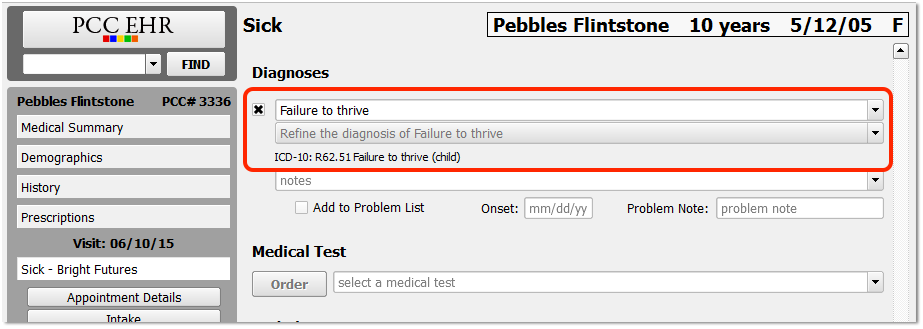
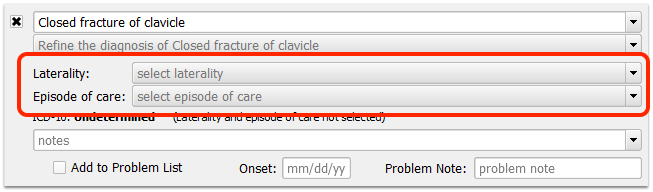
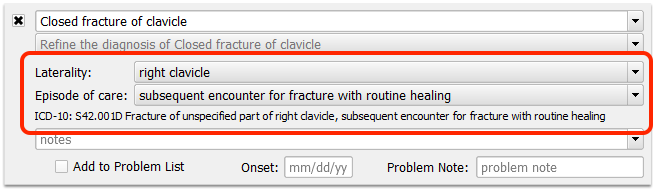
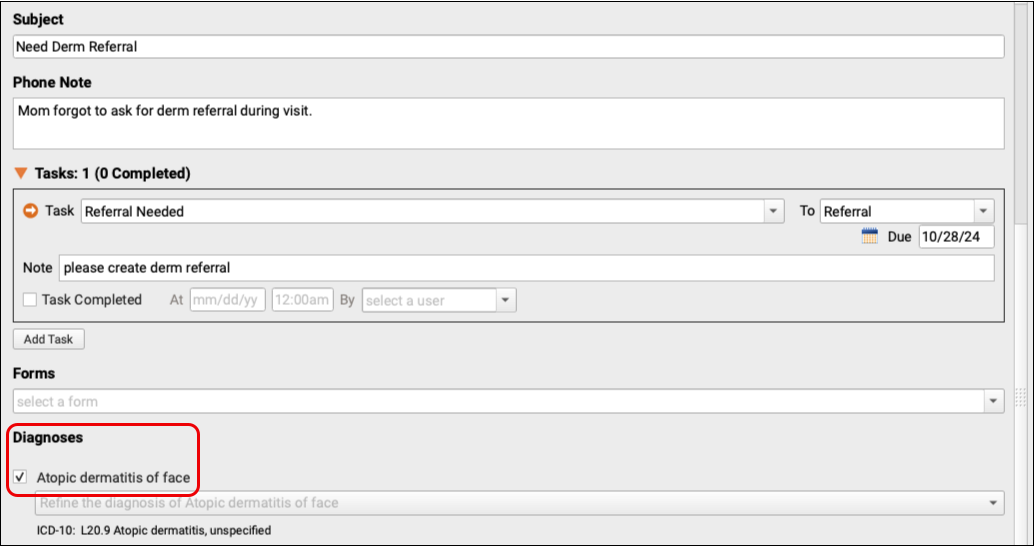
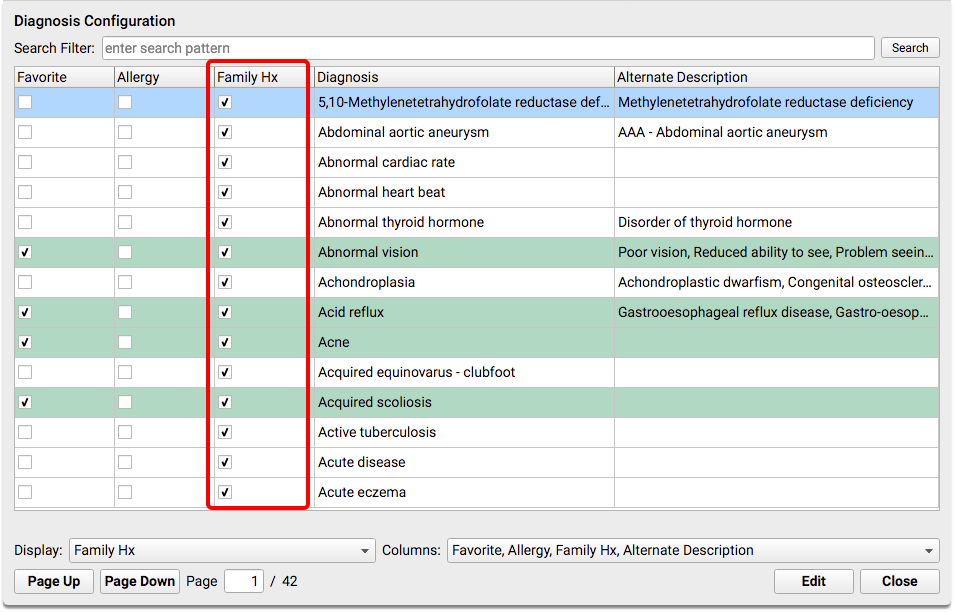
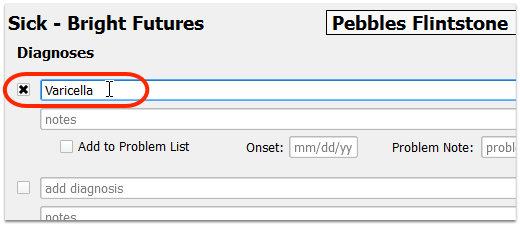
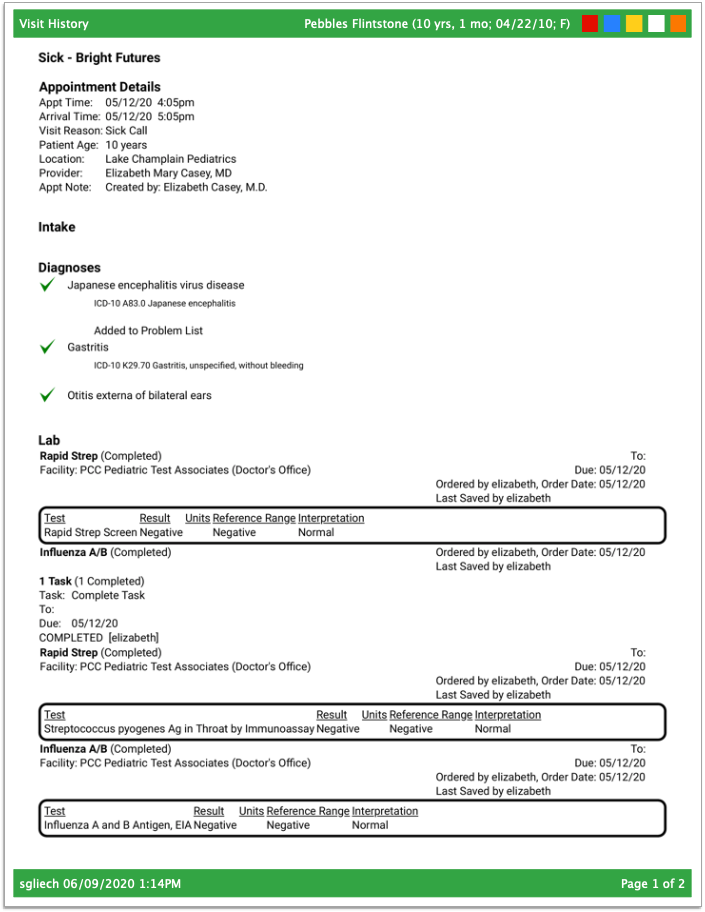
Diagnoses
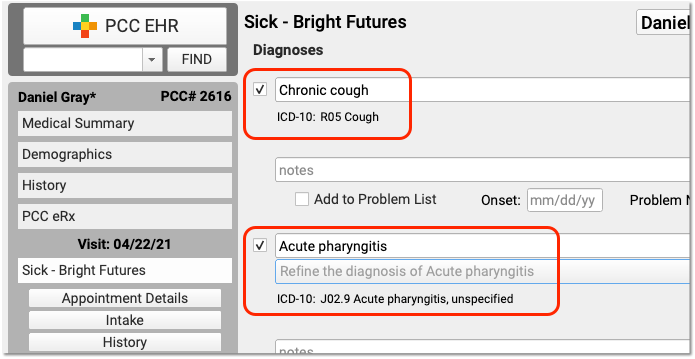
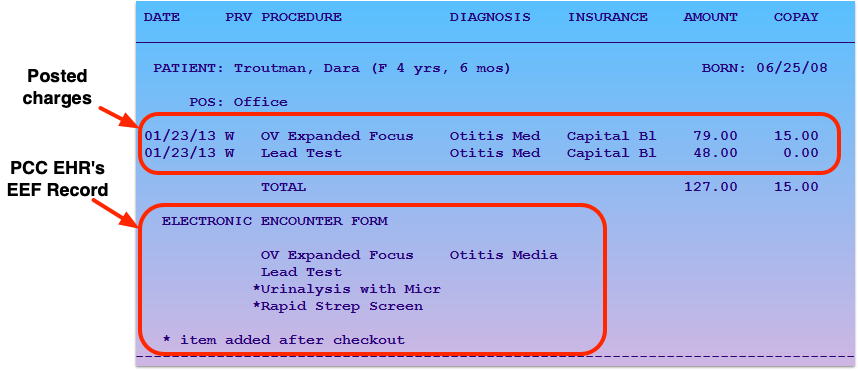
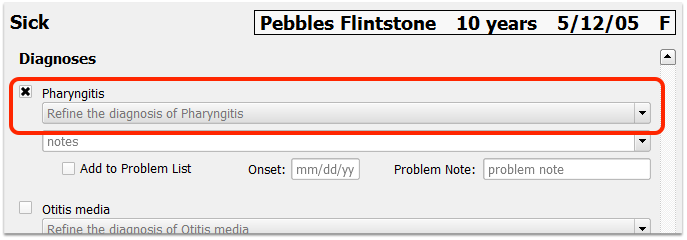
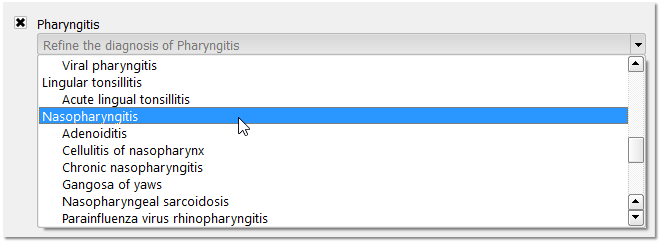
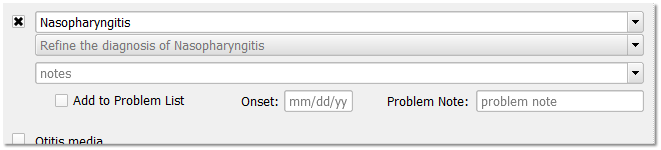
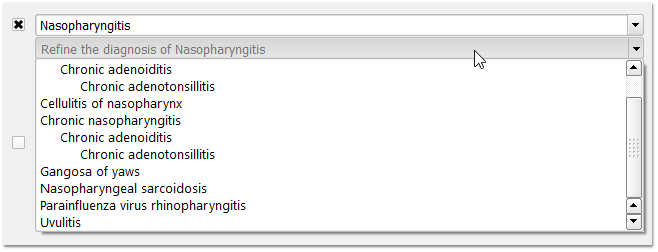
The Diagnoses component, used for charting today’s diagnoses, has special features including a link to the built-in electronic encounter form and tools for adding diagnoses directly to a patient’s Problem List.
For help working with diagnoses in the patient’s chart, read the Find and Refine Diagnoses as You Chart article.
For information about how to configure diagnoses in PCC EHR, read the Diagnosis Configuration article.
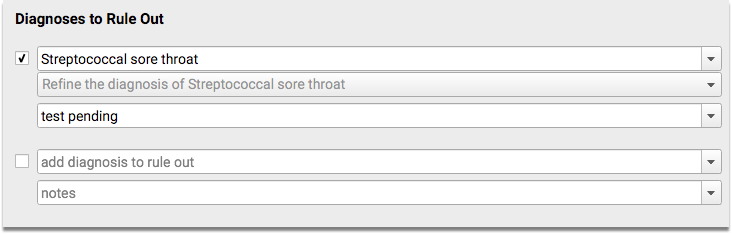
Diagnoses to Rule Out
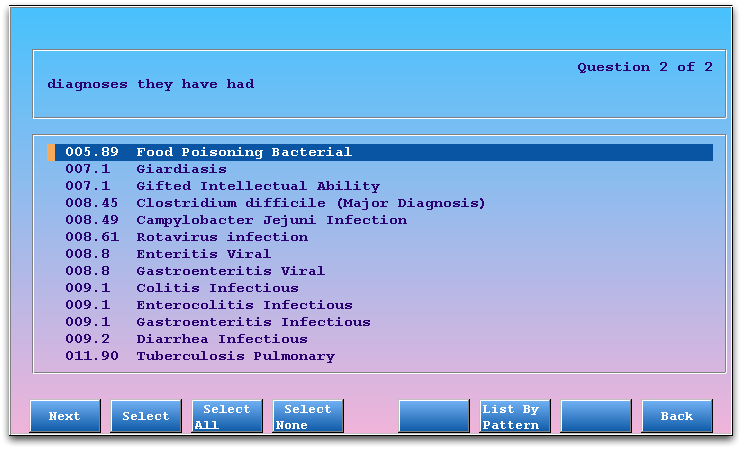
The Diagnoses to Rule Out component is used to chart diagnoses that are being ruled out as part of the patient visit. The drop-down list includes the same diagnoses as included in the Diagnoses component, although diagnosis from the patient’s current problem list do not appear at the top. In addition, there are no indications that a diagnosis is “private”, as rule-out diagnoses are not included in patient reports, by default.
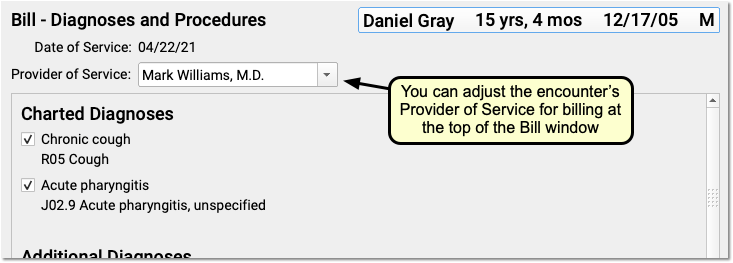
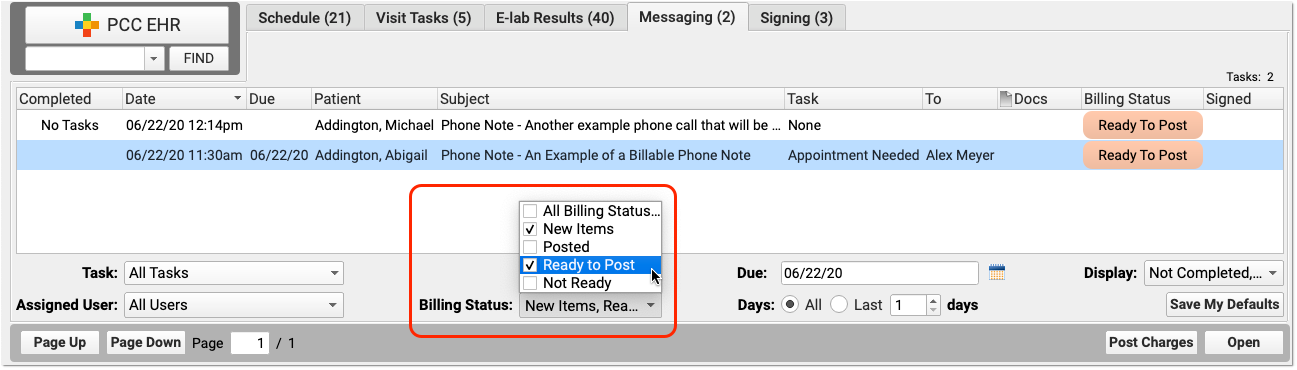
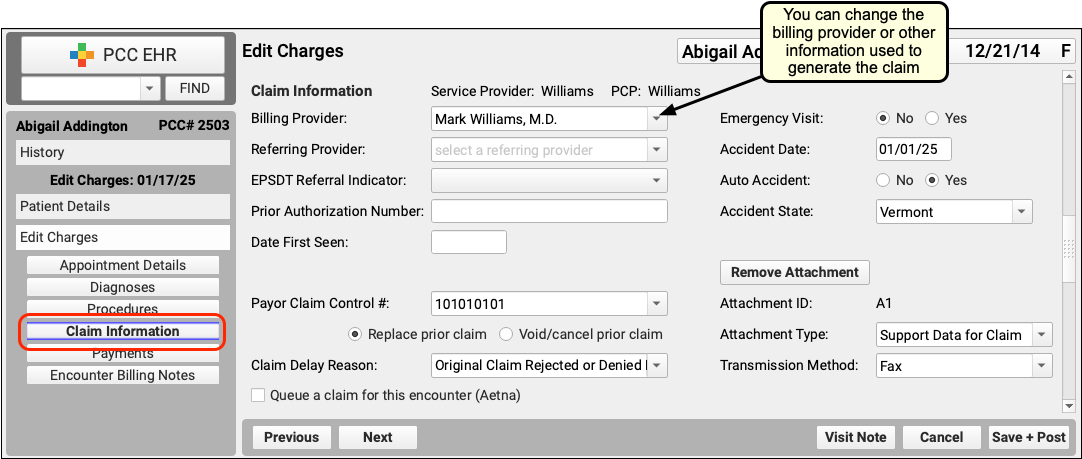
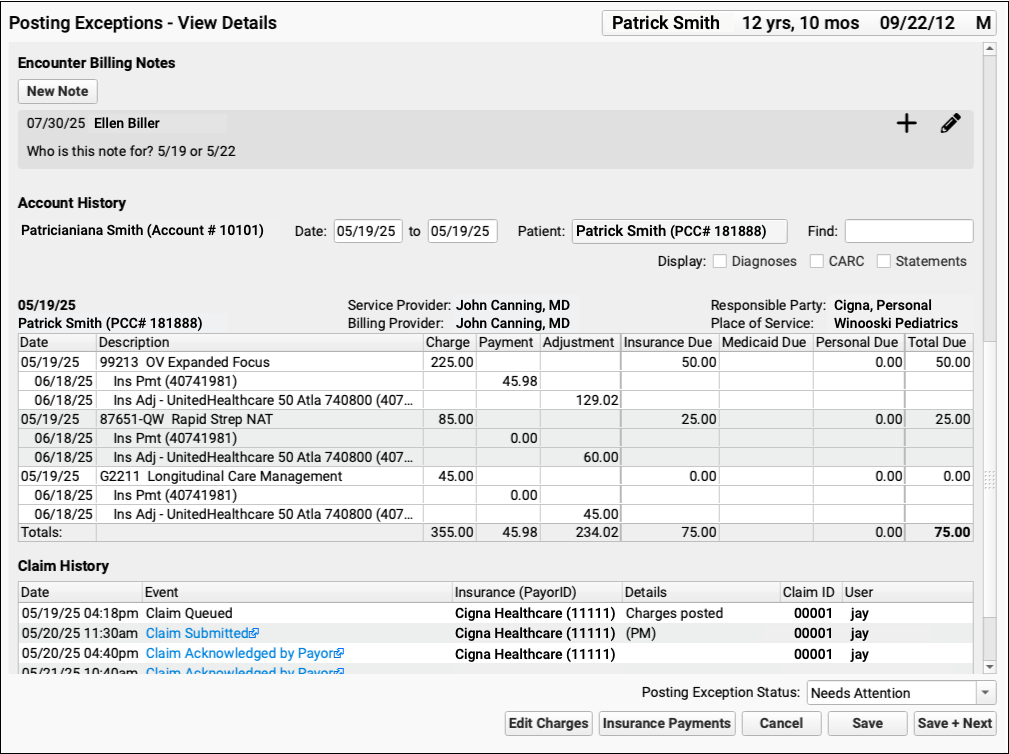
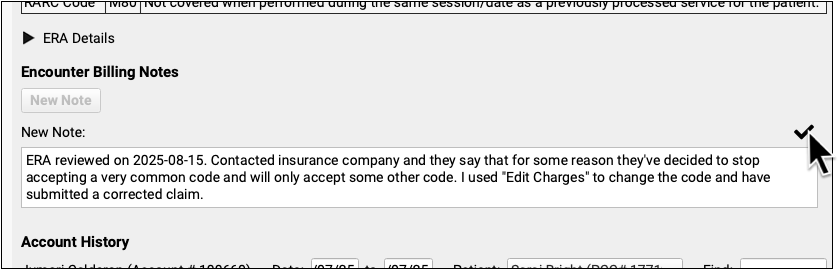
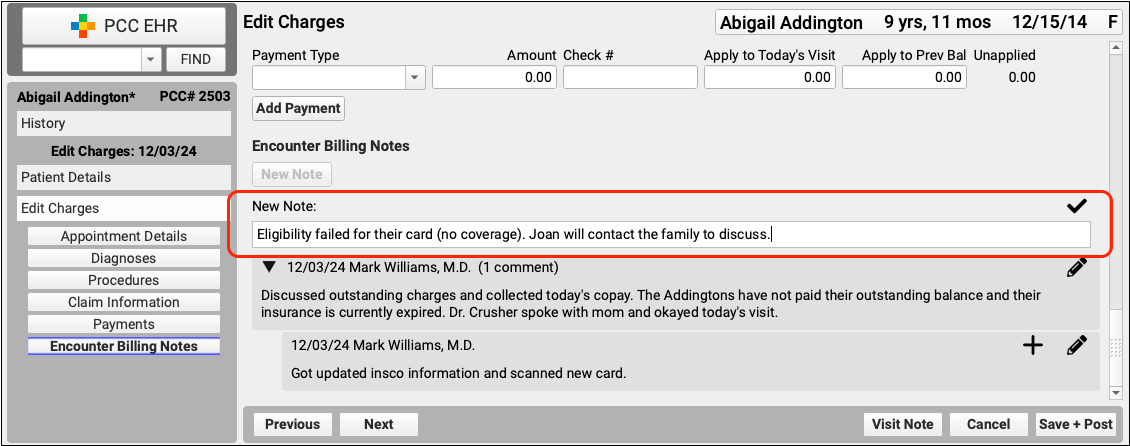
Encounter Billing Notes
Use the Encounter Billing Notes component to record details specific to the billing for an encounter.
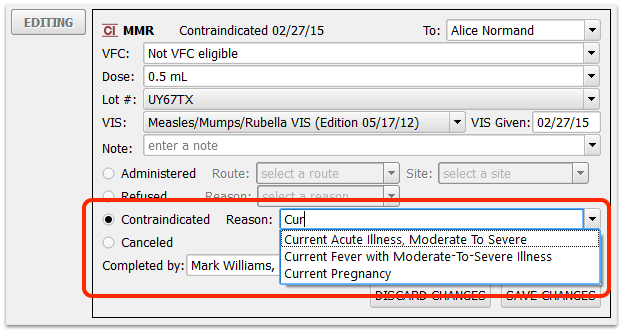
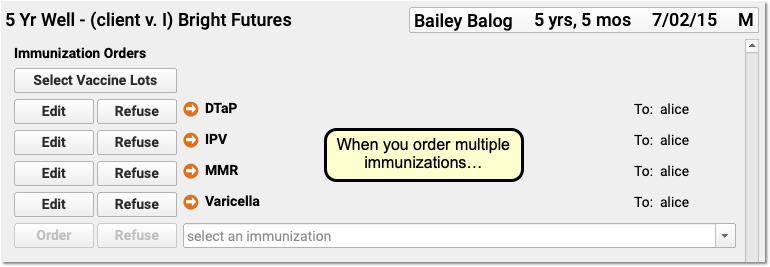
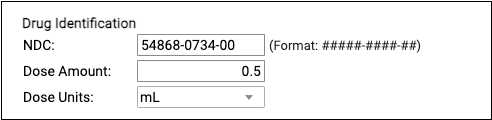
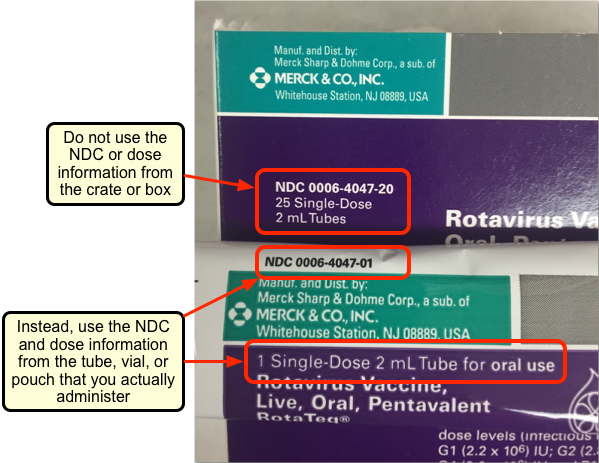
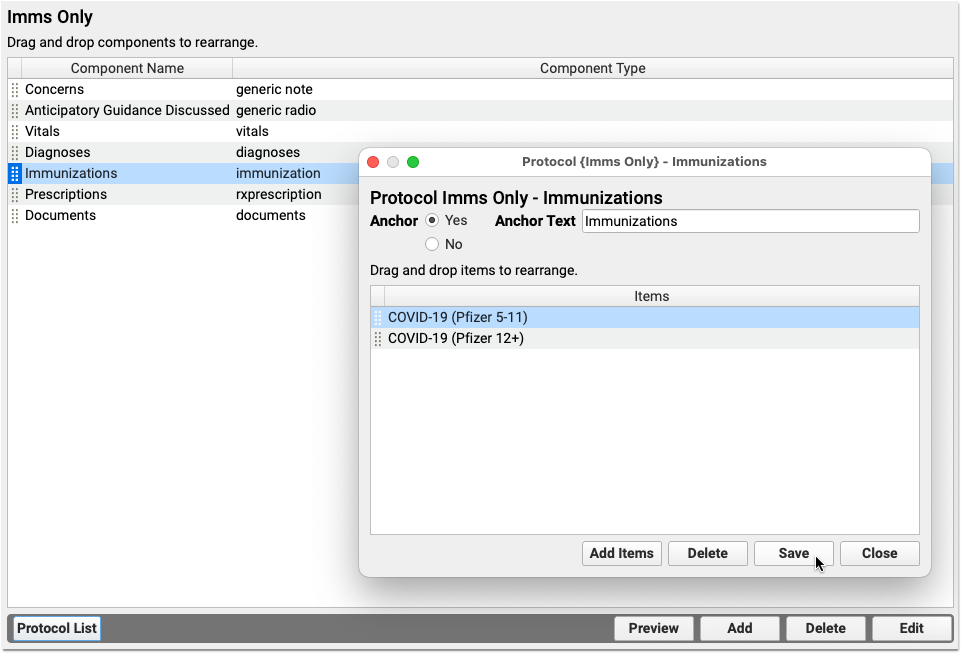
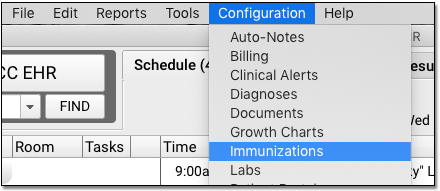
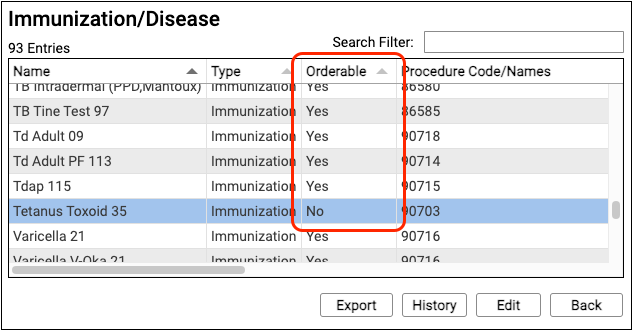
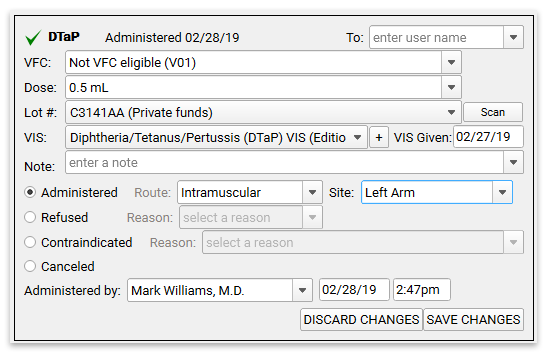
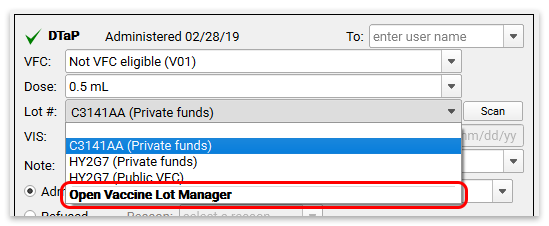
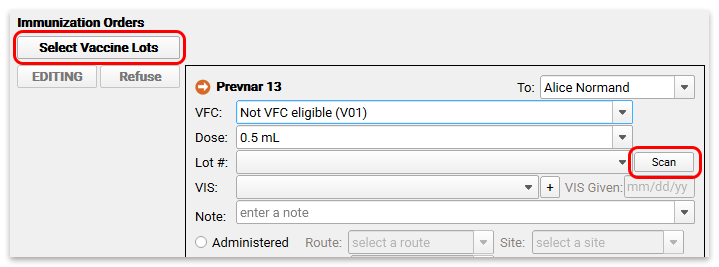
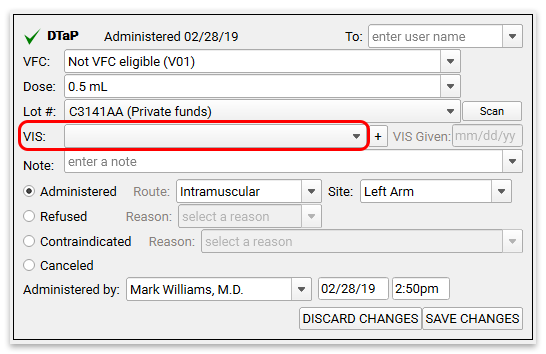
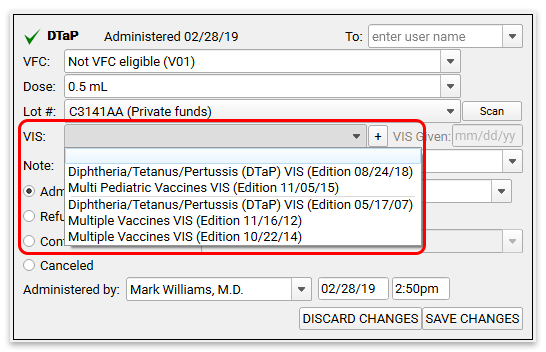
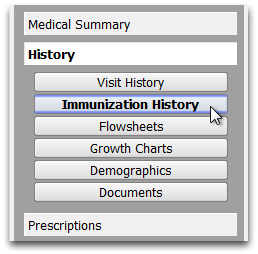
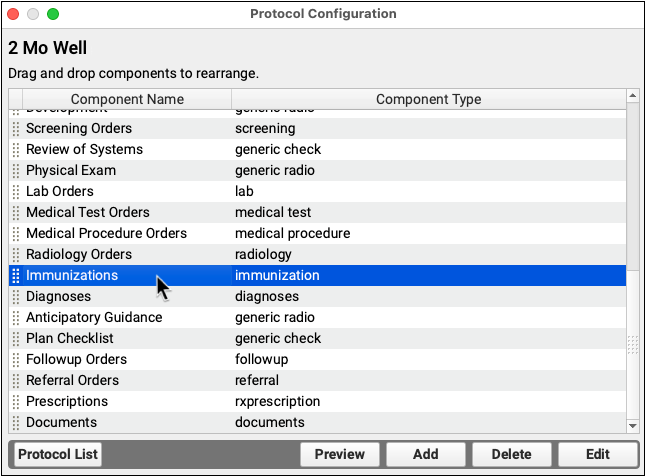
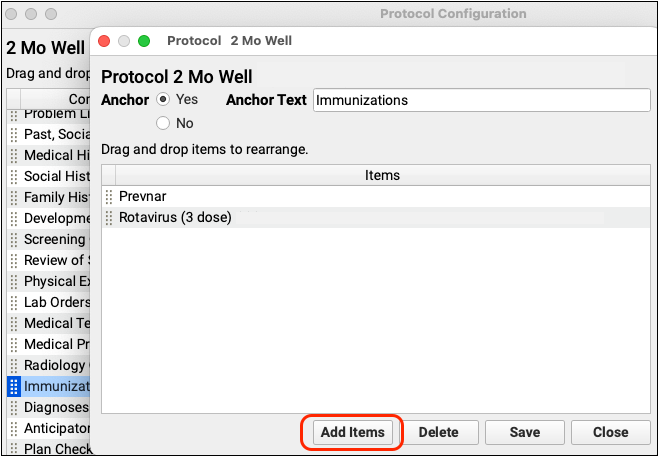
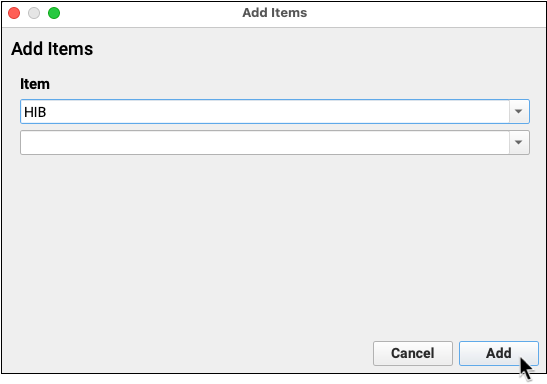
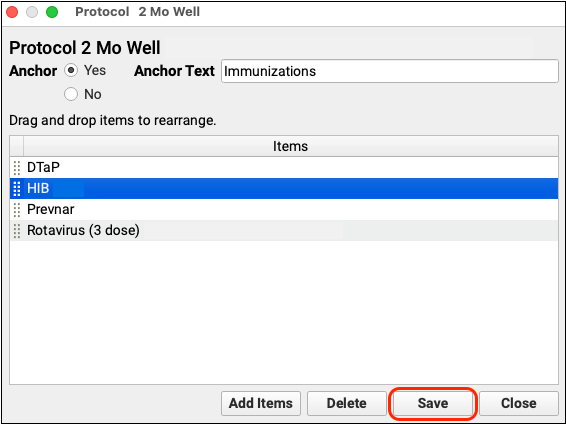
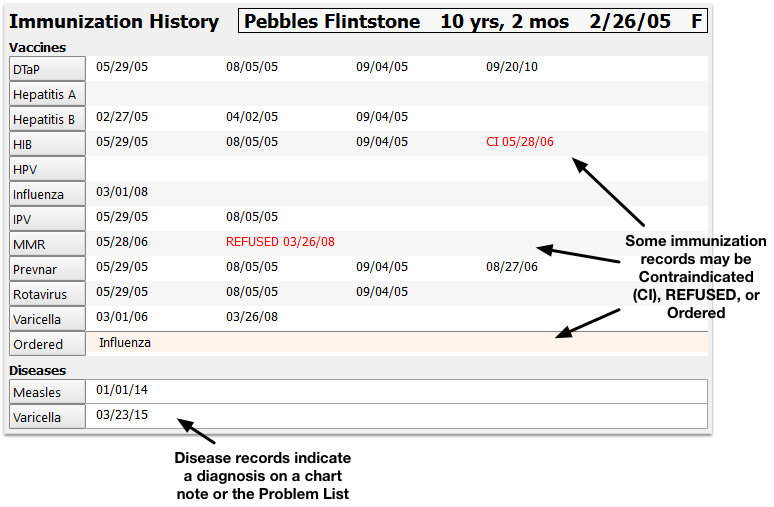
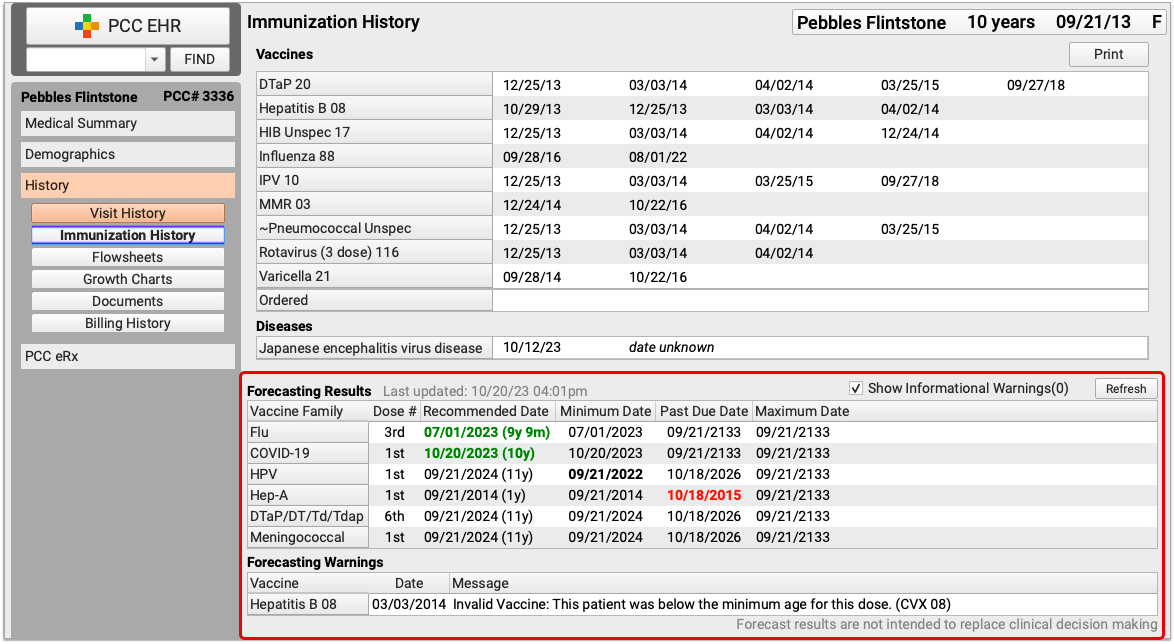
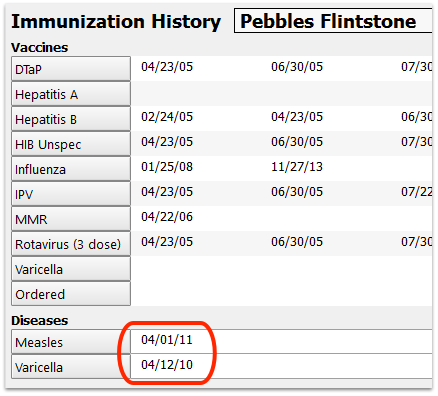
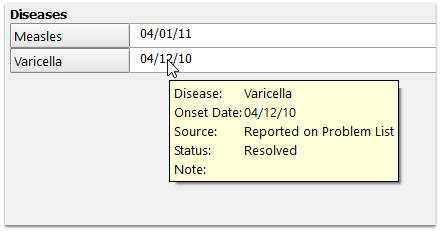
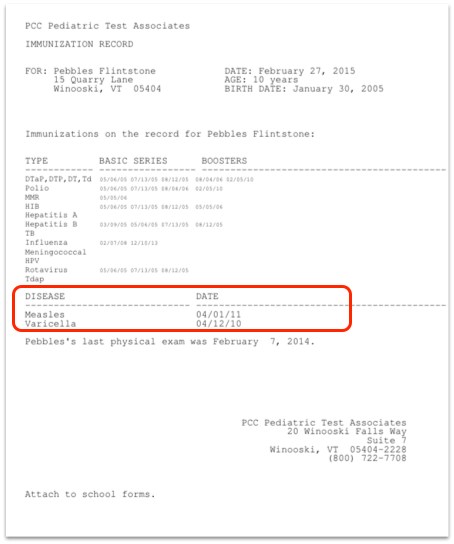
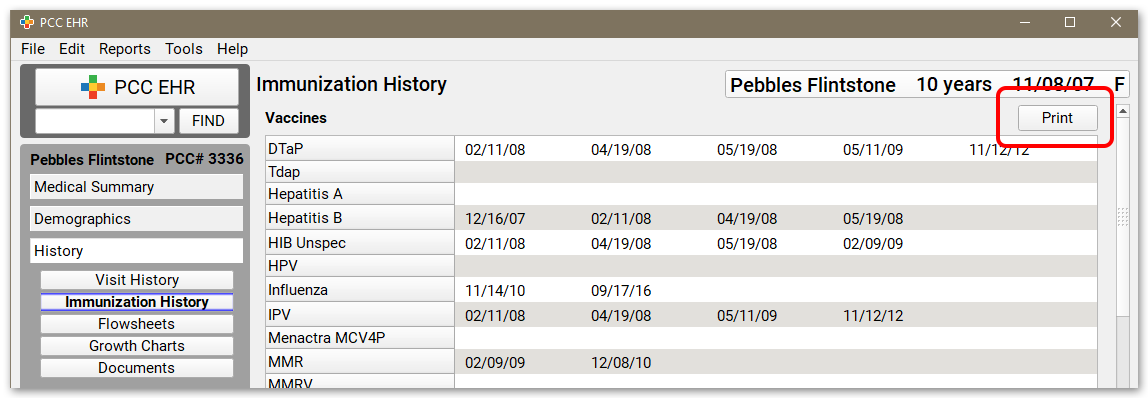
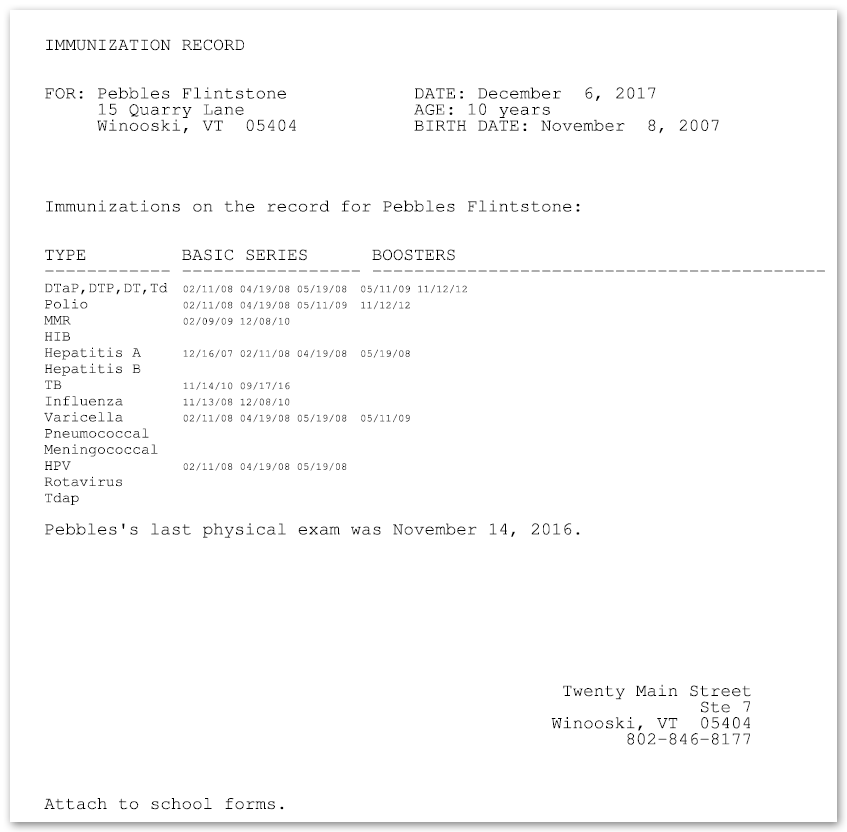
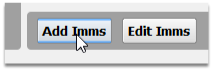
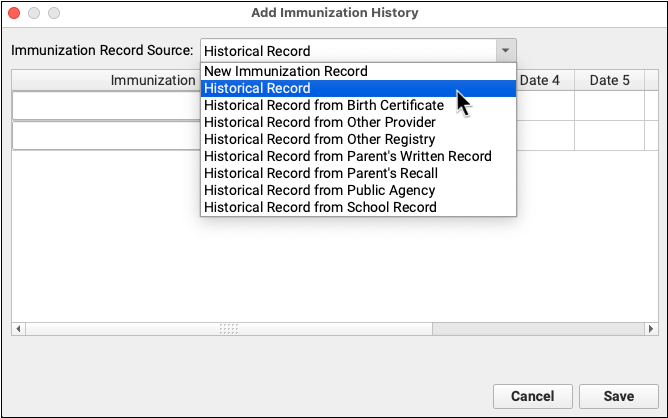
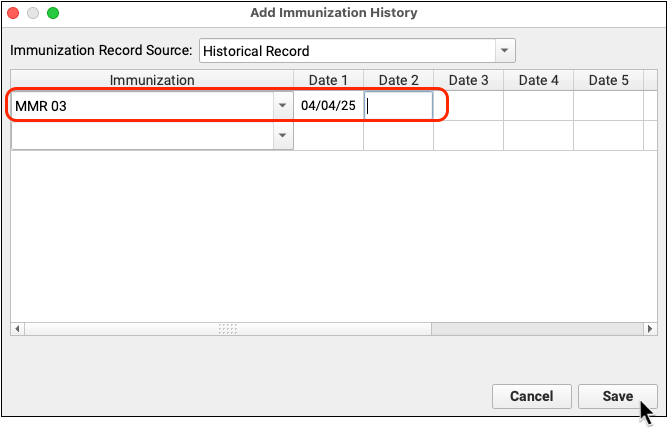
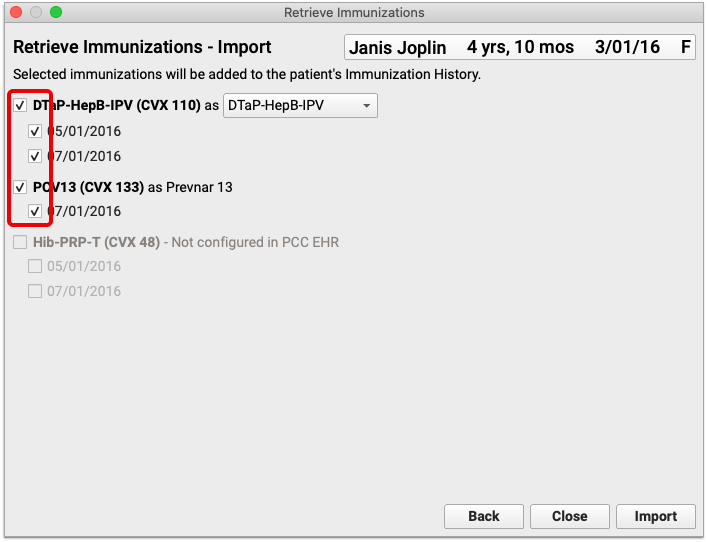
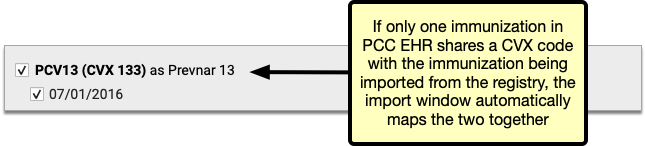
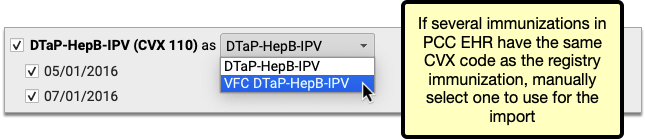
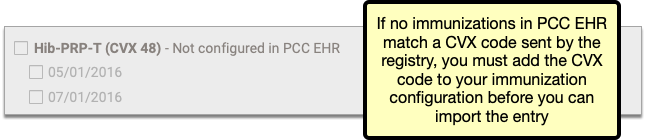
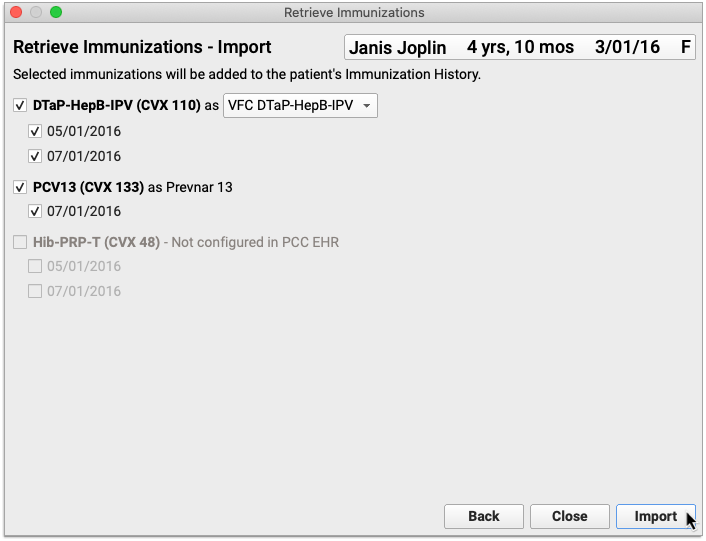
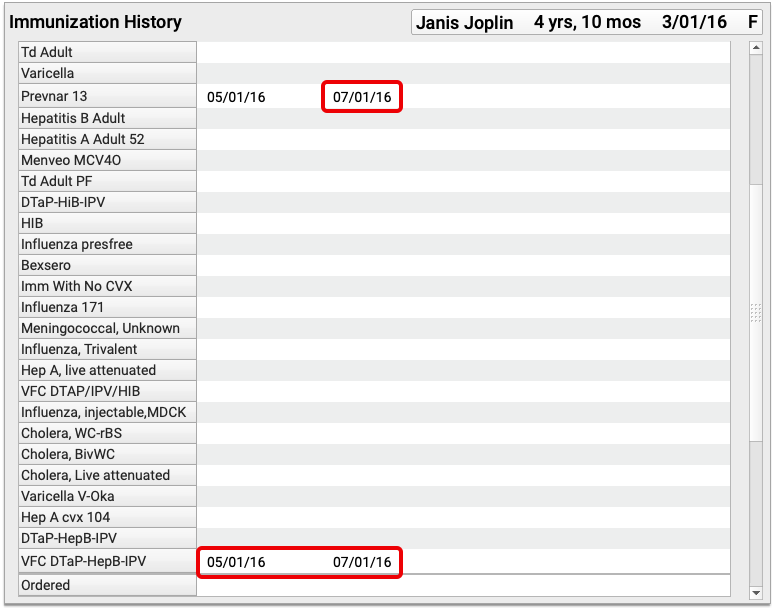
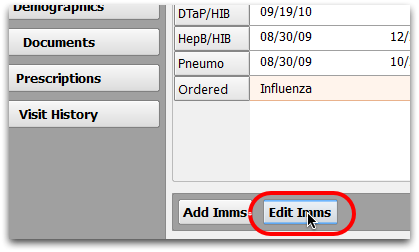
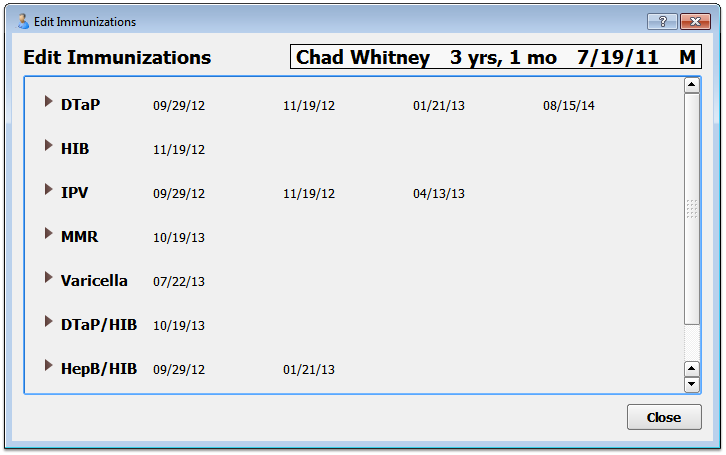
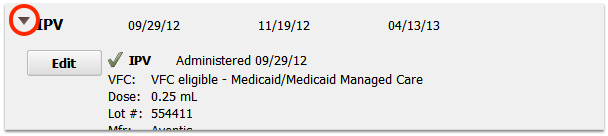
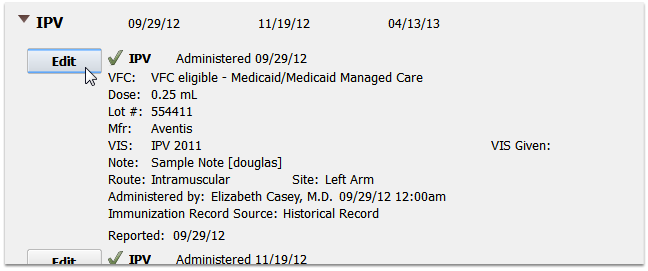
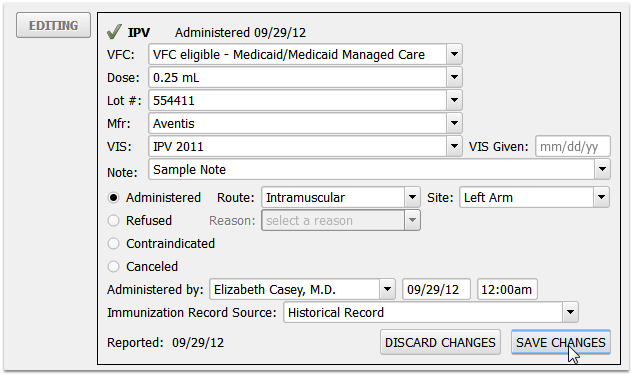
Immunizations
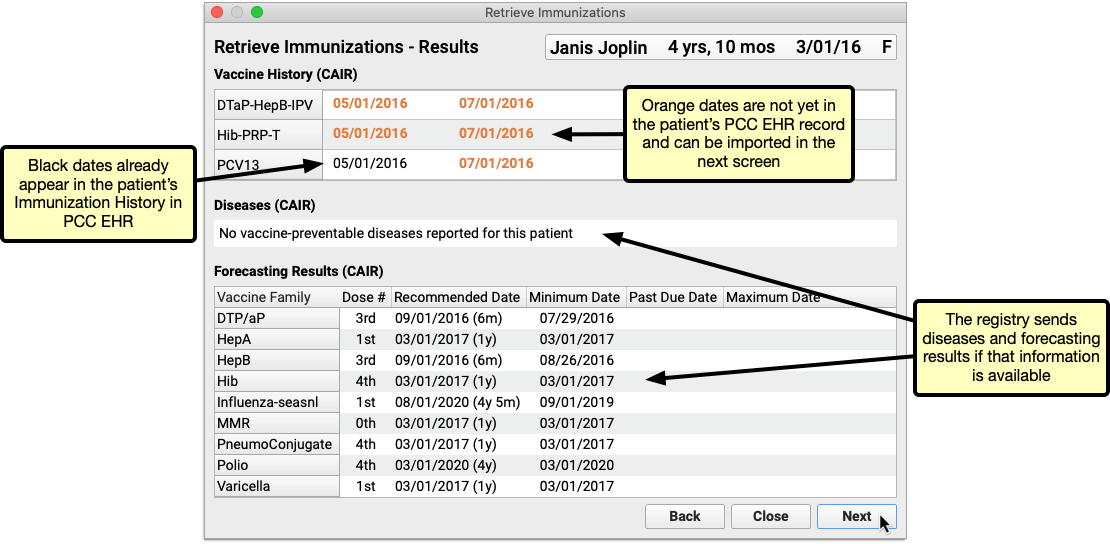
The Immunization component displays a patient’s immunization history and also displays a custom pick list of immunizations for the specific protocol (often configured by age). At practices where a bidirectional immunization registry interface has been established, the Immunization component also allows you to look up and import a patient’s immunization records from the registry.

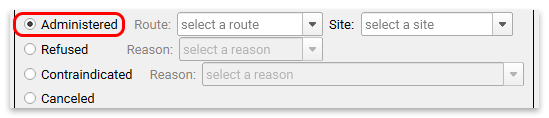
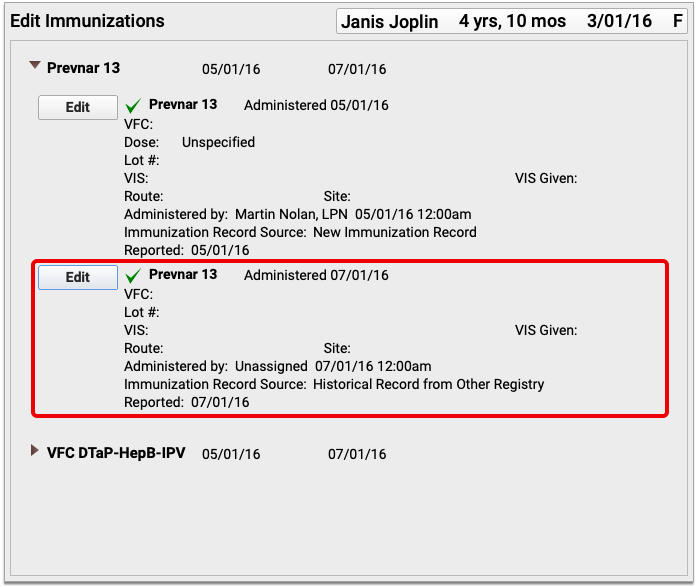
A user can click to create an order for an immunization, and it will include special fields for recording immunization data.
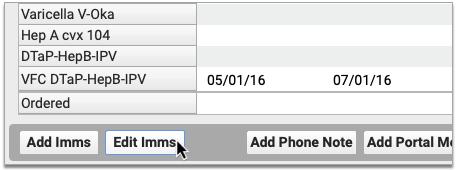
For help working with immunizations in the patient’s chart, read the Review and Update a Patient’s Immunization Record article.
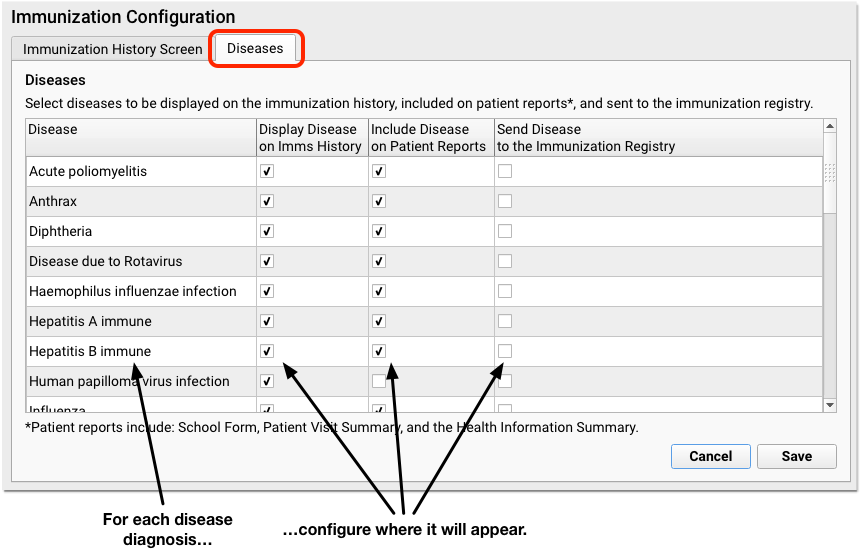
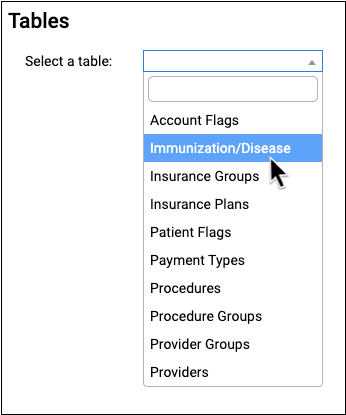
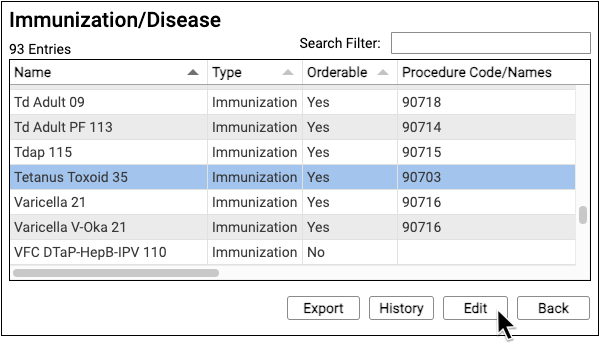
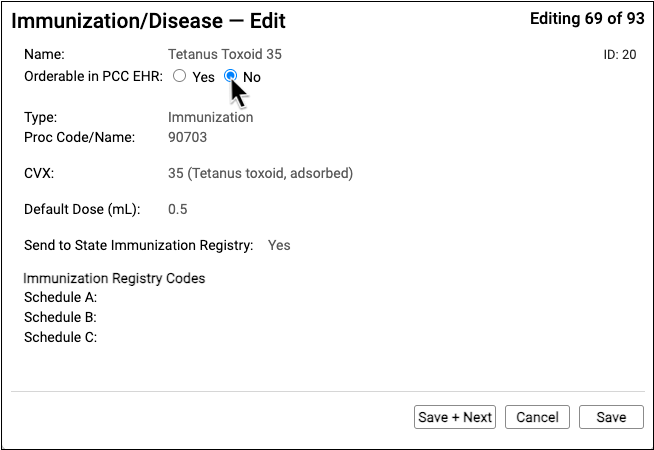
For more information about configuring immunizations in PCC EHR, read the Immunizations Configuration help article.
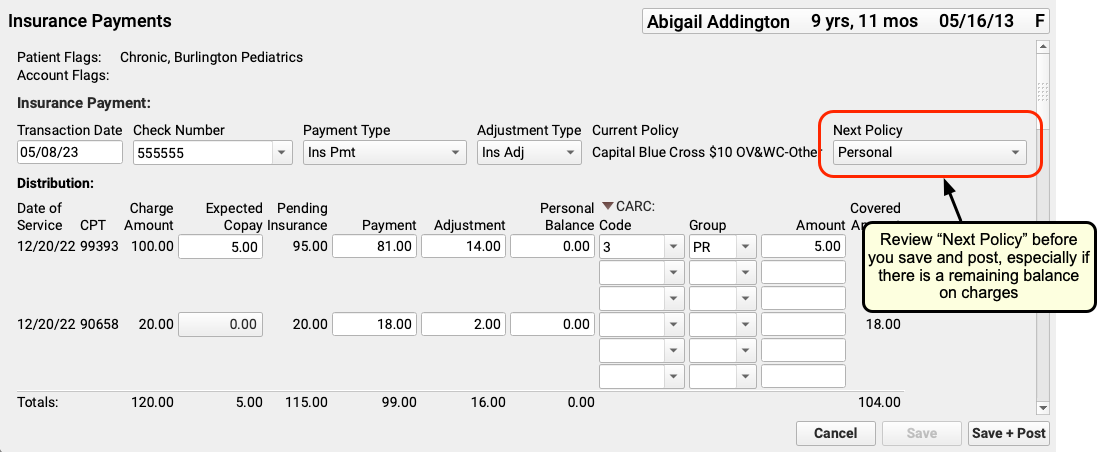
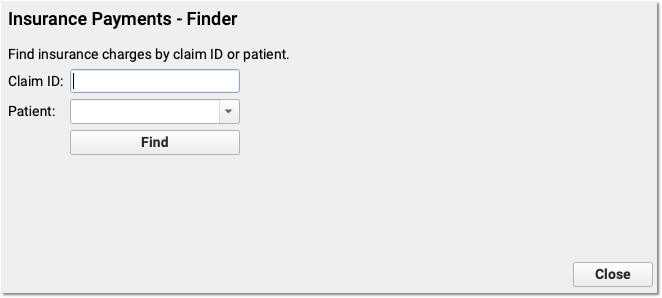
Insurance Eligibility
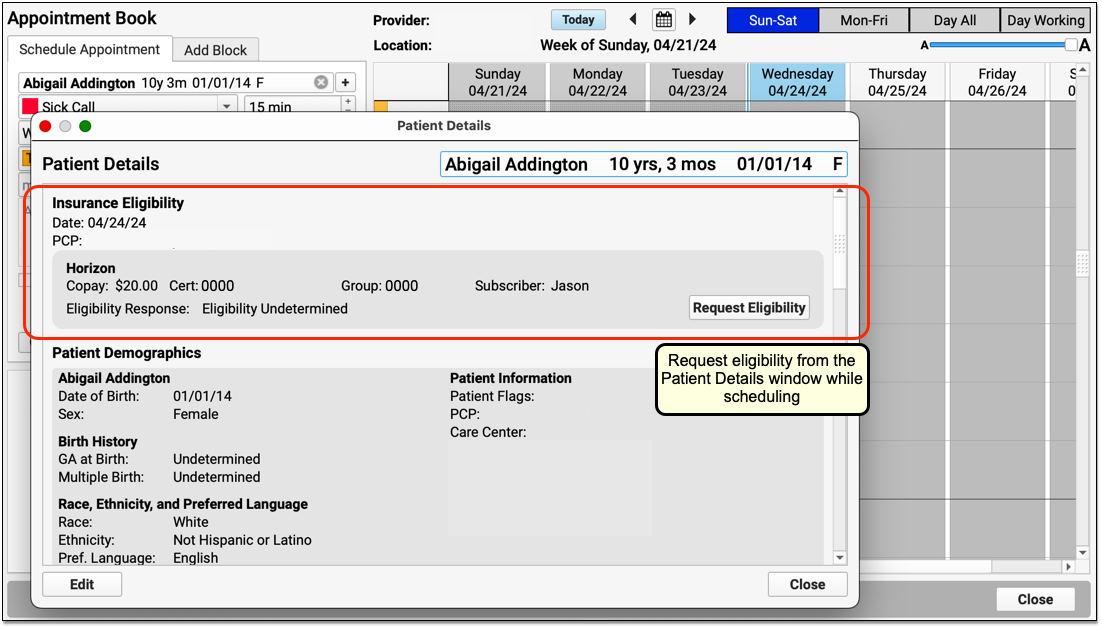
The Insurance Eligibility component is used to review patient insurance eligibility for active policies.
When the component appears in Patient Details, the Medical Summary, or another protocol that is not specific to an encounter, it includes limited features and can only submit a request for eligibility based on today’s date.
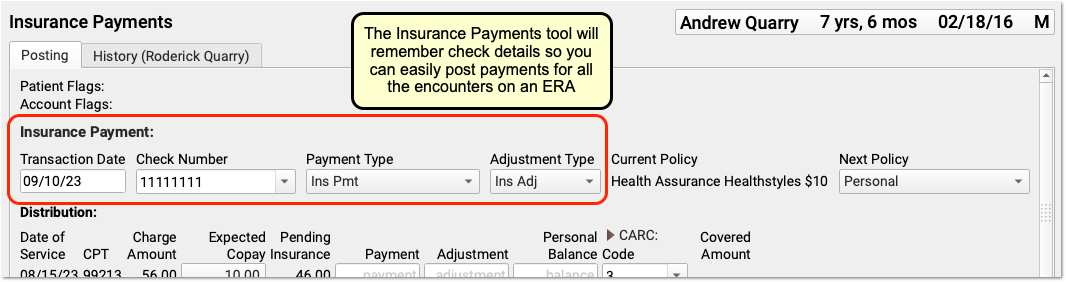
When the Insurance Eligibilty component appears in Patient Check-in, a chart note, when posting charges, or another encounter-specific protocol, it has more functionality and allows the user to manually record a status, date verified, and notes, all of which will be associated with the encounter.
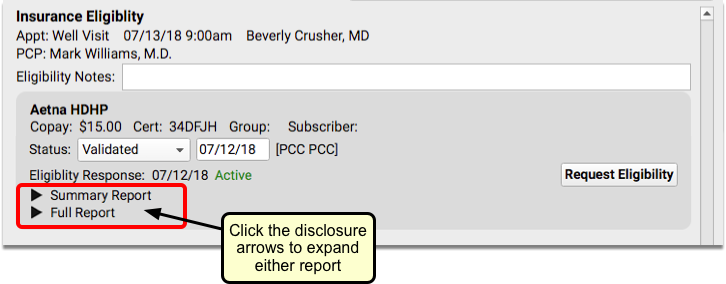
When you first open the Patient Check-In protocol, PCC EHR automatically checks eligibility, if it has not already been done. The Eligibility Response will display either “Active” in green, to indicate that the patient is covered, or “Inactive” in red, meaning that the patient is not currently covered.
For more information about Insurance Eligibility, read Patient Insurance Eligibility with PCC.
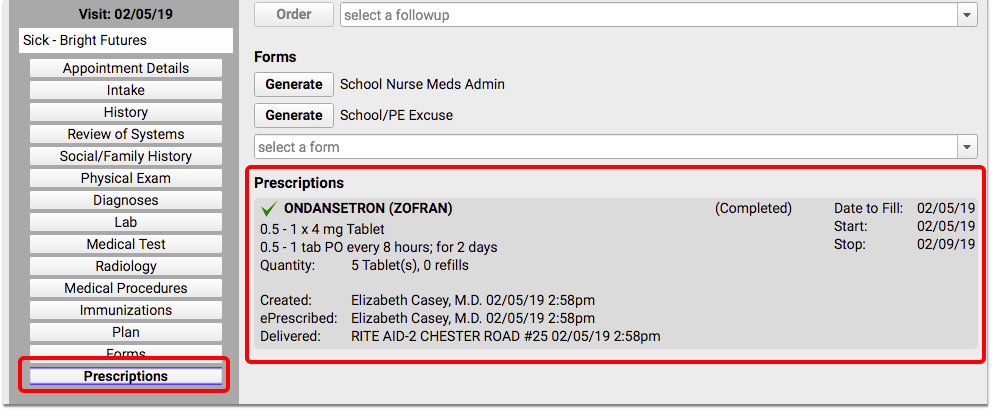
Prescriptions
The Prescriptions component will appear within a patient’s chart note if prescriptions have been added through PCC eRx during the visit. This component will only appear if medication is prescribed during the specific visit.
For more information about prescribing in PCC EHR, review the PCC eRx documentation on learn.pcc.com.
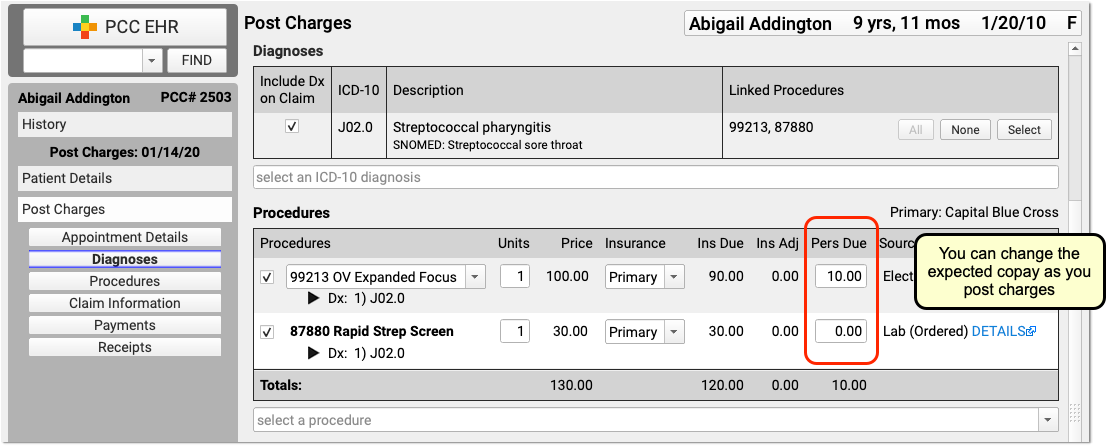
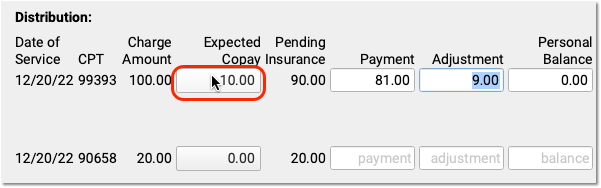
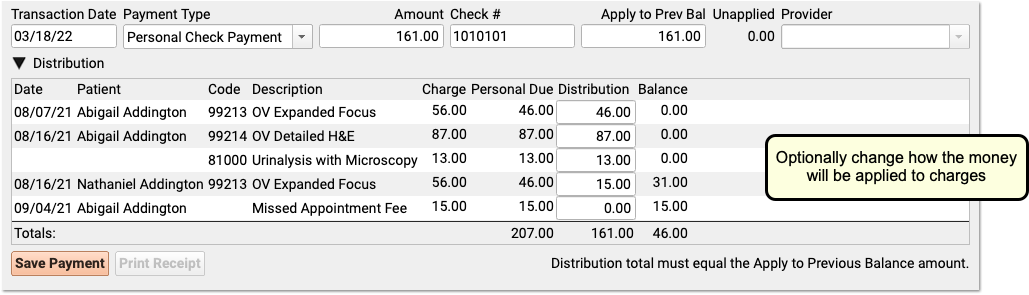
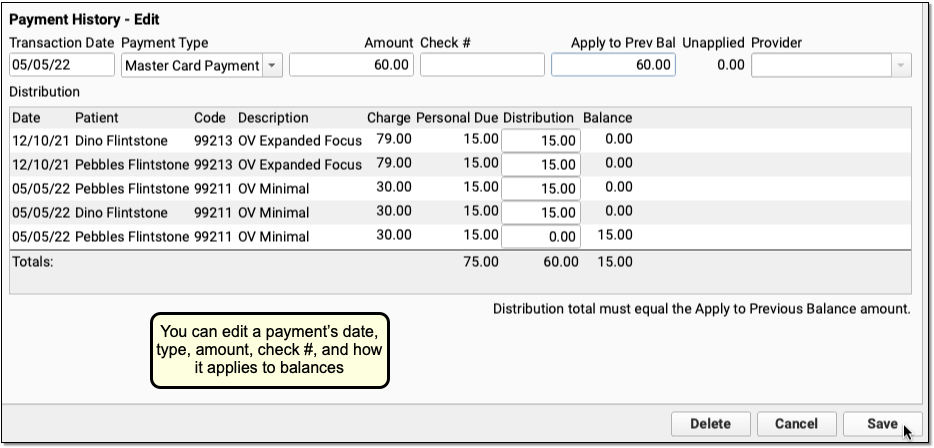
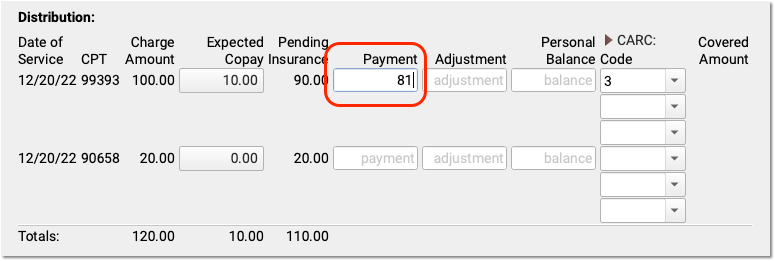
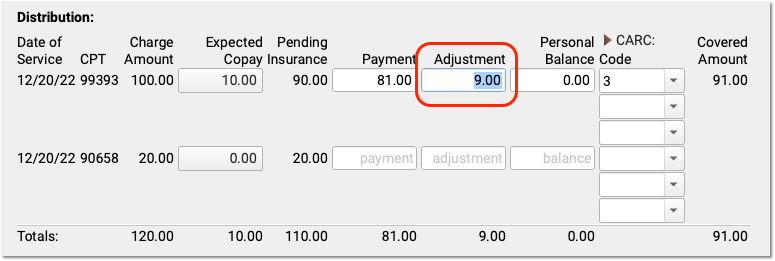
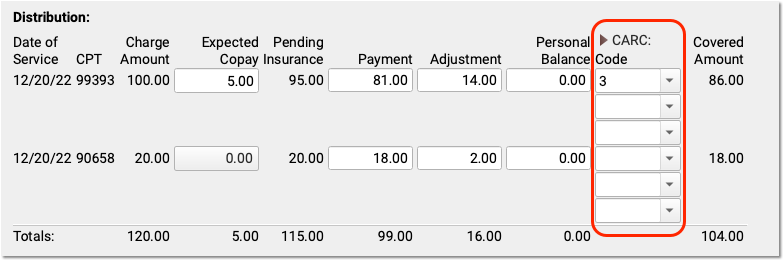
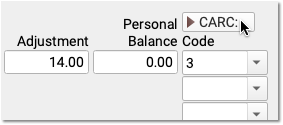
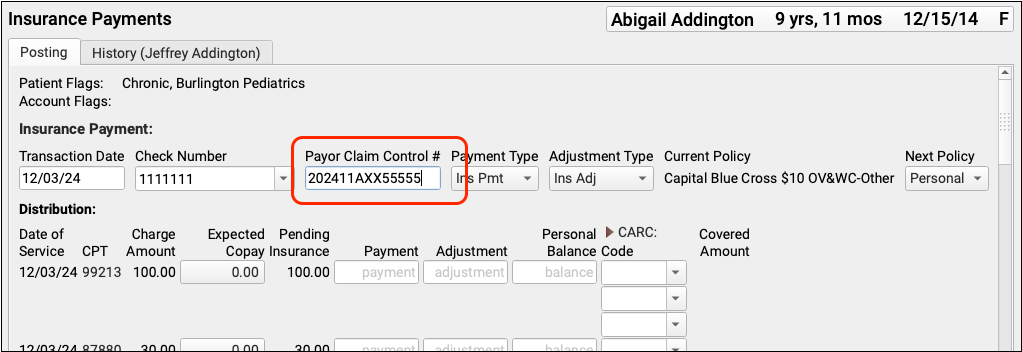
Time of Service Payments
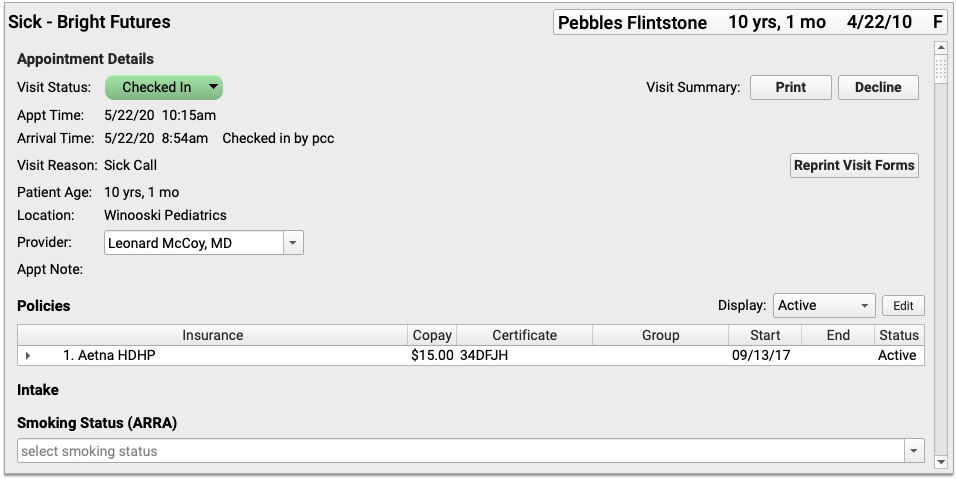
The Time of Service Payments component is used during the check-in process in PCC EHR to post a payment toward the family’s account balance. The amount due today will appear in a ledger.
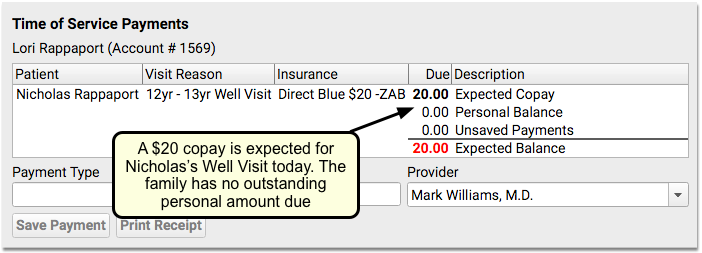
This component is account-specific, so if the patient has siblings, you will see all of the family’s current and past-due balances. The account balance will automatically update as you post payments, and you can also print a receipt to give to the family.
For more information about how to use the Time of Service Payments component, read the Check In a Patient article.
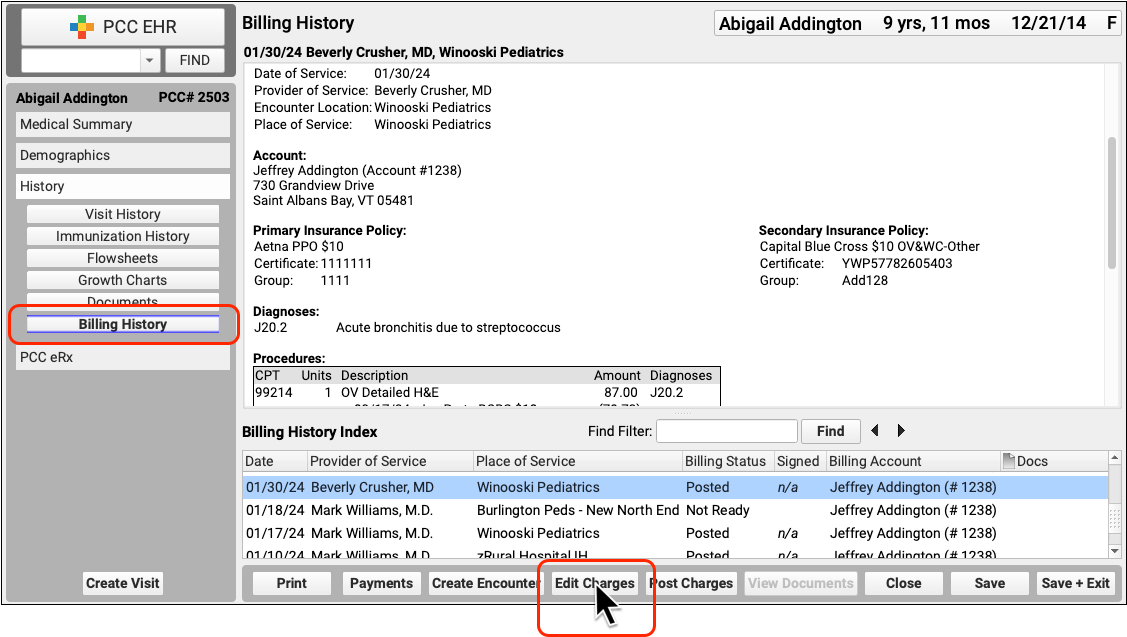
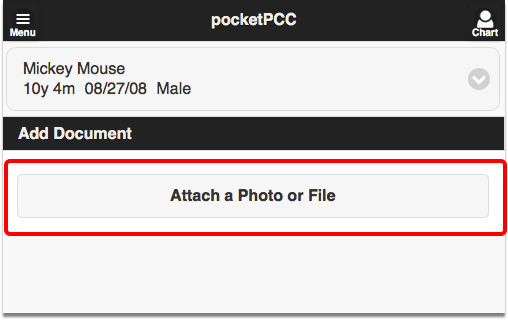
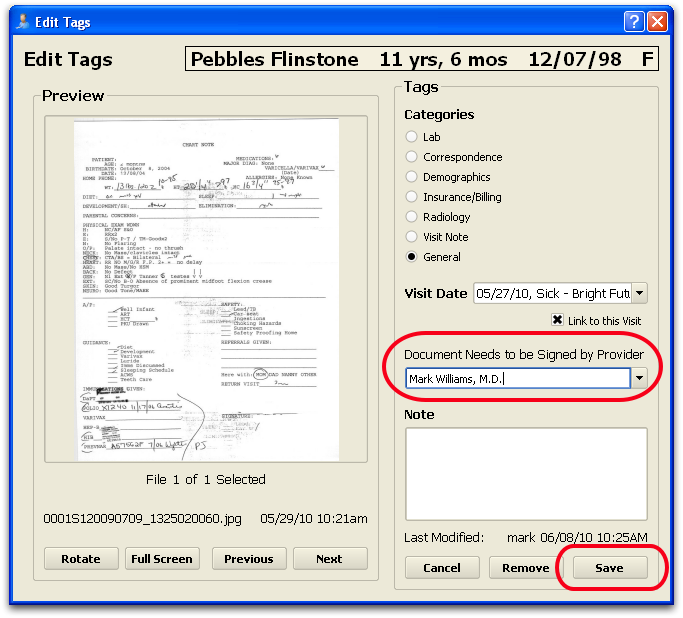
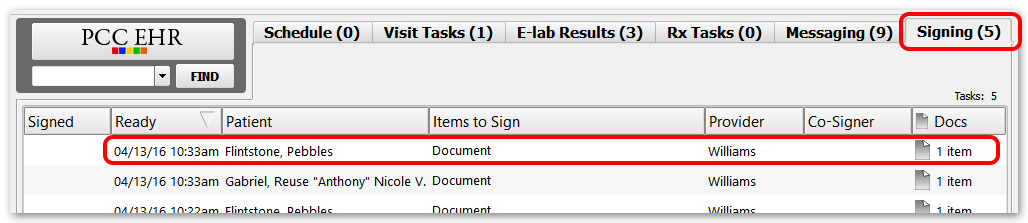
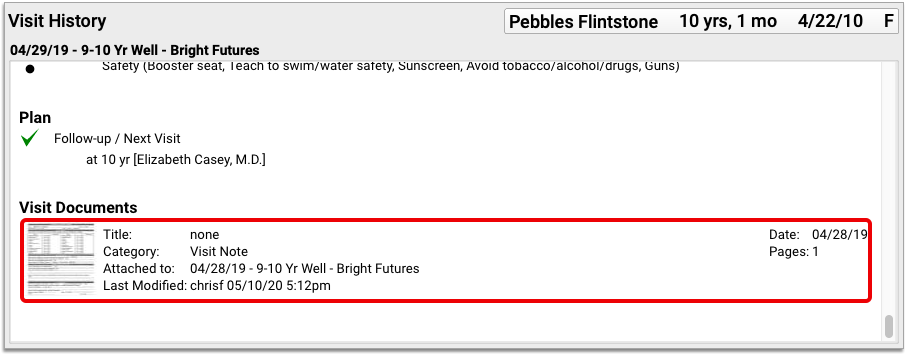
Visit Documents (Documents component)
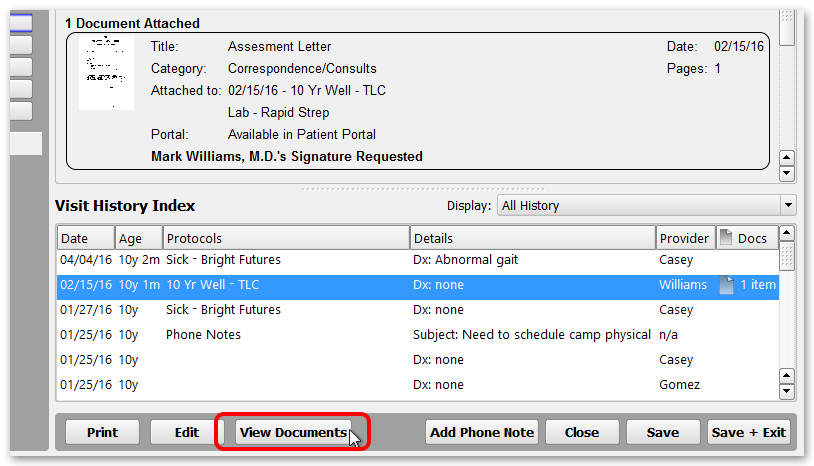
When you add the Documents component to a visit protocol, the Visit Documents component will appear within a patient’s chart note if there are any documents that have been imported into the chart and associated with the open visit. This component will only appear if there are documents for the specific visit.
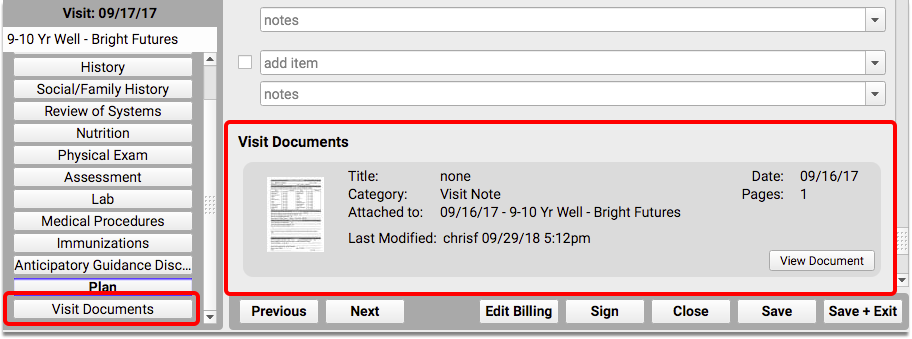
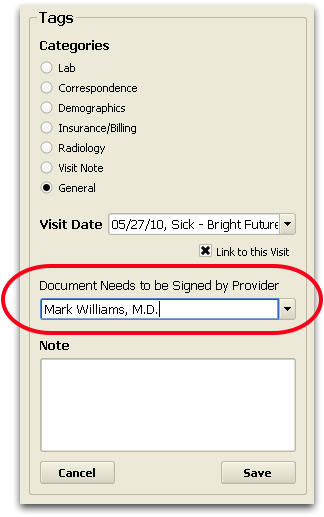
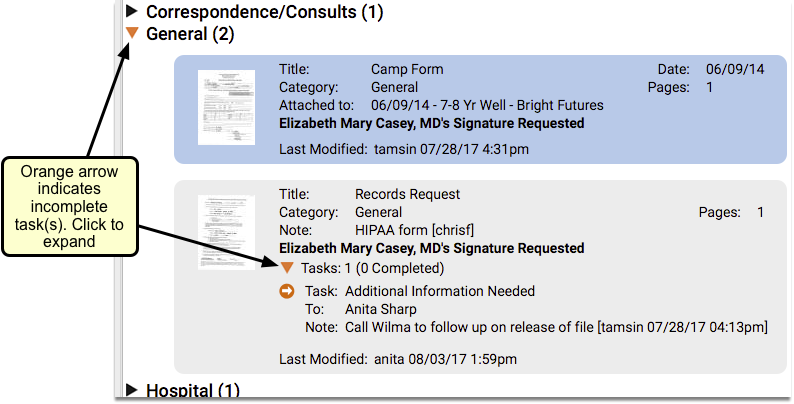
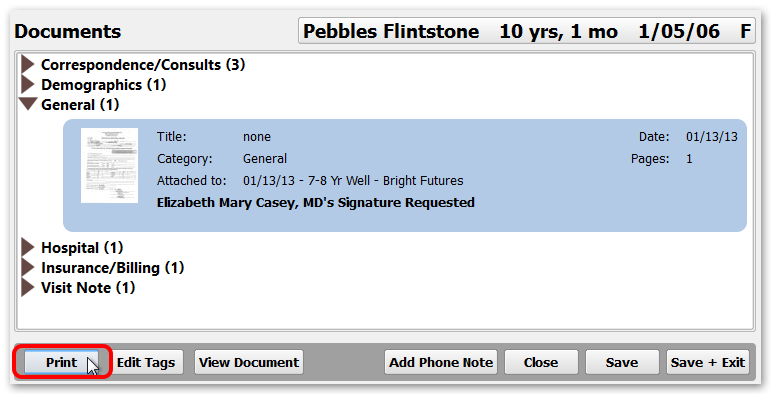
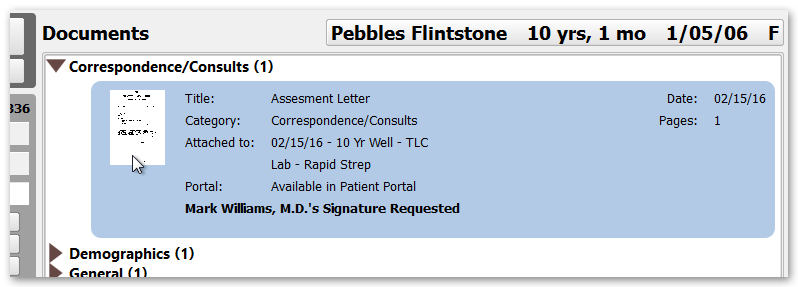
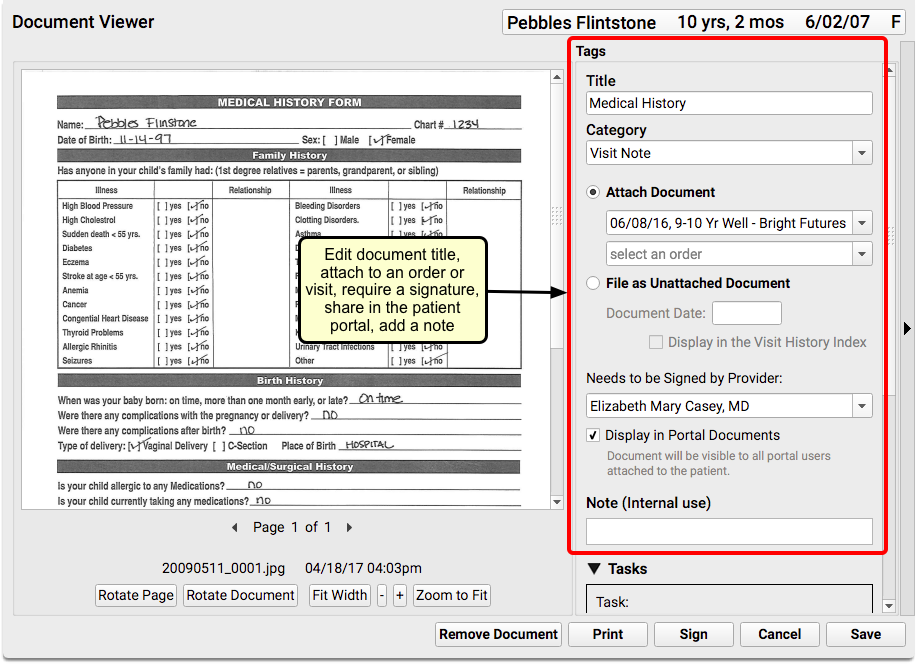
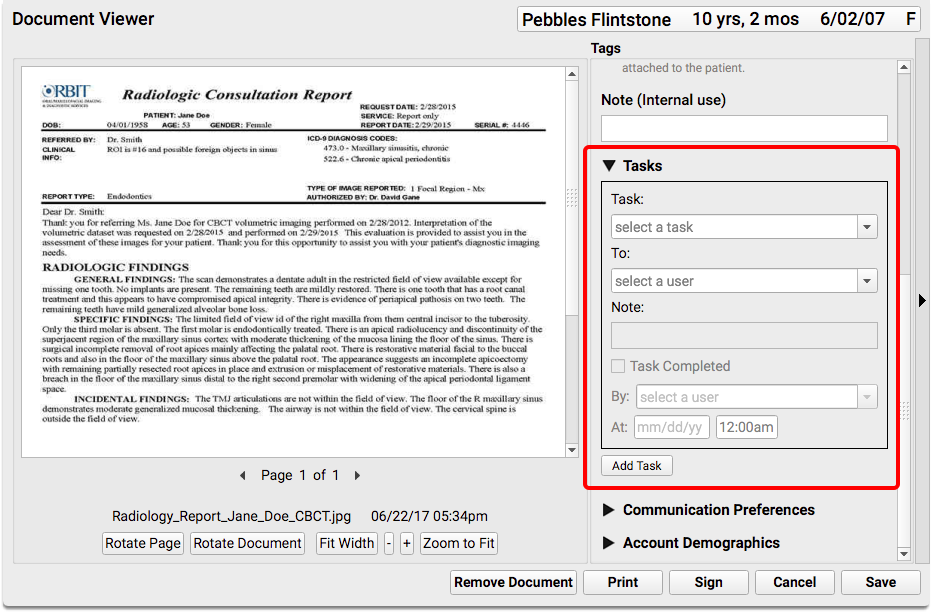
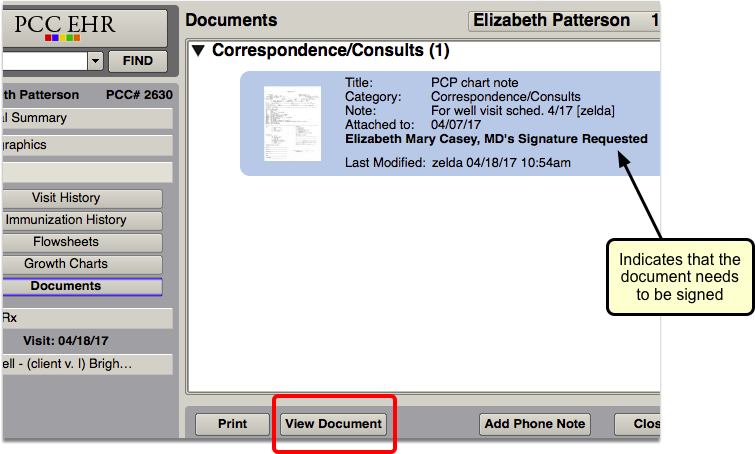
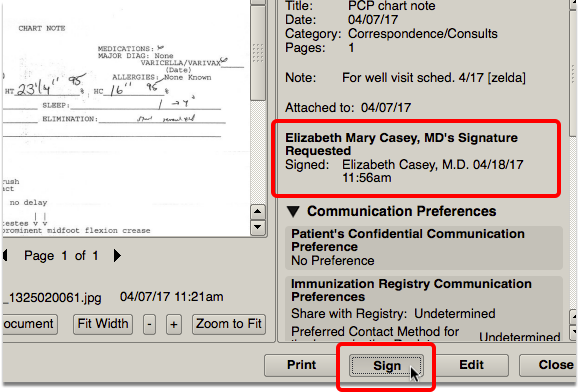
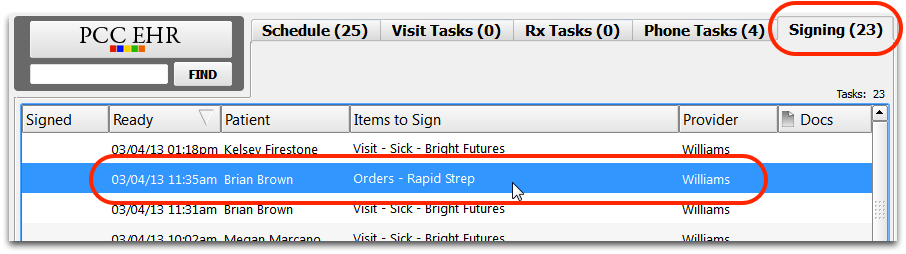
For each document, you can see a thumbnail of the image, any notes or tags attached to the document, and if it is related to a specific order. You can see whether the document was shared in the portal, if it is awaiting a signature, and any associated tasks.
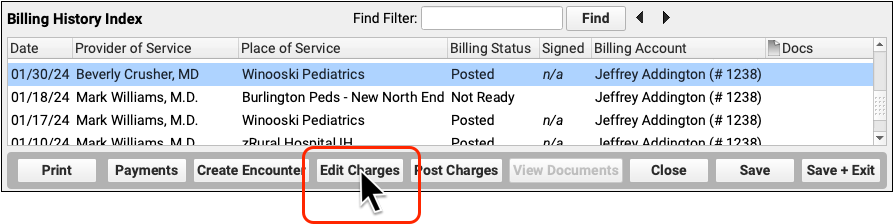
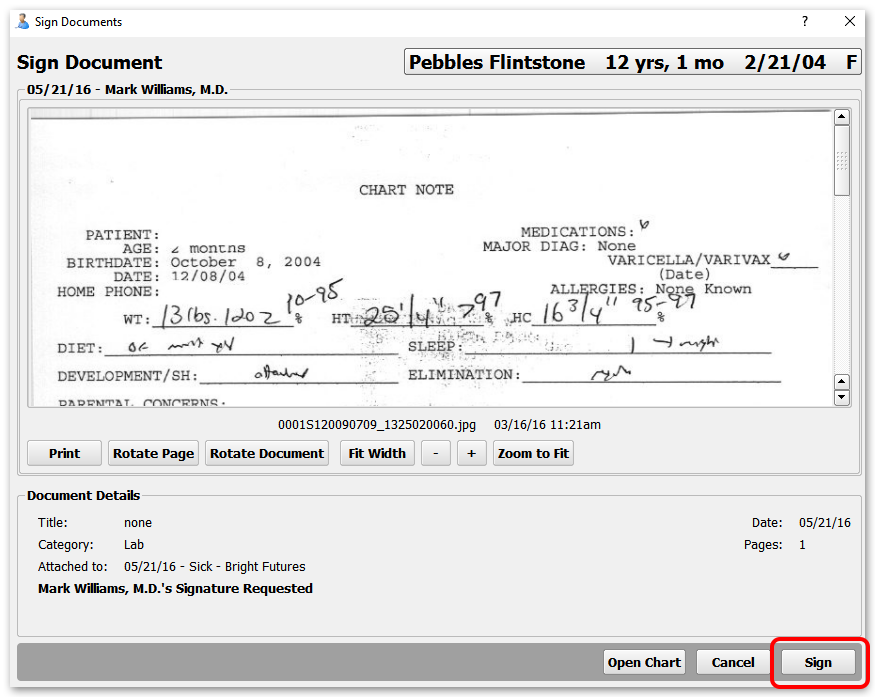
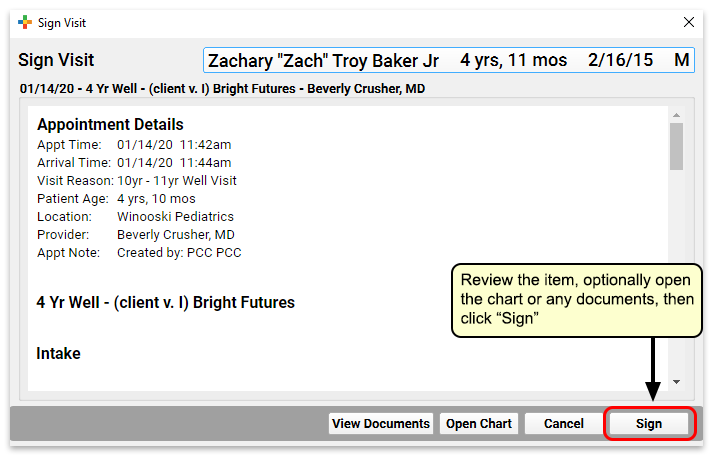
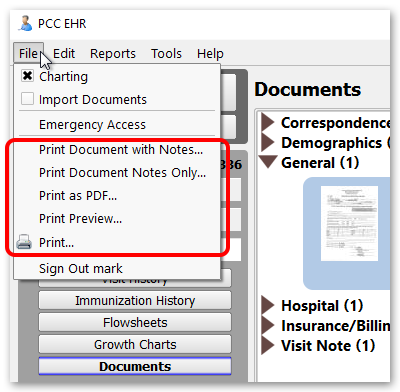
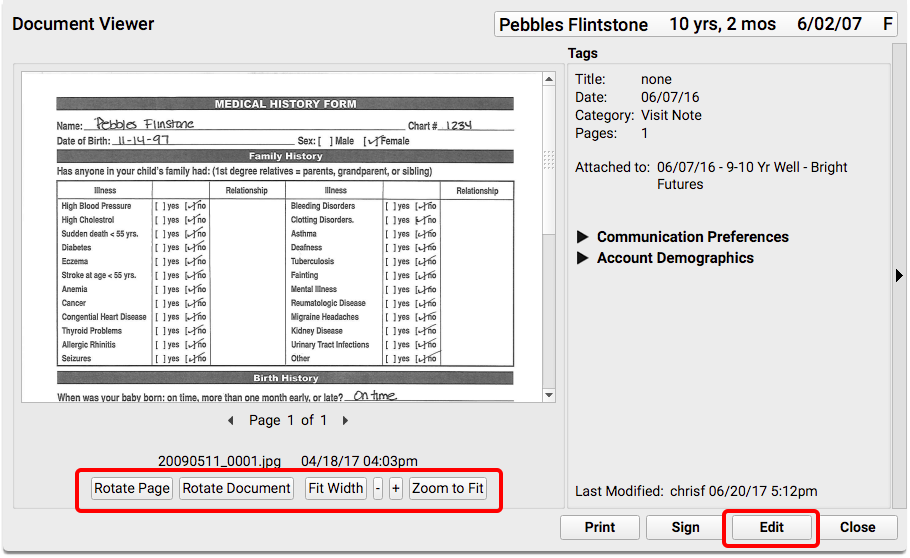
Clicking on the “View Document” button will open the Document Viewer, where you can sign the document, complete or add new tasks, print, or delete the document.
Visit the Working with Documents help article to learn more.
To see other areas of the chart where documents appear, read the Review Documents for a Patient article.
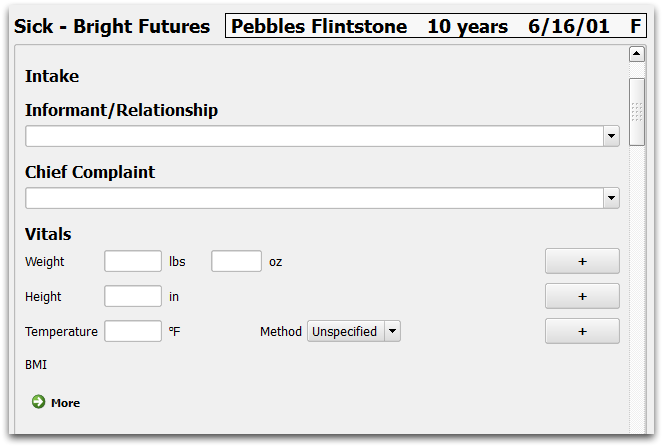
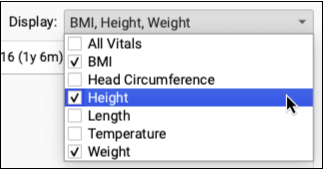
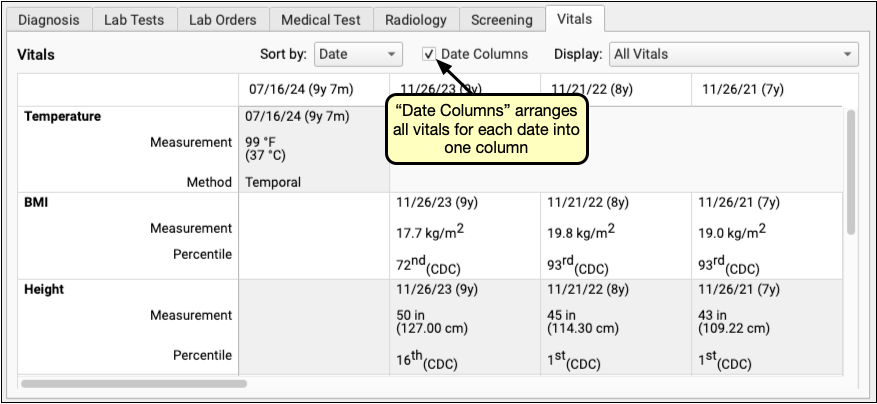
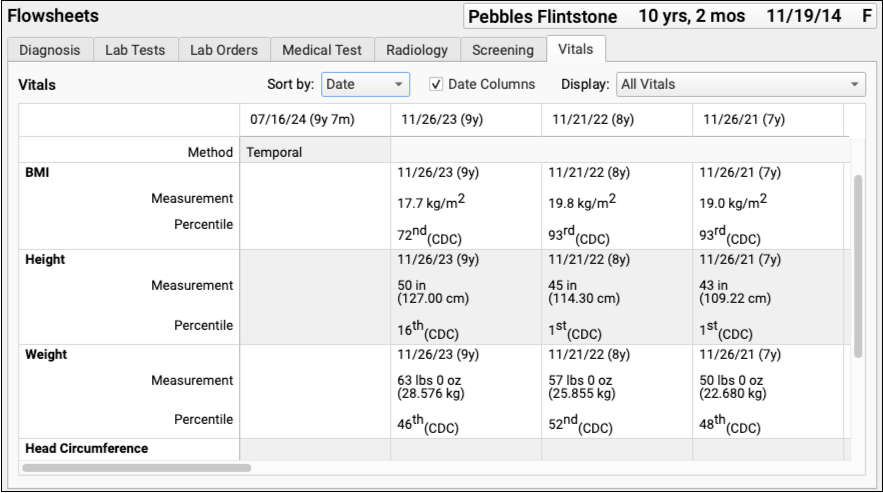
Vitals
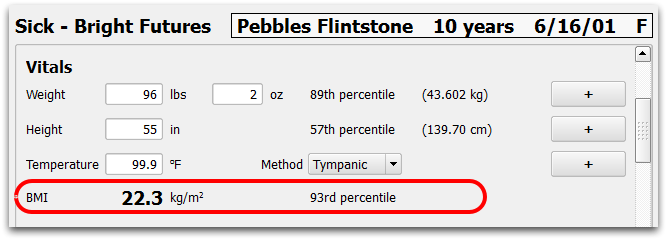
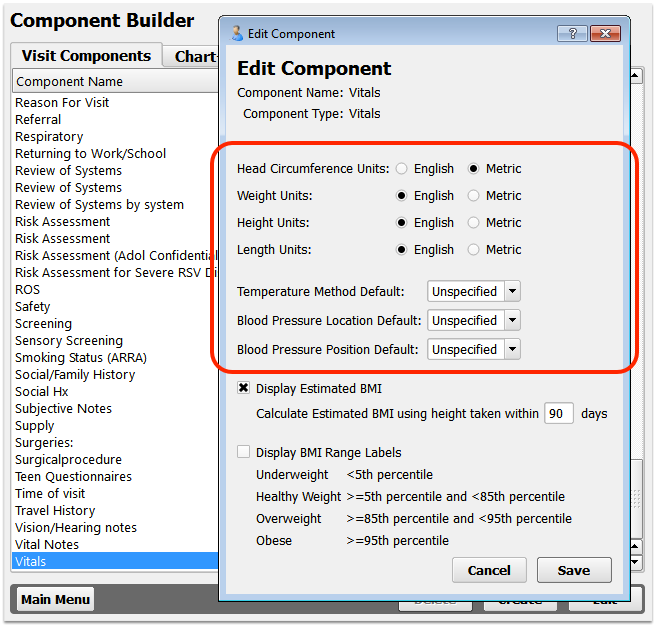
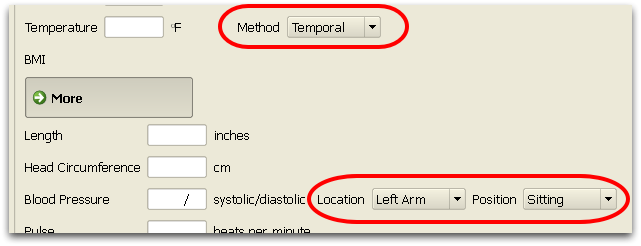
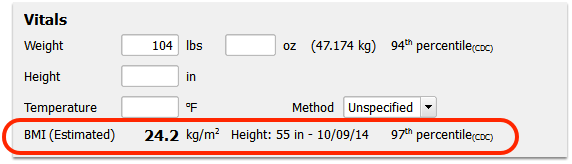
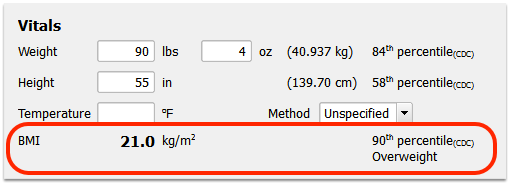
The Vitals component contains special fields for collecting vitals, and includes automatic calculations for percentile and BMI. The Vitals component data populates PCC EHR’s growth charts.
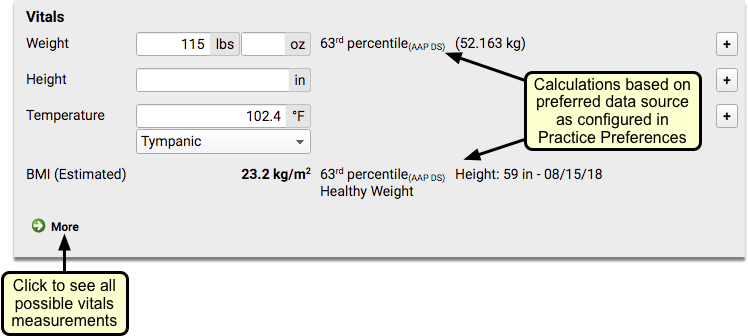
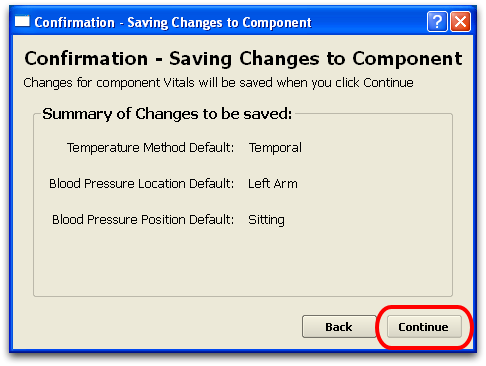
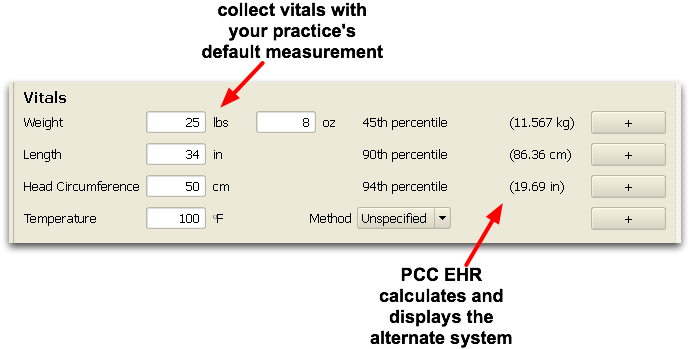
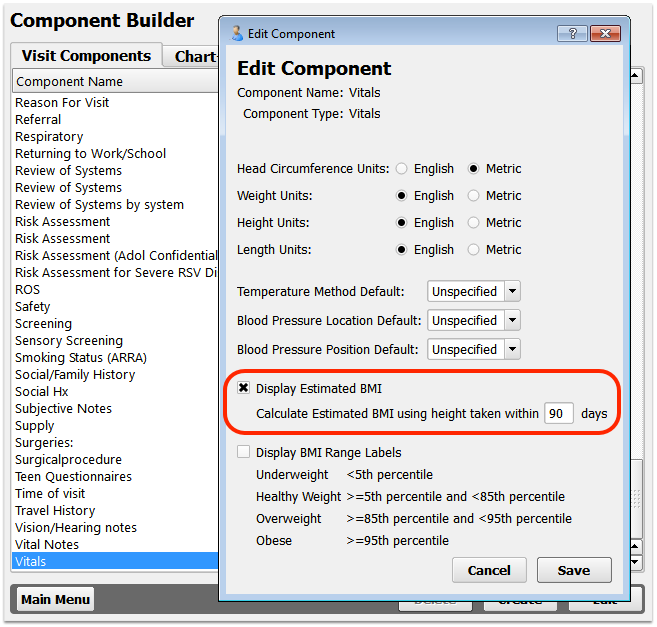
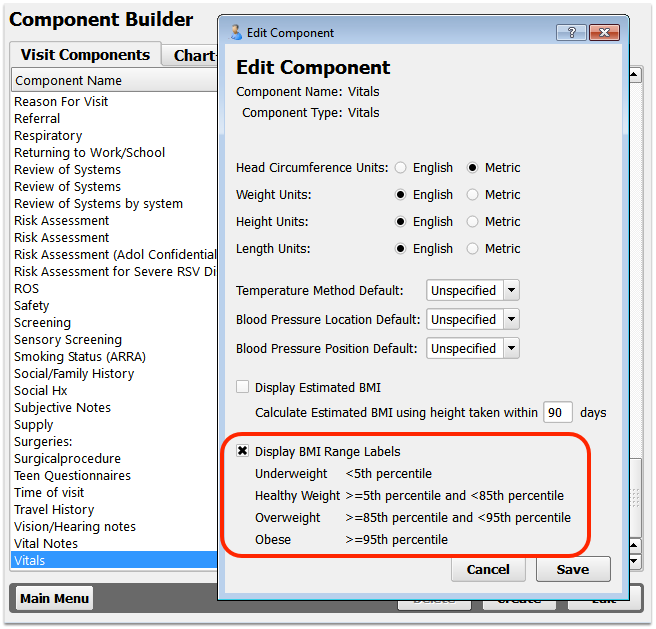
You can configure vitals in PCC EHR for each type of visit protocol. You can customize which fields will appear by default for the visit, determine whether to use English or Metric measurement values, and decide how to calculate BMI values.
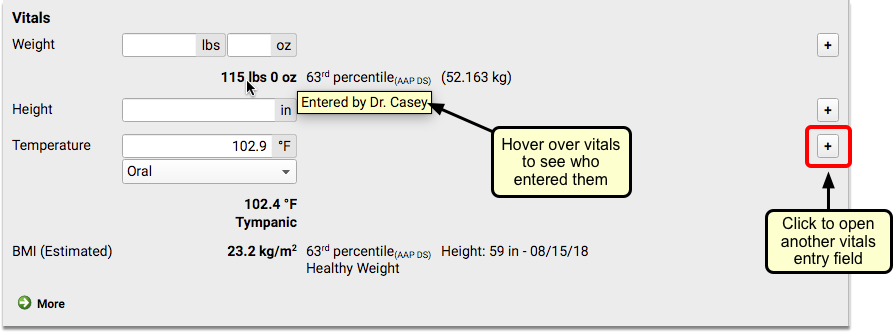
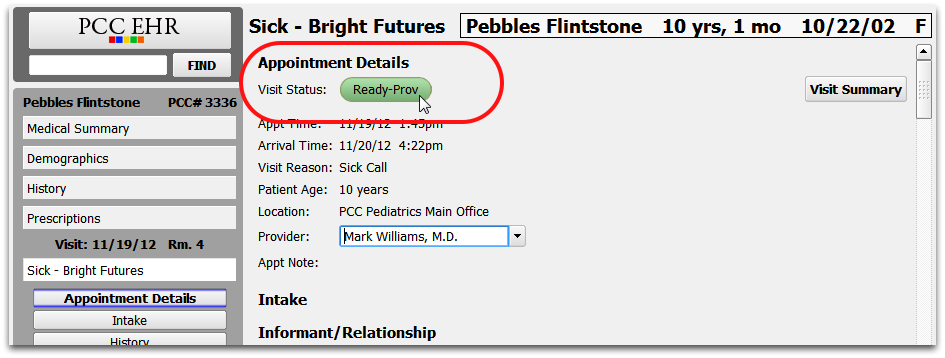
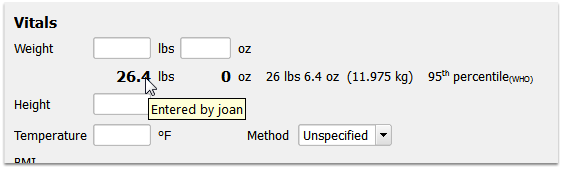
Once entered, vitals will show up immediately, everywhere that vitals are displayed. You can edit any vitals that you entered, and you can see who entered other vitals by hovering over the vitals measurement.
For information about how to configure vitals in PCC EHR, including how vitals interact with growth charts, read the Configure Vitals article.
Meaningful Use (ARRA) Components
Asthma Care
The Asthma Care component can be used to track when a patient or parent requests not to receive an asthma medication.

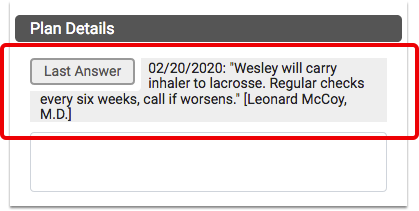
This field is a component of the HL7 C-CDA standard medical record, and supports PCC EHR’s Last Answer feature for quick entry.
Cognitive Status
The Cognitive Status component is a simple entry field that expands as text is added. This field can be added to your visit chart notes to meet Meaningful Use requirements for recording cognitive status for patients.

This field is a component of the HL7 C-CDA standard medical record, and supports PCC EHR’s Last Answer feature for quick entry.
Functional Status
The Functional Status component is a simple entry field that expands as text is added. This field can be added to your visit chart notes to meet Meaningful Use requirements for recording functional status for patients.

This field is a component of the HL7 C-CDA standard medical record, and supports PCC EHR’s Last Answer feature for quick entry.
Smoking Status
The Smoking Status component stores a patient’s answer to smoking status questions as defined by Meaningful Use guidelines.

The 2011 standards for the ARRA Medicaid EHR Incentive program required the tracking of this data for each patient visit. While the more recent and finalized “Meaningful Use Stage 2” standards do not include this requirement, and you do not need to submit reporting around it of the ARRA Medicaid EHR Incentive program, it is still considered best practices. If a pediatric practice attests for the program and is later audited, they must show that they collected smoking status for patients 13 years old and older.
The Office of the National Coordinator for Health Information Technology (ONC) defines the status options and definitions.
| Status |
Definition |
| Never Smoker |
has not smoked 100 or more cigarettes during
his/her lifetime |
| Current Every Day Smoker |
smoked at least 100 cigarettes during his/her lifetime and still regularly
smokes every day |
| Current Some Day Smoker |
smoked at least 100 cigarettes during his/her lifetime and still regularly
smokes periodically |
| Former Smoker |
smoked at least 100 cigarettes during his/her lifetime but does not currently smoke |
| Heavy Tobacco Smoker |
greater than 10 cigarettes per day or an equivalent (but less concretely defined) quantity of cigar
or pipe smoke |
| Light Tobacco Smoker |
less than 10 cigarettes per day, or an equivalent (but less
concretely defined) quantity of cigar or pipe smoke |
| Smoker, Current Status Unknown |
known to have smoked at least 100
cigarettes in the past, but their whether they currently still smoke is unknown |
| Unknown If Ever Smoked |
Unknown |
Transition of Care
The Transition of Care component tracks whether a medication reconciliation was performed when a patient was received from another setting of care, as defined by Meaningful Use guidelines.
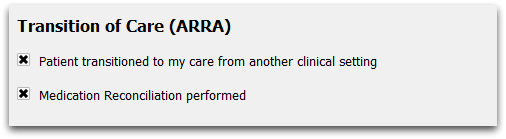
If you are meeting with a new patent, or if your established patient was seen elsewhere since their last visit with you, check the boxes to indicate that a patient has transitioned into your care, and that you performed a medication reconciliation.
For more information, refer to Objective 7: Medication Reconciliation, as described in the the Meet Meaningful Use Measures with PCC article.
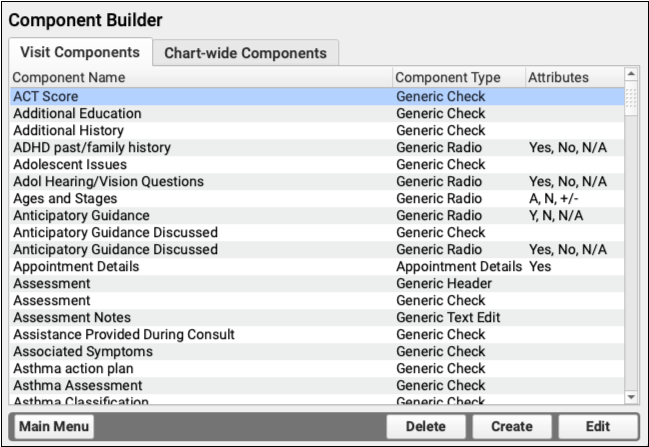
Custom Components
PCC EHR gives you the tools to make your own components, so that you can decide exactly what information you want to track for your patients, and how you want to collect that data. Following are several types of components that you can build yourself.
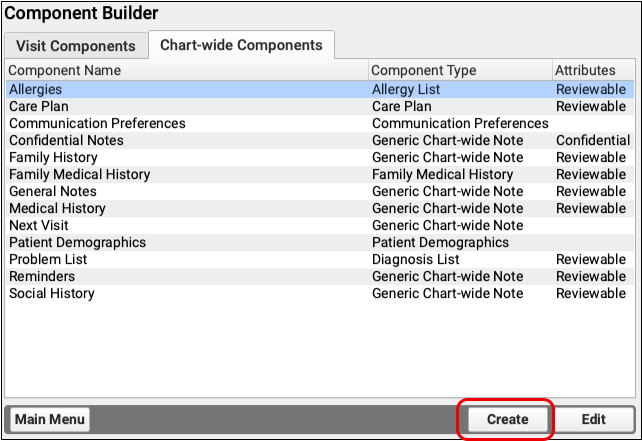
You will also notice that you probably already have a number of these “Generic” components listed in your Component Builder, as PCC EHR includes a number of components that were built to go within certain protocols, for example, the Bright Futures protocols that many PCC clients choose to use.
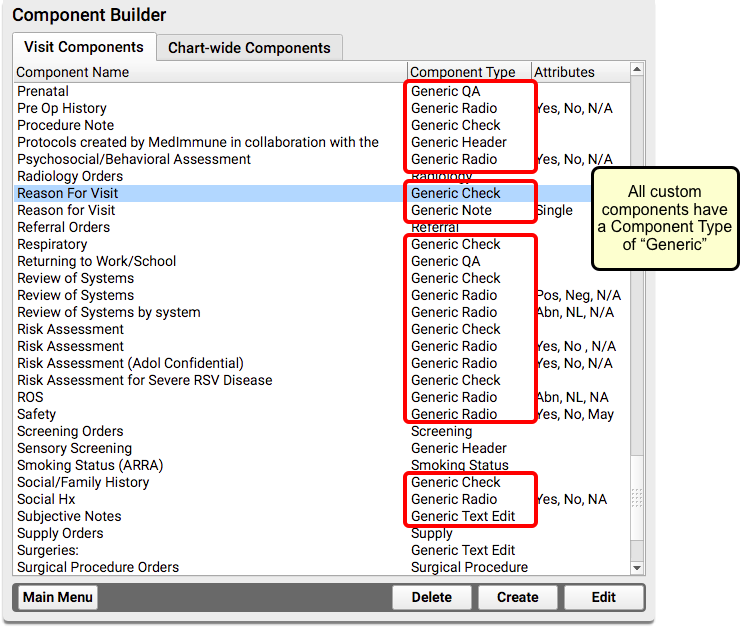
You can get a sense for what types of new Generic components you can create by reviewing the ones you already have.
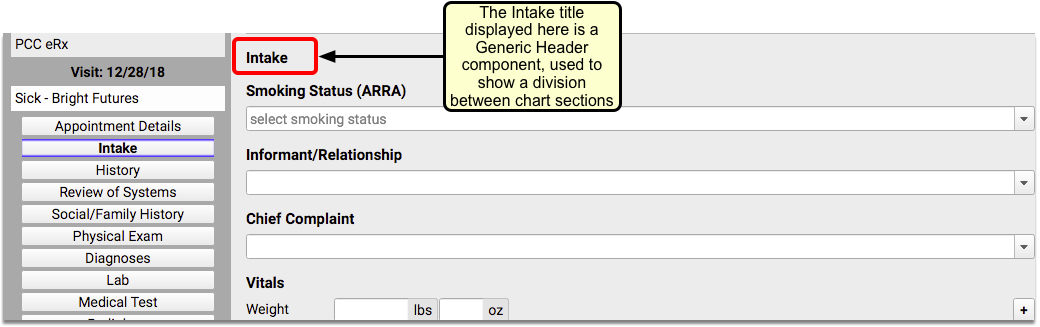
Generic Header
The Generic Header component is a simple title. You can add it to any protocol to serve as a divider between sections on your chart note.
Following is an example of a Generic Header component, used within a Bright Futures sick visit protocol:
Creating a Generic Header Component
When creating a new Generic Header component, you need only enter the title of the header.
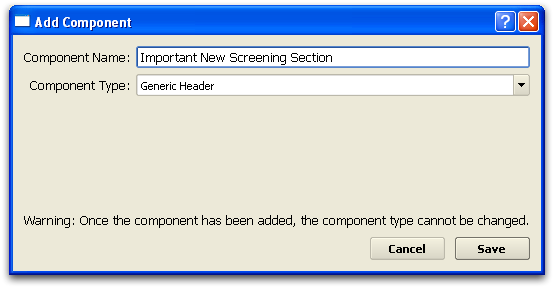
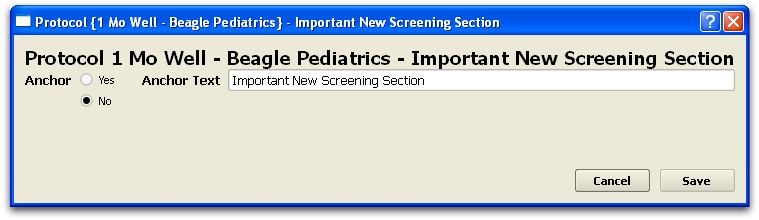
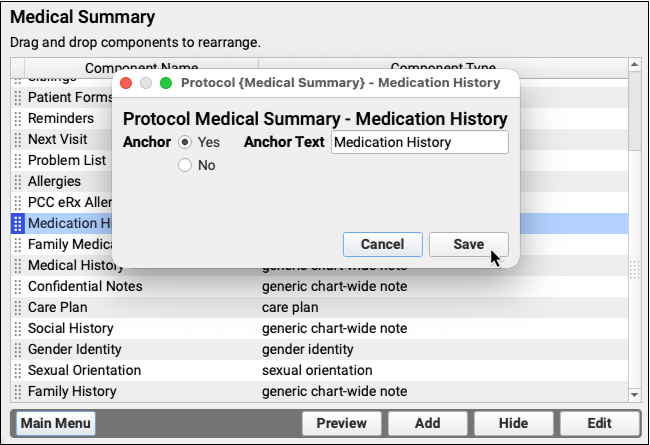
When you add a Generic Header component to a protocol, you can indicate whether or not the component should have an anchor button for navigation and set the anchor text.
Generic Text Edit
The Generic Text Edit component is a large text box. You might use a Generic Text Edit component if your chart note needs a large area for notes. It is suitable for paragraphs and longer text-entry.
Following is an example of a Generic Text Edit component, used within an Asthma visit protocol:
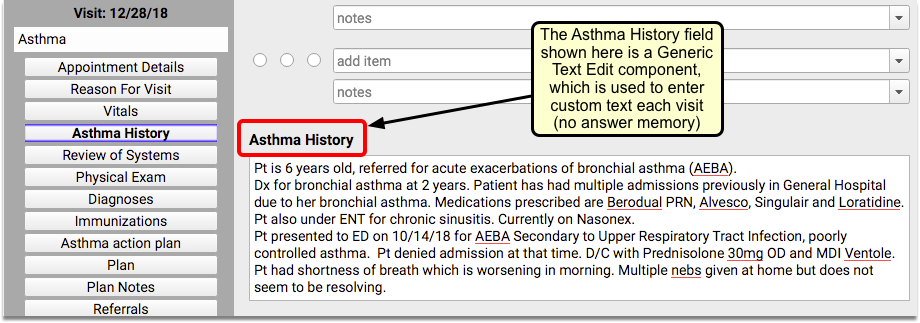
Generic Text Edit components do not use “answer memory”; use components of this type when you need a notes box that is unlikely to be precisely repeated for another visit.
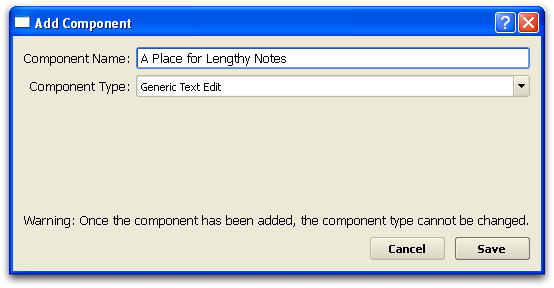
Creating a Generic Text Edit Component
When creating a new Generic Text Edit component, you need only enter the name of the section.
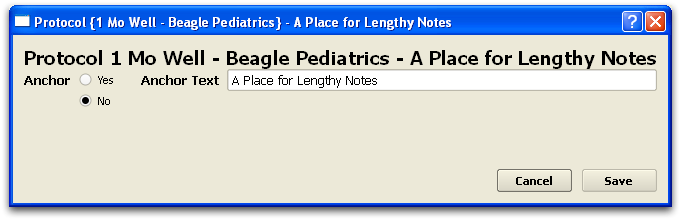
When you add a Generic Text Edit component to a protocol, you can indicate whether or not the component should have an anchor button for navigation.
Generic Note
The Generic Note component is for simple text notes. They appear as a single line, but can contain as much text as needed.
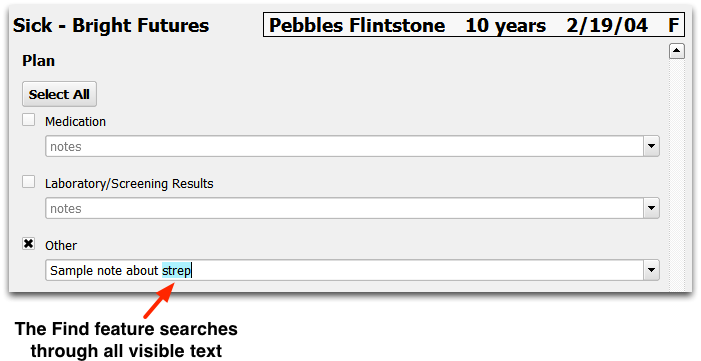
Following is an example of the two types of Generic Note components, used within a sick visit protocol:
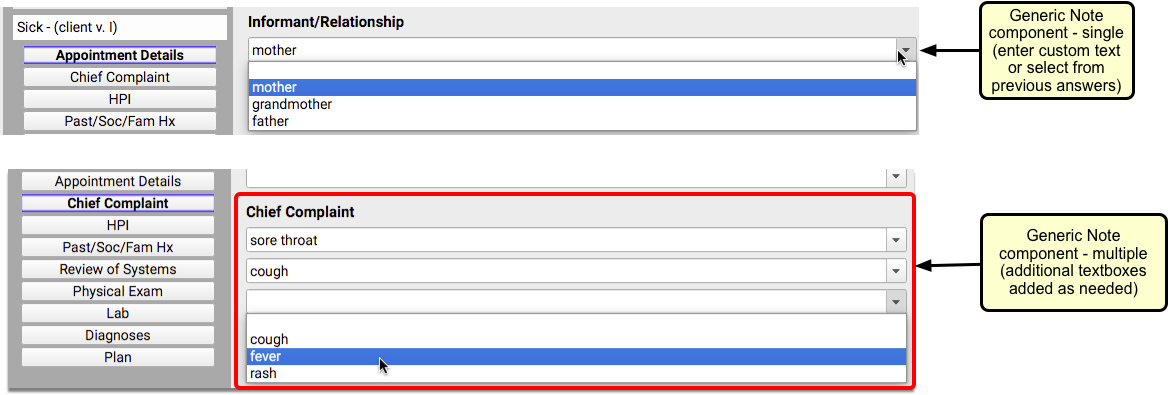
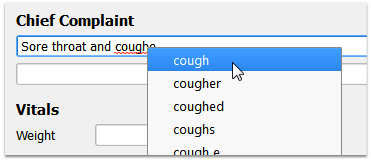
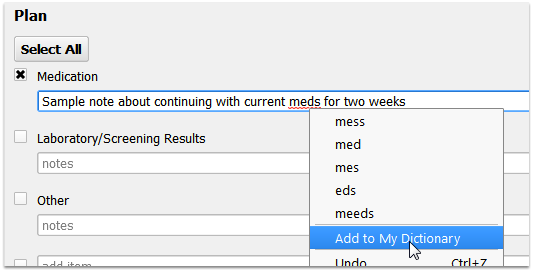
Generic Note components use “answer memory”, either based on the provider or the patient. PCC EHR remembers the answers that you type into a chart note and then supplies a list of previous common answers.
Use the Generic Note component when you want a place for the provider to enter simple notes that may be reused.
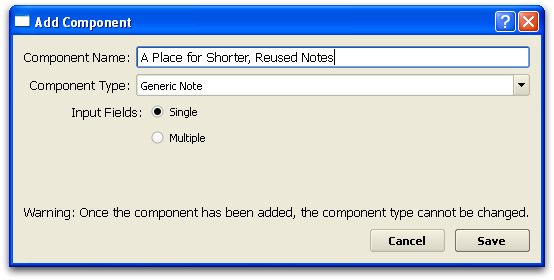
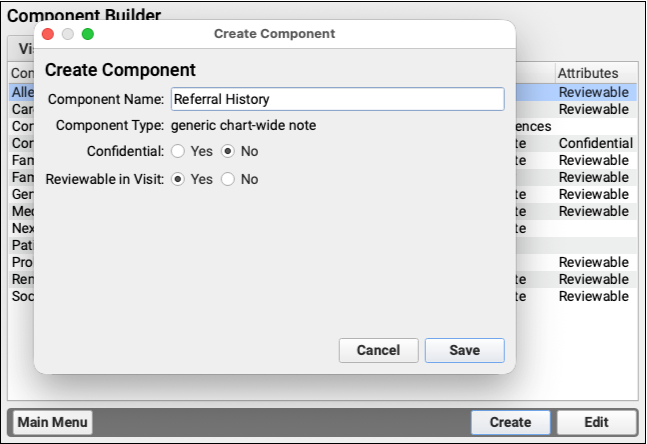
Creating a Generic Note Component
When creating a new Generic Note component, you need to enter the name of the section, and indicate if it should provide single or unlimited input fields.
Single or Multiple?: A “Single” Generic Note will provide only one line of text for entry. A “Multiple” Generic Note will add additional lines of text as you type, so you can enter a series of notes.
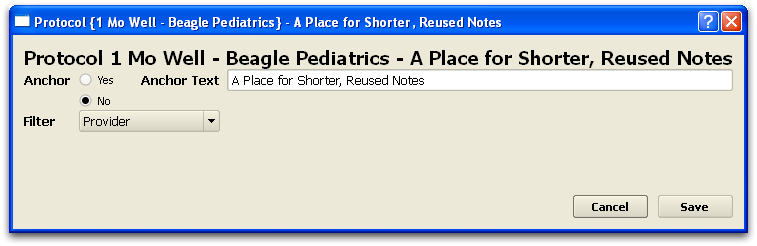
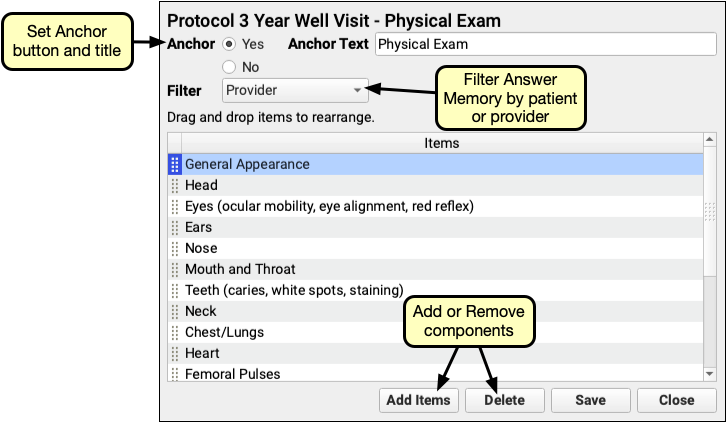
When you add a Generic Note component to a protocol, you can indicate whether or not the item has an anchor button for navigation, and you can set whether answer memory should be filtered by provider, patient, or unfiltered.
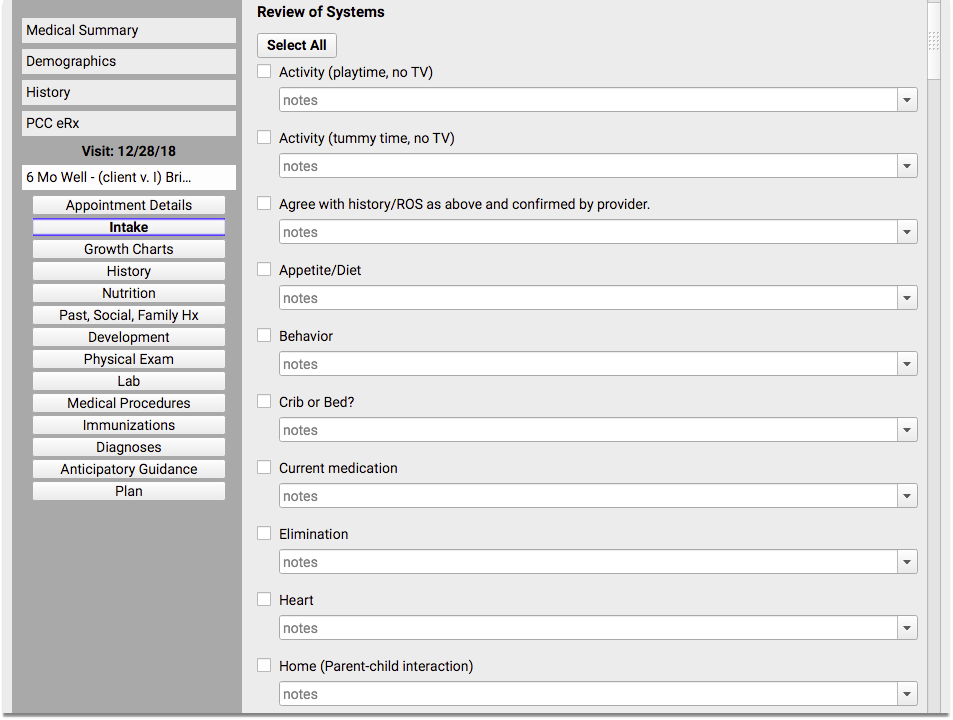
Generic Check
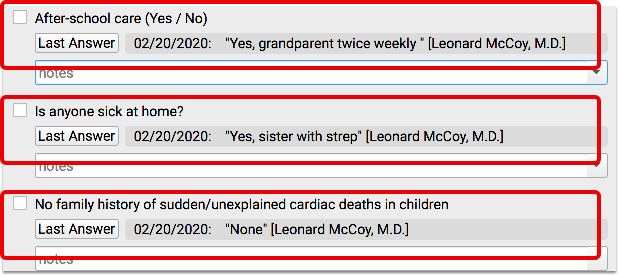
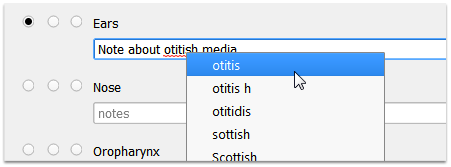
The Generic Check component displays a list of items with checkboxes next to them. While charting, a user can check or uncheck items in the list, and add notes for each item that will be stored in “answer memory”, either by provider or by patient.
Following is an example of a Generic Check component, used within a well visit protocol:
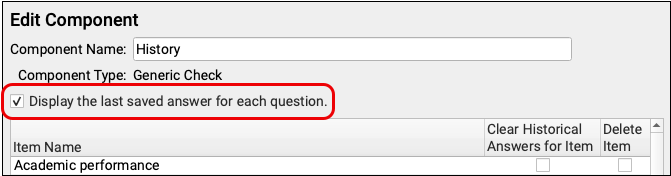
If the “Display last saved answer” option was checked for the component (before the particular patient was checked in), then you will see the most recent saved note as well:

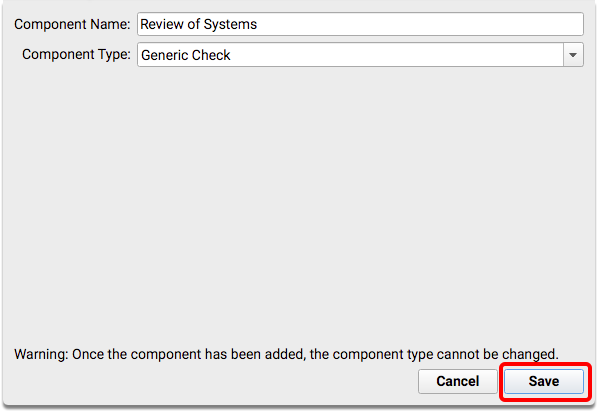
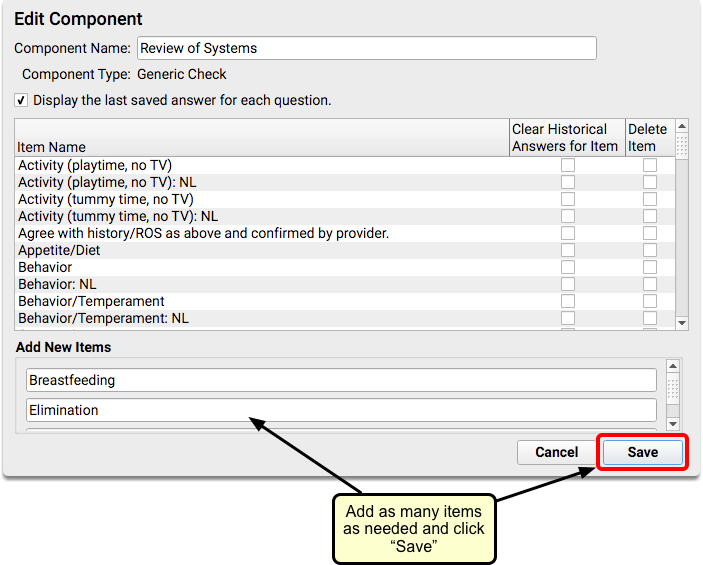
Creating a Generic Check Component
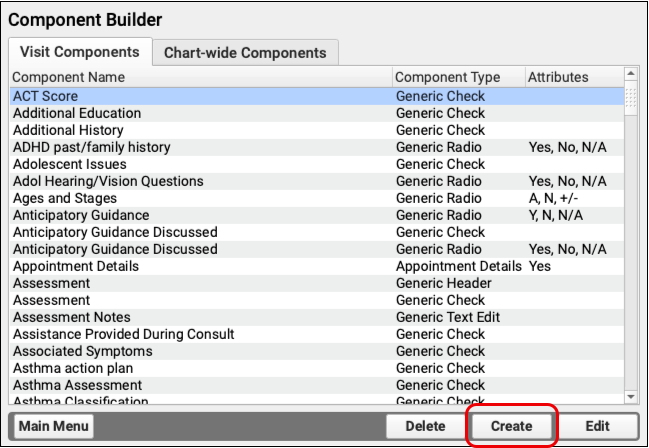
When creating a new Generic Check component, you must name the component and then add the list of items that will be available for the component.
You can also indicate that the component should display the patient’s last answer on the chart note.
For more information about creating and editing components, read The Component Builder.
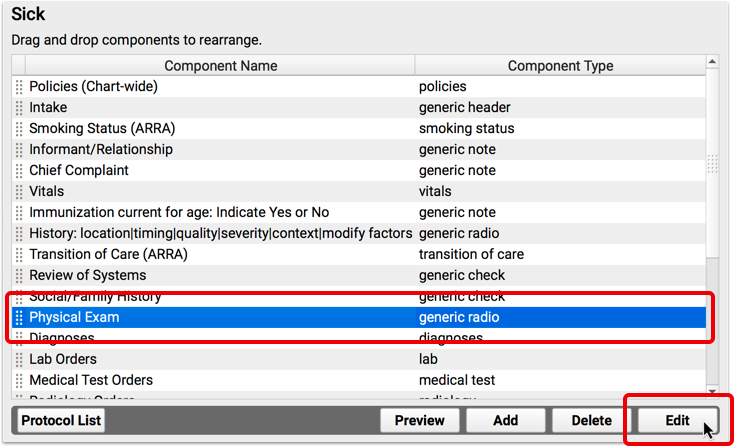
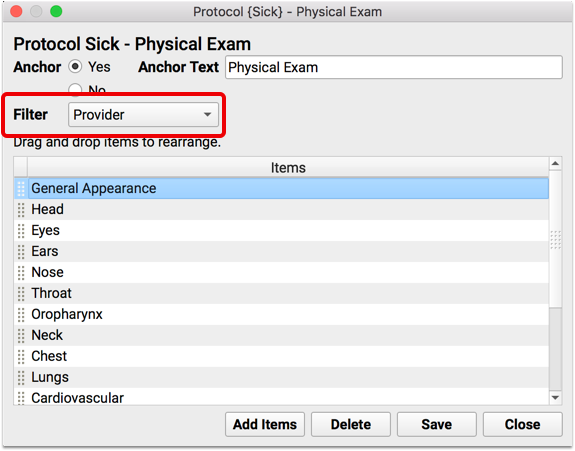
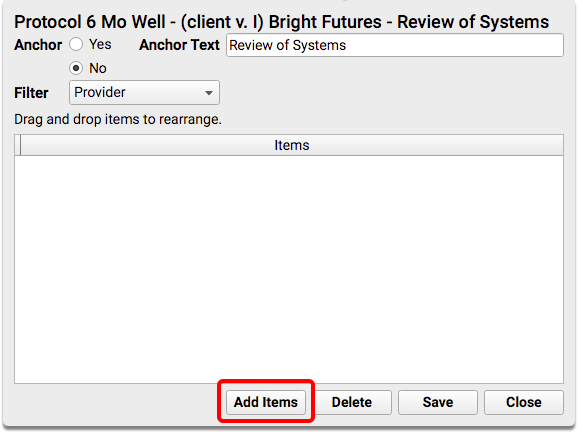
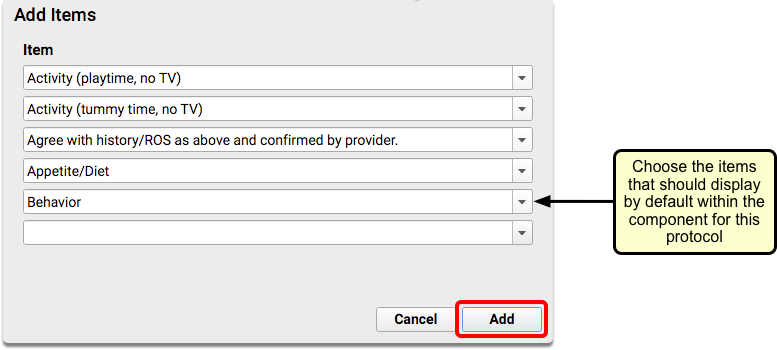
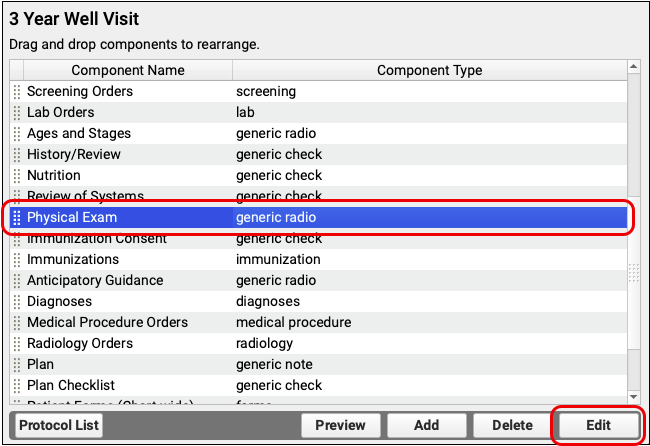
Adding a Generic Check Component to a Protocol
When you add a Generic Check component to a protocol, you must specify which of your list of items will be available by default on the chart note. You can also indicate whether or not the item has an anchor button for navigation, and you can set whether answer memory should be filtered by provider, patient, or unfiltered.
For more information about working with components in protocols, read Create and Edit a Protocol.
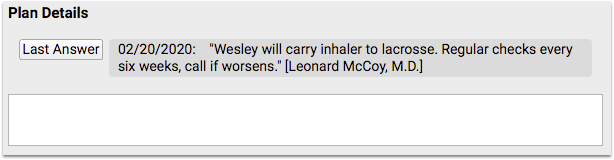
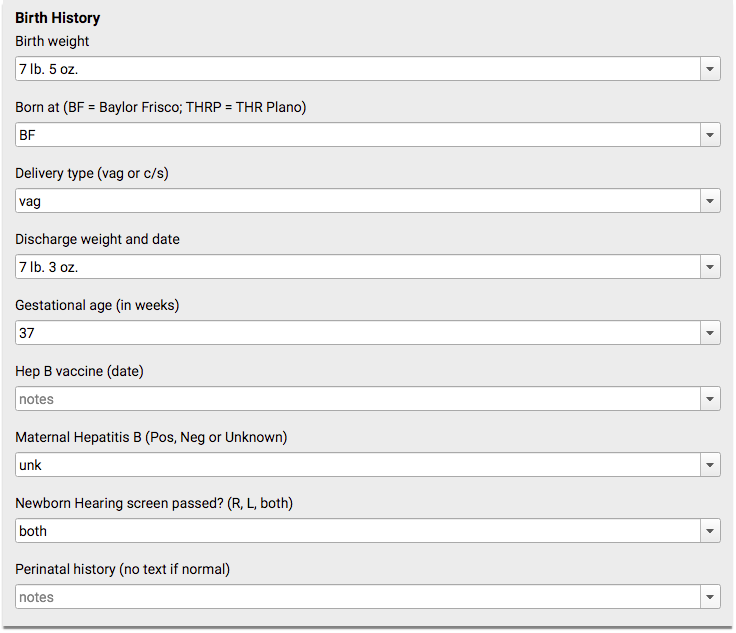
Generic QA
A Generic QA component contains a list of questions with text boxes for recording the answer. The text box field uses “answer memory” and will provide a drop-down menu of past notes based on the provider or the patient.
Following is an example of a Generic QA component, used for newborn well visits:
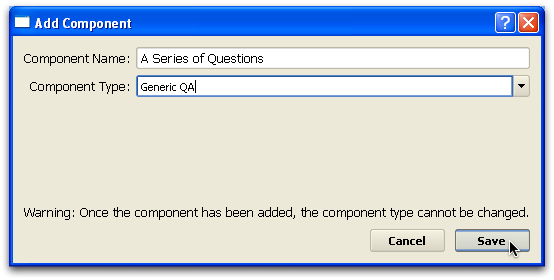
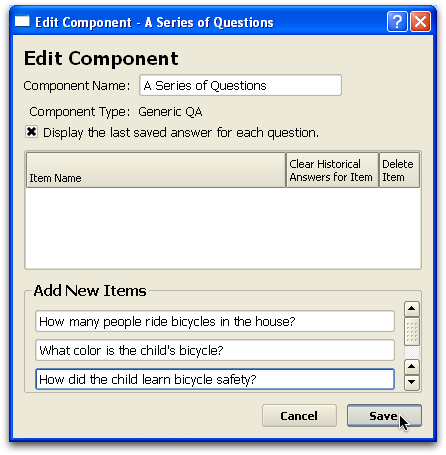
Creating a Generic QA Component
When creating a new Generic QA component, you must name the component and create a list of possible questions and answers.
You can also indicate that the component should display the patient’s last answer on the chart note.
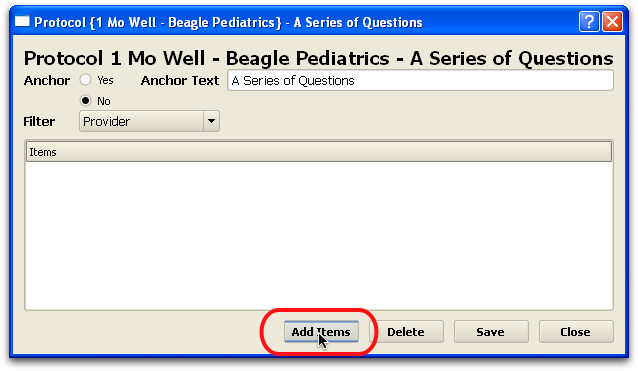
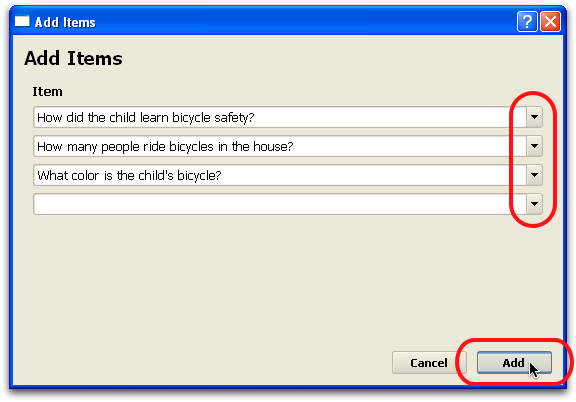
Adding a Generic QA Component to a Protocol
When you add a Generic QA component to a protocol, you must indicate which questions should appear by default on the chart note. You can also indicate whether or not the item has an anchor button for navigation, and you can set whether answer memory should be filtered by provider, patient, or unfiltered.
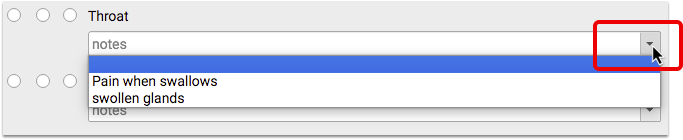
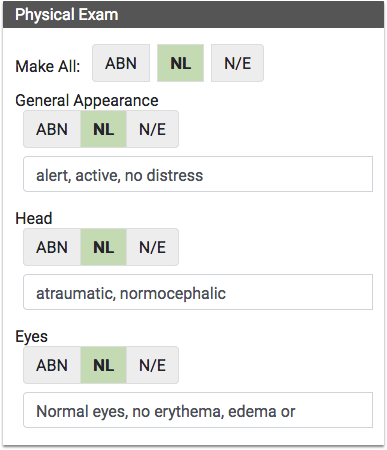
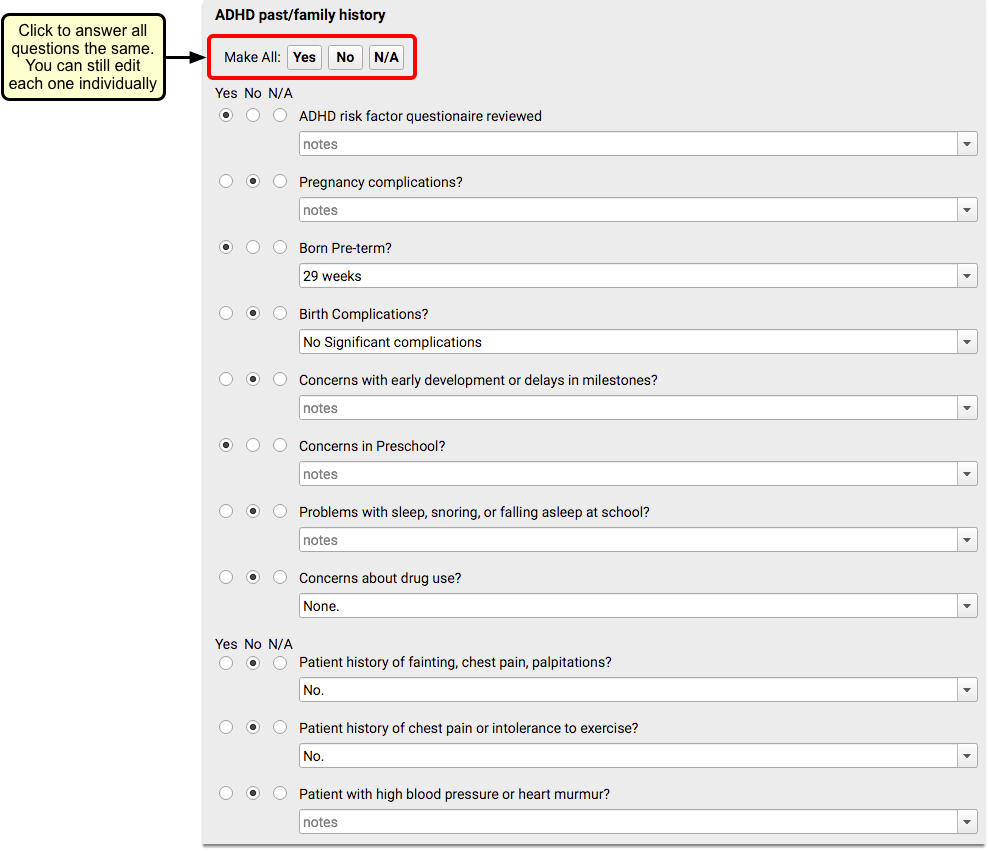
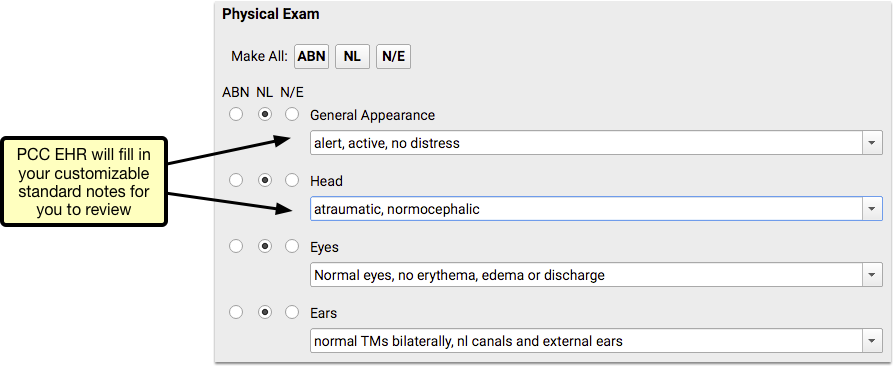
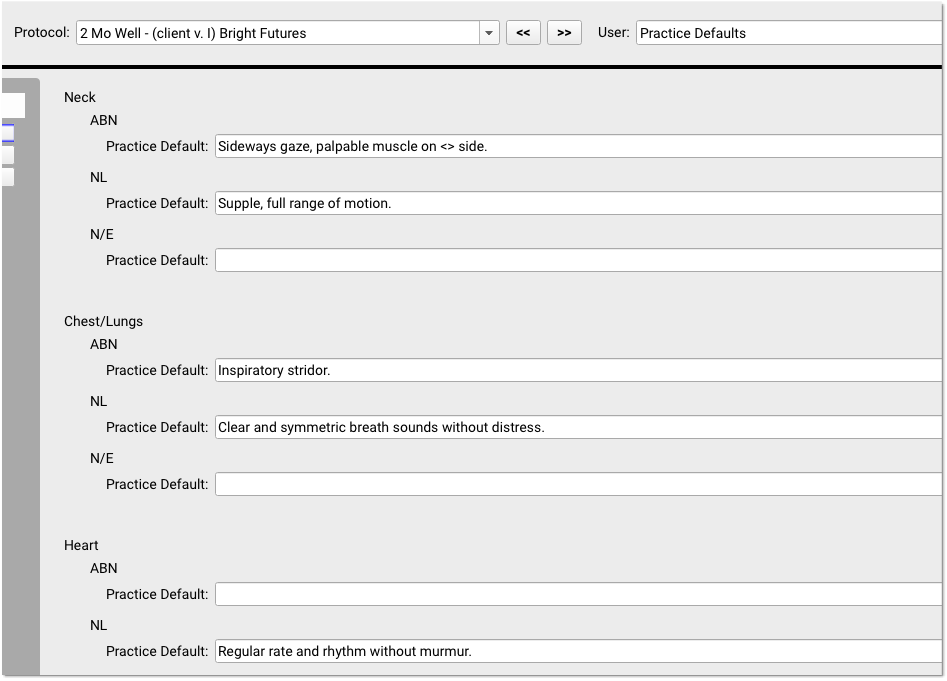
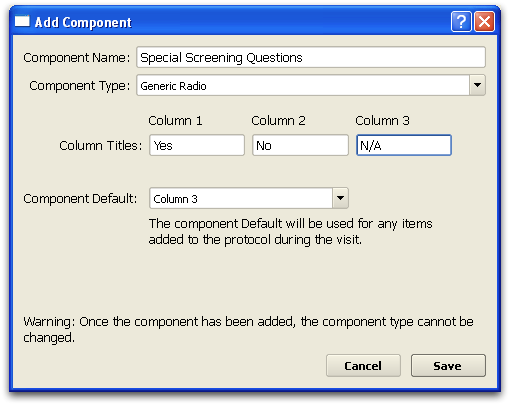
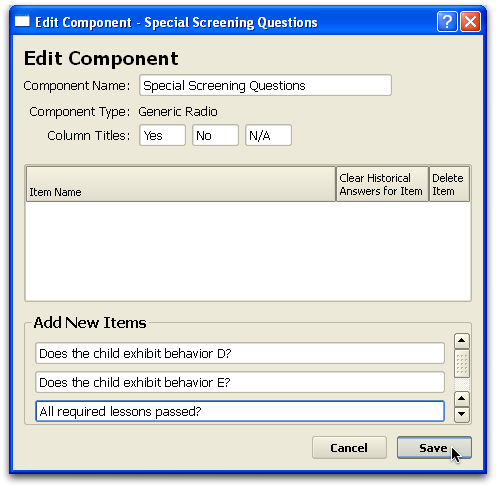
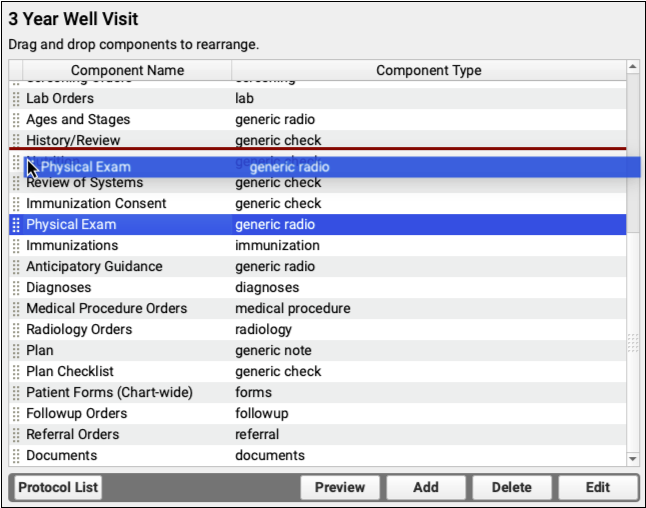
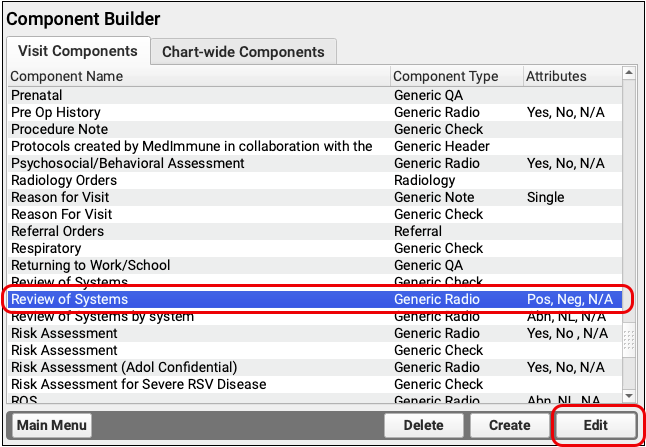
Generic Radio
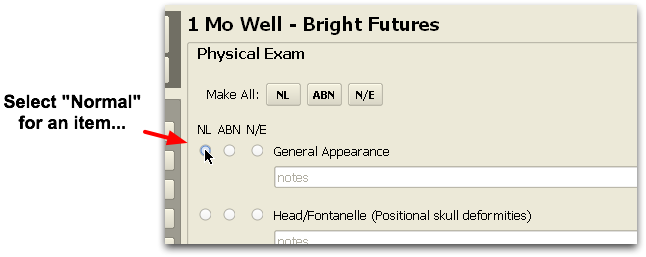
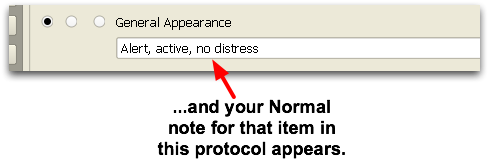
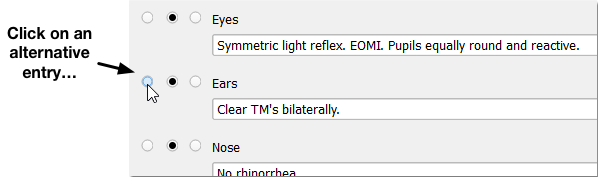
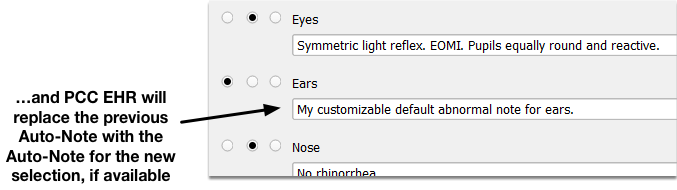
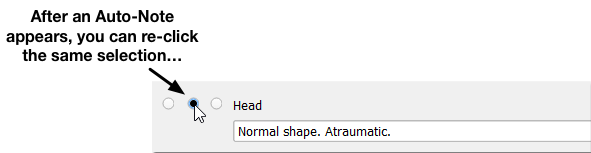
A Generic Radio component presents a list of questions with three columns for selecting an answer and a space for notes. The notes field uses “answer memory” and will provide a drop-down menu of past notes based on the provider or the patient.
Following is an example of a Generic Radio component, used in an ADHD protocol:
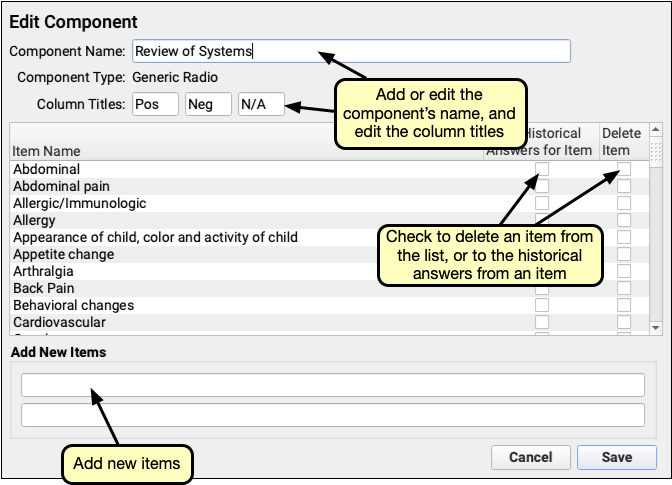
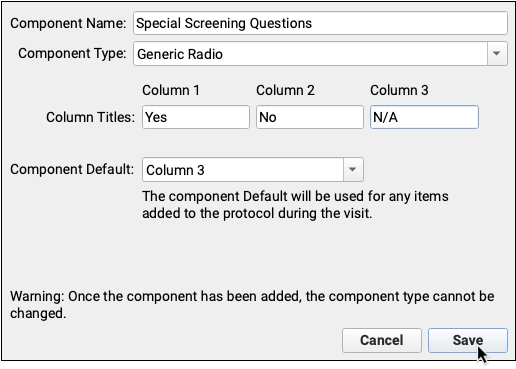
When creating a new Generic Radio component, you must set the three column answers (such as “Yes, No, N/A”), indicate the default selection column, and then create a list of available questions.
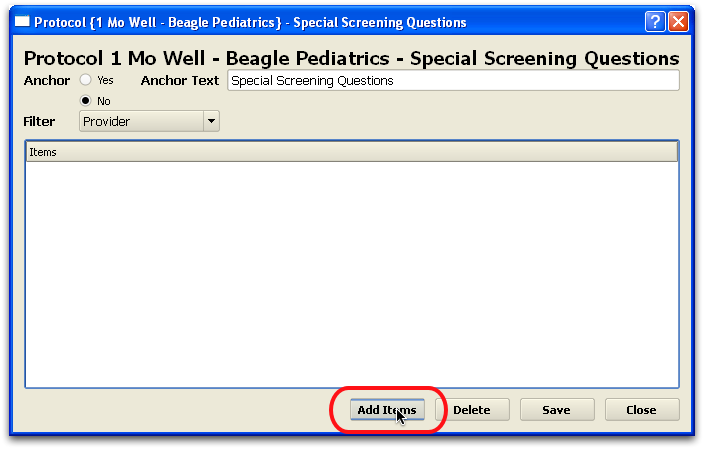
When you add a Generic Radio component to a protocol, you must indicate which questions should appear by default on the chart note. You can also indicate whether or not the item has an anchor button for navigation, and you can set whether answer memory should be filtered by provider, patient, or unfiltered.


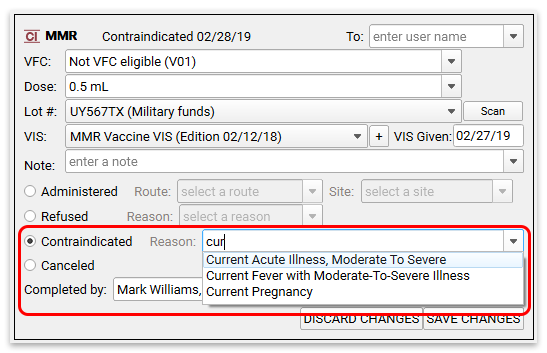


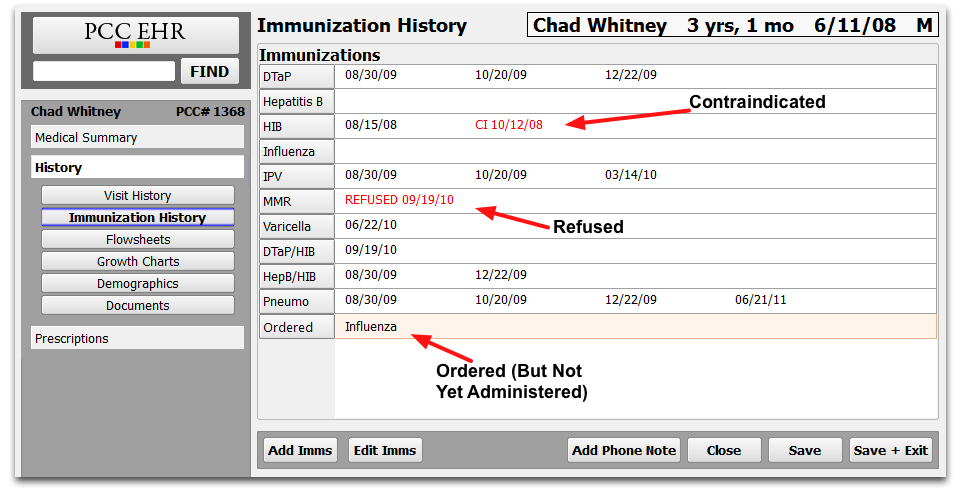


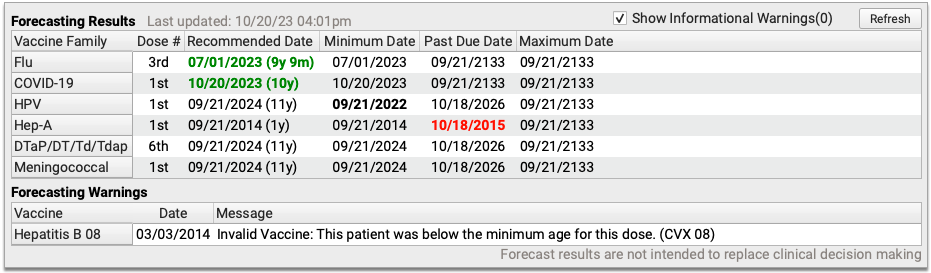
 In the above example, a patient received their fourth DTaP shot too early.