Adjust Charge Details and Claim History (Correct Mistakes)
After you enter charge and encounter information and Post Charges, you can review a patient's billing history in their chart, and work with payments using tools in PCC EHR.
When you need to change the responsible party for an encounter or alter encounter information that appears on a claim (such as diagnoses or prior authorization numbers), use the Correct Mistakes (oops) tool in the Practice Management window.
Learn All Steps for the Biller Role: This article (and video) is part of the New User Training for Billers. You can use that outline to learn how to complete other billing tasks in PCC EHR.
Contents
- 1 Open the Correct Mistakes (oops) Tool in Practice Management
- 2 Navigate the oops Charge History
- 3 Understand Charge and Visit Details in oops
- 4 Review an Encounter’s Servicing and Billing Providers
- 5 Read Billing History Messages
- 6 Review Electronic Claim Responses in Correct Mistakes (oops)
- 7 Review Payments and Adjustments in oops
- 8 Select All of a Visit’s Charges
- 9 Function Keys on the Charge History Screen in oops
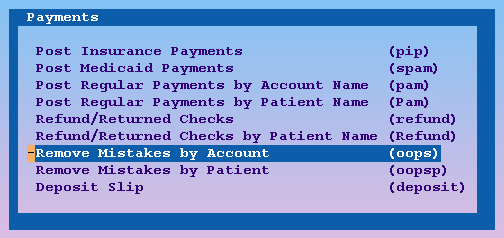
Open the Correct Mistakes (oops) Tool in Practice Management
You can open oops from your Practice Management window, or by jumping to it from another Practice Management tool.
If you are not already working with an account, oops will ask you to select one.
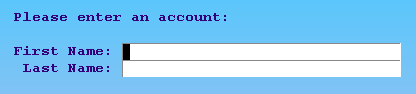
You can also find accounts by patient, insurance ID#, or any of several other criteria. For more information, see the Tools for Finding Patients and Accounts manual.
Jump to oops From Another Tool
Correct Mistakes (oops) is available from many different screens in Practice Management.
For example, from the Post Insurance Payments (pip) program, press F3 – oops.
End Another oops Session for an Account
Only one user at your practice can edit the same account in oops at the same time. If someone is already using oops to modify a family’s charge history, you will see an error screen.
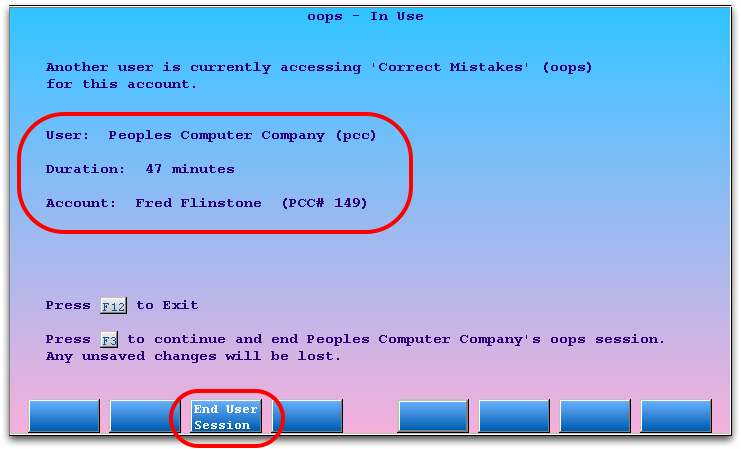
You can press F12 and wait until the user is finished. If you believe that the other screen has already been closed or is stuck, you can press F3 – End User Session to end the previous oops session and continue. The previous user’s last completed actions are safe, because oops saves each major action as you perform it. However, you should review the account and make sure that any outstanding work is complete. For example, there may be claims that you need to generate.
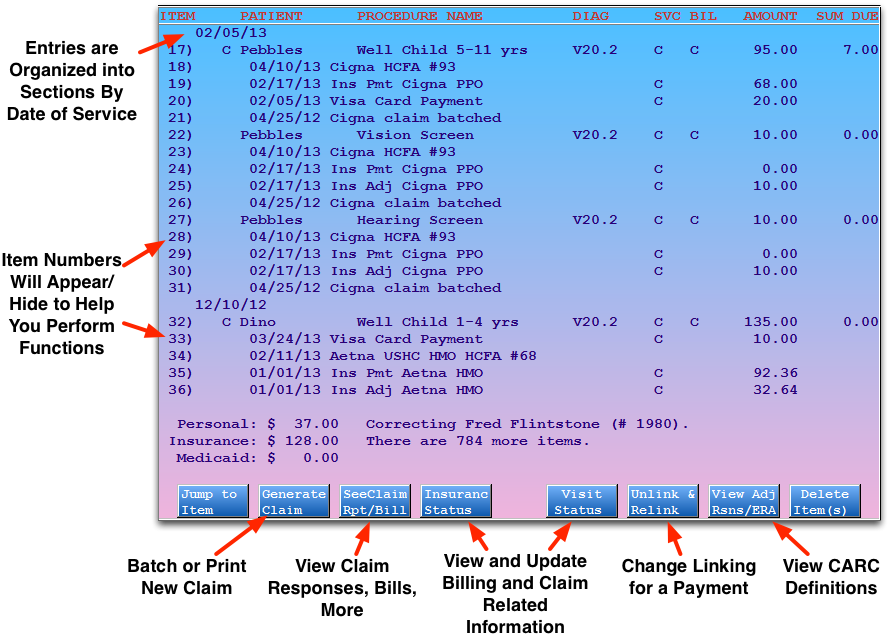
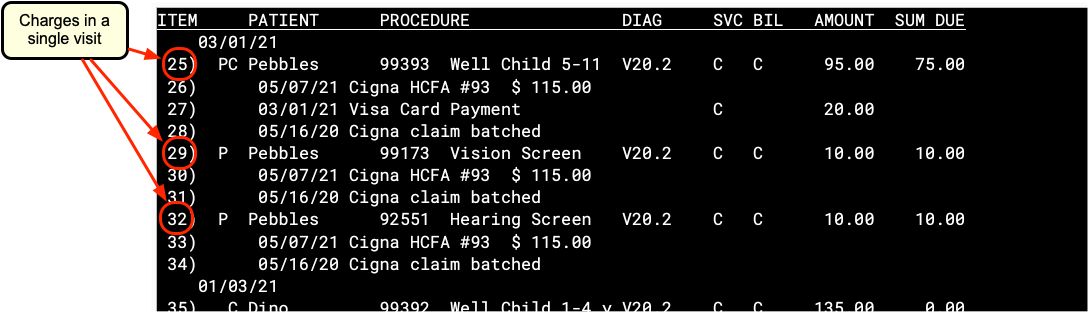
The main screen in oops shows a history of account transactions. The most recent transactions appear at the top. Charges are grouped by date of service. Claim submission history, billed messages, and payments all appear beneath the charges to which they are linked. Every item has a line number for quick selection.
Press Page Up or Page Down to scroll through the history. You can also use the up and down arrow keys to scroll ten lines or the right and left arrow keys to scroll up or down line-by-line.
Enter Item Numbers: When entering items numbers for different actions in oops, such as batching a claim or changing insurance status, you can either type in each of the numbers separated by spaces or commas, like “1 2 3 4 5 6” or “1,2,3,4,5,6”, or you can use a range, such as “1-6”. You can also combine these methods: “1,3-5”.
Jump to Information on a Claim: Press C and enter a claim number to jump to the section of the history that pertains to that claim.

Understand Charge and Visit Details in oops
Charges in oops are grouped by date of service. Each charge shows the patient name, procedure code and/or description, diagnosis billing code, provider initials, amount charged, and amount due. Since all items in oops have a number line at the left, you can easily select specific charges with which to work.
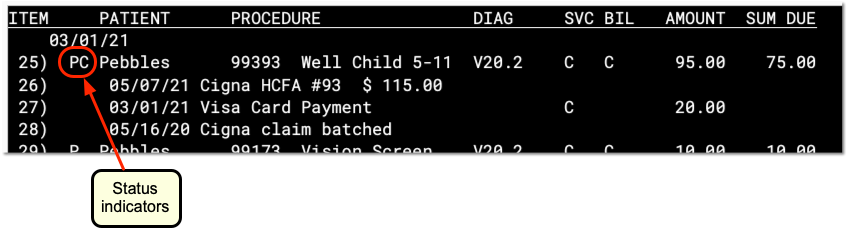
Charge Status Indicators
You may see several letters or an asterisk (*) between the date of the charge and the patient’s name. These indicate basic insurance status information about the charge:
A
- The letter A indicates that the charge is flagged as an accident. Accident information will appear on the insurance claim. Press ’F5′ – ’Visit, enter the number of the charge, and then press Page Down to review or change the accident information.
- P
- The letter P indicates that some portion of the charge is currently pending an insurance company. Once the charge has been fully paid off or no longer pends an insurance company, the P will disappear.
- C
- The letter C indicates that the charge has a copay charge linked to it. The C appears whether the copay has been paid off yet or not. Copays are not procedures, they generally occur as part of the amount due for an office visit or physical procedure.
- *
- An asterisk (*) indicates that the charge currently pends a Medicaid policy.
Review an Encounter’s Servicing and Billing Providers
The Correct Mistakes program displays the provider initials for both the Servicing and Billing providers for charges. It also displays provider information for payments, if specified when the payment was posted.
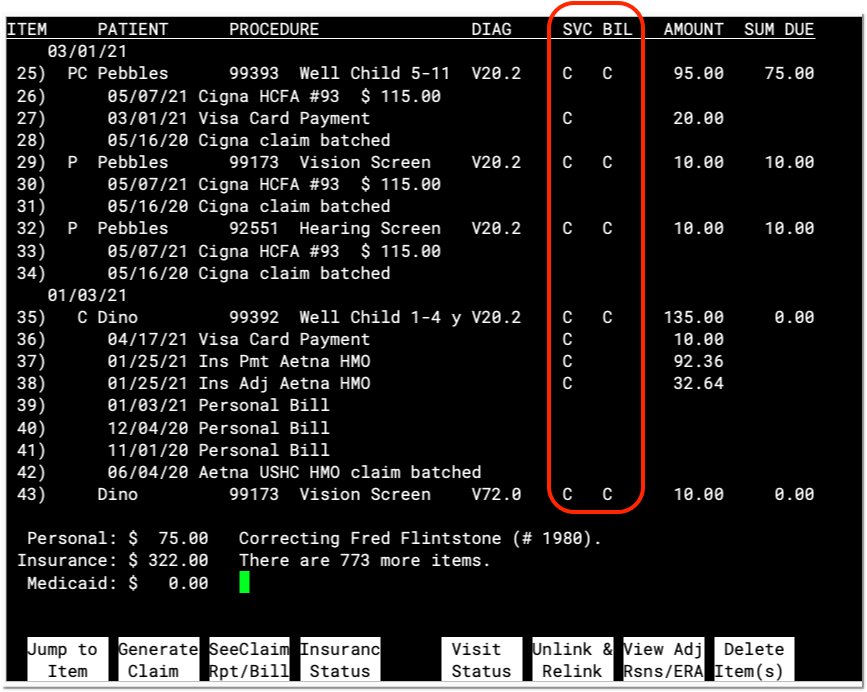
Press F5 – Visit Status and enter one or more charge numbers to change the billing provider. Read Edit an Encounter’s Diagnoses, Billing Provider, and Other Claim Information in Correct Mistakes to learn more.
Read Billing History Messages
In addition to charge and payment information, oops displays billed messages and other important data. For example, you will see entries indicating when a claim was sent, when an electronic clearinghouse received a claim, and when a personal bill was generated.

In the example above, the charge was sent by ECS to ProxyMed (a claim clearinghouse) and then to USHC on 4/26/05. A USHC insurance payment and adjustment were posted in on 5/24/05, and a personal bill (for the unpaid copay amount) was printed on 6/15/05. Note that the USHC check number is also shown.
For claims that occurred after June of 2016, the claim billing message will also include the total for the original billed amount on a claim.
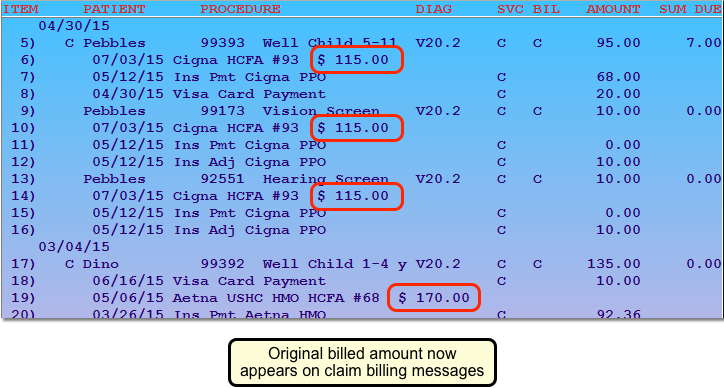
Insurance companies often require billers to identify claims by the total amount filed on the claim.
Toggle Billing History: With all the different steps a claim passes through, your oops screen can get very cluttered. Press E to hide billing history notes. The oops listing will collapse and show you only charge and payment information. Press E again to reveal the billing information. To increase the number of visible lines in oops, you could also learn about making your Practice Management window bigger by reading Larger Practice Management Windows.
Review Electronic Claim Responses in Correct Mistakes (oops)
When PCC receives an electronic claim response from the insurance payor or the claim clearinghouse, you will see that message in the history for the charge in oops.

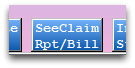
A full report may be available for some billed messages. Press F3 – See Claim Rpt/Bill and enter the item number to read the full report, if available.
Example 1
In the example below, you can see that the electronic claim clearinghouse (ProxyMed) sent several messages to your practice regarding William Amis’s visit on 01/06/06.
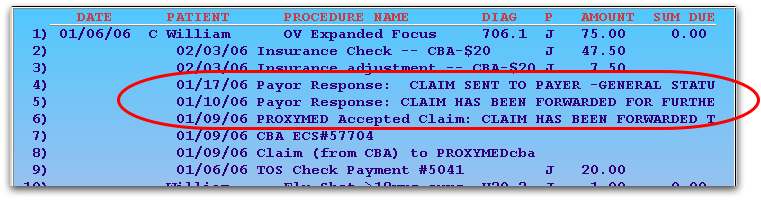
To read the full electronic report, press F3 – SeeClaim Rpt/Bill and then select any entry beginning with “Payor Response” or “PROXYMED Accepted Claim”:

The Correct Mistakes program will open the relevant ECS report and display portions related to this patient that are on that report:
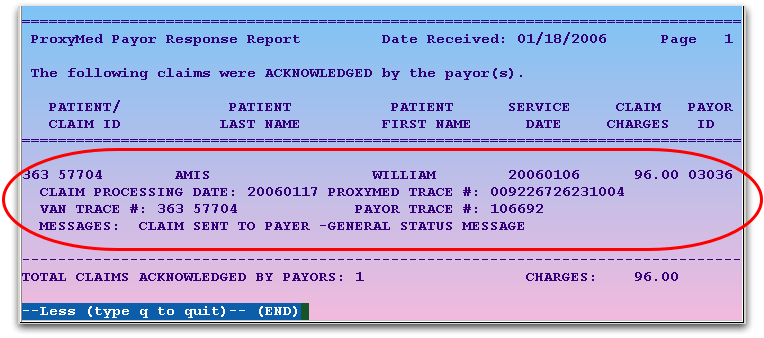
In the above example, the claim was accepted.
Example 2
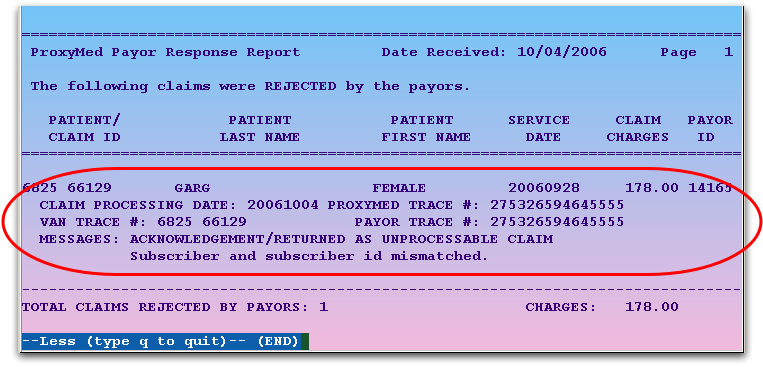
You can also review information about a rejected charge. In the next example, Female Baby Garg’s immunization administration charge was rejected by the MVP insurance company:

To find out why the claim was rejected, press F3 – See Claim Rpt/Bill, enter the number next to the rejection, and press Enter:

PCC will display the segment of the report related to the patient, and you can read all the information that the insurance company (or claim processor) returned:
By using this feature, you can read claim reports from within the oops program. You can also read these reports in your e-mail or through the ecsreports program.
Review Payments and Adjustments in oops
Payments and adjustments appear in oops with information similar to charges: a description, a date, a provider, and an amount. The description includes the payment type, and may include a CARC code that explains the payment or adjustment. Payments and adjustments appear underneath the charge they are applied towards, so you can review the full history of the charge as a series of events.
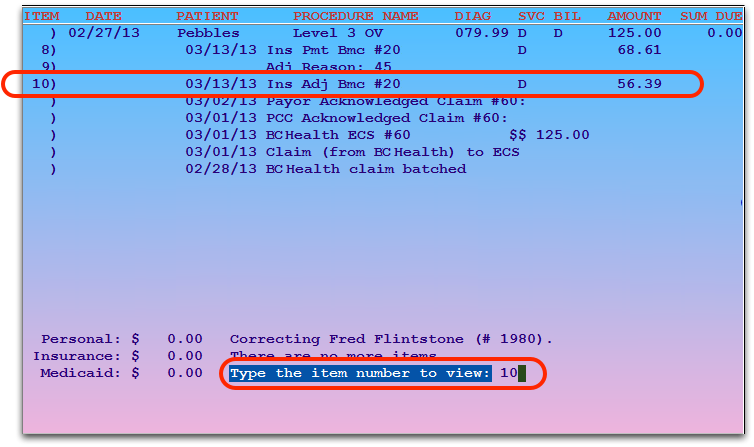
CARC Codes
The numbers that sometimes appear with payments and adjustments are the Carrier Adjustment Reason Codes.
PCC reads these codes directly from your ERAs. You can also enter them when you Post Insurance Payments manually.
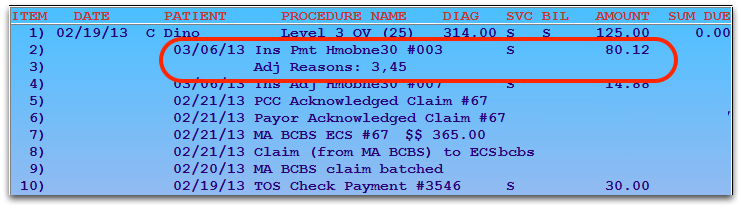
You can use the CARC codes to help research and understand why a certain payment occurred.
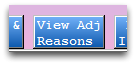
Press F7 – View Adj Reasons and enter an item number to read a description of the codes.


For more information on what CARC codes mean and how they work in PCC, read CARC and RARC Codes in PCC.
Split Payments
If a single payment is applied to more than one charge, it will be indicated using item numbers:

The numbers listed with the payment indicate which charges the payment pays off. The 6/15/05 payment shown above at number 1 is applied to both the physical copay charge on 5/24/05 as well as the OV Problem Focus copay charge on 4/26/05.
Unlinked Payments
If a payment is not applied to any charge, it is called an “open-item” payment or “unlinked”. Open-item payments appear after charge entries and may not have dates in front of them. Linked payments appear underneath the charges they pay off and have posting dates in front of them.
Your PCC system calculates both open-item and linked payments towards an account’s final balance. If a family pays you $50, for example, and you post it without applying it towards a charge, their account will still reflect the payment. However, it will be difficult for you to research how the unlinked money is applied, and sorting out the account’s charges will be more difficult. You should use F6 – Unlink & Relink to link any open payments. You should also link every payment when it is first posted in pam.
Read Post Personal Payments to learn how to post a personal payment or adjustment against a charge.
Select All of a Visit’s Charges
When you need to adjust insurance status, visit details, or re-batch a claim, press F2, F4, or F5 in Correct Mistakes (oops).
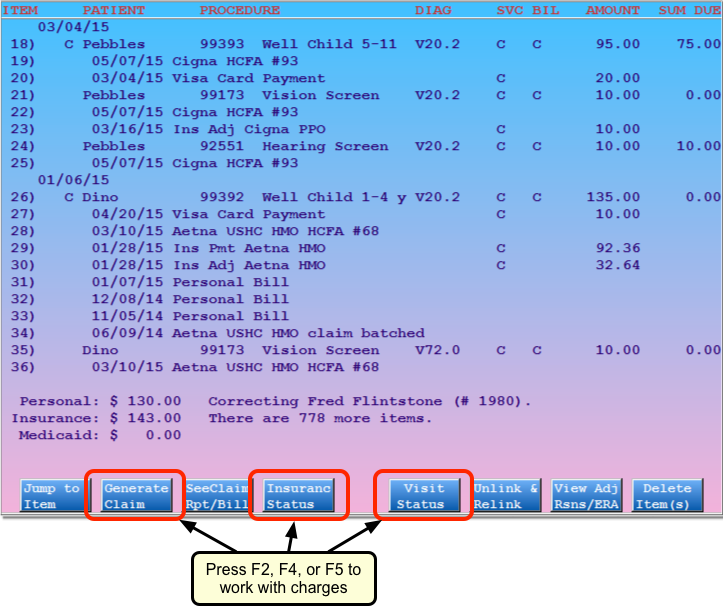
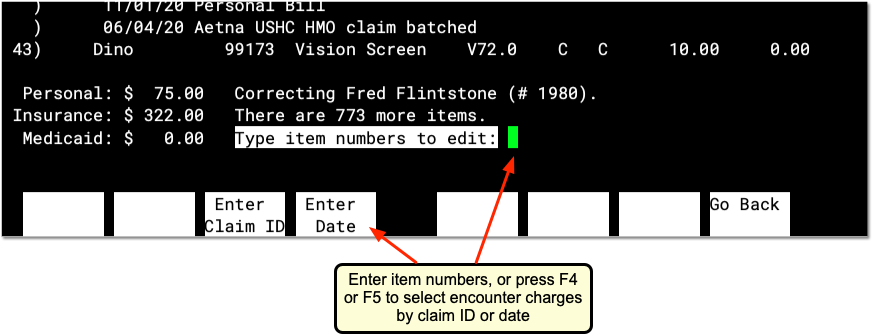
Next, either enter item numbers for charges from a visit, or press F3 or F4 to enter a claim ID or visit date and select all charges.
-
By Claim ID: Press F3 to enter a Claim ID. PCC will find all the charges associated with the Claim ID.
-
By Visit Date: Press F4 to select all charges for a specific visit date with the same patient and physician.
-
By Item Number: Press F2 to return to the default behavior. You can enter item numbers to select charges individually.
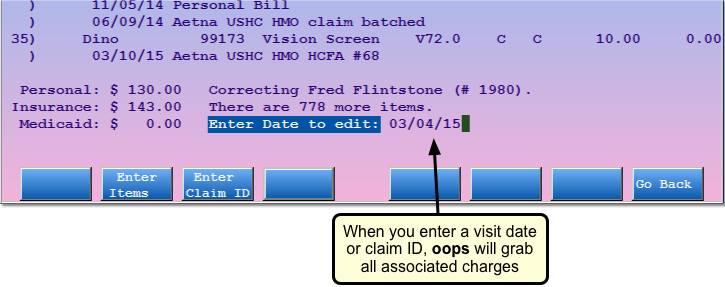
Use the charge selection features to quickly change the insurance status for a visit, enter a resubmission number for all the charges on a claim, or rebatch a claim without having to pick the item numbers for every charge.
Two Visits w/ Same Physician on the Same Day?: If you are working with charges that occurred on a day when the patient had two different visits with the same physician, you should select charges using the item number in order to work with only one visit’s charges. If oops finds two visits on a date with different patients or physicians, it will ask you which visit’s charges you wish to work with.
Function Keys on the Charge History Screen in oops
From this screen, you can perform (or begin) the following actions:
F1 – Jump to Item
F2 – Generate Claim
F3 – See Claim Rpt/Bill
Read the Electronic Claim Responses section for an example.
F4 – Insurance Status
Press F4 or I and select charges to view the Insurance Status screen. You can select charges by item number, claim ID, or visit date. On the Insurance Status screen, you can change the responsible party of a charge or modify the copay amount. Whenever you change insurance status, you should rebatch the updated charges for resubmission or print a new claim (use F2). Read Change Responsible Party and Copay for a Charge to learn more.
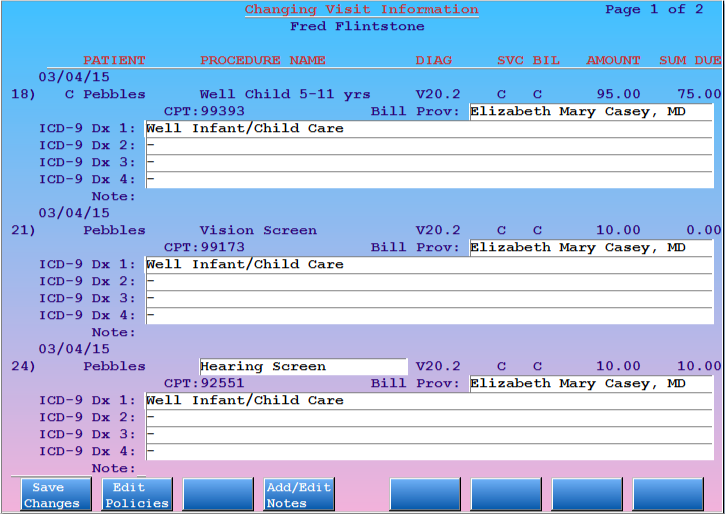
F5 – Visit Status
Press F5 or V and select charges to view the Visit Status screens. You can select charges by item number, claim ID, or visit date. On the Visit Status screens, you can view and change diagnosis and other claim-specific information related to a charge, such as billing provider, referring provider, authorization numbers, accident dates, etc.
F6 – Unlink & Relink
Press F6 and enter an item number of a payment to unlink or relink it. You might want to do this when cleaning up an account balance problem.
Next, oops will summarize the payment(s) you selected, and allow you to relink it to another charge, or leave the payment unlinked.
For an example of relinking a payment, Relink a Payment
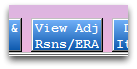
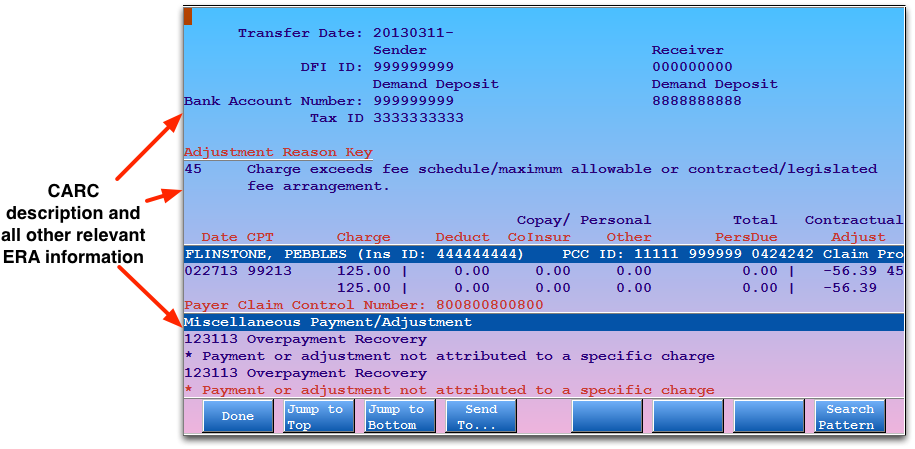
F7 – View Adjustment Reasons or ERA
Press F7 – View Adj Rsns/ERA and enter an item number to read a description of the codes.
If you select an item with associated ERA information, Partner will display the relevant ERA section.
F8 – Delete Item(s)
Press F8 or D and enter item numbers to delete items from the account history. You will be asked to confirm your choices before they are deleted. Once deleted, items can not be retrieved. Your PCC system keeps a log of which user deleted an item and how that action affected the account’s balance. You can review this log by running the daysheet or dsscan programs. Contact PCC for more assistance.