Configure Visit Statuses in PCC EHR
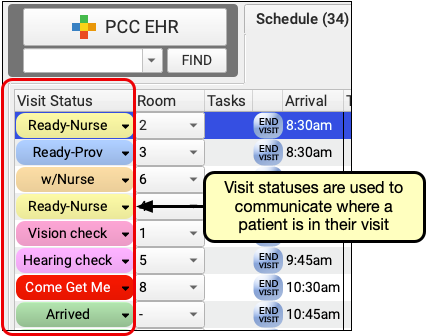
PCC comes with a set of visit statuses that you can use to indicate patient status on the schedule screen. PCC encourages each practice to configure its own visit statuses to compliment the practice’s workflow.
Video: Watch Use Visit Status Counters to Know Where You’re Needed to learn more.
Customize Your Practice’s Visit Statuses
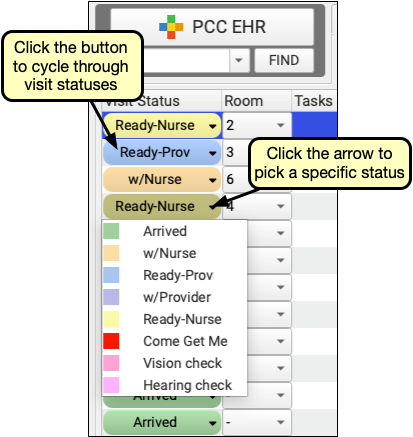
You can add any number of statuses to the ones already in PCC EHR, and you can select a color for each status.
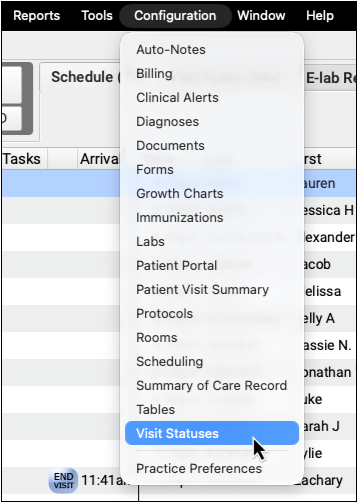
Use the Visit Status Configuration tool to add or remove statuses. You can adjust their color and add or remove them from the Visit Status cycle.

Visit Statuses appear on the Schedule queue as well as at the top of the chart note. Your practice can click to move stepwise through the cycle, or click on the arrow to select any Visit Status manually.
Selecting Colors: Choosing colors for visit statuses that are easy to differentiate but also compliment each other can be challenging if you don’t have a few art classes under your belt. Two good online resources for creating color palettes are color.adobe.com and paletton.com.
Customize Your Visit Status Counters
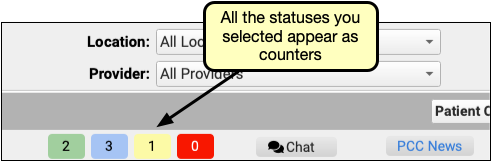
Each PCC EHR user can configure their own Visit Status Counters. These counters appear at the bottom of your PCC EHR screen, letting you know at a glance the number of patients that are marked with specific statuses.
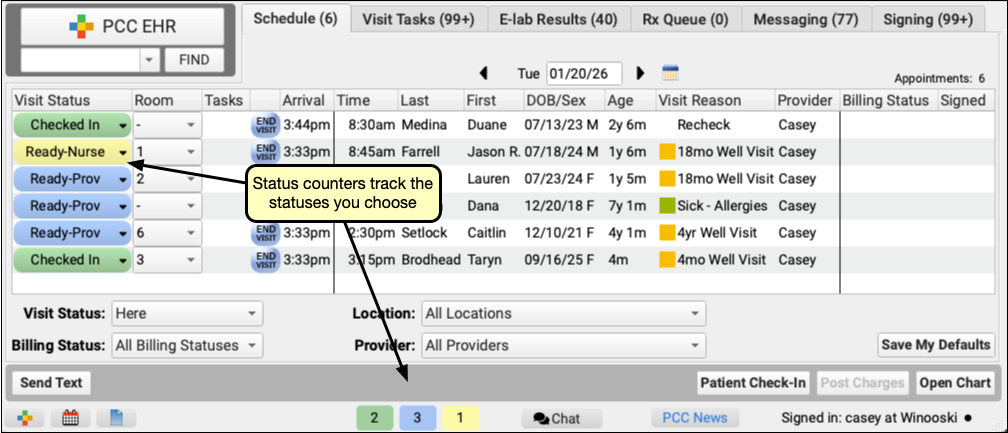
Visit Status Counters show you a count of a specific status, based on your personal user preference and your Schedule queue filters.
You can use the My Account tool to choose several different statuses to track. Each will appear in your practice’s custom color for that status.
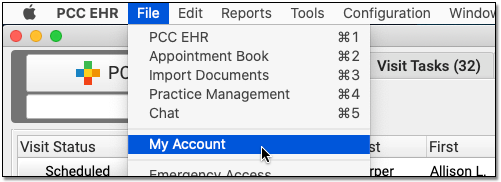
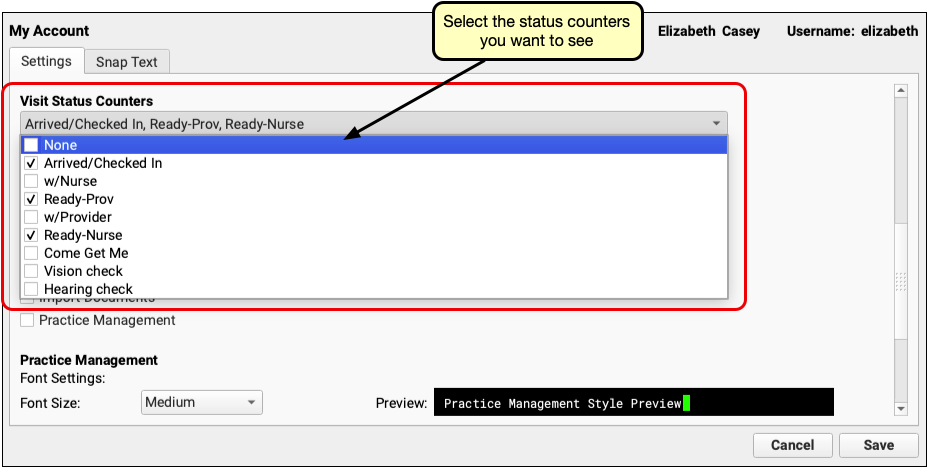
Use the Visit Status Counters drop-down in the My Account tool to select which statuses you want to keep track of during the day.
Can I Set This Up For My Staff?: Each user can define their Visit Status Counters in the My Account tool. An administrator can also set up Visit Status Counters for other users in the User Administration tool.