Run Reports in the Practice Management Window (Partner)
PCC EHR’s Report Library includes reports for front desk, administrative, clinical, patient recall, and more. PCC’s previous software suite, Partner, included some specialized, customizable reports for billing and financial analysis. In the sections below, you can learn how to run these under-the-hood reports found in the Practice Management window.
If you need help finding a report, call PCC support at 802-846-8177 or 800-722-7708. PCC creates custom reports for practices every day, and we can also teach you how to create your own.
Start in Practice Vitals Dashboard: Every PCC office has a Practice Vitals Dashboard. It’s a great place to get started with reporting! Visit Practice Vitals Dashboard to learn more.
Contents
Overview: Run a Report in the Practice Management Tool
Read the procedure below to learn the basics of running reports in the Practice Management window.
Run a Report Program
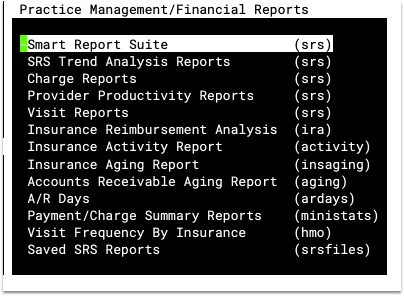
First, find and run a report in the Practice Management window. Many reports are available inside the Smart Report Suite (srs) program.
Select Report Options
The first screen of all report programs contains options. Here are two examples of report options screens:
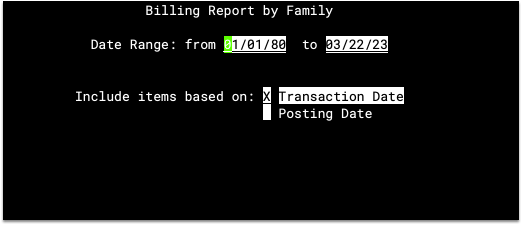
The date range is the most frequently used report option. Some reports have subtotaling, filtering, and sorting options that dramatically change the appearance or content of the final report.
Smart Report Suite Options: The srs-style reports display a Date Range selection screen followed by a Restriction Criteria screen. For more information, read The Smart Report Suite.
Press F1 Generate Report

Other Report Options: The F1 key generates most Practice Management window reports. Some programs include multiple reports available from different function keys, such as the Patient Information (patinfo) and Insurance Reimbursement Analysis (ira) report programs.
Optional: Select Details for Report Criteria
After you press F1 to generate a report, the report program may ask you filtering questions for the report criteria or other options that you selected. Some options require additional details.
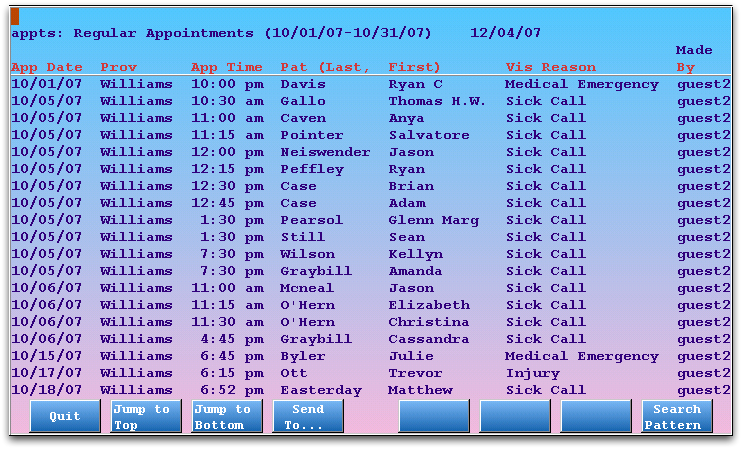
For example, if you answer “No” to the “All Providers?” option in the Appointment Summarizer (appts) report, then the program will ask you to select providers to include. The selection screen has useful function keys to speed up selection.
Select Report Output Destination
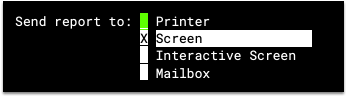
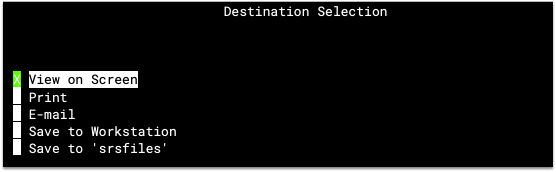
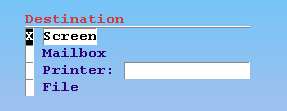
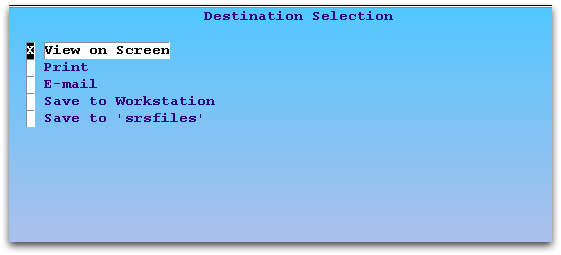
You can read Practice Management reports on your screen, format them for spreadsheets, or print them in an attractive, full-color PDF. While running a report, you will select output options in one of two different ways: on the main options screen, or on a Destination Selection screen after you press F1:
Or:
Mark your selection with an X and press F1 to continue.
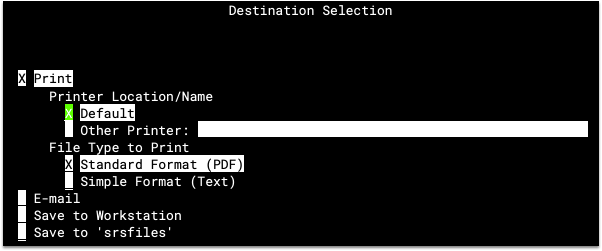
Additional Options: After you mark your Destination Selection, you may see additional options. If you select to “Print” the report, for example, you can then choose a specific printer and/or a printing style.

View Completed Report
Unless you choose to send the report directly to a printer, an e-mail address, or another location, your report will appear on the screen:
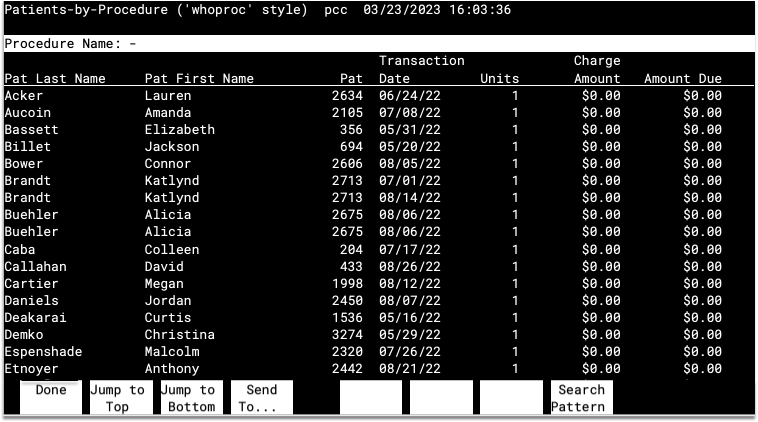
Navigating the Report: Use the arrow keys, the Page Up and Page Down keys, and the F2 – Jump to Top and F3 – Jump to Bottom function keys to navigate around the report. In some reports, the function keys may not be available.
Searching the Report: Press F8 – Search Pattern, enter search text, and then press Enter to search.

While searching, you can press F7 – Search For Next to view the next matching result or press F8 – Search Pattern to clear the search or enter a new search pattern. The “Search on whole words” option allows you to specify whether your search should only find results that are separate words and not part of a larger word.
If you are viewing a report without function keys, you can search for text by pressing the slash key (/), typing a search word, and pressing Enter. You can then jump down to the next search result by pressing N for “next result.”
Optional: Send Report to a New Output Destination
After reviewing a report on the screen, you may decide to print or send the report to a new destination. If your report includes function keys, press F4 – Send To.... The Destination Selection screen will open and allow you to make another selection.

Select Report Criteria in Practice Management Reports
Most Practice Management (Partner) report programs begin with a screen of options that will define and restrict the report’s output. The default settings on the options screen may give you exactly the report you want. If not, you can make changes that will limit the report’s results or format the output.
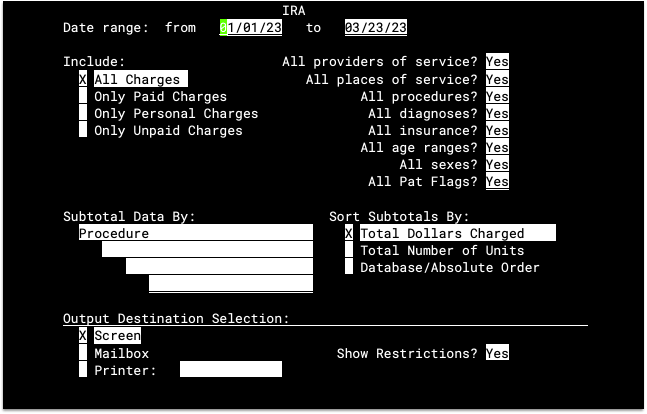
Here is the options screen for the Insurance Reimbursement Analysis (ira) report:
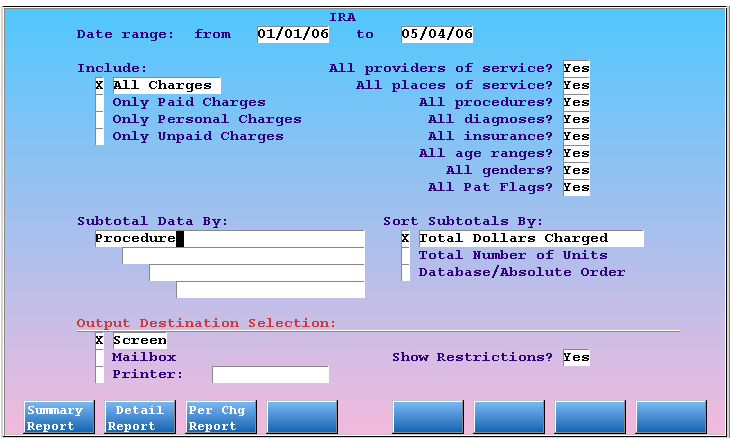
After you set and select your desired options, press a function key (usually F1), to read the report. Sometimes there are several function keys which run different reports. The ira report, for example, contains three different report formats, labeled F1 through F3, as shown above.
The next sections contain explanations of each of the different types of options you may find in Practice Management (Partner) reports.
Dates
Almost every report can be restricted by a date range. The default date range for ira is year-to-date, the default date range for Deposit Slip (deposit) is today’s date. You can alter the date range by entering new dates in the From and To fields.

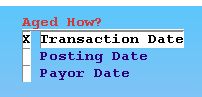
Reports that show the age of balances, such as the Insurance Accounts Receivable Summary ([prog]insaging[/prog]) and the Personal Money Tracking Assistant ([prog]persview[/prog]), allow you to measure the age by three different dates:
-
Transaction Date: Age the balance by the date of service, when the visit occurred.
-
Posting Date: Age the balance by the date the service was entered into your PCC system.
-
Payor Date: Age the balance by the date on which the charge became the responsibility of the current party. This is also called the “Payor Responsibility Date.”
In most situations, aging by transaction date makes the most sense. You usually want to know how old charges really are, from the date of service. Many reports offer only that option.
When Do You Use the Payor Date Option?: If you are reviewing overdue personal accounts, for example, you would want to use the Payor Date when you review accounts in (or create overdue letters) in persview. Otherwise, an old charge that was just rejected by the insurance company last week would trigger a late notice for the family! When you choose the Payor Date option, however, your PCC system is smart enough to know that the charge has only been the family’s responsibility for a week.
Sort and Subtotal Features
The “Subtotal Data By” fields, available on some options screens, have a profound effect on a report’s output. Different subtotal lines reshape a report and can make it more useful for your practice management decisions. Enter an asterisk (*) in any subtotal field to see the different variables by which you can subtotal the report.
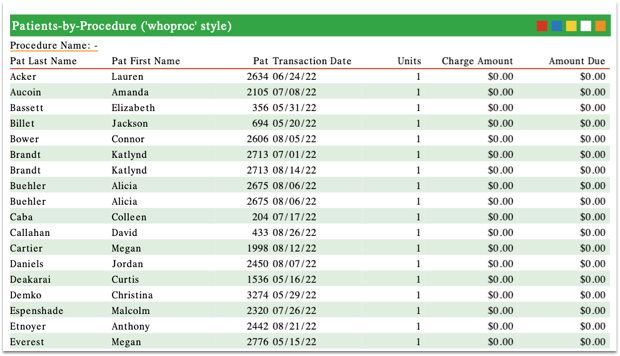
If you want to know how many times each provider performed each procedure over a period of time, run ira and enter “Provider of Service” followed by “Procedure” in the Subtotal Data fields. Then press F1 – Summary Report.

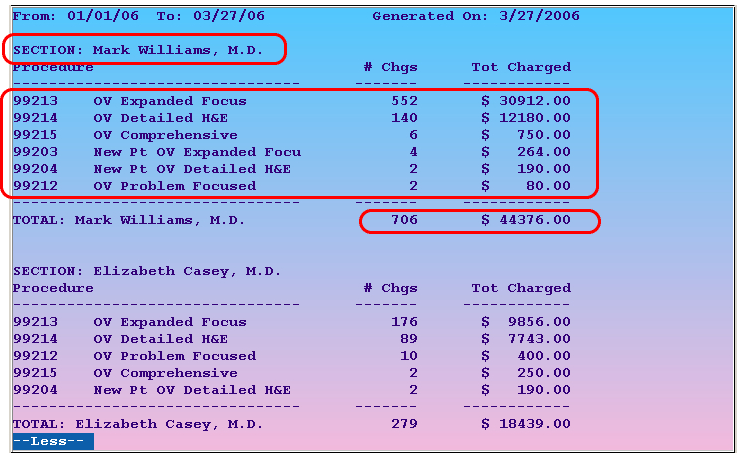
The resulting output will include a section for each provider, details about their procedures for the given date range, and useful totals.
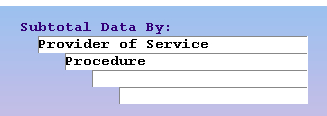
If you reverse the order of the items in the Subtotal Data By fields, and run the same report, ira will sort and total the same data in a different way:
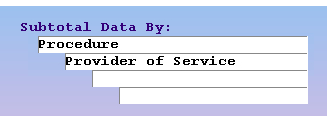
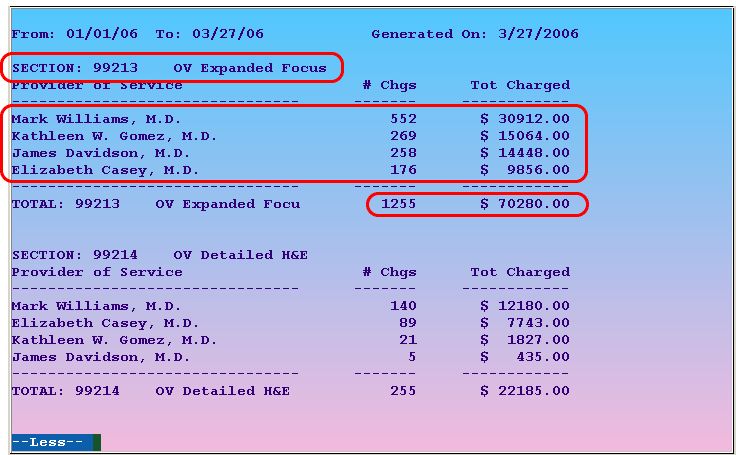
The providers’ numbers for each procedure are identical in the two examples above. The different subtotal field order, however, provides an alternate way to analyze the data.
The Deposit Slips (deposit) program also has a sort/subtotal feature. If your practice needs to balance its cash drawer by user, for example, you could set the options as follows:
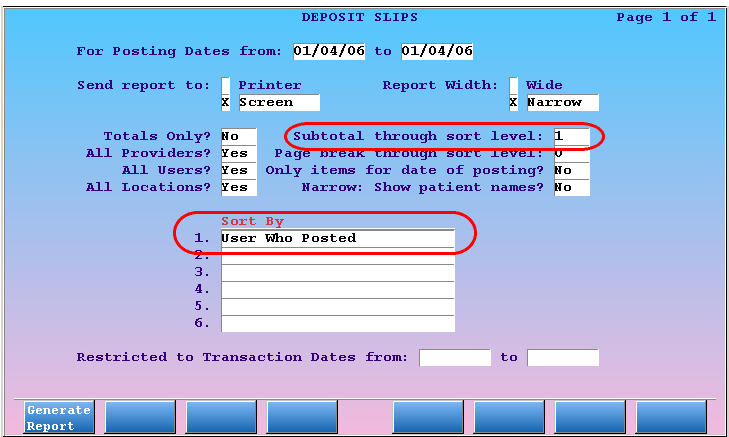
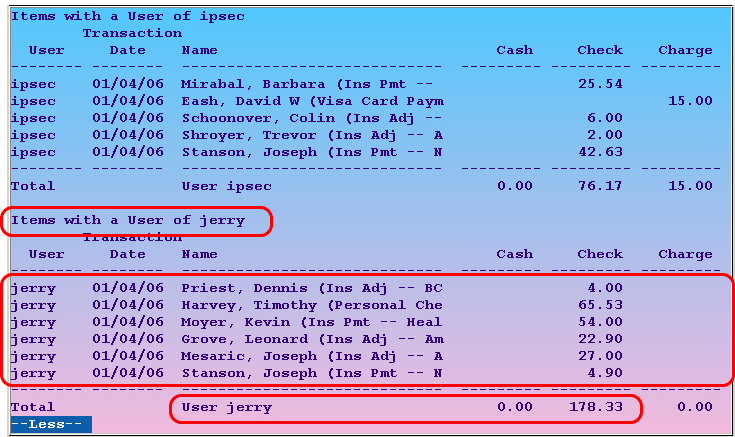
The deposit options screen displays the subtotal features differently from the ira screen, but the feature works the same way.
Some reports, such as deposit, include a “Totals Only” option. This option removes the individual lines of the report, leaving only the totals:
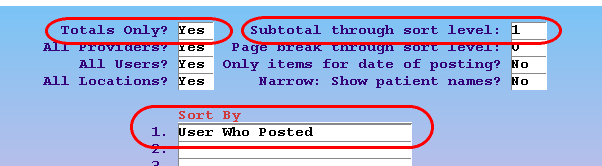
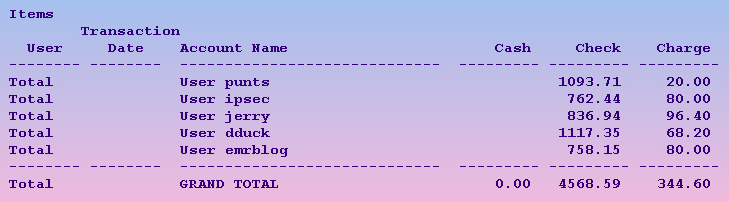
Use “Totals Only” to simplify the report output and view only the total and subtotal information.
Destination Selection
Destination selection options often appear on the criteria screens of reports. For more information, read the Destination Selection section below.
Advanced Criteria Option Screens in Practice Management (Partner) Reports
Many Practice Management reports have options on the initial screen that will cause other configuration screens to appear before the report output is generated. With these options, you can include or exclude large amounts of report data and make a report more useful. The main option screen asks a criteria question, and the subsequent screens ask the user to fine-tune that criteria.
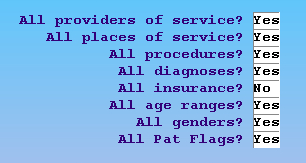
For example, the ira option screen includes a series of yes/no questions:
The Patient Recaller (recaller) option screen contains a long pick-list of possible criteria:
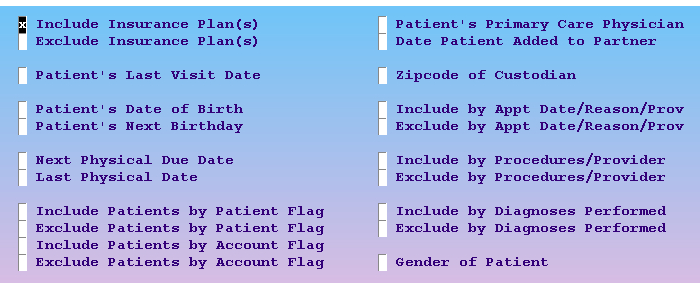
If you answer “No” to any of ira‘s questions, or select a criteria item in recaller, the report will need to ask you which of the selected items you want it to include.
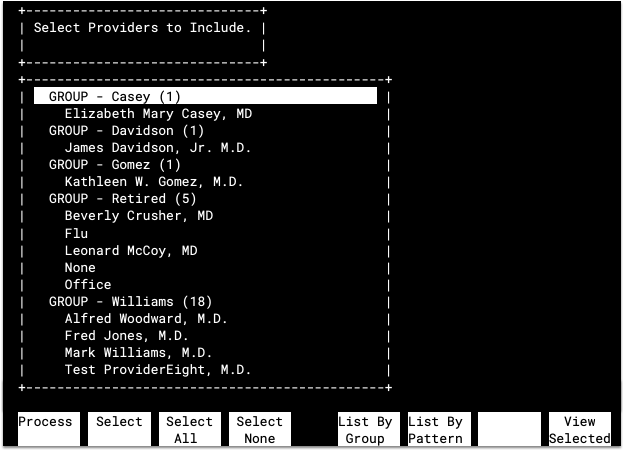
In the examples shown above, the user wishes to run each report for only a single insurance company. They changed the “All insurance?” question to “No” in ira, they checked off “Include Insurance Plan(s)” in recaller. When they run either report, your PCC system will ask them which insurance companies should be included:
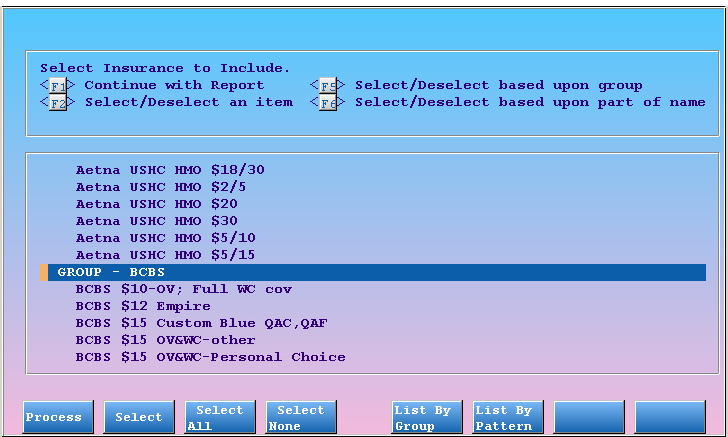
You can scroll through the list with the arrow keys or by pressing Page Down and Page Up. Press F2 – Select to mark an item you wish to include. Press F1 – Process to continue.
The image above shows insurance company selection, but the screen is identical for procedures, diagnoses, providers, or any other restriction criteria. You will see one such screen for every criteria option you selected on the report’s main options screen.
Here is a full explanation of each of the screen’s function keys and how to use them to select entries:
Function Keys on Advanced Criteria Screens
F1 – Process
Press F1 to run the report using all of the items you have selected. If you do not first select an item, the final report may be blank.
F2 – Select
Press F2 to select the currently highlighted item. You can select more than one entry. Selected entries will be marked with an asterisk (*). If you select a “GROUP” item, all of the items within that group will be included. Press F2 a second time to deselect an entry.
F3 – Select All
Press F3 to select all entries. If you want your report to show results for all insurance companies except for a few, you could press F3 and then deselect the entry or entries you do not want to include.
F4 – Select None
Press F4 to deselect all the selections you have made and start over.
F5 – List By Group
Press F5 to condense the list of options. The individual items will disappear and you will see only the groups.
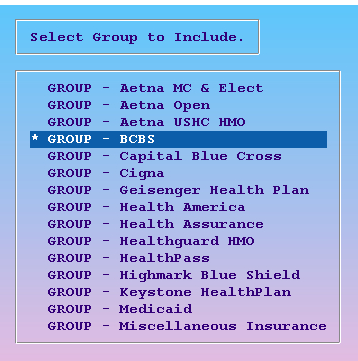
Insurance companies, providers, and procedures all have groups. Selecting the BCBS Group is much easier than selecting every BCBS plan individually. You can modify your groups in the Tables tool, found in the Configuration menu in PCC EHR.
F6 – List By Pattern
Press F6 to search for an item. You can search by name or any number that appears in an item’s title. The search screen gives detailed instructions:
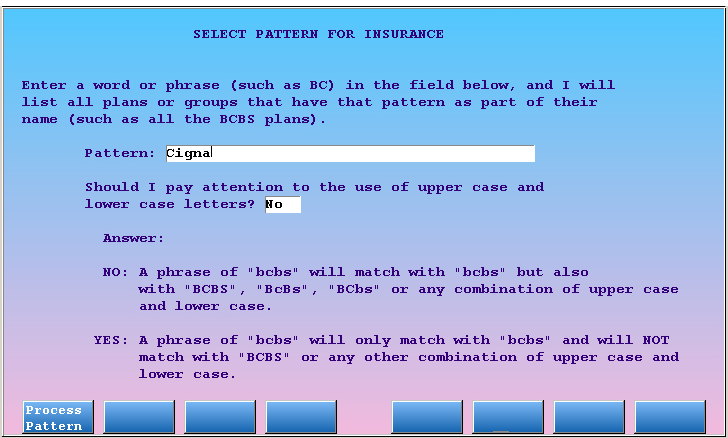
After entering a search item and pressing F1 – Process Pattern, you will see a list of all items that contain the pattern you entered:

After you select desired items from the search results, press F1 – Process. The report will return you to the complete list, allowing you to make additional selections.
After you make your selections, press F1 – Process to continue. If you answered “No” to several questions or selected more than one criteria on the report’s main options page, the report will display a separate selection list for each one.
Select a Destination for a Practice Management Report
Reports can be viewed on your computer screen or sent to a printer. Some reports can also be e-mailed.
The destination options for a report either appear in a section of the main options screen:
Or, they will appear on a Destination Selection screen after the main options screen:
Use the arrow keys to select the output destination you need.
While viewing some reports on the screen, you can press F4 – Send To... to bring up the Destination Selection screen and pick a new destination.
Destination Options
-
Screen/View on Screen: Show the report results on the screen only. Some reports will then ask if you wish to print before leaving the screen.

-
Mailbox/E-mail: E-mail the report to an e-mail account. Some users use the Mailbox option to transfer a report to their PC and then load it into a spreadsheet program. Contact PCC for assistance or read the SRS section below for more information.
-
Print: Send the report output directly to a printer. You can send the report to your default printer or enter a specific printer name. Enter an asterisk (*) in the printer name field to see a list of available printers.
-
File/srsfiles: Send the report output to a file stored on your server. This option is only available in the Smart Report Suite and a few other reports. Read the SRS sections below for more information on how to control criteria and output in
srsand retrieve files from thesrsfilesprogram. -
Save to Workstation: Transfer the report directly to your computer workstation.
Interactive Reports: Some reports can generate an interactive view, allowing you to jump around and perform operations while reviewing the report output. Read the Interactive Reports section for more information.
View Report Output on the Screen in Practice Management
Practice Mangement reports appear on the screen either as plain text or through a standard interface.
Use the arrow keys or the Page Up and Page Down keys to move around the report. If function keys are available, you can also press F2 – Jump to Top and F3 – Jump to Bottom.
Search a Report
While viewing any plain text output, press the slash key (/), type a search pattern, and press Enter to search. You can then step down to each search result by pressing the N key.
If you are viewing a report within a Practice Management interface, as shown in the image above, press F8 – Search Pattern, enter a search pattern, and press Enter.

You can then press F7 – Search For Next to step down to each search result.
Choose a New Output Destination
If you are viewing a report within a Practice Management interface, as shown in the image above, press
F4 – Send To...
to return to the Destination Selection screen and pick a new report output.