Register for EPCS
After a brief registration process, you can send electronic prescriptions for controlled substances (EPCS) from PCC eRx.
Companion Video Under Construction: The companion video for this article is being updated to reflect new functionality in PCC 10.4, which arrived on October 12th, 2025. You can watch the previous version, but please note that some steps may not match your PCC system.
Contents
Overview
The registration process for the electronic prescribing of controlled substances (EPCS) ensures that only you are be able to use your account, name, and credentials to send electronic prescriptions for controlled substances from PCC eRx.
The registration process involves you (the registrant) and an administrator at your practice.
Before registration, the administrator:
- obtains a hard token for you, and
- enrolls you for EPCS, which grants you access to the registration process.
During registration, you:
- prove your identity, and
- set up two-factor authentication for EPCS.
You can access registration and monitor your progress on the My Settings page in PCC eRx. To get to the My Settings page, go to the Rx Queue in PCC EHR, then click the My Settings link in the top navigation bar.
Before You Register
Work with an administrator to prepare for a successful EPCS registration process.
Prescriber: Prepare for Success
Gather everything you need in order to register successfully on the first try.
Get a Hard Token
A hard token is a plastic fob with a unique serial number that generates numeric passwords. Every prescriber needs a hard token in order to register for EPCS.Your hard token becomes tied to your identity during the EPCS registration process. Each time you send an electronic prescription for a controlled substance, you are required to validate your identity by entering a new password from your token. This extra layer of security is commonly called a second factor of authentication because you use it in addition to a password.
Your practice must provide you with a hard token and you must have it in hand before you begin the EPCS registration process in PCC eRx. The token must be new, meaning that it cannot already be registered to a different provider or organization.
Your practice administrator can request hard tokens from PCC Support at no cost. PCC orders tokens from Exostar, the credential services provider that authenticates prescribers for EPCS. Once ordered, tokens ship directly to your practice, generally in less than two weeks from the order date.
Get the Authy App
In addition to your hard token, you can set up your smartphone as a second factor of authentication for EPCS. This is called a soft token or mobile credential.
If you would like the option of using your smartphone as a second factor of authentication for EPCS, download the Authy app now and create an account.
You might already have the Authy app if you use SecureConnect to access PCC EHR remotely, or for another organization or product.
Decide Which Email Address to Use for EPCS Registration
Exostar requires an email address at the start of the EPCS registration process so that it knows where to send copies of service agreements and other communications. Decide now which email address you want to use for registration and tell it to the administrator who will enroll you in the registration process. The administrator enters this email address when they enroll you. The email address you choose should be an active one that you check regularly.
Remove Credit Locks
You must complete an identity proofing process when you register for EPCS. Exostar, the credential services provider that authenticates prescribers for EPCS, relies on being able to access your Experian credit history for this process.
Remove credit locks before beginning EPCS registration so that you can complete the identity proofing process as seamlessly as possible.
If you have credit locks in place, the identity proofing service cannot access your credit history and cannot generate questions that would prove your identity. The alternative is to schedule a video interview with Exostar, which could add days or weeks to the registration process.
Set Aside Enough Time
PCC recommends that you set aside thirty minutes in a quiet, distraction-free space to complete the EPCS registration process.
Administrator: Verify the Prescriber’s User Account Details
Administrators must enroll prescribers before they can begin the EPCS registration process. Before enrolling a new prescriber for EPCS, the administrator should verify the that the prescriber’s full name and credentials are accurately recorded in PCC EHR.
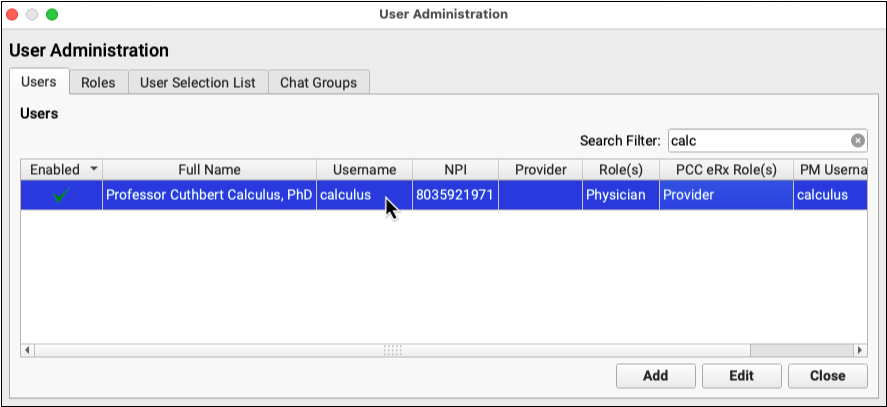
Open User Administration
Open User Administration from the Tools menu in PCC EHR.

View the Prescriber’s Account Details
Find the prescriber’s account in the list, then double-click on it to view the details.
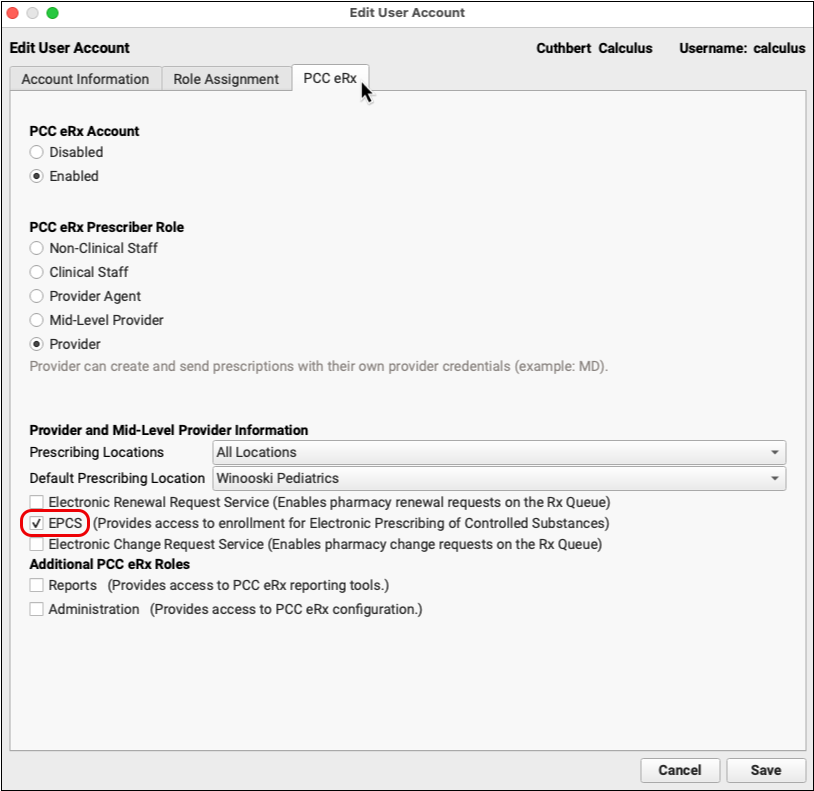
Verify the Prescriber’s Name, NPI, and DEA Number
On the first page of account details, verify that the prescriber’s NPI and DEA numbers are present and correct.
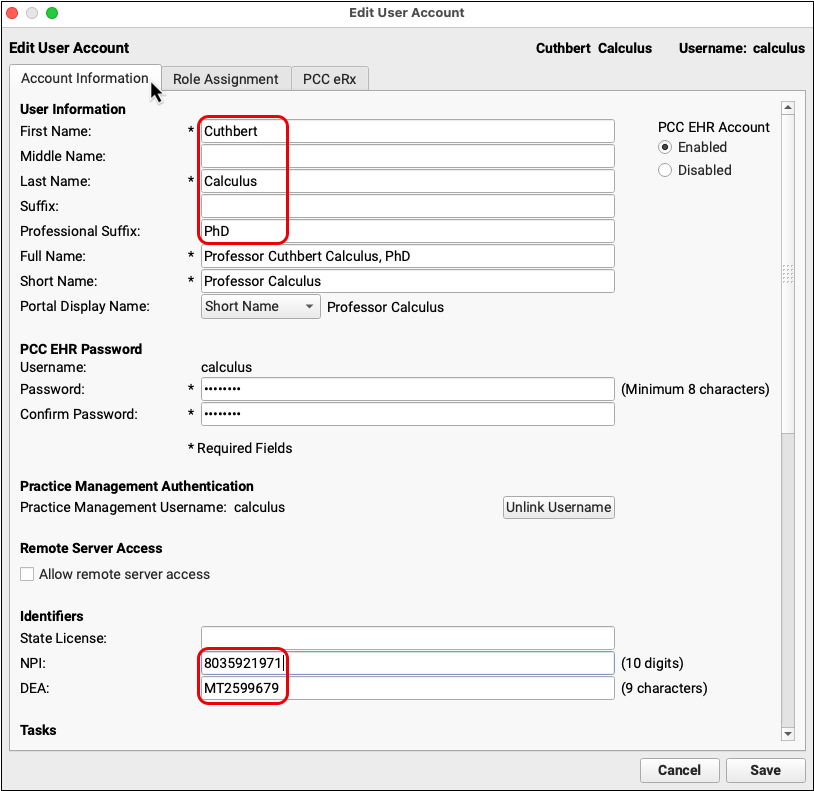
Also, check that the first and last names recorded on the account are the prescriber’s legal names, spelled identically to their photo ID, and that each part is recorded in the right field. For example, the “Last Name” field should only contain the prescriber’s last name, not their professional suffix. The professional suffix can be recorded in the “Professional Suffix” field. If the prescriber’s name is not recorded correctly, it could cause delays in the EPCS registration process.
Verify that EPCS is Enabled
Click on the PCC eRx tab within the account details and verify that the “EPCS” checkbox is checked.
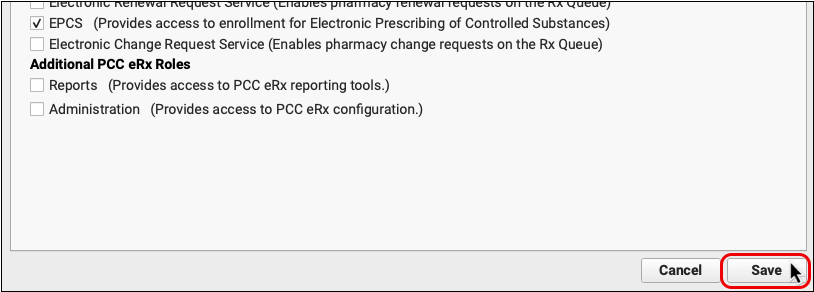
Save and Exit User Administration
Once the prescriber’s account details have been verified, save and exit User Administration.
Administrator: Enroll the Prescriber for EPCS
After verifying the prescriber’s account details in User Administration, the administrator can enroll the prescriber for EPCS. The administrator must have permission to access the Administration tab in PCC eRx to complete the necessary steps. If your practice needs help setting up PCC eRx user permissions, contact PCC Support or watch the video.
Go to the Administration Page in PCC eRx
Open the Rx Queue in PCC EHR, then click on the Administration tab.

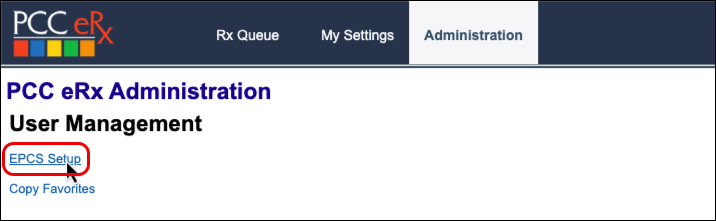
Click EPCS Setup
Click on the “EPCS Setup” link.
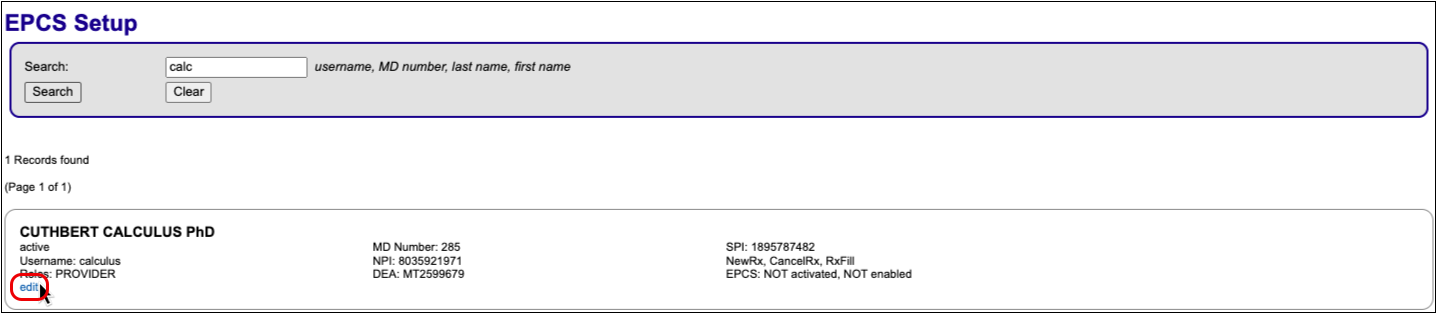
Find and Edit the Prescriber’s eRx Account
Search for the prescriber, then click on the “Edit” link beneath their account details.
Enroll the Prescriber
Click the “Enroll Prescriber” button, then enter the email address that the prescriber will use to receive communication from Exostar. Exostar is the credential services provider that authenticates prescribers for EPCS.

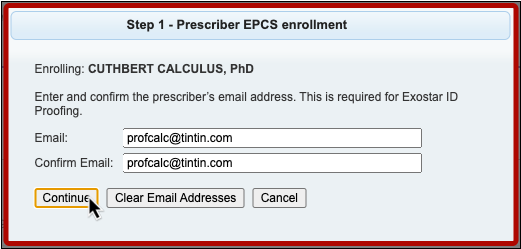
Click the “Continue” button to save the prescriber’s email address and finish enrolling them for EPCS.
No Seats Remain: If you receive a message that “No seats remain” when attempting to enroll a prescriber for EPCS, contact PCC Support to order a new hard token for the prescriber. This can happen if your practice is out of hard tokens, or if tokens you ordered long ago expired before you could register them.
End of Administrator Steps: The remaining steps in this article must be completed by the registering prescriber.
Create an EPCS Password
Create the password you will use every time you send an electronic prescription for a controlled substance.
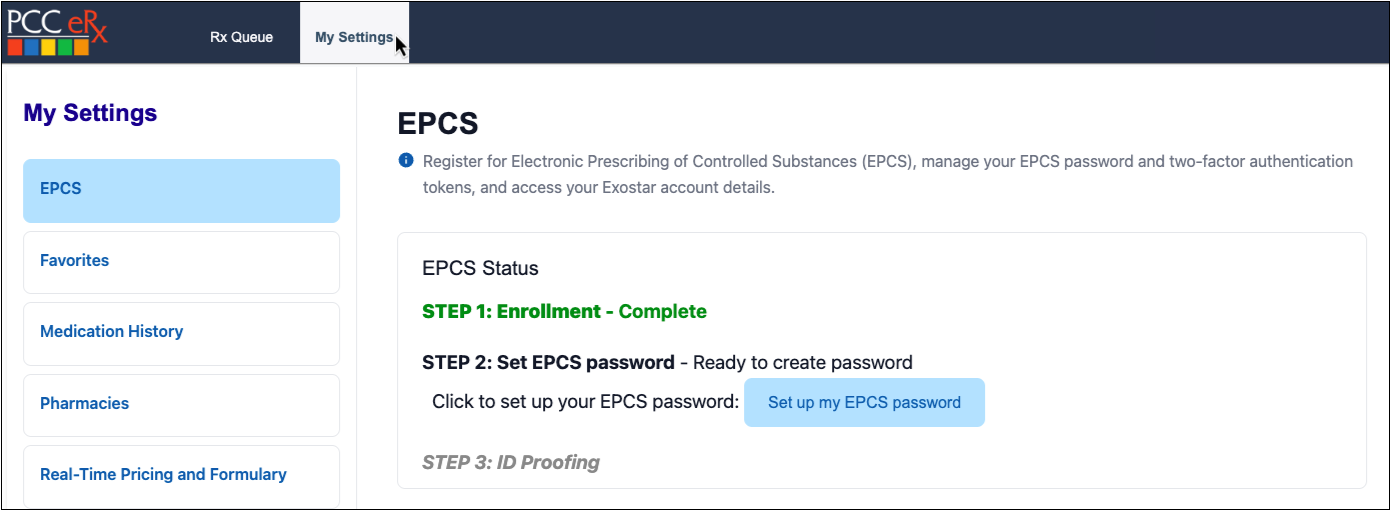
Open the My Settings Page in PCC eRx
Log into PCC EHR and go to the Rx Queue.

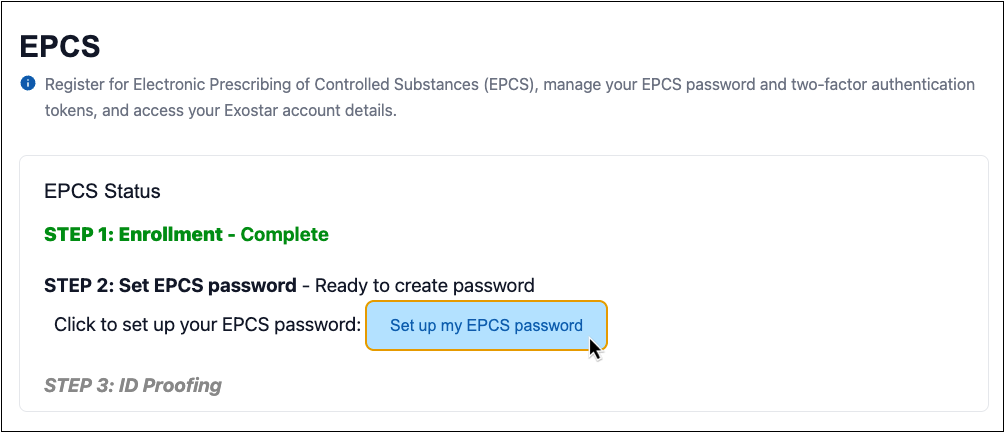
Click on the My Settings tab to view your EPCS Status and access the registration process.
Click “Set Up My EPCS Password”
Click the “Set up my EPCS password” button to launch the next step of the EPCS registration process.
Create a Password
Create a password that meets all of the requirements listed on the screen.
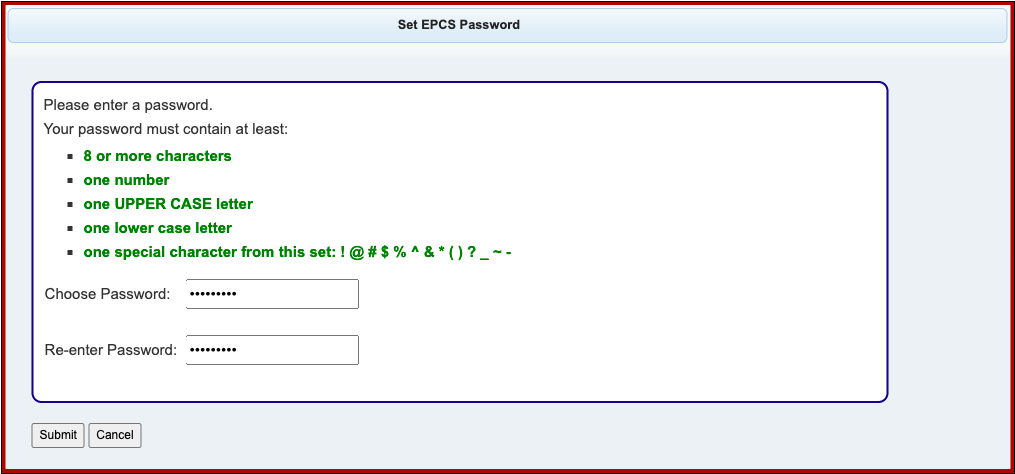
You will enter this password every time you send an electronic prescription for a controlled substance.
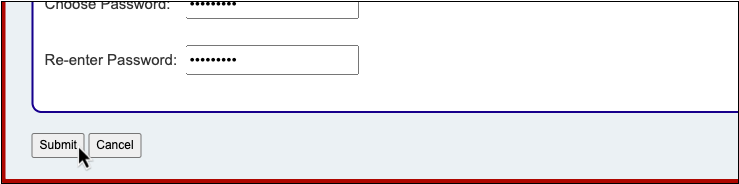
Save Your Password
Click the “Submit” button to save your password and move on to identity proofing
Complete ID Proofing
After creating a personal prescribing password, prove your identity.
Take Out Your Hard Token and Smartphone: You must have your hard token in hand for the rest of the EPCS registration process, as well as your smartphone with the Authy app already downloaded and registered to your name and device. If you do not have a smartphone, contact PCC Support.
Remove Credit Locks Before Proceeding: You cannot complete Experian ID Proofing with a credit lock in place. Remove your credit locks before proceeding.
Enter the Serial Number from Your Hard Token
After creating your EPCS password, you proceed to the ID Proofing window.
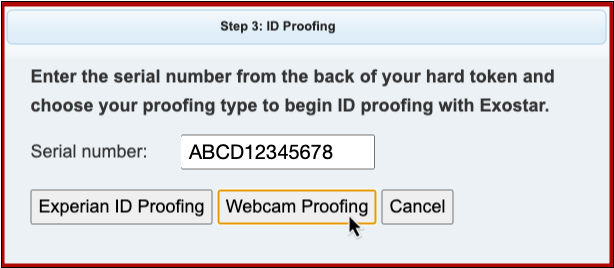
Once in the ID Proofing window, enter the serial number from the back of your hard token.
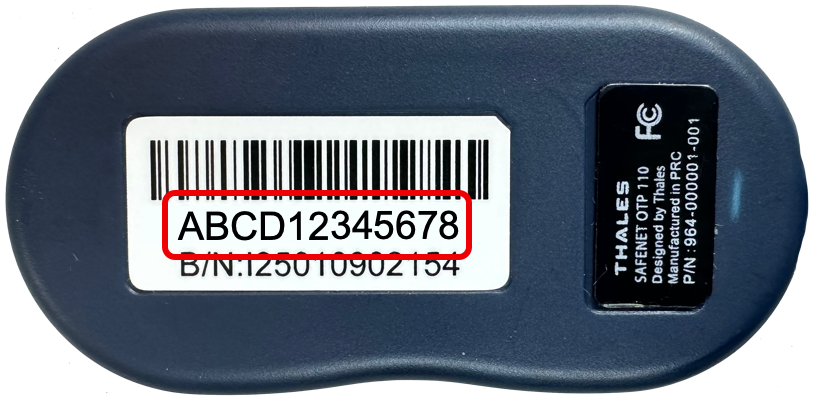
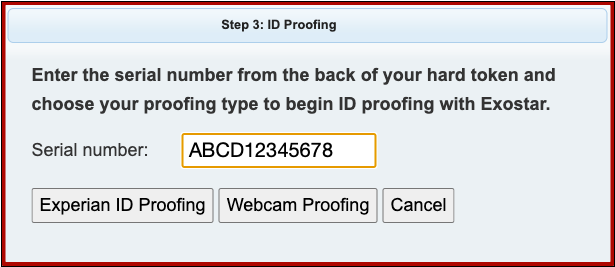
The serial number should begin with four letters and end with eight numbers.
Click 'Cancel' to Exit and Resume Later: If you need to pause and exit the registration process at this point, click the “Cancel” button. Your progress will be saved. You can resume registration later at this step from the My Settings page in PCC eRx.
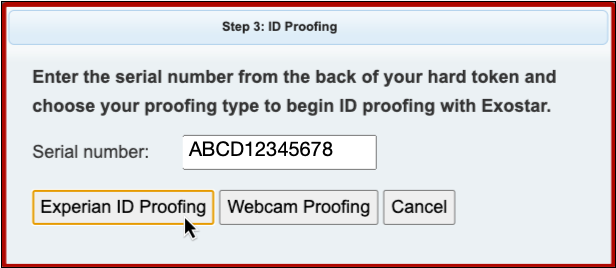
Begin Experian ID Proofing
Click the “Experian ID Proofing” button to connect to Exostar and begin the identity proofing process.
Experian ID Proofing
For most registrants, Experian ID Proofing consists of using your smartphone to capture a photo of your identity document and a selfie. In some cases, or if the photo capture process fails, you may instead be asked a series of questions based on your Experian credit bureau history. You have two chances to answer the questions correctly. If you are successful, you can finish the EPCS registration process right away.
Webcam Proofing
If you do not pass Experian ID Proofing, you will be offered a Webcam Proofing session instead. Webcam Proofing is a video interview conducted with Exostar, the credential services provider that authenticates PCC prescribers for EPCS. Webcam Proofing takes longer to complete than Experian ID Proofing because it is contingent on interviewer availability, so PCC recommends trying Experian ID proofing first.
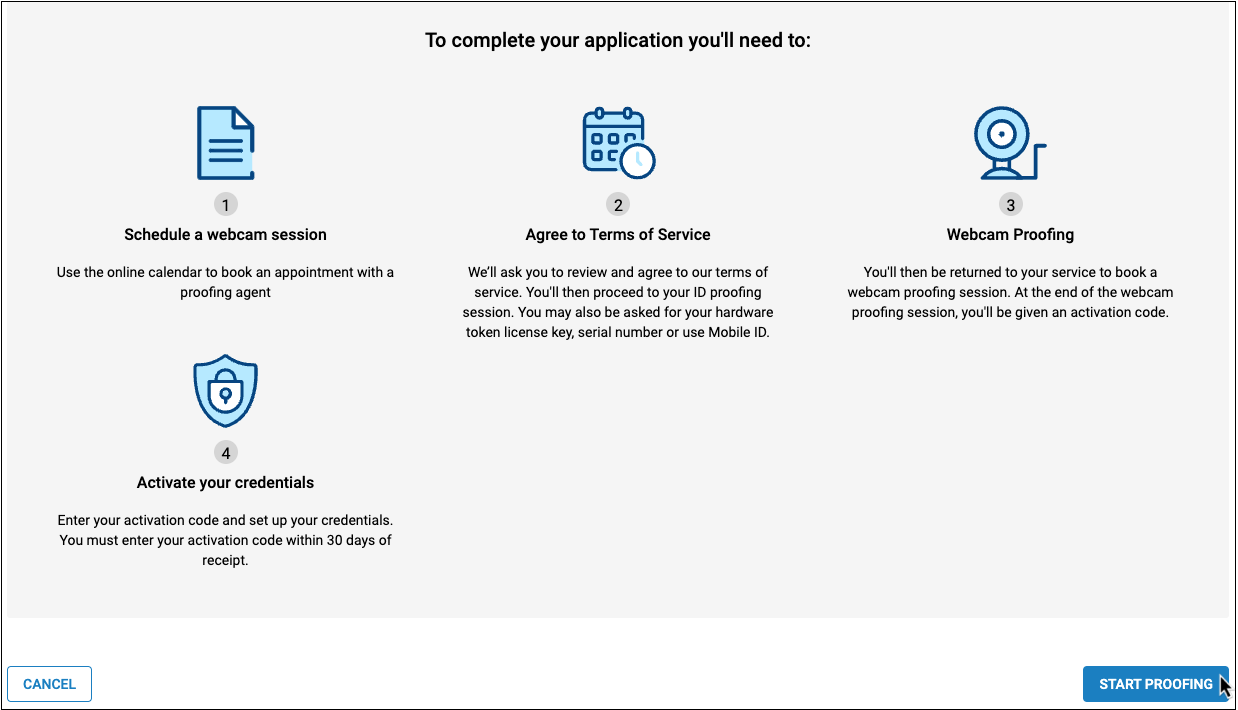
Review Exostar’s Instructions
Review the instructions on the screen. Before proceeding, check that you have enough time and all of the required materials.
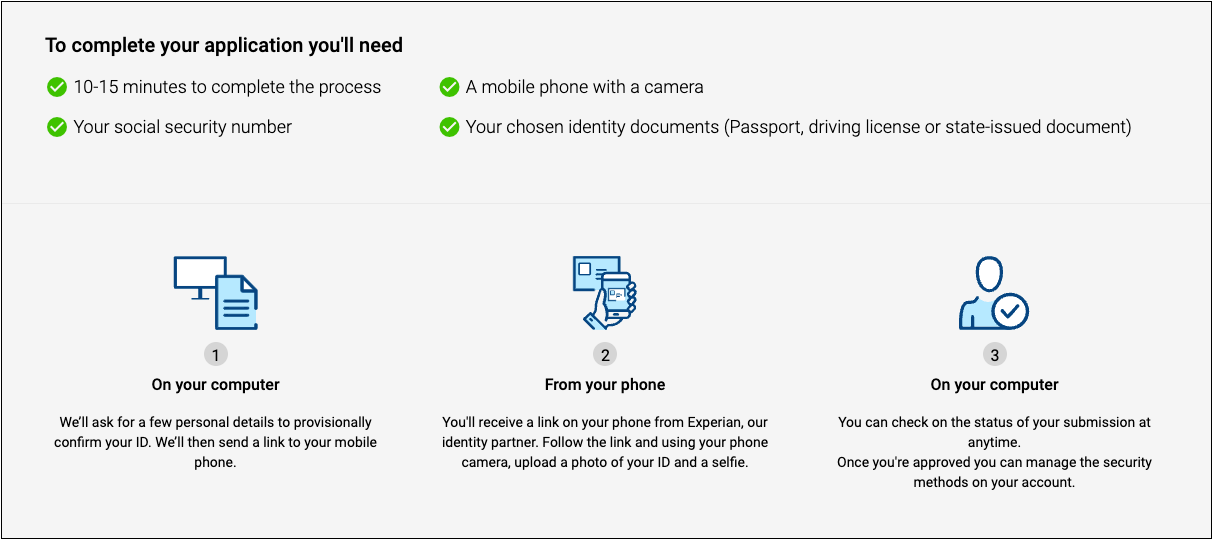
Click “Start Proofing”
Click the “Start Proofing” button to begin identity proofing.

30 Minutes to Complete Identity Proofing: From this point, you have 30 minutes to complete all identity proofing steps. If you do not complete all steps in the 30-minute time frame, Exostar ends your session and you need to try again.
Agree to Exostar’s Terms and Conditions
Review Exostar’s terms and conditions, then click the “Agree and Continue” button to proceed to the next step.
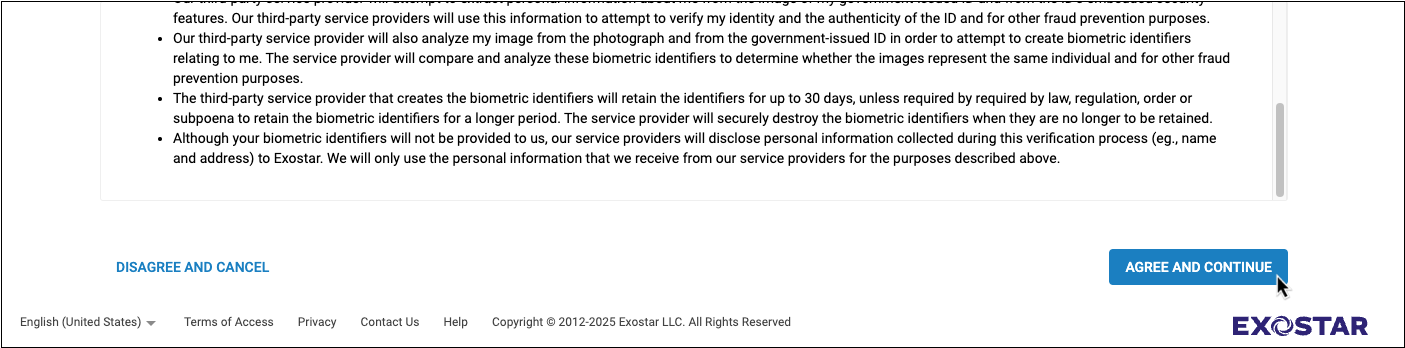
Exostar sends a copy of the agreement and supplemental materials to the email address that your practice administrator used to enroll you for EPCS.
Enter Your Personal Information
Check that your name is listed correctly, then fill out the personal details form with your current home address, date of birth, and your social security number.
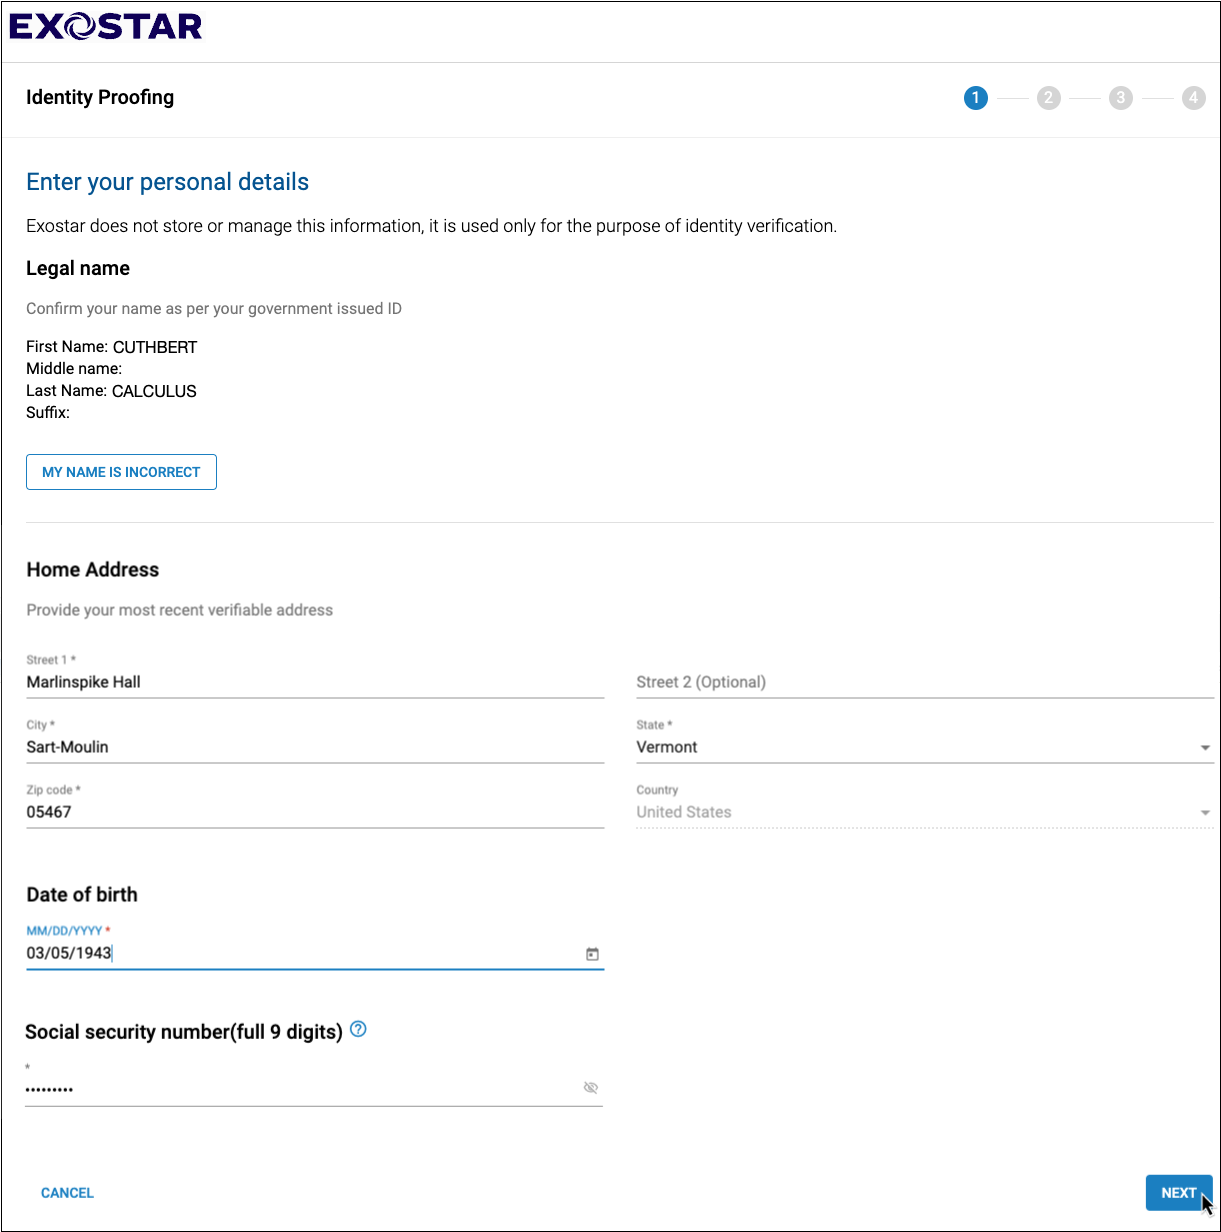
This information is solely used to look up your Experian credit bureau history for the purpose of authenticating your identity during the identity proofing process. Neither PCC nor Exostar stores this information.
When you have finished filling out the form, click “Next” to proceed to the next step.
Your Name Must Match What Experian Has on File: Your name spelling on the personal details form, which comes from your user account details in PCC EHR, must match what the Experian credit bureau has on file. The easiest way to verify that your name on the form matches what Experian has on file is to click “Next” and attempt to proceed to the next step. If your name does not match what Experian has on file, you will not be allowed to proceed with identity proofing and you should contact PCC Support for assistance.
Enter Your Mobile Phone Number
Enter your mobile phone number then click “Next”.
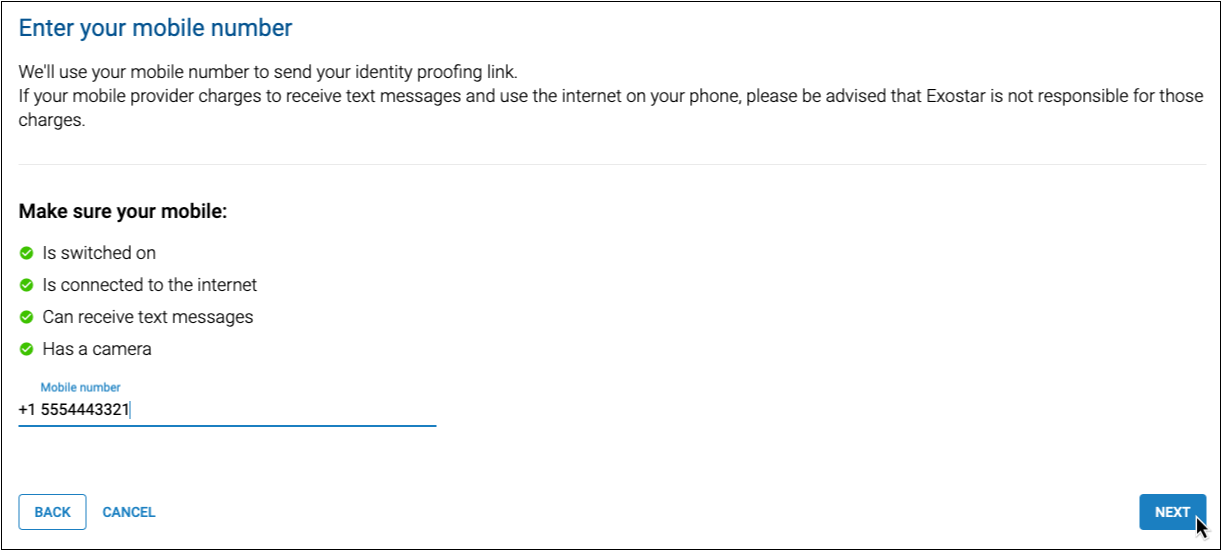
Exostar will send you a text message with a link to the next part of the identity proofing process. In order to complete the steps, your mobile phone must be switched on, have service, and have a camera.
10 Minutes to Complete Phone Steps: From this point, you have 10 minutes to complete the identity proofing steps on your mobile phone. If you do not complete all mobile phone steps in the 10-minute time frame, Exostar ends your session and you need to try again.
Tap the Link in the Text Message from Exostar
When you receive the text message from Exostar, tap the link to access the next part of the identity proofing process.
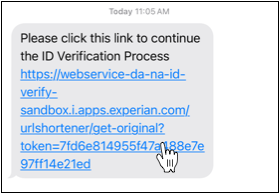
Your mobile phone must be connected to the internet and have a camera in order to complete the next steps.
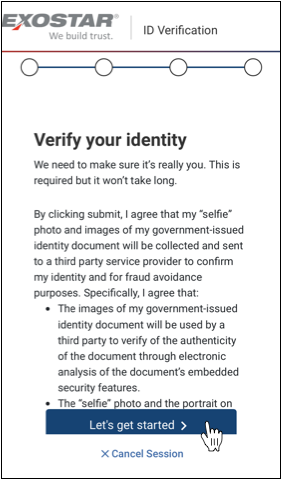
Agree to the Terms of Mobile Phone Identity Proofing
Review the identity verification terms presented by Exostar, then tap “Let’s get started” to proceed.
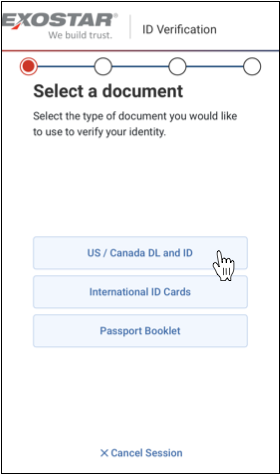
Select Your Document Type
Select the type of document you plan to use to verify your identity. You may use a driver’s license, passport, or other government-issued photo ID.
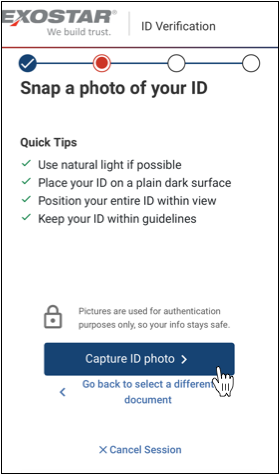
Snap a Photo of Your ID
Take out your identity document and place it on a plain, dark surface in a room with good, even lighting.
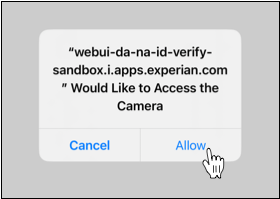
On your phone, tap the “Capture ID Photo” button. If prompted, allow the website to access your phone’s camera.
Take a picture of your ID, making sure to position the entire document within the guidelines on the screen.
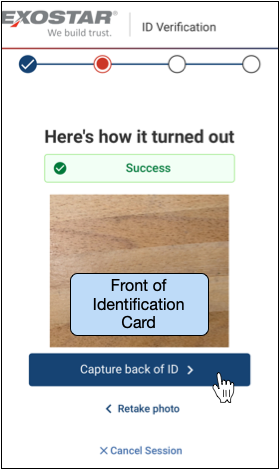
Review the photo and retake it if necessary. If you are using a double-sided ID, click “Capture back of ID” to take a picture of the other side.
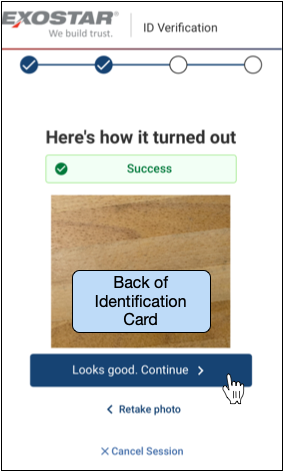
When you have taken all necessary ID photos and are satisfied with their quality, click “Looks good. Continue” to proceed to the next step.
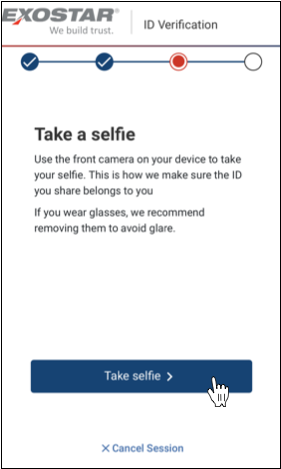
Snap a Selfie
Position yourself in a room with good, even lighting. If you wear glasses, remove them to reduce glare.
On your phone, tap the “Take selfie” button. If prompted, allow the website to access your phone’s camera.
Take a selfie, making sure to position your entire face within the guidelines on the screen.
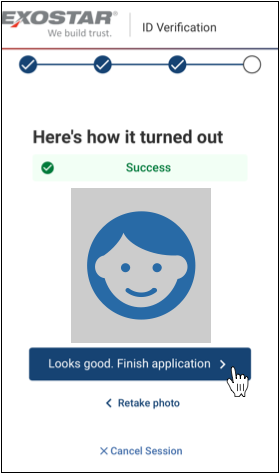
Review the photo and retake it if necessary. When you are satisfied with its quality, click “Looks good. Finish application” to proceed to the next step.
Put Your Phone Down and Return to Your Computer
The phone steps are complete. Put down your phone and return to your computer to mark the identity proofing process complete.
Complete ID Proofing
On your computer screen, click the “ID Proofing Completed” button to indicate that you have finished the required steps on your phone.
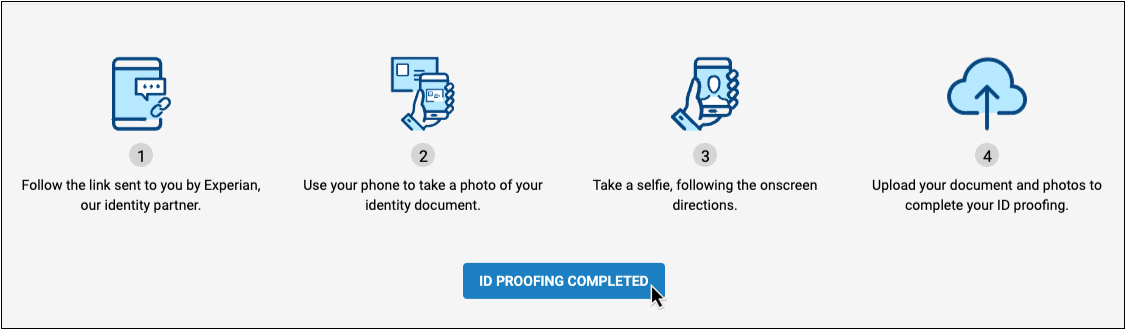
This moves you on to token activation, the final part of the EPCS registration process.
30-Minute Timer Still Active: The 30-minute timer to complete EPCS registration is still active. Move on to the next step immediately. You must activate your hard token before the 30 minutes are up. If you do not activate your hard token in time, you must start identity proofing over again.
If you were unable to complete ID proofing using your mobile phone, read Alternative ID Proofing Methods.
Activate Your Tokens
Finish setting up two-factor authentication for EPCS. Every time you send a prescription for a controlled substance, PCC eRx requires you to use one of your tokens in addition to your EPCS password.
Activate Your Hard Token
You must activate your hard token in order to complete EPCS registration. In order to activate your hard token, you must have it in hand.
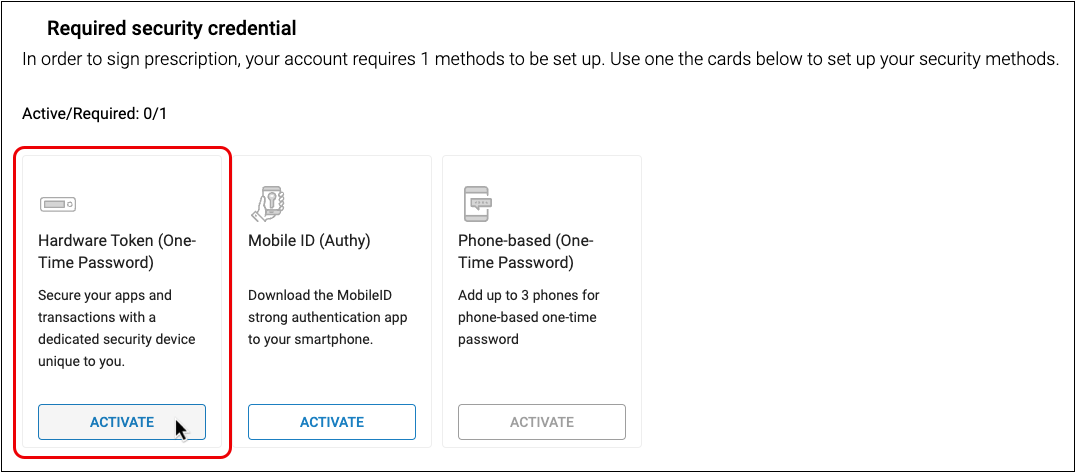
Under Hardware Token, Click “Activate”
Click the “Activate” button in the Hardware Token section of the page.
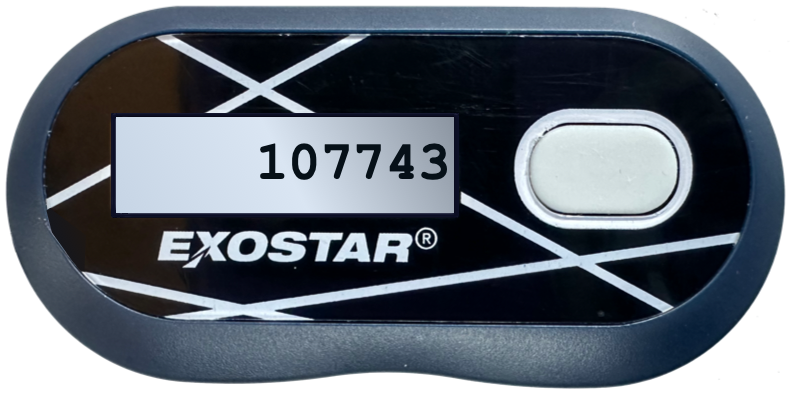
Press the Button on Your Hard Token to Generate a One-Time Password
Press the button on your hard token to generate a one-time password. One-time passwords are six-digit numeric codes tied to your device’s serial number that are only valid for thirty seconds.

Enter the Password
Type the password into the field on your screen labeled “One-time password 1”.
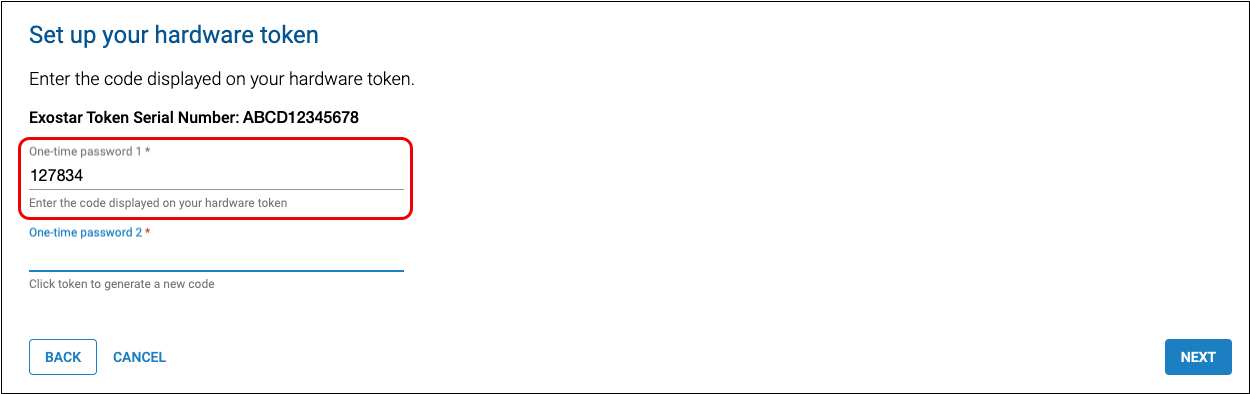
After 30 Seconds, Press the Button Again to Generate Another Password
Wait 30 seconds and press the button on your hard token again to generate another one-time password.
Enter the Second Password
Type the second password into the field on your screen labeled “One-time password 2”.
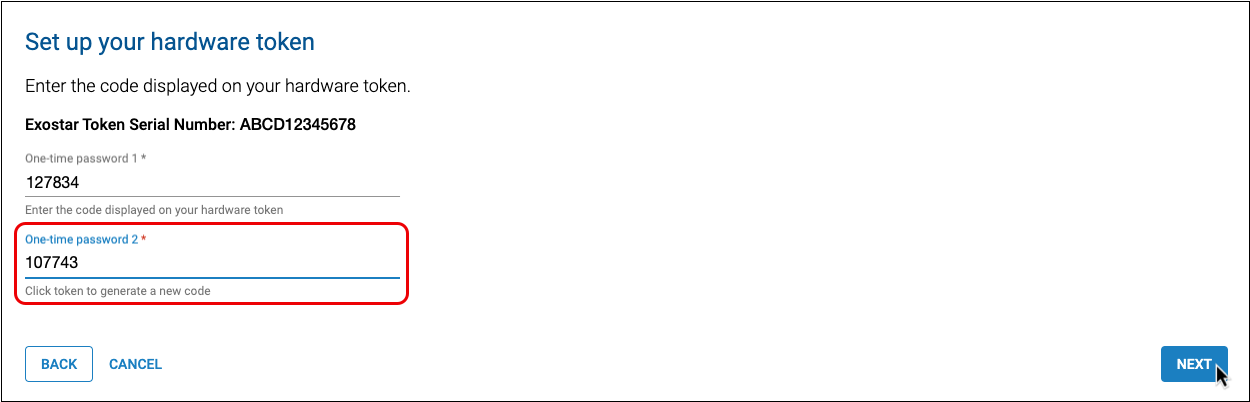
Click the “Next” button to finish registering your hard token.
Once registered, your hard token is bound to your identity. Only you may use it as a second factor of authentication when sending electronic prescriptions for controlled substances from PCC eRx.
30-Minute Timer Done!: Now that your hard token is active, the time-sensitive part of the EPCS registration process is complete. The remaining steps are not required to be completed within the 30-minute session time frame, but PCC recommends that you complete them straight away.
Activate Your Soft Token
Set up your smartphone as an additional factor of authentication for EPCS. In order to activate this authentication method, you must have your smartphone in hand, ideally with the Authy app already downloaded and registered.
While it is not recommended, you can optionally skip this step now and configure your soft token later.
Under Mobile ID, Click “Activate”
Click the “Activate” button in the Mobile ID section of the page.

Mobile ID is Exostar’s term for a soft token.
Enter Your Cell Phone Number and Email
Enter your mobile phone number and the email address you used to set up the Authy app.
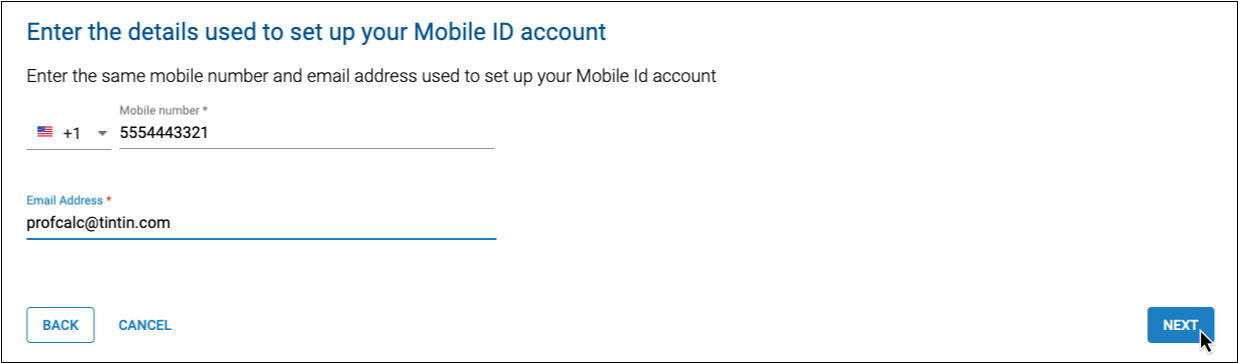
Then, click the “Next” button to initiate the part of the process that takes place on your smartphone.
Pick Up Your Smartphone
Pick up your smartphone to finish activating your soft token.
Approve the Request to Bind PCC eRx to Your Device
Approve the request from the Authy app to bind PCC eRx to your device.
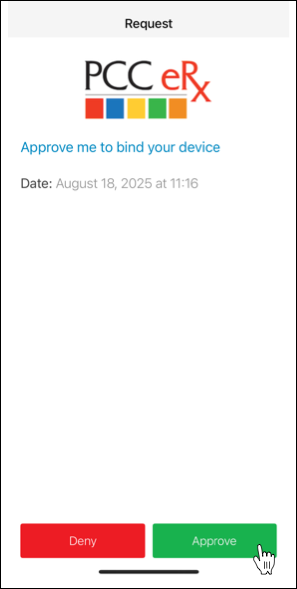
Once you approve the pending request, a PCC eRx soft token appears under your PCC account within the Authy app.
No Request? Follow Manual Set Up Instructions: If you have the Authy app installed but do not receive the request bind PCC eRx to your device, you can manually set up your soft token instead.
Don’t Have the Authy App? Download It Now: If you do not have the Authy app installed on your smartphone, you will receive a text message with a download link instead of a push notification. Open the text message, click on the link, and install the Authy app before activating your soft token.
Once registered, your soft token is bound to your identity, phone number, and device. Only you may use it as a second factor of authentication when sending electronic prescriptions for controlled substances from PCC eRx.
If you lose or change devices or phone numbers, you can restore access to your soft token.
Activate an Exostar Account Backup
Provide Exostar a phone number that can be used to verify your identity in case you lose access to your hard and soft tokens. This simple step will save you from having to repeat the identity proofing process.
Under Phone-Based, Click “Activate”
Click the “Activate” button in the Phone-based section of the page.
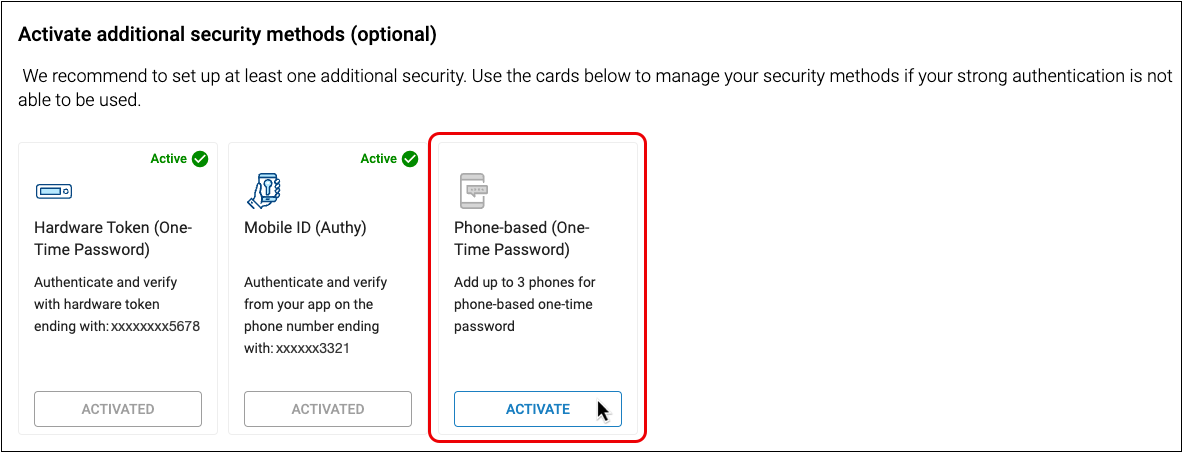
This authentication method may only be used as a failsafe to access your Exostar account details, not for sending electronic prescriptions for controlled substances.
Enter Your Phone Number
Enter your phone number, then confirm it by typing it again.
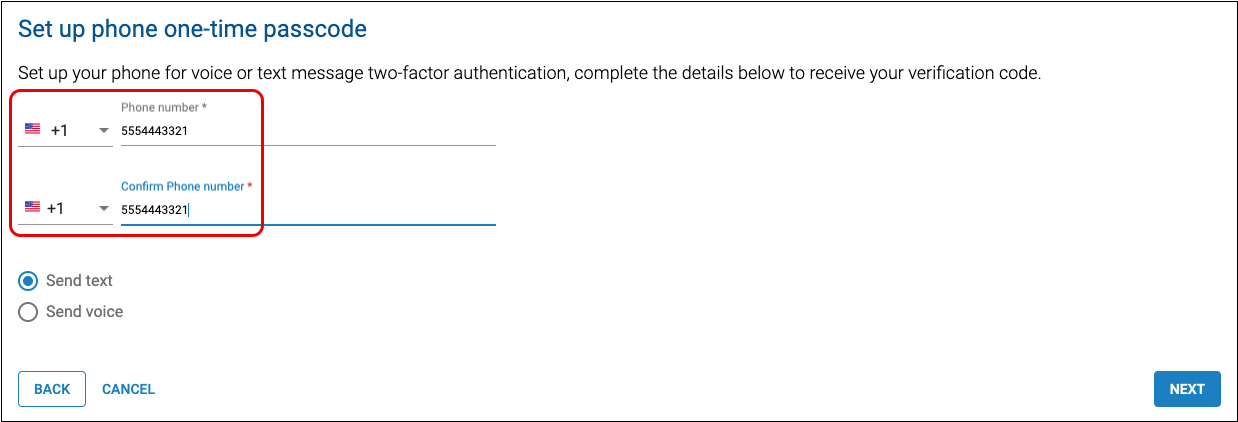
You can enter a landline or mobile phone number.
Select “Send Text” or “Send Voice”
Select how you would like to receive verification codes from Exostar. You can receive codes by text or phone call.
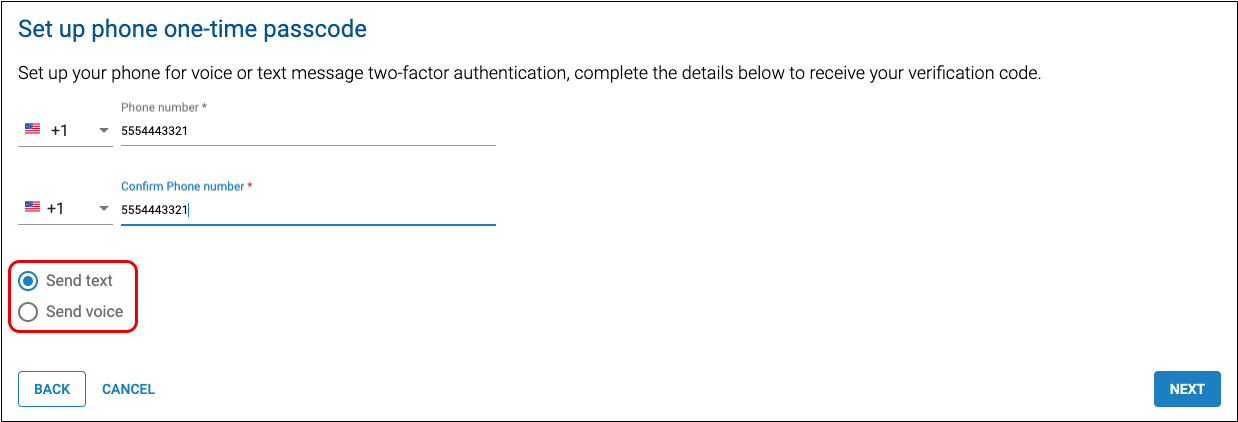
If you entered a landline, you must select the voice method of verification.
Click “Next” to Receive a Verification Code from Exostar
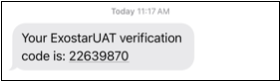
Click the “Next” button, then check your phone for a verification code from Exostar.
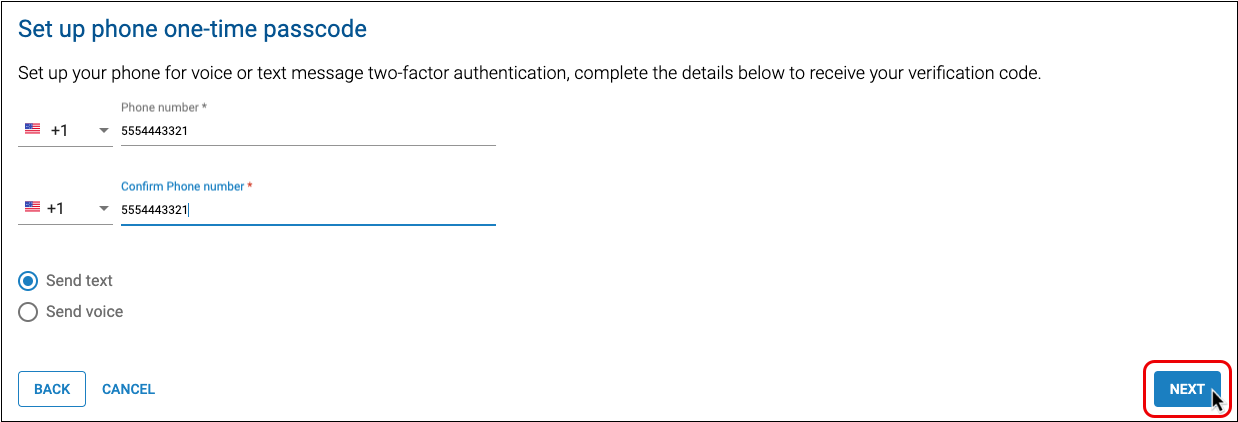
You will receive the verification code by text or phone call in accordance with your preference.
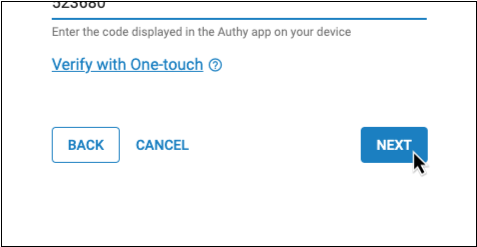
Enter the Verification Code
Enter the verification code from Exostar into the “Verification Code” field in PCC eRx.
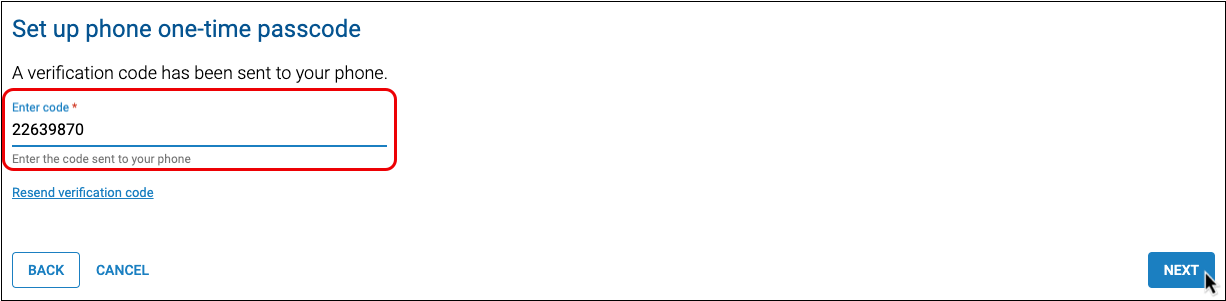
Then, click the “Next” button to finish registering your phone number as a backup authentication method for Exostar account access.
Resend Code: If you do not receive a verification code from Exostar, click “Resend verification code” and follow the instructions.
Click “Finish”
Congratulations! You have successfully completed registration for EPCS. Click the “Finish” button to exit the registration process.
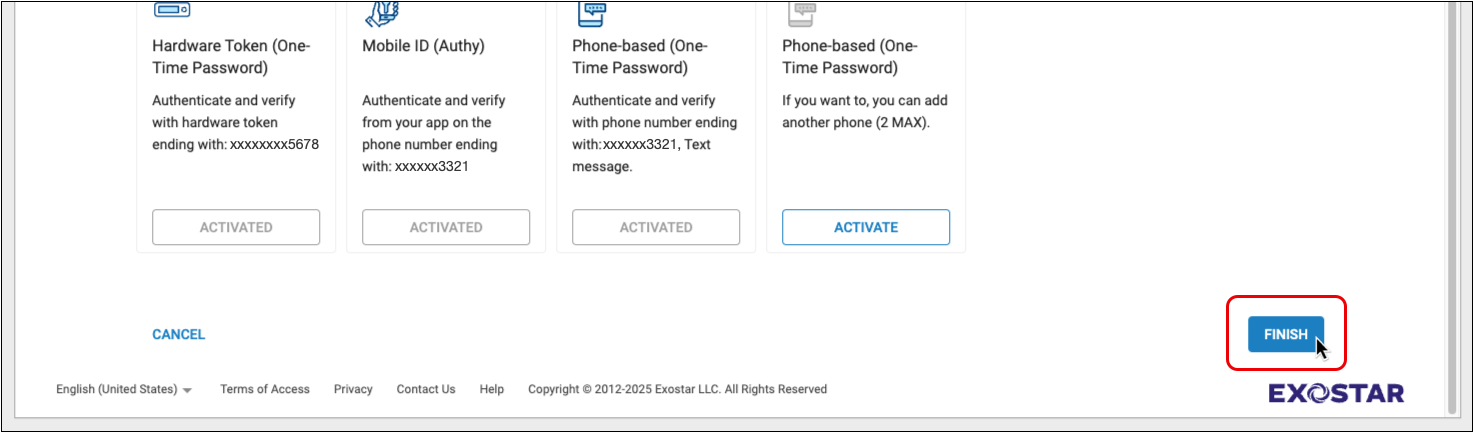
You are now approved to send prescriptions for controlled substances from PCC eRx.
Start Prescribing
The EPCS Status section of the My Settings page indicates when you have successfully completed EPCS registration.
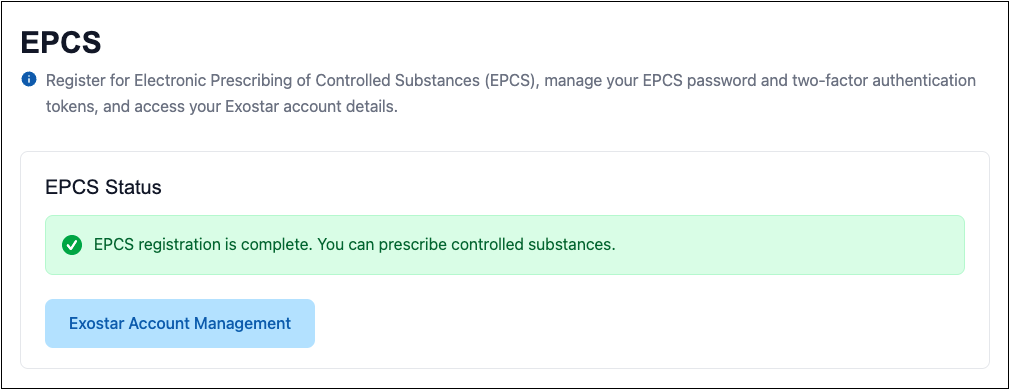
It may take up to 48 hours after you complete registration for pharmacies to recognize your status as a verified prescriber of controlled substances for your practice.
To learn more about prescribing controlled substances, read Prescribe Controlled Substances.
To learn about how to manage your tokens, read Manage Your EPCS Tokens.
Alternate Workflows
Some registrants are offered alternative identity proofing methods or are required to undertake manual soft token setup.
Other Identity Proofing Methods
Some registrants are not offered the option to complete ID proofing using a mobile phone or are unsuccessful when they attempt to do so. In this case, they may be offered a different method of identity proofing.
Answer Credit History Questions
If you have a complex credit history or if you are unable to complete mobile ID proofing, you may instead be offered identity proofing via credit history questions.
With this method, you must answer the questions generated from your Experian credit bureau history to confirm your identity. The questions might include current or past loan payment amounts, addresses, or the names of financial institutions with which you are or have been affiliated.

Two Attempts: If you do not answer enough questions correctly on the first try, you can make one additional attempt. After two unsuccessful attempts, you must schedule a Webcam Proofing session.
Complete Webcam Proofing
Webcam Proofing is a live video interview with Exostar, the credential services provider that authenticates PCC prescribers for EPCS. Webcam Proofing is the only option for prescribers who are not able to pass other forms of ID proofing.
Continue ID Proofing from the My Settings Page
Open the My Settings page in PCC eRx and click “Continue ID Proofing” in the EPCS section.
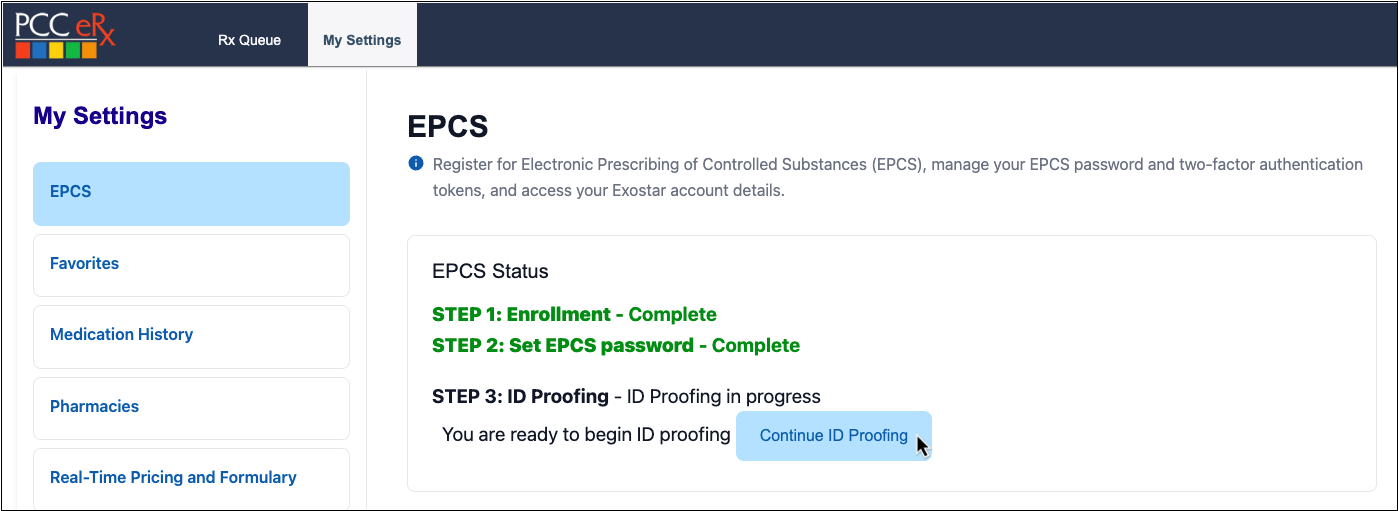
You can access PCC eRx from the Rx Queue or within a patient’s chart.
Select “Webcam Proofing”
If blank, enter the serial number from the back of your hard token. Then, click the “Webcam Proofing” button.
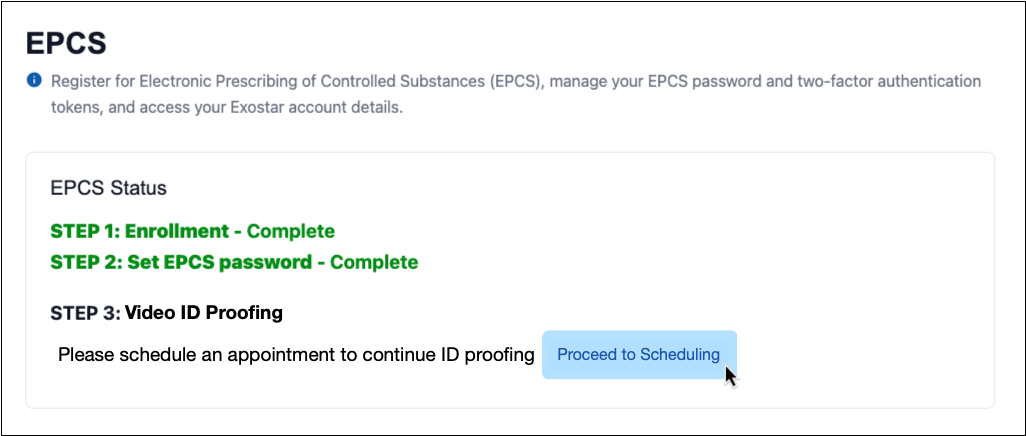
Review Exostar’s Instructions, then Start Proofing
Review the instructions on the screen then click the “Start Proofing” button to schedule a Webcam Proofing appointment.
Agree to Exostar’s Terms and Conditions
Read Exostar’s terms and conditions, then click the “Agree and Continue” button to proceed to the next step.
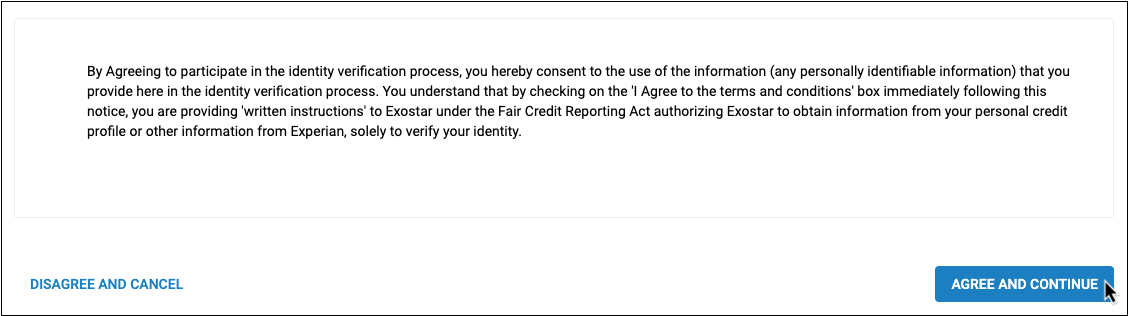
Exostar sends a copy of the agreement and supplemental materials to the email address that your practice administrator used to enroll you for EPCS.
Select an Appointment Date and Time
Choose a date and time for your Webcam Proofing session with Exostar.
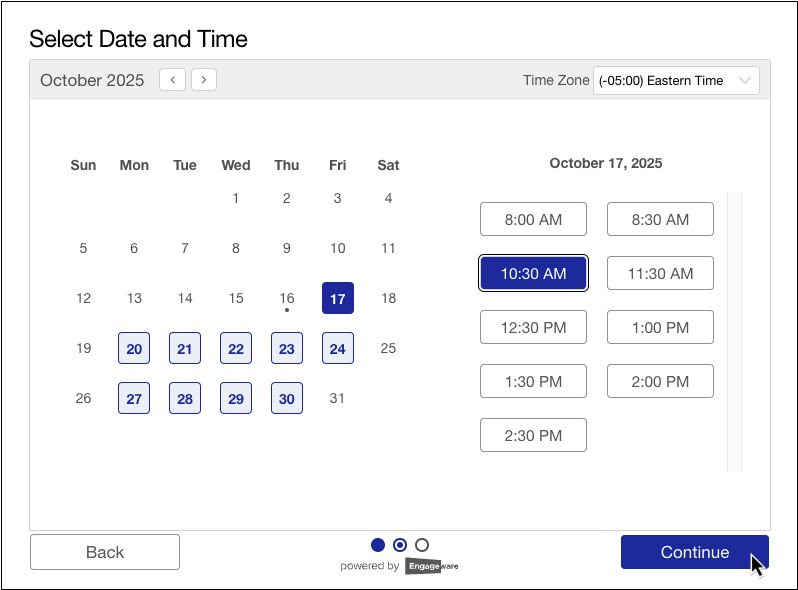
Then, click the “Continue” button.
Enter Your Personal Contact Details
Enter your personal contact information.
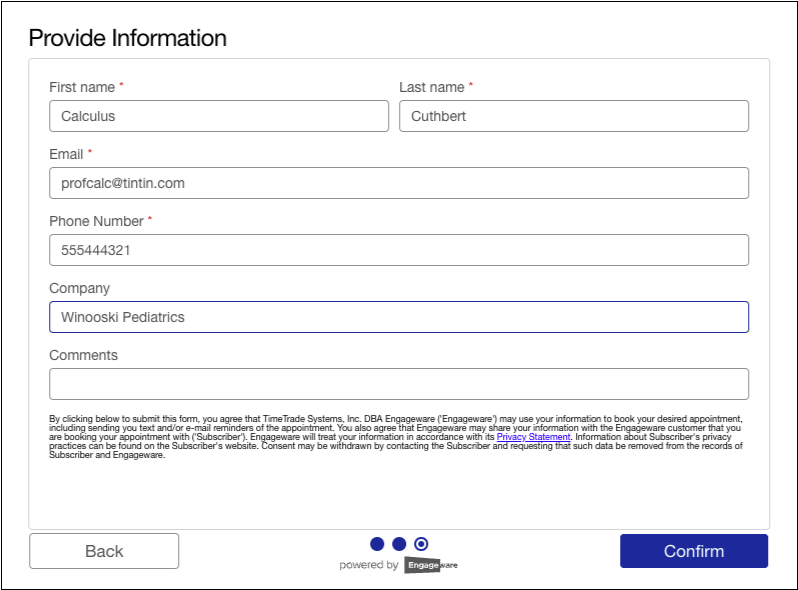
You must enter your first and last name, email address, and phone number. You can optionally enter the name of the practice where you work, and comments for the Exostar interviewer.
Confirm Your Appointment
Click the “Confirm” button to finish scheduling your Webcam Proofing session with Exostar.
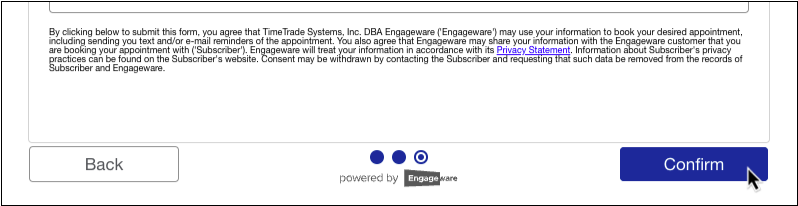
Optionally use the “Add to Calendar” link on the confirmation page to add the appointment to your personal calendar.

When you are done, close the window.

Prepare for the Video Interview
Prepare ahead of time for the success of your video interview with Exostar:
- Check that you have a valid and unexpired photo ID that is either issued or accepted by the U.S. government. Driver’s licenses are the most common form of identification used for Webcam Proofing.
- Check that the name on your photo ID matches the name on your PCC EHR user account. If it does not, contact PCC Support as soon as possible for help resolving the discrepancy.
- Prepare two proof of address documents from different sources to show the interviewer, such as utility bill and a bank statement. Additional documentation may be required at the interviewer’s discretion.
- Have a working webcam or smartphone with a camera.
- Run a Microsoft Teams system test before your appointment.
- Prepare a place to write down the activation code you will receive at the end of your live video interview.
Check Your Email for the Meeting Link
Shortly before your video interview, Exostar sends a Microsoft Teams meeting link at the email address you provided when you scheduled your appointment.
Join the Meeting at the Appointed Time
When it’s time for your appointment, click the link in your email to join the meeting. Connect to video for the meeting but do not connect to audio.
Answer the Call from Exostar
When Exostar is ready to start the interview, the interviewer calls the number you provided when you scheduled your appointment. Answer this call to begin the interview.
Participate in the Interview
The Exostar interviewer checks your photo ID and ask you questions to confirm your identity. Interviewers may use their discretion to request additional documentation to confirm your identity.
If You Pass: If you are successful, you receive an activation code that you must enter into PCC eRx to confirm that you passed Webcam Proofing.
If You Are Unsuccessful: If you are unsuccessful, learn the reason why from the interviewer, then contact PCC Support for assistance.
Write Down Your Activation Code
If you successfully pass Webcam Proofing, the interviewer provides you with an activation code at the end of the session.
Write down the code somewhere you can easily reference it.
Enter Your Activation Code into PCC eRx
Open the My Settings page in PCC eRx and click the “Continue ID Proofing” button. Enter the activation code from your Webcam Proofing session, then proceed to registering your tokens as additional factors of authentication for EPCS.
For more information about the Webcam Proofing process, read the “Live Video Proofing” section of Exostar’s Identity Proofing Resource page.
If you exit the Webcam Proofing process before scheduling an appointment, you can resume from the My Settings page in PCC eRx by clicking the “Webcam Scheduling” button.
Manually Activate Your Soft Token
If your smartphone is not set up to allow notifications from the Authy app or you come across other issues while trying to set up your soft token using the steps above, follow the steps in this section instead.
Get to the Soft Token Activation Workflow
You can manually activate a soft token during the EPCS registration process, or later from the My Settings page in PCC eRx. Choose the option that fits your situation best, then move on to the next step.
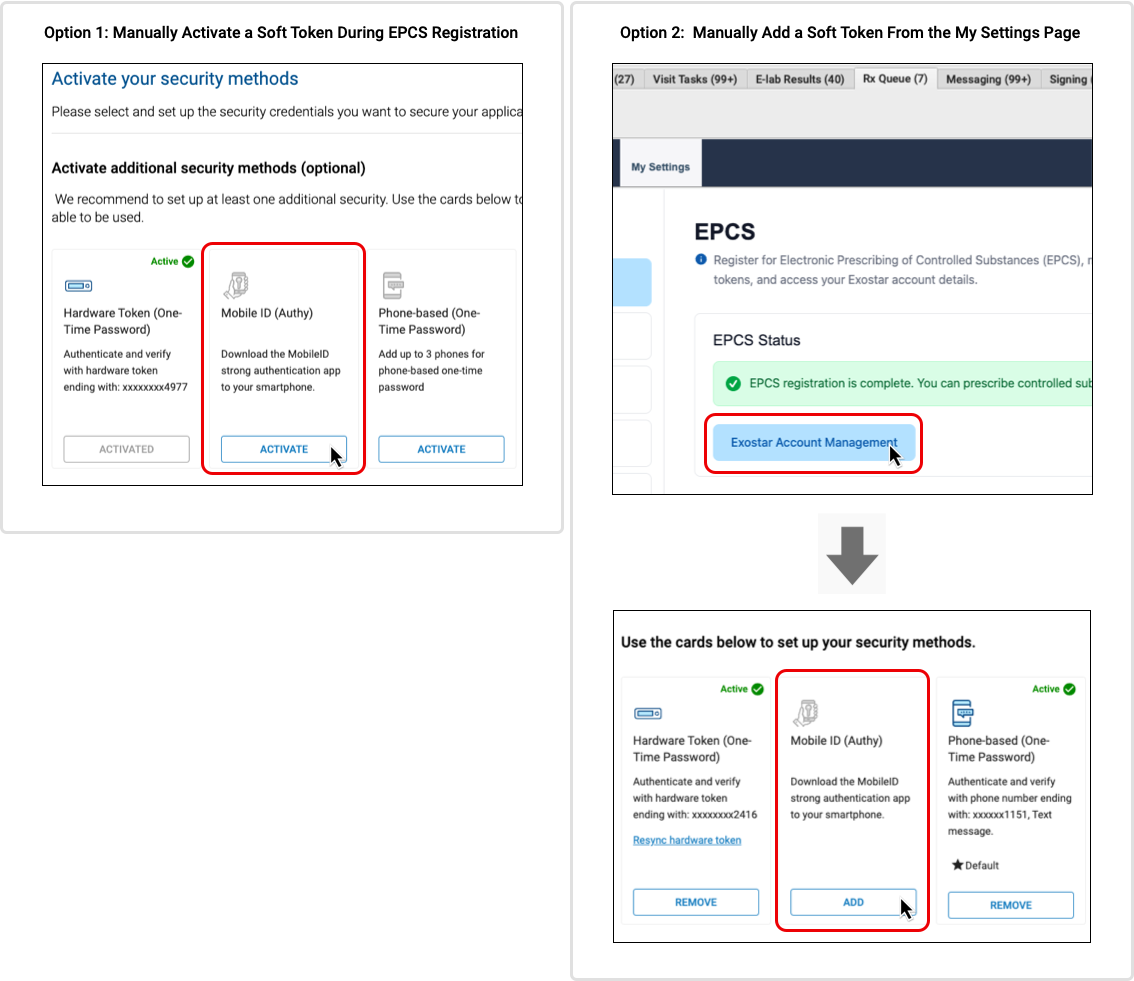
Option 1: During EPCS Registration: Click the “Activate” button in the Mobile ID section of the Activate Your Security Methods page.
Option 2: From the My Settings Page: Click the “Exostar Account Management” button on the EPCS tab of the My Settings page in PCC eRx. Then click the “Add” button under Mobile ID.
Enter Your Cell Phone Number and Email
Enter your mobile phone number and the email address you used to set up the Authy app.
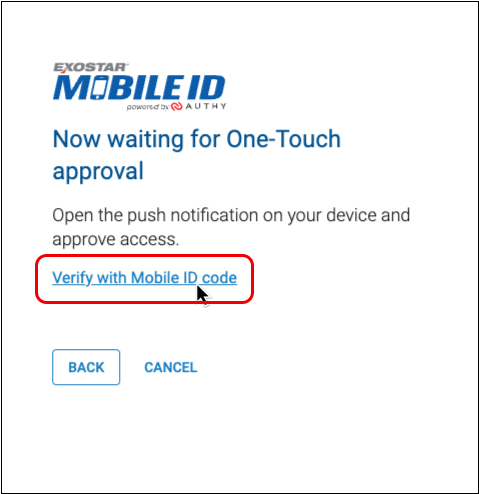
Click “Verify with Mobile ID”
Click the “Verify with Mobile ID code” link.
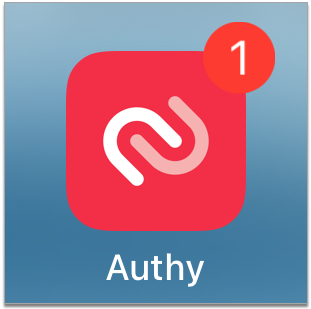
On Your Phone, Open the Authy App
Find the Authy app on your smartphone and open it.
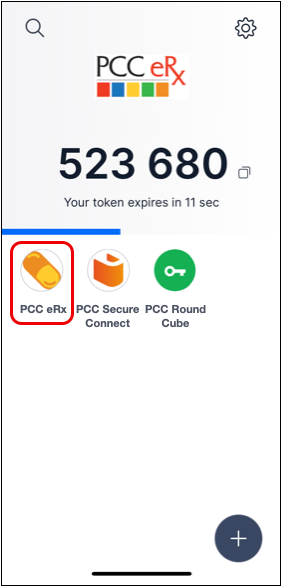
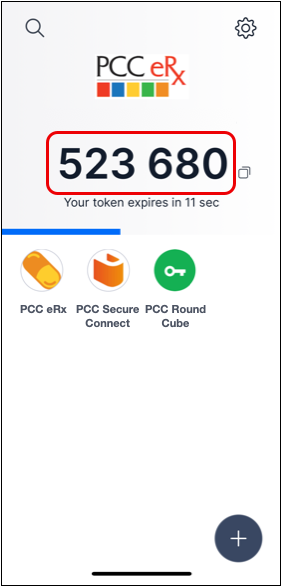
Locate the PCC eRx Soft Token in Authy
In the Authy app, locate your PCC eRx soft token and tap on it.
The PCC eRx soft token is a one-time password generator labeled “PCC eRx”. The soft token generates a new one-time password every thirty seconds.
Enter a One-Time Password from Your Soft Token into PCC eRx
Enter a code from your PCC eRx soft token into the field labeled “Enter Code” on your computer screen.
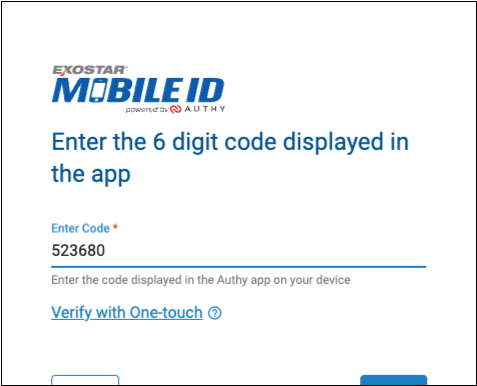
Click “Next” to Finish Activating Your Soft Token
After entering the one-time password from your soft token into PCC eRx, click the “Submit” button.