Practice Management Program Name Index
PCC’s previous product software suite, Partner, was a collection of individual programs. The programs all had a single-word name for easy reference.
This document is a glossary of the old program names, with brief descriptions of their function.
Deprecated: In most cases, the programs or tools list below have been replaced by a modern solution in PCC EHR. Contact PCC Support for help finding the right tool for your office’s needs.
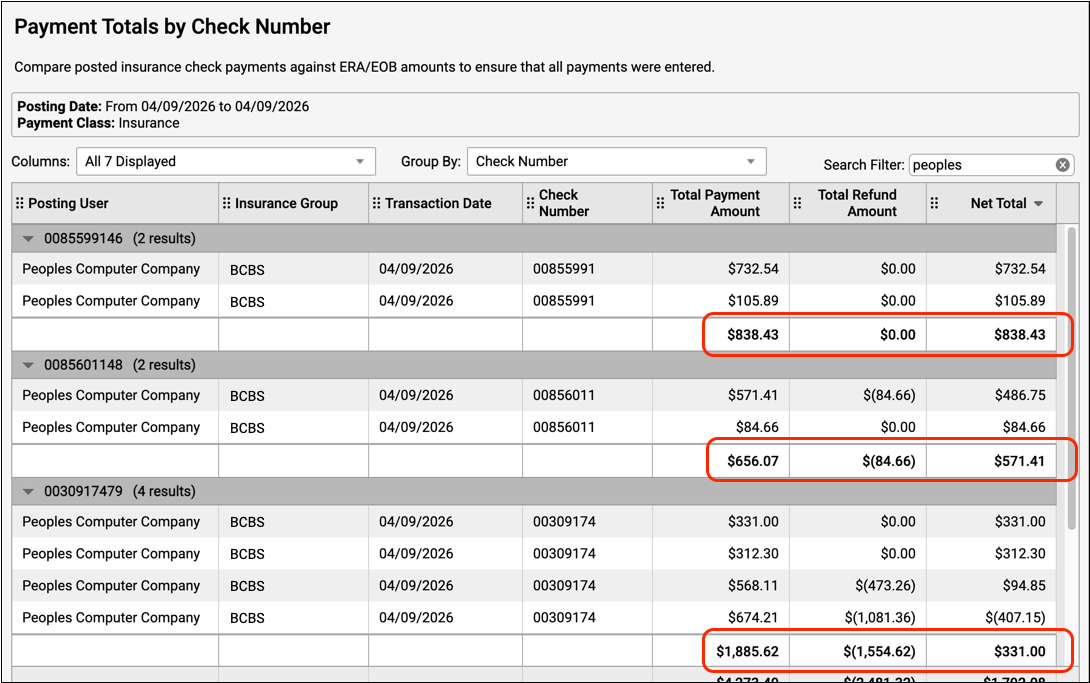
activity- The Insurance Activity Summary (
activity) provides a quick review of activity for each insurance group for a given date range. Becauseactivitydisplays the number of visits and charges, you can see which companies make up the largest part of your business. Since payments per visit are also on the report, you can useactivityto begin evaluating which companies are paying you well and which are paying you poorly. addblock- The Add Blocks (
addblock) program added a single block to the schedule for a given date, provider, block type, and time range. You could also review existing blocks, read block notes and remove blocks from withinaddblock. This functionality has been replaced by Appointment Book functionality. autopip- Autopost Insurance Payments (
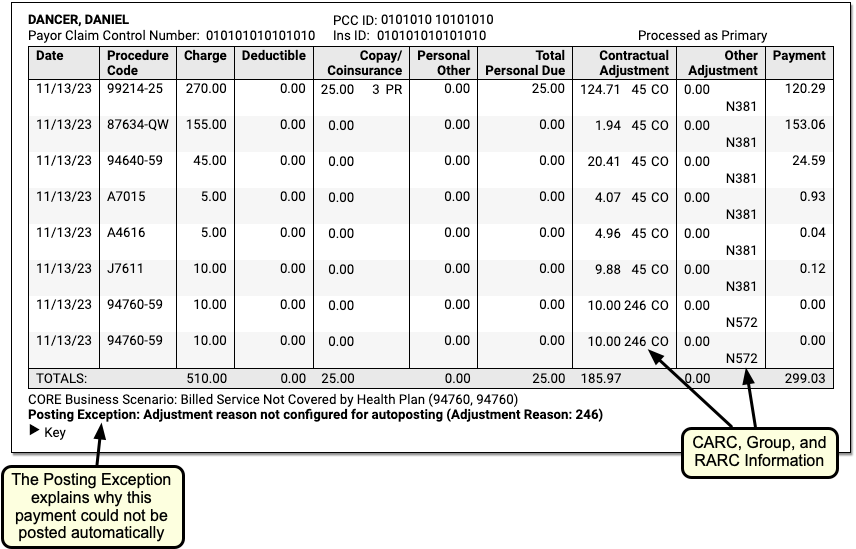
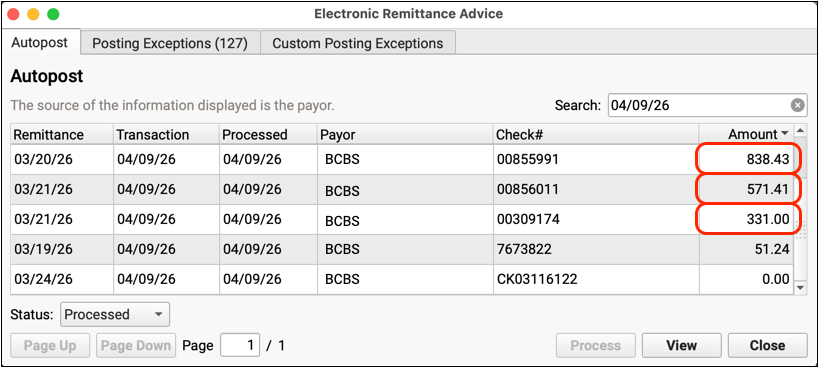
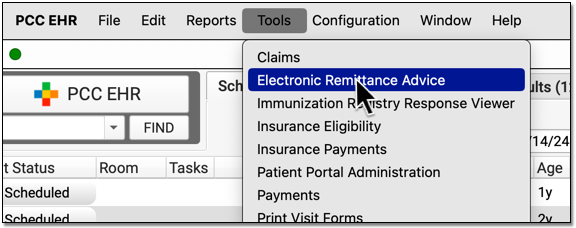
autopip) automatically processed and posted adjudication from ERAs sent to your practice. This functionality has been replaced by the Electronic Remittance Advice tool in PCC EHR. See Post Insurance Payments. - AniTa
- AniTa was a Windows program that some clients used to connect directly to PCC practice management tools before PCC EHR. TeraTerm was an older program used for the same purpose. PCC did not write AniTa or TeraTerm. These tools have been replaced by Practice Management in PCC EHR.
appts- The Appointment Summarizer (
appts) was a scheduling analysis report. It listed appointments by a variety of criteria and subtotaled by provider and visit reason. ardays- The A/R Days (
ardays) report ages your accounts receivable and shows the number of days of work outstanding in each aging category.ardayscan tell you, for example, how many days of your accounts receivable are over 90 days old. arra- The ARRA report reports on the Medicaid status of visits by patients within a given time frame. It is designed to help your office determine if you may qualify for the ARRA incentive program. For more information, read the ARRA Report help article.
autoflag- Your PCC system can automatically mark patients who haven’t visited recently as “Inactive”, or automatically add any other status flag based on a range of criteria. You can work with your PCC account team to create up to six sets of unique criteria for assigning status flags. Later, you can use
autoflaglogto see what flags were assigned to patients. Contact PCC Support for help configuringautoflag. autoflaglog- When your practice uses
autoflag, you can review which patients were marked as Inactive with theautoflaglogprogram. After you runautoflaglogand enter a date range, you will see a list of all patients who received the Inactive flag.
backups- The
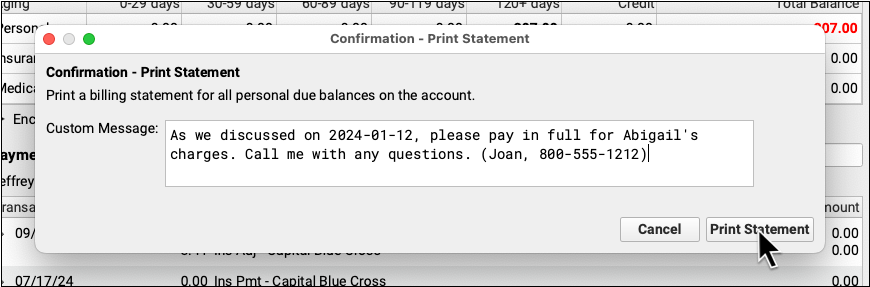
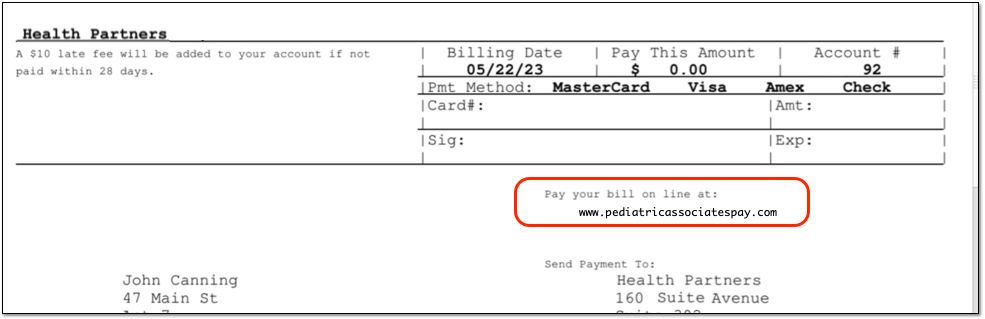
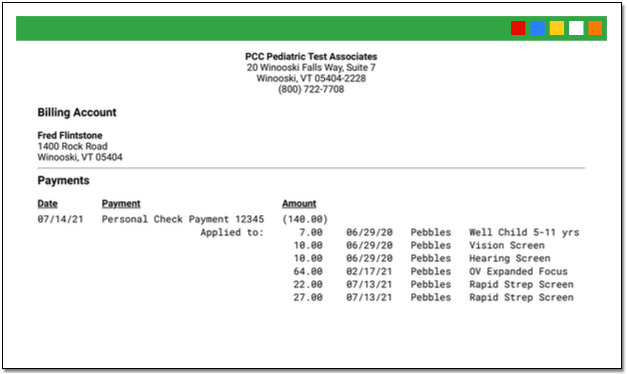
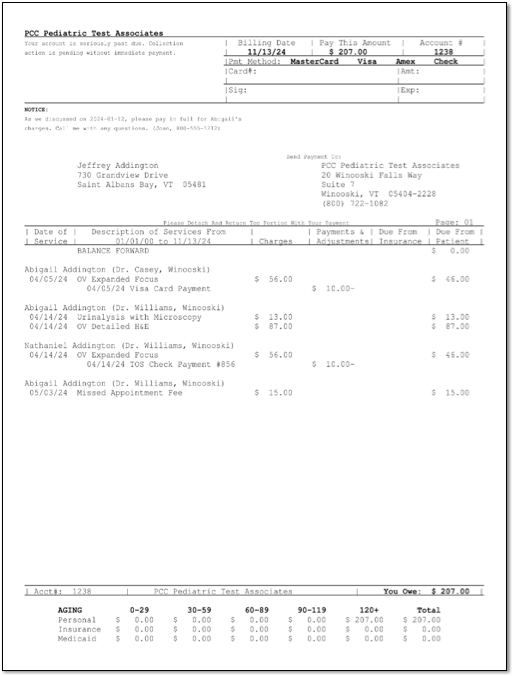
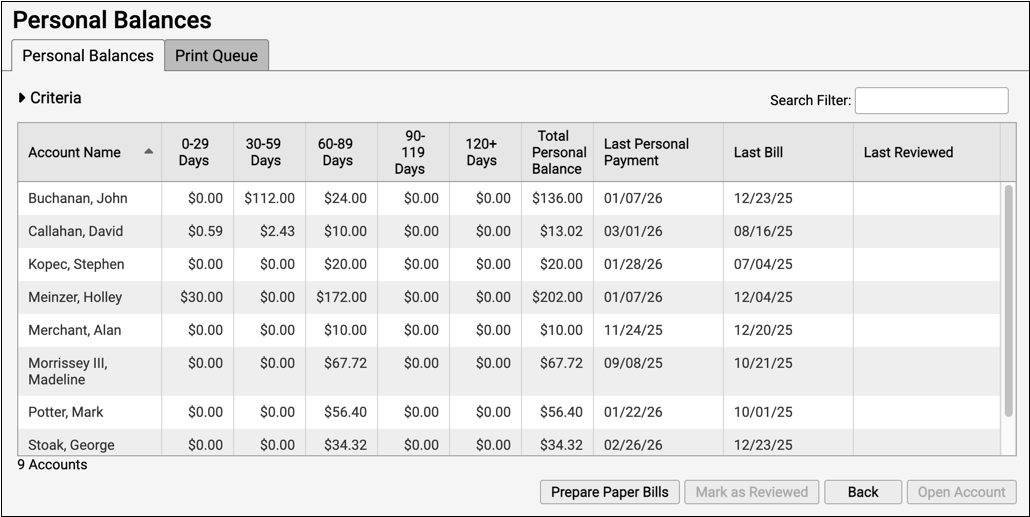
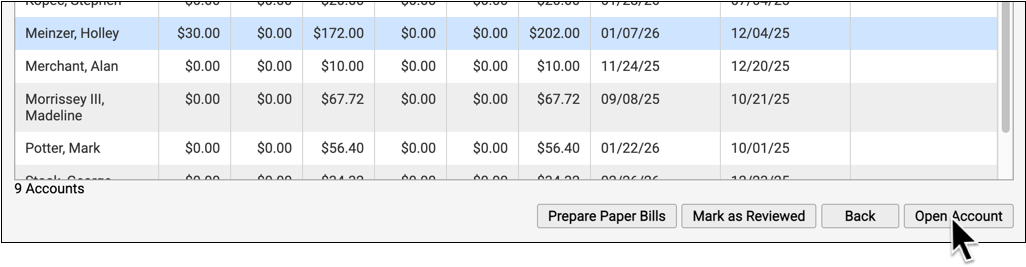
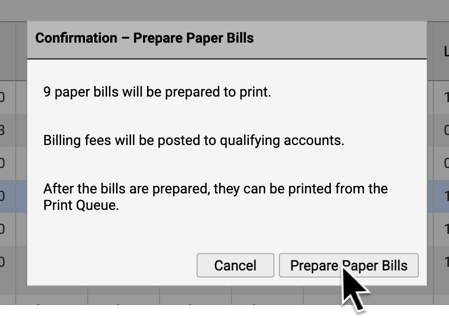
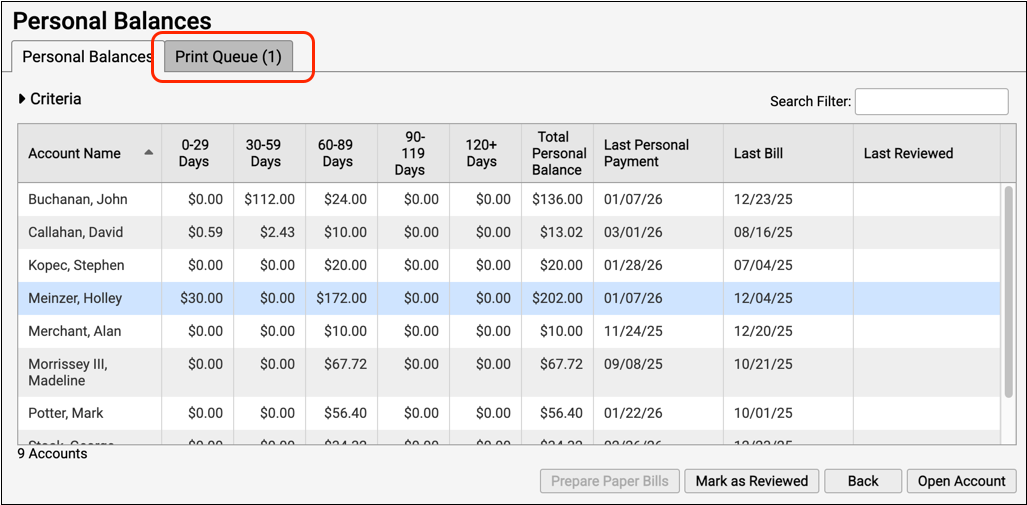
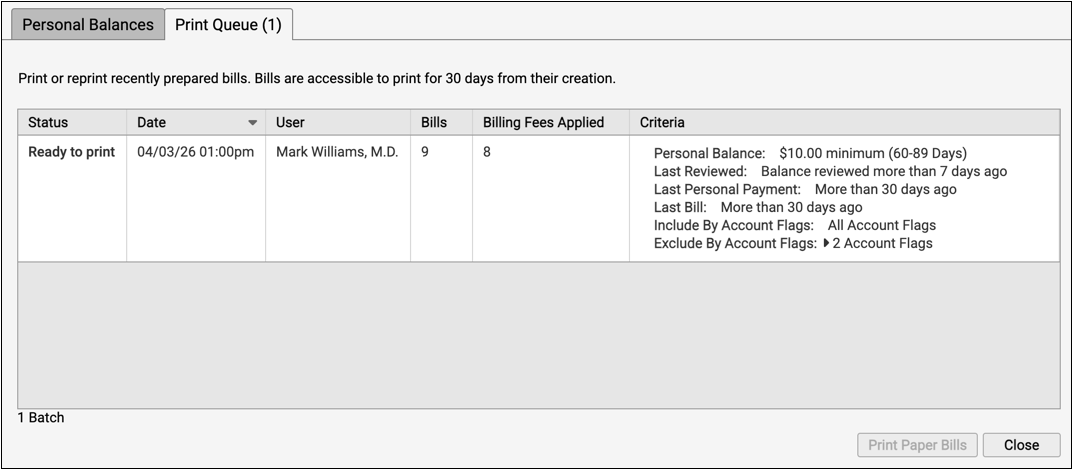
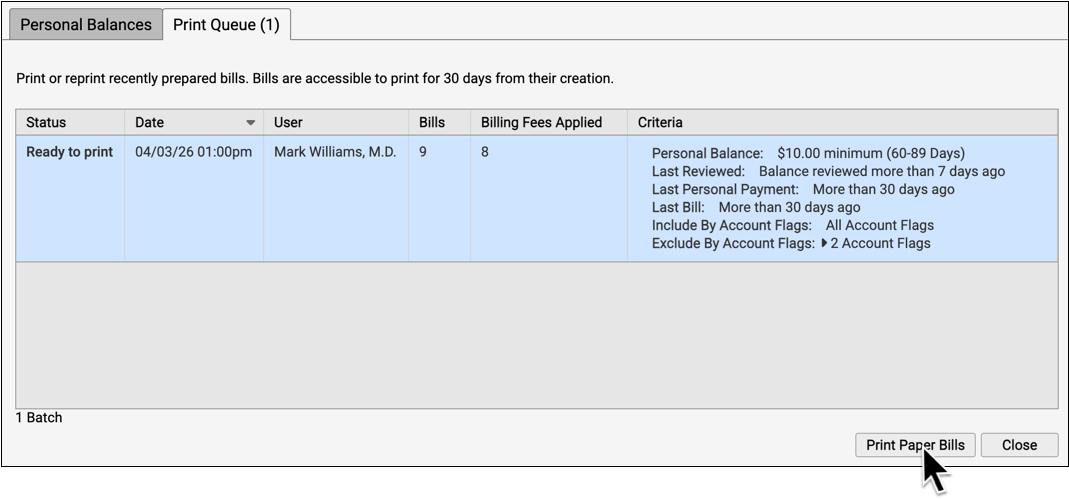
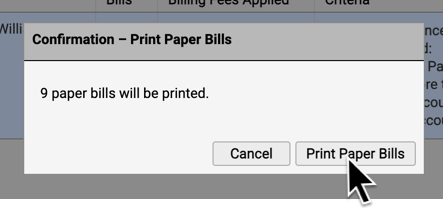
backupsprogram makes backups of your PCC Server. Backups occur every night, automatically, either into a cloud backup service or onto a local backup tape. You can runbackupsmanually if you need to create an additional backup or if the nightly backup failed. bills- The
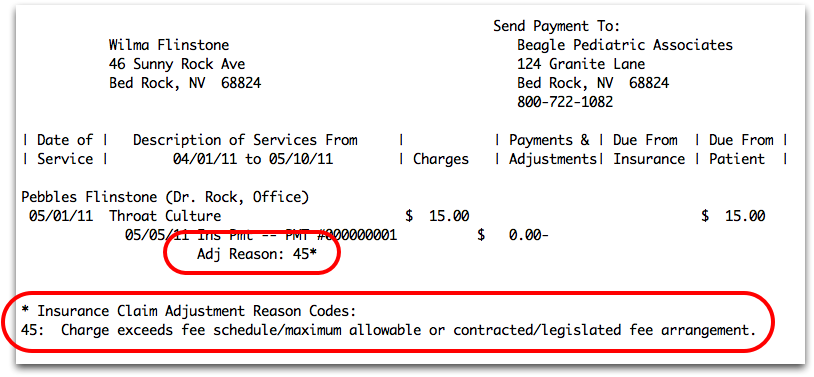
billsprogram generates personal bills. bump- The
bumpprogram lists overlapping appointments for any given day. byins- The
byinsreport lists all insurance plans by their insurance group. Insurance groups are important because many financial reports use them. The Tables tool in PCC EHR allows users to review the insurance table by group, makingbyinsobsolete. byproc- The
byprocreport lists all procedures by their procedure group. Procedure groups are used by various reports. The Tables tool in PCC EHR allows users to review the procedure table by group, makingbyprocobsolete. byprov- The
byprovreport lists all of your providers sorted by provider group. Provider groups are used by several programs and reports. caprep- The Capitated Plan Member Report (
caprep) provides usage numbers which can help you evaluate the pros and cons of a capitated plan. ced- The Configuration Editor (
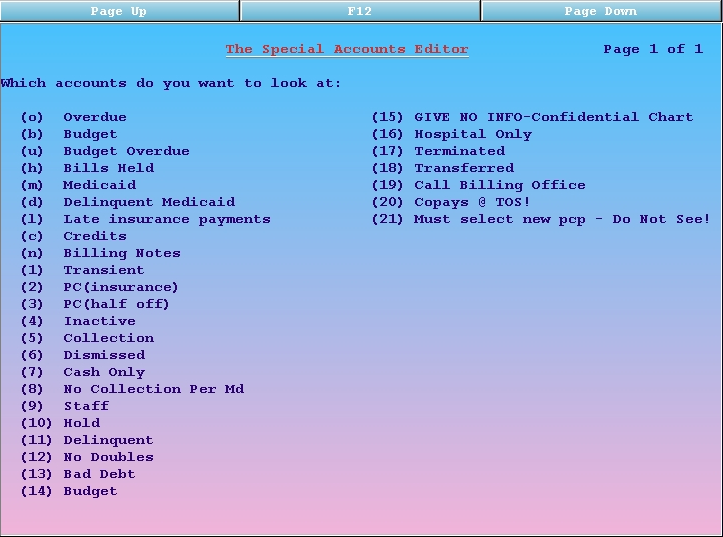
ced) contains lists of questions that control the behavior of some PCC programs. cfs- The Special Accounts Editor (
cfs) generates an interactive list of accounts. The available lists are based on your office’s status flags or one of several built in criteria, such as overdue accounts or accounts with credits. chart- The Appointment Book Displayer (
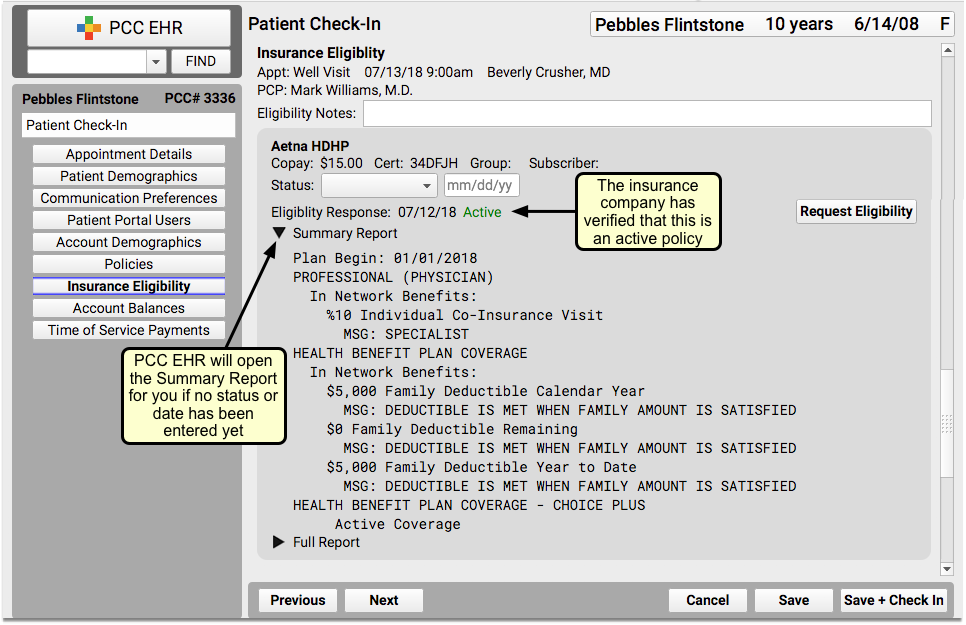
chart) was written to help users pull charts. It displays a single provider’s appointments for a single day without showing spaces for available appointments.chartis usually shorter than thescanreport, making it easier to read and print. checkin- The Patient Checkin (
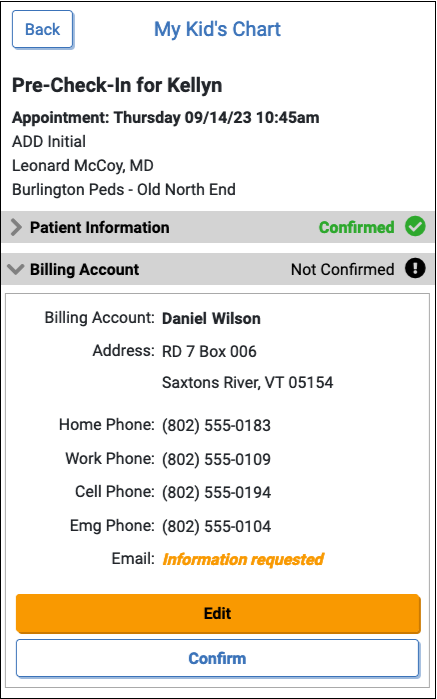
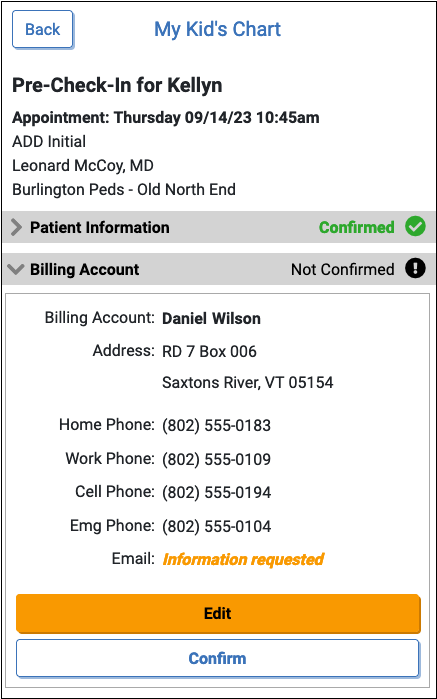
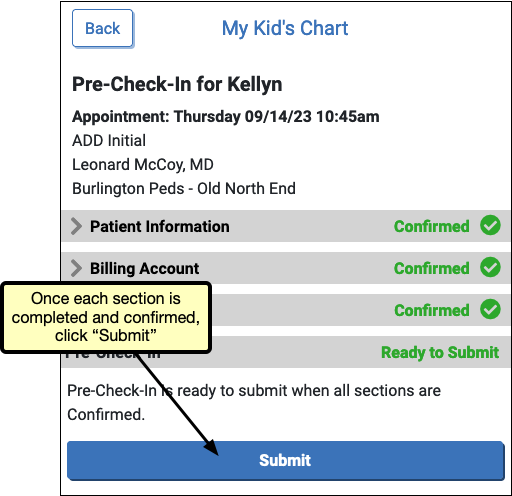
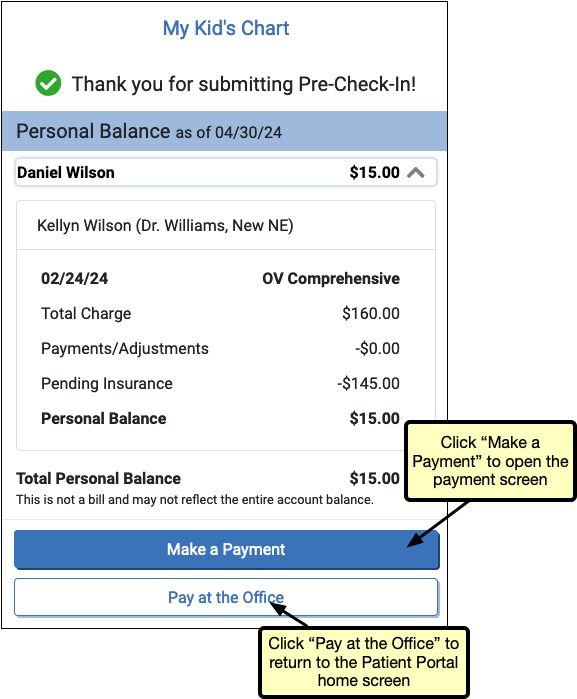
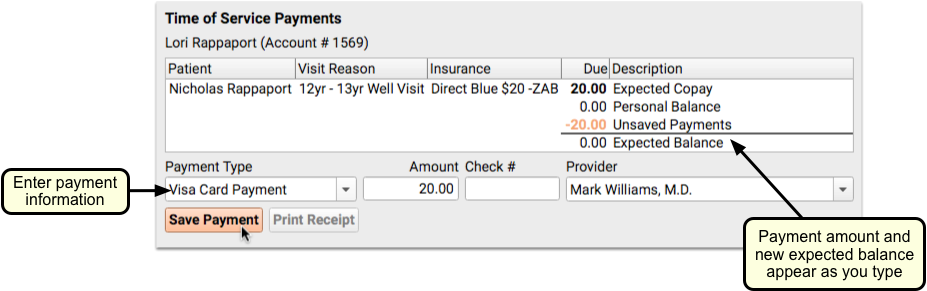
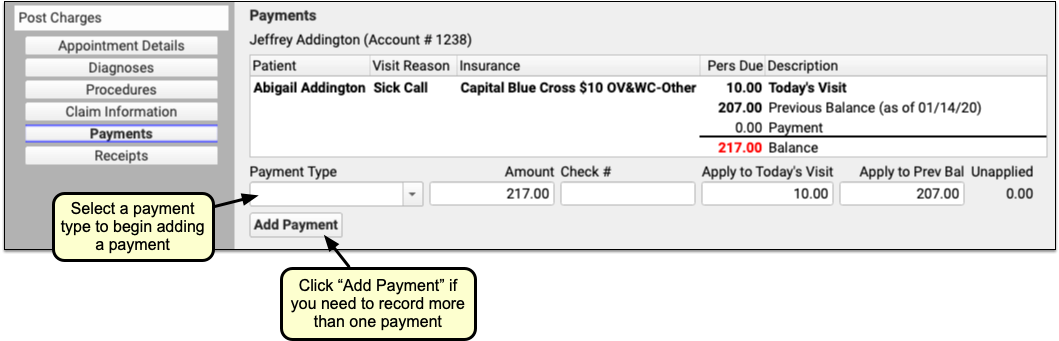
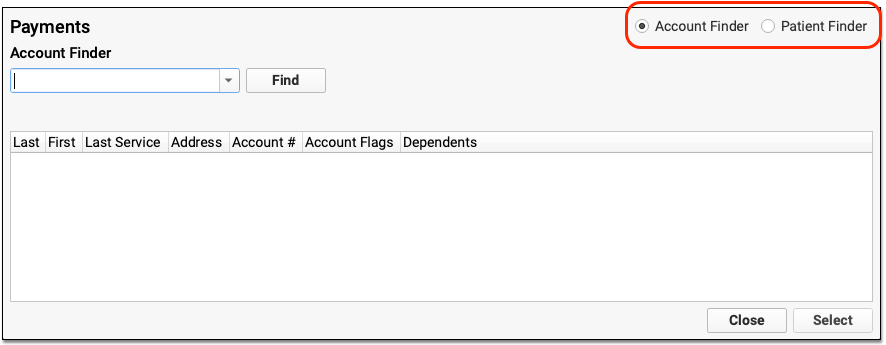
checkin) program is a Practice Management program used to confirm or update a patient’s demographic, insurance, and balance information. It has been replaced by Patient Check-In in PCC EHR. checkout(formerlychuck)- The Checkout program (
checkout) is a Practice Management program used to posts procedures, diagnoses, payment, and accompanying claim information. It has been replaced by Post Charges in PCC EHR. chuck -d- The
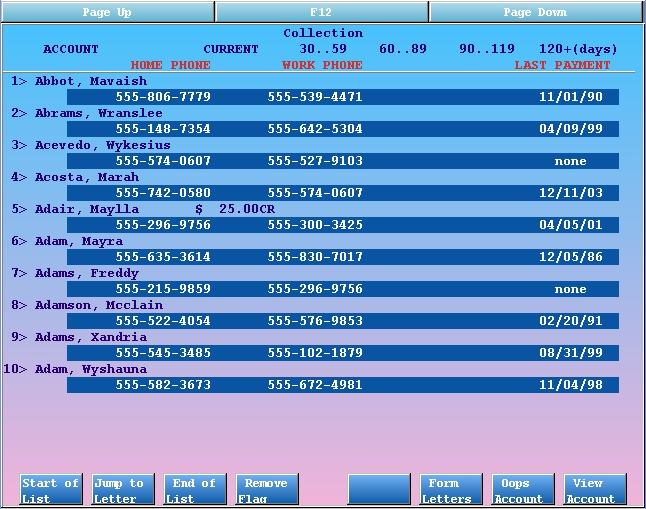
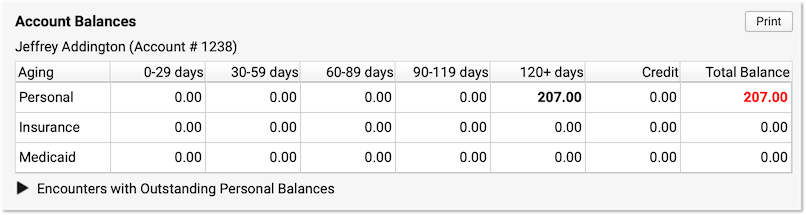
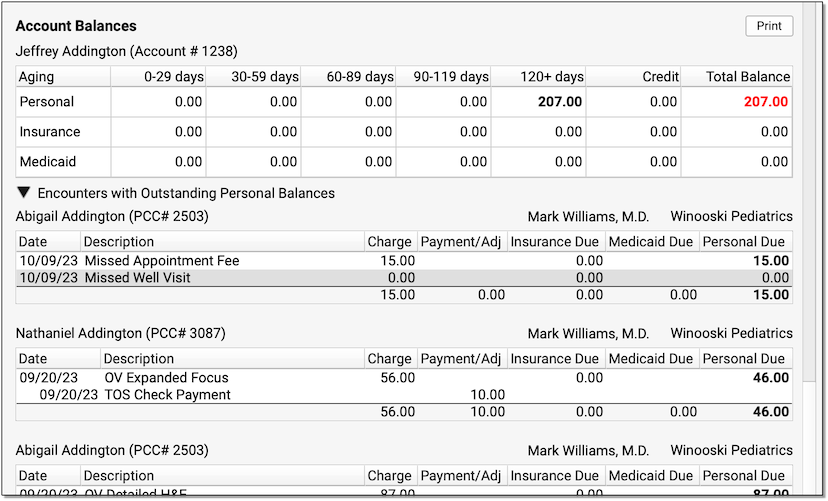
chuck -dcommand is a troubleshooting command for reviewing configuration settings in the charge posting infrastructure on your PCC system. It displays charge-posting and HCFA configuration settings for your system. If there are any apparent errors, the word “ERROR” will appear in the report’s output. When you runchuck -d, you can use the pipe symbol to send the output toless. At a command prompt, type “chuck -d | less”. This will prevent the report’s text from scrolling off your screen. coll- The Collection Report (
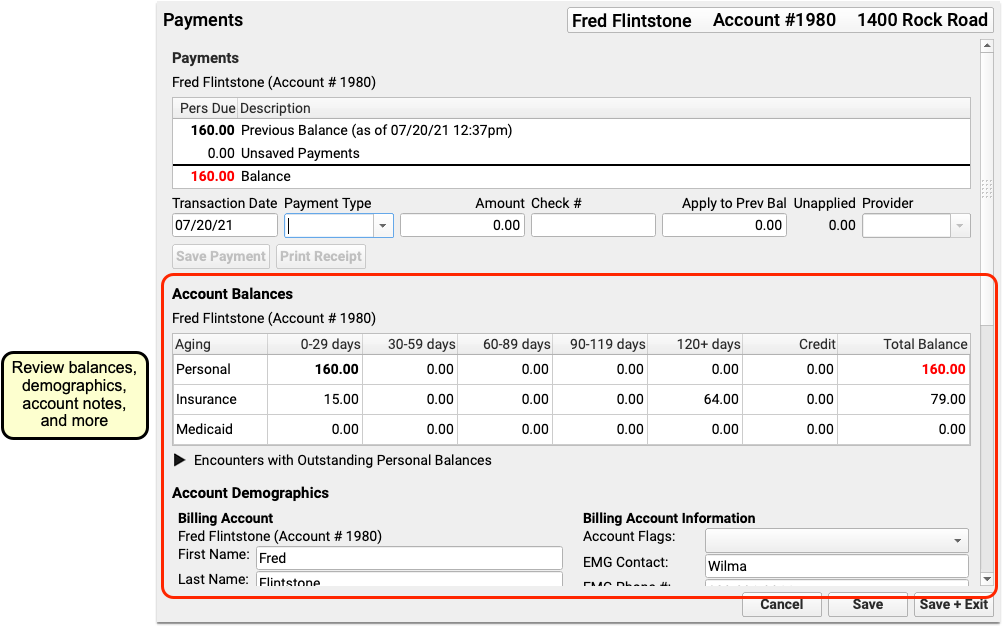
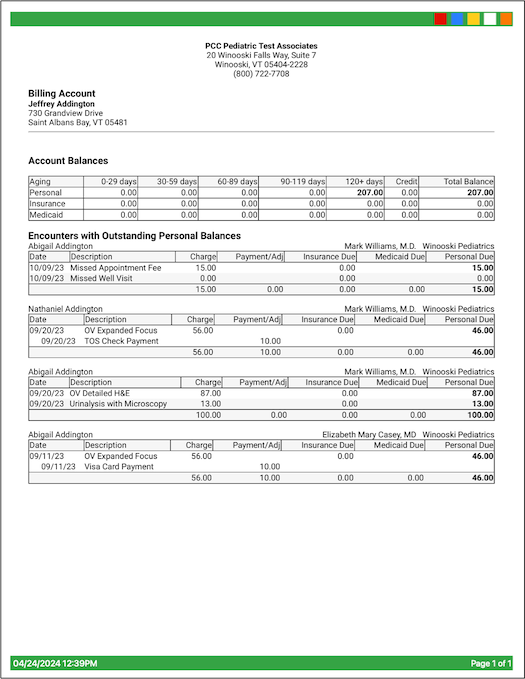
coll) shows detailed information about outstanding charges for a single account. Basic demographic information and payments for any date range are also available in the report.collcan also display all payments from a family during a certain time period, such as a full tax year. The Collection Report has been replaced by the Encounters with Outstanding Personal Balances function available during Patient Check-In, in the Payments tool, and in other screens in PCC EHR. cscb- The Consistent Sick Call Blocker (
cscb) places multiple blocks in Partner’s schedule according to a specified date range and list of providers.cscbworks from block template files that must be edited before running the program. csedit- The Charge Screen Editor (
csedit) allows you to configure which diagnoses and procedures appear on the charge posting screen incheckout, the charge posting tool found in Practice Management. You can link custom lists of procedures and diagnoses to different locations, providers, and visit reasons. curimms- The Current Immunization (
curimms) report and the Epidemic Prevention (epidemicreport both check for missing immunizations based on billed data. Thecurimmsreport output can be added to a paper forms and will show you if your system does not have a billing record for a specific immunization for the patient. Theepidemicprogram can be run on an entire age group and will list all patients who do not have immunization records that meet your system’s configurable immunization standards. For a more powerful tool with better output, see the Overdue Vaccine Recall report. cvxreport- The Immunization CVX Configuration Reports (
cvxreport) program lists your practice’s immunizations and diseases, along with the CVX codes currently assigned in your Immunization and Disease table. When you have a CVX code assigned to an immunization, the report also displays that code’s official CDC name. Use this report to get a quick look at your configuration and spot any immunizations with missing or incorrect CVX codes. dailycheck- The Daily Check program (
dailycheck) lists all visits posted on a single day or range of days. The report includes every diagnosis, procedure, amount charged, and payment posted. Usedailycheckto review a day’s postings and compare them against paper encounter forms. Some office managers run dailycheck each day to review the billing for encounters before claims are submitted. For more information, read the Daily Check help article. daysheet- The Daysheet report shows all charges, payments, and adjustments for any date range or a single day. If problems arise while balancing out at the end of a day, the
daysheetreport can help reveal why. Every entry includes the poster’s username. The report includes removed or changed items. deposit- The
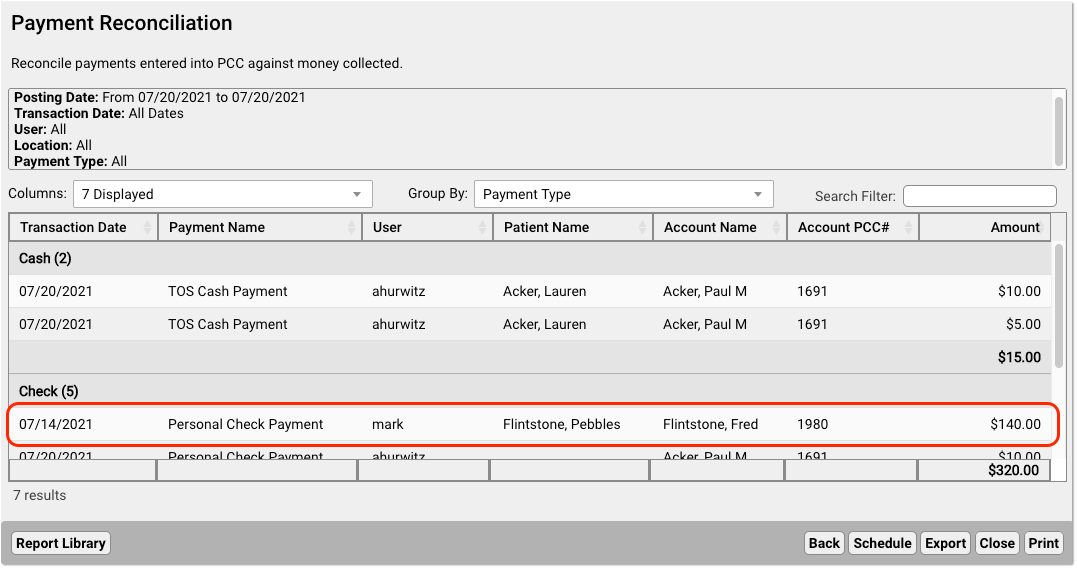
depositreport lists all cash, check, and charge payments posted on a single day or date range. A practice can reconciledepositagainst their cash drawer at the end of the day or the end of a shift. Each payment includes the username of the person who posted it.
dsscan- The Daysheet Scan (
dsscan) displaysdaysheetentries for one particular account. You can see every charge, payment, or adjustment posted or deleted on an account, along with the user who performed the action.dsscanis useful when you need to audit account activity, as it can make it easy to see (for example) when a charge is posted by one user and deleted by another user. duplicates- The Duplicate Account/Patient Report (
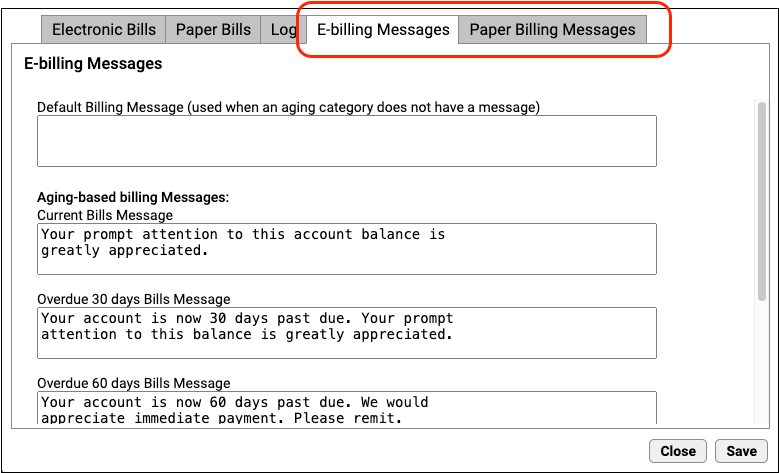
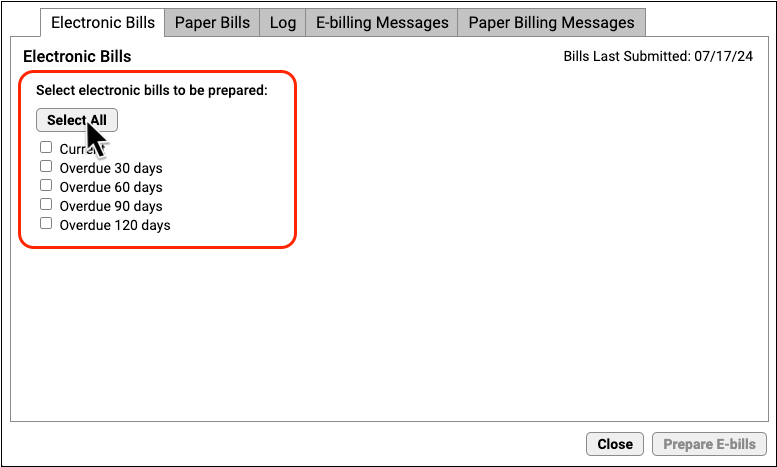
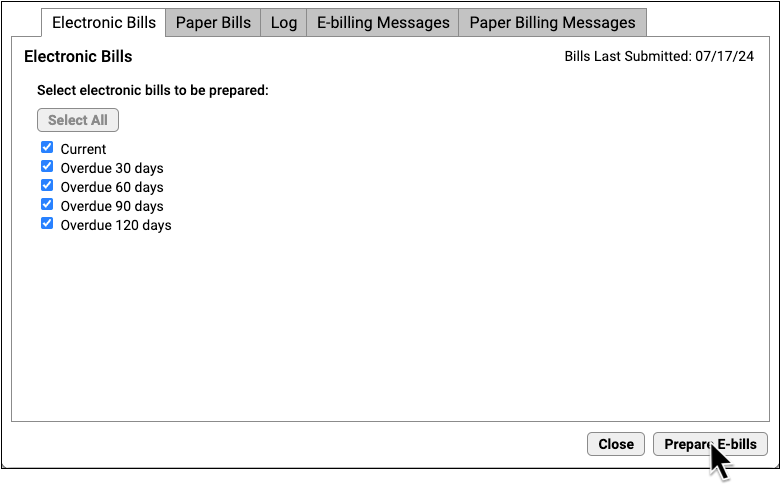
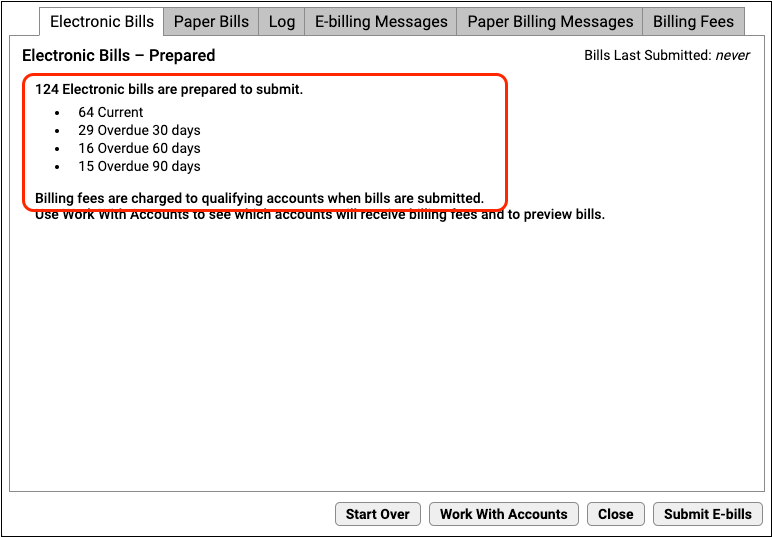
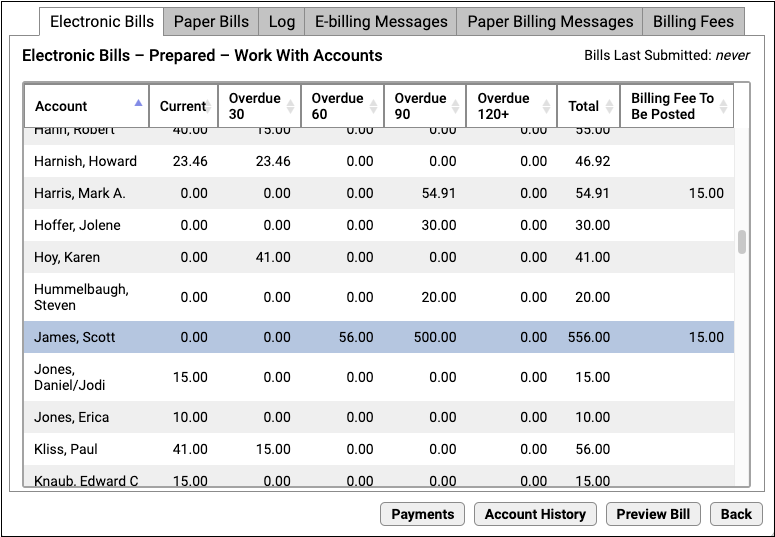
duplicates) shows all accounts and patients that have a duplicate entry. ebs- The Submit Electronic Bills (
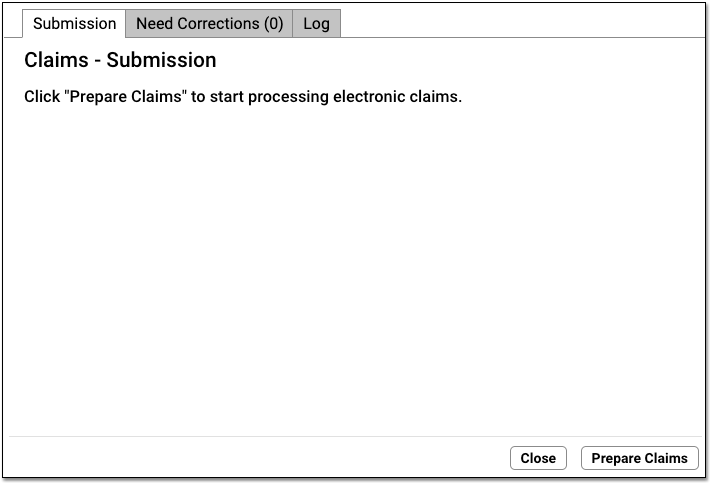
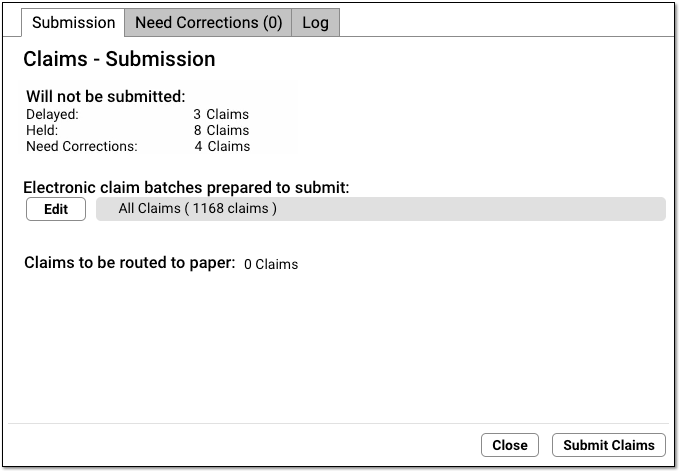
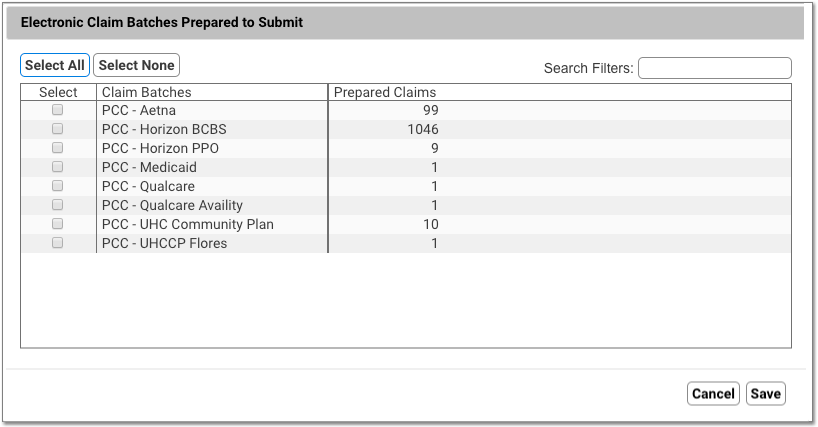
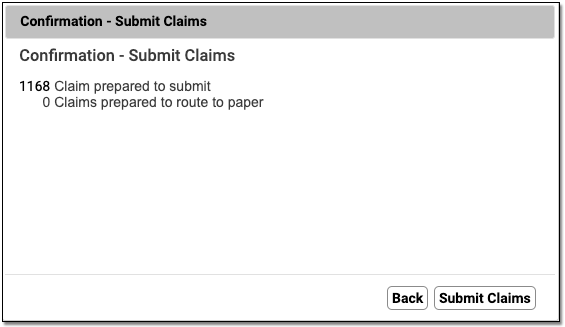
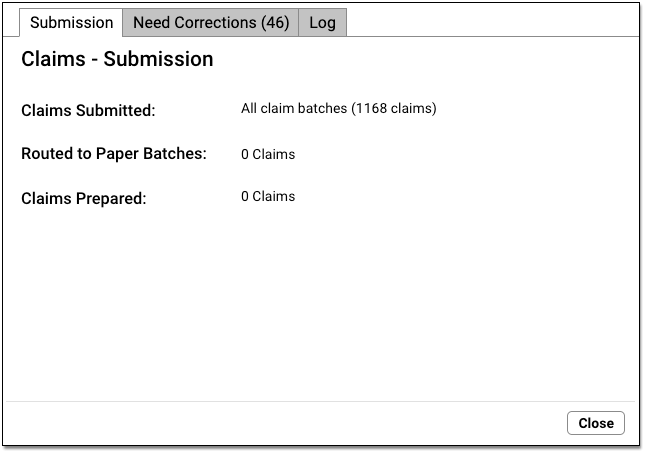
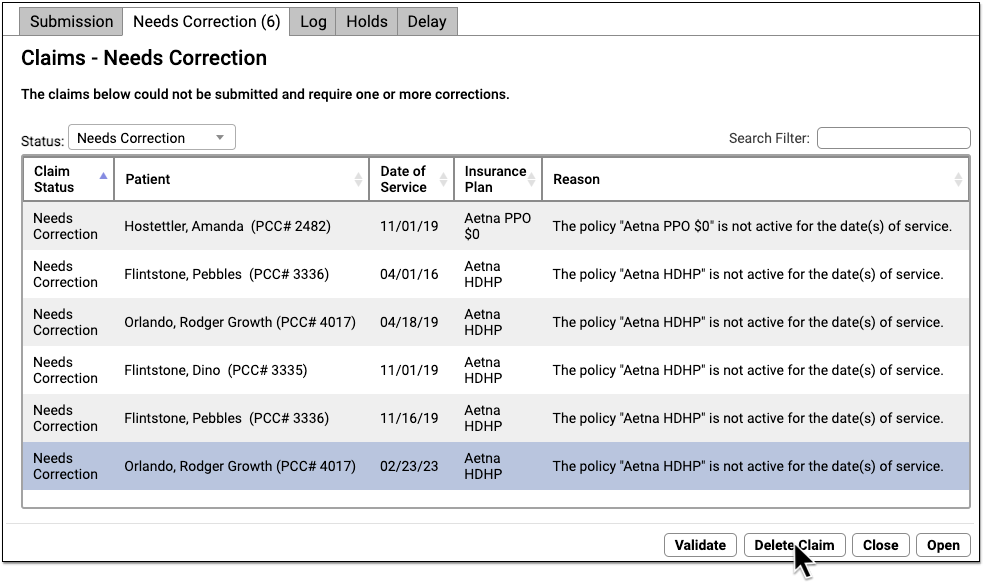
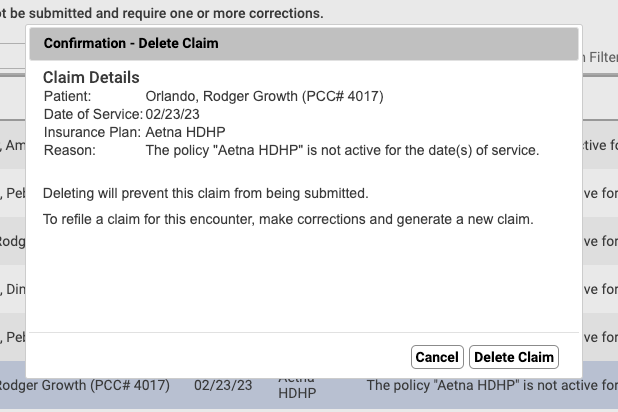
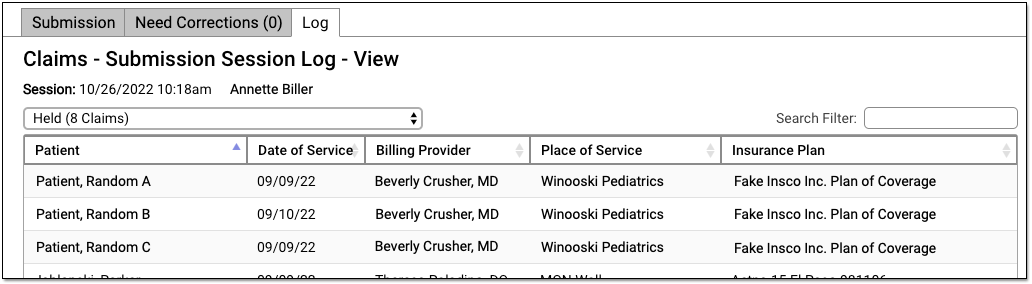
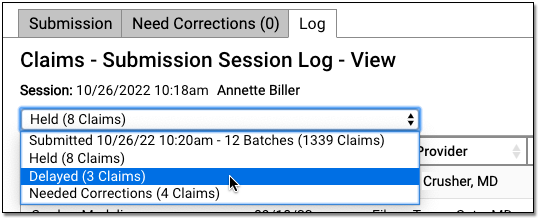
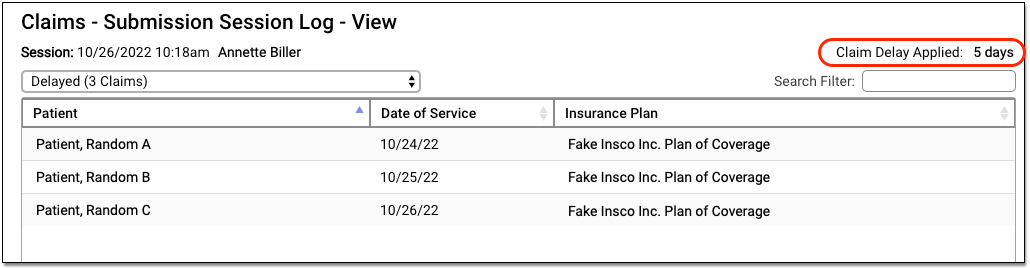
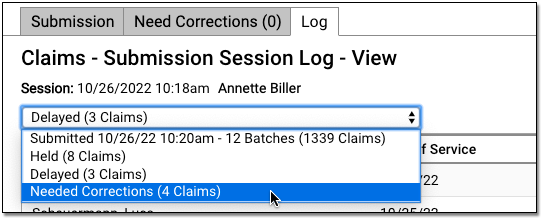
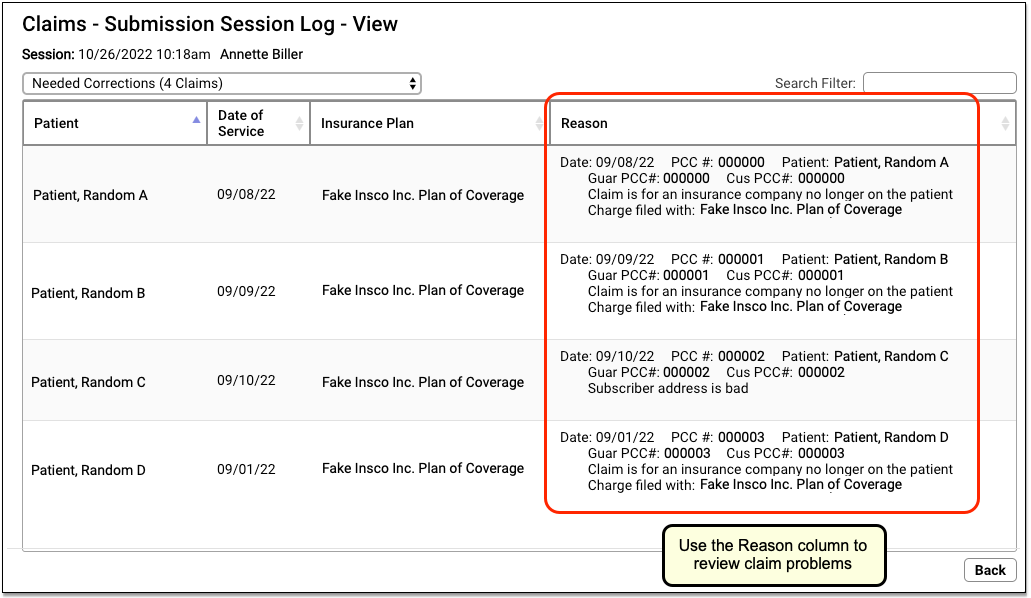
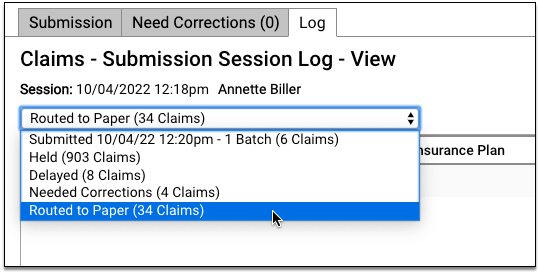
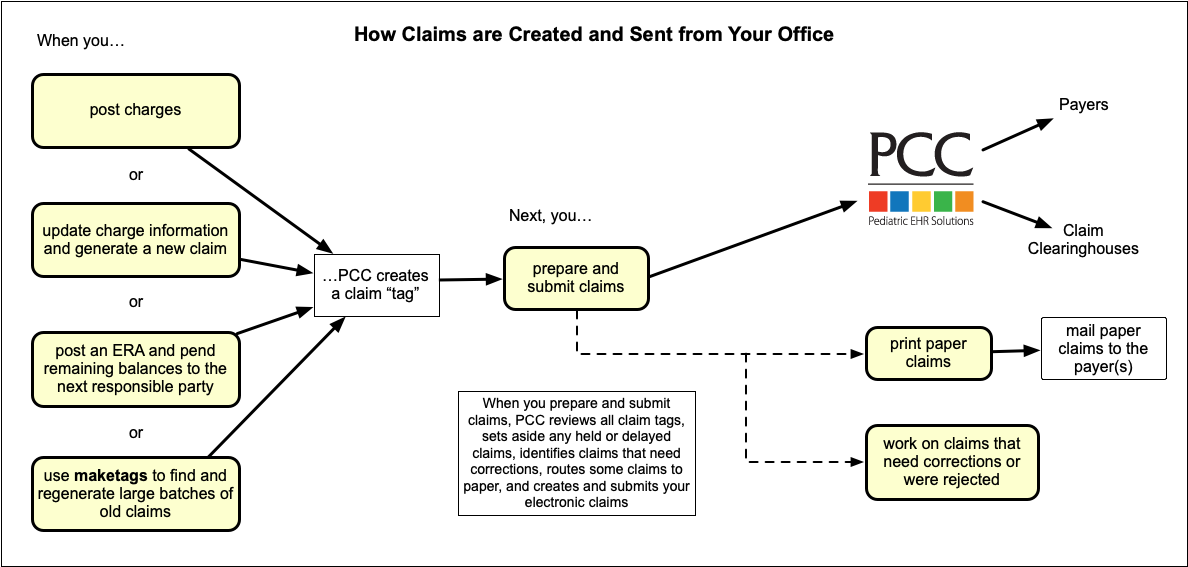
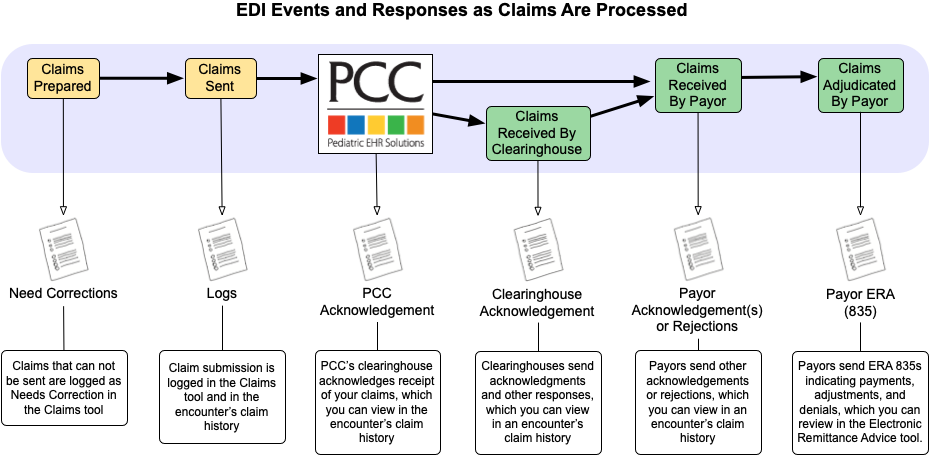
ebs) program runs thebillsprogram for electronic personal billing.ebssends your personal bills to a company that prints and mails them for you. You must have a contract with the company before you can run this program. ECS- The ECS Submission (
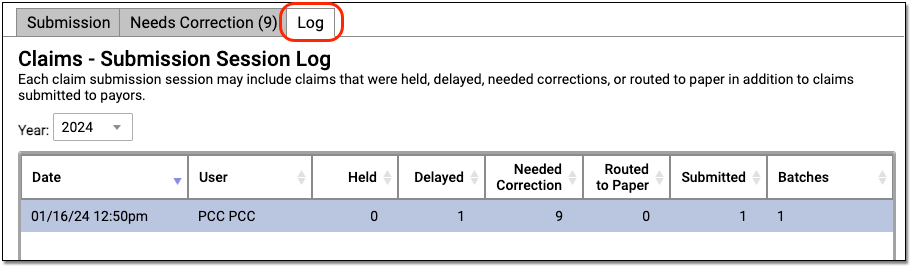
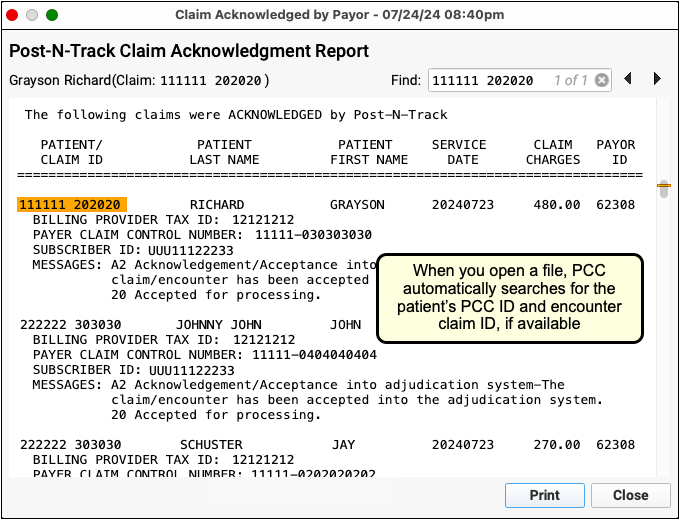
ECS) program, along with thepreptagsprogram, were used to process and submit your insurance claims electronically. They have been replaced by Submit Claims in PCC EHR. ecsreports- The ECS Reports (
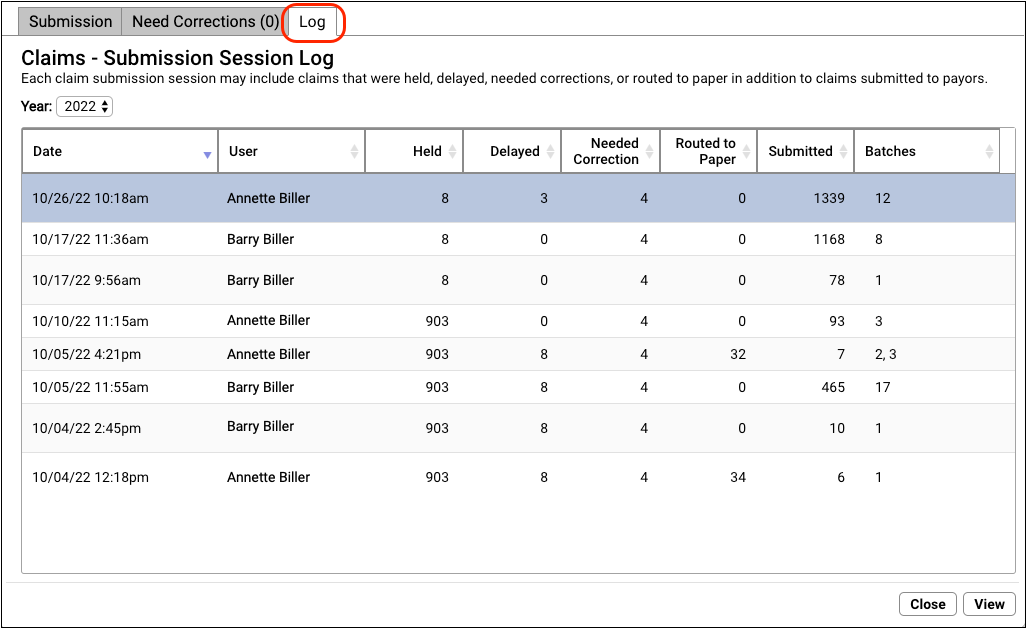
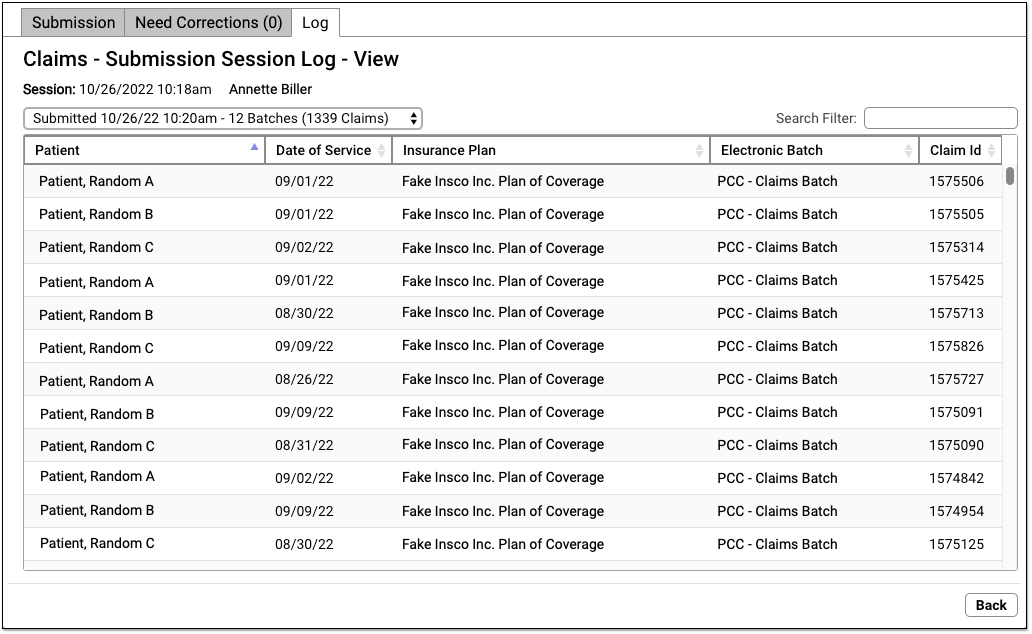
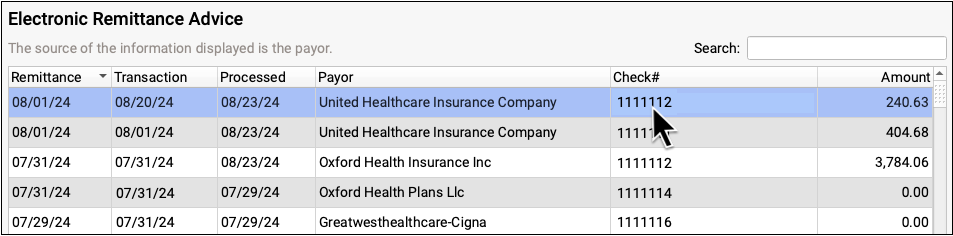
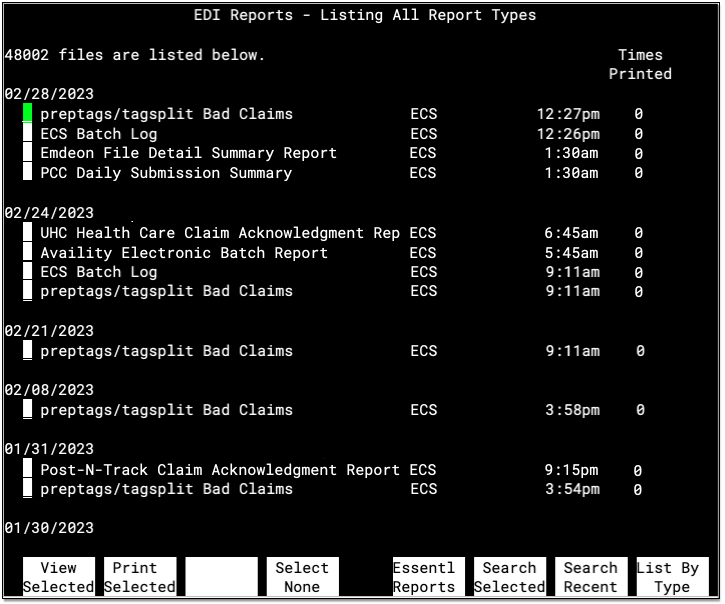
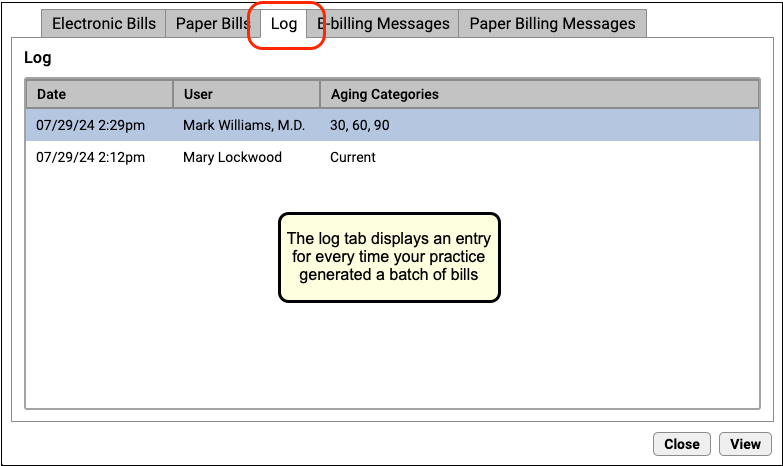
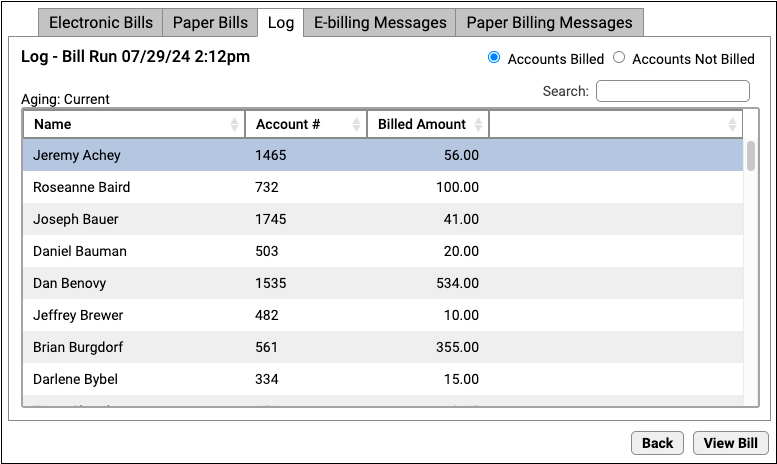
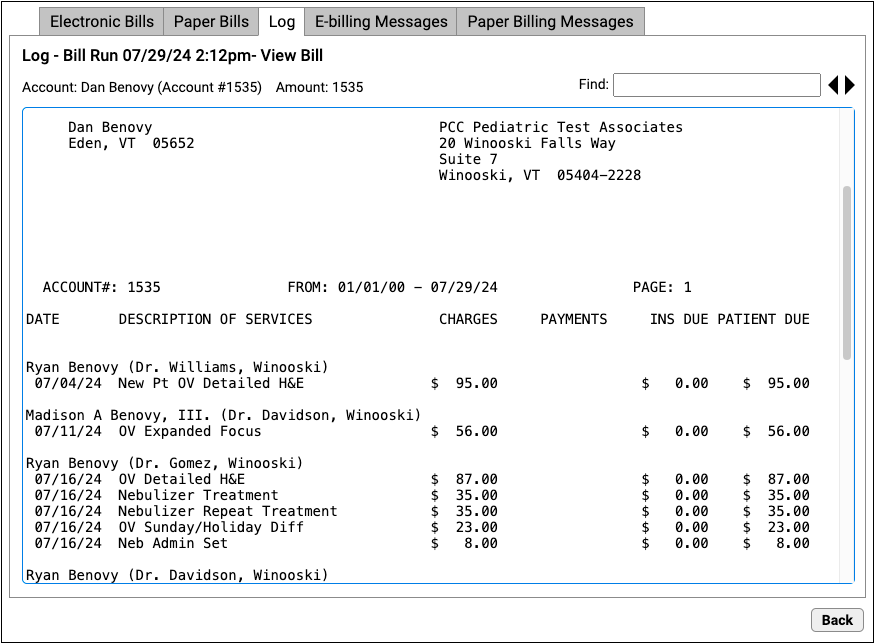
ecsreports) program is an archive of electronic communication to your system, including electronic claim submission reports, ebills reports, and electronic remittance advice (ERAs). The program organizes these communications by date and includes a category view and various search features for finding and working with old reports. The ECS Reports program is replaced by the Electronic Remittance Advice tool, the log found in the Bills tool, and the Billing History in the patient’s chart. See also Review Archived Claim and EDI Reports.
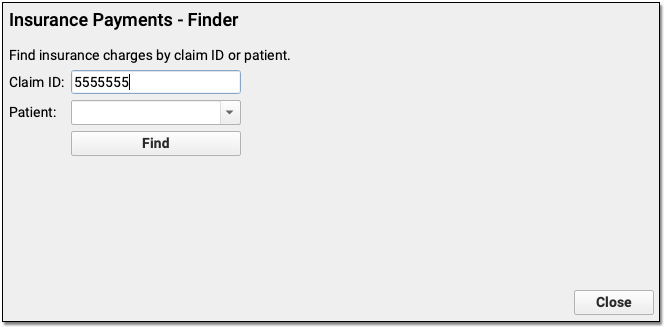
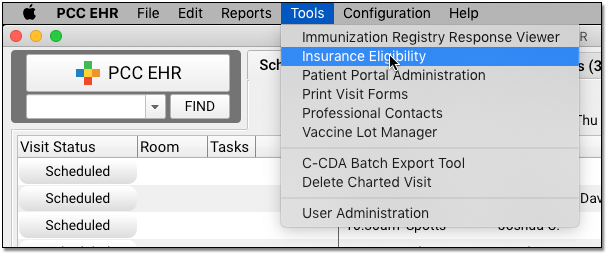
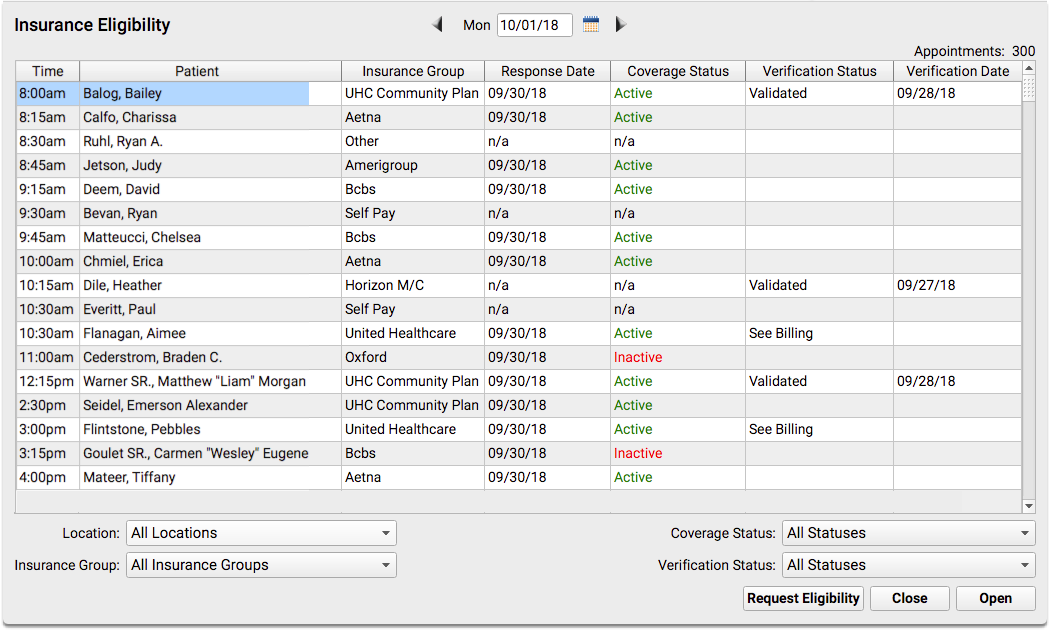
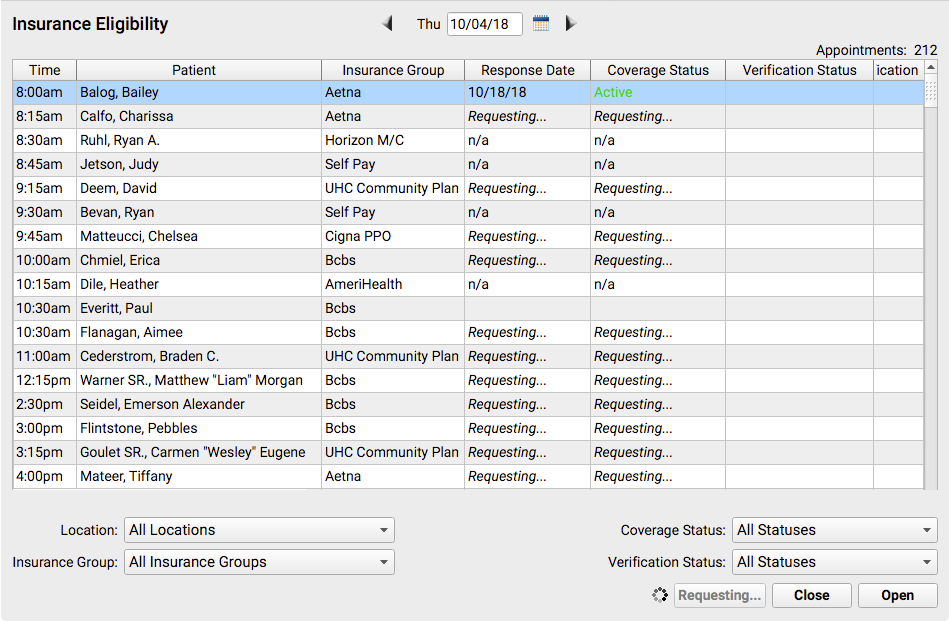
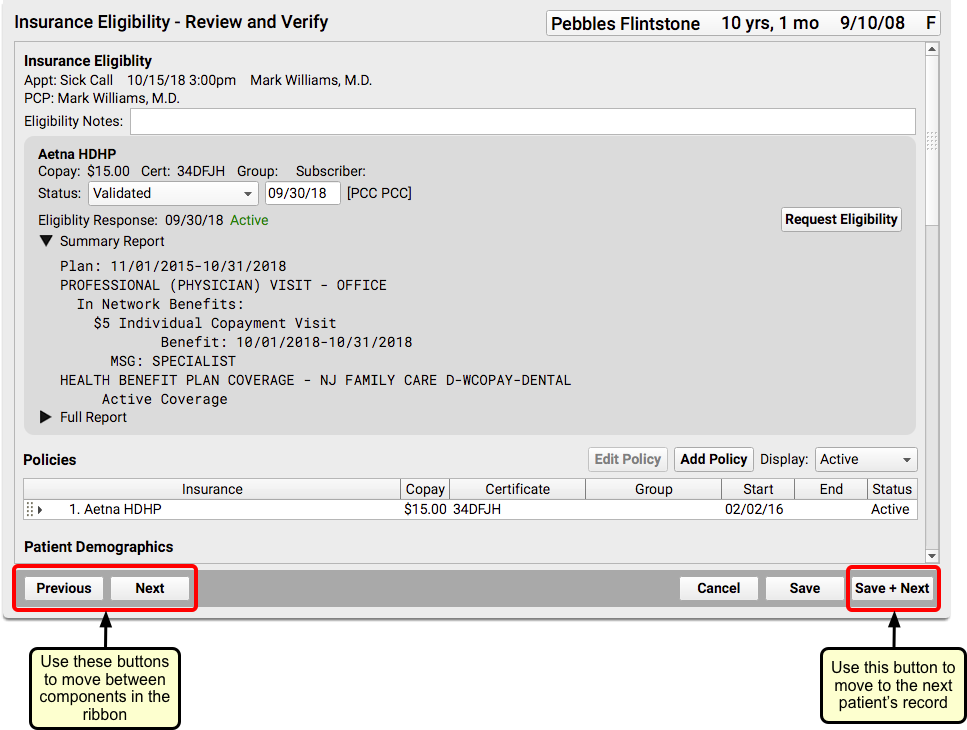
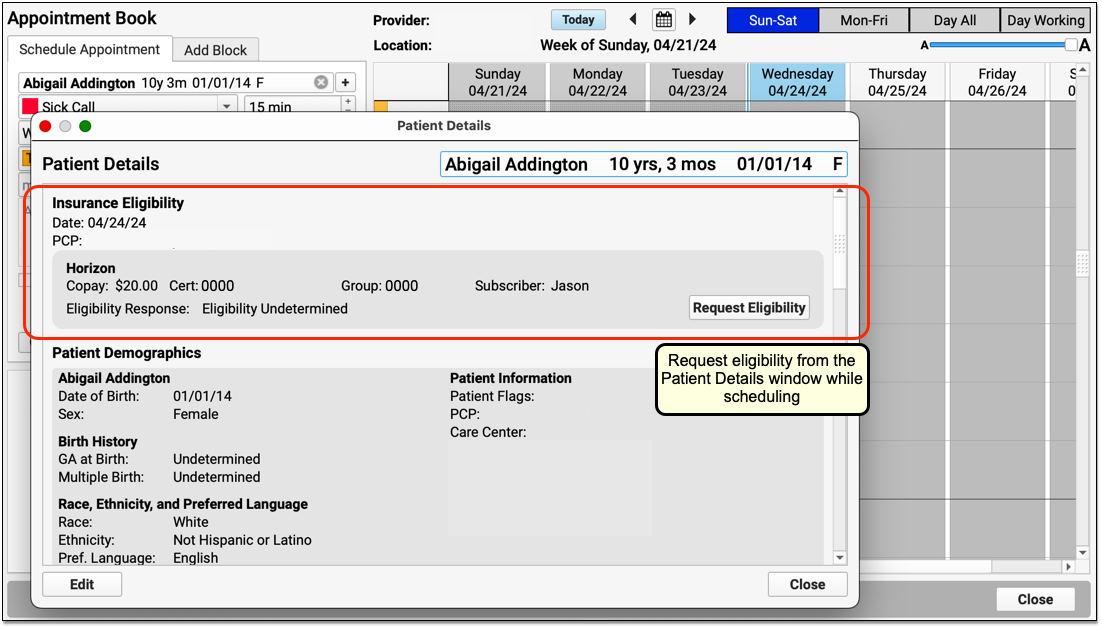
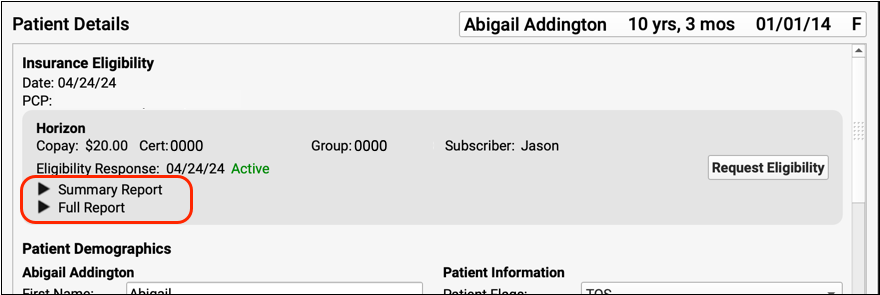
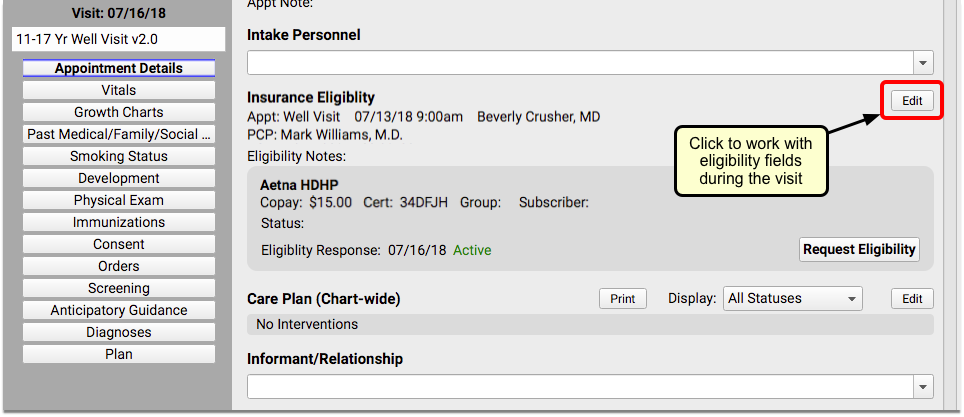
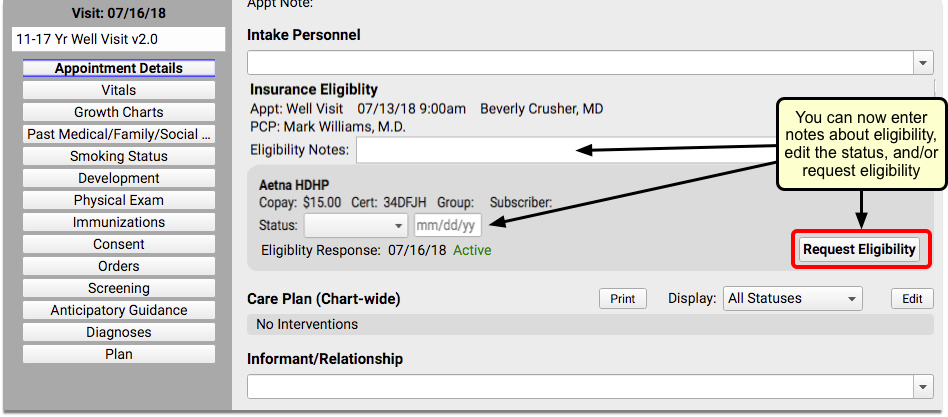
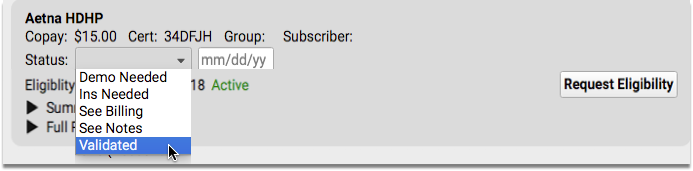
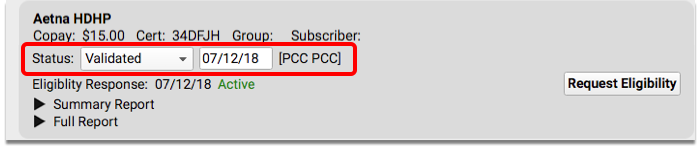
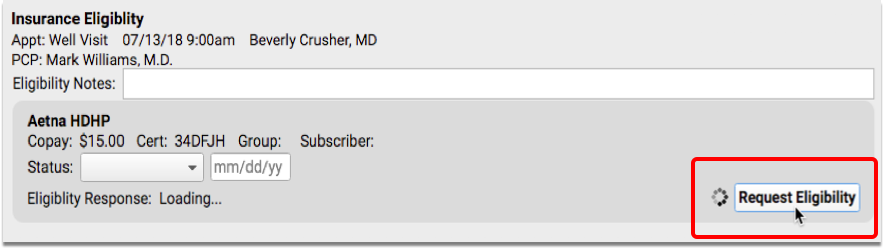
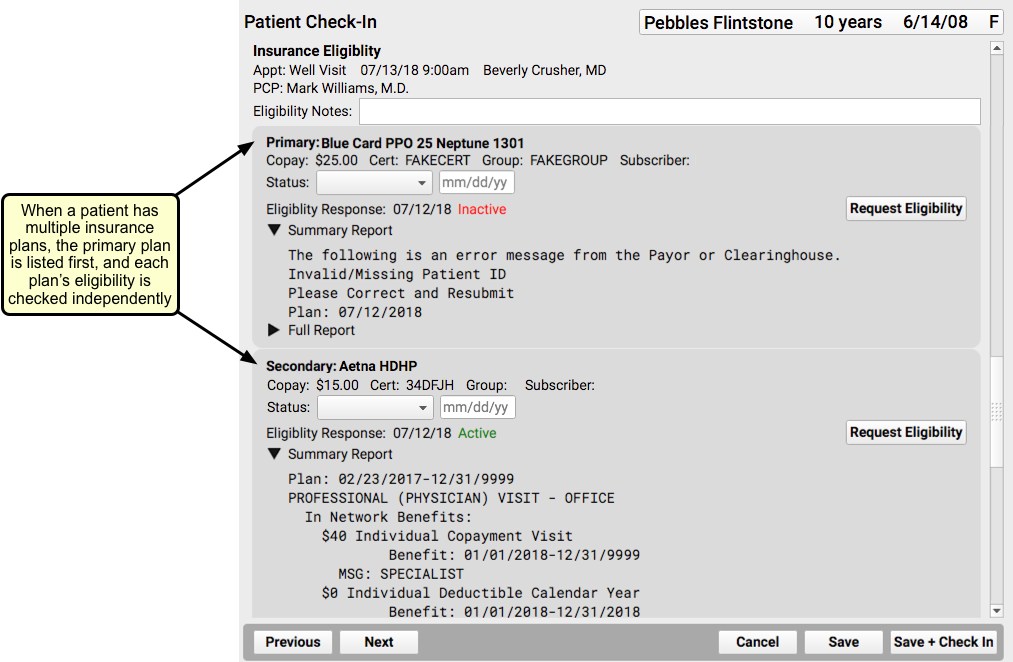
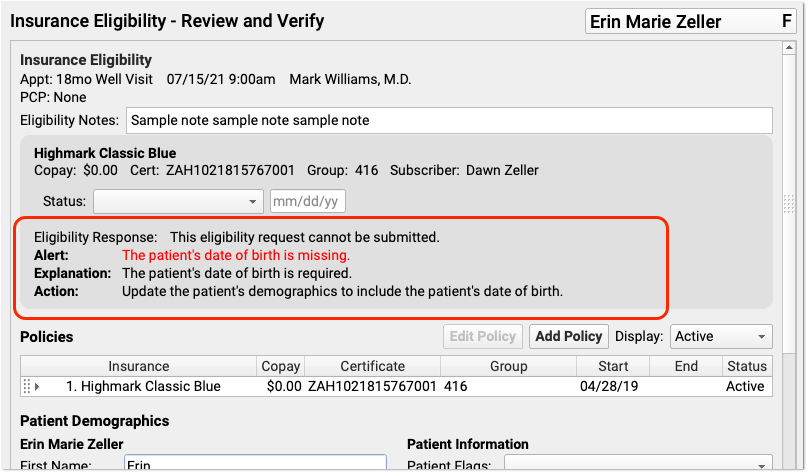
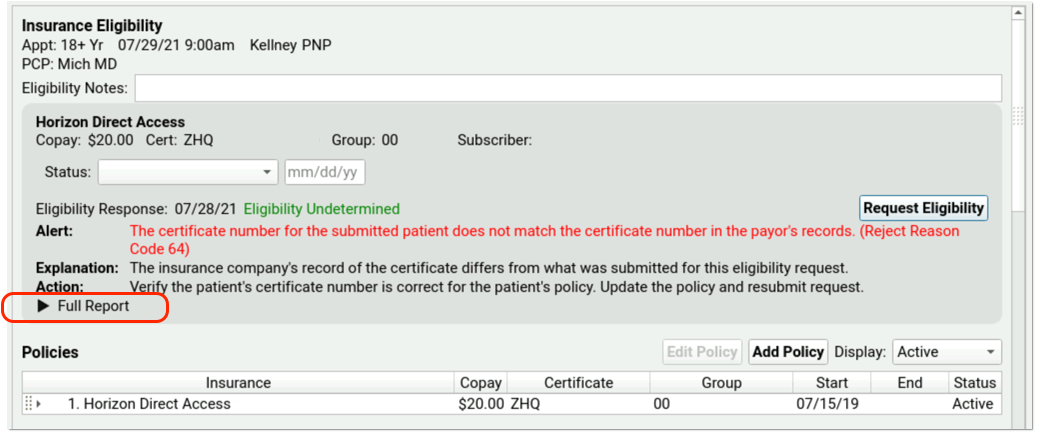
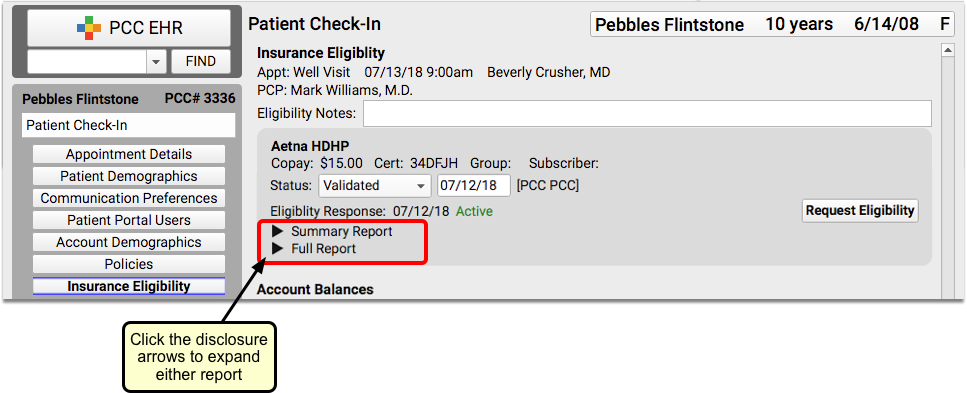
elig
- The Eligibility (elig) program displays patient insurance eligibility. Use the program to view a list of appointments and their accompanying eligibility information, request an eligibility update, or make notes or set a status about eligibility. While using the program, you can also contact the patient’s family and update insurance information.
epidemic- The Epidemic Prevention program (
epidemic) creates a list of children who are missing a specified immunization. The output is based on your immunization configuration and patient records, so a review of your configuration and patient records is essential before running the program. See also:currimms. escb- The Extended Sick Call Blocker (
escb) places blocks in Partner’s schedule based on a selected date, time range, and provider. Useescbto add extra blocks, of any type or size, for a certain week. fame- The Family Editor (
fame) manages account information. Runfameto update family demographics, add a new insurance policy to an existing account, or add a new account to Partner. From withinfame, you can also review a billing summary, run a collection report, or review an account’s transaction history. findem- The Advanced Find Routines (
findem) allow you to find and list patients by a range of criteria. For example, you can use findem to find patients by insurance certificate number, home address, and more. full- The
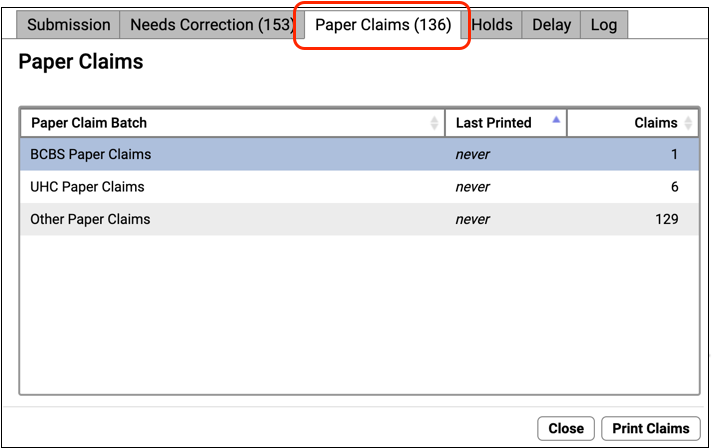
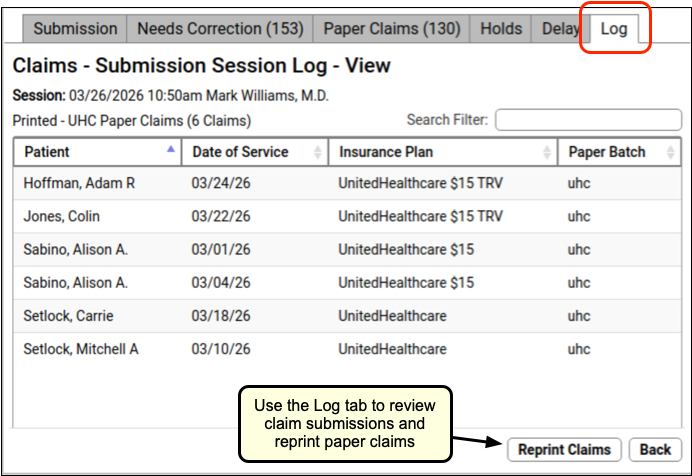
fullreport displays an abbreviated daily schedule for several providers, side-by-side. Along with the time and provider, the report lists the length of each appointment, the patient’s first initial and last name, and the visit reason. hcfa- The HCFA Form Generation program (
hcfa) prints paper insurance claims. hmo- The HMO report generates an age distribution for each primary-care physician for any of your practice’s insurance groups. Run
hmoto find out how many patients under five years old have BCBS and Dr. Smith as their primary care physician.hmolists all physicians for all age ranges in a single report and includes subtotals. immcheck- The
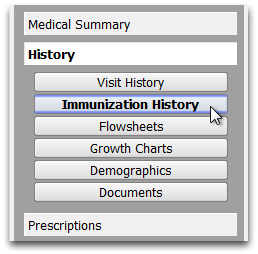
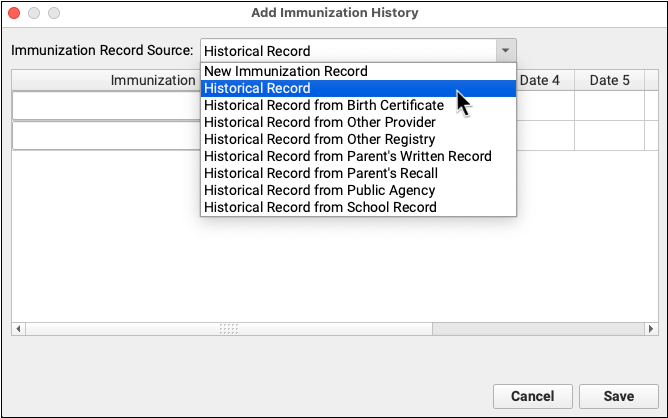
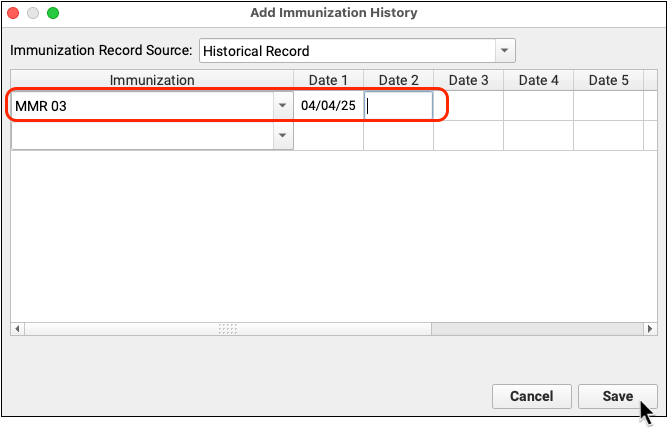
immcheckreport lists all of the details surrounding immunization and physical configuration at your office, based on billing procedures. When you runimmcheck, you should use the pipe symbol to send the output toless. At a command prompt, type “immcheck | less”. This will prevent the report’s text from scrolling off your screen. imms- The Immunization Record (
imms) stores an immunization record for every patient. Runimmsto review immunizations or print an immunization record. immsreg- The Immunization Registration (
immsreg) sends your patient immunization records to a state or commercial immunization registry. inquire- The Scheduler’s
inquireprogram displays a list of any patient’s appointments. You can review a patient’s appointment history, see details about upcoming appointments, and cancel or reschedule any appointment. insaging- The Insurance Accounts Receivable Summary (
insaging) shows an aged summary of your practice’s outstanding charges broken down by insurance group. Use it to see which carriers owe you the most money and how old those balances are.insagingis also a quick way to see your practice’s total A/R, and it can help you determine which insurance carriers need special attention. The report lists the percentages of your A/R for which each insurance group is responsible. This report has been replaced by the Unpaid Encounters tab in the Insurance Balances tool. inscoar- The Insurance Accounts Receivable Detail (
inscoar) report provides a detailed, charge-by-charge accounts receivable report for your insurance companies. Useinscoarto find unpaid insurance charges and to work on old, overdue charges. You can also runinscoarinteractively, allowing you to jump into different programs and research or modify charge information while viewing the report. This report has been replaced by the Unpaid Encounters tab in the Insurance Balances tool. inscows- The Insurance Company Work Sheet (
inscows) program generated a worksheet for planning the behaviors of a new insurance plan. The worksheet helped a user visualize which procedures would require a copay, appear on a claim, be adjusted off at time of service, and so forth. As PCC Support now handles the creation of custom insurance configuration files (“Special Information Files”), they no longer use this worksheet with practices. ira- The Insurance Company Reimbursement Analysis (
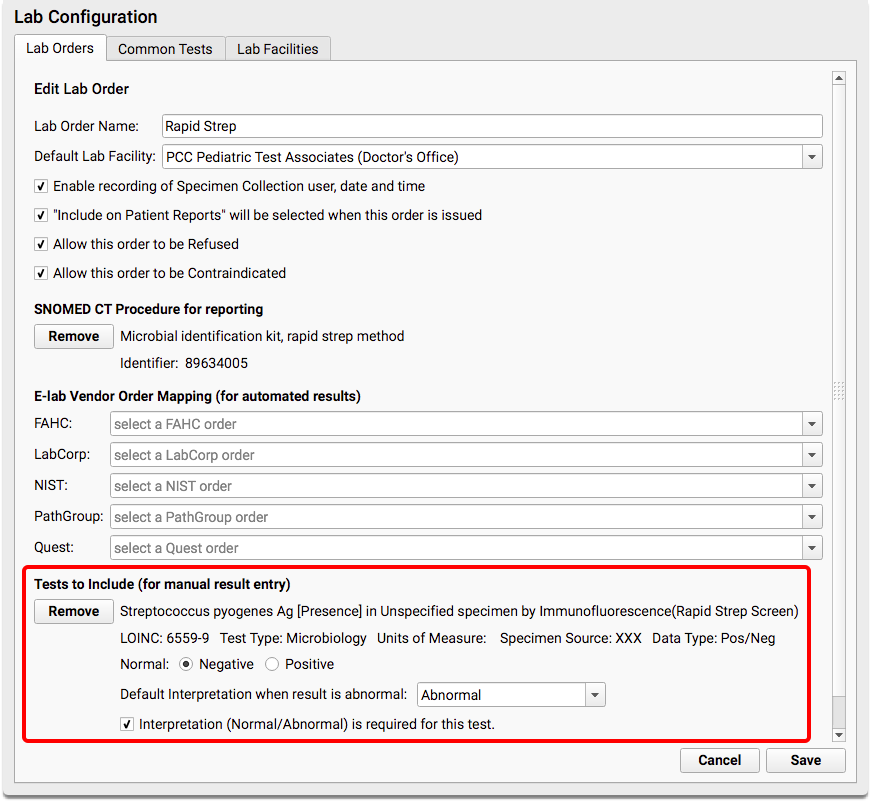
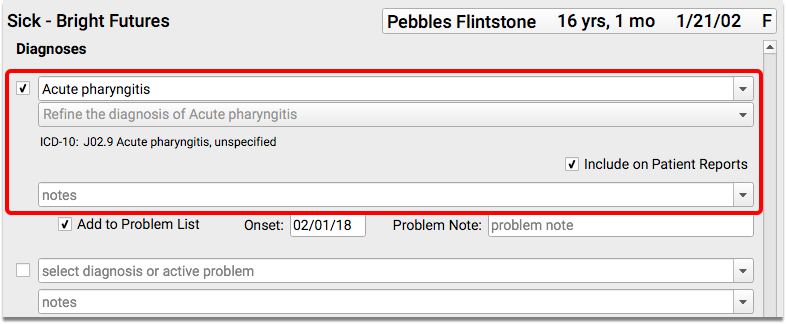
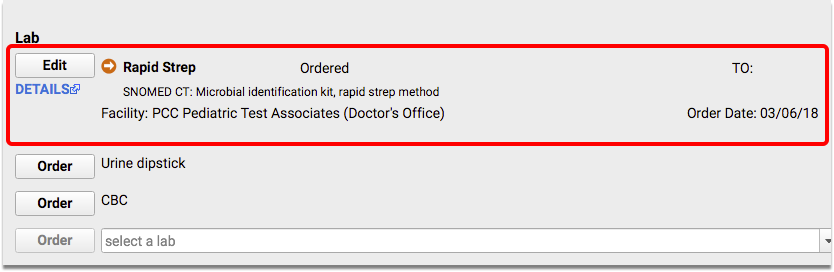
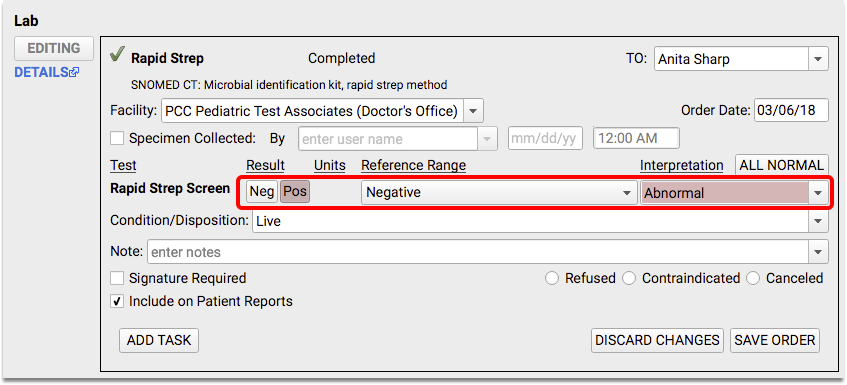
ira) program produces a number of different reports with a wide range of customizable options. You can useirato show procedure and charge activity for an entire year, compare the work done by different providers, evaluate the reimbursement levels of different insurance companies, and track payment of individual charges.irais a catch-all report that can answer questions when you are making financial decisions for your practice. lab- The Lab Work Database (
lab) stored lab orders, printed lab order forms, and recorded lab results. listins- The List Account/Patients By Insurance (
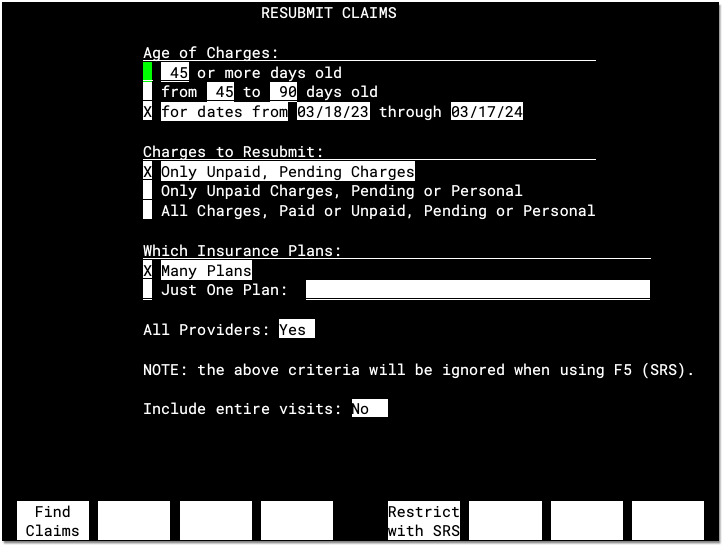
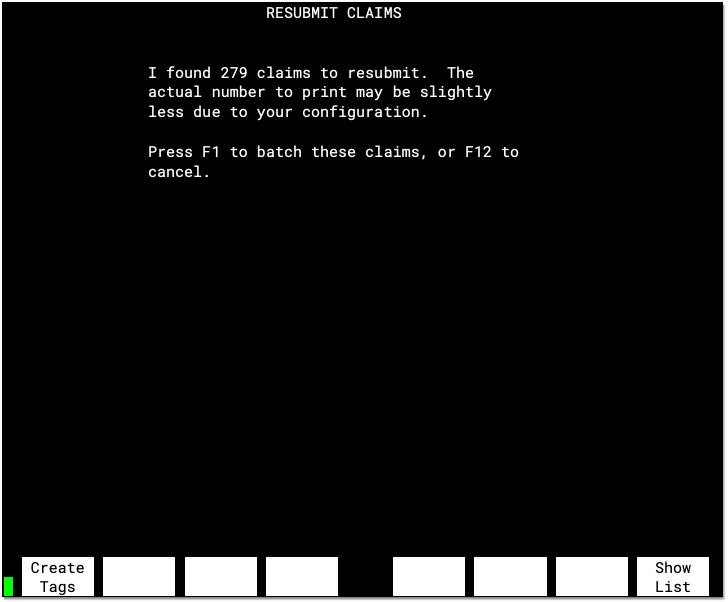
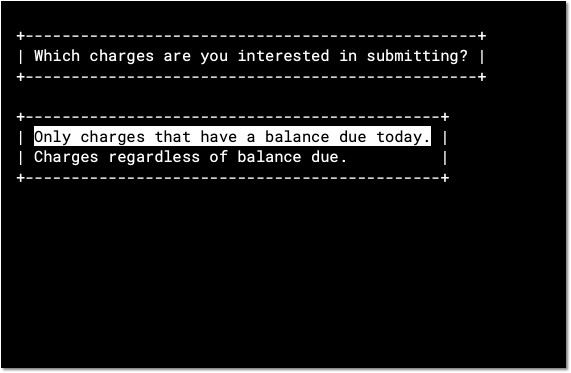
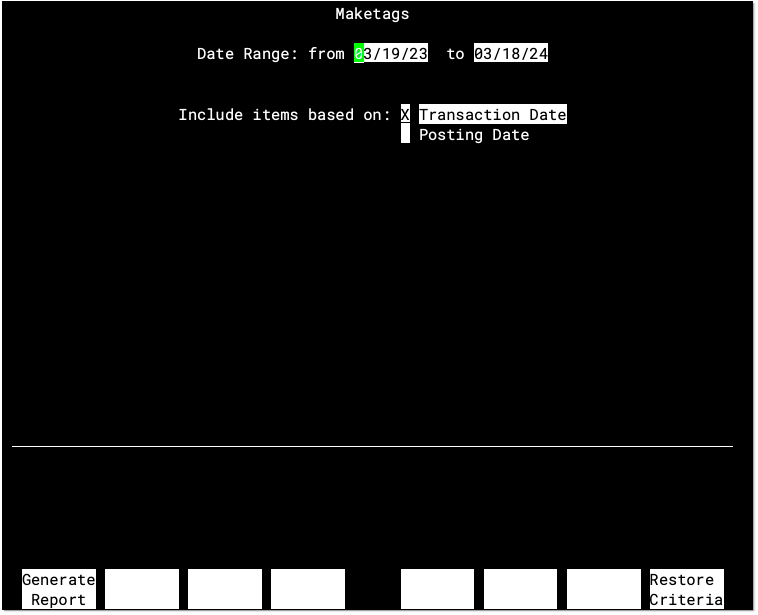
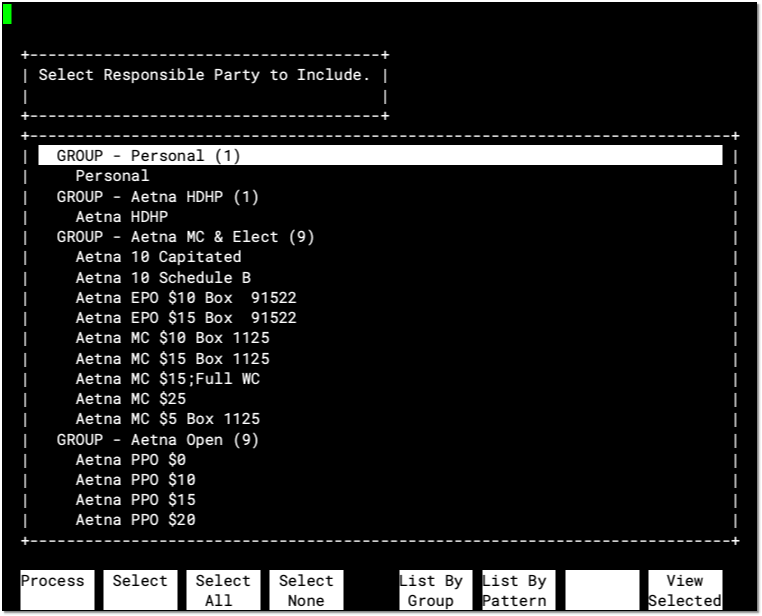
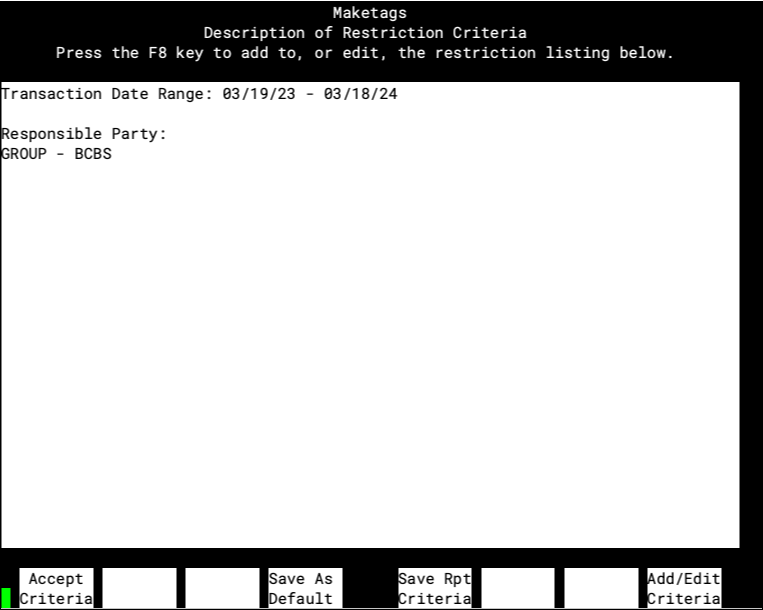
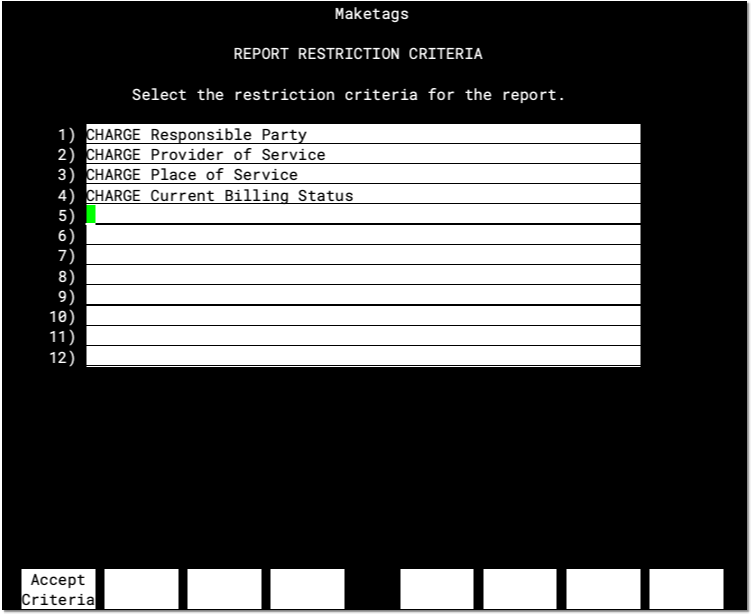
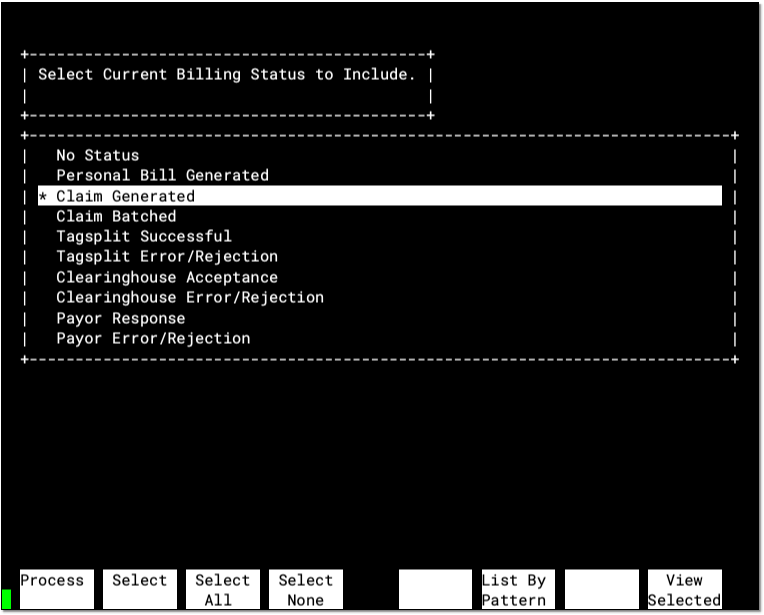
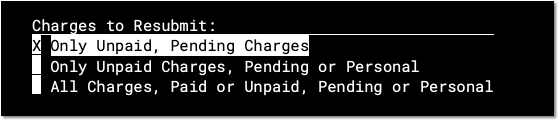
listins) report produces lists based on insurance plan effective dates for any plan or group of plans. Uselistinsto find all patients who have a particular insurance plan during a specified date range. maketags- Resubmit HCFA Forms (
maketags) is an insurance billing program that finds and rebatches large groups of unpaid or paid claims. After runningmaketags, you can send the batched claims usingECSorhcfa. ministats- The
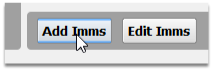
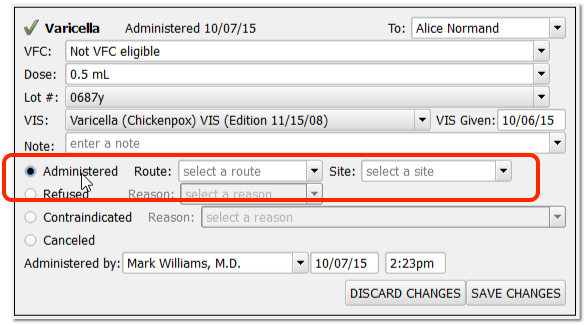
ministatsreport produces a break-down of your practice income for a given date range by payment type, payer, and year. nimms- The Nurses Immunization (
nimms) program adds immunizations to a patient’s record. The advantage ofnimmsoverimmsis that you can add multiple immunizations quickly while adding provider and immunization lot information.
notify
- The Patient Notification Center(
notify) is a configuration tool for creating one-time or recurring notifications for appointment reminders, patient recall, and other purposes. After creating a notification, Partner automatically contacts patients by phone, text, or email. notjane- The Patient Editor (
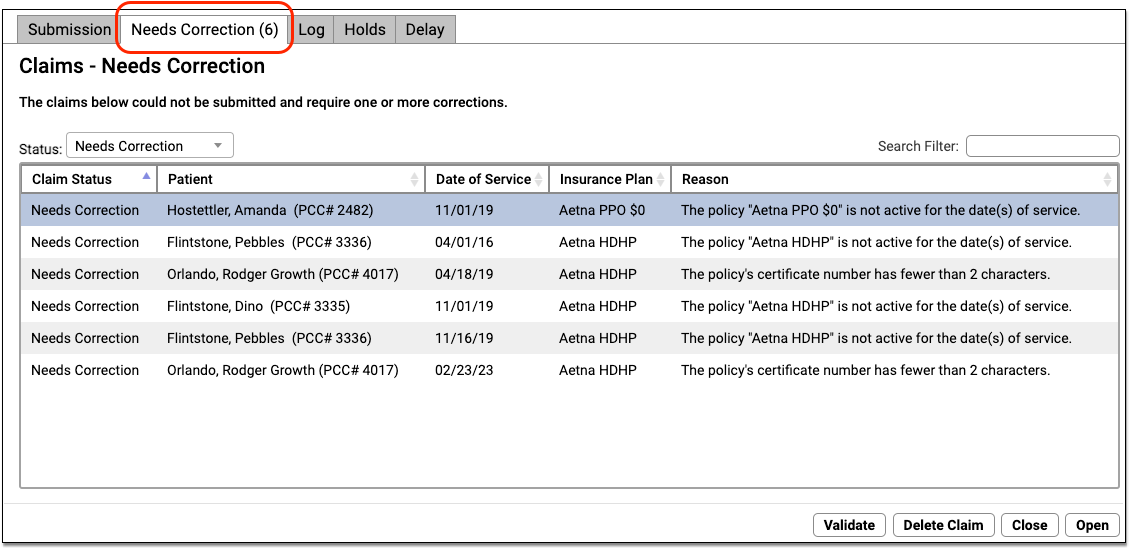
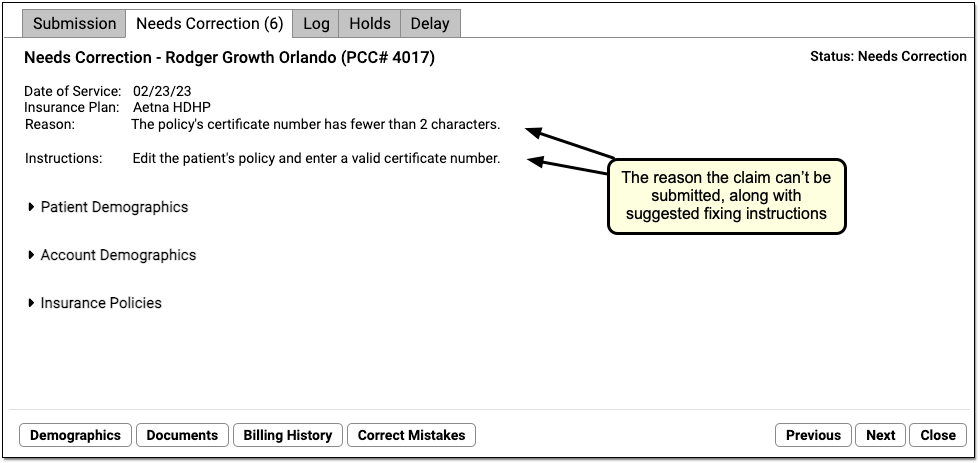
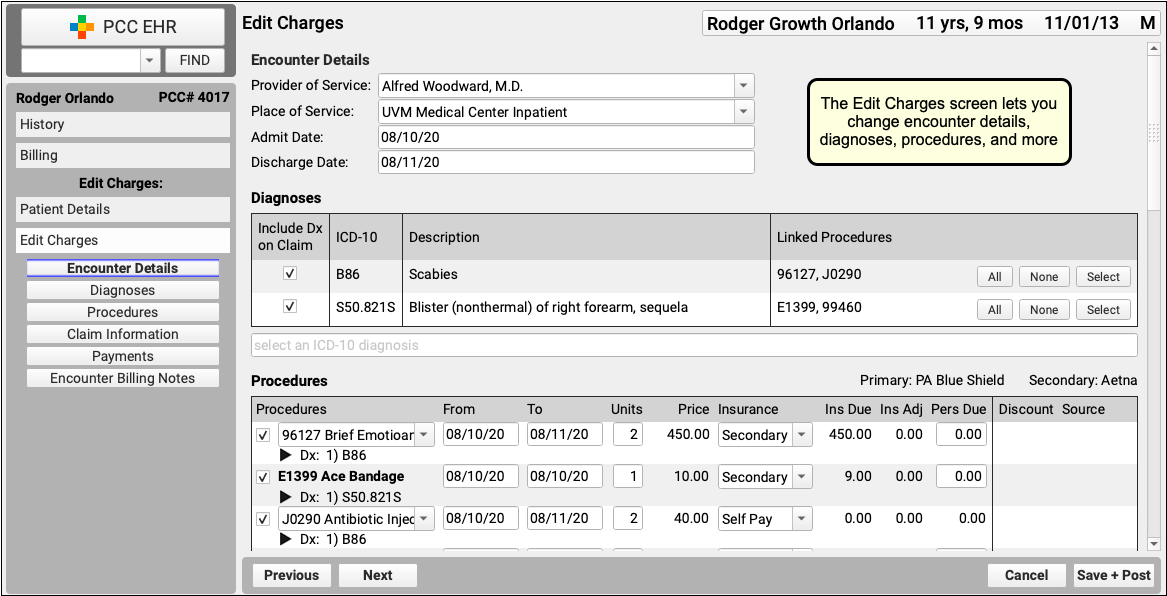
notjane) manages patient information. Runnotjaneto update patient information, view an immunization record, research visit history, or read about a patient’s major diagnoses and allergies. oops- The Correct Mistakes program (
oops) can make changes to posted procedures, including the insurance status and many visit details that appear on a claim. Useoopsto change a procedure’s diagnoses or add a payor claim control number. The Correct Mistakes program has been fully replaced by Edit Charges functionality, which is available from a patient’s Billing History as well as from worklists found elsewhere in PCC EHR. oopslog- The Daily Corrections Log (
oopslog) was an under-the-hood report that displayed daily activity in theoopsprogram. Theoopsprogram has been deprecated and replaced by Edit Charges functionality. openpmts- The Open/Unlinked Payments (
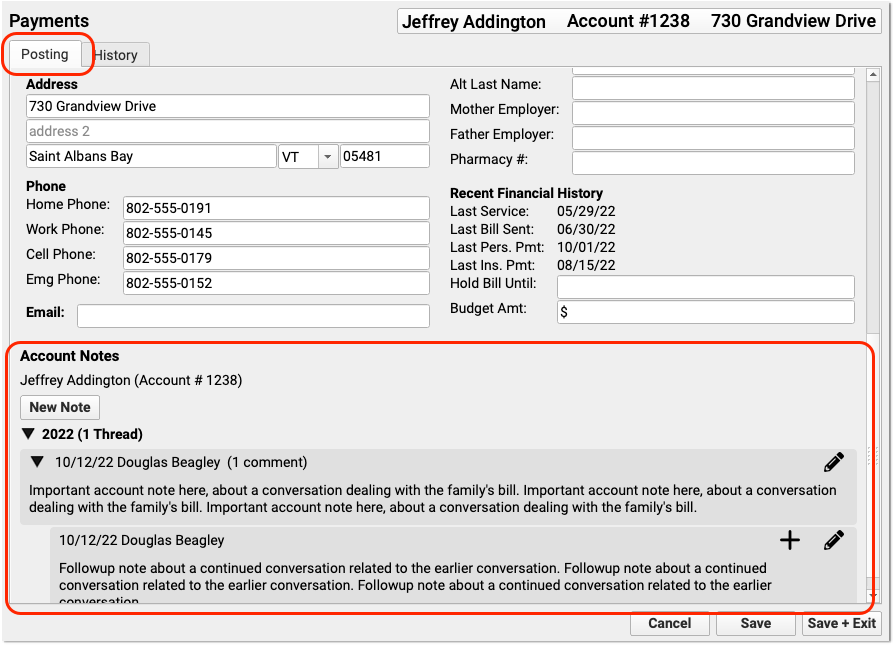
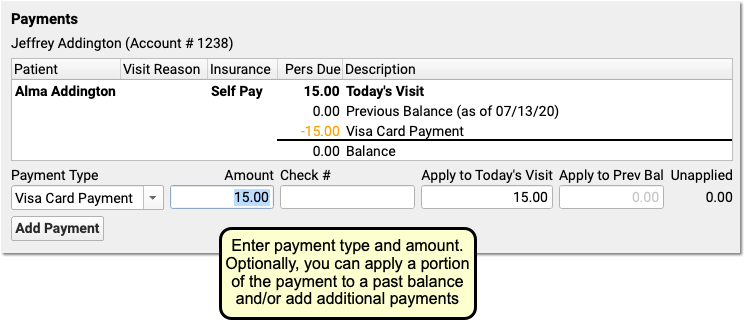
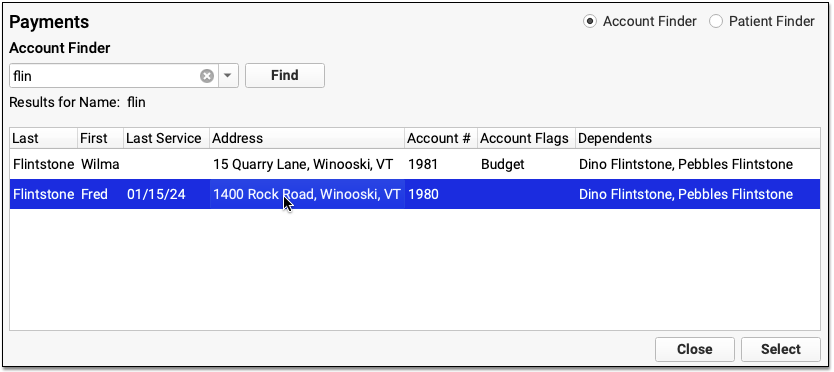
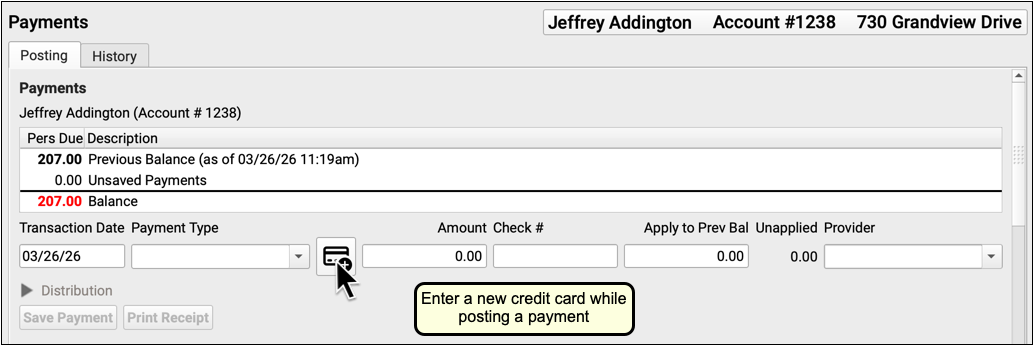
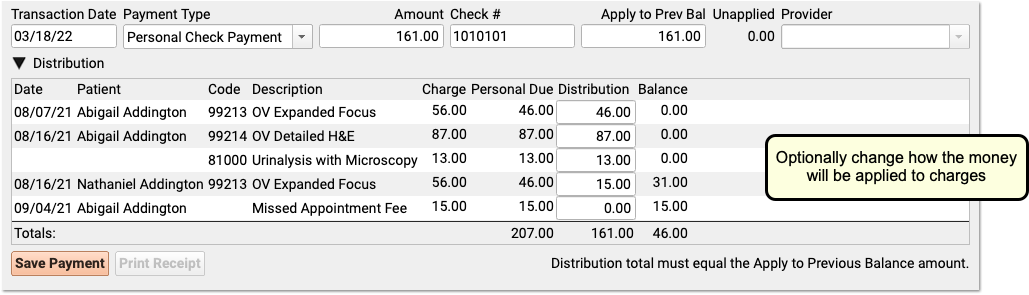
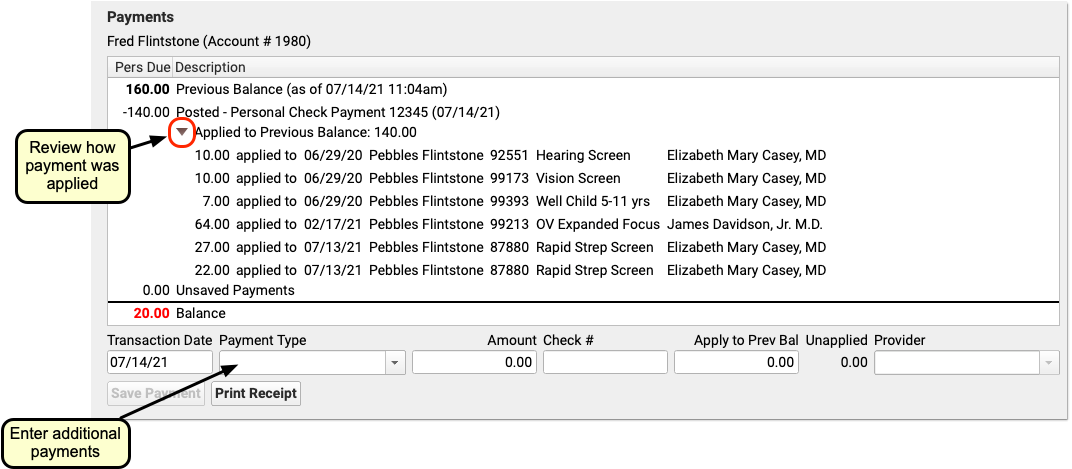
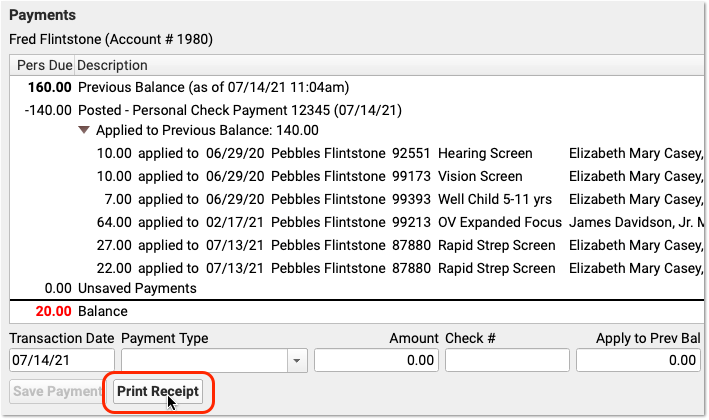
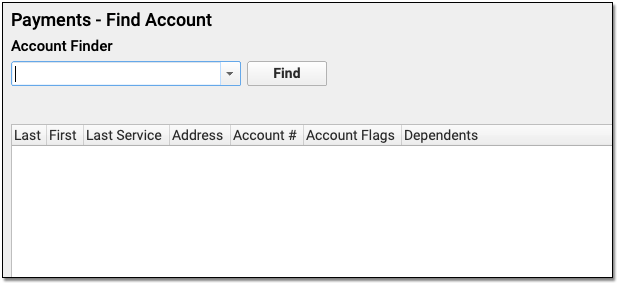
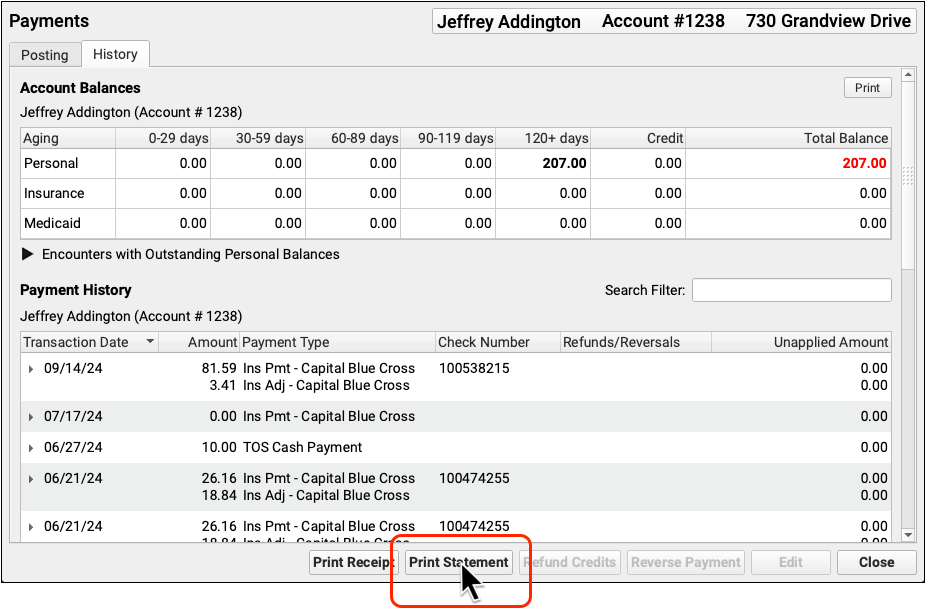
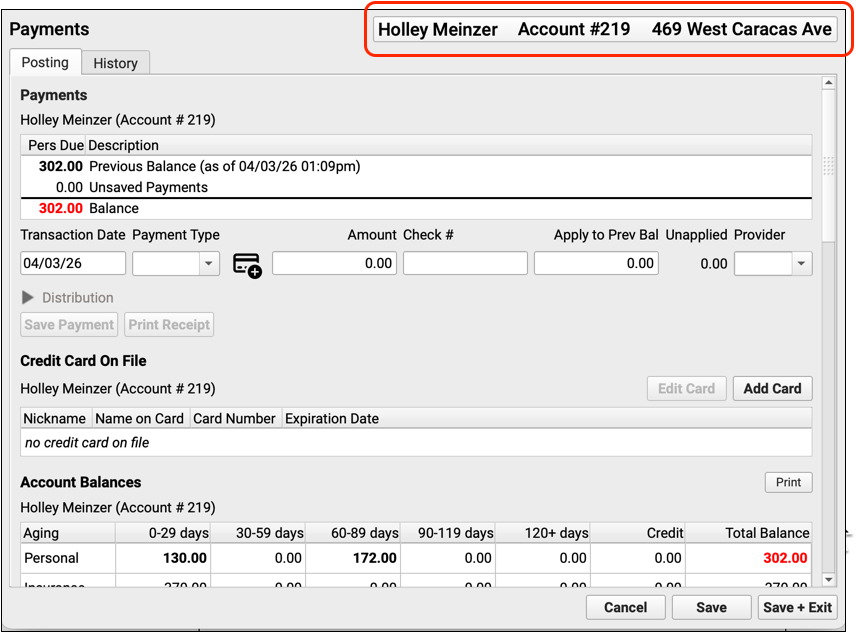
openpmts) report lists credits and payments that are not linked to a specific charge. Your PCC system automatically applies unlinked payments towards each account’s balance, but payments are difficult to locate or understand if they are not linked.openpmtscan be subtotaled in various ways to help you clean up accounts with unlinked payments. pam- The Post Regular Payments (
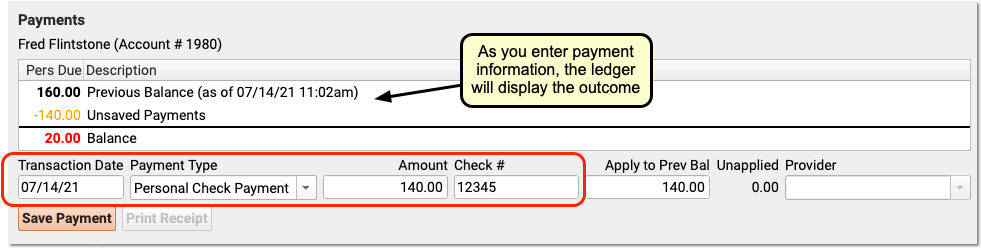
pam) program, posts personal payments or adjustments to an account.pamcan quickly post a stack of checks or a single co-pay. patinfo- The Patient History report (
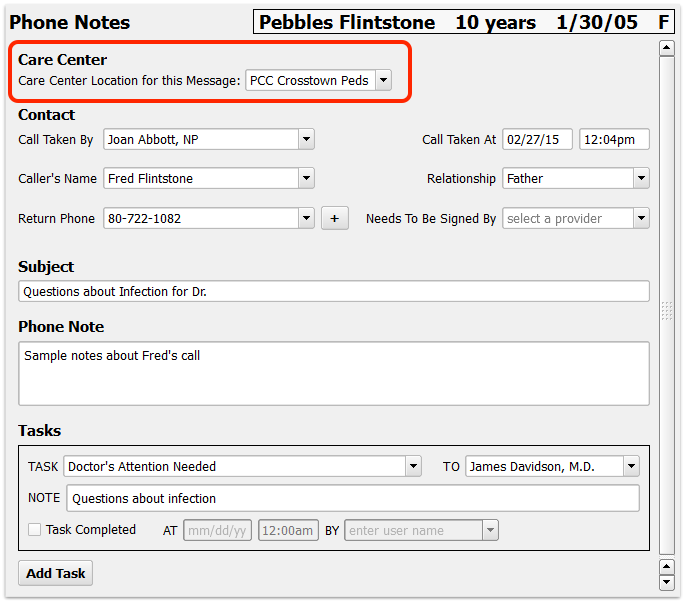
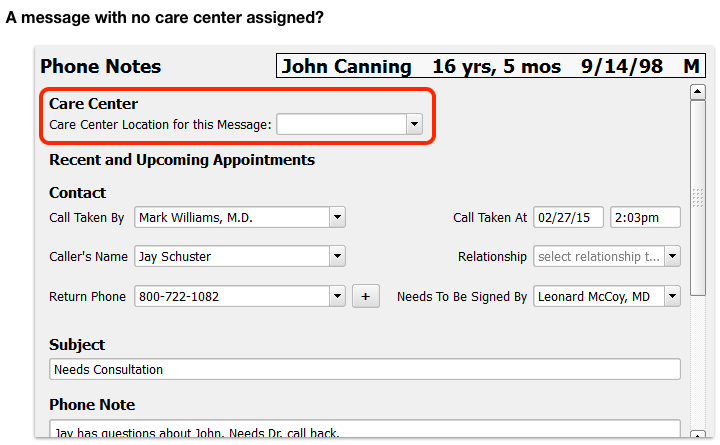
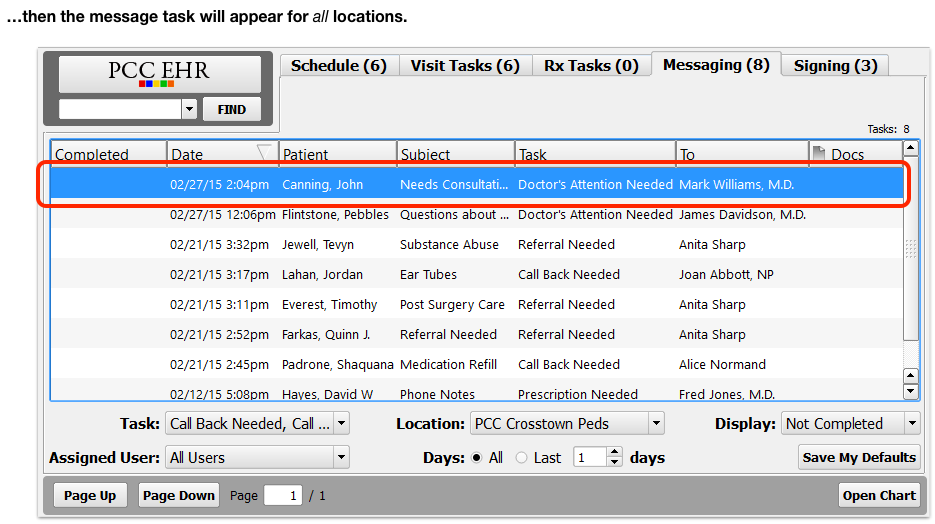
patinfo) includes both a Visit History report and a Diagnosis History report. The information is based on billing data and not clinical information from the chart. The Visit History includes a section with billed diagnoses and a section that lists each visit date along with the provider, diagnoses, and procedures for that date. The Diagnosis History shows each diagnosis that has been posted for the patient and lists each date that diagnosis was given. pen- Phone Encounter Notes (
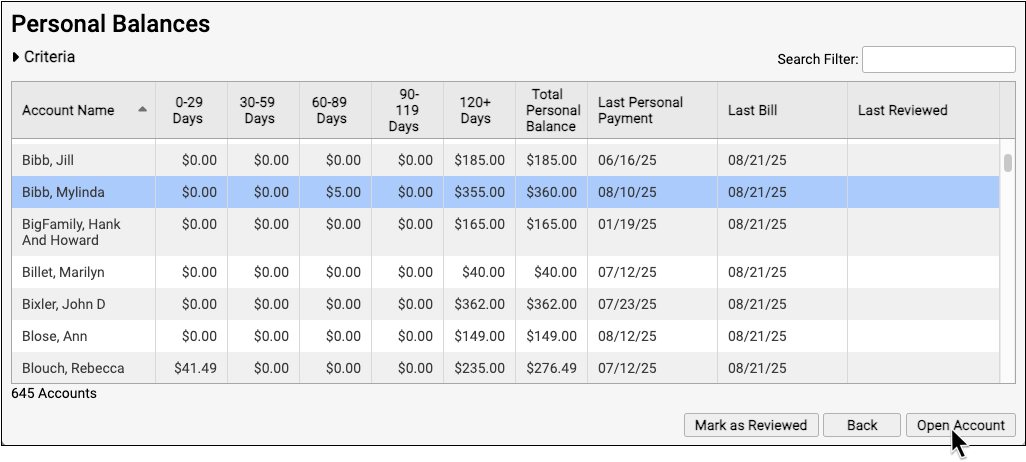
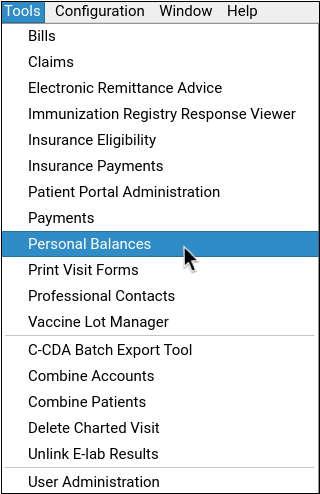
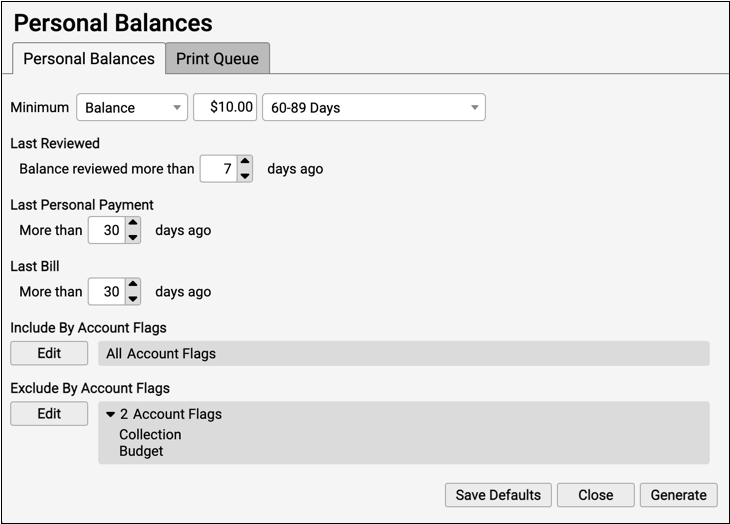
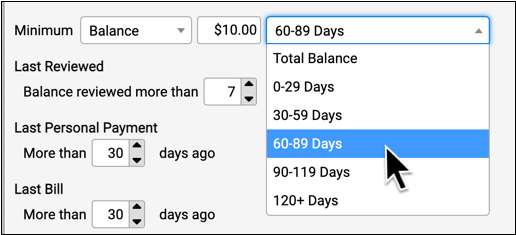
pen) records and reports on phone calls. Nurses can usepento record details of a phone call and jump into scheduling or a patient’s record. Providers can later review and process flagged phone calls usingpen‘s interactive reporting features. persview- The Personal Money Tracking Assistant (
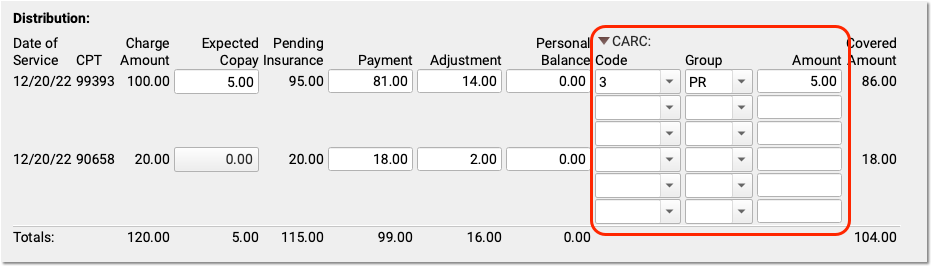
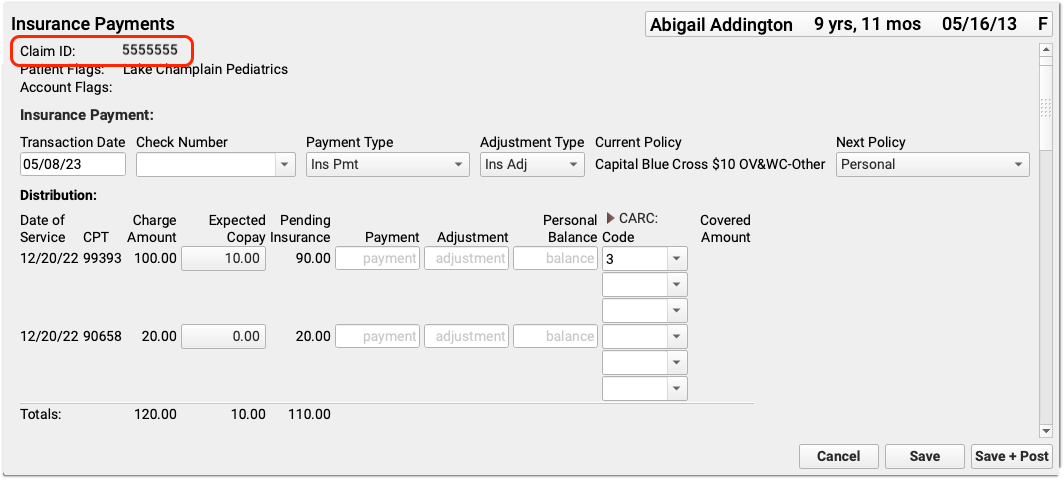
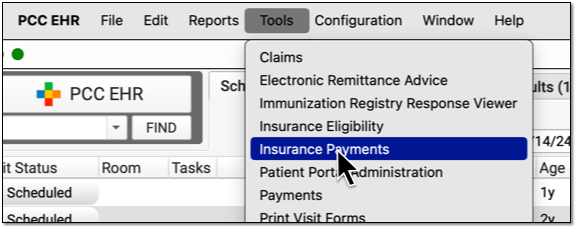
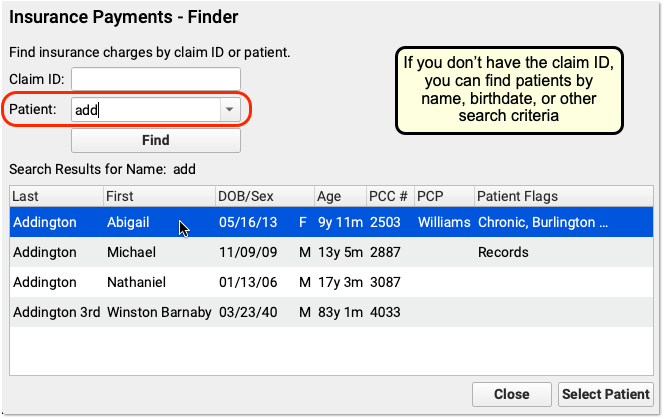
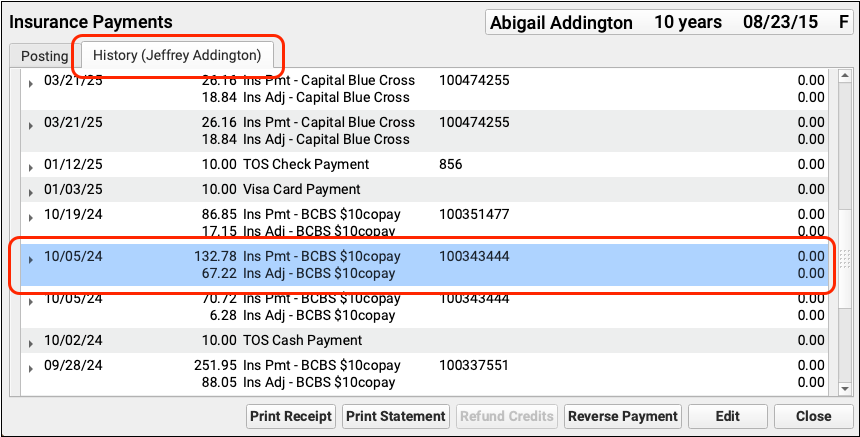
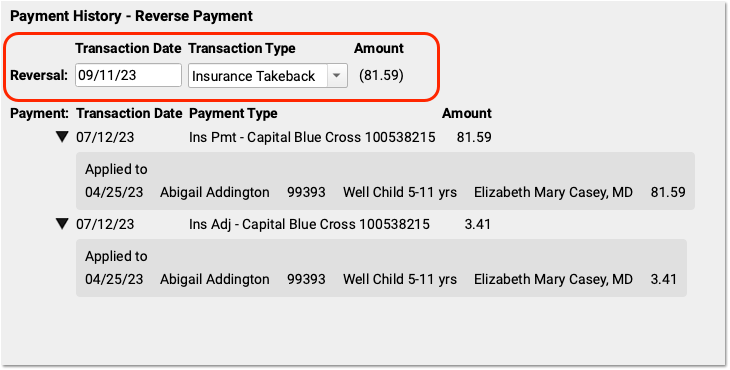
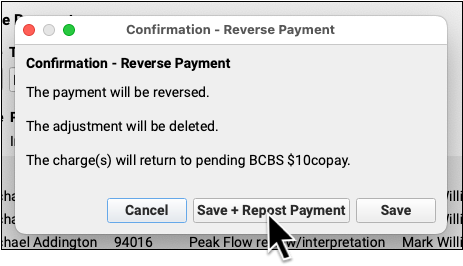
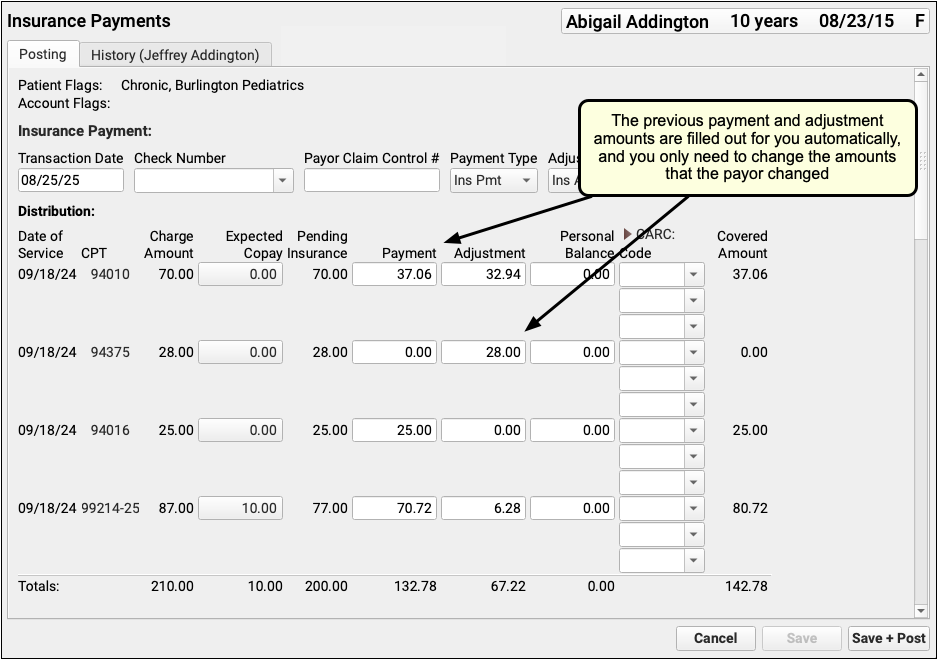
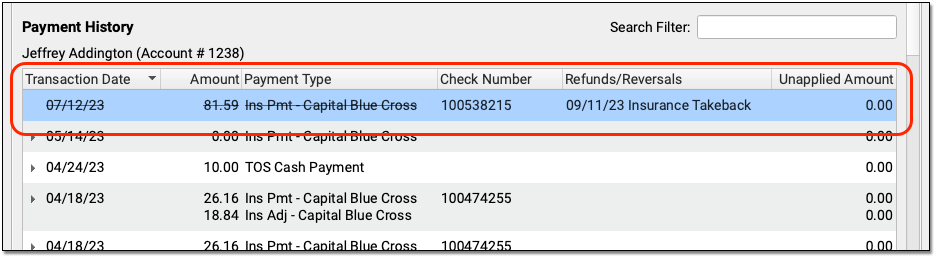
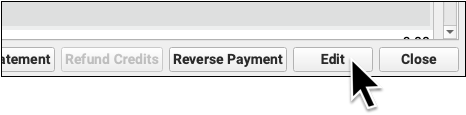
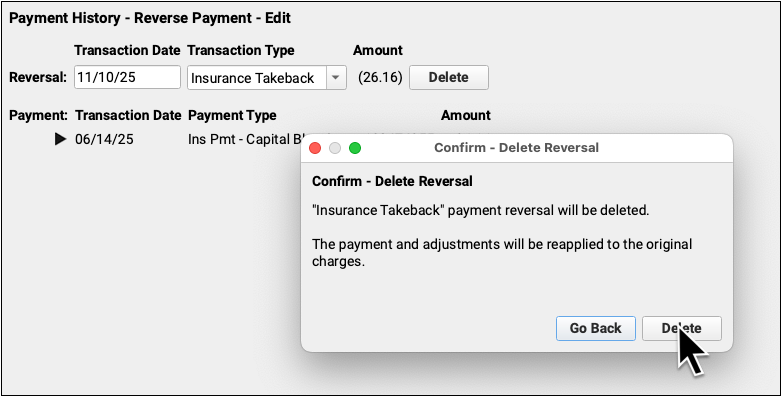
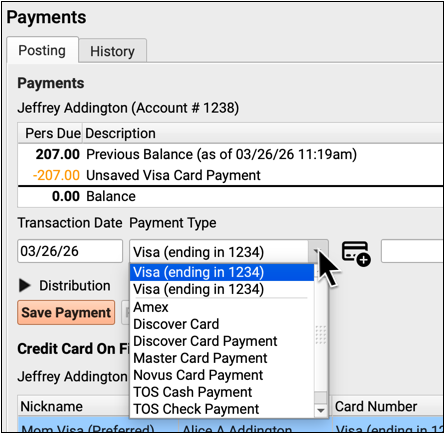
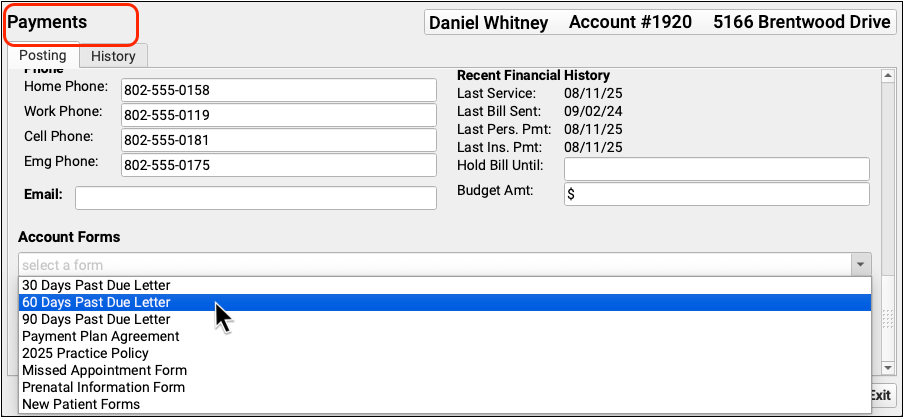
persview) is an interactive report for managing accounts with outstanding personal balances. You can limitpersviewto show families that are extremely overdue or who owe more than a specific amount. Frompersview‘s output, you can generate bills or form letters for one or many accounts. You can also jump directly into other programs for more information about an account. pip- The previous Post Insurance Payments program (
pip) was used to manually post insurance payments and adjustments. It has been replaced by Insurance Payments in PCC EHR. pnpscan- The Appointment Book Displayer by Location (
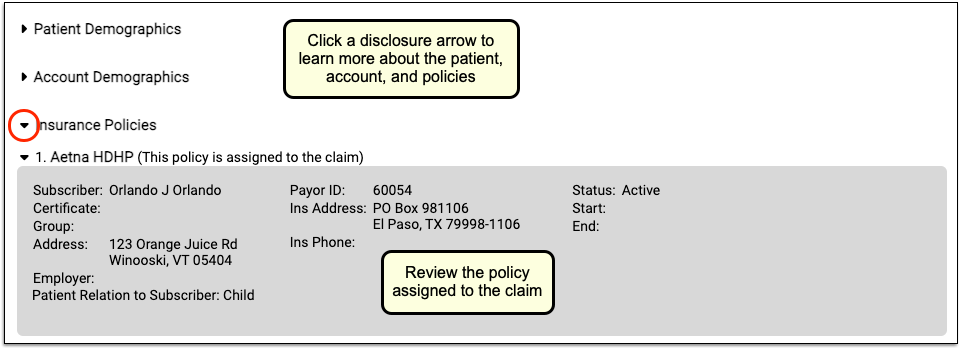
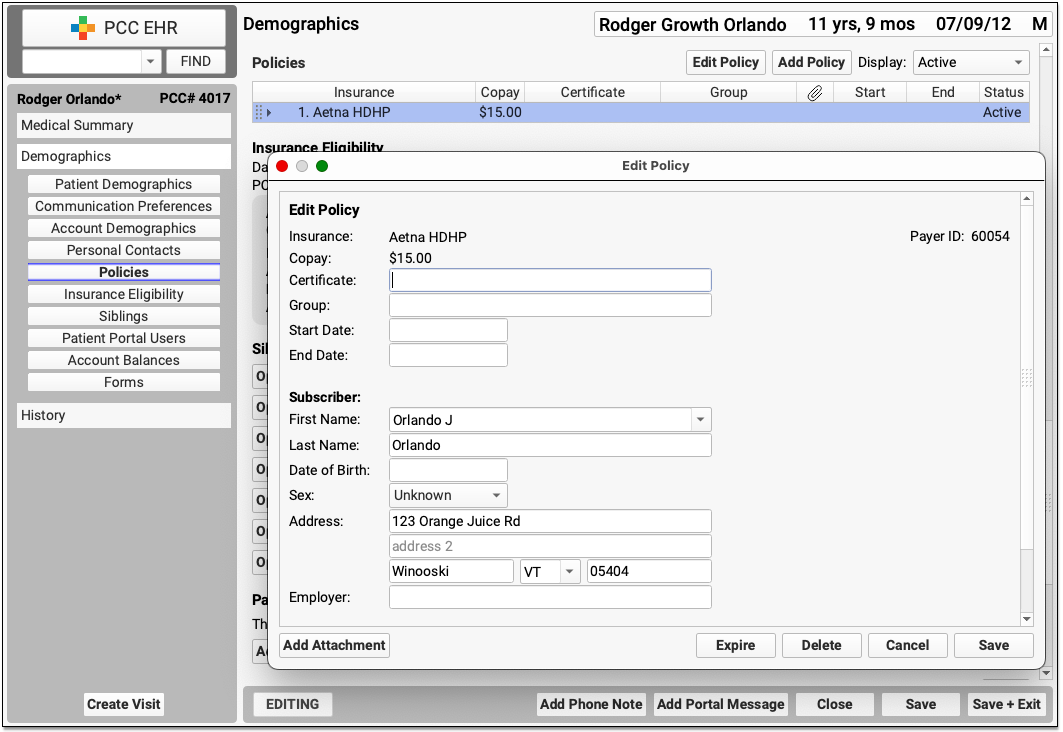
pnpscan) shows scheduled appointments for one or more providers and can be limited to a specific location. policy- The
policyprogram was used to manage an account’s insurance information. It was available directly from the Practice Management interface as well as incheckin,fame, orcheckout. It has been replaced by the policy component in PCC EHR. policylog- The
policylogprogram displays a log of all changes made to a patient’s insurance policy records. If an insurance policy was accidentally deleted or edited, you can usepolicylogto review what changes were made. You can runpolicylogfrom within thepolicyprogram or from a command prompt. prenc- The
prencprogram, also called the “Print Encounter Forms” program, was used in Partner to print encounter forms for the day. It has been replaced by the Print Visit Forms tools in PCC EHR. prepare- The
prepareprogram recompiles your schedule with new hours. Whenever you make changes to a provider’s hours inprofile, you must runpreparefor them to take effect. preptags- The
preptagsprogram prepares insurance claims that are waiting to be submitted and runs theECSprogram. printpatstats and specstats- The Print Patient Statistics (
printpatstats) program generates a series of text based charts on demographic data such as patient sex and age distribution. Thespecstatsscript allows users to filter theprintpatstatsdata usingrecaller‘s criteria interface. profile- The Provider Profile Machine (
profile) sets the work hours for each provider. Runprofilewhen you need to edit providers’ IN and OUT times. You can have more than one “profile” or set of work hours. provids- The Provider ID Editor (
provids) allows you to override providers’ standard ID numbers submitted with insurance claims. prscprint- The
prscprintreport will show every provider’s in and out times for a given date or date range. When you are configuring multiple providers’ schedules and need a quick view of who is in and out of the office,prscprintis a quick and easy reference. ra- The Partner Windows (
ra) is a collection of pick-lists for running different Partner Programs. New Partner users use therawindows to find and run Partner Programs. Most Partner users see theraprogram automatically when they log in. The alternative to usingrais to run programs from a command prompt. recaller- The Patient Recaller (
recaller) builds patient or account lists based on a wide range of criteria. In addition to producing customizable lists, therecallercan generate form letters and address labels.Before PCC EHR replacements were introduced, clients used
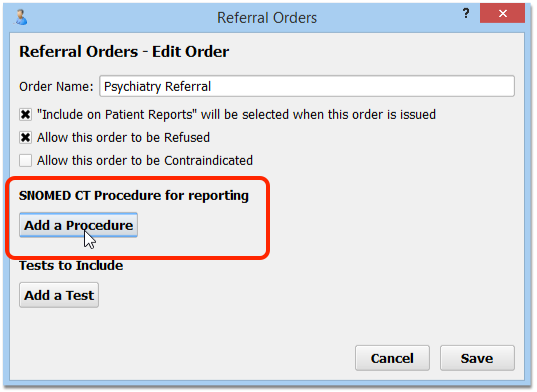
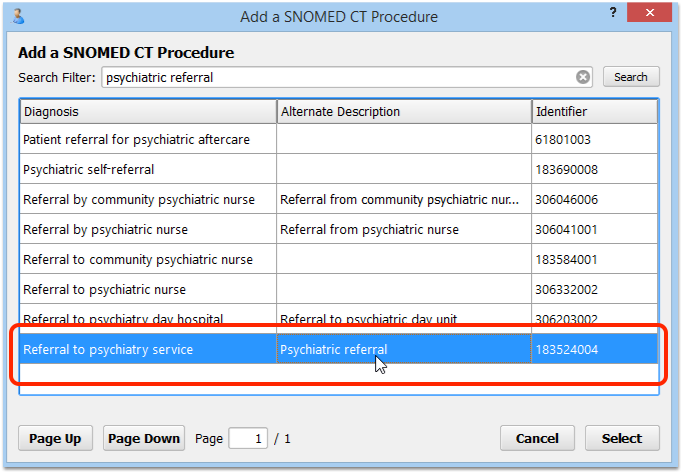
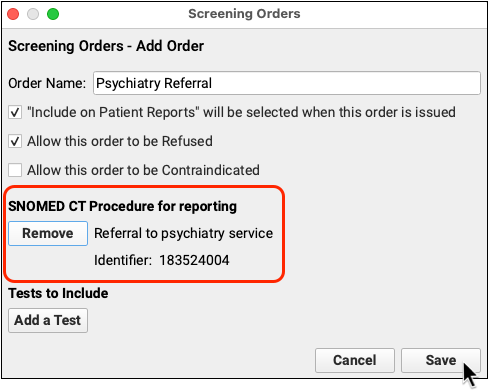
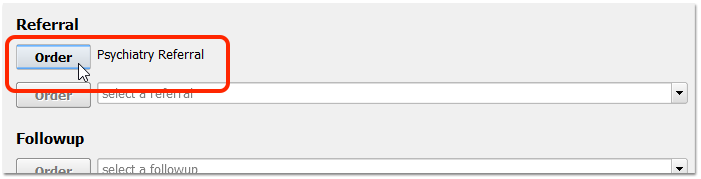
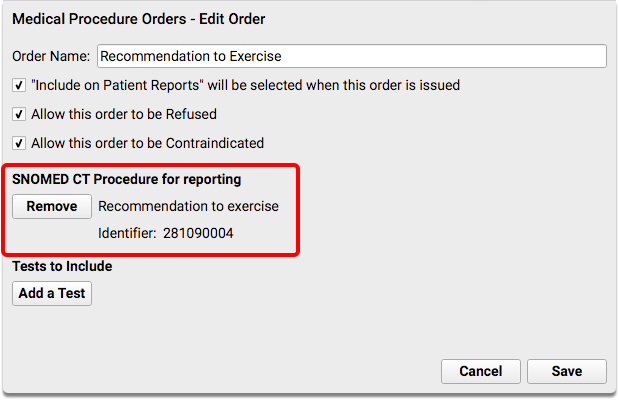
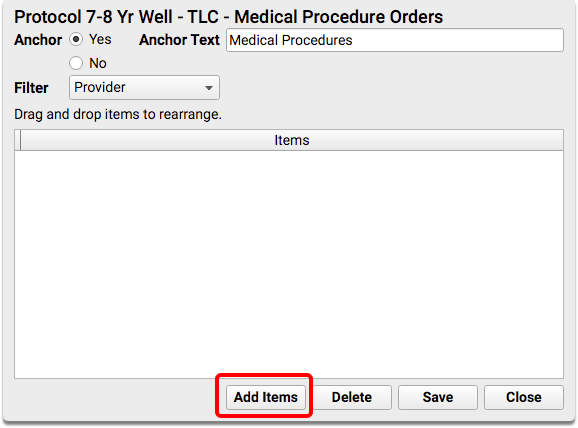
recallerto recall patients for physicals, find patients who received a certain procedure, list patients based on a status flag, generate appointment reminder postcards, review a list of patients with asthma diagnoses, or view patients who have a particular insurance plan. referral- Referral (
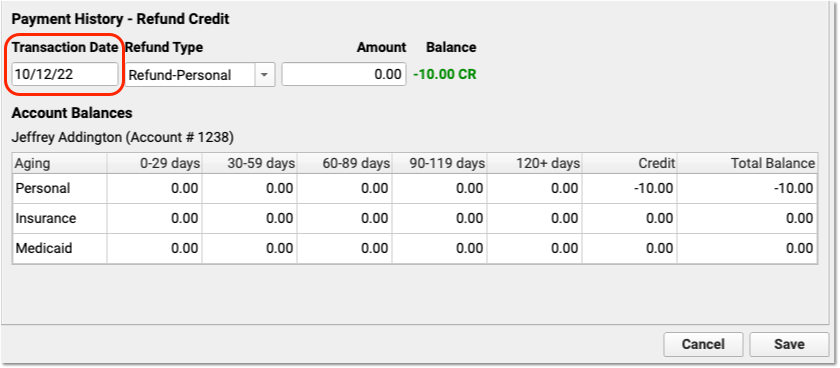
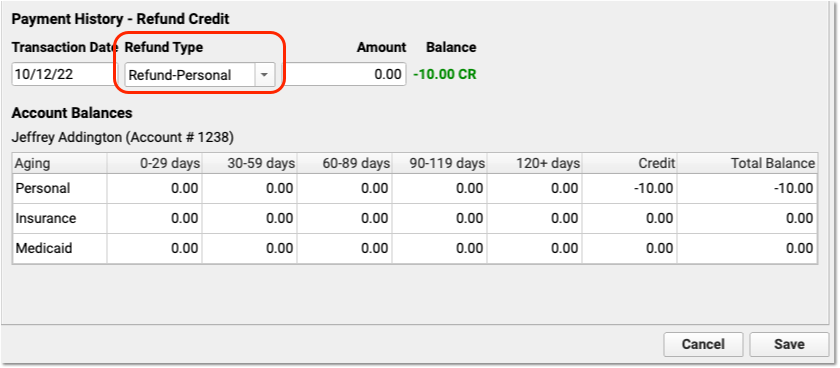
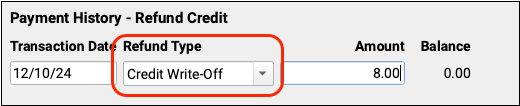
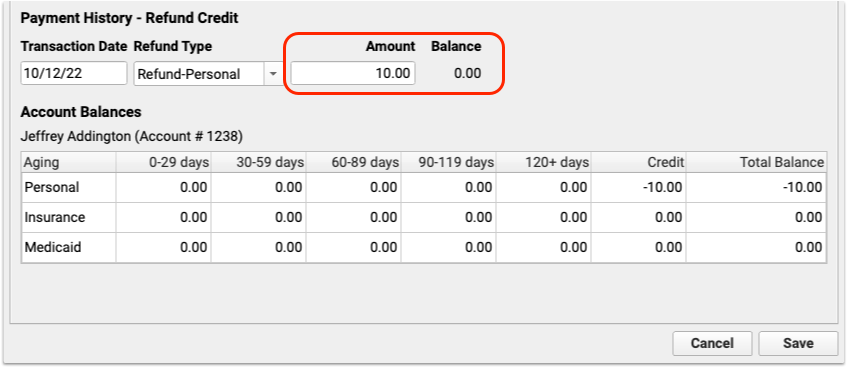
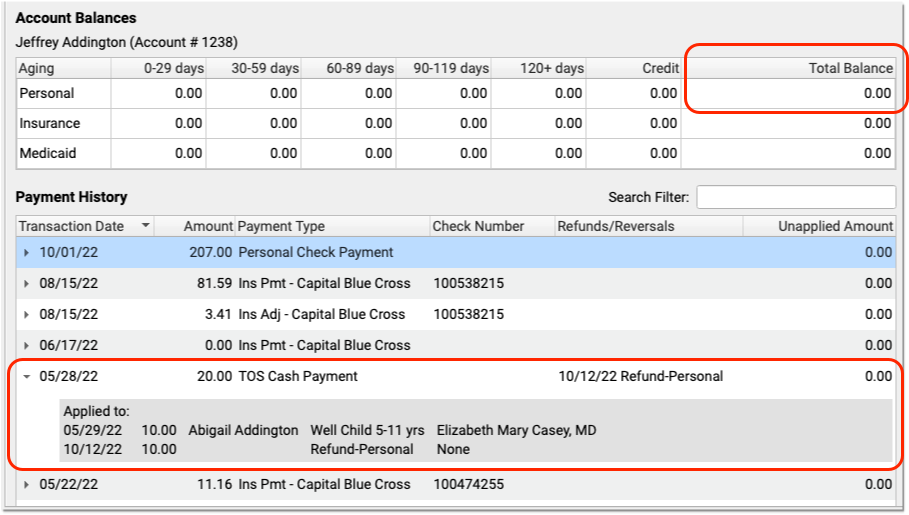
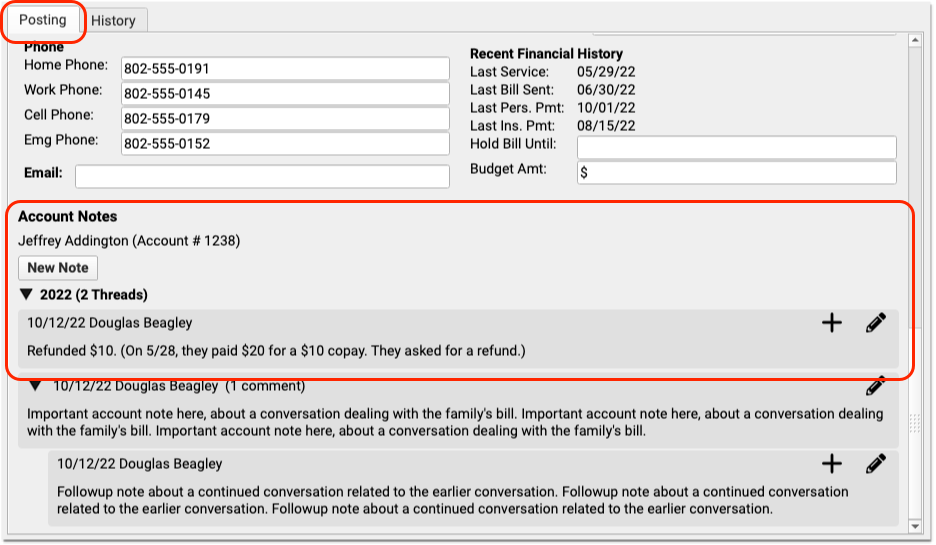
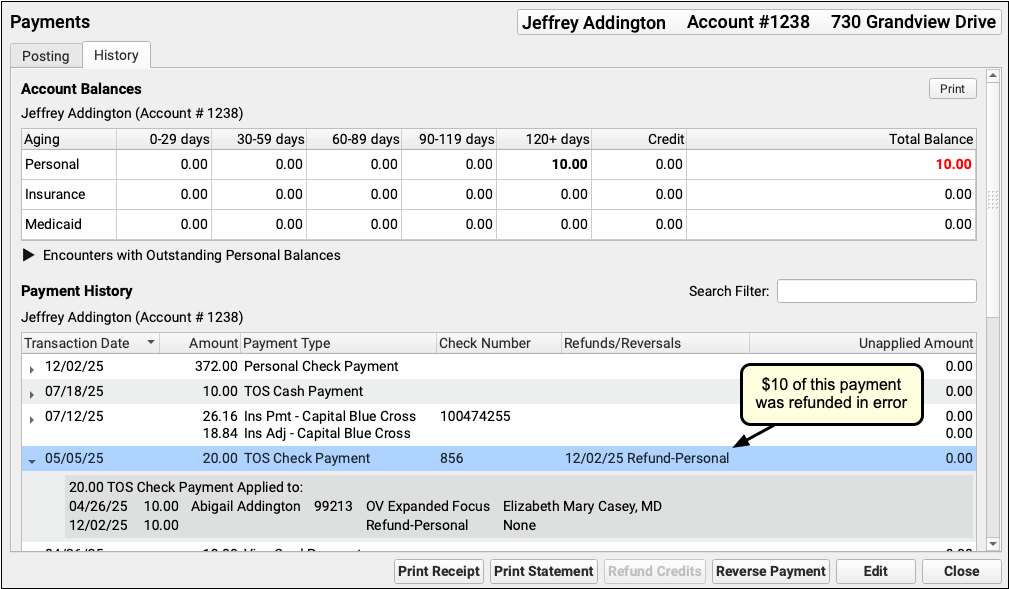
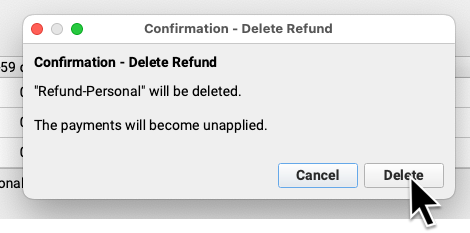
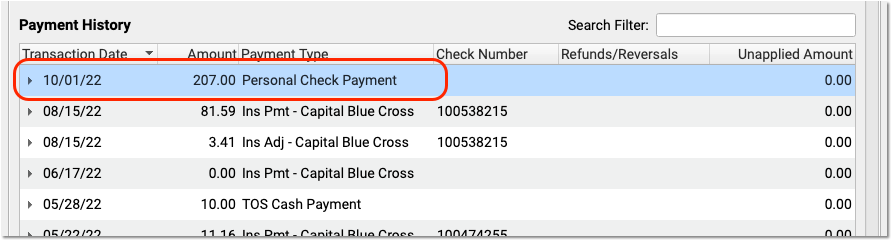
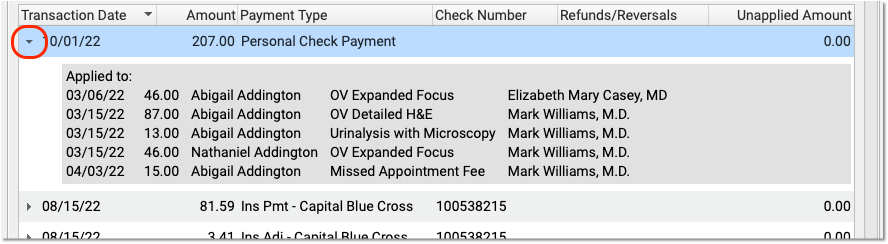
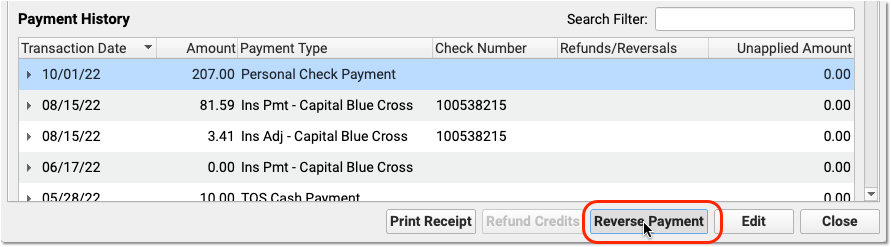
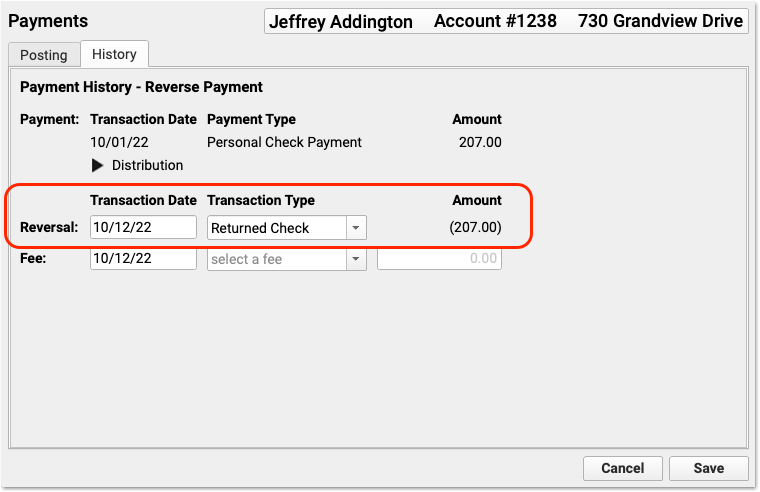
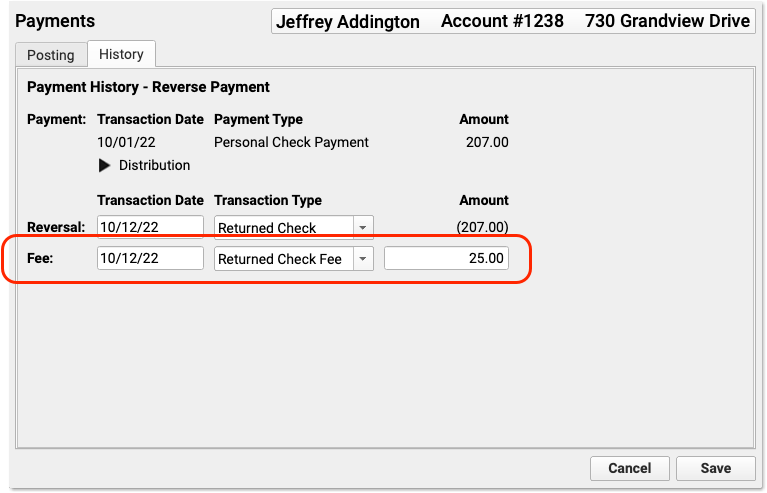
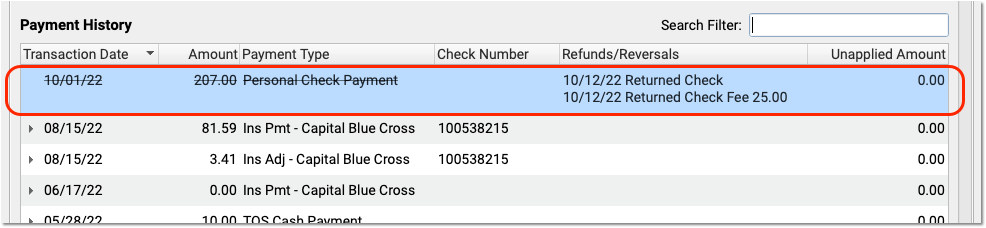
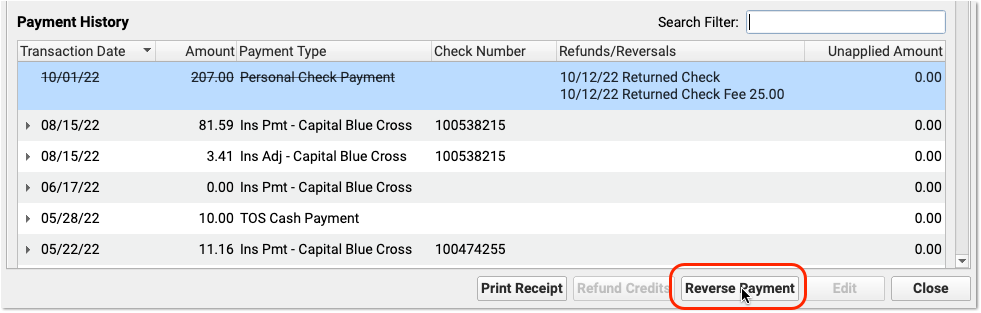
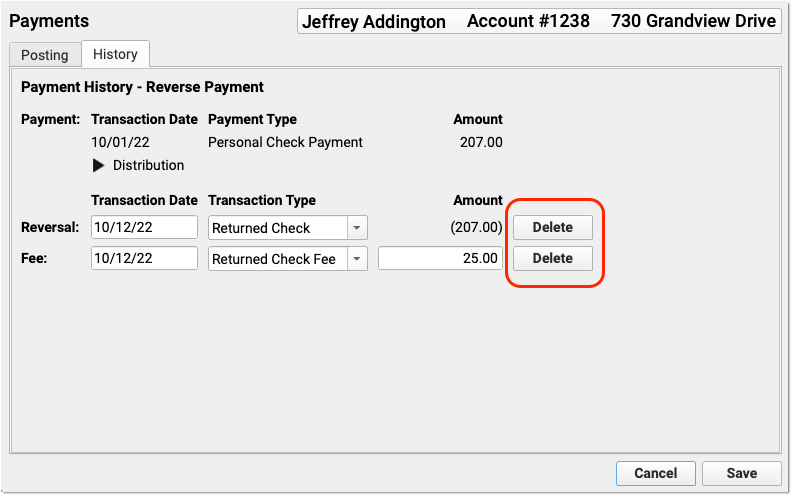
referral) recorded basic referral information, tracked referrals for each patient, and generated referral forms and referral reports. The Referral Statistics Report (refreport) sorted and displayed patient referrals. These features have been replaced by orders in PCC EHR. refund- Post Refunds (
refund) posts refunds, account adjustments, and penalty fees. Items posted in refund behave similarly to charges posted incheckout. For example, you can link a payment or a credit to a refund, and each refund type can be found in the procedure table inted. rmscb- The Remove Sick Call Blocks (
rmscb) program removes blocks of any type based on a date range and provider list. Runrmscbto remove lots of blocks from your schedule at once. rolo- The Rolodex (
rolo) is a basic address list storage program. It can manage many different rolodex lists for different purposes and includes a basic search function. sam- The Scheduling Appointment Minder (
sam) schedules appointments for patients. scan- The Appointment Book Displayer (
scan) displays the day’s schedule for one or more providers. Inscan, you can flip through the days of your schedule using the right and left arrow keys.PCC can customize the information shown in the
scanreport. Along with normal schedule information, it could show you who scheduled each appointment and the date the appointment was made. scrod- The Provider Schedule (
scrod) program tells Partner which days providers work and which days they are off.scrodis a calendar on which you configure a provider to work their regular hours, work a special profile, work other “strange” hours, or go on vacation. snomedmap- The
snomedmapprogram is a collection of custom reports that you can use to understand the relationship between the clinical SNOMED-CT and billing ICD-10 diagnosis codes you use on your PCC system. spectstats- See
printpatstats. squish- The
squishreport displays an abbreviated schedule for any provider for an entire week. The report lists each visit reason, the length of the appointment, and the patient’s name. srs- The Smart Report Suite (
srs) is a report library in Partner.srscontains dozens of powerful, customizable reports, all run with a consistent interface. tater- The Account History Report (
tater) provides a history of transactions on an account.taterreports on charges, payments, refunds, and other transactions. This report was replaced be the Account History in the patient’s chart. - TeraTerm
- TeraTerm is a Windows program that connects a PC computer to Partner. You run all Partner programs by first running TeraTerm and logging into Partner. AniTa is a newer program used for the same purpose. PCC did not write AniTa or TeraTerm.
ted- The Table Editor (
ted) contains a list of lists used by your PCC system. This configuration tool was replaced by the Tables tool in PCC EHR. tickle- The Tickler Module (
tickle) is an automatic email reminder program. Use tickle to create reminders or messages about patients and accounts that will be delivered at a later date to a specified email account. Some offices use a list ofticklemessages as a cancellation list for appointments. twomonths- The
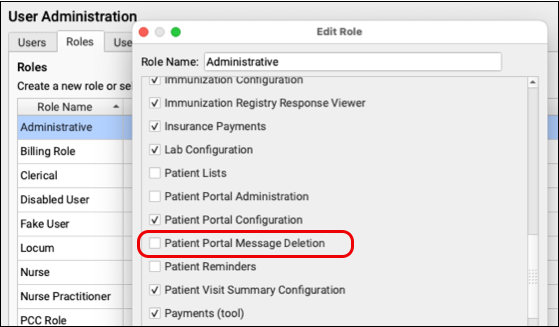
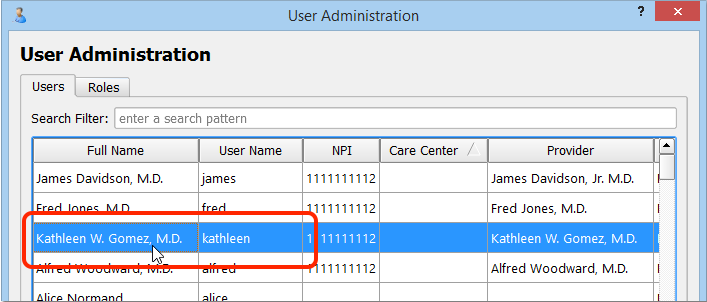
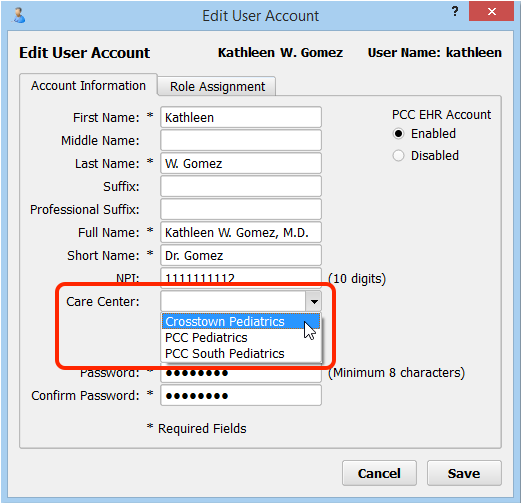
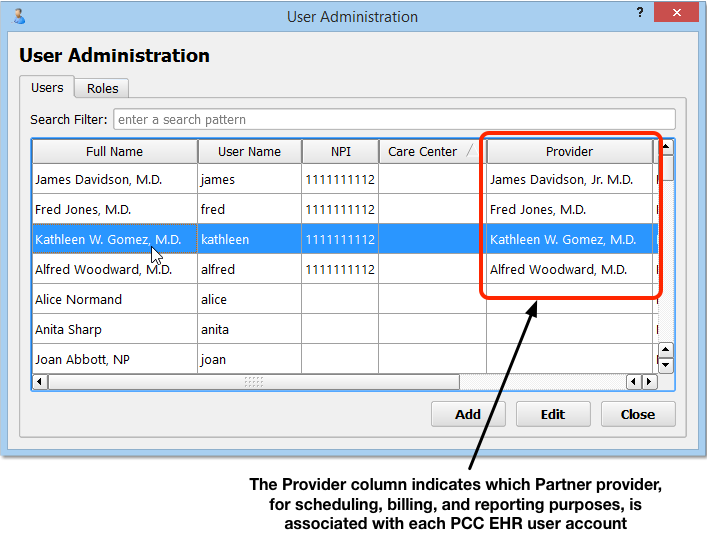
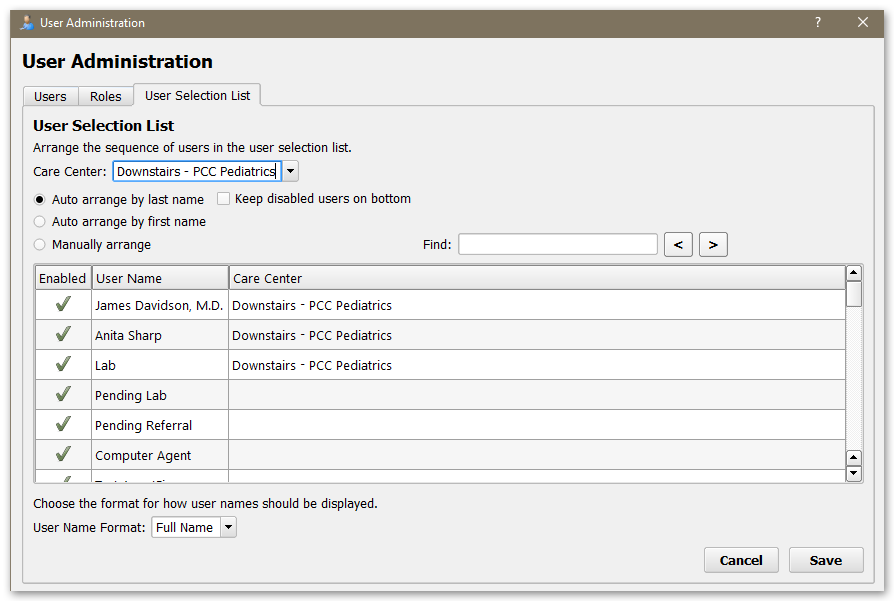
twomonthsreport sends a calendar-style schedule directly to your default Partner printer. You can run thetwomonthsreport from a command prompt. useradmin- The User Administration (
useradmin) program adds or locks-out Partner users, changes passwords, and modifies permission lists for some Partner functions. utilize- The Insurance Utilization (
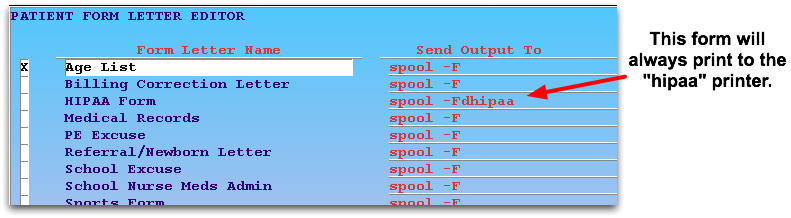
utilize) report shows you all of the patients who visited during a given date range and had a certain insurance carrier as their primary payor. waffle- The Friendly Form Letter Editor,
waffle, makes changes to Partner’s form letters. Usewaffleto modify existing form letters or create new ones.