Share Your Screen with PCC Support
ScreenConnect gives PCC live access to your workstation for support, troubleshooting, and training. The ScreenConnect application creates a secure connection during each individual session.
Contents
Install and Launch ScreenConnect for Windows
To use ScreenConnect, you will need to install ScreenConnect files. You may need your computer’s admin password if install and download permissions are locked on your workstation.
Install ScreenConnect
To install a ScreenConnect instance, use the unique session code that you receive from PCC Support to download your session’s ScreenConnect zip file.
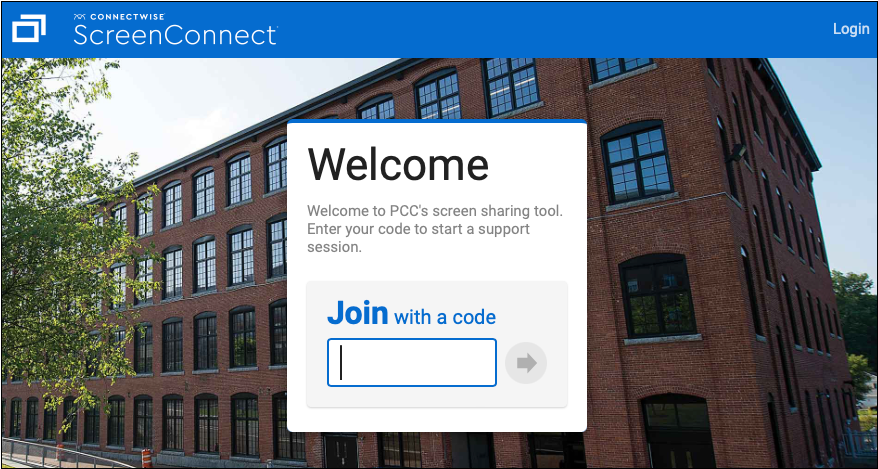
Navigate to the ScreenConnect Login Page
During a support call, open your preferred browser and type the url “help.pcc.com” or “https://pccvt.screenconnect.com”.

Receive Your Unique Session Code
Your PCC support person will create a new ScreenConnect session. Once the session is live, they will give you a unique session code.
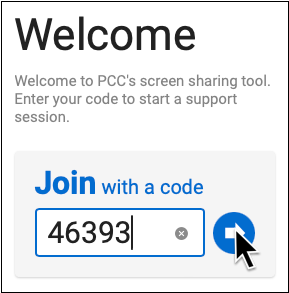
Enter Your Code
Enter your unique session code and click the arrow button. A zip file for your unique session will download.
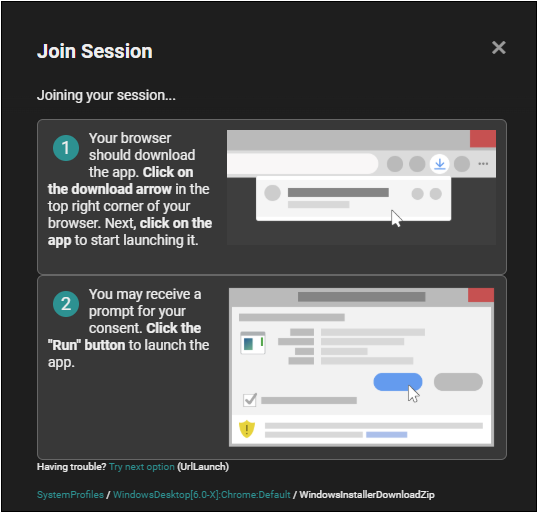
Extract and Run the ScreenConnect Instance
Open the ScreenConnect Zip File
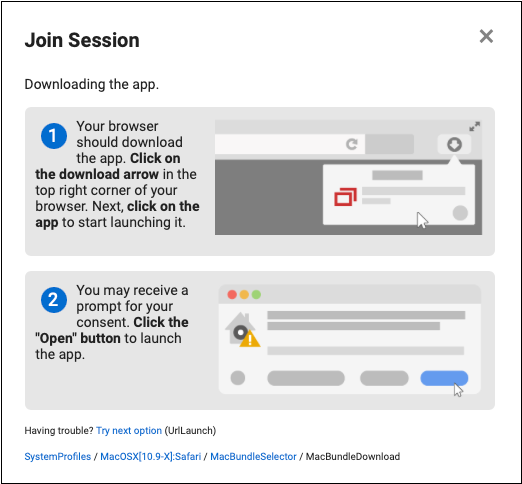
Once the download is complete, click your browser’s download arrow or navigate to your Downloads folder. Double-click the ScreenConnect.WindowsClient.zip file to open it.
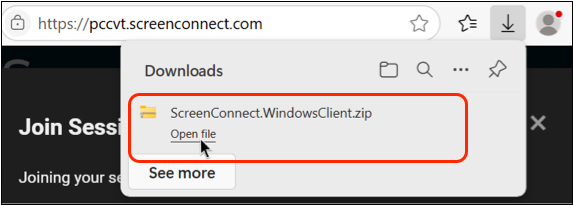
A window displaying the contents of the zip file will open.
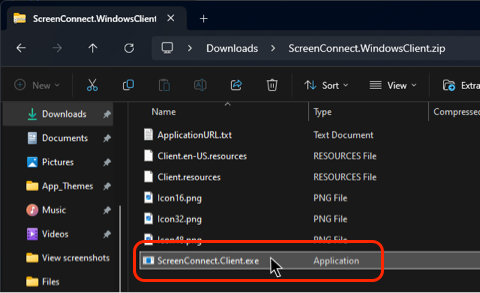
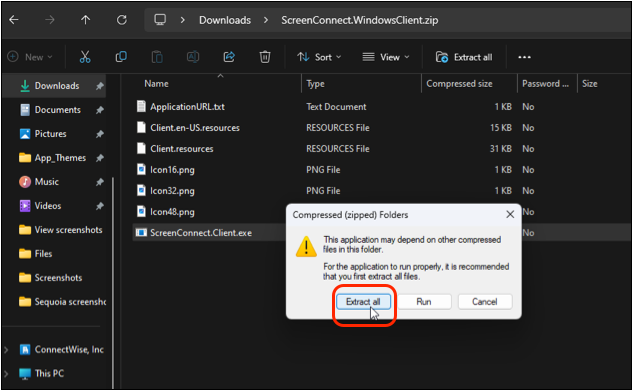
Extract All Files in the ScreenConnect Zip File
Double-click on the ScreenConnect.Client.exe file within the zip file window to extract the contents. When prompted, click “Extract All”.
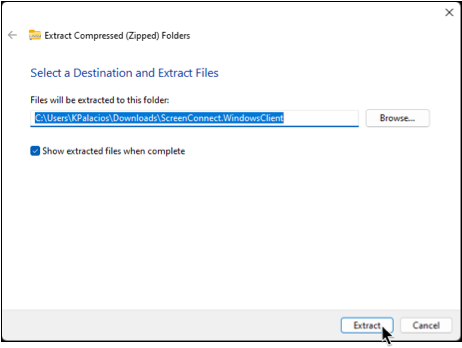
Select a File Destination
You can use the default destination or enter a chosen destination for the extracted file. Then click “Extract”.
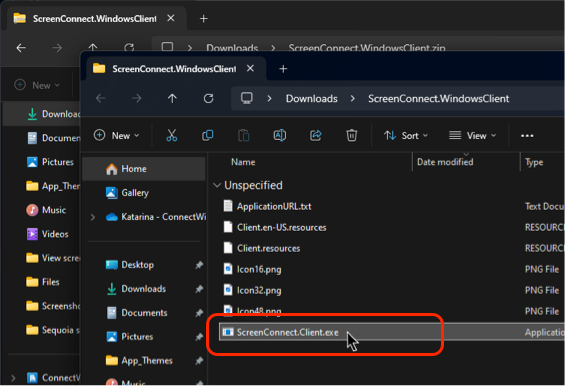
Run the ScreenConnect Application
When a new window opens, double-click on the ScreenConnect.Client.exe file to run the application.
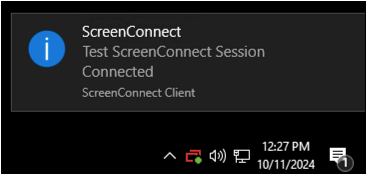
Along with a confirmation message, you may notice a change in background color and new icon in your system tray.
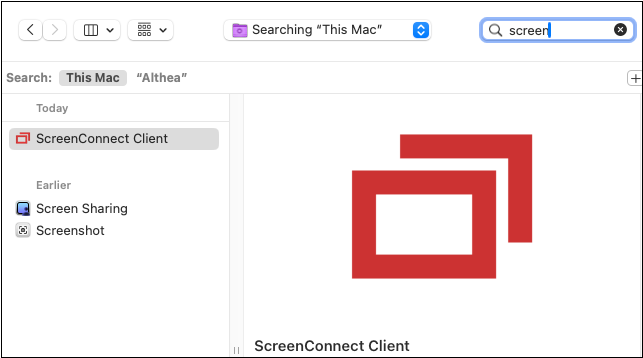
Install and Launch ScreenConnect for Mac
To use ScreenConnect, you will need to install ScreenConnect files. You may need your computer’s admin password if install and download permissions are locked on your workstation.
Install ScreenConnect
To install a ScreenConnect instance, use the unique session code that you receive from PCC Support to download your session’s ScreenConnect zip file.
Navigate to the ScreenConnect Login Page
During a support call, open your preferred browser and type the url “help.pcc.com” or “https://pccvt.screenconnect.com”.
Receive Your Unique Session Code
Your PCC support person will create a new ScreenConnect session. Once the session is live, they will give you a unique session code.
Enter Your Code
Enter your unique session code and click the arrow to open your session.
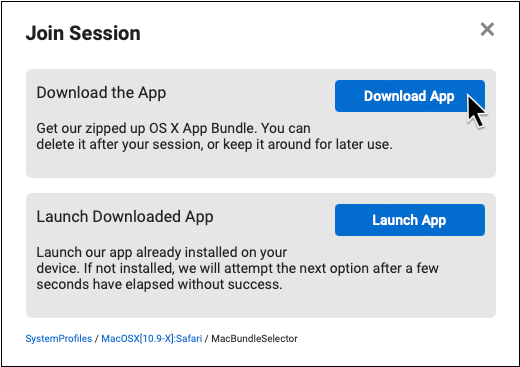
Download the ScreenConnect Application
Click “Download App” to download the ScreenConnect application.
Grant ScreenConnect Access to Your Workstation
Mac users downloading ScreenConnect for the first time may need to grant the application access to their workstation.
Open System Settings
Click the “Open System Settings” button at the prompt. This will take you directly to the Privacy & Security section of your settings.

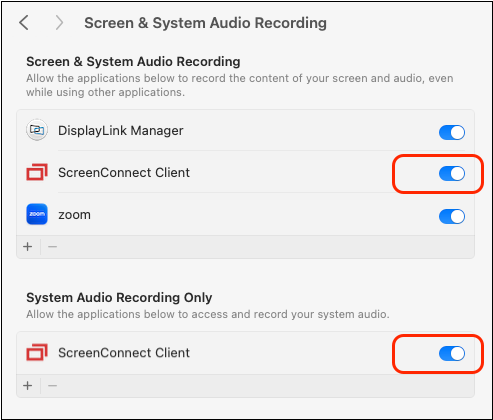
If you do not see a prompt, you can access these permissions in System Settings. Once there, navigate to Privacy & Security, then open Screen & System Audio Recording.
Add ScreenConnect
Click the “+” icon, then search for ScreenConnect and select it.
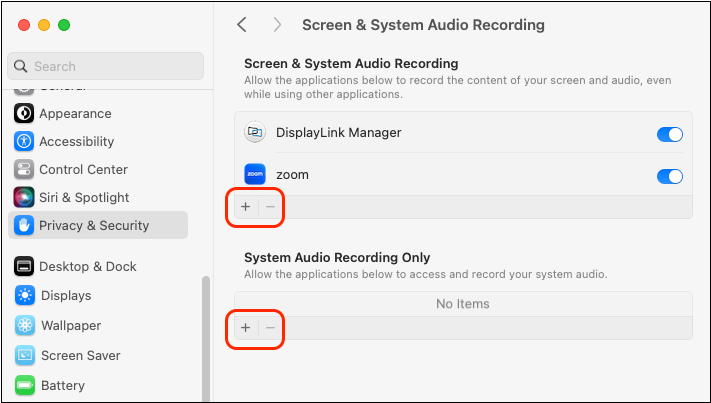
ScreenConnect will already be present in your Screen and System Audio Recording settings if you have used ScreenConnect in the past.
Grant ScreenConnect Access to Your Workstation
Click the ScreenConnect slider to the “on” position to grant access to your workstation.
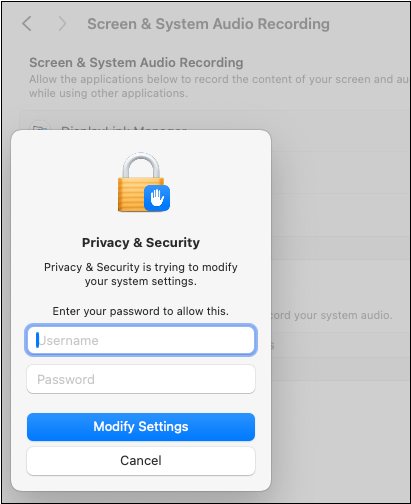
Enter Your Username and Password
Enter your computer’s username and password if prompted.
Still Not Connected?: If these permissions do not grant access to ScreenConnect, you may also need to adjust settings in Accessibility and Full Disk Access. These are sections within the Privacy & Security portion of your Mac’s System Settings.
Launch ScreenConnect
After you download the ScreenConnect application, launch the application to share your screen with PCC.
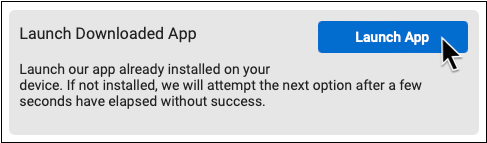
Launch the ScreenConnect Application
Click the “Launch App” button to launch the application.
Allow Your Browser to Open ScreenConnect
Click “Allow” or “Always Allow” if you are prompted to do so.

You may notice a change in your desktop background color when you are connected. A ScreenConnect options bar will appear at the top of your screen.

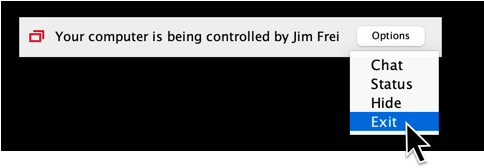
End a ScreenConnect Session
To end a ScreenConnect session, click “Exit” in the ScreenConnect options bar.
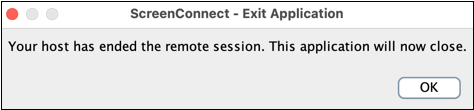
If your PCC support person ends the session first, you will be notified with an Exit Application popup.
Use Your Mobile Device’s Camera for Workspace and Equipment Triage
You can use your phone, tablet, or laptop camera to work out a problem with your physical workspace, hardware or other equipment with a ConnectWise View session.
Request a ConnectWise View Session
Ask your PCC support person to text or email you a ConnectWise View session link. You can also request a url to type in to your device’s web browser.
Confirm Your Link
Check with your PCC support person that the link you received is the correct one. You can avoid phishing scams by always confirming a link before tapping on it.
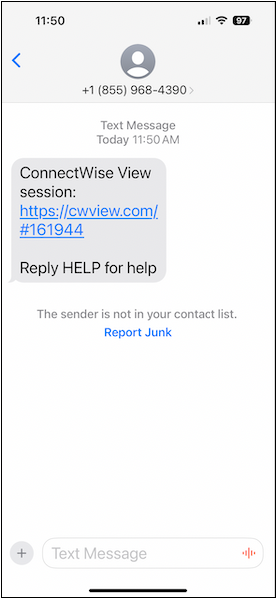
Tap Your Link
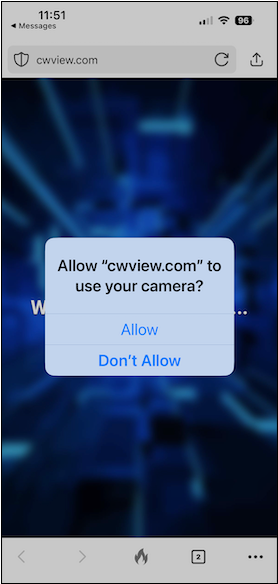
Tap the link and, if prompted, grant permission to use your camera for workspace triage.
Your PCC support person will see the view from your mobile device’s camera and begin triage.
PCC can control which camera view is selected on a phone, as well as whether to mute the mobile device or use a low-bandwidth setting.
End Your ConnectWise View Session
To end a ConnectWise View session, close the browser window on your phone.