Install and Configure PCC EHR on a New Computer
PCC EHR runs on a large server at your practice or in the cloud. A small PCC EHR software program, called the “client” software, runs on each of your Windows PCs, or MacOS workstations.
How do you install the client software on a new laptop or desktop so it can connect to PCC EHR?
In Office: Under most circumstances, you can only install the PCC EHR software on a computer while it is located in your practice, working on your practice’s network. If you need to connect to your office remotely, you can use pocketPCC, or use PCC SecureConnect to connect through a browser window with 2-factor authentication.
Contents
Windows PC Installation Instructions
Follow the steps below to install PCC EHR software on a Windows PC.
Download the PCC EHR Installer
Open a Web browser and visit your server’s PCC downloads page. It gives you direct access to important PCC downloads, as well as links to PCC support and our online documentation at learn.pcc.com.
The url is simply your PCC acronym followed by pcc.com/downloads. So, if your acronym was ABCD, your downloads page would be at https://ABCD.pcc.com/downloads


In-Office Link: This link will work when your computer or workstation is connected to your office’s PCC network. If you use a third-party to manage your network, or need to connect to PCC EHR from a home office, contact your Client Advocate for download assistance.
Run the Installer
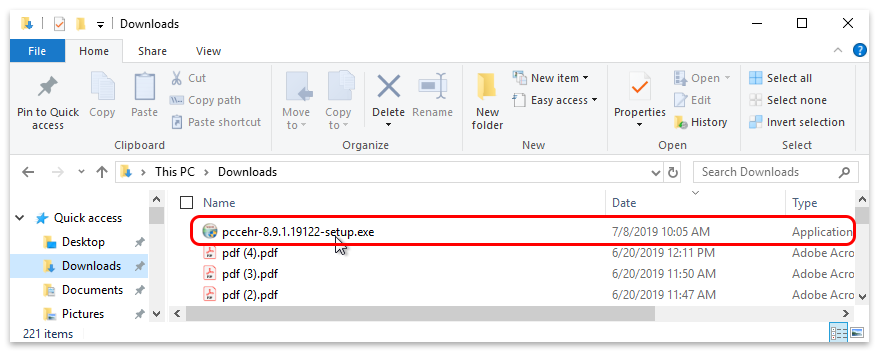
The setup application should run automatically. If it doesn’t, you can double-click on the icon in your downloads list.
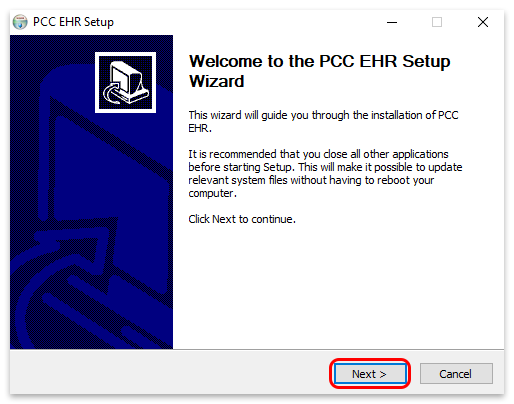
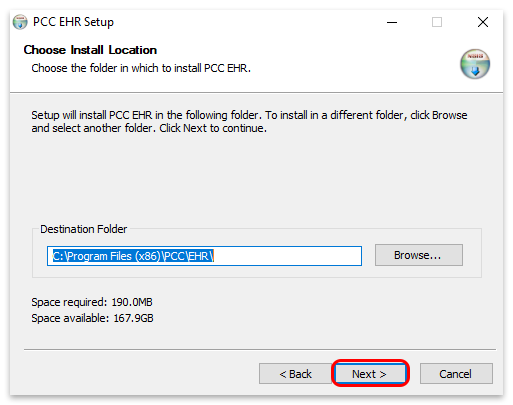
Click through the PCC EHR Setup Wizard
You will see a PCC EHR installation guide. Simply click “Next” or “Install” to move through all steps.
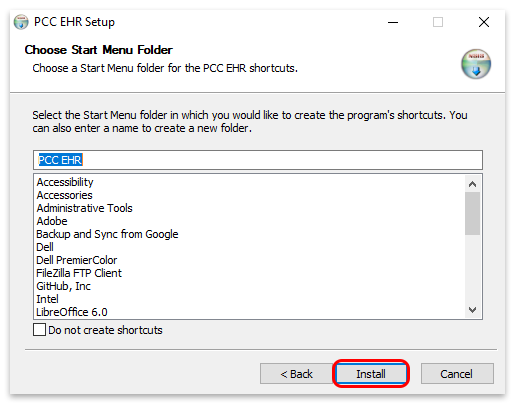
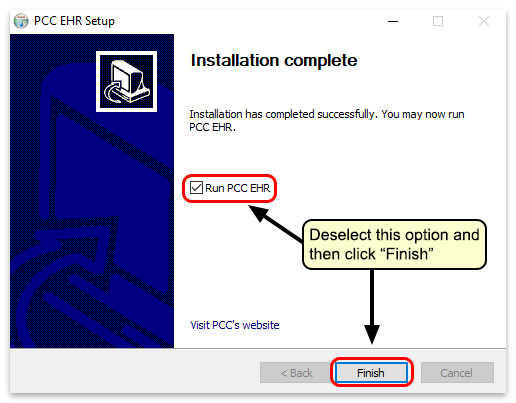
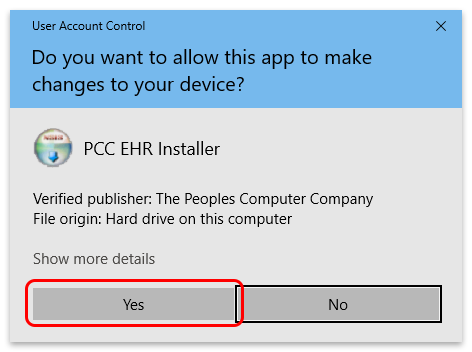
Enter Password: Your computer may ask you for an administrative username and password. If you do not know it, consult your office manager or office system administrator.
Run PCC EHR Settings
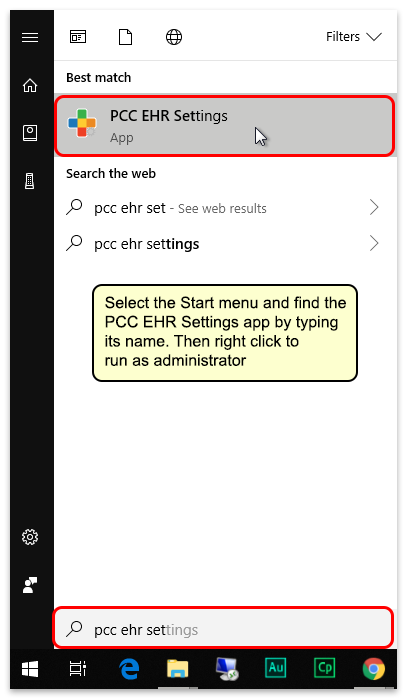
The PCC EHR Settings program can be found by searching for “PCC EHR settings” in your Start menu.
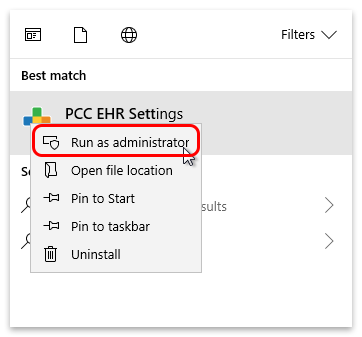
Run As Administrator: You must right-click on the PCC EHR Settings application and choose to run it as an Administrator.
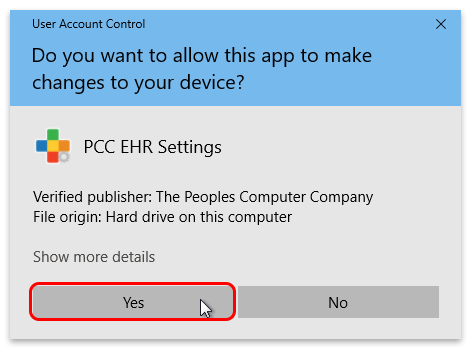
Enter Your Database Settings
Enter the database settings for your practice. Contact PCC Support at 1-800-722-1082 for assistance.
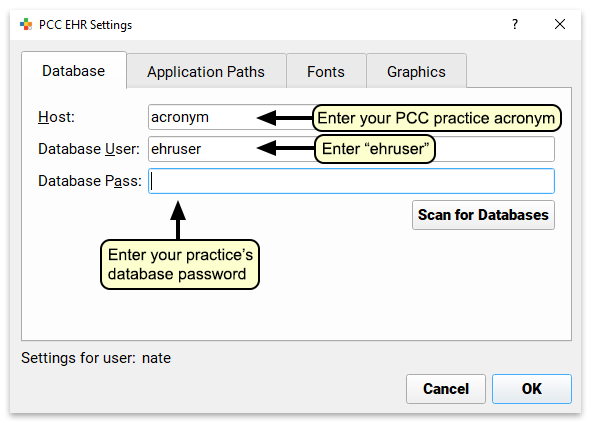
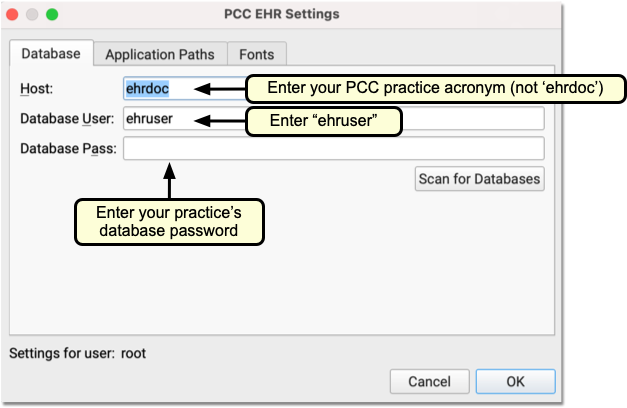
- For “Host”, enter your practice’s PCC acronym.
- For “Database User”, enter “ehruser”.
- For “Database Password”, enter your practice’s database password.
Call or E-Mail for Help: If any of the above settings do not work at your practice, contact PCC Support for assistance.
Optional: Add PCC EHR to Your Task Bar
Since you will be using PCC EHR every day, you may want to add it to your computer’s task bar. Find the application icon (or the alias on your desktop) and drag it to the task bar.
Apple Macintosh (MacOS, Mac OSX) Installation Instructions
Follow the steps below to install PCC EHR software on an Apple Macintosh computer.
Download the PCC EHR Client
Open a Web browser and visit your server’s PCC downloads page. It gives you direct access to important PCC downloads, as well as links to PCC support and our online documentation at learn.pcc.com.
The url is simply your PCC acronym followed by pcc.com/downloads. So, if your acronym was ABCD, your downloads page would be at https://ABCD.pcc.com/downloads


Click the “PCC EHR Client” link to download PCC EHR.
In-Office Link: This link will work when your computer or workstation is connected to your office’s PCC network. If you use a third-party to manage your network, or need to connect to PCC EHR from a home office, contact PCC Support for download assistance.
Run the Installer
The setup application should run automatically. If it doesn’t, you can double-click on the icon in your downloads list.
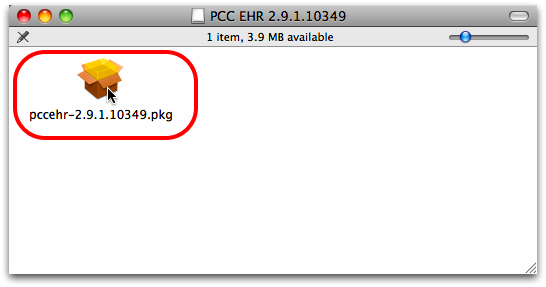
Macintosh Disk Image and Packages: You may need to pop-open a disk image (.dmg file) and double-click on a package:
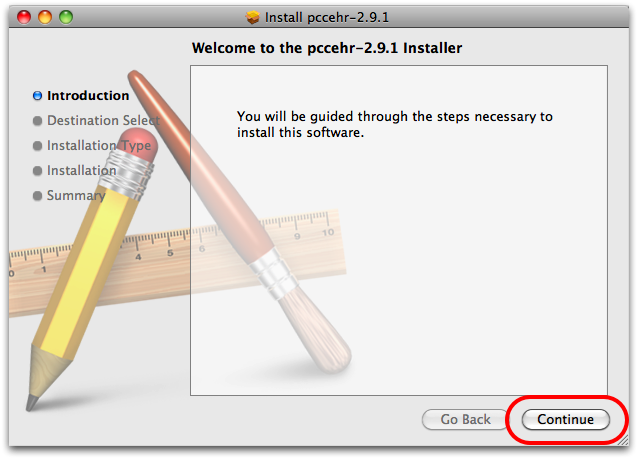
Click through the PCC EHR Installer
You will see a PCC EHR installation guide. Simply click “Next” or “Install” to move through all steps. PCC EHR may launch automatically when you are finished.
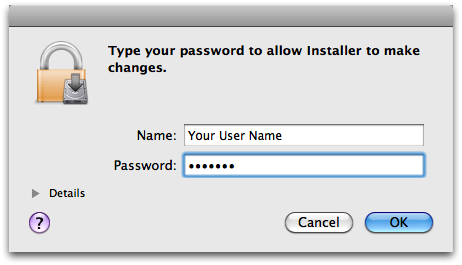
Enter Password: Your computer may ask you for an administrative username and password. If you do not know it, consult your office manager or office system administrator.
Run PCC EHR Settings
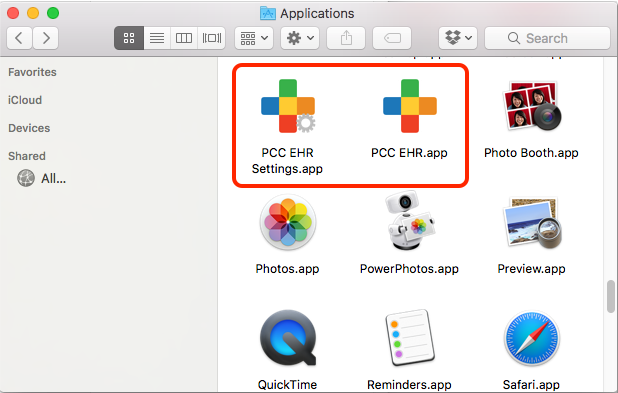
The PCC EHR Settings program is located in the Applications folder on a Macintosh. Find PCC EHR Settings and run it.
Administrative Permission: Changing your PCC EHR settings requires an administrative account on your workstation. You may need to open the Terminal application, located in the Utilities folder in the Applications folder, and then run sudo /Applications/PCC\ EHR\ Settings.app/Contents/MacOS/PCC\ EHR\ Settings Contact PCC Support for assistance.
Enter Your Database Settings
Enter the database settings for your practice.
Macs running the Sequoia operating system may require additional steps when installing PCC EHR for the first time. Contact PCC Support at 1-800-722-1082 for assistance.
Optional: Add PCC EHR to Your Dock or Task Bar
Since you will be using PCC EHR every day, you may want to add it to your computer’s dock. Find the application icon and drag it to the appropriate location.
On the Macintosh, you can find the PCC EHR.app application in the Applications folder.

