Schedule, Chart, and Bill a Telemedicine Visit
Read the procedure and recommendations below to learn how to schedule, chart and bill a telemedicine visit with PCC.
Watch a Video: You can watch an overview of a telemedicine workflow in PCC EHR by viewing Schedule, Chart, and Bill a Telemedicine Encounter.
Configuration: To learn how to configure PCC EHR for telemedicine, read Configure PCC EHR for Telemedicine Encounters.
Contents
- 1 Perform a Telemedicine Visit
- 1.1 Schedule the Patient’s Appointment
- 1.2 Click “Telemedicine” and Optionally Enter a URL For Connecting
- 1.3 Create and Share Telemedicine Connection Information
- 1.4 Check Eligibility, Send Reminders
- 1.5 Manage Your Schedule in PCC EHR
- 1.6 Connect to Your Telemedicine Platform
- 1.7 Open the Chart, Set Status, and Begin Telemedicine
- 1.8 Chart the Encounter
- 1.9 Select Diagnoses, Orders, and Indicate Other Procedures
- 1.10 Click “Bill” and Select a Visit Code
- 1.11 Update Units and Linking, and “Make Ready for Billing”
- 1.12 Sign the Chart Note
- 1.13 Click “Ready to Post” and Review the Billing Place of Service
- 1.14 Update Diagnoses, Procedures, Claim Information, and Payments
- 1.15 Click “Save + Post” to Queue Up a Claim
- 2 Optional: Post Charges in Practice Management Instead
- 3 Bill for a Phone Call as a Telemedicine Encounter
- 4 Bill for Patient Portal Messages as a Telemedicine Encounter
- 5 Other Telemedicine Resources
Perform a Telemedicine Visit
Read the procedure below for an overview of how to schedule, chart, and bill a telemedicine encounter in PCC EHR.
Schedule the Patient’s Appointment
Use the Appointment Book to schedule a patient, just as you would any other encounter.
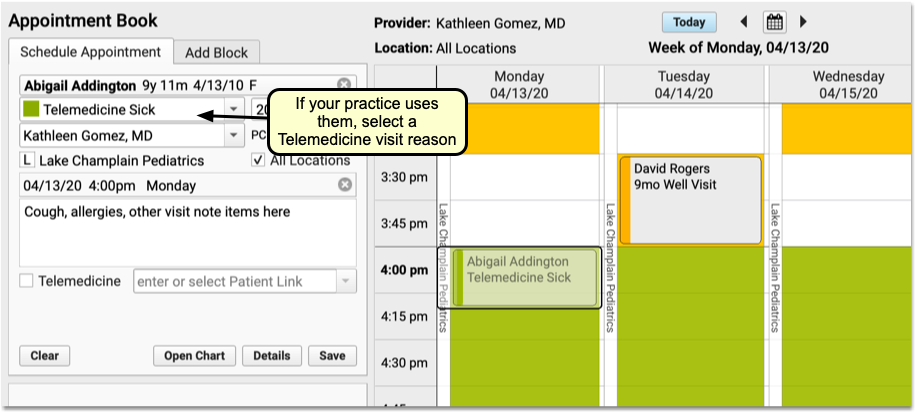
If your practice uses telemedicine visit reasons, mapped to specific telemedicine chart protocols, be sure to select one. As you schedule, you can review telemedicine consent, insurance information, and any additional details you normally confirm with the patient or family.
To learn more about the Appointment Book, visit Schedule Patients in the Appointment Book.
Unplanned Telemedicine Encounters: Even if you are recording a telemedicine encounter that happened yesterday or are created on-the-fly during a phone call, PCC recommends you schedule Telemedicine appointments so they appear in the clinician’s schedule and are ready to chart and bill.
Click “Telemedicine” and Optionally Enter a URL For Connecting
When you create the appointment, check the “Telemedicine” option near the bottom of the Schedule Appointment tab.
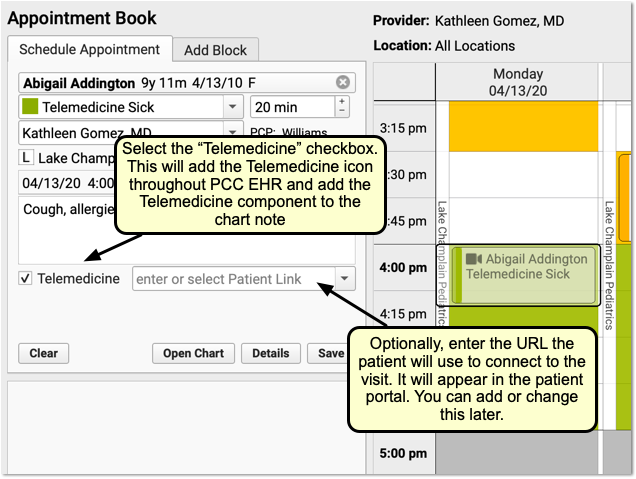
If available, enter the URL web address that the patient or family will use to connect to the visit. If your practice has a set of persistent URLs, you can select from a drop-down menu.
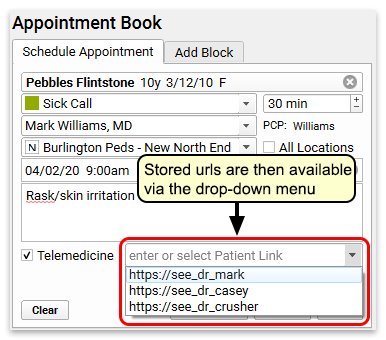
The URL link will appear in the patient portal for the family.
I Don't Have the URL Yet!: Depending on the video telemedicine tool you use, you may not know this URL at the time you schedule the appointment. That’s ok! You can leave this blank and fill it out later, either here in the Appointment Book or directly on the patient’s chart.
After you schedule the appointment in PCC EHR, you may need to also create an appointment with your third-party telemedicine vendor. You may need to share the connection address with the family at a later date. Incorporate these needs into your practice’s scheduling procedure so that when it is time for the visit, both the clinician and family know what to do.
Your practice can store and retrieve telemedicine connection information on the appointment, as shown above, as well as in the Telemedicine component that appears at the top of all telemedicine visits.
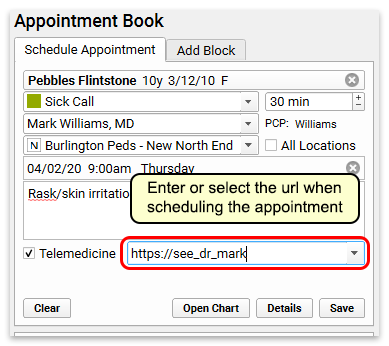

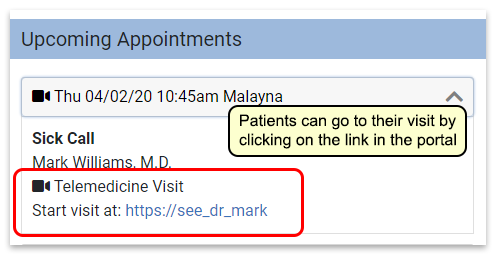
You can add the URL to this field at any time, and it will appear in the patient’s portal. You can also email or text the link to the patient or family.
Check Eligibility, Send Reminders
As you would for any other appointment, your practice can use PCC’s tools to check patient insurance eligibility and send appointment reminders.
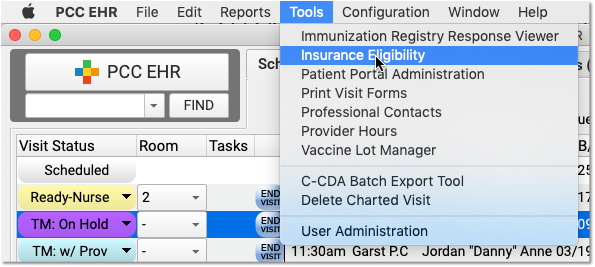
Is This Telemedicine Visit Billable?: Insurance requirements and payment differ for every payer, and often on a state-by-state basis. PCC recommends that you contact major payers and learn what they require for telemedicine visits. While the COVID-19 crisis improved payer responsiveness to telemedicine services, historically there has been a wide range of support and payment from payer to payer. PCC discusses trends such as this at our monthly Billing Drop-In.
Manage Your Schedule in PCC EHR
You can easily see which visits on the schedule are telemedicine visits thanks to the telemedicine video camera icon.
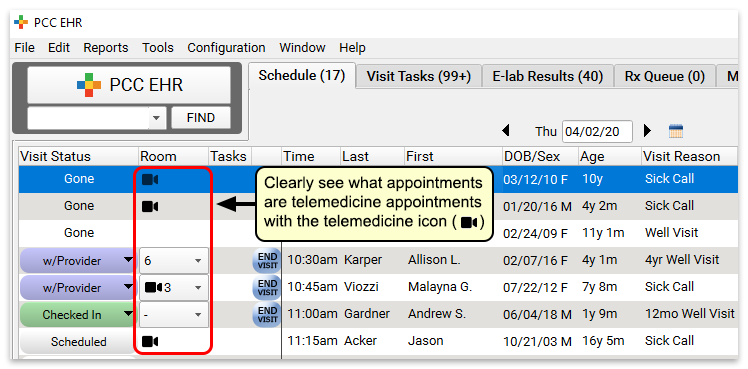
Do We Check In Patients?: Depending on your telemedicine workflow and the tools you use, your practice may have to adjust your check in procedures for telemedicine visits. Your front desk might connect with the patient first via phone to go over insurance and other check-in details, or the clinician might start the visit. Your practice can create custom telemedicine Visit Statuses to track these steps and help coordinate patient flow.
Connect to Your Telemedicine Platform
When it’s time for the visit, connect to your telemedicine platform. Typically, your clinicians can do this from the link at the top of the chart note.

If your practice works with multiple vendors or uses a different method to open a connection, you will need to share that with each clinician.
Some clinicians have told PCC that they prefer to connect on one computer monitor and use another monitor to chart and take notes during the encounter.
Why Isn't My Link Clickable?: If you connect to PCC EHR through a remote client, such as by using remote desktop protocol, then the link will not be clickable. Instead, you can copy and paste that link into your browser.
Open the Chart, Set Status, and Begin Telemedicine
Next, the clinician double-clicks on the patient’s name to open the chart and begin the visit.
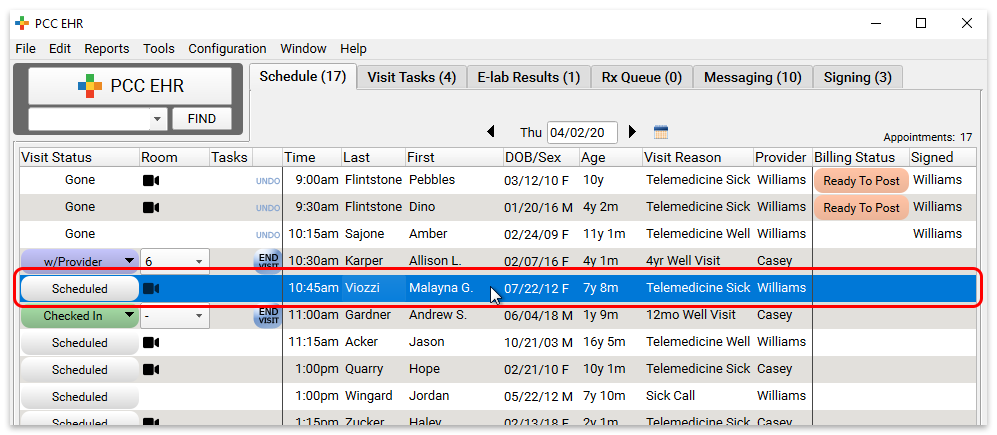
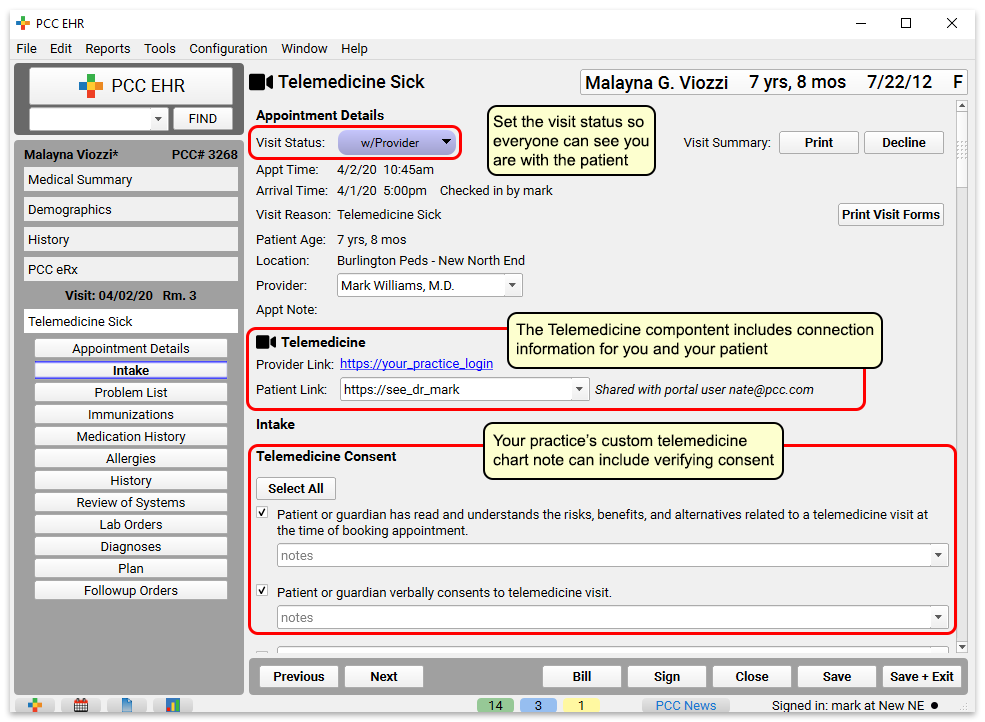
The clinician can set their status to inform the practice the visit has begun. Connection links will appear in the Telemedicine component at the top of the chart note.
Your practice could include a “Telemedicine Consent” component at the top, as illustrated above.
Chart the Encounter
Clinicians can use your practice’s customizable telemedicine chart note protocol to review vitals, history, and perform other steps.
Collect and Record Vitals During a Telemedicine Visit?: Your practice may want to collect vitals as reported by the parent or patient, and indicate the source of that information. You could use PCC’s standard Vitals component and indicate they were reported and not measured, or you could create custom components to indicate the source of information.
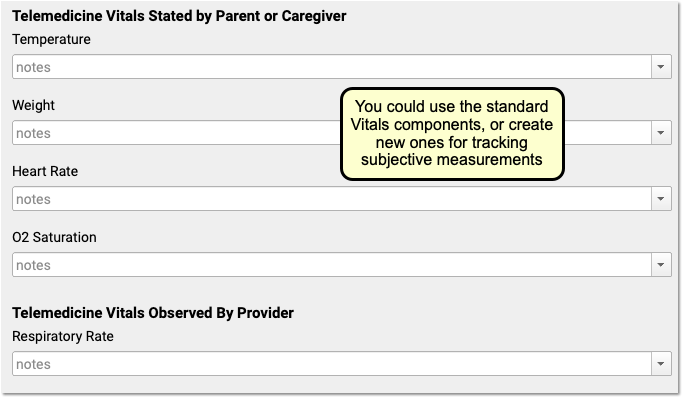
For more tips on designing a great telemedicine chart note protocol, read Create a Telemedicine Chart Note Protocol.
Select Diagnoses, Orders, and Indicate Other Procedures
After a visit is complete, the clinician should double-check diagnoses along with procedures and other orders on the chart note.
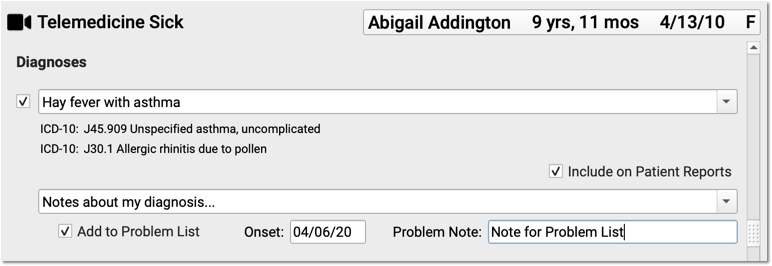

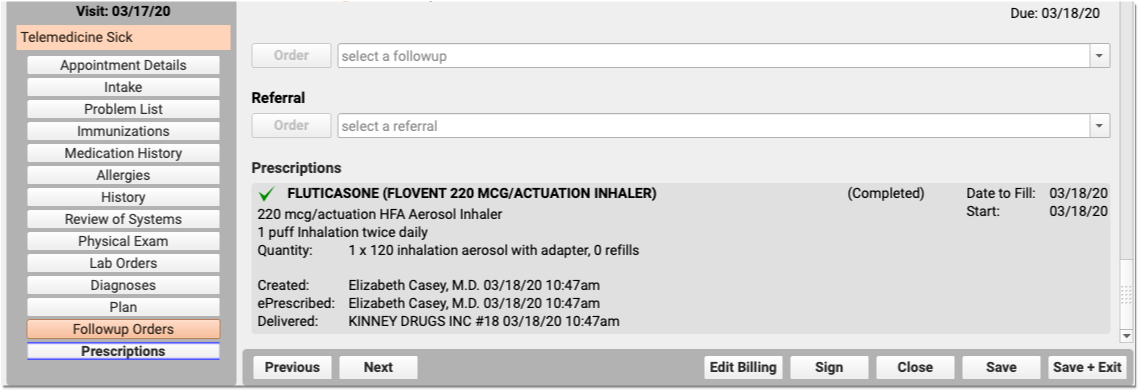
You can also click “PCC eRx” to create prescriptions. New and renewed prescriptions will automatically append to the bottom of the chart note.
Click “Bill” and Select a Visit Code
Next, click “Bill” to review and select codes on the Electronic Encounter Form.

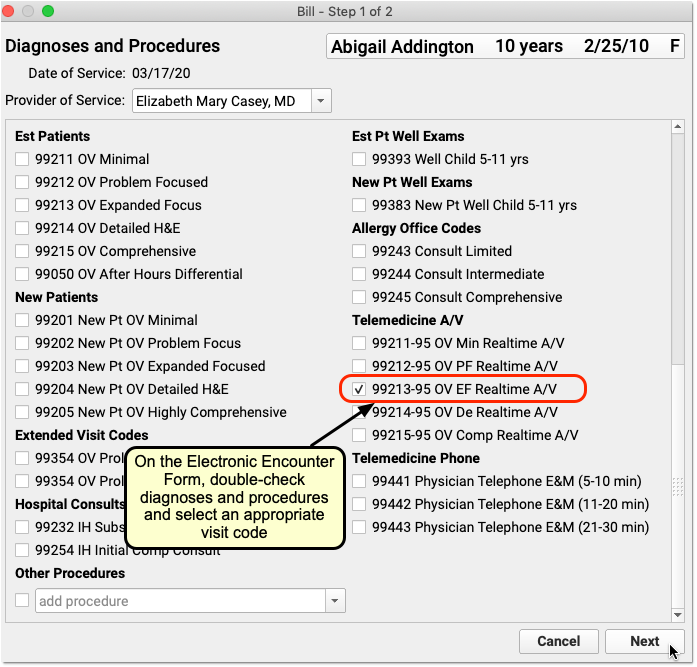
The Electronic Encounter Form displays all diagnoses and procedure codes from items the clinician selected on the chart note. They will typically select a visit code manually.
For a telemedicine visit, you might select a -95 code for a live audio and video E&M visit. For a phone-only visit, you might use time based codes 99441-99443. Check out the configuration article to learn about other telemedicine visit codes. PCC also created a Telemedicine Timing reference sheet.
Update Units and Linking, and “Make Ready for Billing”
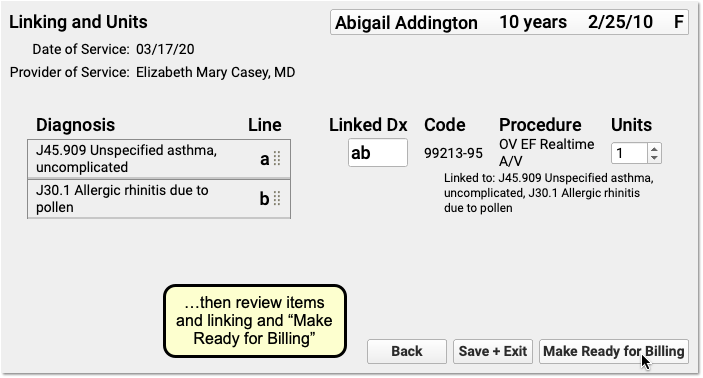
After you review and add codes, you can review units and which diagnosis is linked to each procedure. Next, make the visit ready for billing.

Sign the Chart Note
Complete charting and sign the chart note just as you would for other encounters.

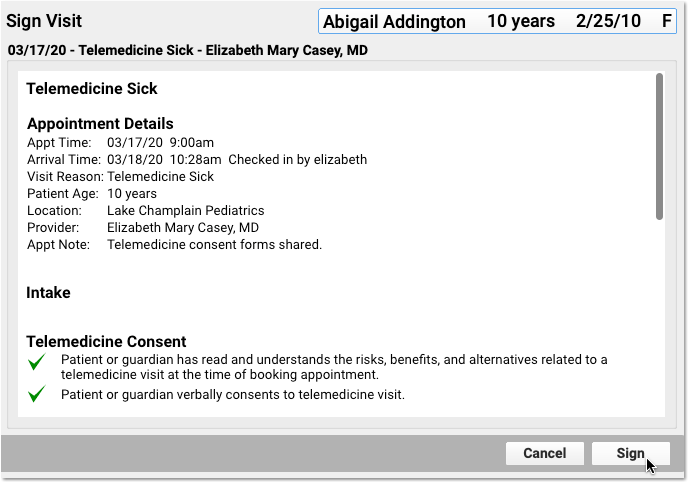
PCC EHR supports cosigning providers if needed.
Click “Ready to Post” and Review the Billing Place of Service
After the clinician has made the encounter ready for billing, your practice can click “Ready to Post” to post charges.

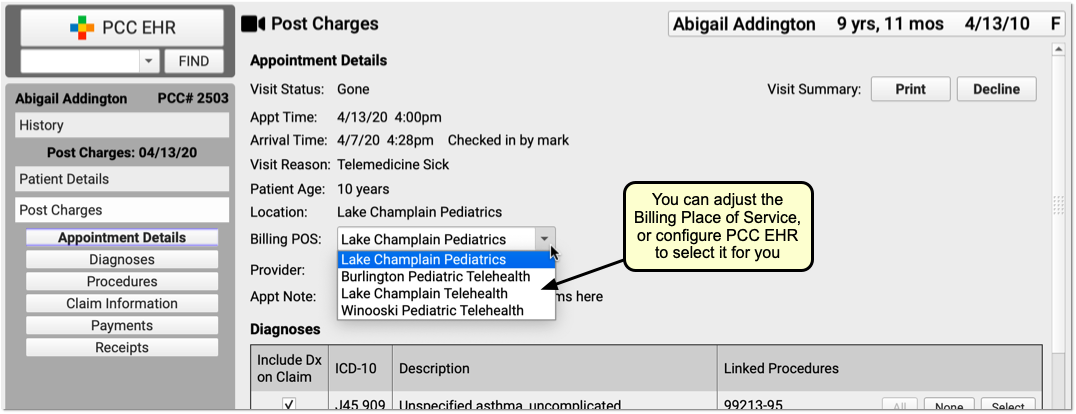
Review the appointment details and optionally select a new Billing Place of Service.
Automatic Telehealth Place of Service: PCC EHR can automatically select an appropriate telemedicine place of service based on your practice’s configuration. Alternatively, you can select a Billing Place of Service manually when you post charges. If a patient is seen for both a telemedicine and an in-person encounter on the same date, with the same clinician, charges with different places of service will result in two separate claims (as of PCC 9.4).
Update Diagnoses, Procedures, Claim Information, and Payments
Next, the biller can make any required adjustments to diagnoses, procedures, claim information, or payments.
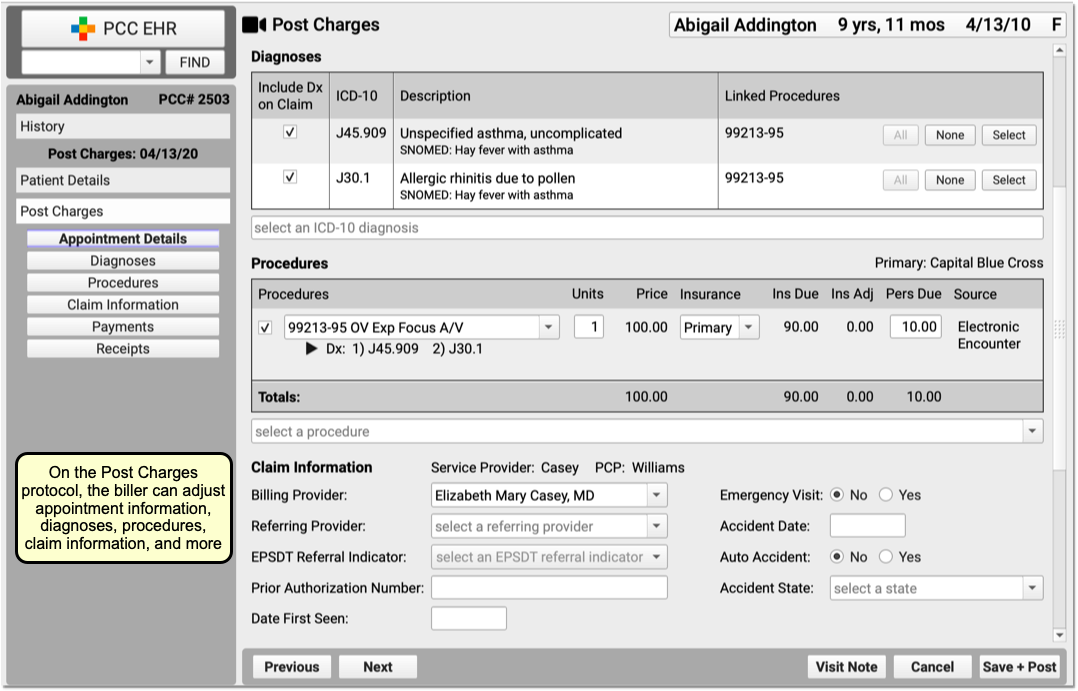
Billing for telemedicine is a rapidly evolving issue. Contact your payers to review their requirements.
Click “Save + Post” to Queue Up a Claim
Finally, the biller clicks “Save + Post” to post the charges and queue up a claim.

Later, the biller can come back to Post Charges if they need to add additional items.
Optional: Post Charges in Practice Management Instead
If your billers prefer the older Post Charges (checkout, chuck) charge posting tool, they can use it instead.


While the Practice Management interface does not include all functionality found in PCC EHR, some billers prefer it.
Just as they can in PCC EHR, the biller can review details and make any adjustments needed to diagnoses, procedures, or claim information. Then they can post the charges and payments and queue up a claim.
Bill for a Phone Call as a Telemedicine Encounter
By using the above procedure, you can schedule, chart, and bill for a telemedicine encounter.
You can also turn phone calls that a clinician charted on a PCC EHR phone note into a billable telemedicine encounter.
Read Bill for Phone Calls and Portal Messages to learn more.
Bill for Patient Portal Messages as a Telemedicine Encounter
Your practice may help patients by exchanging secure portal messages, email, or other asynchronous text communication. You can bill for those encounters as a telemedicine visit, though many conditions apply.
You can bill for portal messages in PCC EHR using the same tools and workflow you would use for phone encounters. Read Bill for Phone Calls and Portal Messages to learn more.
Other Telemedicine Resources
As you research tools and procedures for telemedicine in your practice, you may find these helpful:
