Create a Custom Report
You can view and save custom reports and report categories in PCC EHR.
Video Overview: For a video walk-through of custom report creation, watch Create a Custom Report.
Contents
Create a Custom Report
When you want more details on a specific data set, customize a report to get the information you need.
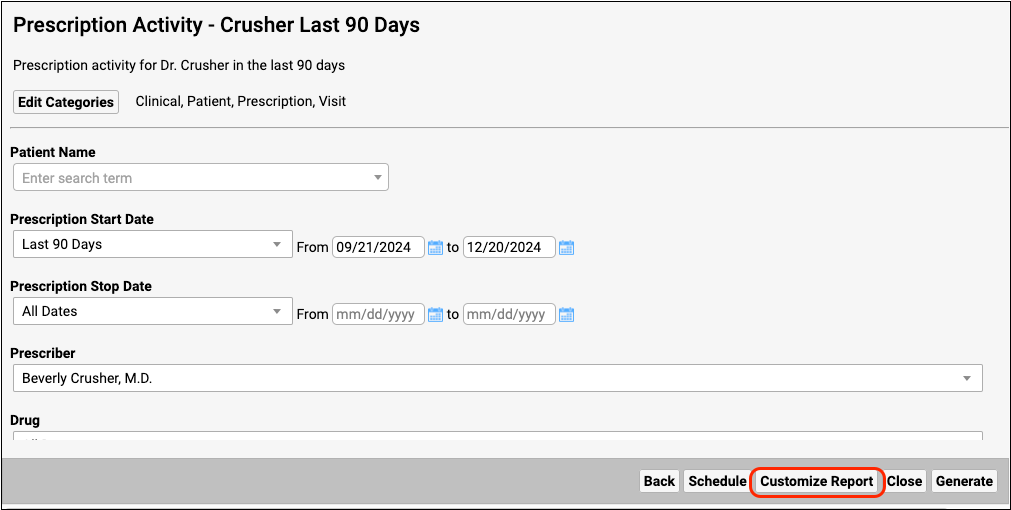
Click “Customize Report”
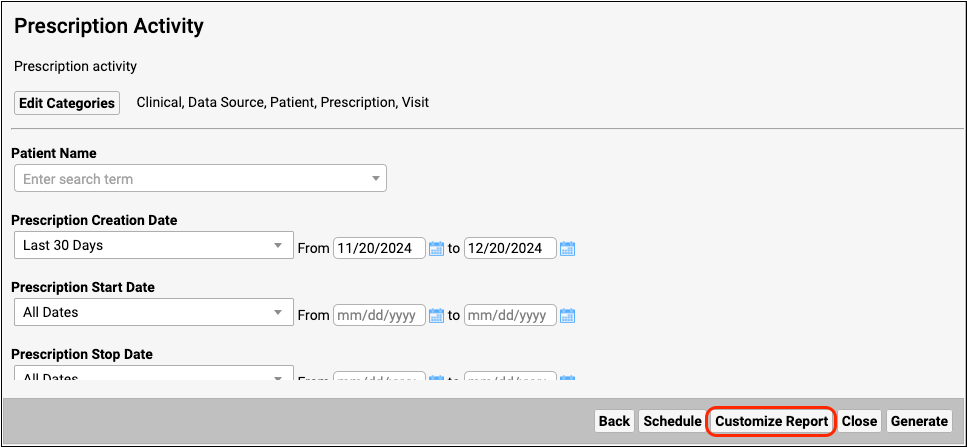
To create a custom report, click the “Customize Report” button at the bottom of any report.
Rename, Describe, and Categorize Your Custom Report
Give the report a new title and description, assign any number of categories, and select which criteria you want to appear on the report.
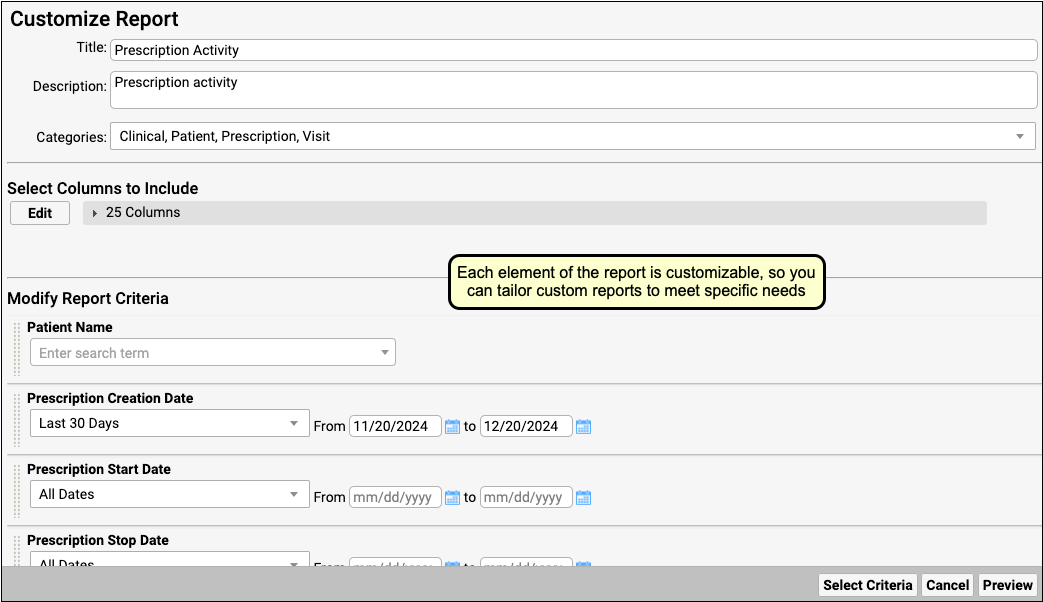
Selection boxes remember your last selection when you run the report.
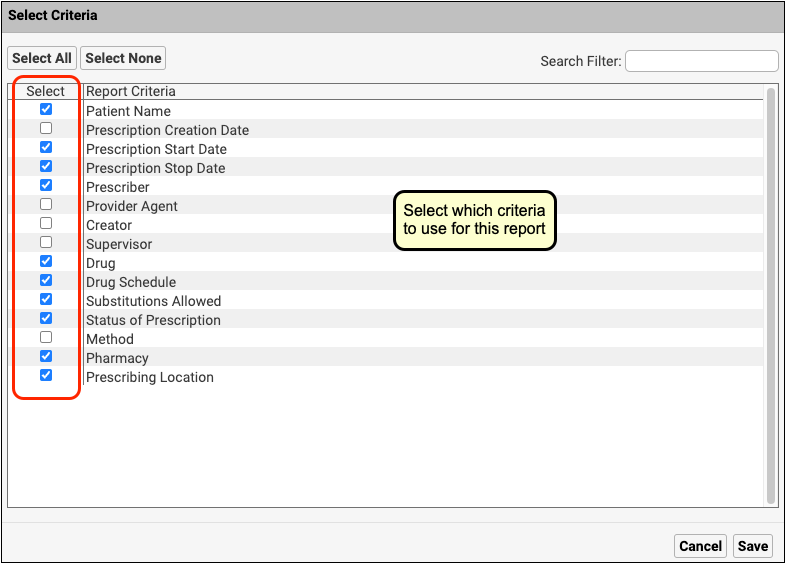
Select Criteria
Use the “Select Criteria” button to add or remove criteria from a report. This is particularly useful if you are starting from a large Data Source report that contains criteria that are not needed to find the information you need.

Select Columns
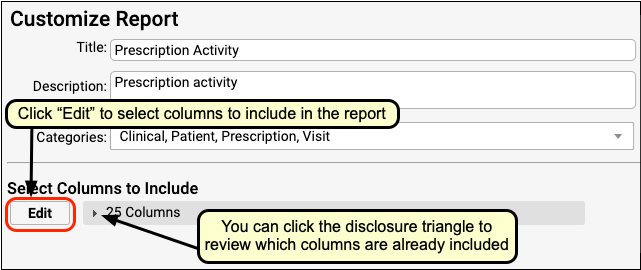
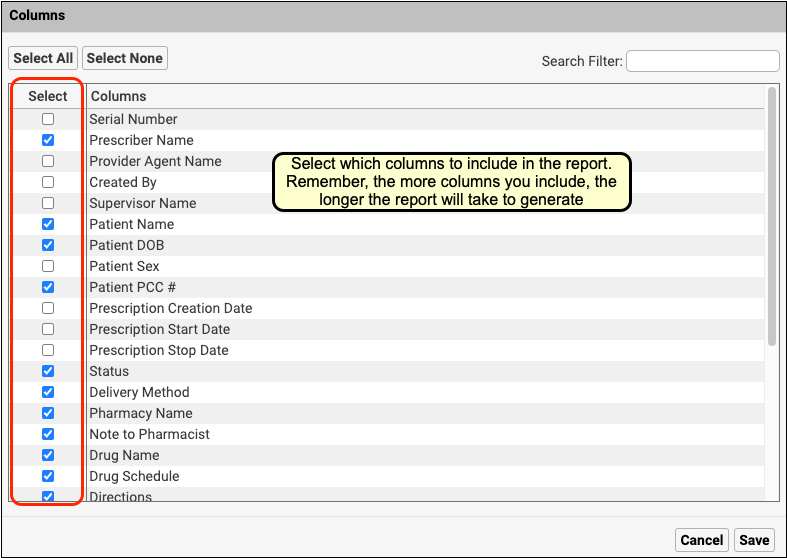
Click “Edit” under “Select Columns to Include”, then choose which columns to include in the report. The more columns your report includes, the longer it will take to generate.
Set Defaults and Preview
Set criteria selections that you want to display by default, then click “Preview”.

Refine Default Output
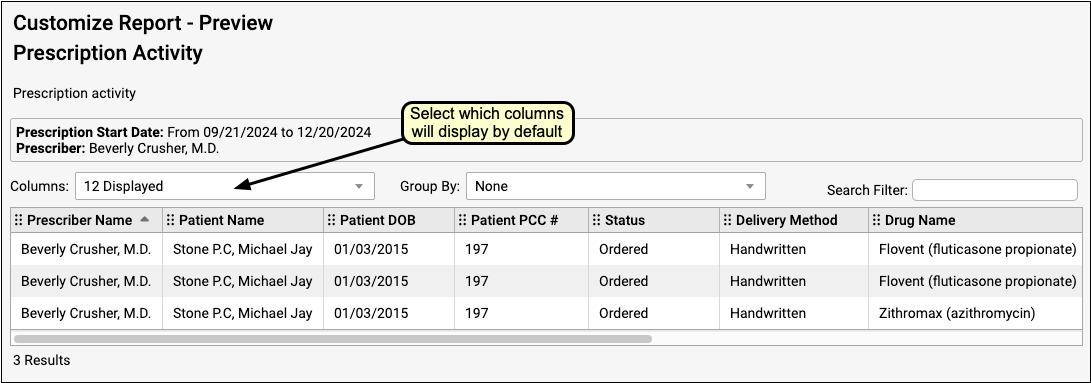
In the report preview, select which columns will display by default when you run the custom report.
You can click “Back” to make criteria adjustments.

20,000 Row Limit: Exports from the report output (View Results screen) in the Report Library are currently limited to 20,000 rows. If your output appears to be exactly 20,000 rows long, it may not contain all of the information that you are looking for. If this occurs, return to the report configuration screen and click “Export Report” to get your full report. Read Export Large Data Sets from the Report Library to learn more.
Save Your Custom Report
Click “Save As” to make final adjustments to the report title and description. Then click “Save”.


Once you have saved your new report, you can run it just like any other report. It will appear alphabetically in each report list category that you assigned it to.
Get the Most Out of Your Reports
To get the most out of your reports, start by identifying the precise information that you want to collect. Then restrict your report criteria to display only your desired information.
Refine Your Question
Think about the question you’re trying to answer before creating your report and see if you can narrow it down to a key data set.
Example question: Which active patients with an Asthma diagnosis were prescribed an inhaler in the last three months?
Restrict by Date
Restrict your reports by date when possible for faster reporting. Ensure that your date range is specific to the question that you are asking.
Remove Criteria When Possible
Remove extraneous criteria from the Select Criteria window. The more criteria that the report needs to evaluate, the longer it takes to run.
Reduce Column Volume
Choose only the columns that provide information essential to your question. Edit the Columns criteria when customizing and remove unnecessary columns.
Think Critically About Default and Filtering Criteria
The inclusion of certain criteria may cause information to be left out of a report. Think carefully about each criterion that you set, remove, or leave as a default.
For example, the default Document Modification report includes a timestamp set for 8am-5pm, which prevents patients who were seen after hours from appearing on the report output. You can remove the timestamp when customizing so that your report output includes patients seen after hours.
Another example is the Last Visit Date criterion in the Patient List report, which excludes patients who have not had a visit. If you want a list of all active patients regardless of whether they’ve had a visit, remove the Last Visit Date filter criterion when customizing the Patient List report.
Set Limits on Data Source Reports
Data Source reports contain many criteria to choose from, but these reports are most useful when pared down. Make sure to remove all criteria that do not pertain to your question when customizing a Data Source report.
Use Data Source Reports to Start a Custom Report
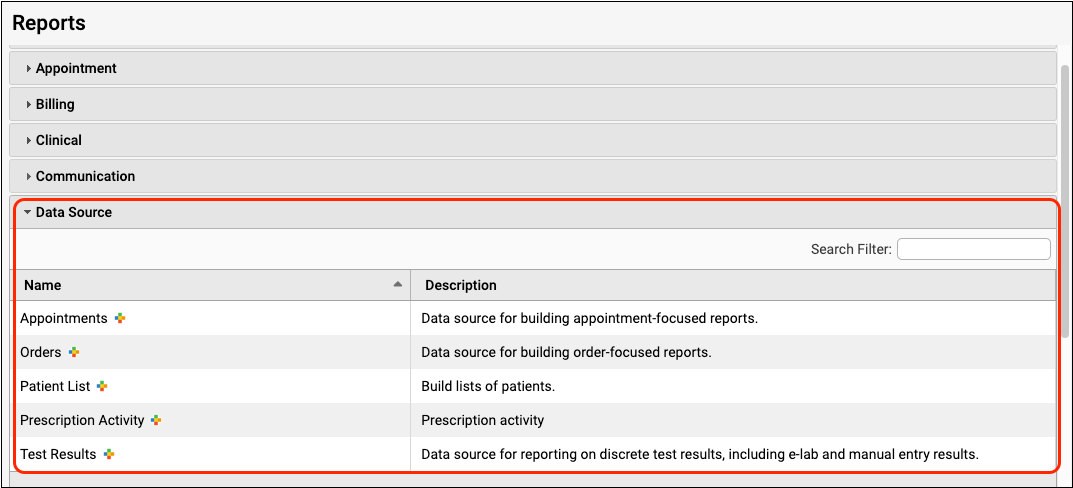
The Data Source report category contains a number of master reports with extensive filter sets, which may be perfect for using as a foundation for custom reports. If you want to go beyond adjusting a report that already exists and create something totally new, a Data Source report is a great place to start.
Edit or Delete a Custom Report
You can return to your custom report to edit it again at any time. When you open the report, click the “Customize Report” button.
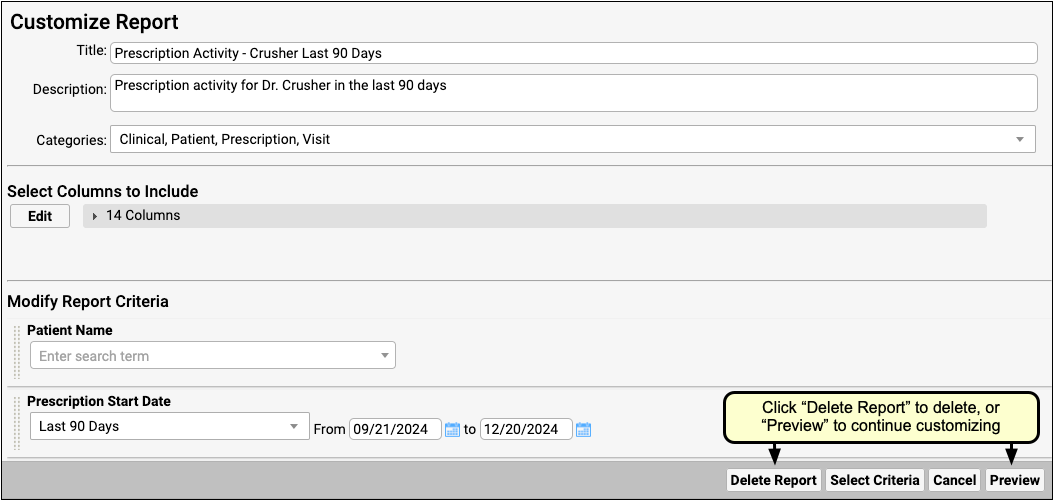
Click “Delete Report” to delete your custom report. Click “Preview” to continue customizing.
Create Custom Report Categories
The Report Library in PCC EHR organizes reports into categories. Your practice can create its own custom categories and can choose which roles have access to specific report categories.
Manage Categories
Click the “Manage Categories” button at the bottom of the report list.
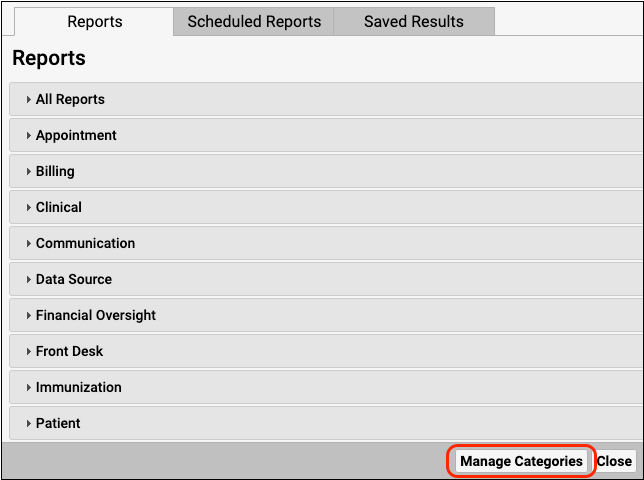
You can add, delete, or edit categories from the Manage Categories screen.
Add a New Category
Click “Add” in the Manage Categories screen to create a new category.
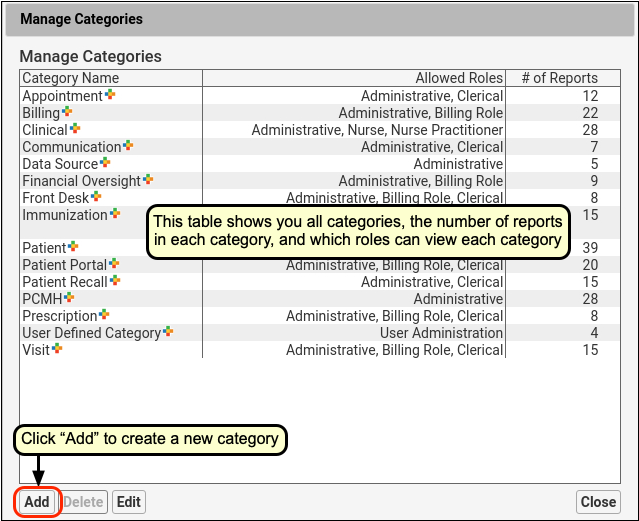
Configure Category Name and Role Access
Enter a name for your new category and select the roles that can view this category. Then click “Save”.
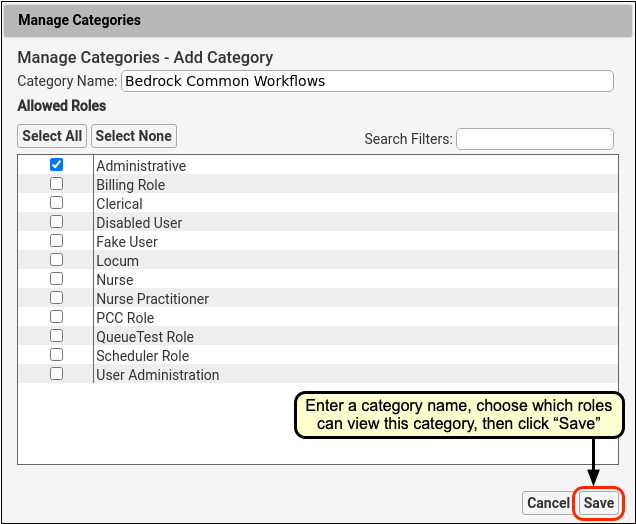
Category Access is Role-Specific: Categories are not user-specific; they are available to everyone with the roles you select in the Manage Categories screen. To find out more about how to limit access to specific categories, read Restrict Access to Reports in the Report Library.
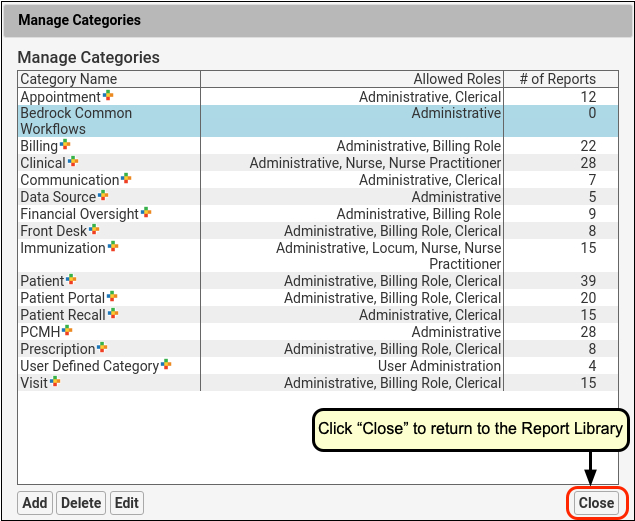
Review and Close
Review your choices and click “Close” to exit the Manage Categories screen.
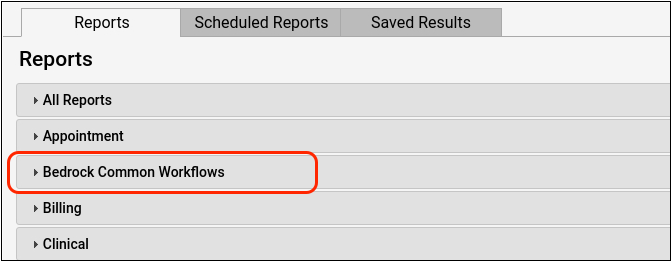
Add a Report to a Custom Category
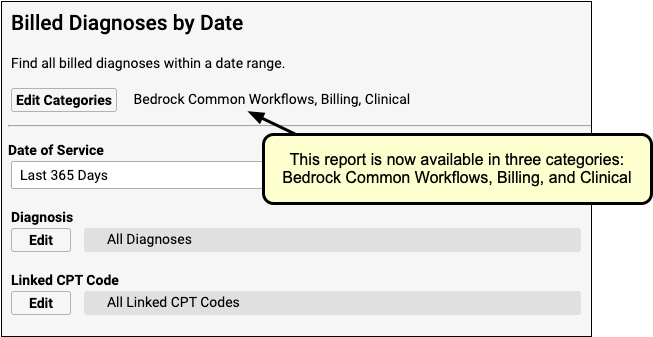
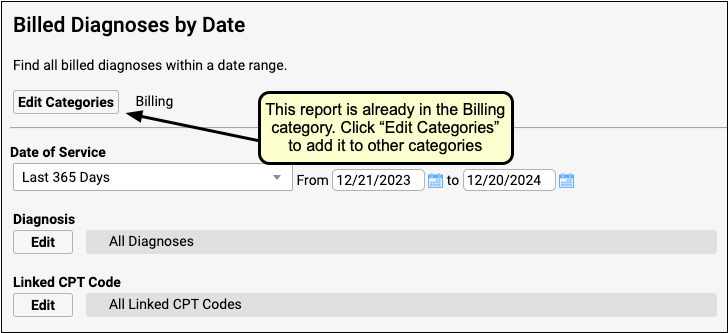
Once you have created a new custom category, you can add any report to it. The categories that the report is already assigned to are displayed in the Categories column in the report list as well as at the top of the open report.
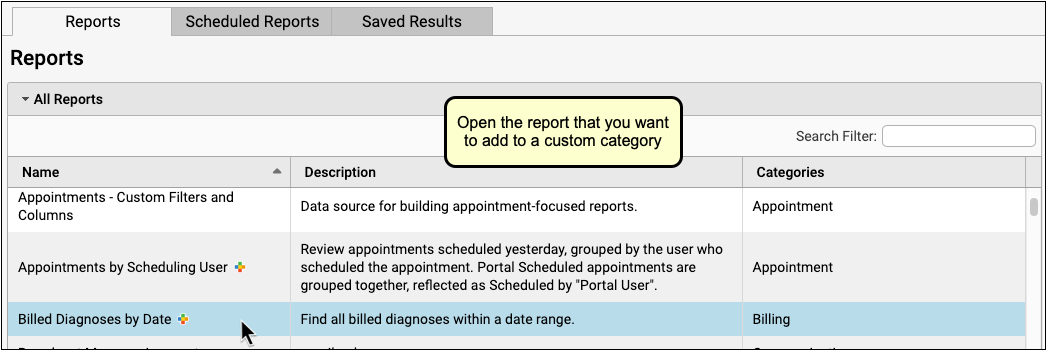
Select the Report
To add a report to a new category, open the report in the report list.
Edit Categories
Click “Edit Categories” to change the report’s category settings.
Configure Categories and Save
Use the checkboxes to add and remove the report from categories, then click “Save”.
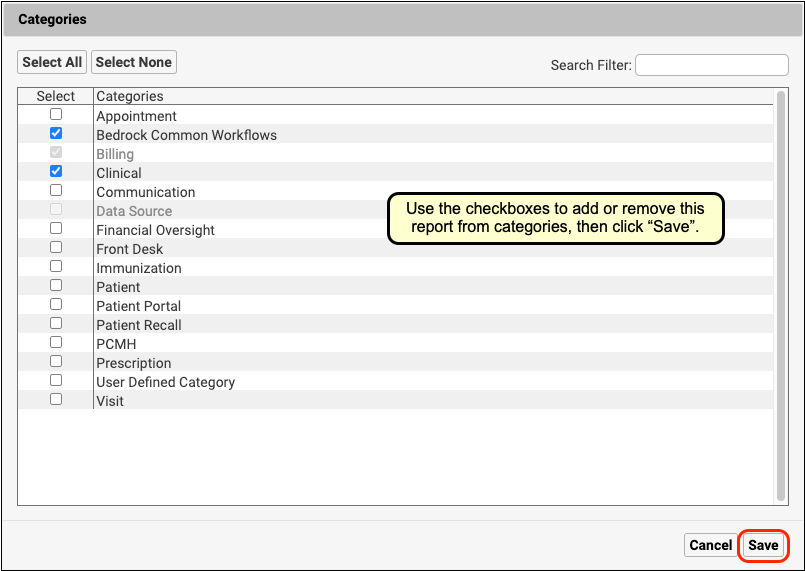
Stock reports cannot be removed from their default categories.
Review Category Changes
You can review the category settings in the report list and within your report.
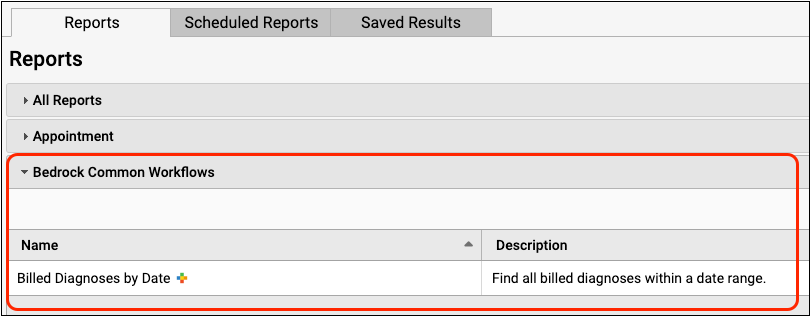
You can click “Edit Categories” within the report to make further changes.
