Generate Forms in PCC EHR
Your practice can generate visit forms, excuse letters, camp forms, and other forms in PCC EHR. Whether you print forms on paper, or create electronic copies in the patient’s chart and send them via the patient portal, PCC EHR can create the form you need.
Contents
Print a Batch of Visit Forms for the Day
Use the Print Visit Forms tool to print a batch of visit forms for all of a day’s encounters.
For more information, read Print Visit Forms.
Generate or Print a Single Form
When you need to generate or print a form, use the Patient Forms component. Your practice can add the Patient Forms component to any protocol ribbon in PCC EHR.
Click “Generate” in the Forms Component
Use the chart-wide Forms component to generate patient forms in PCC EHR.

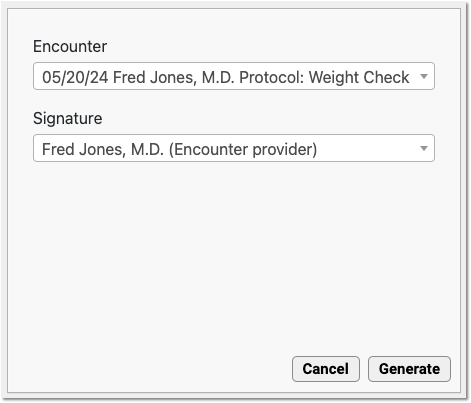
Add Information if Prompted
When you click “Generate” or select a form from the drop-down, a pop-up appears prompting for any additional required information. If there is no additional information required, this step is skipped.
Review the Document
Review the form in the document viewer. You can attach it to a visit or order, save a copy in the patient’s chart, display the document in the patient portal (this option is selected by default), or print it.
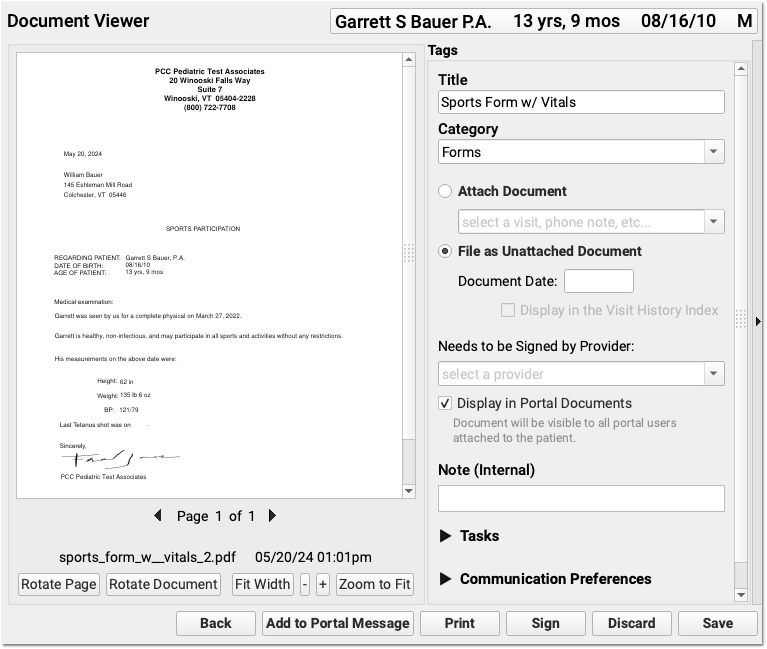
Use the back button to reenter form data as needed.
Forms Fill in Variables: PCC form letters can have form letter variables which automatically fill in with information about your practice, the patient, or a particular visit or issue. Certain variables can even tell if they are being generated within a chart note, and fill in the form letter using details from that specific visit, phone note, or portal message. If your practice has multiple locations, PCC EHR can fill in practice information based on your working location.
Generate Immunization School Forms in PCC EHR
Click “Print” at the top of a patient’s Immunization record to generate your practice’s customizable school form.
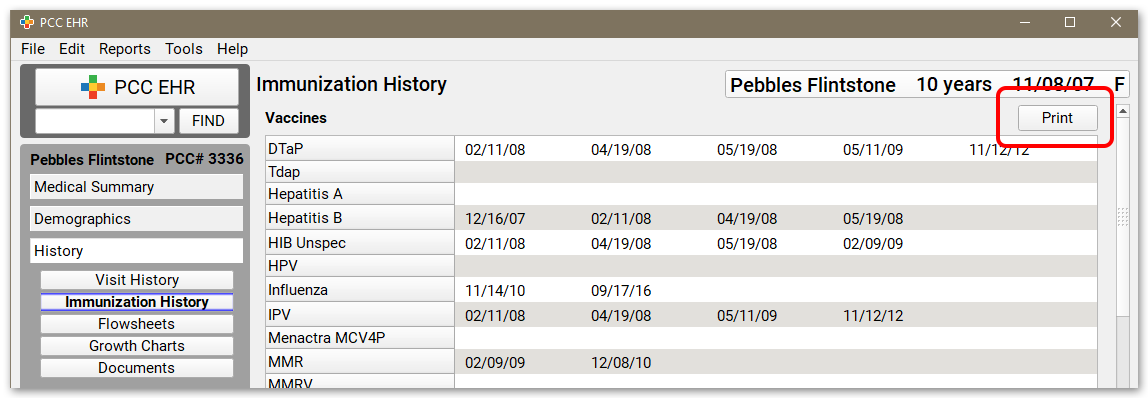
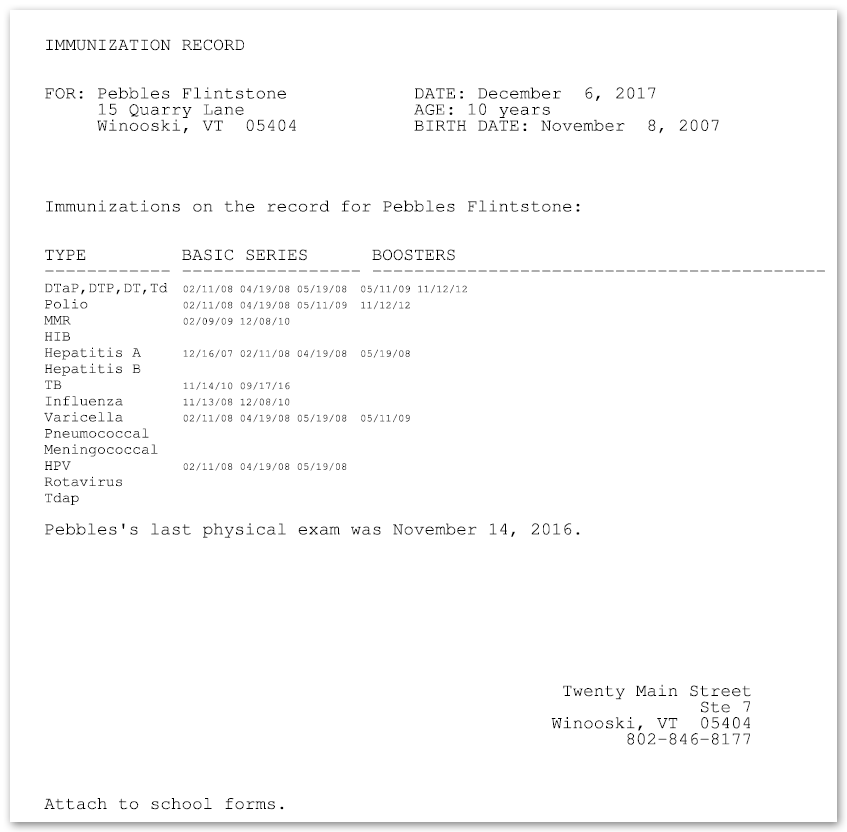
If your office has multiple school form formats, you can select the one you want before printing.


If you don’t see the school form you expect, get in touch with PCC Support at support@pcc.com or 802-846-8177 or 800-722-7708. They can help you customize and configure your school form(s) so they are available and print correctly from PCC EHR.
Families Can Generate an Immunization School Form in the Patient Portal: Families can access their patient’s immunization record and generate a school form from the patient portal. For more information, read the My Kid’s Chart User Guide.
Generate Lab and Radiology Requisitions in PCC EHR
After you create lab or radiology orders and document diagnoses in a patient’s visit protocol, you can generate a requisition form.
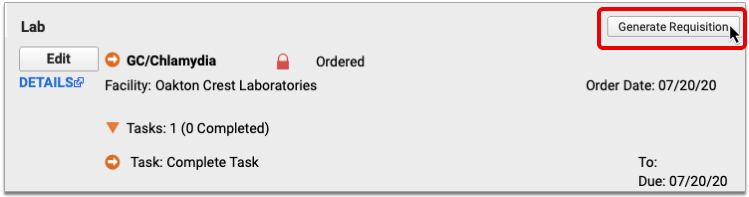
Click “Generate Requisition”
Click the “Generate Requisition” button in the Lab or Radiology component of the chart note protocol.
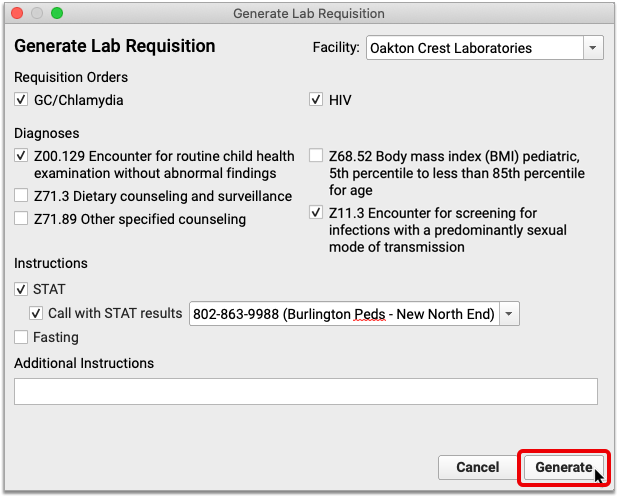
Choose Requisition Information
Select orders and supporting diagnoses for the requisition. The options in the window reflect what you charted in the patient’s visit protocol.
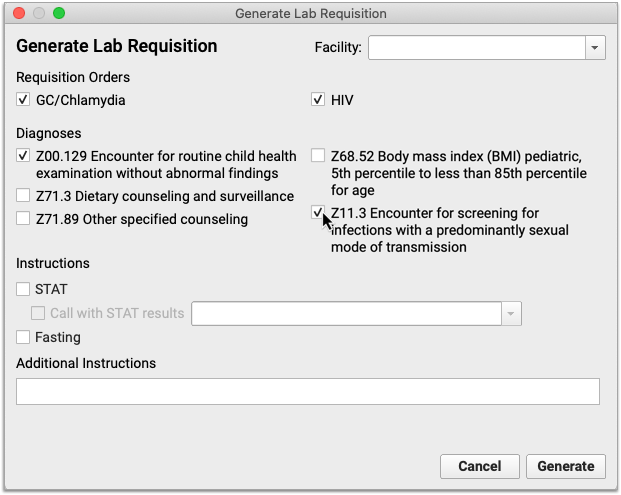
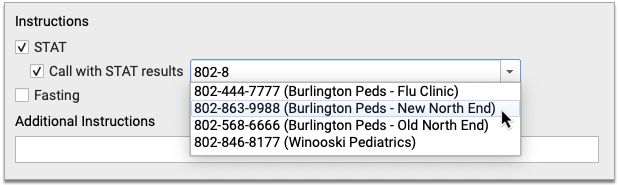
Optionally Add Special Instructions
You can optionally define special instructions for the facility to follow.
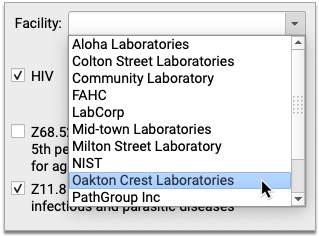
Select a Facility
If generating a lab requisition, you can also include a facility name, address, and phone number on the requisition by selecting a lab from the “Facility” drop-down.
Generate the Requisition
Once the requisition options have been filled out, click “Generate”.
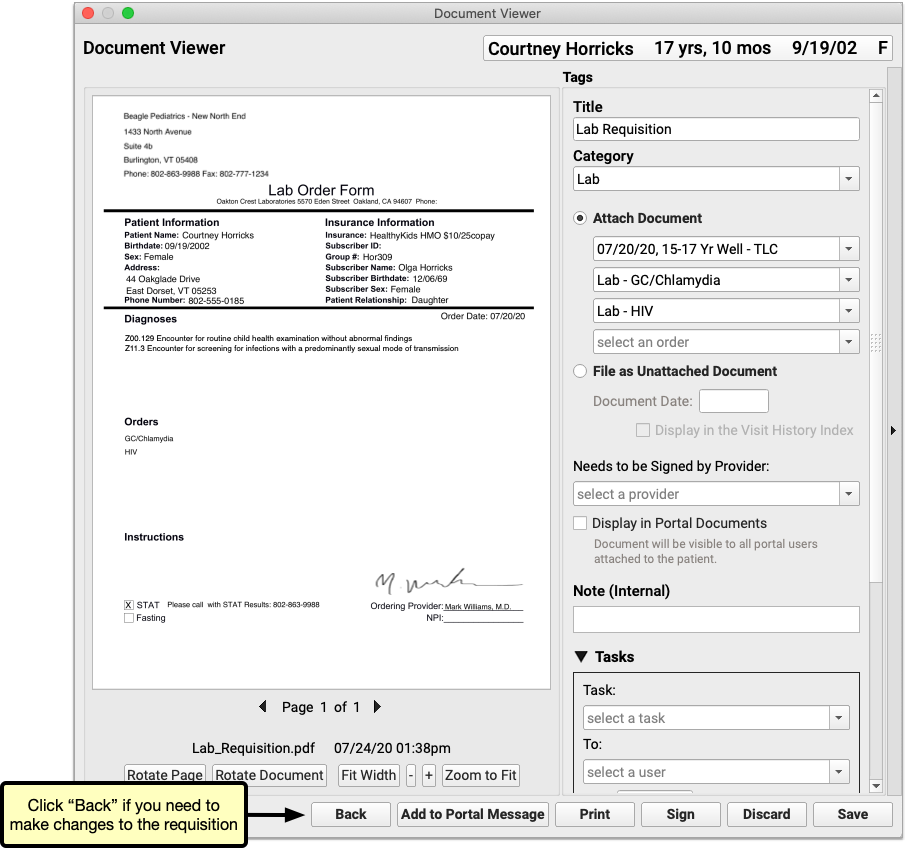
The generated requisition opens in a document viewer window where you can give it a title, categorize it, add tasks, share it to the patient portal, print it, and more. If you need to make a change before sending it out, click the “Back” button and adjust the settings.
You can learn more about how to configure and generate lab and radiology requisitions in the article Generate Outbound Lab and Radiology Requisitions.
Configure the Forms Component in PCC EHR
You can configure which forms will appear by default for “one click” generating on each chart note. You can improve form letter workflow for your practice by making sure the right forms appear on the right protocols.
Set Up Forms for Single-Click Generation
You can place the Forms component on any chart note protocol, decide where it should live on your Medical Summary, Demographics, and other chart note sections, and adjust which forms appear by default.
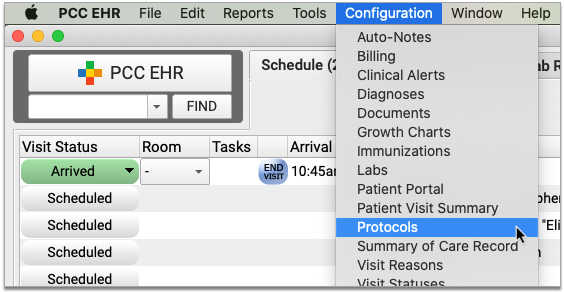
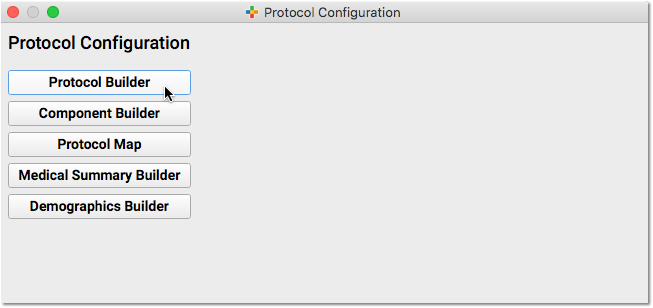
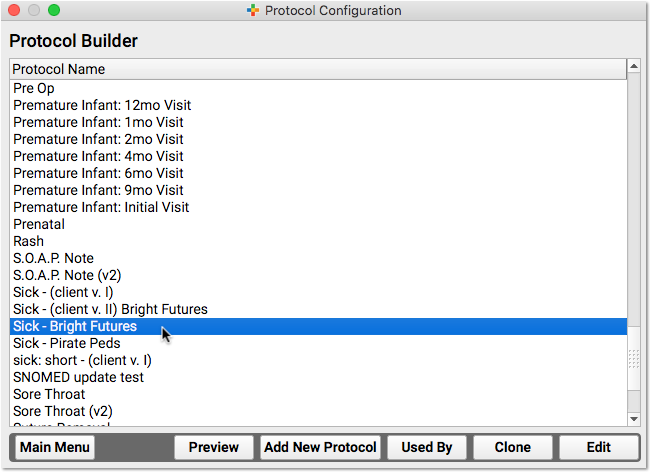
Open Your Protocol in Protocol Configuration
Open the Protocol Configuration tool and pick a chart section or protocol where you will add or move the Forms component.
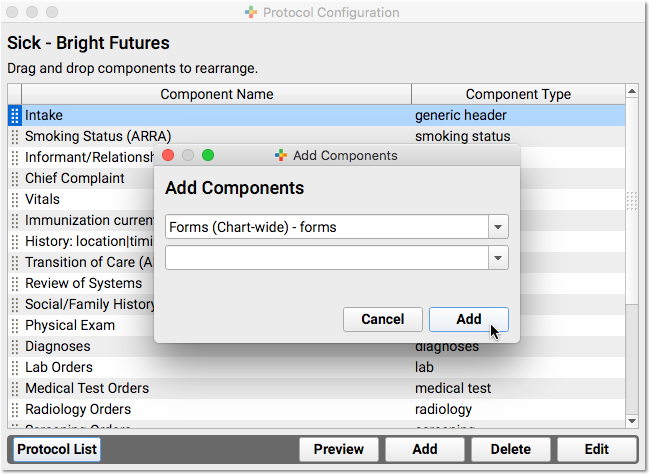
Add the Forms Component
Click “Add” to add the Forms component to your protocol. Use the tab on the side to slide it to a new location in the protocol.
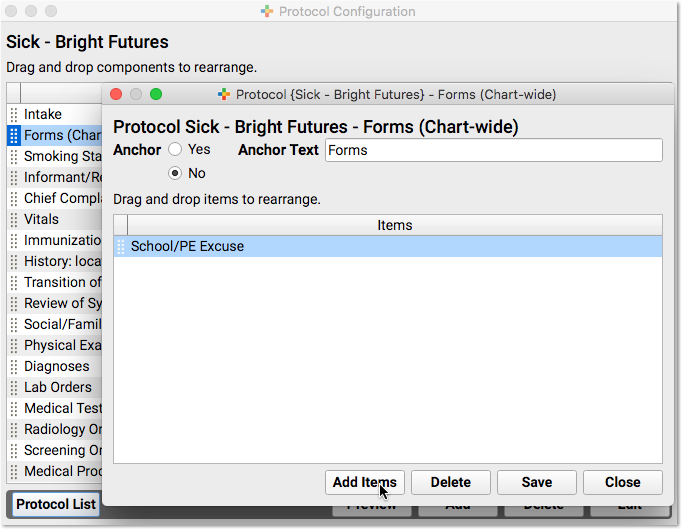
Select Single-Click Forms
Double-click on the component to set up default forms for that chart note or chart section. For example you could configure School/PE Excuse letters to be single-click in sick visits, or make form letters single-click in the Medical Summary or Demographics chart sections.
Watermarks, Questions, and Custom Forms: Test Printing on Workstations
If your practice generates form letters that have watermarks, ask form letter questions, or use other special features, you should test those forms from PCC EHR to see if they work as expected.
For example, if you generate a watermark, you may need to adjust the printing settings in your workstation’s operating system to make the watermark print at the right darkness level. And if PCC Support helped you set up a custom form with unusual script or information requirements, they may need to make adjustments after your update.
Preview and Adjust Forms in the Forms Configuration Tool: If your practice has switched to using the Forms Configuration tool in PCC EHR, you can use it to preview your forms with real patient data and adjust their configuration. To learn more about working in the Forms Configuration tool, read Create and Manage Forms in PCC EHR.
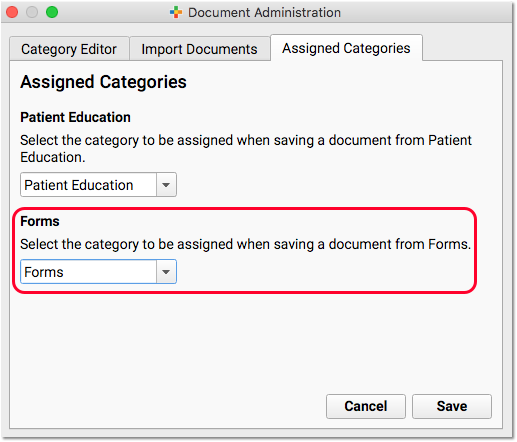
Adjust Default Forms Category
By default, PCC EHR will save a form letter into a Forms category, which you can later review in the Documents section of the patient’s chart.
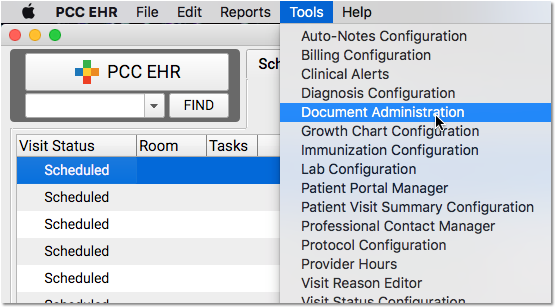
Optionally, you can use the Document Administration tool to change the default save location for forms.
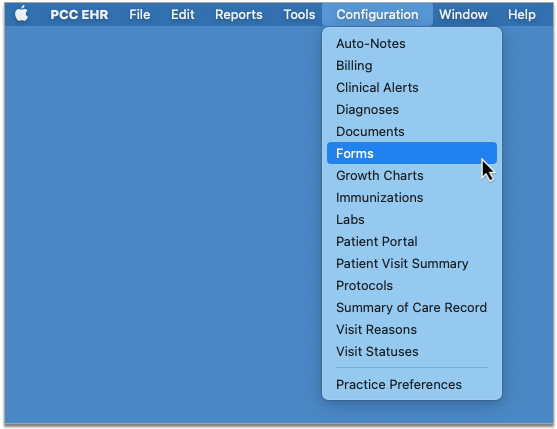
Change the Display Order of Forms in the Forms Component
If you have switched to using the Forms Configuration tool in PCC EHR, you can use it to update the display order of forms in the Forms component.
Open the Forms Configuration tool and click the “Edit Display Order” button.
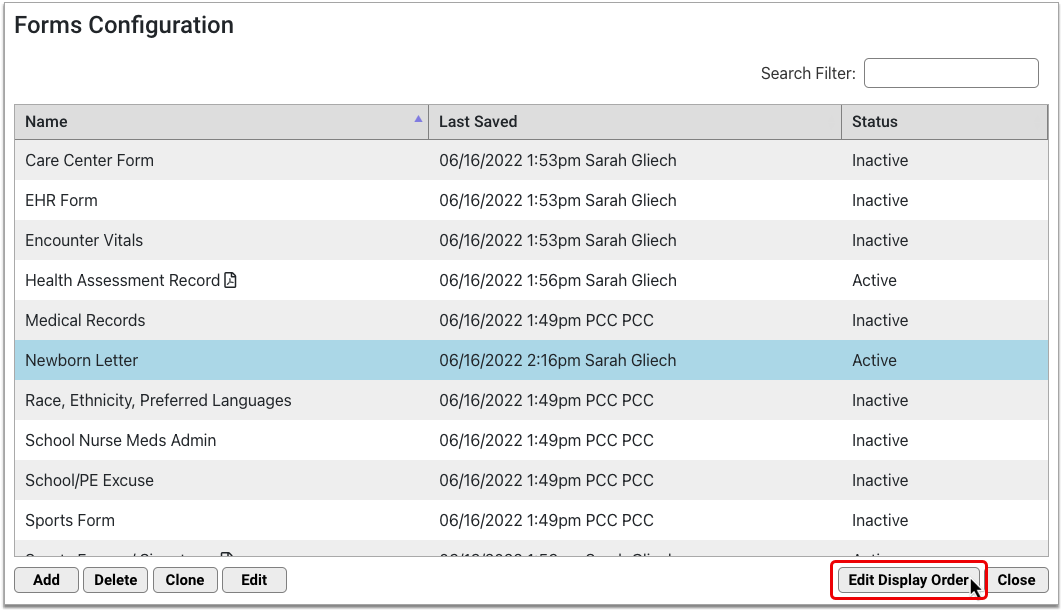
Drag and drop the forms in the list to rearrange the order in which they display in the Forms component.
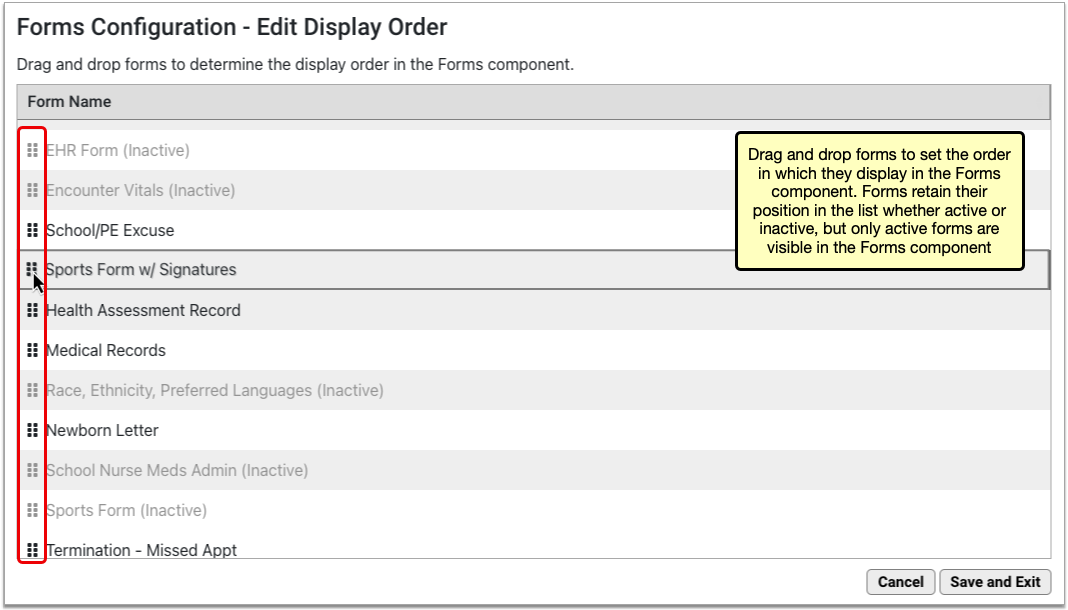
The list includes both active and inactive forms, but only active forms display in the Forms component. The Forms component will update to reflect your changes as soon as you click “Save and Exit”.
Show or Hide Forms in the Forms Component
If you have switched to using the Forms Configuration tool in PCC EHR, you can use it to determine which forms show in the Forms component.
Open the Forms Configuration tool and edit any form to set its status.
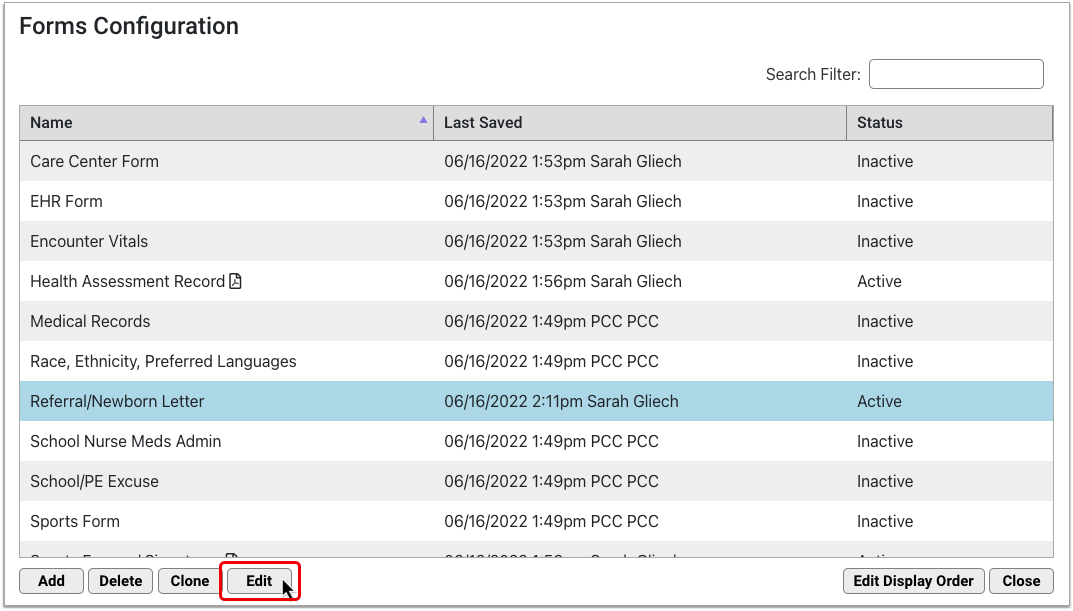
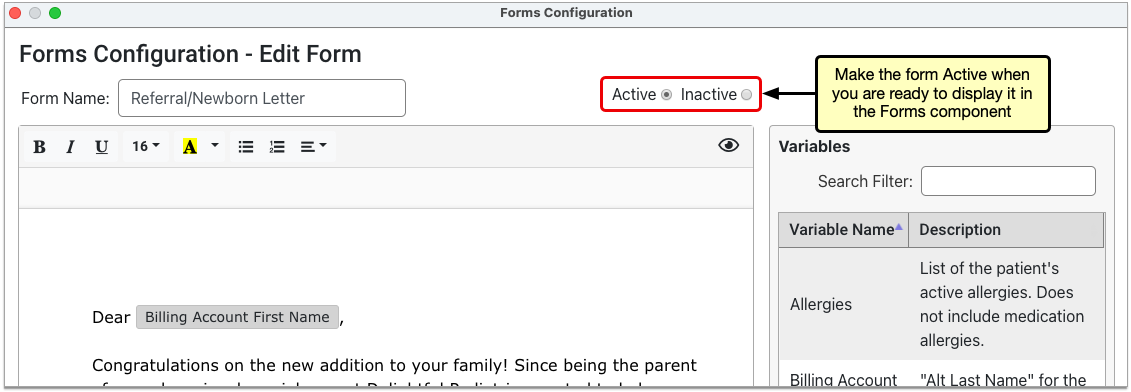
Active forms display in the Forms component; Inactive forms do not. The status takes effect as soon as you save the form.
If you have not switched to using the Forms Configuration tool in PCC EHR, contact PCC Support for help adding or removing forms from the Forms component.
Add a New Form to PCC EHR
You can add, edit, or remove forms from PCC EHR yourself if you have made the switch to using the Forms Configuration tool.
If you have not switched to using the Forms Configuration tool, contact PCC Support at support@pcc.com or 802-846-8177 or 800-722-7708 when you want to add, edit, or remove forms from PCC EHR.
If you provide a document, link, or PDF of your form to PCC Support, they can help format and install that form onto your PCC EHR system. They can optionally use variables so the form will autofill with patient or family information. Note that there is turnaround time needed for these requests.