Edit Encounter Charges and Other Claim Information and Resubmit a Claim
Use the Edit Charges feature in the Billing History in a patient’s chart if you need to edit diagnoses, procedures, or other encounter or claim information. For example, you can change the place of service, the provider of service, responsible party for each charge, copay amount due, billing provider, and other information. After you make changes, you can queue up a new claim.
You can also use “Edit Charges” to add the Payor Claim Control Number (PCN) to the claim, enter a claim delay reason, and send a replacement claim.
Video: Watch Edit Encounter Charges and Resubmit Claims to learn more.
Edit Encounter Charges and Claim Details
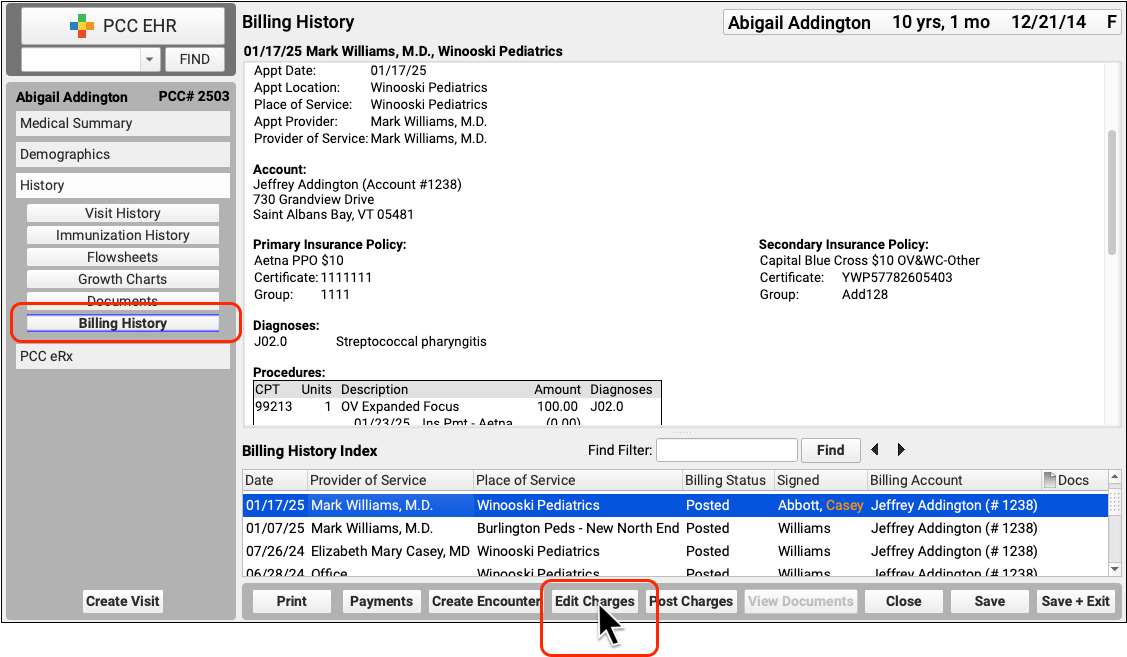
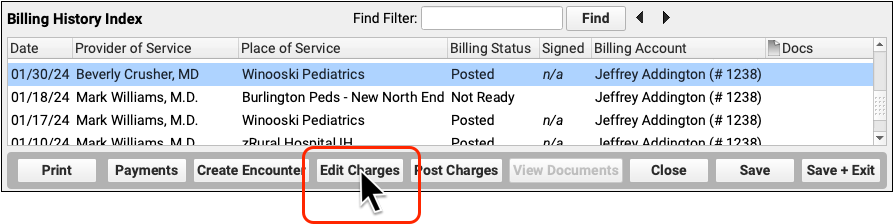
When you need to edit the charges for an encounter and related claim information, click “Edit Charges” from the Billing History section of the patient’s chart.
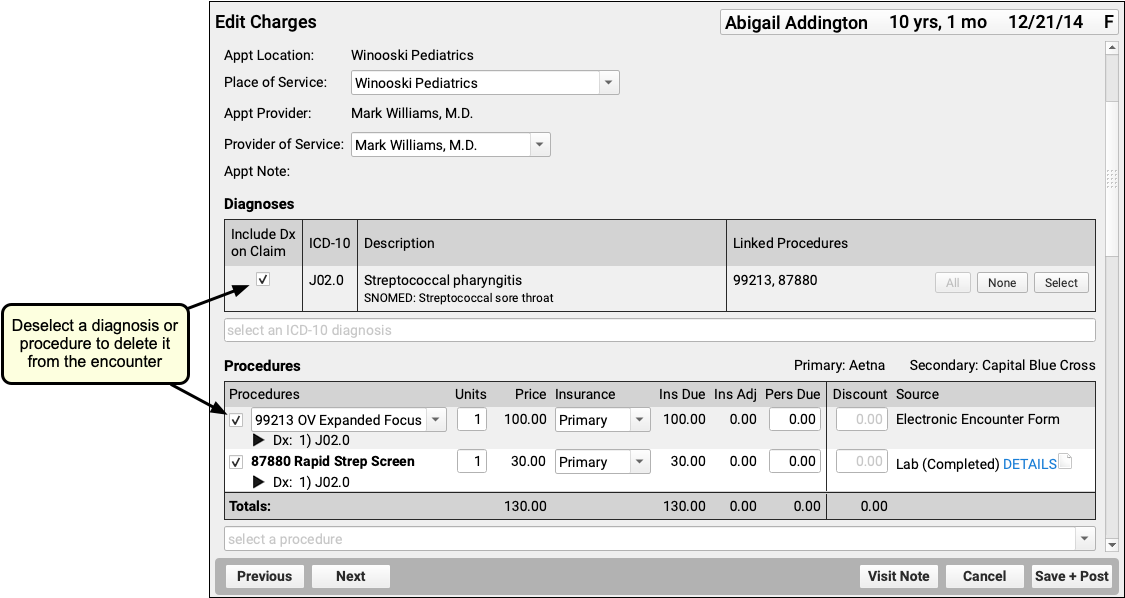
On the Edit Charges screen, you can modify all charges and encounter information. Use the search field in the Diagnoses or Procedures components to add additional diagnoses or procedures and adjust linking. To delete a diagnosis or procedure, deselect it. Changes will apply only to the encounter’s billing history and to future outgoing claims, they will not affect what was charted for the visit.
You can also use the Procedures component to pick a code modifier, change the responsible party for a charge, or update the personal due (or copay) amount for each charge.

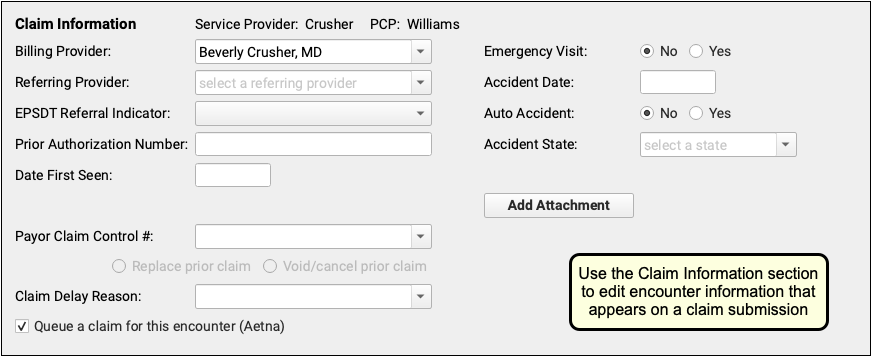
Below the charges, you can use the Claim Information section to enter other details that may appear on a claim.
To learn more about the Claim Information fields, read the new Resubmit a Claim procedure below or the Edit Encounter Charges and Resubmit Claims guide.
When you click “Save + Post” to save your changes to an encounter, PCC EHR will queue up a new claim by default if one is needed. You can manually set whether or not to queue up a claim using the checkbox at the bottom of Claim Information section.

Processing Queued Claims Will Remove Duplicates: When you first post the charges for an encounter, PCC EHR automatically queues up a claim. When you edit the encounter and make changes, you can safely queue up another claim. When you submit claims, PCC EHR automatically evaluates multiple queued claims for the same encounter and only submits the most up-to-date information on a single outgoing claim. However, if you are resubmitting a claim or filing an appeal, there are additional steps. See the procedure below.
Resubmit a Claim
When you need to resubmit a claim, file an appeal, or send a corrected claim, use the Billing History in the patient’s chart to add claim resubmission information to the encounter and queue up a new claim.
Select the Encounter
In the patient’s Billing History, select the encounter that may need a new claim.

Review Encounter Details and Claim History
Use the sections of the Billing History to understand why the claim may need to be resubmitted.
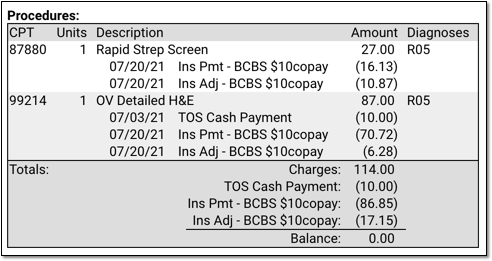
For example, the Procedures section displays all payments and adjustments applied to the charges and the outstanding balance.
You can also use the Claim History section to review the history of every claim for the encounter.

You can click on a link to see more details of each event. In addition, you may find it helpful to open the Electronic Remittance Advice tool and search for the indicated check number to research the payer’s response.
Click “Edit Charges”
When you’ve determined that a corrected claim, updated claim, or appeal is needed, click “Edit Charges”.
Update the Encounter and Charge Information
Use the components on the Edit Charges screen to edit encounter and charge information that appears on a claim. For example, you may need to adjust the provider, place of service, or encounter date. You can also add or remove diagnoses and procedures.
Update the Responsible Party for Each Charge
Who are you submitting a claim to? Review and set the assigned responsible party for each charge.

For each charge, you can select any policy that is active for the patient on the encounter’s date of service. If necessary, you can click on the “Patient Details” navigation button to update the patient’s policies.
Update Other Claim Information
Use the Claim Information section to adjust the billing provider, accident information, attachment information, or other details.
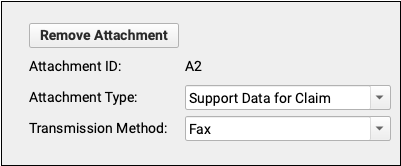
For example, if you need to fax an attachment to the payer, click “Add Attachment” to add an attachment ID and attachment information to the claim.

Enter the Payor Claim Control Number
If a payer has already received a claim for this encounter, you must enter the Payor Claim Control Number (PCN). If PCC received an ERA or you entered the PCN manually, you can select it from a drop-down menu in the Claim Information section. Otherwise you can enter it manually.
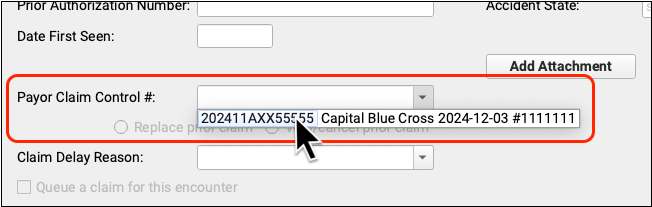
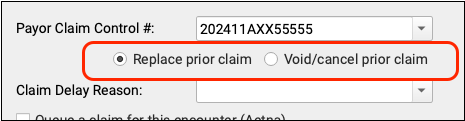
By default, when you enter a PCN, you are sending a replacement (or “corrected”) claim. You can instead send a claim void request to the payer. Under the hood, these options adjust the Claim Frequency Code for the outgoing claim to be either 7 (Replacement of prior claim), or 8 (Void/cancel prior claim).
Optionally, Select a Claim Delay Reason
When needed, select a Claim Delay Reason to include on the claim.
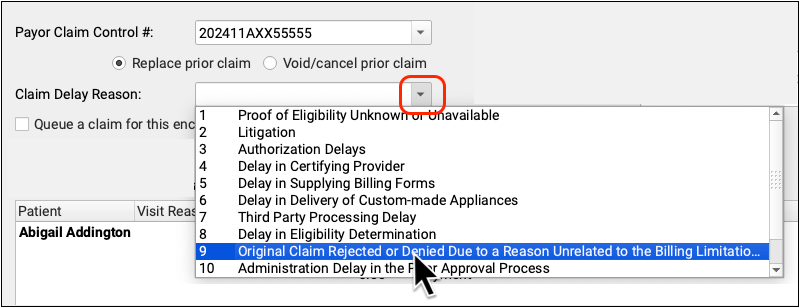
The Claim Delay Reason “9 Original Claim Rejected or Denied…” is commonly used when filing corrected claims or appeals. A PCN is always required in those circumstances, and PCC EHR will remind you if you forget to enter one.
Review the “Queue a Claim” Checkbox
Before you click “Save + Post”, double-check that the “Queue a claim” option is checked (if desired) and that it indicates the correct payer. If you’ve added new charges or made other changes that suggest a new claim is needed, PCC will automatically select the “Queue a Claim” checkbox, but the final choice is up to you.
Next to the checkbox, you can see the payer configuration settings (or “batch”) that PCC will use to format the claim. If it looks incorrect, double-check that you have assigned the charges to the correct policy in the Procedures component.
Save Your Changes and Queue Up a Claim
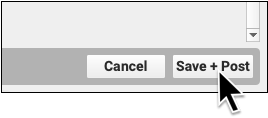
Click “Save + Post” to save your changes to the encounter. If the “Queue a claim” checkbox is selected, this will also queue up a new claim.
What If I Queue Up Two Claims For the Same Encounter?: When you process and submit claims, PCC will review all queued claims and combine duplicates. It will use the most recent claim’s information.
Submit Claims
Use the Claims tool in the Tools menu to process and submit your outgoing claims. For more information, read Submit Claims.