Patient Portal Practice Settings and Configuration
Your practice can configure what details and options appear in My Kid’s Chart, PCC’s patient portal.
Contents
- 1 Patient Portal Configuration
- 2 Automatic Privacy in My Kid’s Chart When a Patient Becomes an Adult
- 3 Configure the Practice Address that Appears in My Kid’s Chart
- 4 Configure Which Growth Charts are Visible in the Patient Portal
- 5 Configure Where the Patient Portal Users Component Appears in PCC EHR
- 6 Change the Default Logout Time in My Kid’s Chart
- 7 Automatically Inactivate Portal Message Conversations
- 8 Customize the Patient Portal Message Protocol
- 9 Turn On and Customize Patient Portal Message Templates
- 10 Set Portal Message Conversations Inactivity
Patient Portal Configuration
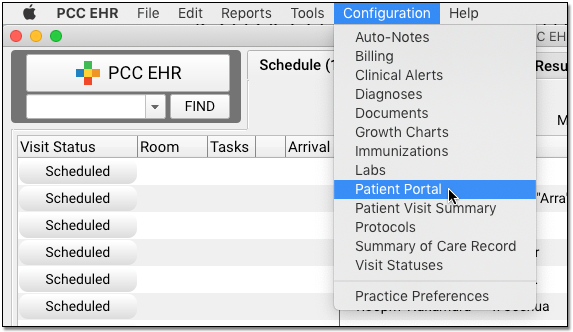
Use the Configuration tab of the Patient Portal Configuration tool to change or update what your patient portal users will see.
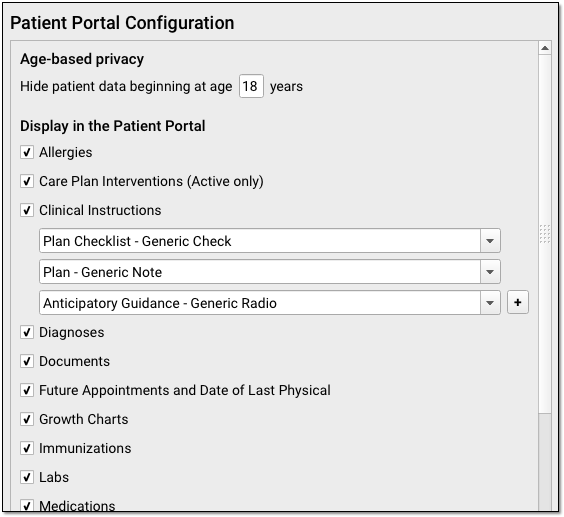
Use the checkboxes to determine what will appear in My Kid’s Chart for all users. Configuration changes are practice-wide, for all patients and all locations. (Note that specific orders can also be hidden on a case-by-case basis with the “Display on Patient Reports” checkbox within the orders themselves.)
Use the image and list below to review your options.
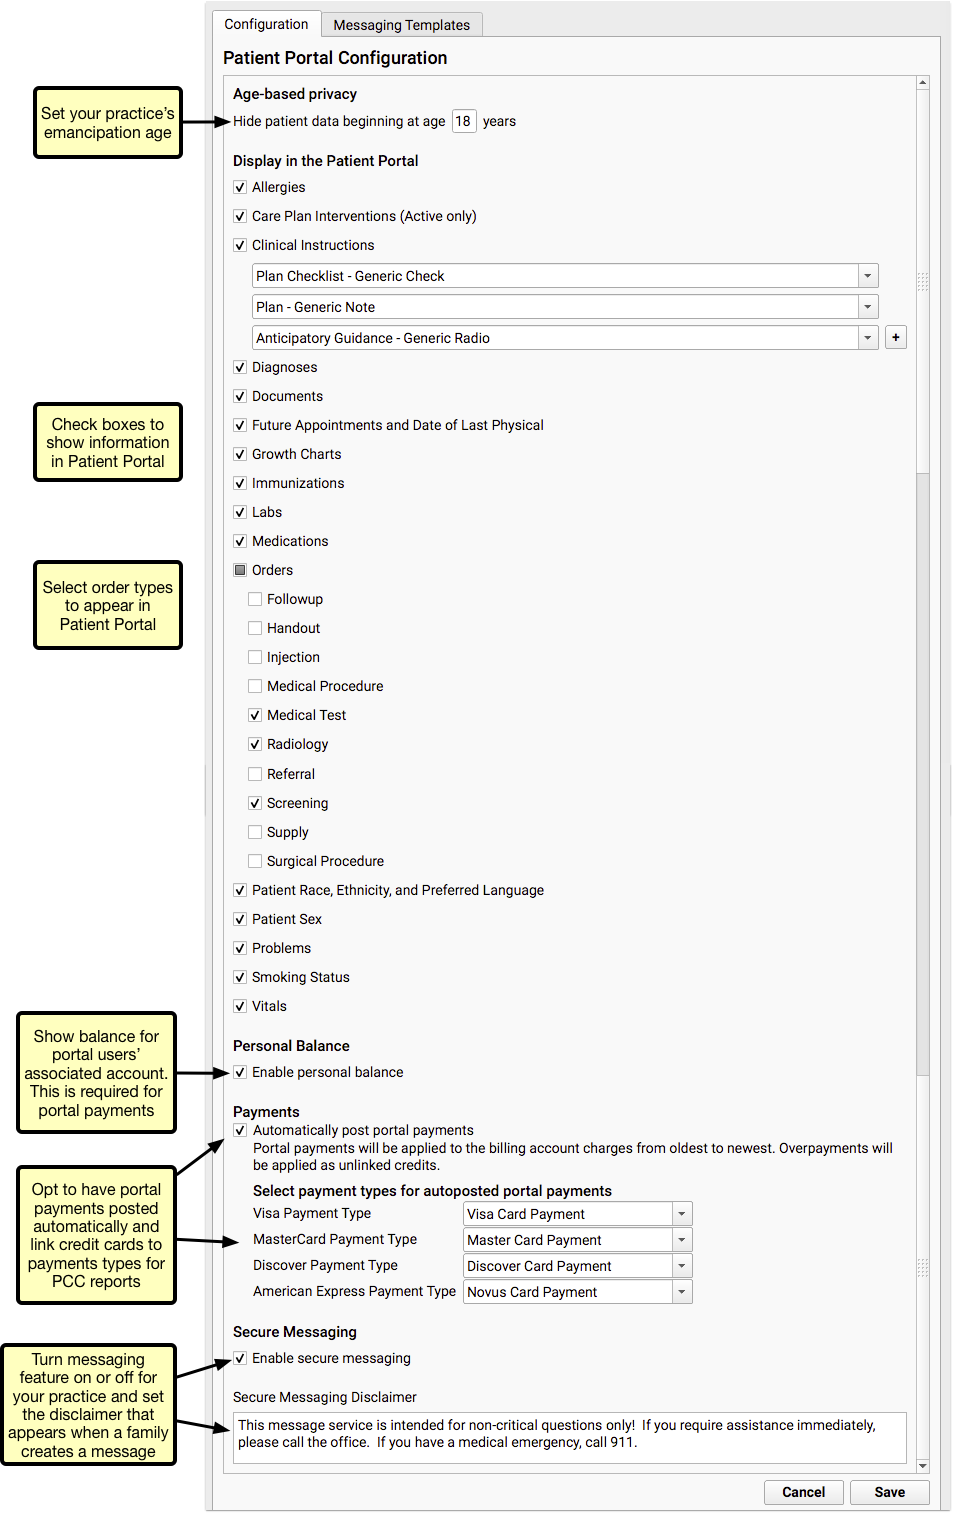
Turned Off By Default: Care Plans and Payments, as well as patient sex, race, ethnicity, preferred language, and smoking status are not visible in My Kid’s Chart by default. Your practice can check the boxes to enable these features.
-
Set Age-Based Privacy: The age-based privacy setting sets the age of emancipation for patients in My Kid’s Chart. When a patient reaches this age, all of their medical information is automatically hidden from all portal accounts (including their own). Your office can grant account access to patients above this age on an account-by-account basis. For more information, read Patient Portal User Account Administration.
-
Clinical Instructions: Your practice can share clinical instructions through the Patient Portal. You can add any generic chart note component to the Clinical Instructions, and they will appear in the portal.
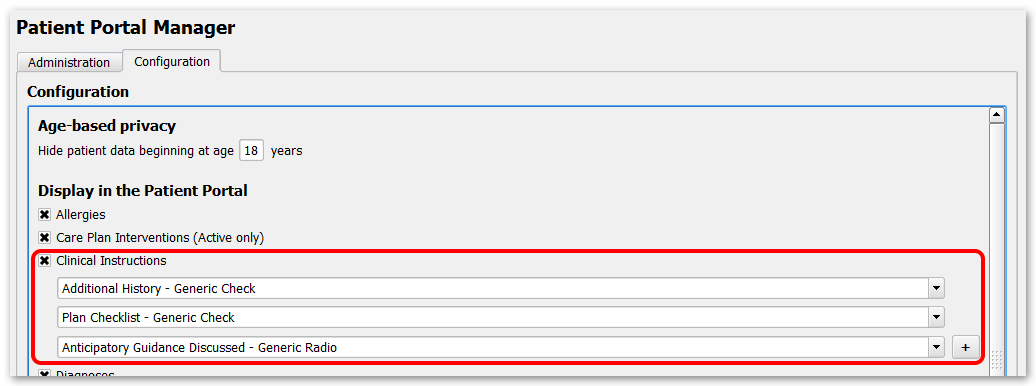
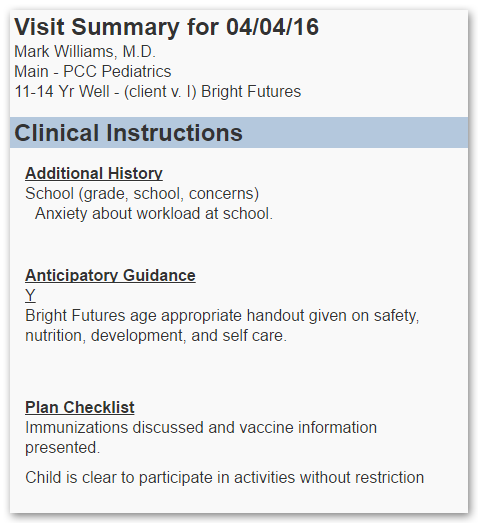
Separate Configuration for the Patient Visit Summary Report: The configuration for Clinical Instructions in My Kid’s Chart is independent of the configuration for Clinical Instructions in the Patient Visit Summary Report. Read more here about configuring Clinical Instructions in the PVS.
-
Personal Balance: The Personal Balance feature is turned on for all practices by default. This feature allows patients’ families to see their outstanding balance within the portal. The Personal Balance feature must be turned on before your practice can receive payments through the patient portal.
-
Payments: Your practice can choose to enable auto-posting of payments made through your patient portal. You will need to select a payment type for each credit card listed, which will be used to identify portal payments in PCC reports. If you do not have an appropriate payment type option, you can add one in the Payment Types table or contact PCC Support for help. For more information, read Get Started with Patient Portal Payments.
-
Secure Messaging: Your practice can turn the Secure Messaging features of My Kid’s Chart on or off.
-
Secure Messaging Disclaimer: If your practices allows secure messaging to and from your practice, you can customize a message that will appear at the top of the screen whenever a portal user creates a new message.
Access Controlled: Like other configuration items, the Patient Portal Configuration tool is limited to those users with an appropriate user role. Use the User Administration Tool to review your practice’s roles and control who can make changes to My Kid’s Chart.
Automatic Privacy in My Kid’s Chart When a Patient Becomes an Adult
The My Kid’s Chart patient portal will automatically hide all patient records from all users when a patient reaches your practice’s defined emancipation age.
After the patient’s birthday, they will appear with a “Privacy Enabled” flag on the user’s account.
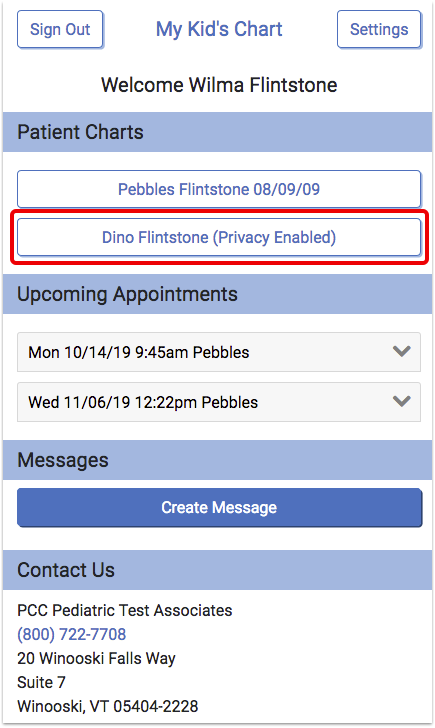
A parent or patient will still see that the patient is connected to their account, but they will not see any information about upcoming appointments and they will not be able to review patient records.

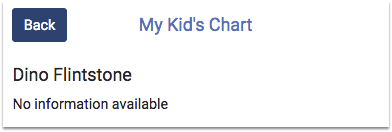
This feature meets HIPAA privacy guidelines and improves patient security. Here are some issues to keep in mind:
-
Messages Are Still Available: If your practice uses the Messages feature of My Kid’s Chart, parents will still be able to send your office messages and questions in relation to connected patients, even after they turn eighteen. Your staff should keep this in mind when responding to incoming questions on the Messaging queue in PCC EHR.
-
18, 16, or 21?: Age eighteen is the My Kid’s Chart default emancipation age, but your practice can set your state’s emancipation age in the Patient Portal Configuration tool, as shown above.
-
Special Circumstances: If your practice has teenage patients who use your patient portal, you may need to manually grant them access to their own records after they reach emancipation age. Or, if an adult patient has a guardian, that person may need to be granted access to the patient’s record. For help working with individual portal accounts, read Patient Portal User Account Administration.
Configure the Practice Address that Appears in My Kid’s Chart
If your practice uses PCC’s Care Center features to manage patients for several different pediatric offices that use the same practice database, you may want to set which office address each patient portal user will see when they log into My Kid’s Chart.
Use the Practice Preferences tool to set which location address appears in the patient portal, as well as on the Health Information Summary report.
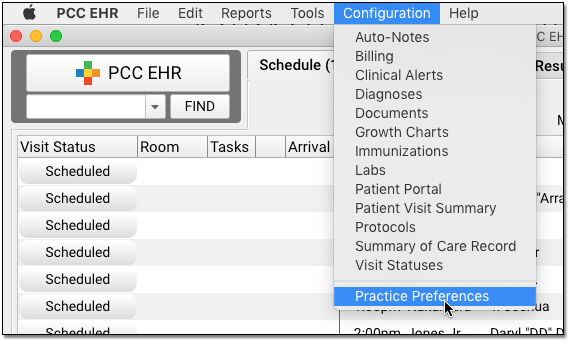
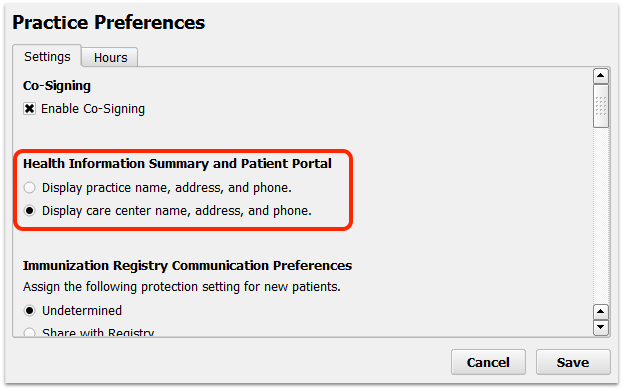
After setting this option, the patient portal and the Health Information Summary will automatically display either your practice’s default address or the patient’s care center address. If the patient has no care center assigned, they will see the practice’s default address instead.
If a parent has several patients who visit physicians at different care centers, both addresses will appear for them when they log in to My Kid’s Chart.
Configure Which Growth Charts are Visible in the Patient Portal
Your practice can control which growth charts are shown in the patient portal by checking the box within the Portal Display column in the Growth Chart Configuration tool.
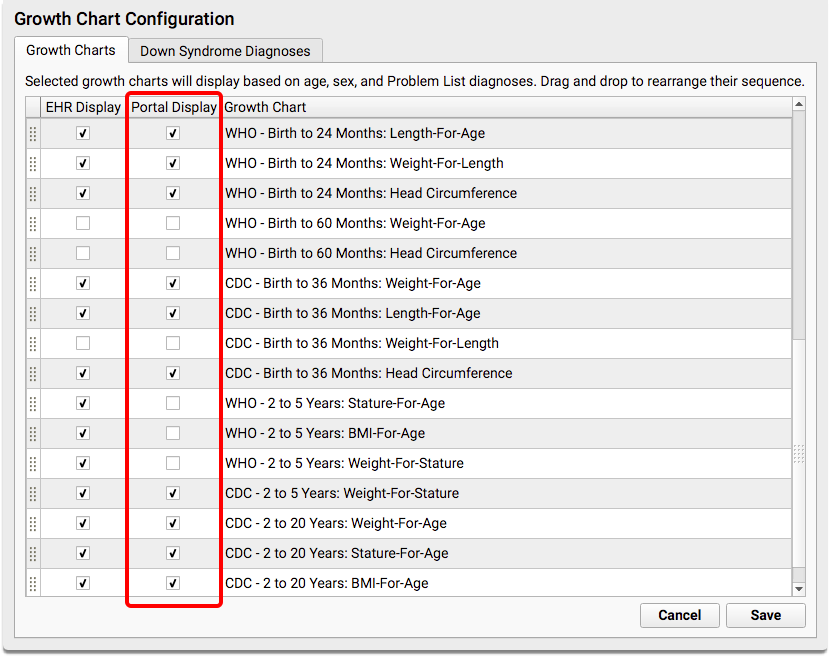
By default, the same Growth Charts that you use in PCC EHR will be visible to families in the portal. You can uncheck any that you don’t want showing up in the portal, or you can decide to disable growth charts in the portal entirely by unchecking the Growth Charts option in the Patient Portal Configuration tool.
Do You Hide Vitals Now? Growth Charts Displays Them: Your practice can specifically set whether or not to display patient vitals from each encounter in the patient portal. Growth Charts also display vitals collected by your practice. If you prefer to hide vitals information on chart notes and patient summaries, you may also wish to turn off Growth Charts.
Configure Where the Patient Portal Users Component Appears in PCC EHR
The Patient Portal Users component is added by default to the Patient Check-In protocol and to the Demographics section of the patient’s chart.

The chart-wide Patient Portal Users component can be added wherever else you need it, such as on phone notes, on the Medical Summary, or on every appropriate well visit protocol. By placing it in the context of the other work your practice does, you’ll be able to support your families better.
Use the Protocol Configuration tool to edit chart note protocols and chart sections.
Change the Default Logout Time in My Kid’s Chart
After 5 minutes of inactivity, My Kid’s Chart will log a user out. PCC can customize the logout time for your practice. Contact PCC Support for more information.
Automatically Inactivate Portal Message Conversations
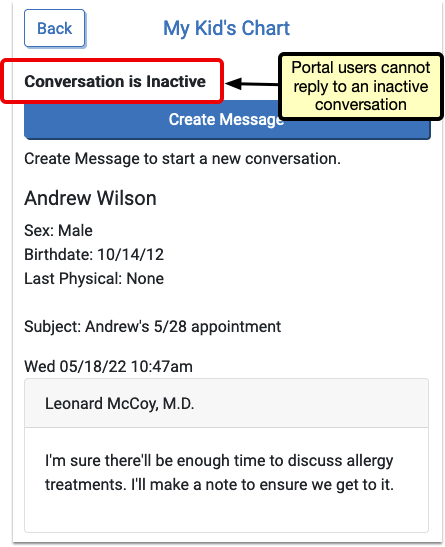
Portal Messaging includes the option to prevent replies to a message thread after a selected number of days. If the portal user does not send a reply within the selected number of days, the conversation will become inactive and additional replies cannot be sent. The countdown resets every time a reply is sent.
The length of time before a conversation becomes inactive is set in Patient Portal Configuration.
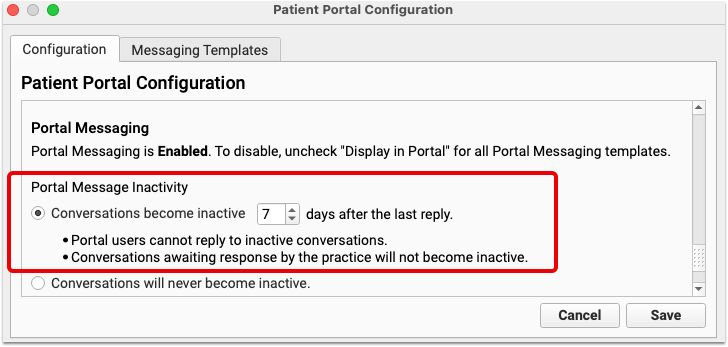
You can select any number of days, from 1 to 99. Keep in mind that selecting too short a date range can prevent users from replying at all, so select a reasonable length of time.
Customize the Patient Portal Message Protocol
When your practice sends or receives a patient portal message, you work with a Portal Message protocol that includes the message information.
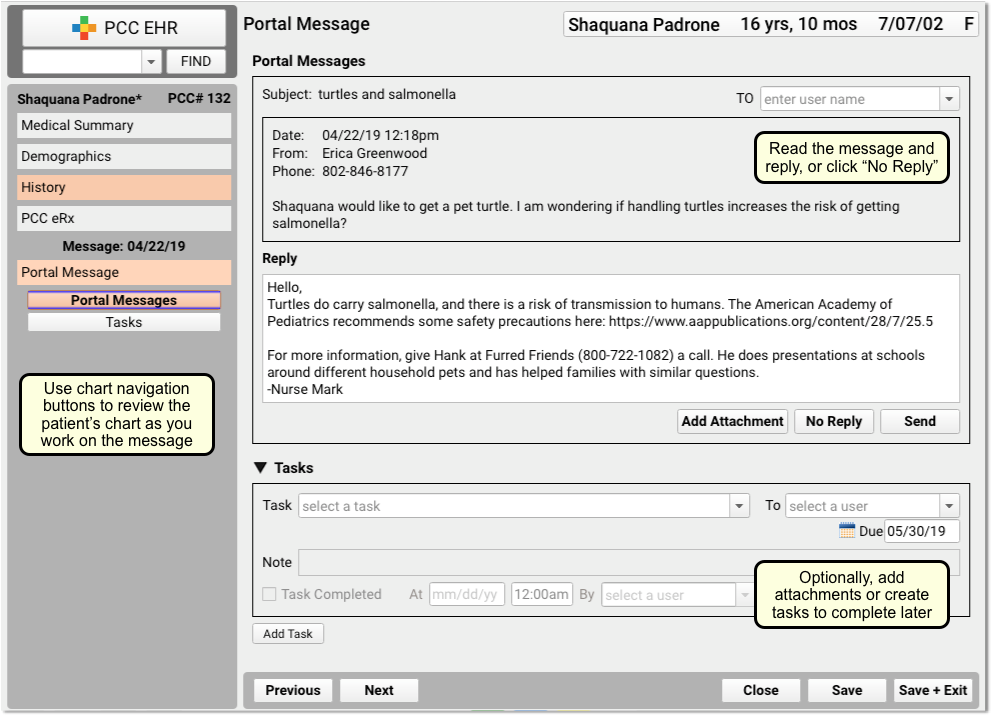
Your practice can customize this protocol to include other tools that your staff may find useful when responding to a portal message. For example, you could add the “Recent and Upcoming Appointments” component, or the “Forms” component.
To make changes to the Portal Message protocol, open Protocol Configuration from the Configuration menu and click “Protocol Builder”. The Portal Message protocol is listed with other protocols at your practice.
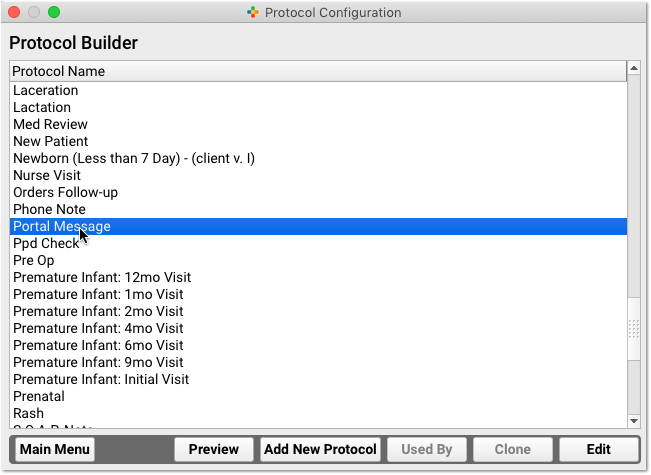
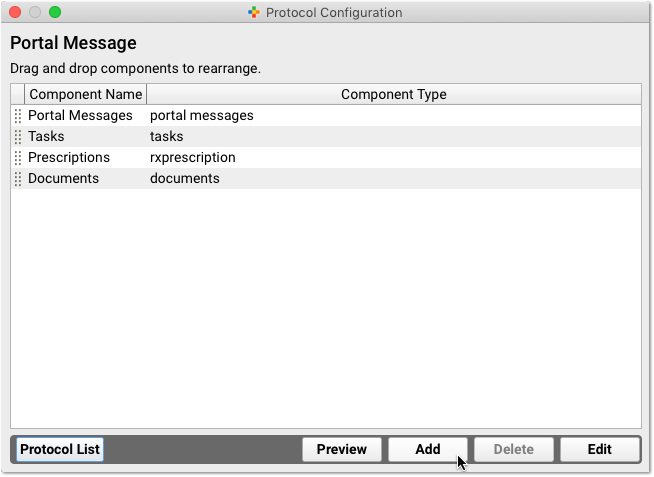
You can add, delete, and edit the components that appear when you work with portal messages.
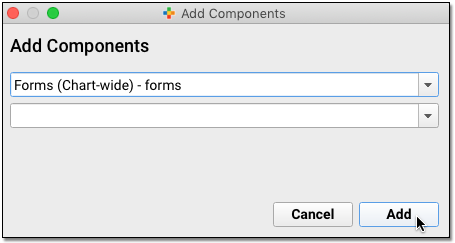
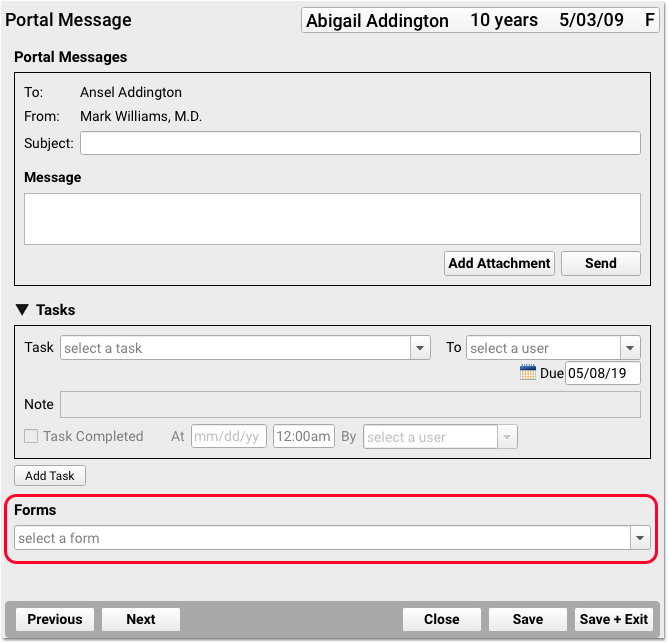
Once you add a component, it will be available to your staff on every portal message sent or received afterwards.
Turn On and Customize Patient Portal Message Templates
PCC EHR includes three optional patient portal message templates that you can use as-is, or customize to work better for your office. You can also create your own messaging templates.
To work with patient portal message templates, click on the Messaging Templates tab of the Patient Portal Configuration tool.

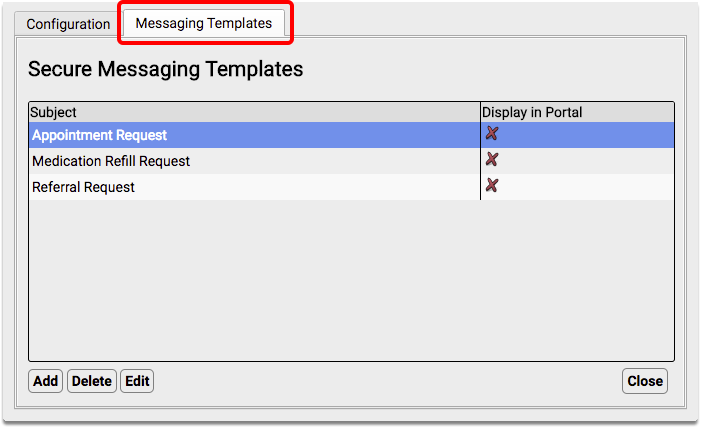
Note: In order to use portal messaging templates, your practice must have Secure Messaging enabled in the Configuration tab.
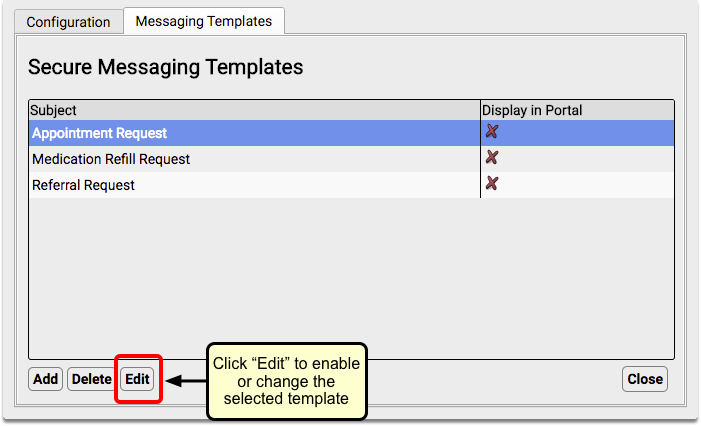
Highlight the template you want to turn on and click “Edit”.
Select the “Display in Portal” checkbox.
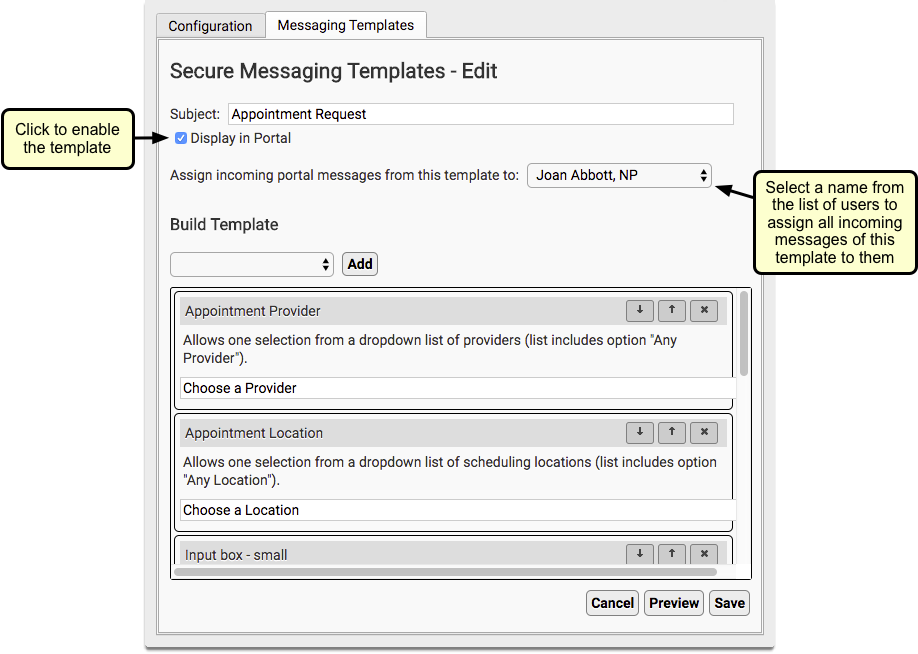
You can also choose to automatically assign incoming messages of a certain template to a specific person at your practice.
You can make additional edits to the contents of your portal messages, and you can also create your own custom message templates. For more information, read the Guide to Portal Messaging Template Configuration.
Set Portal Message Conversations Inactivity
Portal Messaging includes the option to prevent replies to a message thread after a selected number of days. This is set in Patient Portal Configuration.

You can select any number of days, from 1 to 99. Keep in mind that selecting too short a date range can prevent users from replying at all, so select a reasonable length of time.
If the portal user does not send a reply within the selected number of days, the conversation will become inactive and additional replies cannot be sent. The countdown resets every time a reply is sent.
