Review Payment History and Edit Payments
You can review payment history by encounter, or see all payment history for an account. You can also edit payments that were posted incorrectly and adjust how payments are applied to charges. Read below to learn how.
To learn how to enter payments, read Post Personal Payments or Post Insurance Payments. To learn about the many ways to generate a receipt for families, read Print a Receipt.
Watch a Tutorial Video: To see a demonstration of the features in this article, watch Review Payment History and Post Insurance Payments.
Contents
Review Payment History for an Encounter
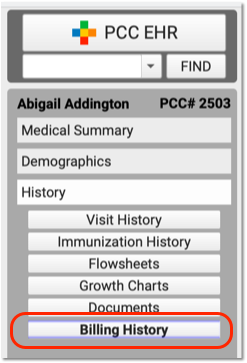
Use the Billing History in a patient’s chart to review detailed charge and payment information for any encounter.
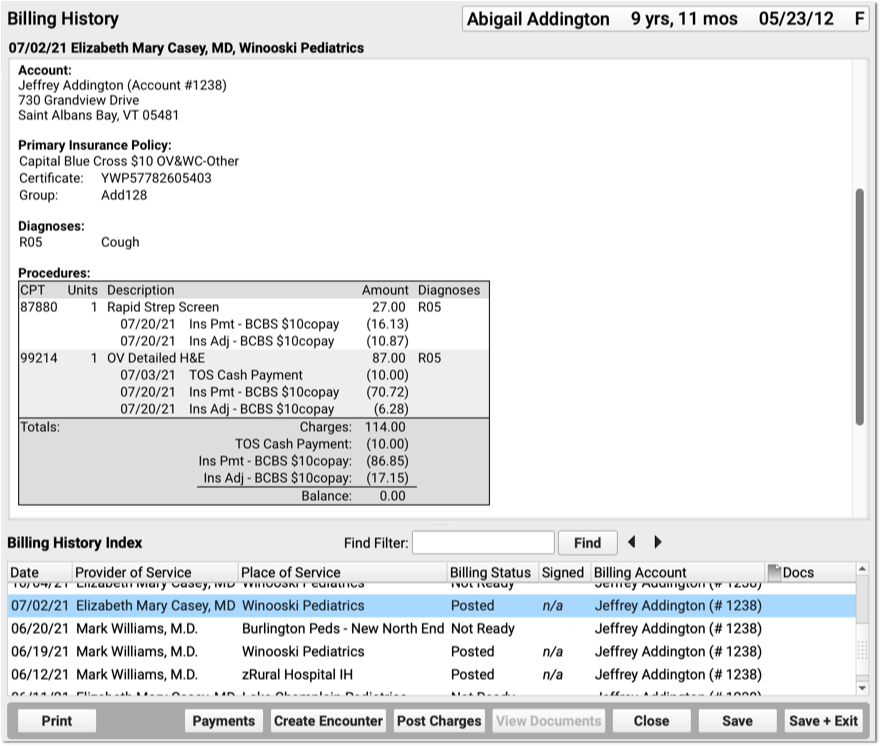
The Billing History displays all of the billing-related information for an encounter.
In the Procedures section, you can review charges for the encounter and a history of all payments.
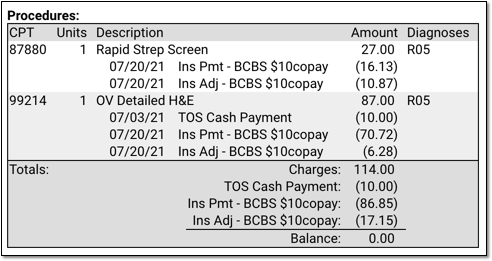
For each charge, you can see personal payments, insurance payments, and adjustments.
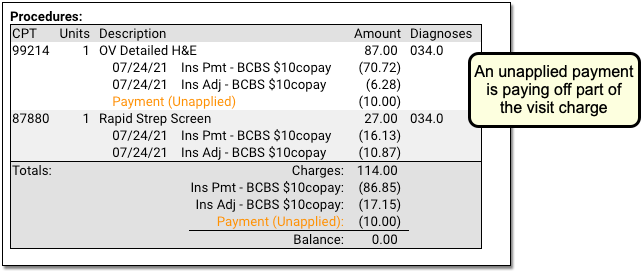
If any unapplied (or “unlinked”) payments on an account are paying off charges, you will see the “Payment (Unapplied)” amount indicated for each charge and in the totals section.
In the Payments section, you can review payments posted on the same date as the encounter. To configure which payment types appear in this section, contact PCC Support.

For each payment, you can review what charges the payment applies towards.
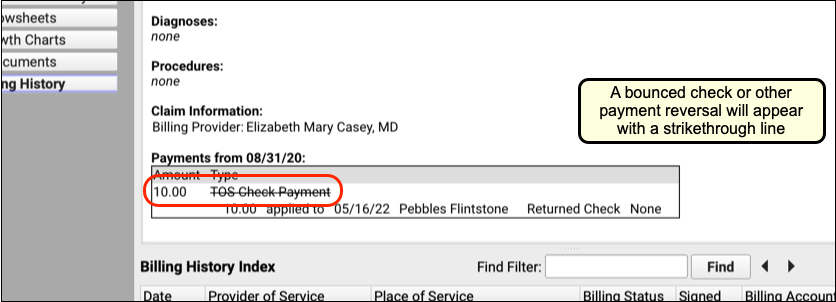
See Bounced Checks and Other Payment Reversals
If a payment has been reversed (such as a returned check or a stopped credit card payment), it will appear along with the reversal procedure. The payment description will be struckthrough to help you identify that it was reversed. (If only part of a payment has been reversed, then the payment is still partly valid and the strikethrough line will not appear.) PCC identifies reversals as any account adjustment procedure of the types Receipt-NSF or Receipt.
Jump to the Payment History from the Encounter’s Billing History
After you review the charges and payments for an encounter, you may want to work with the billing account’s payment history and make changes. Click the “Payments” button to open the Payments tool.

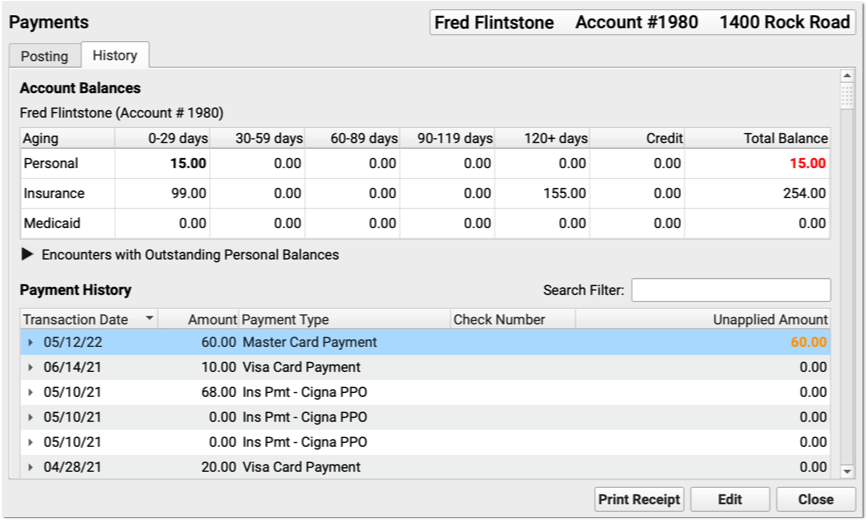
In the Payments tool, you can edit payments, add notes, print a receipt, or make changes to how a payment is applied.
Review an Account’s Complete Payment History
Use either the Payments tool or the Insurance Payments tool to review and edit an account’s full payment history.
Open an Account’s Payment History
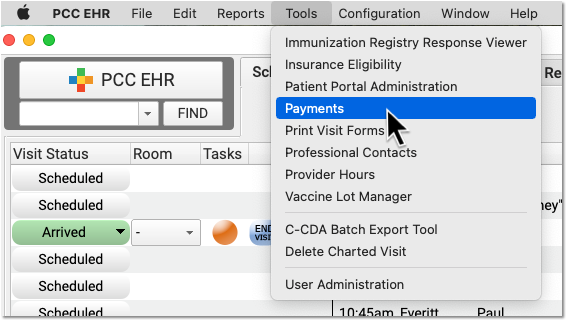
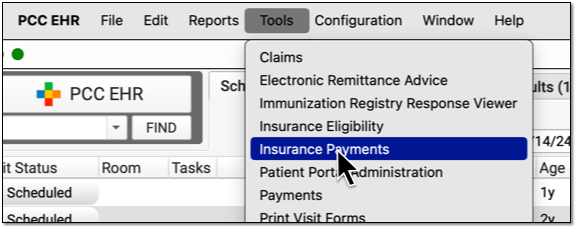
You can jump to Payments from within a patient’s Billing History, as shown above. Or you can open it from the Tools menu:
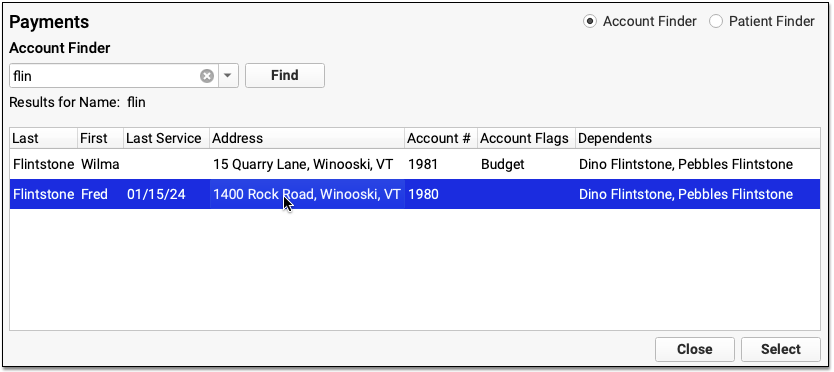
You can search for an account by name or use other search parameters, like an account phone number. The list of matching search results includes a Dependents column to help you confirm that you have the right account.
Alternatively, you can search by patient using the Insurance Payments tool:
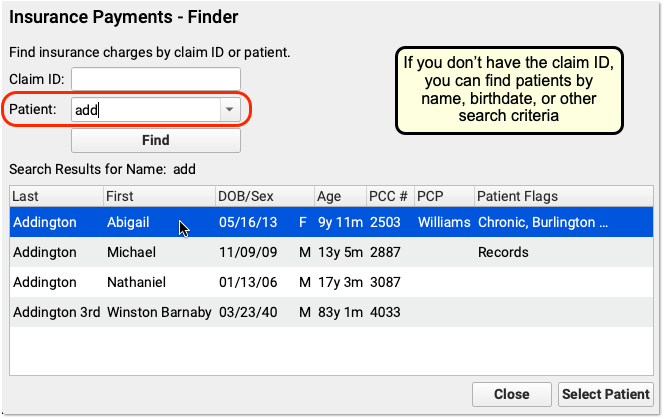
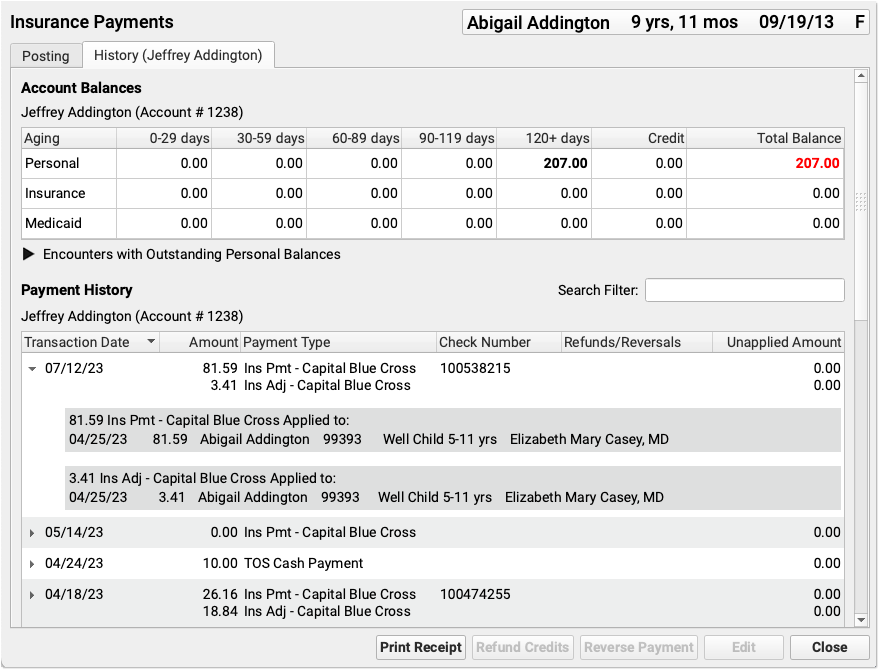
After opening either the Payments tool or the Insurance Payments tool, click on a “History” tab to see the account’s payment history.

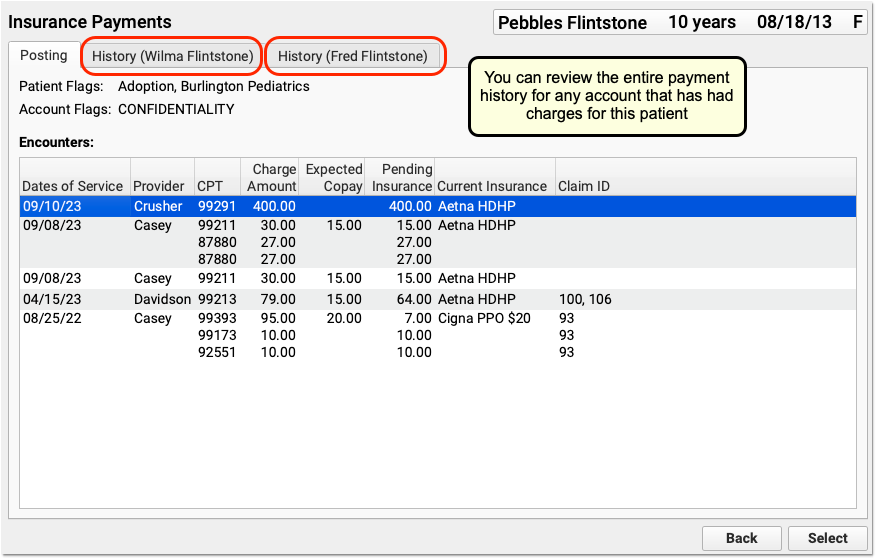
If you are working in the Insurance Payments tool and the patient has had charges with more than one account, you will see two history tabs.
Understand the Payment History
Whether you are reviewing an account’s payment history in the Payments tool or the Insurance Payments tool, the screen is the same.

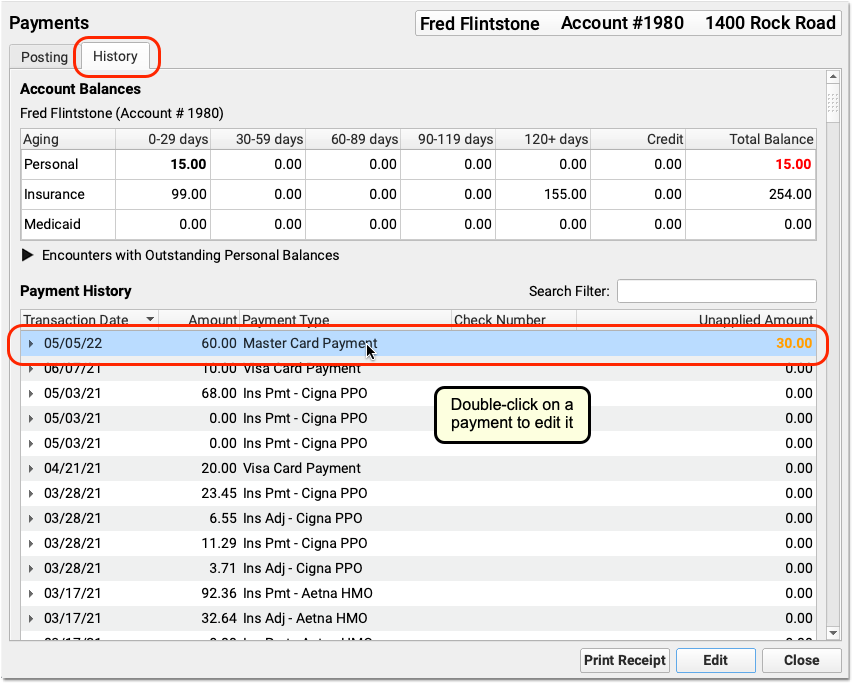
Aged account totals appear at the top, followed by a list of payments. The most recent payments appear at the top of the list. For each payment, you can identify the Transaction Date, the Amount, the Payment Type, the Check Number, whether any Refunds or Reversals are applied, and any Unapplied Amount.
Check Number or EFT Trace Number?: “Check Number” is the conventional term for the unique number associated with a payment. Depending on how your practice received the funds, the check number may actually be an EFT trace number.
Click the disclosure arrow next to a payment to see what charges it applies towards.


If any portion of a personal payment is unapplied, the payment amount appears in bold orange in the Unapplied Amount column. You can click the disclosure arrow to see more details about unapplied payments.

Since insurance payments and adjustments are posted together, they are grouped together in the history.
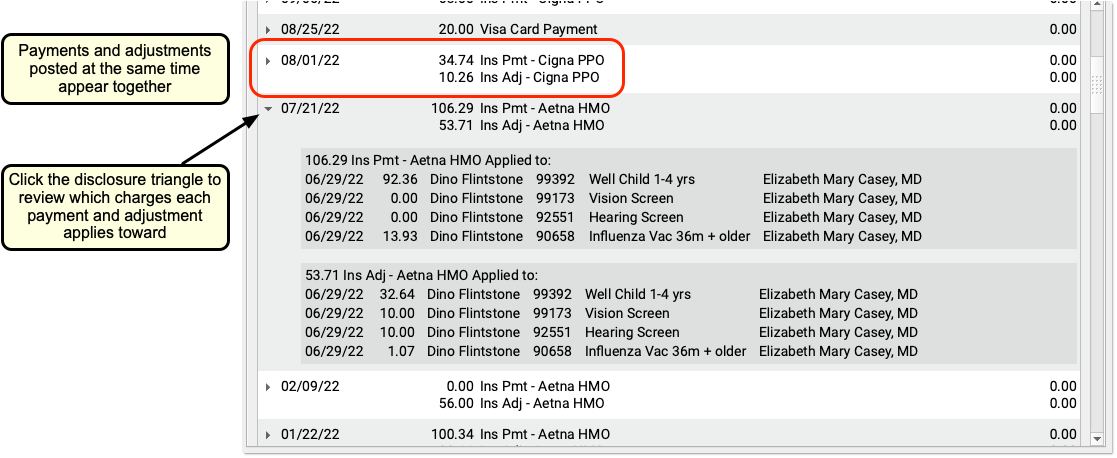
As in the Billing History in the patient’s chart, any reversed payment is struck through, along with details of the reversal. The original payment transaction date, amount, type, and check number are preserved.

You can use the History tab in the Payments tool or the Insurance Payments tool to review account balance and payment information. Then you can switch to the Payment or Posting tabs to post payments or perform other actions.
Edit Personal Payments
Double-click on a personal payment in the History tab to make changes.
You can modify the transaction date, payment type, amount, or check number. You can also change how much of a payment applies towards balances on personal charges, and you can use the Distribution section to specify which charges the payment applies towards.
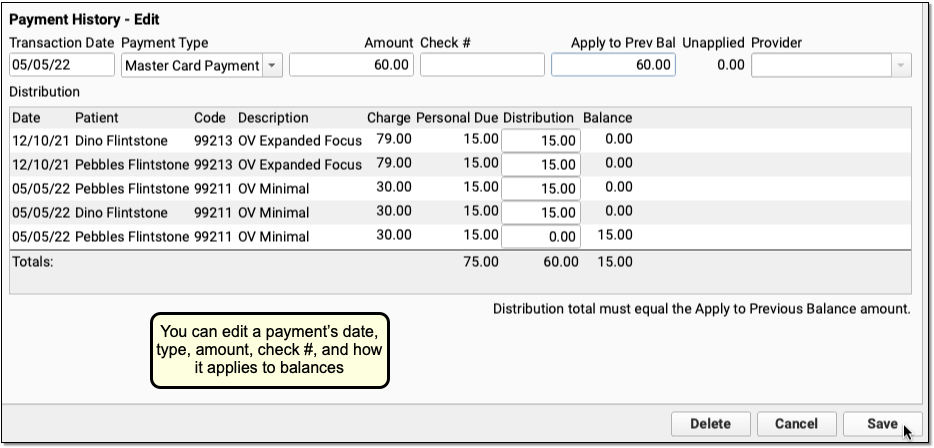
Click “Save” to save any changes to the payment. Or, click “Delete” to delete the personal payment.
In addition to fixing mistakes made during payment entry, your practice can use the History tab to identify unlinked payments, edit them, and apply them towards appropriate charges on an account.
Editing a Payment Updates Your Daysheet and Other PCC Auditing Reports: When you edit a payment, it will update your system’s underlying payment reports. For example, the Daysheet report will display a negative entry and a positive entry, reflecting the removal of the old payment and the addition of the new payment with your saved changes.
Edit Insurance Payments
Double-click on an insurance payment to make changes.
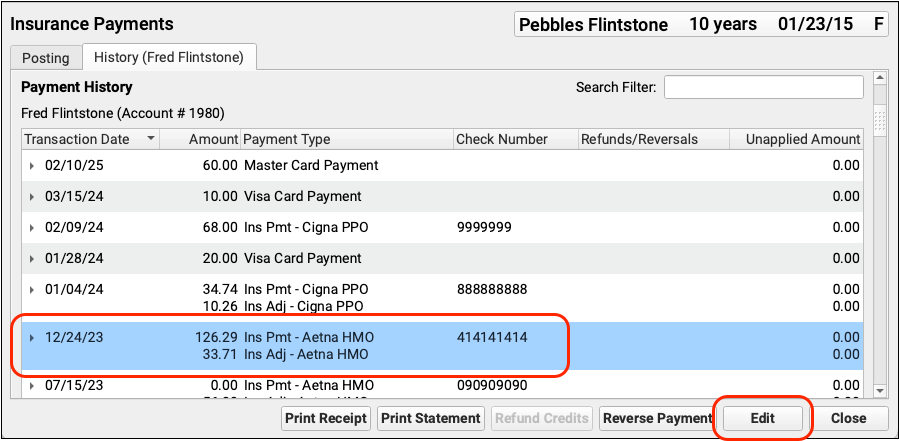
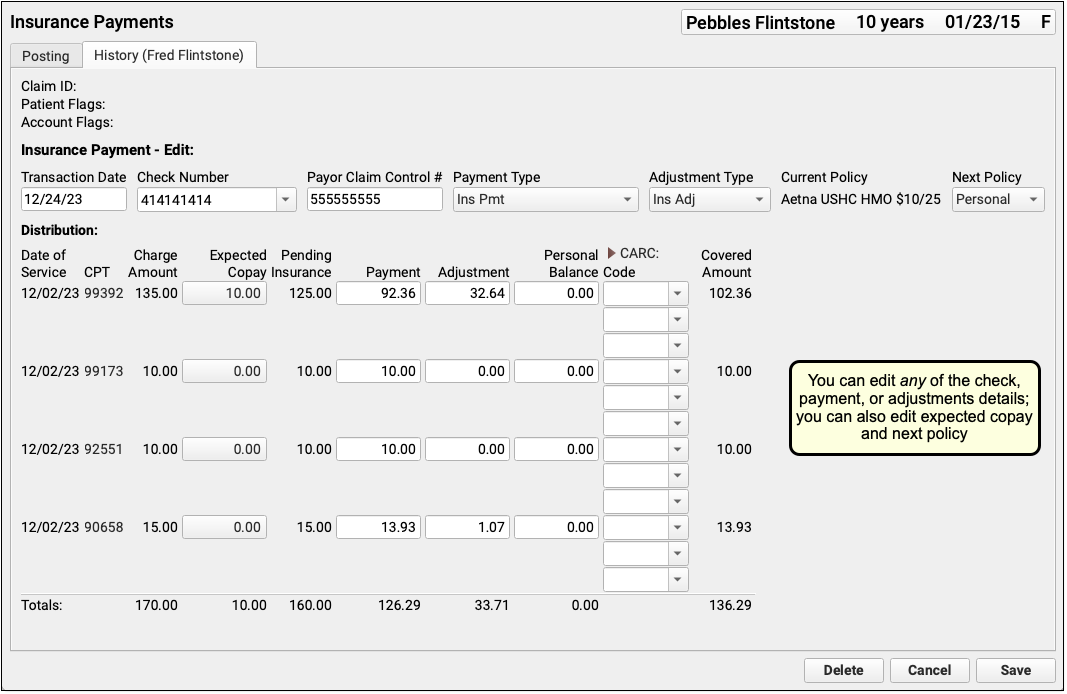
You can edit any aspect of the insurance payment and adjustment, including the transaction date and other payment information, amounts, and CARC information. You can also change the expected copay amount for a procedure. If you’ve learned the patient had another policy for the date of service, you can also update the Next Policy field to change the responsible party for the charges.
For more information, read Post Insurance Payments and Adjustments.
Print Receipts for Posted Payments
In the History tab in the Payments tool, you can select any payment(s) and click “Print Receipt” to print a receipt. For a detailed guide, read Print a Receipt.
