Use Orders to Track Clinical Measures for Reporting, Mandates, and Incentive Programs
Pediatric practices often need to report on clinical and other visit data that is collected over a designated period of time. Whether you are tracking something for PCMH, pay for performance, “Reach Out and Read”, or another incentive program, you can use an order in PCC EHR to record what occurred on the chart note. Your practice can use orders to track medical procedures, screenings, labs, referrals and any other work done on behalf of a patient during an encounter.
How does this work? First you create the right kind of order, add the correct codes and tests, and configure billing behavior for the order. Next, you add the order to chart note protocols. During a visit, clinicians can click “Order” and add and complete tasks to track the activity in the chart. Finally, PCC EHR reports, such as the customizable “Orders By Visit” report, will help you get the data you need for a certain date range.
By configuring orders to track an activity, you can make it easy for your practice to complete tasks, bill for services, as well as meet the requirements of a CQM or other mandate or program guideline.
Examples: In this article, we configure PCC EHR to meet the requirements of NQF 0418: Depression Screening, a Clinical Quality Measure used for PCMH and other mandate programs. (For more details about CQM requirements, read How to Chart for Each Clinical Quality Measure.) We also cover how an office could use an order to implement the “Reach Out and Read” program, which encourages literacy by giving children books during their pediatric visits. You can follow a similar procedure to configure PCC EHR to meet other reporting needs or an initiative of your practice.
Contents
- 1 Create an Order and Add Tracking Codes
- 2 Add Orders to Chart Note Protocols
- 3 Configure Billing Codes for Your Screenings, Procedures, and Other Orders
- 4 Chart the Visit, Use the Orders
- 5 Achieve One-Click Reporting By Removing the Default Task
- 6 Remember to Bill the Visit and Perform Other Steps
- 7 Reach Out and Read (ROR) Example
- 8 Run Reports on Collected Data
Create an Order and Add Tracking Codes
To get started, first create an order or edit an existing order. Follow the steps below to learn how to create (or edit) an order and add required tracking information for a CQM, Meaningful Use Measure, Pay for Performance report, or other program or mandate.
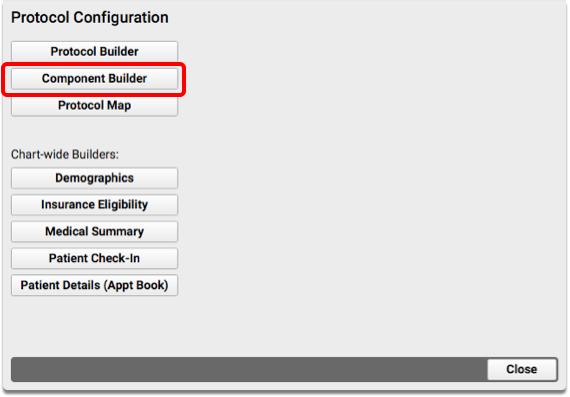
Open the Component Builder
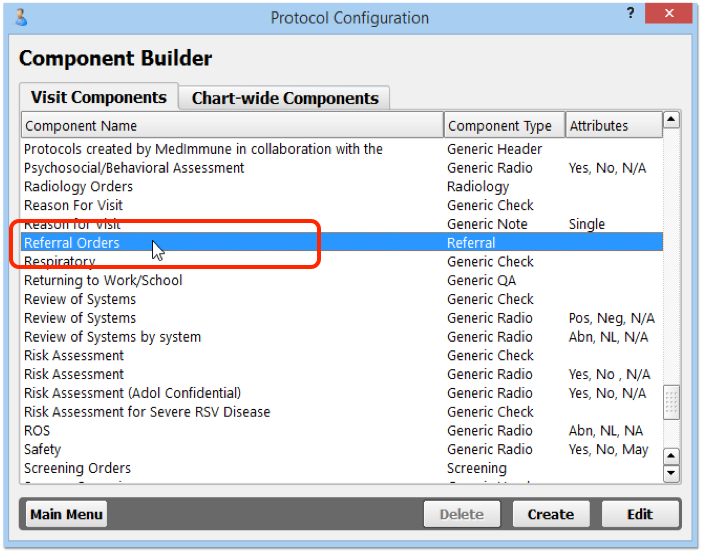
First, open the Protocol Configuration tool and click on “Component Builder”.

Open the Appropriate Orders Component
Find the order component that is the best fit for what you wish to track. Double-click to open it.
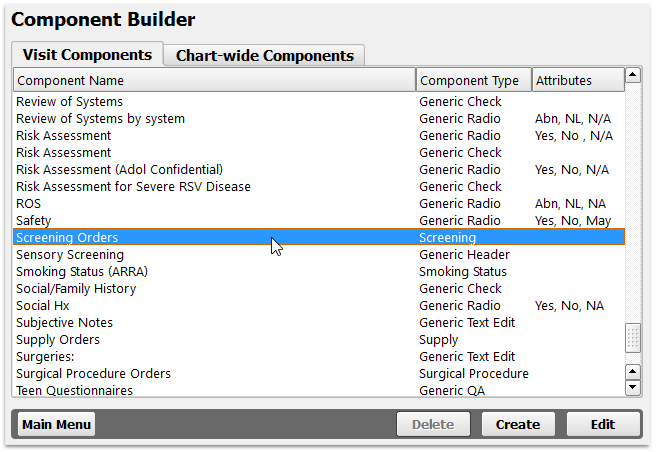
Order components all have the term “Orders” at the end of their name. They include Follow-Up Orders, Handout Orders, Lab Orders, Medical Procedure Orders, Medical Test Orders, Radiology Orders, Referral Orders, Screening Orders, Supply Orders, and Surgical Procedure Orders.
Edit or Add an Order
Click “Add” to create a new order, or double-click on an existing order to make changes.
Your practice can have one or more orders that meet the same mandate or workflow need for your practice. For example, for depression screenings you might have different orders for a PHQ-9 and for other types of screening and followup.

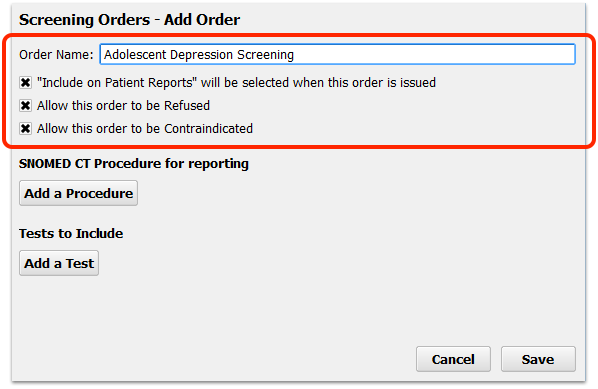
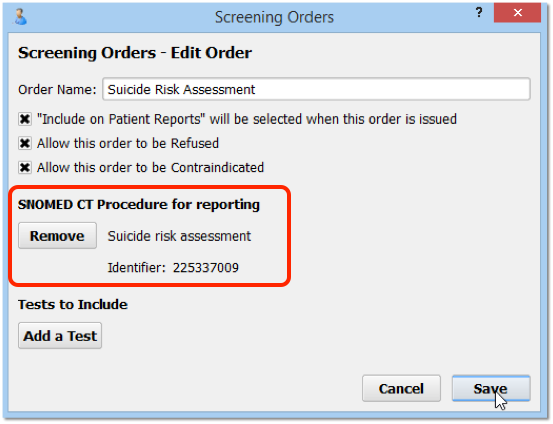
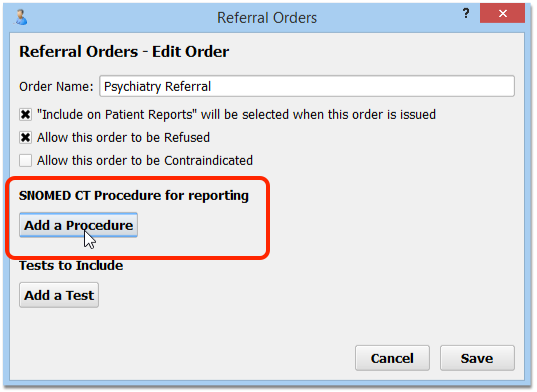
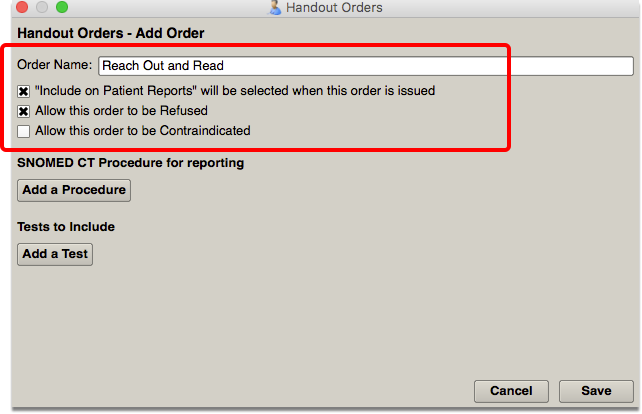
Configure Basic Order Details
Review the order name and set any other configurable options. For example, you may want certain orders to be private by default, in which case you would deselect the “Include on Patient Reports” option.
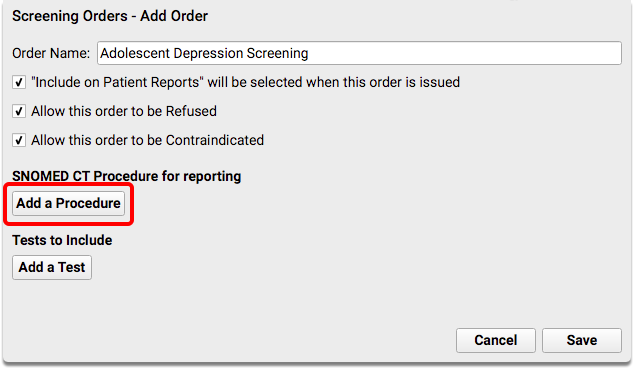
Maybe: Review or Add SNOMED-CT Procedure Codes for Tracking
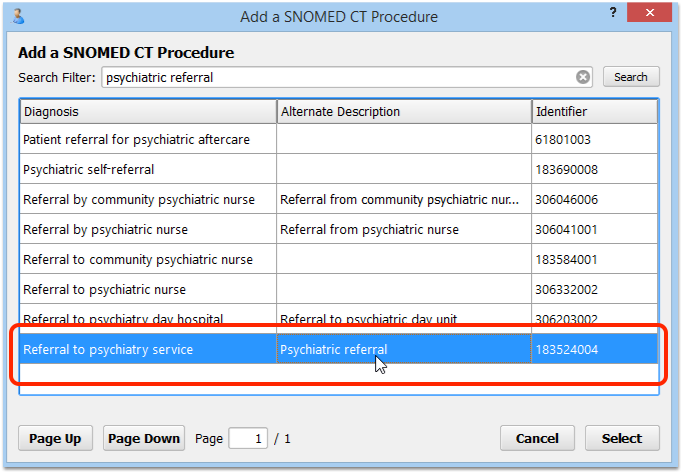
Some measures or reporting needs are met by tracking the use of specific SNOMED-CT procedure codes. Search and add the appropriate procedure.
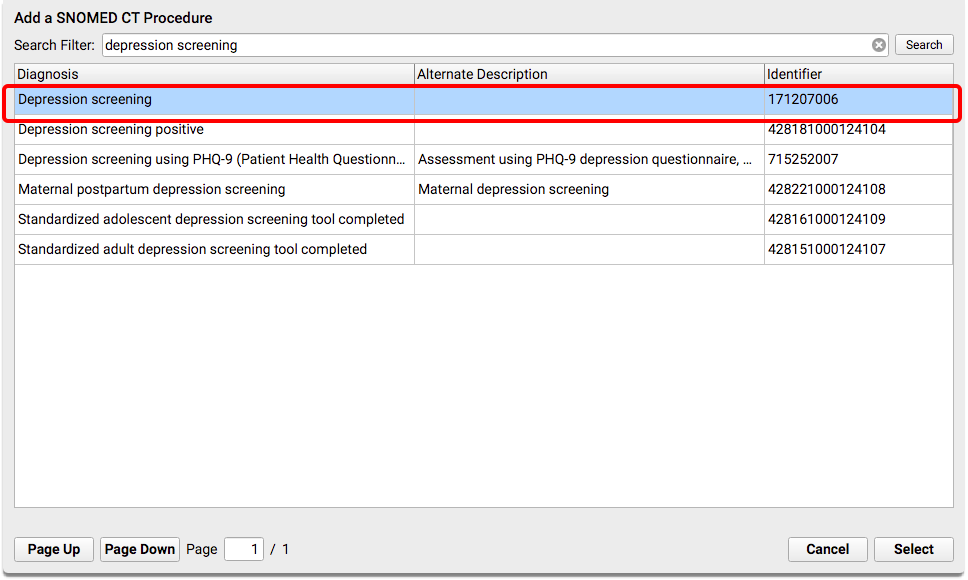

For example, when a patient has a positive result on a depression screening, your practice might perform a suicide risk assessment screening order. That order is tracked with SNOMED-CT procedure in order to report on a Clinical Quality Measure.
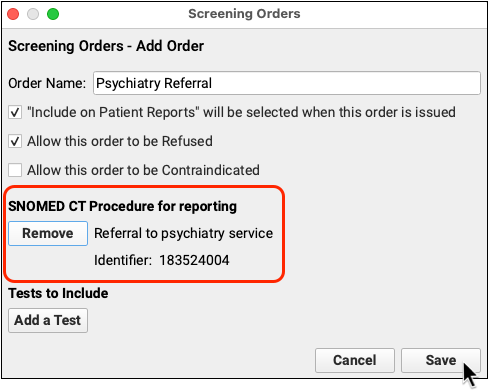
You would edit the relevant Orders component and order, and then add appropriate SNOMED-CT Procedure codes.
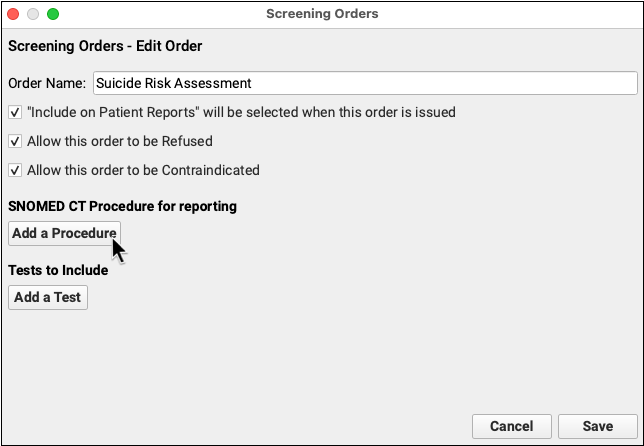
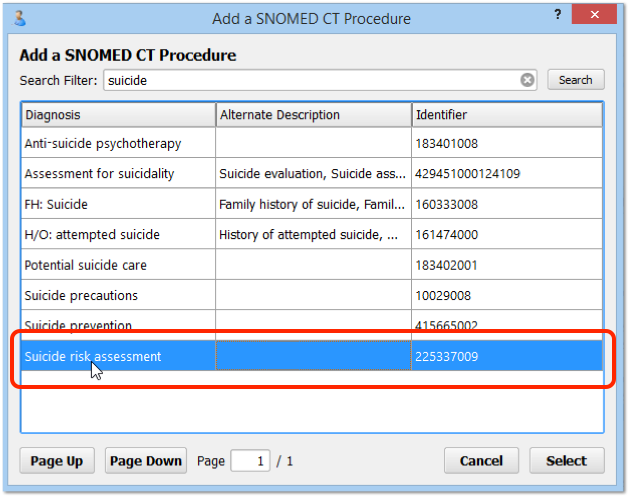
For example, for a suicide risk assessment screening order, you could add 225337009, “Suicide risk assessment (procedure)” to the order. You could also add codes to followup orders, such as Completion of a Mental Health Crisis Plan, Coping Support Management, or other mental health evaluation or treatment.
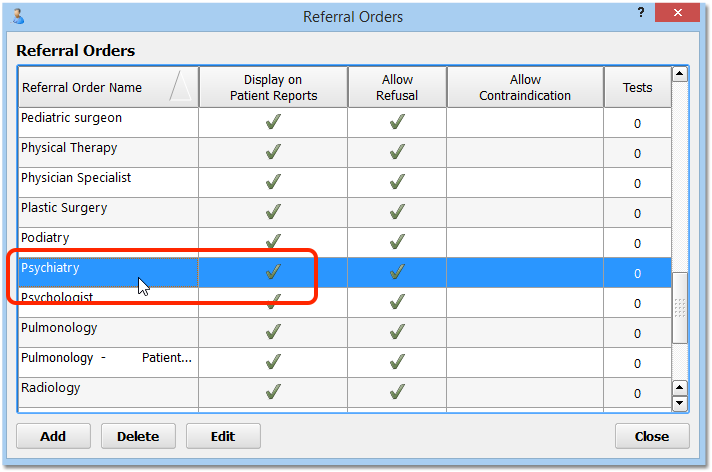
Some measures, such as the depression CQM, track referrals. Referrals are also tracked with Referral Orders component orders and a SNOMED-CT Procedure description.
For example, you may have referrals for an initial psychiatric evaluation or a specific depression referral.
For information on which SNOMED-CT descriptions to use for each type of order, refer to your state or officiating agency’s requirements for tracking data for a report. For tips on recording information for each CQM, read How to Chart for Each Clinical Quality Measure.
Maybe: Review and Add Tests (LOINC codes) for Tracking
Some measures or reporting needs are tracked by the use of a specific, standardized test. Search and add the appropriate test that you perform, and adjust test options.
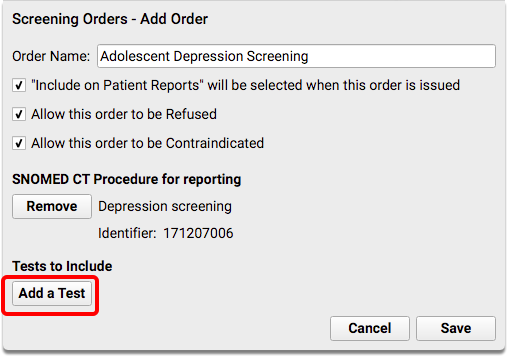
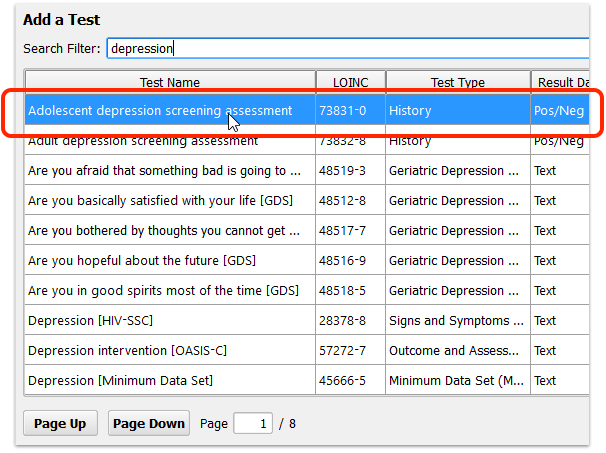
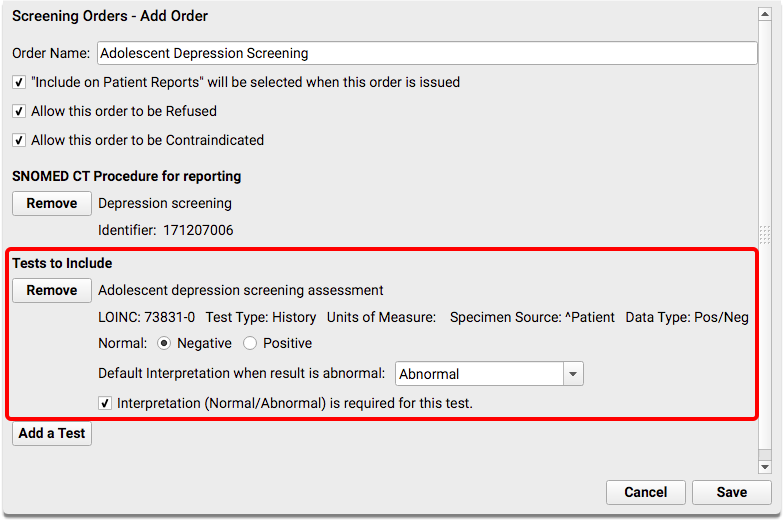
Tests are identified with a unique LOINC code.
What Tests Should I Add?: The specific test you should add depend on what your practice performs and on the requirements of the mandate you wish to track. For example, for an initial depression screening, you might add 73831-0, “Adolescent depression screening assessment” or 73832-8, “Adult depression screening assessment” for an order for patients 18 years or older. The tests should have a Negative/Positive result. You can also add more than one test to a single order. For example, if you perform a PHQ-9 at each visit, you might first add the “Adolescent depression screening assessment” test, which is used by the clinical quality measure, and then also add the “Patient Health Questionnaire 9 item (PHQ-9) total score” test in order to record the patient’s numerical result.
Repeat for Other Orders that Meet the Same Measure
Your practice may have more than one order that meets the same measure or reporting need! Click “Add” to create new orders, or double-click on existing orders to make changes. Repeat the steps above to configure the order, and add the appropriate LOINC tests or SNOMED-CT description.
Reach Out and Read For Each Age Group: If you are using orders to track the distribution of books for the “Reach Out and Read” program, you may benefit from creating multiple orders. By using orders based on a patient’s age, and adding the correct order to each chart note, you’ll later be able to report in more detail what books were distributed.
Add Orders to Chart Note Protocols
After you configure the orders your practice will use to track activity, add them to chart notes. Your clinicians will then see the “Depression Screening” order, for example, during the visit and be able to track the screening with a single click.
While customizing the chart note is optional, it will make it more likely that the clinician will use the order to track the service they provided.
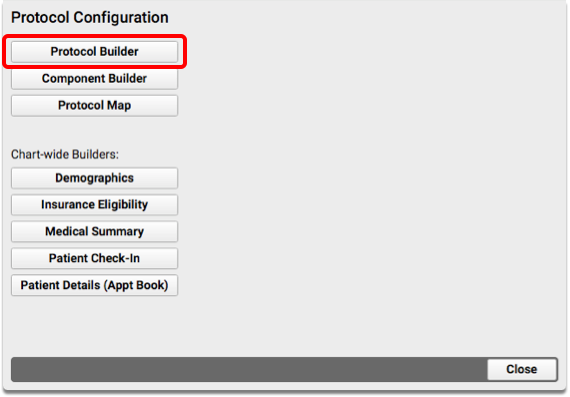
Open the Protocol Configuration Tool
Click on the Tools menu and select Protocol Configuration.
Open the Protocol Builder
Click Protocol Builder on the Protocol Configuration tool window.
Edit a Chart Note Protocol
From the list of Chart Note Protocols, select the first one that could be used for a patient that a measure intends to track.
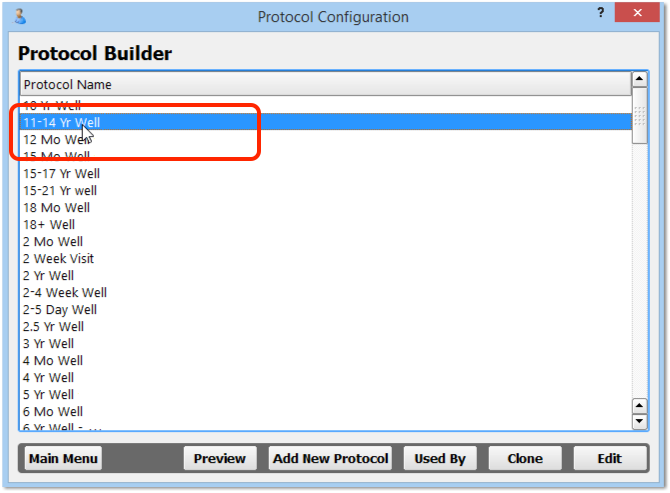
For the Depression example, find the first chart note protocol that would be used for a patient aged 12 years or older. Double-click to edit it.
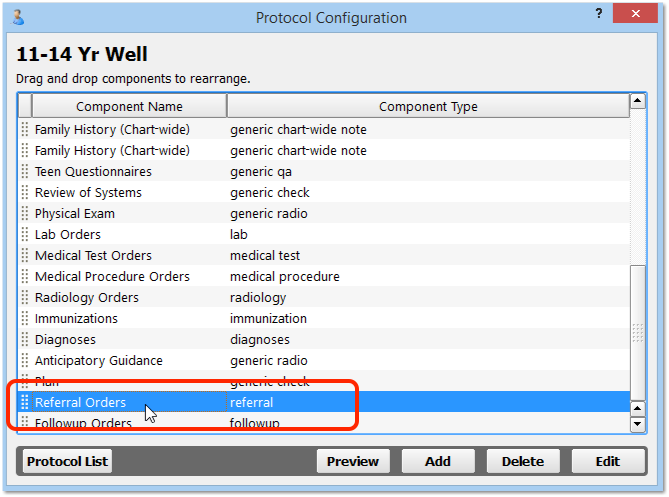
Edit (or Add) the Relevant Orders Component
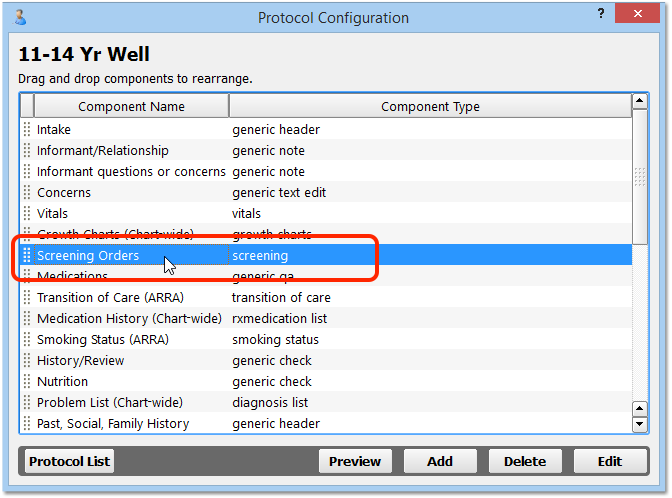
From the list of components that appear in this chart note protocol, find the orders component (Medical Procedure Orders, Screening Orders, Referral Orders, etc.) and double-click to edit it. If the component does not yet appear on this chart note protocol, click “Add” and select the component to add it.
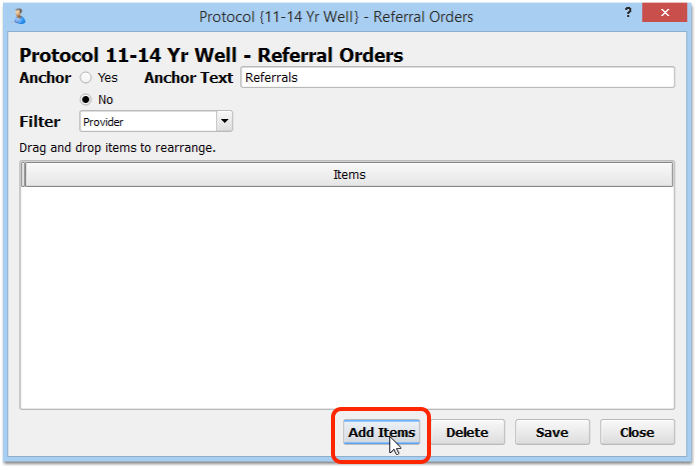
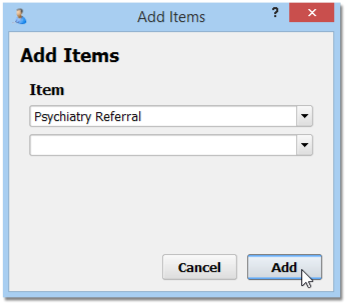
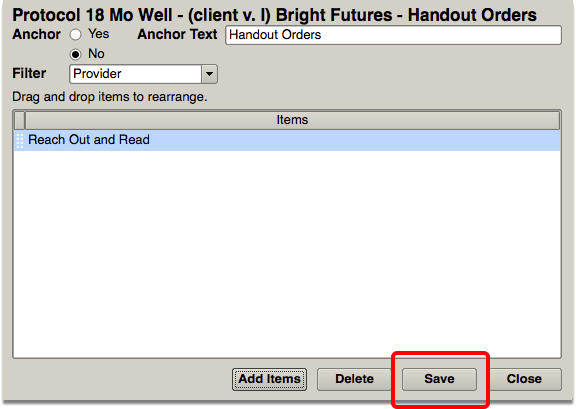
Add the Specific Orders
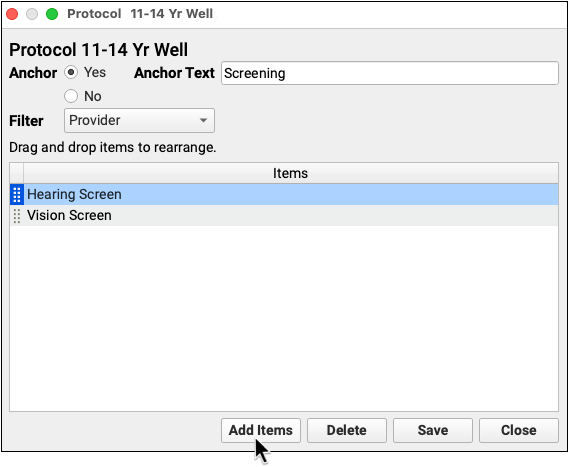
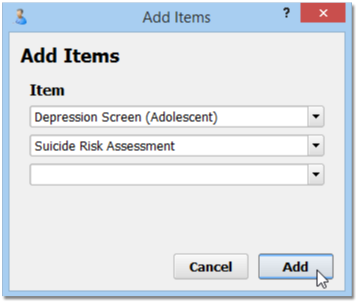
Click “Add Items” and select the appropriate orders that you wish to track during that type of visit. For example, select the Depression Screening and any other appropriate screening orders in order to make it easier for your practice to use that order during that type of visit.
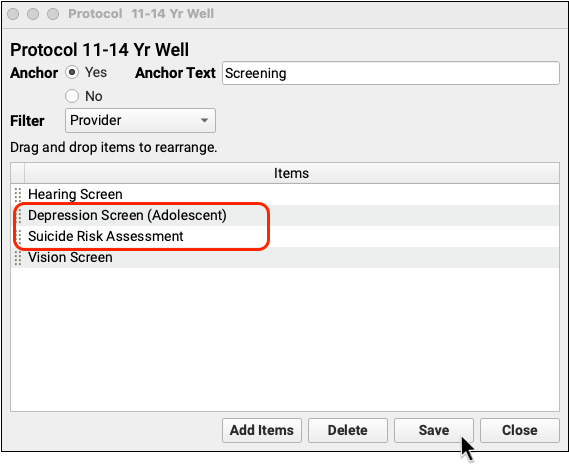
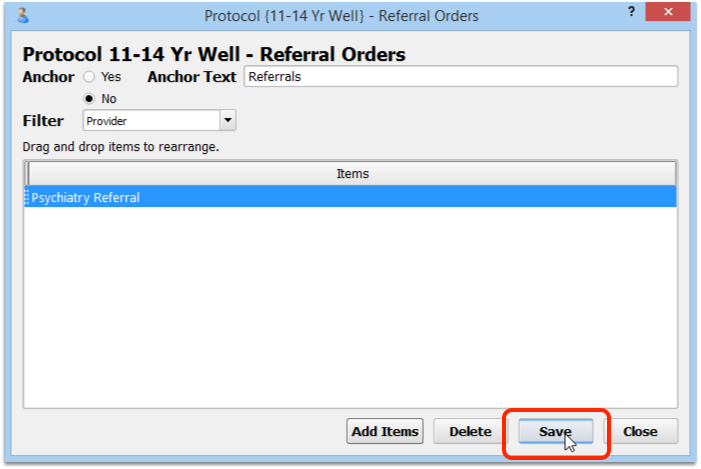
Repeat For Referrals or Other Orders
Optionally, add other screenings, referrals, or other orders. You might also want to add orders that could result from a positive screening, for example.
Repeat For Each Chart Note
You should repeat the above steps for every chart note, adding appropriate orders that you wish to track during the related visit.
Configure Billing Codes for Your Screenings, Procedures, and Other Orders
Some performance measures and incentive programs track results by billing codes. And, whenever you add a new order in the component builder, you should consider whether that order needs to trigger procedure codes for billing on the electronic encounter form.
How can you make sure that the correct billing codes show up when a clinician orders a Fluoride Varnish, or uses some other order to track a clinical activity?
Read the procedure below to learn how to use the Billing Configuration tool to set up the correct billing codes for your orders. (You can see more details in the Billing Configuration article.)
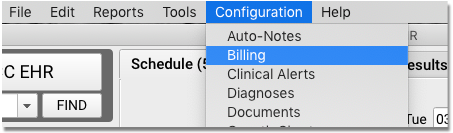
Open the Billing Configuration Tool
Open the Billing Configuration Tool in the Tools menu in PCC EHR.
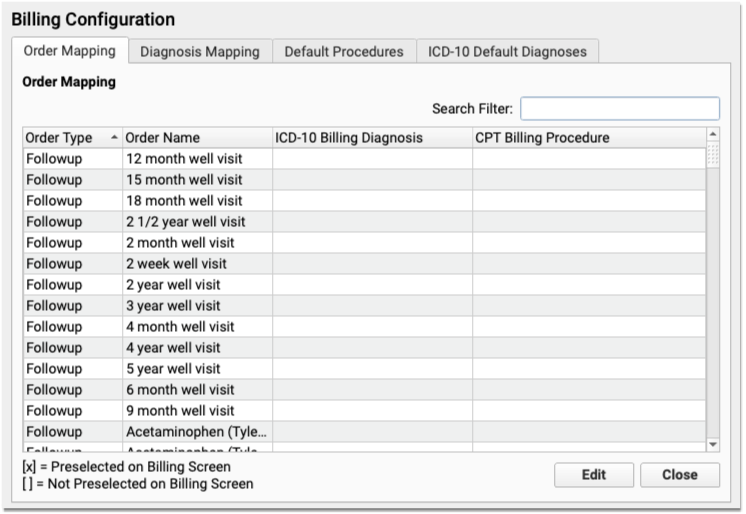
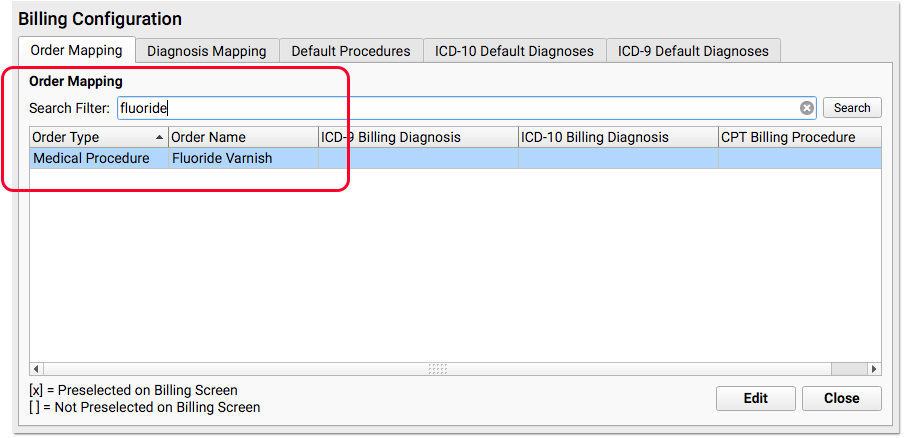
On the “Order Mapping” Tab, Find Your Order
Use the Search field to find the order you wish to configure for billing. Double-click to open the order.
Enter the Billing CPT Code for the Order
Under the CPT Billing Procedures section, enter one or more codes for the order. You can set the codes to be automatically selected on the electronic encounter form, or you can set them to appear as optional codes for the clinician or biller to select later.
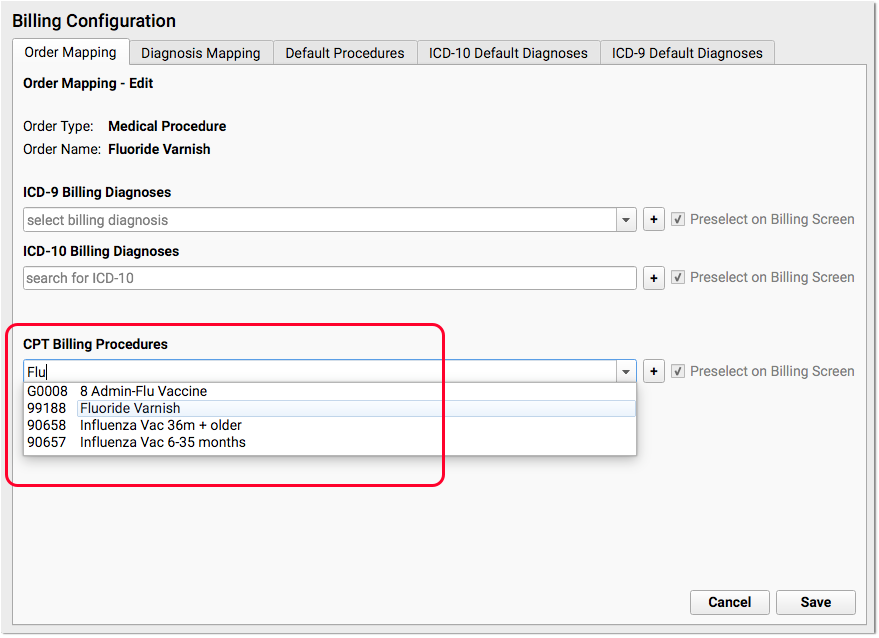
What About Billing Diagnoses (ICD-10)?: On this same screen, you can added optional ICD-10 Billing Diagnoses. They will then appear on the Bill screen whenever someone orders this order for the patient. However, this should be rarely used. Diagnoses should be charted on a chart note and not added in Billing Configuration. For example, for a Fluoride Varnish, the appropriate diagnosis code is sometimes the standard well visit code (Z00.129), which the clinician selects on the chart note.
What if I Can't Find a Procedure?: If you are configuring a new procedure that your practice has never billed before, you may need to update your practice’s list of procedures. You can do so in the Procedures table in the Tables tool.
Save Your Changes and Test Your Order(s)
After you’ve reviewed and updated the required billing code for an order, click “Save” and repeat the process for all orders that you need to review in order to meet your reporting needs. Then, create a visit for a sample patient and try them out! Whenever you create an order on the chart note, the correct corresponding codes should appear on the Bill screen.
Chart the Visit, Use the Orders
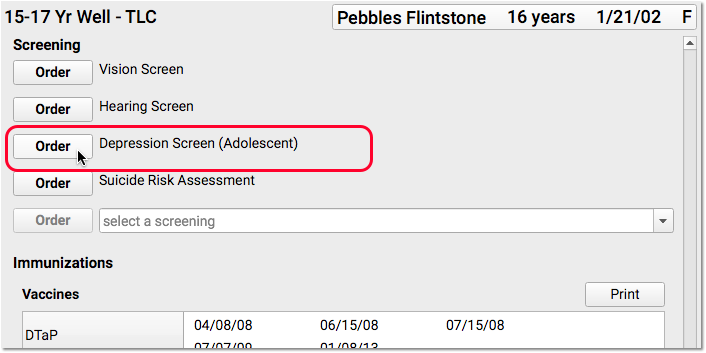
After you have completed the above configuration, your practice’s clinicians can track the completion of a screening, medical procedure, or other order with a single click. Since you added the order to a chart note protocol, the clinician will see it every time they chart a visit of that type.
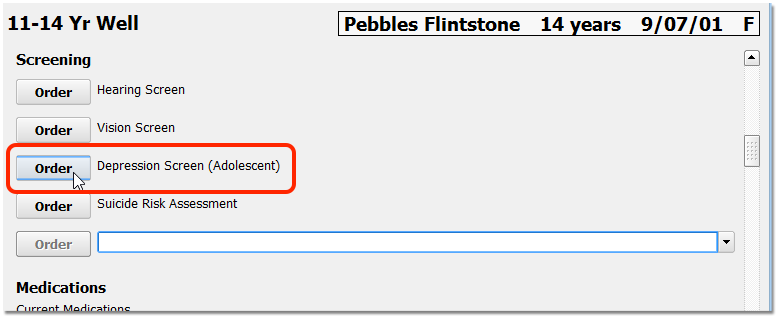
Optionally, the clinician can assign the order to another clinician, or complete the screening immediately. If the screening is refused, they can select “Refused”. If the screening is contraindicated, they can select “Contraindicated” and enter an appropriate contraindicated diagnosis in the Diagnoses component on the chart note.
When the screening is complete, they can enter a result in the order.
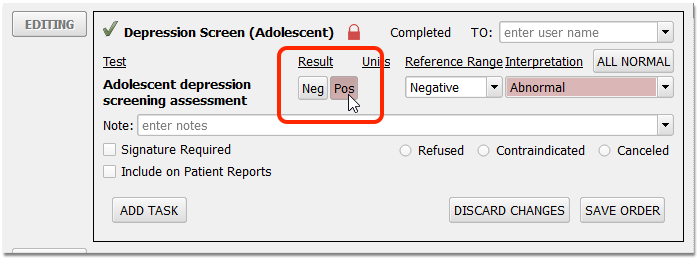
Unless refused or contraindicated, a positive or negative result is often required to track a measure. The result interpretation, in the Interpretation field, is not required for Clinical Quality Measures, though your practice may configure an order to require it.
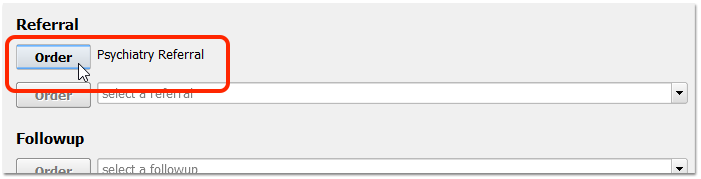
If a test result is positive, record whatever additional care follows.
For example, you may prescribe appropriate medication, order a Suicide Risk Assessment or order a referral.
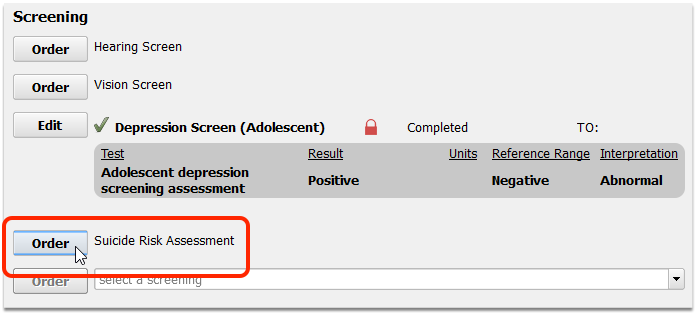
Enter results and take any other appropriate followup steps.
When you complete your order, you will capture data for your reporting needs.
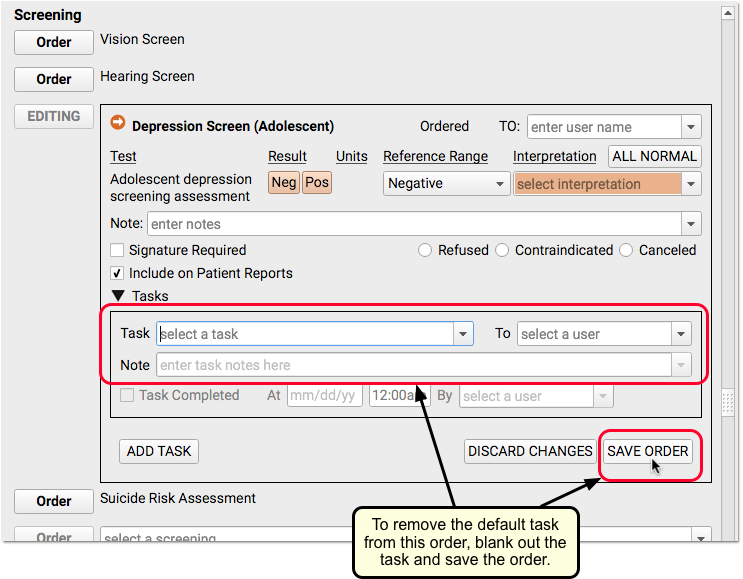
Achieve One-Click Reporting By Removing the Default Task
By default, orders have a single incomplete task. If you clinicians remove that task, they can trigger the order (and track data for the measure) with a single click.
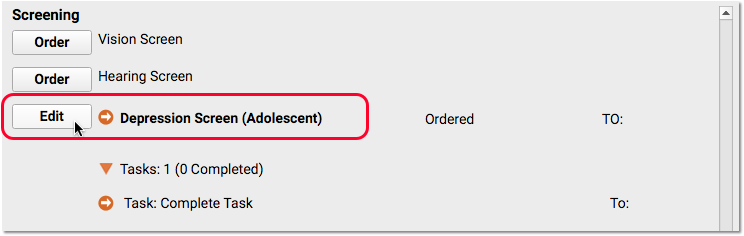
First, click Order and then click Edit to edit the order.
Next, blank out the default task on the order and click “Save Order”.
For the clinician who removed the task, there will no longer be a task that needs completion for the order to be tracked as complete.
Remember to Bill the Visit and Perform Other Steps
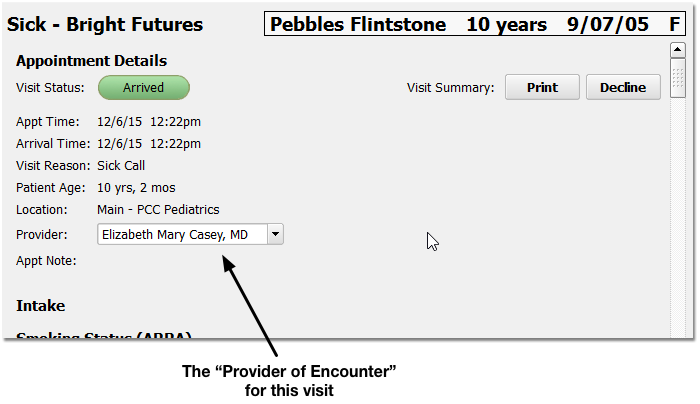
When orders are complete and a visit is ready to be billed, make sure someone at your practice confirms the provider of the encounter. Many mandates or incentive programs require reporting based on a provider.
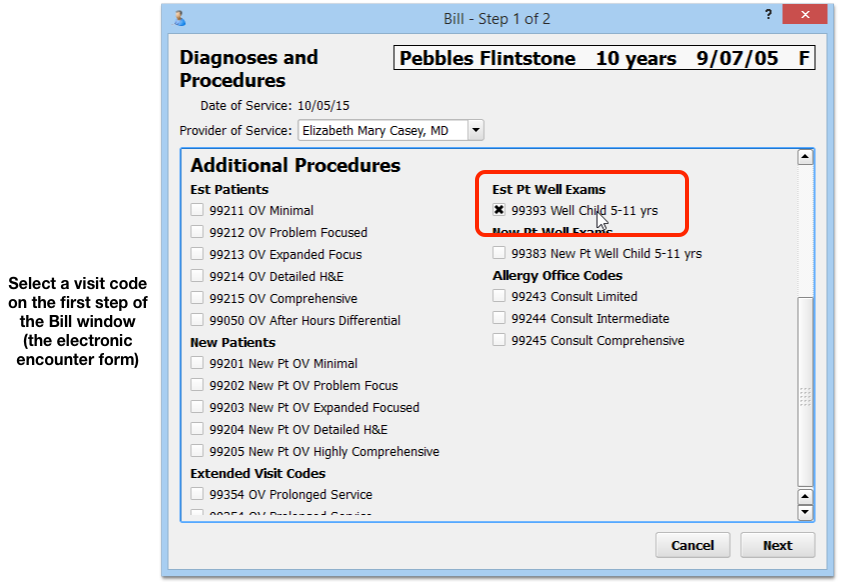
Next, the provider should click “Bill” and select an appropriate visit encounter code. In addition to billing, the visit encounter code is used to track data for Clinical Quality Measures and many other reporting features in PCC EHR.
Reach Out and Read (ROR) Example
Several pediatric practices have used the procedures above to track data for the “Reach Out and Read” program. ROR provides books for more than 3.8 million children and families in more than 4,500 clinics, health centers, and pediatric practices in the United States. You can use PCC EHR to track your ROR activity on each chart note, and then later produce the information you need for your Reach Out and Read semi-annual progress report.
First, you would create a Reach Out and Read order in your practice’s Handout Orders component in the Component Builder.
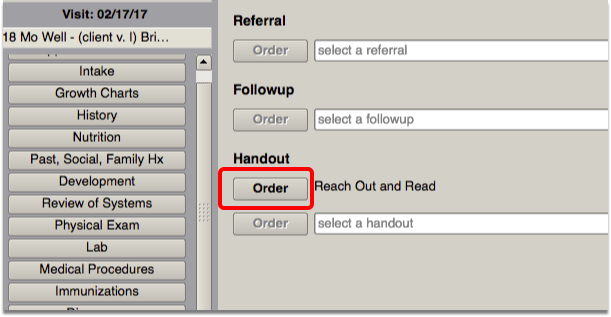
Next, you would edit each chart note protocol so that the Handout component and Reach Out and Read order appeared on the chart note.
Then, the clinician could indicate that they provided a book to the child using the order on the chart note… or signal a nurse or other clinician to complete the order with a task.
Run Reports on Collected Data
Once your practice is charting a specific activity using an order, you can use PCC’s customizable reports to produce exactly the output you need for a mandate, program, or other initiative.
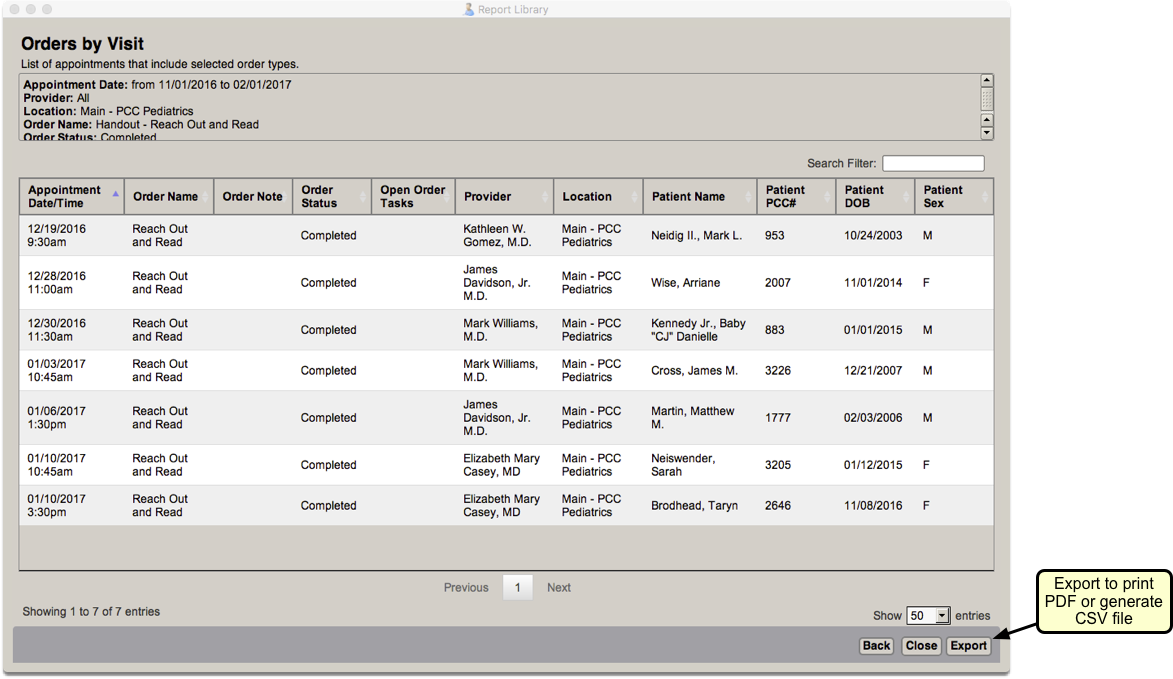
The example below shows how you might export data using the Orders by Visit report.
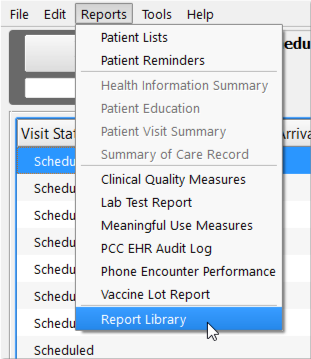
Open the Orders by Visit Report
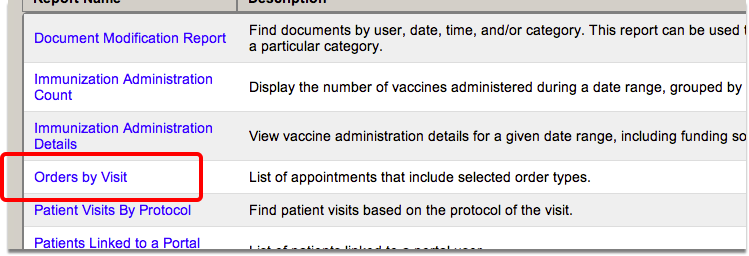
From the Reports menu, select Report Library, and then click on the Orders by Visit report.
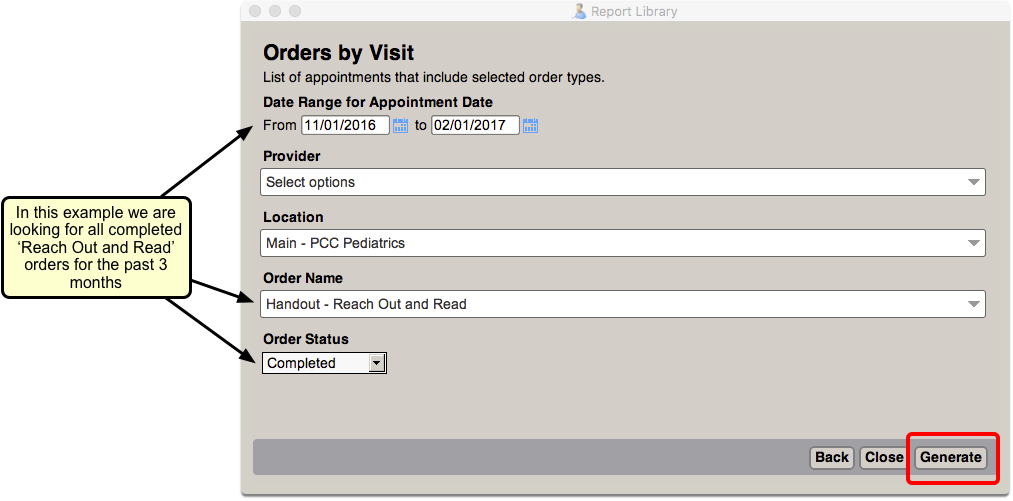
Set Report Criteria
Enter your search criteria and click “Generate.”
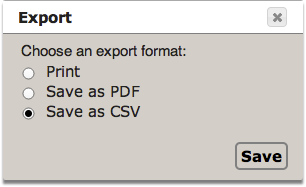
Export Your Data
Click the “Export” button and save the data as a CSV file. This will allow you to import it into Excel, or another spreadsheet application, and work with your data so that you can submit it in the required format.