Check In a Patient
When a patient arrives at your practice, use Patient Check-In to check them in. Patient Check-In will help you review the family’s demographic and insurance information, check insurance eligibility, review outstanding balances and post payments, and more.
Watch a Video: You can learn how to check in a patient by watching Patient Check-In Video. The video covers the topics in this article.
Contents
How to Check In a Patient
When a patient checks in, do you review their address, update their policy information, and collect copay? What else do you say when you greet the parent? Your practice can customize the Patient Check-In protocol to meet your needs.
Follow the procedure below to learn about a typical Patient Check-In, including a number of useful tools.
Find the Appointment and Click on the “Scheduled” Status
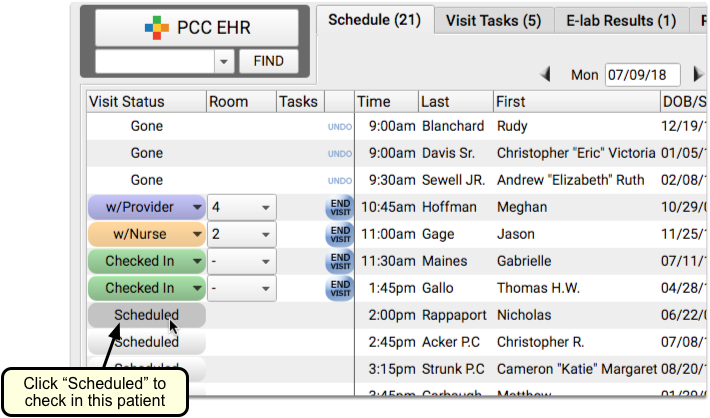
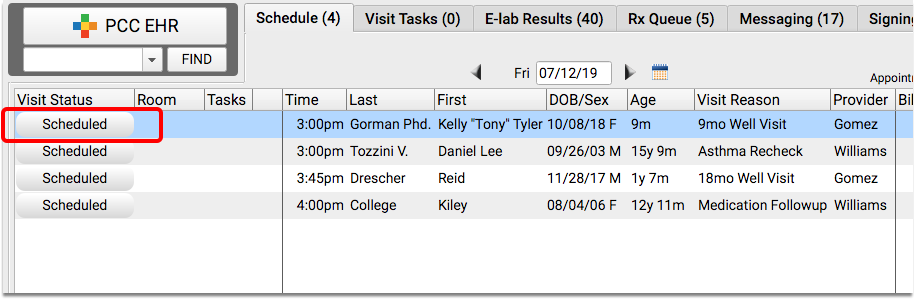
When you are ready to check in a patient, click on their appointment’s “Scheduled” status on the Schedule queue.
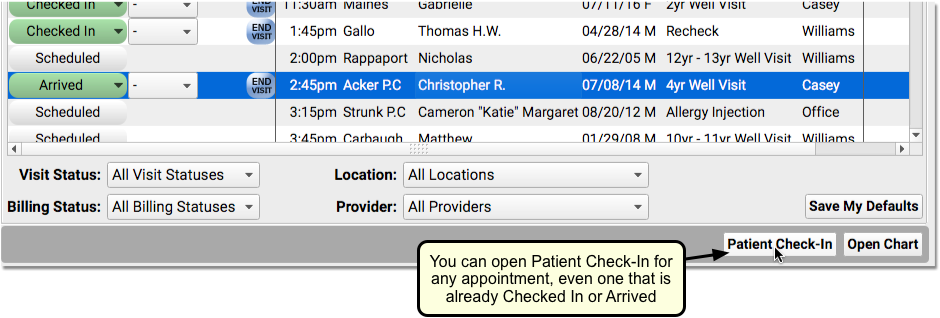
Alternatively, you can highlight the appointment and click on the “Patient Check-In” button.
Optional: Review Patient Check-In Alerts
Your practice’s custom Patient Check-In alerts may appear when you begin to check in a patient.

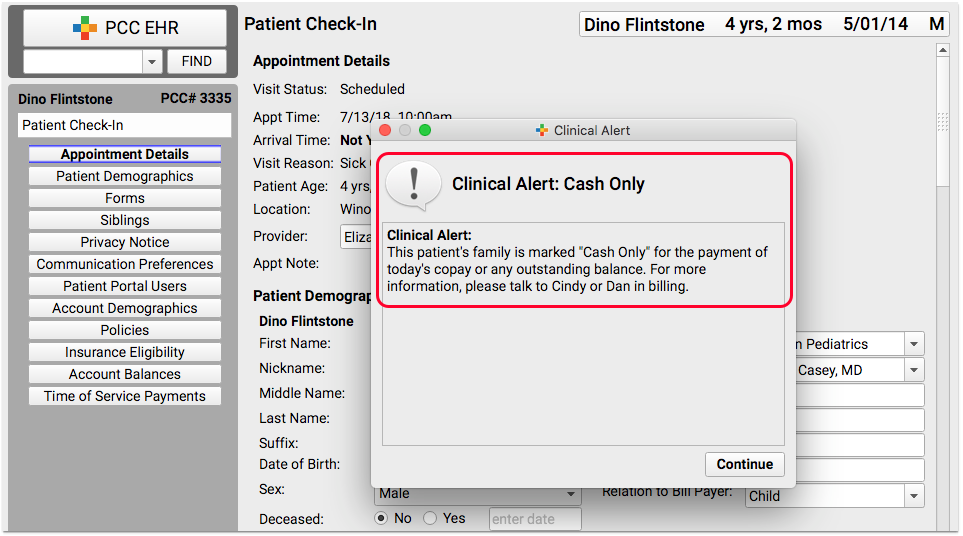
Review these alerts. They may include important details that you need to follow-up on with the family.
Review Demographics, Insurance Policies, and Other Components
Use the “Next” button, or the anchor navigation buttons, to review important information with the family.
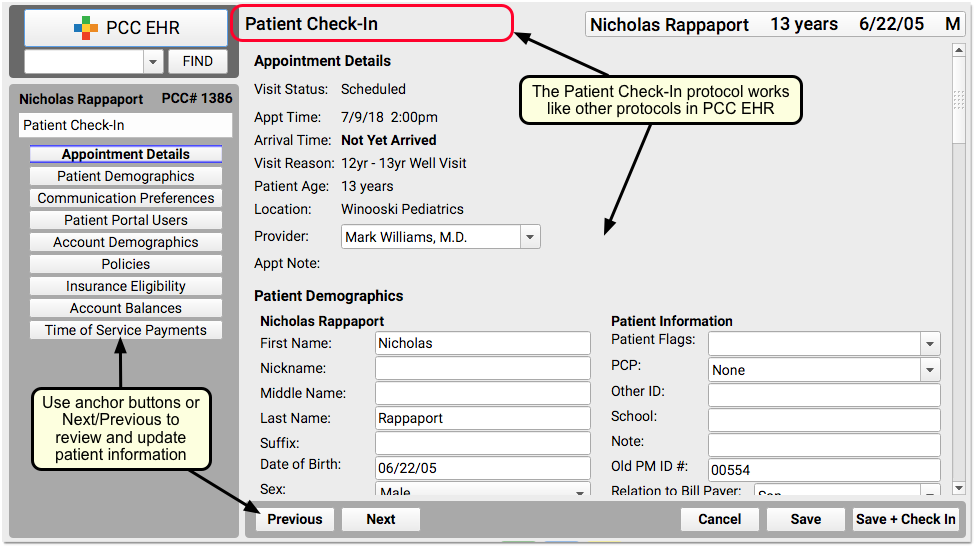
At each visit, do you confirm patient name, appointment information, demographic information, and insurance policies? Use each component on the ribbon to check over these details with the family.
Update Patient and Family Information
Make changes for the patient or the family account right on the Patient Check-In ribbon. For example, you might ask, “Do you still live at 54 Elmwood Road?” and update the account address if it has changed.
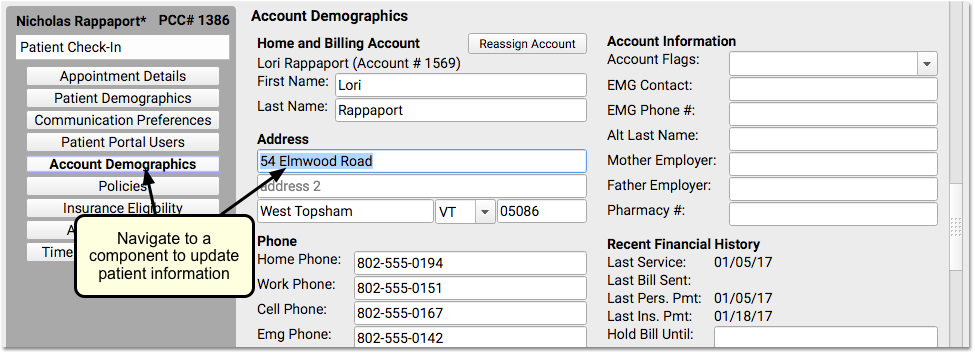
Similarly, you can use the Policies component to add, edit, or expire an insurance policies.
For more information about common demographics components, like Communication Preferences (and Immunization Registry Communication Preferences), Account Demographics, Personal Contacts, and more, read Review and Update Patient and Family Demographics.
Review Insurance Eligibility
Look at the Insurance Eligibility component and check that the patient is validated for today’s visit.
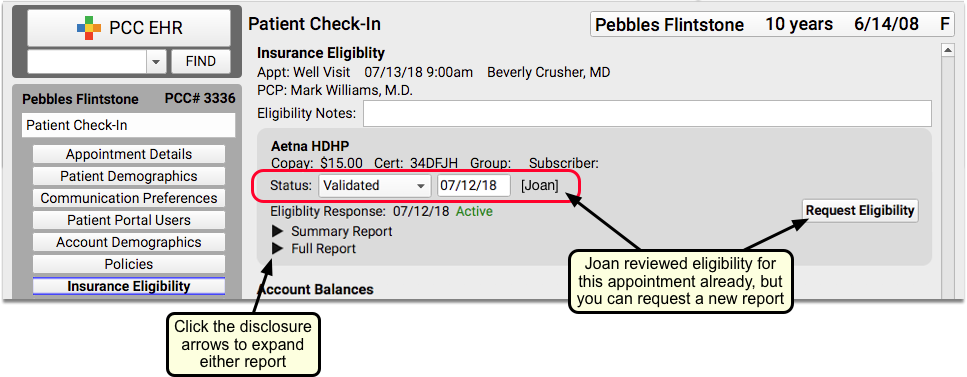
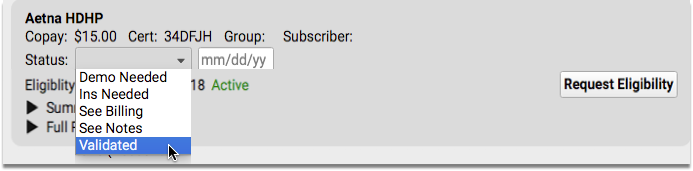
Optionally, you can click a disclosure triangle to look at the Summary Report or Full Report from the insurance carrier. If you just updated or added a new policy, you may want to click “Request Eligibility” to request a new report from the carrier. You can then set a new Status, based on what you learn.
For more information about the Insurance Eligibility component, read Patient Insurance Eligibility with PCC.
Confirm Family is Using the Patient Portal, Help Them Sign Up
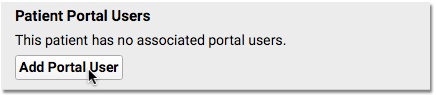
Use the Patient Portal Users component to quickly review portal information and help the family with patient portal access.
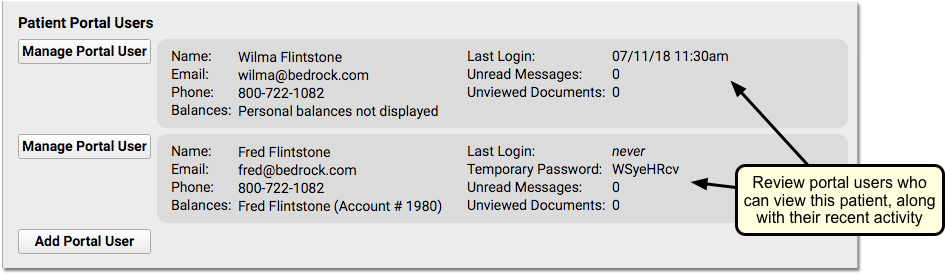
You can see if mom, dad, or another guardian has access to the patient’s records. If the patient has no portal account users, you can click “Add Portal User” to jump into the Patient Portal Manager.
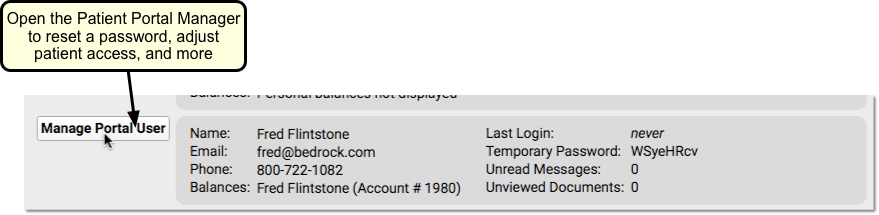
If the family has not logged in, doesn’t have a linked billing account, or needs their password reset, you can click “Manage Portal User” to open up the Patient Portal Manager and help the family with their accounts.
For more information, read Patient Portal User Account Administration.
Review Outstanding Account Balance
Review the Account Balance component to understand outstanding personal charges.
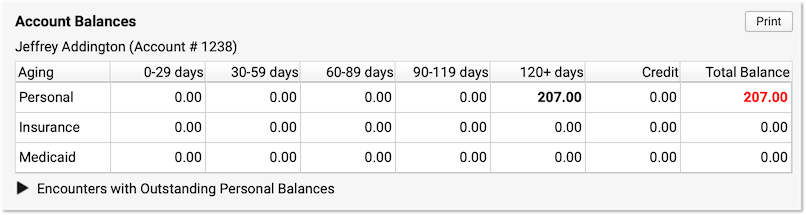
Balances are account-based, so you can see total overdue amounts for this patient and any siblings who share the same billing account. Unpaid balances are broken down into Personal, Insurance, and Medicaid charges. They are aged across aging categories (0-29 days, 30-59 days, etc.), with the total personal balance due displayed in red.
Does the family want to know where the balance comes from? Click the disclosure triangle to view a summary of the charges that have an outstanding personal (non-insurance) balance.

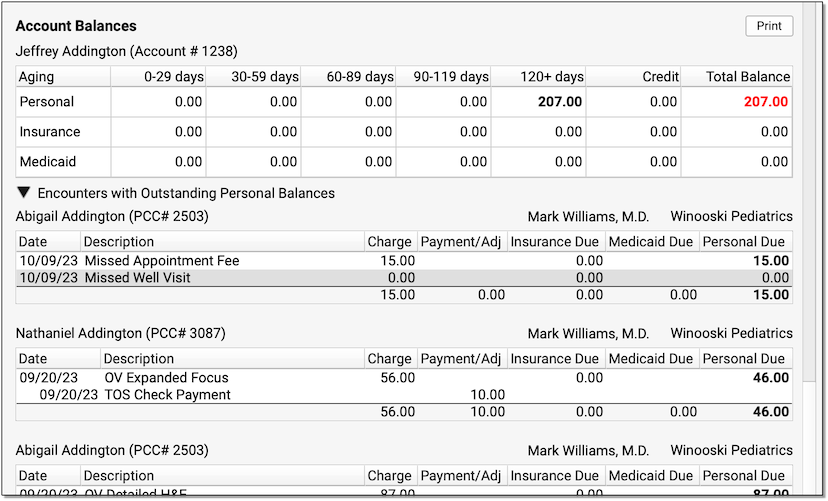
You can see the patient, the date of service, each charge, and a record of all payments or adjustments applied toward the charge so far. You can use these details to explain outstanding charges to the family.
Collect Payment
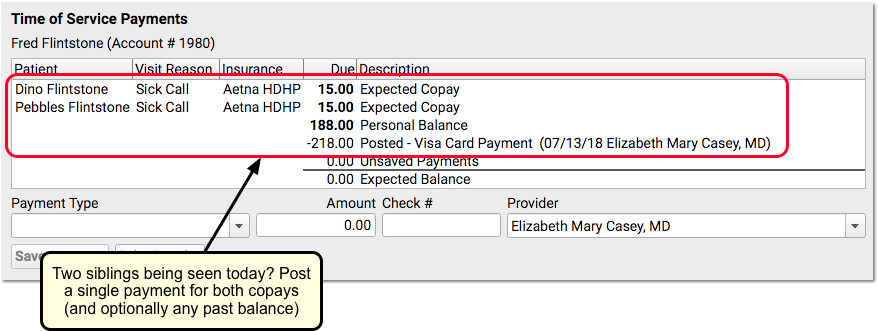
Use the Time of Service Payments component to post today’s copay, or other amount, toward the account balance. The amount due today will appear in a ledger.
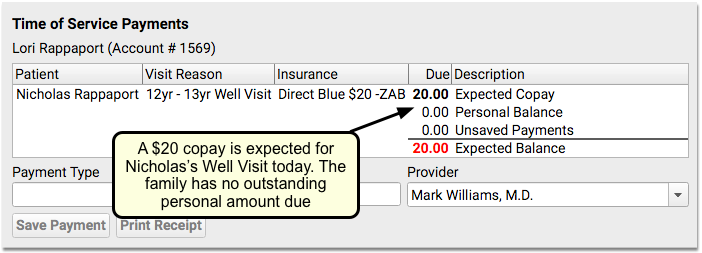
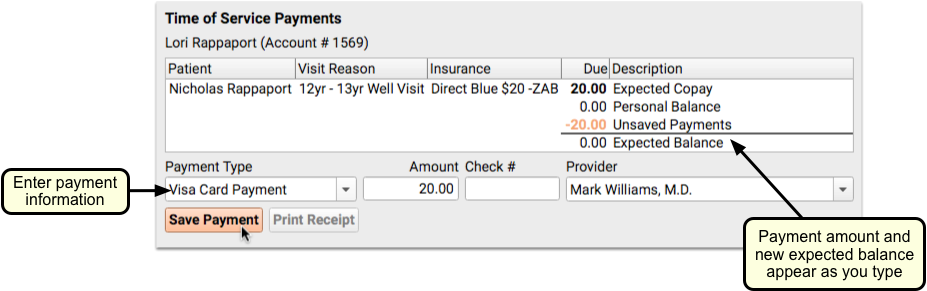
Select a payment type, enter an amount, and if appropriate enter a check number and select a provider. The provider will default to the provider for today’s encounter. As you enter payment details, you’ll see the payment amount appear in the ledger above. You can see the new expected balance before you save the payment.
For an account with past-due balances, you can post a single payment for past charges and today’s copay.
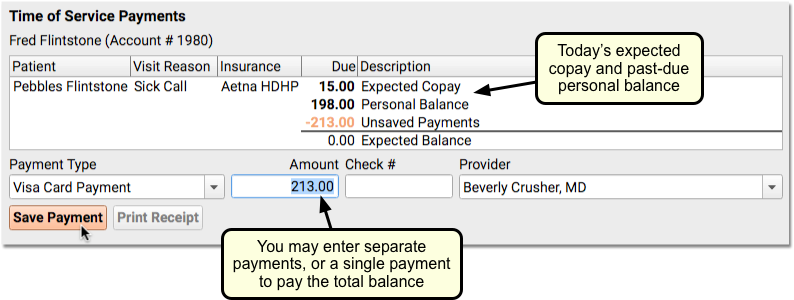
If the account has balances due for encounters related to a sibling, you can clearly see the totals of their copays and outstanding balances. You can post a single payment toward all of the family’s current and past-due balances.
When you check in the next sibling, you’ll see the payment details from when you checked in the first sibling.
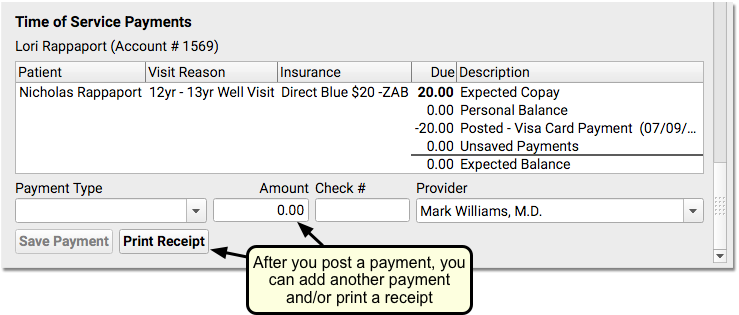
Optionally, Print a Receipt
After you post one or more payments, you can click Print Receipt to print out a receipt.

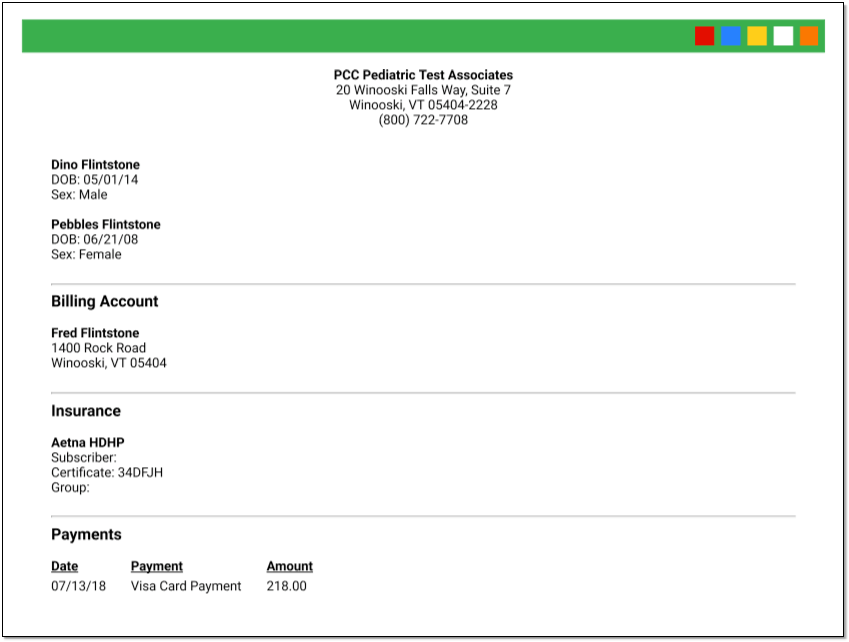
You can make changes and reprint the receipt if you need to, and you can always retrieve the receipt if you need it later by returning to the Patient Check-In protocol.
Click “Save + Check In”
When you are finished checking in the patient, click “Save + Check In”.
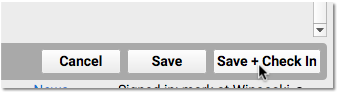

PCC EHR will update the patient’s status to Checked In, increment the Visit Status Counter for Arrived/Checked-In patients, and you’ll be ready to greet the next patient.
Undo Check-In (Revert Visit Status Back to “Scheduled”)
If a patient is checked in (or “arrived”) by mistake, you can easily revert the visit status back to “Scheduled”.
Simply highlight the visit that was checked in by mistake, click on the Edit menu from the top of the screen and select “Revert Status to Scheduled”.
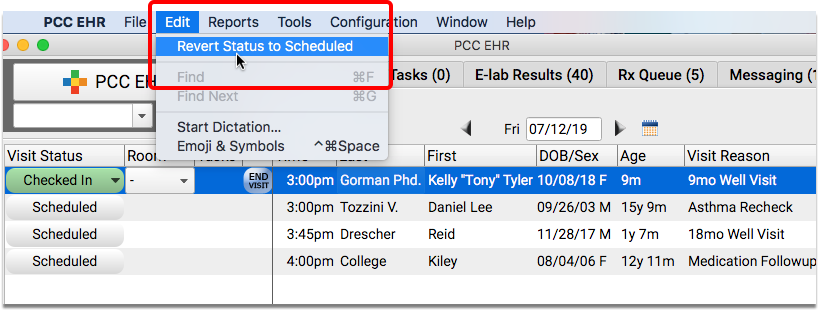
The appointment will revert back to “Scheduled”.
Orders Prevent Status Change: If you have created orders on the visit chart note, you will not be able to revert the visit status.
Open Patient Check-In Again to Reprint Receipt, Post Another Payment, and More
You may not complete all of the Patient Check-In steps right away. For example, the parent may return to the desk to ask for a receipt. Or you may need to post an additional payment or update policy information later.
You can reopen the Patient Check-In ribbon for any appointment by selecting the appointment and clicking “Patient Check-In”.
Who Checked a Patient In? Who Posted a Payment?
PCC EHR tracks which user at your practice performed various functions. This can help when there’s confusion at the front desk or when you need to balance out your cash drawer.
You can see who checked a patient in by reviewing the Appointment Details component.
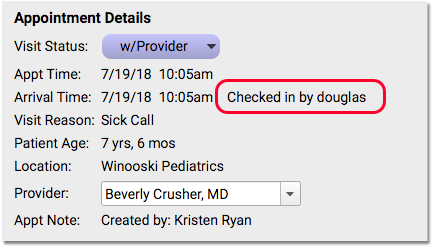
You can find that component at the top of a chart note or in Patient Check-In. So, for example, if you wanted to know who checked a patient in, you could highlight the appointment on the Schedule screen and click “Patient Check-In”. Or, you could open the visit’s chart note and look at the top of the protocol.
You can see who posted a payment in the payment’s description in the ledger in the Time of Service Payments component. You can also see who posted a payment in the deposit report and in other Practice Management reports.
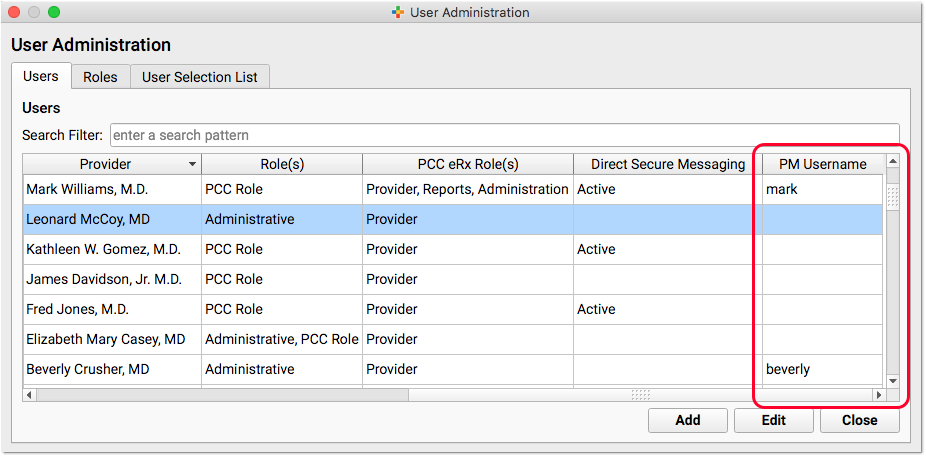
Are Your Staff Accounts Linked?: When you post a payment in PCC EHR, you want it to display appropriate attribution in your practice management reports. For this to work, your practice’s EHR user accounts should be linked up with their practice management user accounts. Your Client Advocate or New Client Implementation specialist will help you with this.
You can also review the PM Username column in the User Administration tool, and enter practice management account information for your staff.

Check In or Arrive Patient, Visit Status Counters
Patient Check-In is a great tool for reviewing and updating patient information and for performing other front desk tasks. However, you can optionally just mark a patient as having arrived, without checking them in.
PCC EHR has an “Arrive Patient” button, which you can see when you open a chart for a patient who has not been checked in.
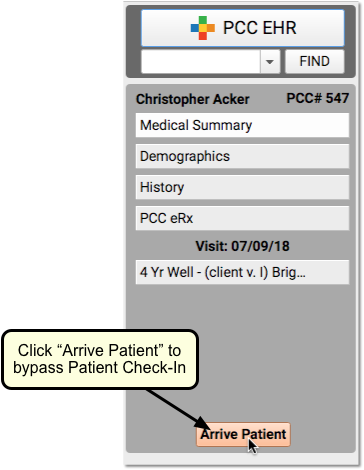
If a provider wants to create an appointment and begin working with the patient immediately, for example, or if your practice decides not to use Patient Check-In, you can click to “Arrive” a patient instead.
Keep in mind that when you “Arrive” a patient, you skip the Patient Check-In protocol, which includes important components such as a patient’s policies and eligibility. (You can optionally complete Patient Check-In later, using the “Patient Check-In” button on the Schedule.)
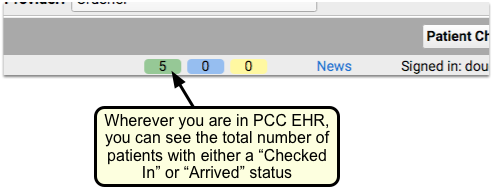
Your green Visit Status Counter (at the bottom of the screen) will display a total of all patients on your Schedule screen who are either Checked In or Arrived.
Configure Patient Check-In for Your Practice
You can adjust what components appear in Patient Check-In, create custom components, and create custom Patient Check-In Clinical Alerts.
To learn how to customize your practice’s Patient Check-In workflow, read Configure Patient Check-In.
Optional: Pre-Check-In
Pre-Check-In is an optional function in PCC’s patient portal. Your patients and families can add, confirm, and update patient, billing and insurance information through the patient portal in advance of their visit, so your practice can quickly update patient data and reduce wait times for your patients.
When Pre-Check-In is enabled, a status icon appears in the Visit Status column in PCC EHR’s Schedule queue.

Visits indicated with an orange clipboard icon have Pre-Check-Information waiting to be reviewed and imported by your practice. This can be completed before or during check-in.
When a portal user completes Pre-Check-In in PCC’s Patient Portal, the submitted information appears in a Pre-Check-In component in Patient Check-In
For more detailed information on configuring and using Pre-Check-In, click here.