Export Patient Lists for PhoneTree
PhoneTree is a vendor that can automatically contact your patients by phone. The instructions below will show you how to create a list of patients and transfer them to your PC for use with the PhoneTree program.
Note: PCC’s Patient Notification Center can help you setup reoccurring notifications and then manage and send them for you with TeleVox. The instructions below are for finding and exporting patients manuallyfor the PhoneTree system.
Create the PhoneTree Patient List
First, use Partner’s phonetree program to create a list of upcoming appointments.
Run phonetree
Type phonetree at a command prompt or select the phonetree program from your Partner windows.
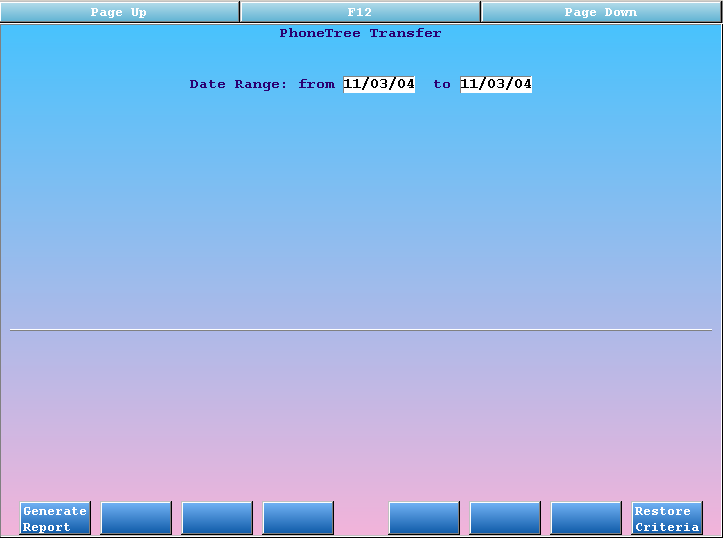
Input Date
Enter a date range for appointments that need reminder phone calls. PhoneTree will call all the patients scheduled to come in between these two dates. The default range is all the appointments for today, but you can send a week’s worth of appointments at once if you wish.
Review/Add Criteria
On the next screen, review the restriction criteria. The default settings collect all appointments for the date range entered that are either waiting for an encounter form or already have one printed. That means that canceled, deleted, missed, or posted visits will not be included in the list.
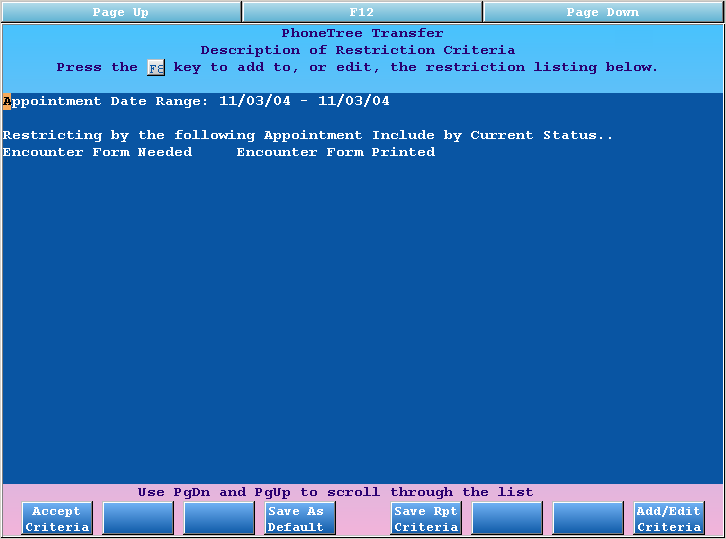
Press [fkey title=’F8′ subtitle=’Add/Edit Criteria’ display=’inline’ /] if you want to change the default settings or limit the list of appointments further. See the “Customize the Output” section below for an example.
Press F1
Press [fkey title=’F1′ subtitle=’Accept Criteria’ display=’inline’ /] to run the report and collect appointment information.
When phonetree finishes creating the list, it will prompt you to begin the file transfer.
Transfer PhoneTree List
After creating a list of patients for PhoneTree calls, the next step is to transfer the list of patients and appointments to the automated telephone system on your PC. The transfer process is different for users of AniTa and TeraTerm.
AniTa Transfer Instructions
AniTa uses the “YModem” protocol to transfer files to your PC. Once transferred, PhoneTree can read the list and make the needed phone calls.
Trouble Transferring: Some users report problems during file transfer. If the instructions below fail to transfer your PhoneTree file, even after rebooting your computer, consider switching to TeraTerm for creating and transferring your file. For help setting up TeraTerm, contact PCC Support at 1-800-722-1082.
Follow these steps to transfer the list:
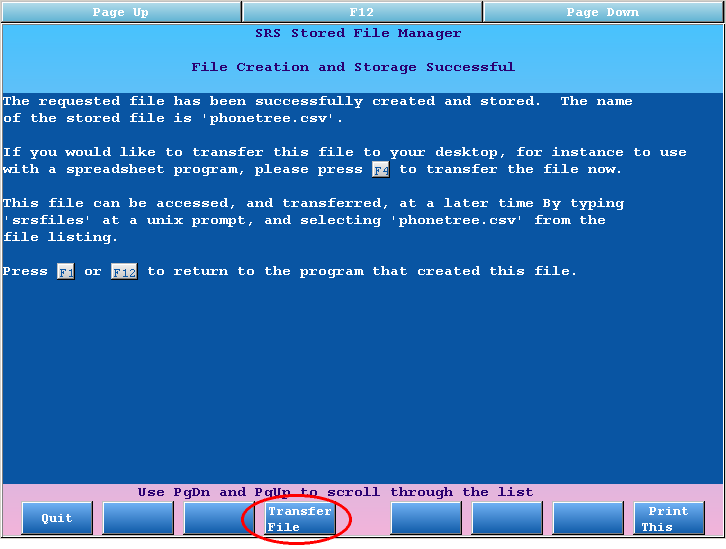
Press F4
Press [fkey title=’F4′ subtitle=’Transfer File’ display=’inline’ /] to begin the transfer process.
View Instructions
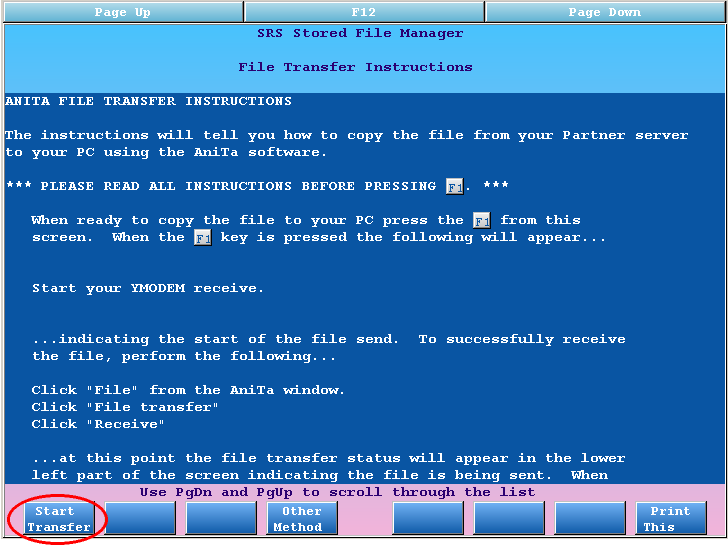
You will see a list of instructions describing how to perform the transfer. You can read the instructions to learn more about the process.
Press F1
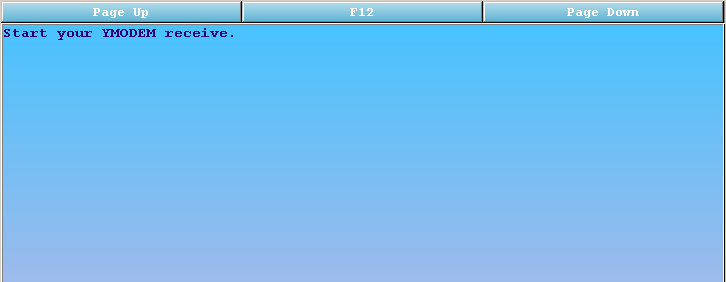
When you are ready to transfer the file, press [fkey title=’F1′ subtitle=’Start Transfer’ display=’inline’ /]. You will see the following message:
Start File Transfer
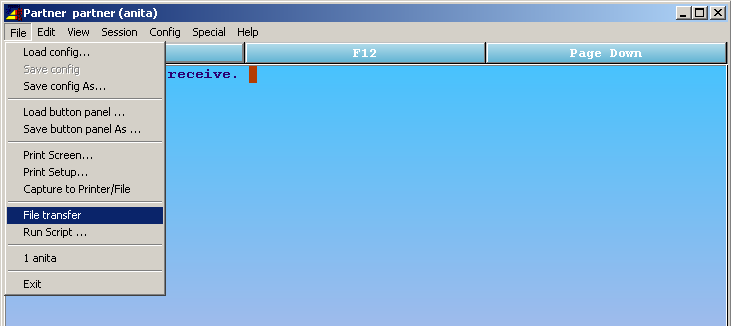
Click on the “File” menu and select “File Transfer”.
Click “Receive”
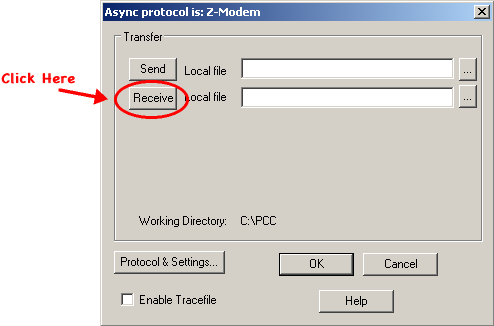
In the window that opens, click the “Receive” button to start the transfer.
Once the transfer has finished, you can find the phonetree.csv file in the C:PCC directory on your PC. Your automated phone system can retrieve it from that folder.
TeraTerm Transfer Instructions
TeraTerm uses the “ZModem” protocol to transfer files to your PC. Once transferred, PhoneTree can read the list and make the needed phone calls. Follow these steps to transfer the list:
Press F4
Press [fkey title=’F4′ subtitle=’Transfer File’ display=’inline’ /] to begin the transfer process.
View Instructions
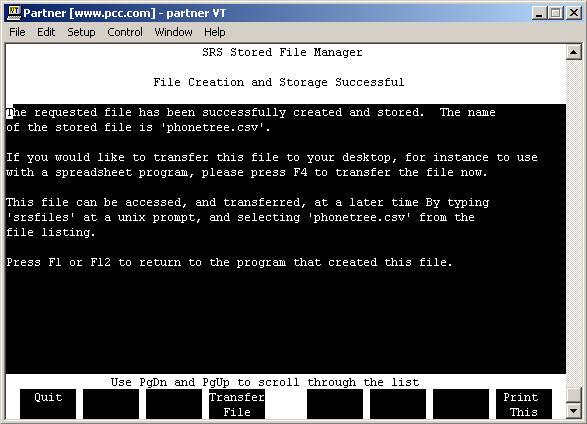
You will see a list of instructions for performing the transfer. You can read the instructions to learn more about the process, including how to change the directory in which the file will be saved.
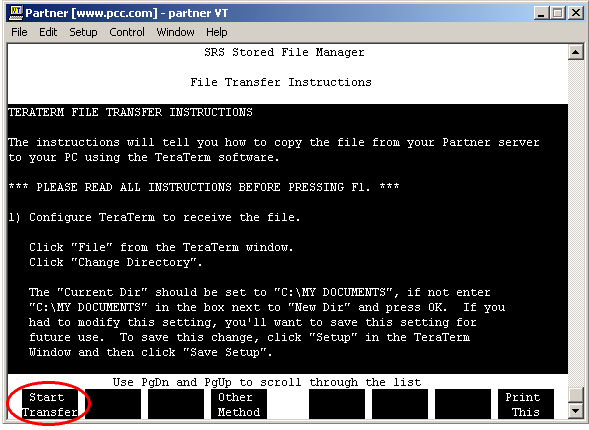
Press F1
When you are ready to transfer the file, press [fkey title=’F1′ subtitle=’Start Transfer’ display=’inline’ /]. You will see the following message:
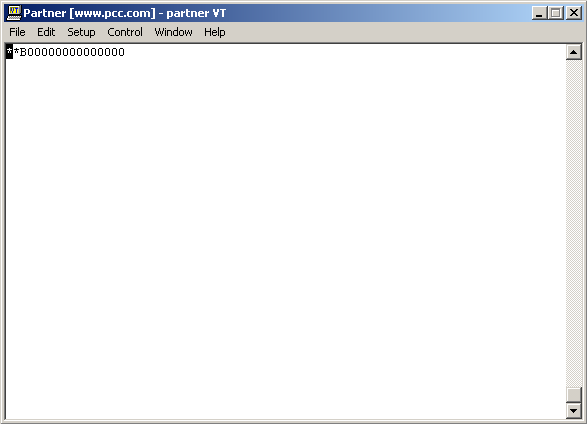
Begin Transfer
Click on the “File” menu and select “Transfer”, “ZMODEM” and “Receive”, as shown below:
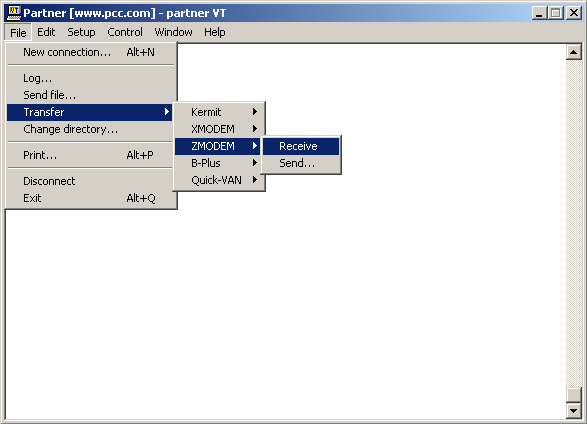
After the transfer is completed, you can find the phonetree.csv file in the TeraTerm directory (C:Program FilesTTERMPRO). Your automated phone system can retrieve it from that folder.
Filter Patients for PhoneTree
Do you have a list of patients who do not wish to receive phone call reminders? Perhaps you only send out reminders for certain visit reasons? While you are running phonetree, you can add restrictions to limit which patients your telephone system will call.
Press F8
From the “Description of Restriction Criteria” screen, press [fkey title=’F8′ subtitle=’Add/Edit Criteria’ display=’inline’ /] button.
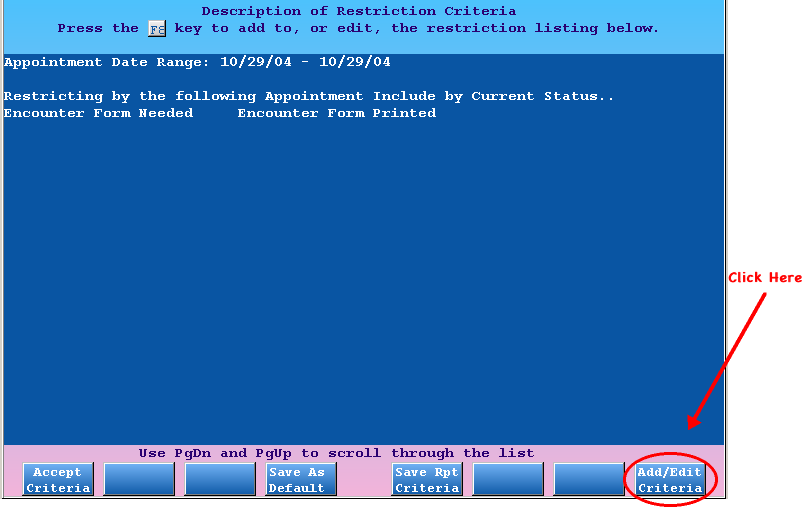
Select Additional Criteria
The default criteria is by appointment status. Canceled visits or visits that have charges posted will not require a phone call. In the example below, we added the additional criteria of visit reason and custodian status flags:
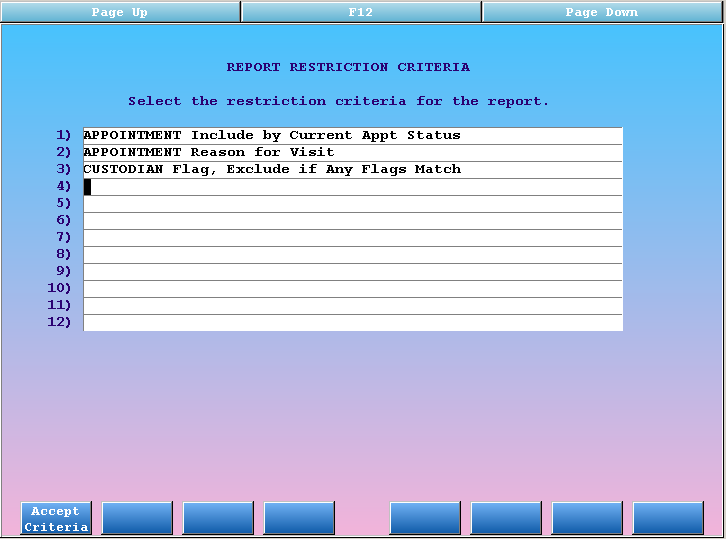
After selecting the criteria, press [fkey title=’F1′ subtitle=’Accept Criteria’ display=’inline’ /] to continue.
Verify Appointment Statuses to Include
Next, verify the appointment statuses to be included. The default behavior is usually correct:
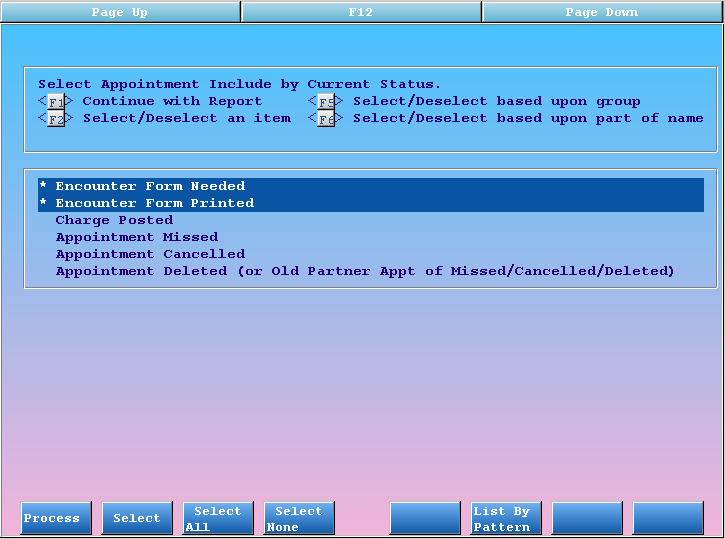
Press F1 to continue.
Specify Behavior for Each Criteria
Next, specify behavior for the other criteria you added. You will be shown one screen for each criteria. The examples below show both the visit reason and “Custodian – Exclude by flag” criteria screens. First, we select visit reasons:
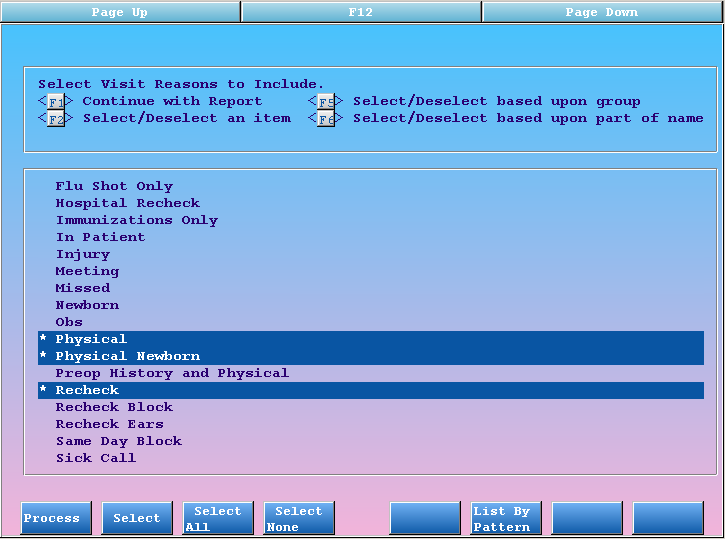
Press F1 in between each criteria screen to move on to the next one. In the image below, we set which Custodian Status Flags to exclude from our list:
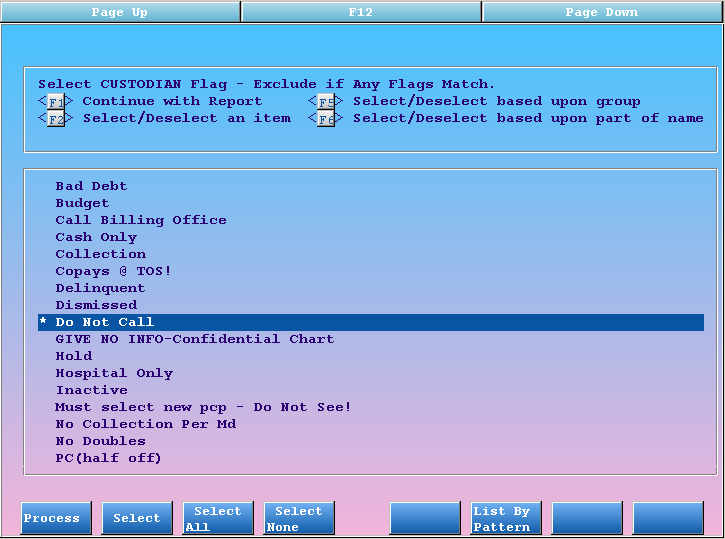
Press F1 again to process your selection.
Review Your Selections and Run the Report
Back on the Restriction Criteria screen, check your work to make sure you have selected appropriate criteria. Press [fkey title=’F4′ subtitle=’Save As Default’ display=’inline’ /] to save your choices as a new default. You can also press [fkey title=’F5′ subtitle=’Save Rpt Criteria’ display=’inline’ /] to save these settings as a criteria set that you can later retrieve from the date selection screen.
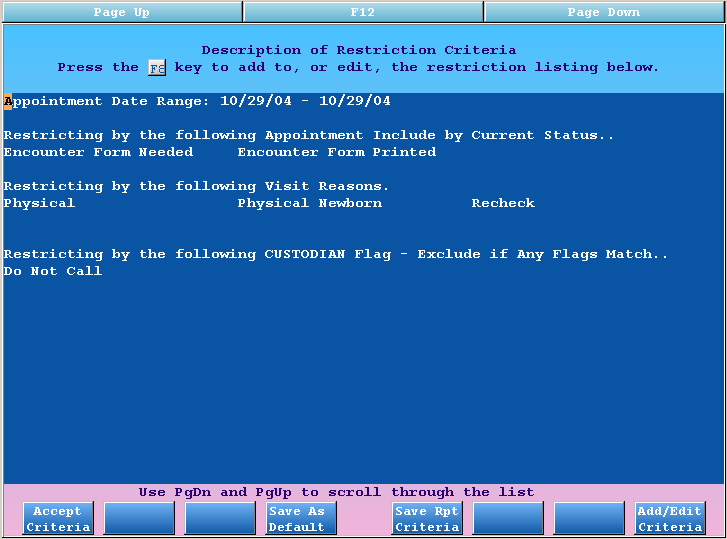
Press [fkey title=’F1′ subtitle=’Accept Criteria’ display=’inline’ /] to continue running your report.
Read More: The PhoneTree program uses the same report engine as the Smart Report Suite (srs). To learn more about the criteria functions, read the Smart Report Suite guide.
