Configure Patient Check-In
You can configure Patient Check-In in PCC EHR to meet the specific needs of your practice. You can adjust what components appear, create custom headers for your front desk staff, and create custom Patient Check-In Clinical Alerts.
Read the sections below to learn the different tools and features for Patient Check-In.
Watch a Video Instead?: You can learn about how to configure Patient Check-In to meet the needs of your practice by watching the Patient Check-In Configuration Video.
Contents
Configure the Check-In Protocol, Add or Remove a Component
Like other screens in PCC EHR, your practice can decide exactly which components should appear on the Patient Check-In protocol. You may decide to add useful components like Forms or Care Plans, and you can rearrange components or create custom notes that you want staff to see whenever a family checks in.
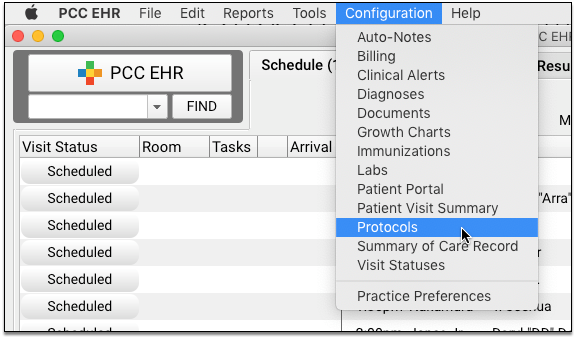
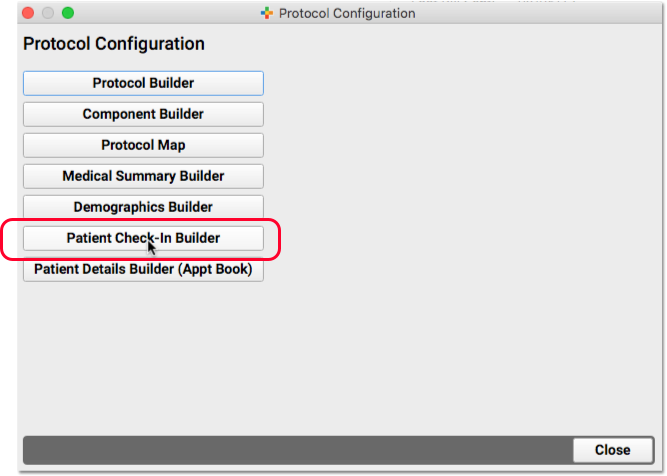
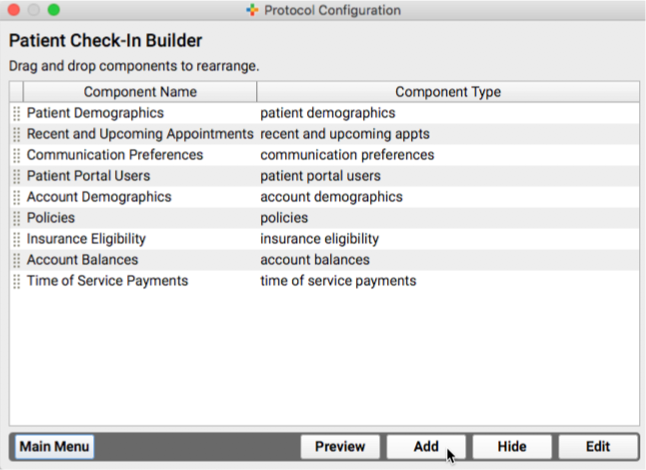
To get started, open the Patient Check-In Builder in the Protocol Configuration tool.
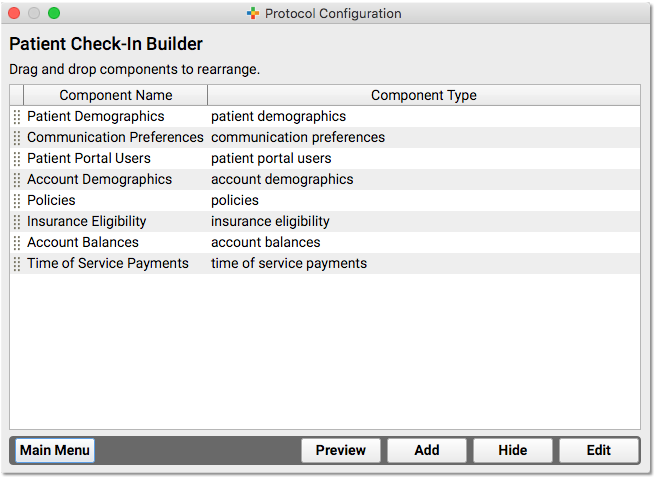
The default Patient Check-In components are shown in the image above. They include Patient Demographics, Communication Preferences, Patient Portal Users, Account Demographics, Policies, Insurance Eligibility, Account Balances, and Time of Service Payments.
You can click and drag the handle on the left to rearrange components, or click “Hide” to remove a component.
Click “Add” to add a new component.
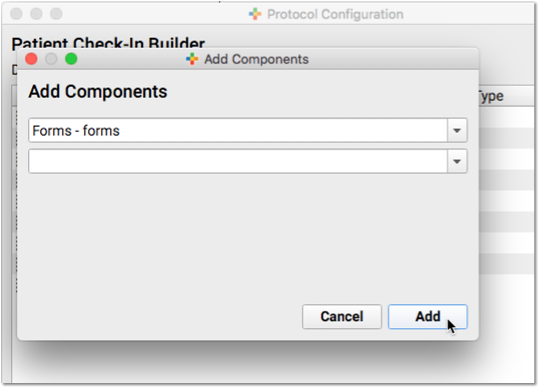
Double-click or select and click “Edit” to adjust any available configuration options for a component.
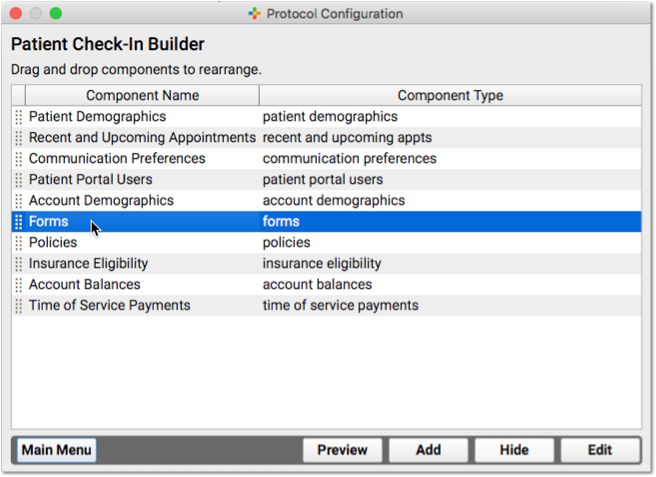
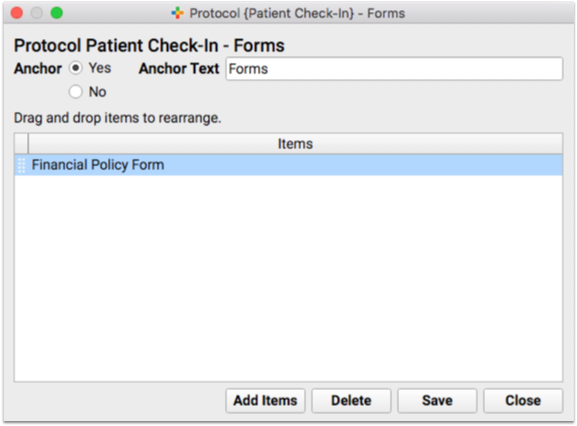
For example, you can change the contents of some components and change the anchor button text.
Create a Custom Headline and Notes Field in Patient Check-In
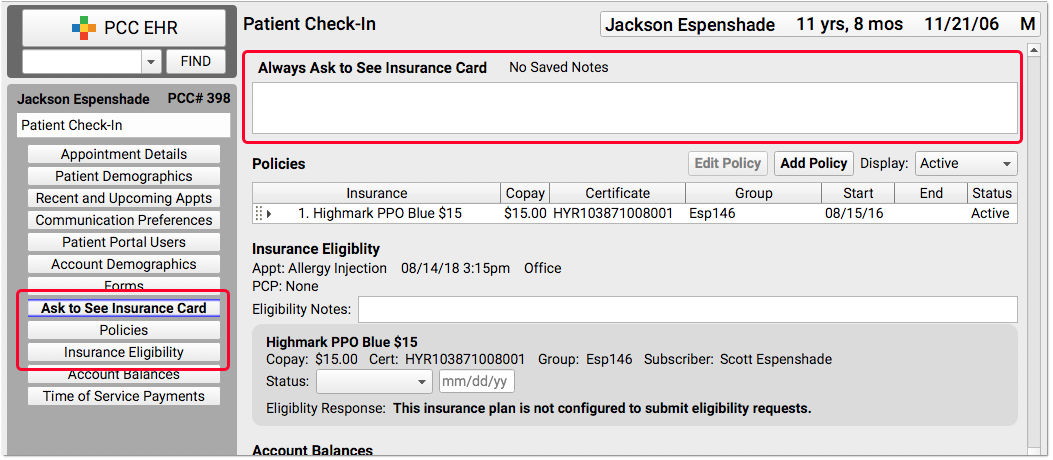
Do you want a custom component, featuring a headline and a notes field that your front desk staff will see every time they open the window? You could use this record any persistent, chart-wide information for the patient or family.
You can add a headline and notes field by creating a new chart-wide component.
First, open the Component Builder and visit the “Chart-Wide” component list. Create a new component.
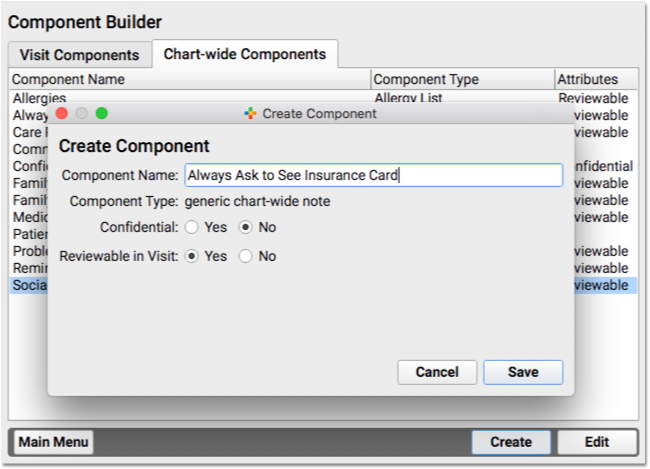
Next, use the Patient Check-In Builder to add the component to your Patient Check-In protocol.
The component will appear when you check in a patient.
For more information about available components, read the PCC EHR Component Reference. For more examples of how to edit protocols, read the Edit Protocols article.
Custom Alerts During Patient Check-In
What kinds of things do the front desk staff need to know when they check in a family? Billing issues, incomplete forms, important announcements and reminders? Maybe you track a patient’s preferred pronoun, when it is different from the sex in their chart record?
Your practice can create Clinical Alerts to inform them of these issues. When you create a Clinical Alert, you can indicate whether it should appear when a chart is opened or saved, and/or when the patient is checked in.
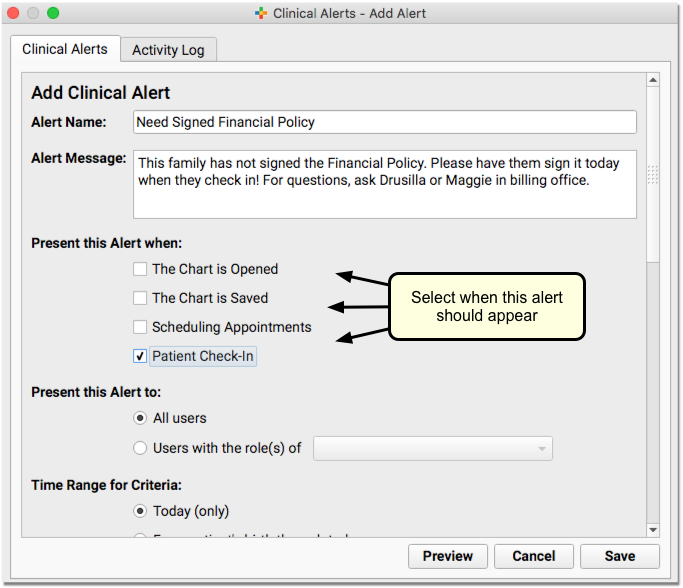
You can base the alert on a wide range of available criteria, including patient or account flags, demographics, or other details. This is the perfect tool for common patient and family status flags, like Billing Problem, Privacy Notice, or other clerical needs.
All Staff Alerts: If it’s important that the entire staff see an alert, make sure you check each appropriate box. Opening and saving the chart are not the same as Patient Check-In, for example.
For a guide to creating and editing Clinical Alerts, read the Clinical Alerts help article.
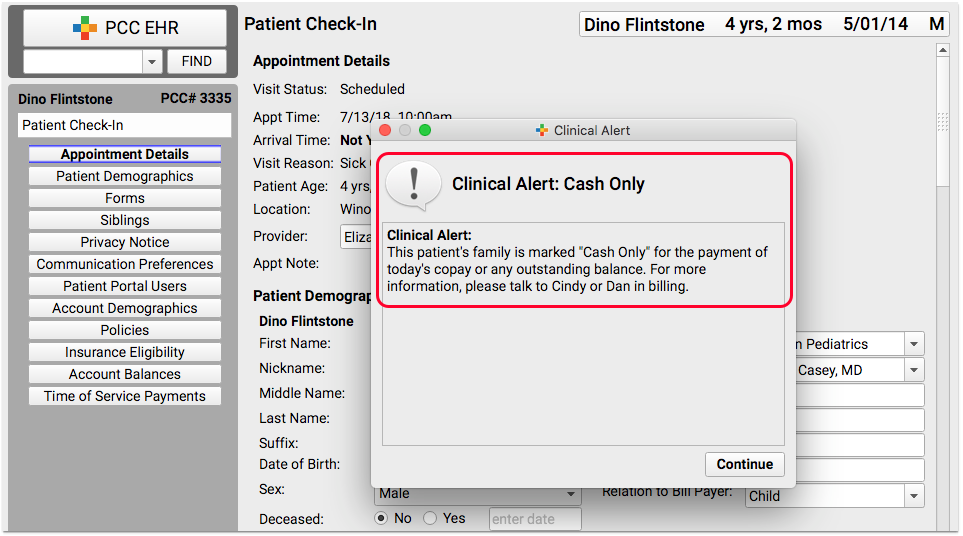
When someone checks in a patient who matches the criteria for an alert, it will appear along with your message about the topic.

