Work with Documents in a Patient’s Chart
Find and work with patient documents in the Documents section of the patient’s chart. The Documents section of a patient’s chart displays all documents associated with the patient, sorted by category and date.
Contents
Find Patient and Account Documents
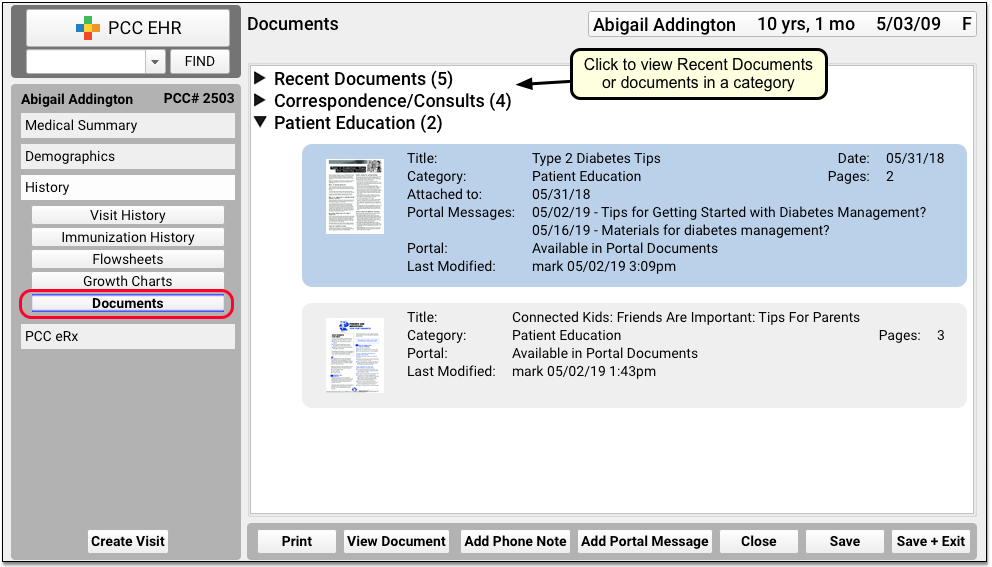
Open the patient’s chart. Click on “History” in the navigation, then select “Documents” to view the patient’s document categories.
- Patient documents are generally directed to the family, school, or specialists. These might include excuse forms, asthma action plans, referral forms, etc.
- Account documents are directed to the account holder (the guarantor or custodian). These are usually billing- or insurance-related forms such as past due letters, address verification letters, or policy-related mailings.
Click the arrow next to a category to expand and show documents in that category. If an arrow is orange, the document includes at least one outstanding task.
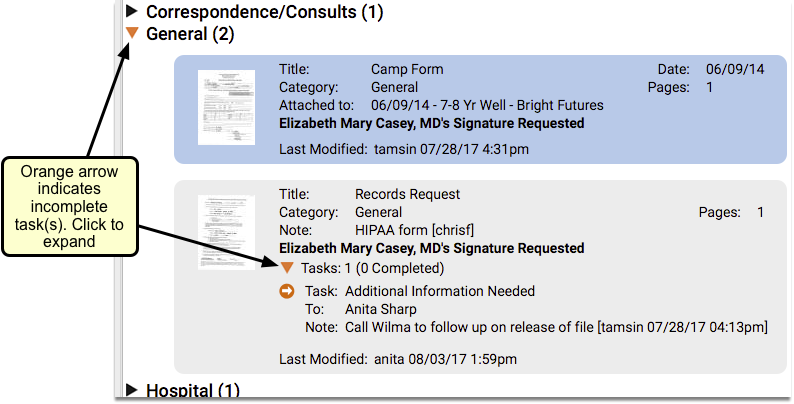
For each document, you can see a thumbnail of the image, any notes or tags attached to the document, and if it is related to a specific encounter. You can see whether the document was shared in the portal, if it is awaiting a signature, and any associated tasks.
Sorted By Category and Date: Documents in a patient’s chart are first sorted by your practice’s custom list of categories, and then by document date. A document’s date is based on the order or visit it is attached to. If a document is unattached, you can enter a manual unattached date by editing the document’s tags.
Print Scanned Documents
Select any document on the Documents screen and click “Print” to print a copy.
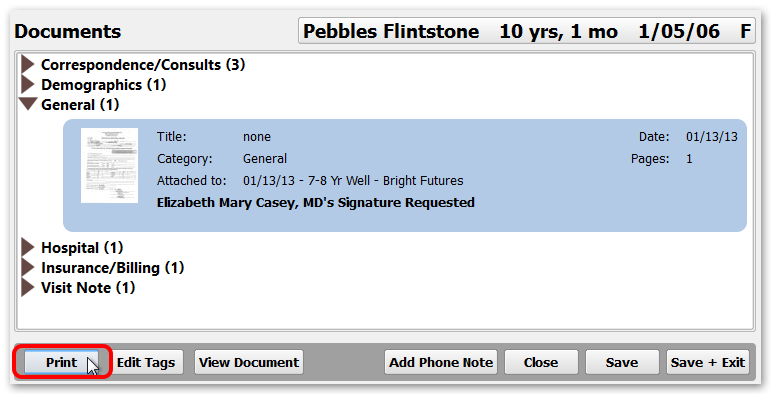
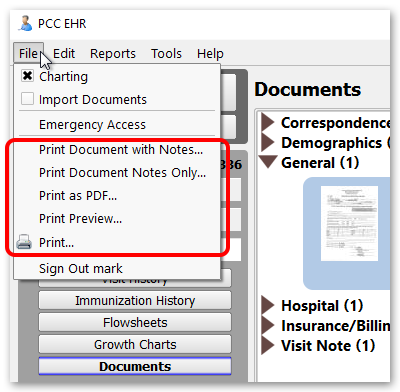
You can also print documents with their notes, print only the notes, or print the document by itself. Select a document and click on the File menu to see your printing options.
View and Edit Documents
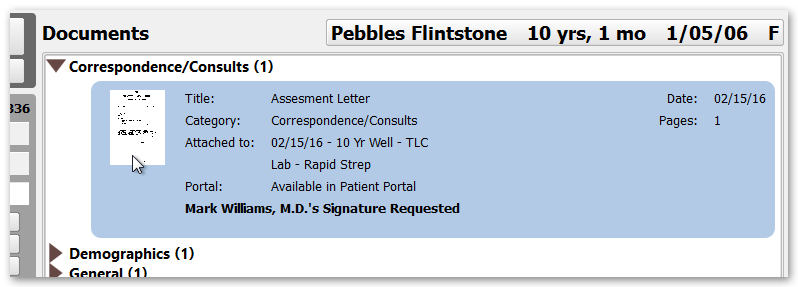
Double-click on any document on the Documents screen to view it.
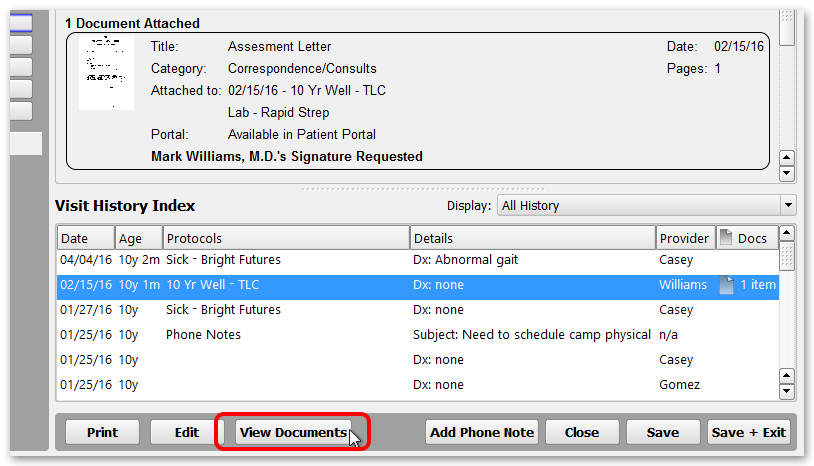
You can also find documents on the Visit History screen and click “View Documents” to view them.
While viewing a document, use the Rotate, Fit Width, -, +, and Zoom to Fit buttons to adjust your document view.
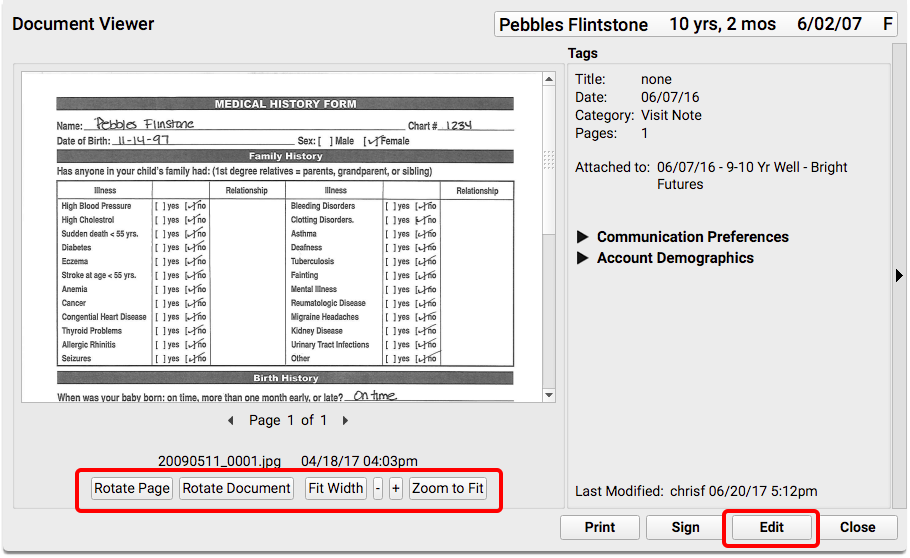
Click “Edit” to access the Document Tags.
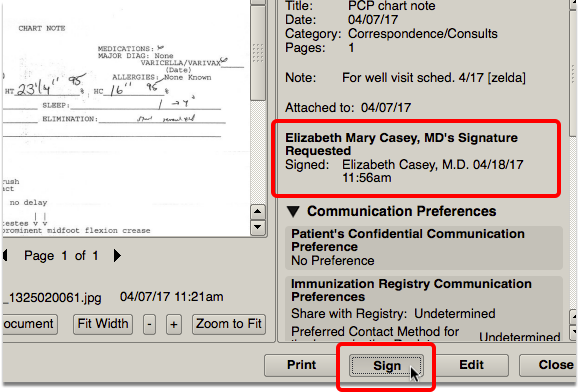
You can edit various document tags and attributes. You can also remove the document from a patient’s chart using the Remove Document button, or if a provider is viewing the document, they can sign it right from this screen.
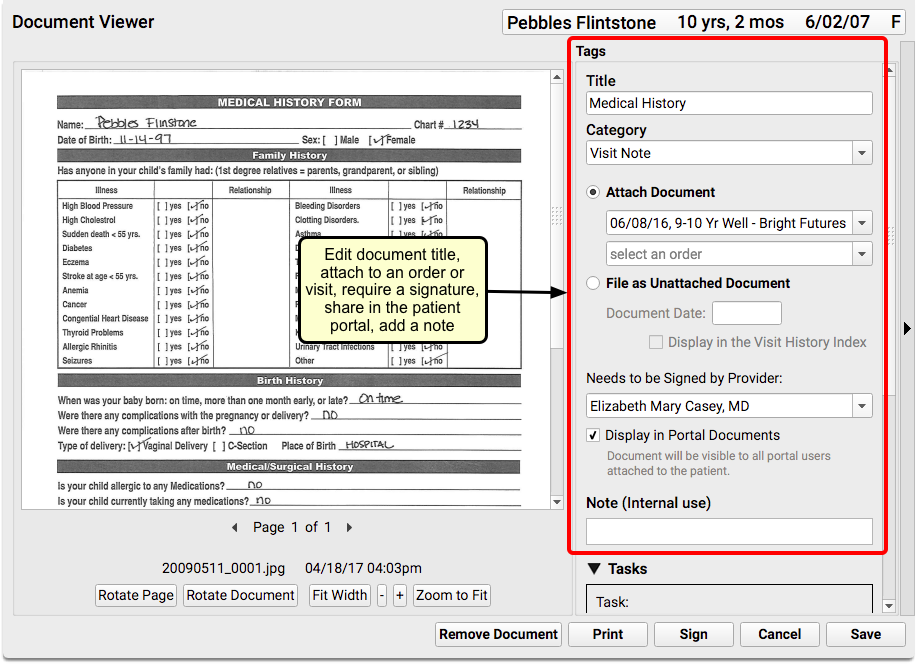
You can make several changes to the document:
-
Rotate: Click “Rotate Document” to change the default rotation of the document in all views.
-
Title: The document Title is used to identify the document in the Visit History and Documents section of the patient history, as well as in My Kid’s Chart, the patient portal.
-
Category: Choose a new Category, such as Correspondence or Radiology, to reclassify the document. If you wish to edit the document categories your office uses, read Edit Document Categories.
-
Attach Document: To associate a document with a visit or other chart event, click “Attach Document” and select from the drop-down menu. If selecting a visit, you can then optionally select an order or orders within that visit. Or, file as an unattached document.
-
Signing: If the document needs to be signed by a provider, you can choose that provider here.
-
Patient Portal: Check this box to share the document with My Kid’s Chart accounts that have access to this patient’s records.
-
Notes: Enter notes about the document and they will appear in both the Visit History and on the Documents screen.
-
Remove: Click “Remove Document” to remove the document from this patient. You can then use the Import Documents screen to link the document to another patient.
For a more detailed explanation of each of these document tags, read more about importing documents into a patient’s chart.
Work With Document Tasks
You can use the Tasks tool to add and complete tasks while editing a document in PCC EHR.
Create a Task
You can create a task while a document is in “Edit” mode.
The Tasks tool is located just beneath the Document Tags. You may need to scroll down to see them.
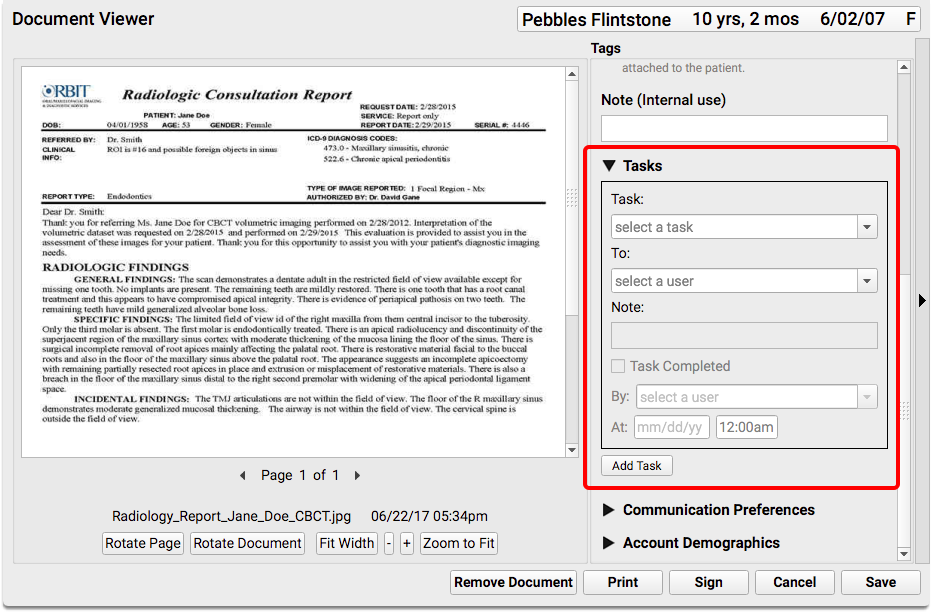
For each document you can add new tasks, select a user, and add a note. You can add more than one task if many different users need to respond to the content of a document.
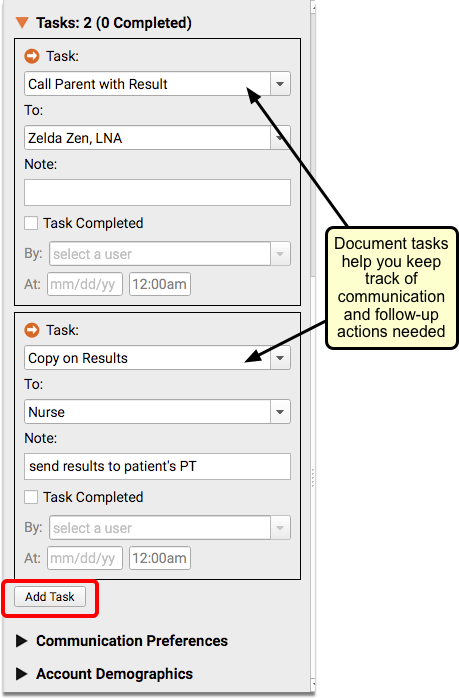
Click “Add Task” to add as many tasks as you need to the document.
Complete a Task
Users can review and work with document tasks on the Messaging queue in PCC EHR.
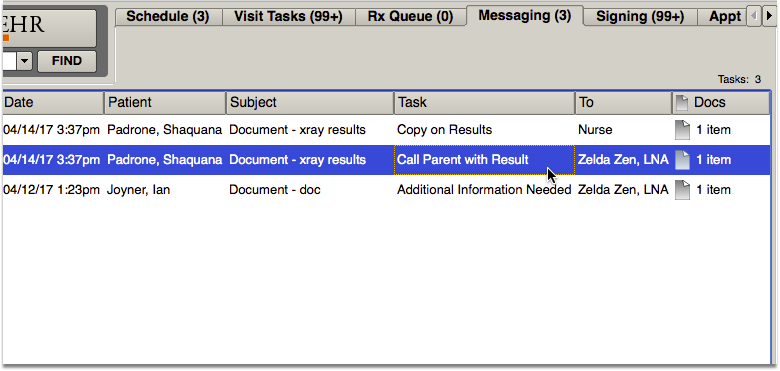
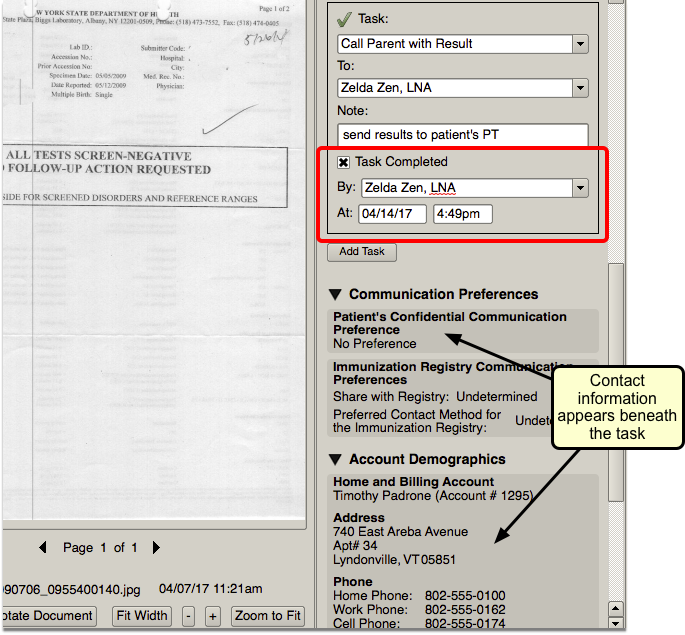
When they open a document, they can see contact information which will help them complete many tasks. For example, if you needed to call back a patient’s mom about a document, the contact information would be ready for you.
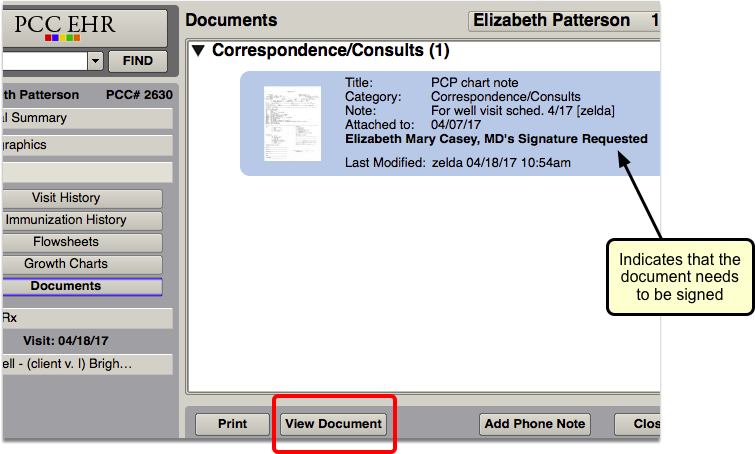
Sign a Document
If you review a document while working in the patient’s chart, you can sign it from there. You do not need to visit the Signing queue to pick up and sign the document.
