Processes and Best Practices for Managing PCC EHR and Patient Portal Accounts
When your practice shares information to the patient portal, you want to ensure that the right people receive it. This article lays out process, notes, and recommendations for creating patient, billing, and home accounts in PCC EHR and linking them to Patient Portal users.
Contents
If this is your first time adding patients and creating accounts, step-by-step instructions are available on our Add New Patients and Accounts page.
Linking Patient Portal accounts to PCC EHR billing accounts is essential to use Patient Portal’s Pre-Check-In feature. Pre-Check-In will be most effective with as many linked accounts as possible. For more information on preparing for Pre-Check-In, click here.
Follow Your Practice Policy: The following includes recommendations for managing patient and portal accounts, but your practice may have different standards or policies, such as how to record a full name, or assign patient flags. These instructions are intended to help you make full use of PCC’s products, and to make sure that PCC EHR and PCC’s Patient Portal work together efficiently.
Creating Patients in PCC EHR
Before you can add a home or billing account, you need a unique patient. To ensure that you’re not duplicating an existing patient, begin by searching PCC EHR for your patient’s name and review the results. If your patient does not appear, click “Create Patient” to begin adding patient demographic information.

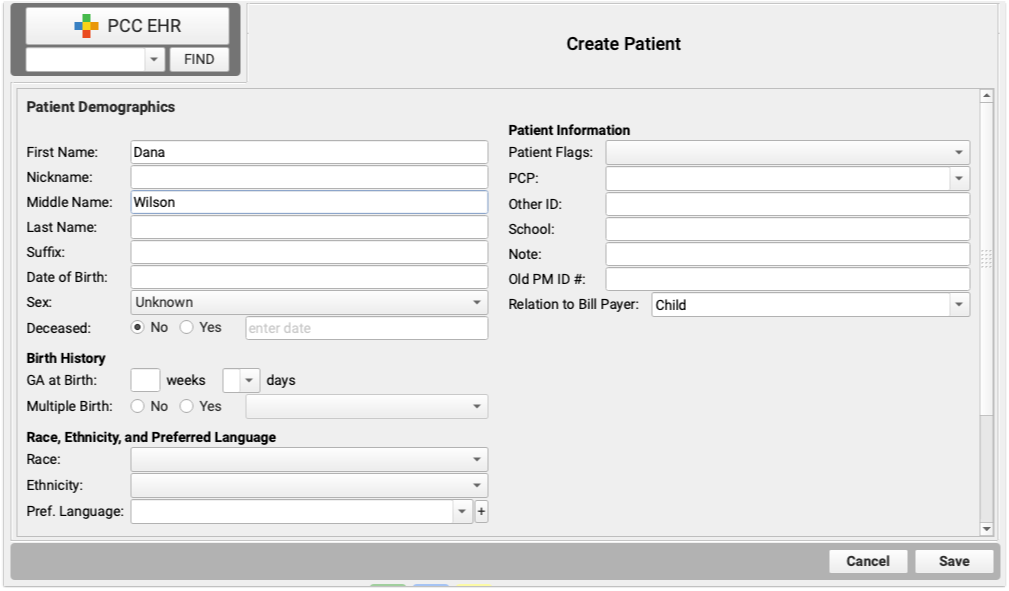
Check Relation to Bill Payer: By default, PCC EHR sets “Relation to Bill Payer” to “Child”. You may need to adjust this field if the patient has their own billing account, or their own insurance plan, or is covered by another individual.
Assign or Add Accounts in PCC EHR
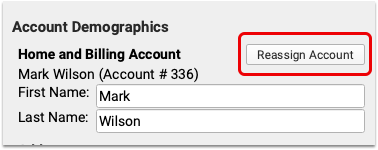
When creating a new patient, the “Assign Account” button appears in the Account Demographics section. Click it to assign this patient to a home and/or billing account.

To avoid creating duplicate accounts, search for an existing account. Select an existing account, or, if the user does not appear in the results, click “Create Account”.
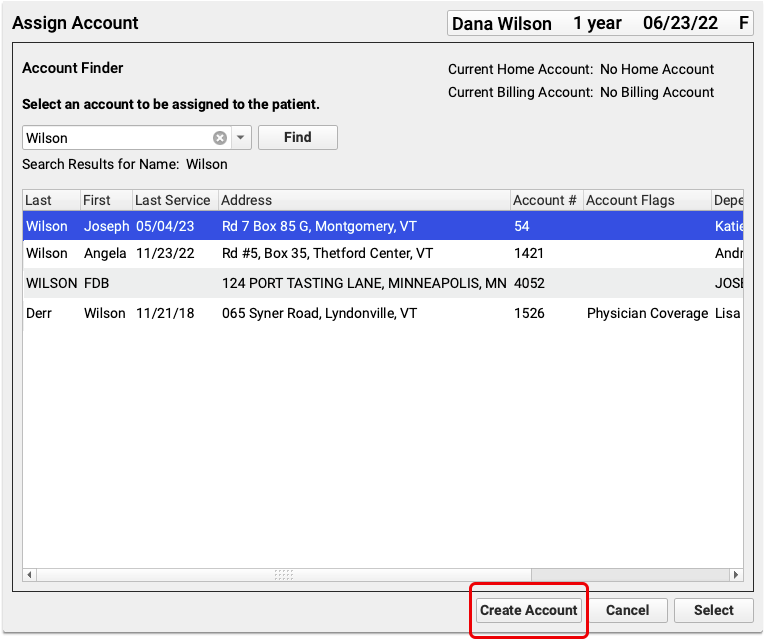
PCC recommends creating accounts for individuals, instead of creating a single account for both parents. So instead of creating “Mark and Angela Wilson” assign the patient to either “Mark Wilson” or “Angela Wilson”.
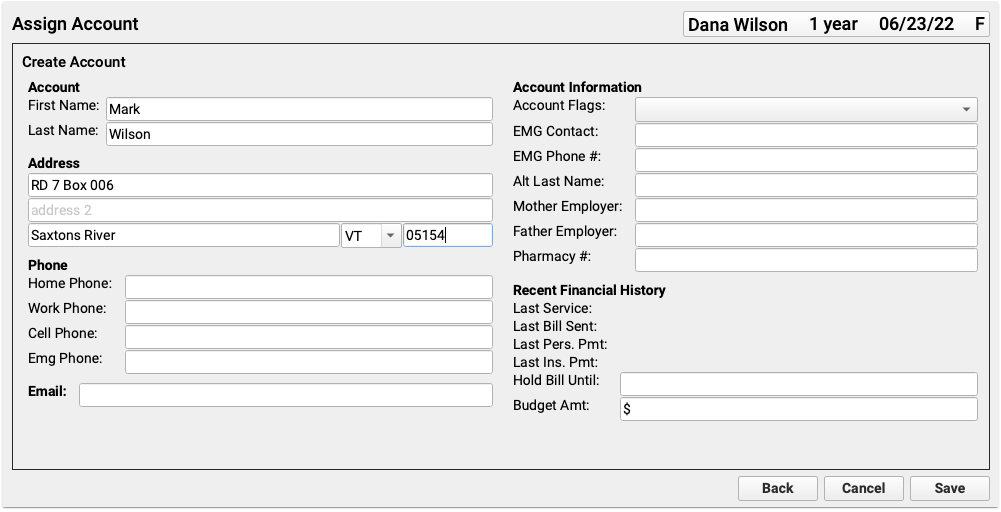
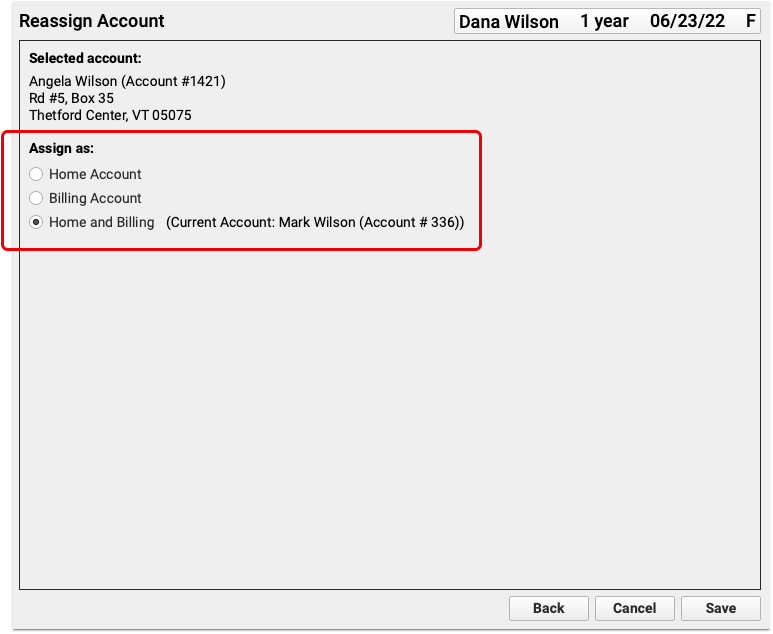
After creating the Home and Billing account, if the patient should be assigned to a different account for billing, click “Reassign Account”. Adding a billing account is just like adding the home account above, search to avoid duplicates, and click new account if needed. Then assign it to the proper role, Home, Billing, or both.
If you’ve assigned one person as the home and billing account, any other parents or persons associated with this patient should be assigned as a personal contact with the appropriate relationship selected. Those users can be assigned portal accounts of their own, and given access to their Patient Information through the Portal.
Pre-Check-In and Billing Accounts: When linking Portal accounts to EHR accounts for Pre-Check-In, remember that Pre-Check-In is only available to the portal user linked to the patient’s billing account. Because billing history is linked to the billing account, editing the billing account’s name or reassigning the patient’s billing account will change or remove the billing history for that patient, and should not be used to change who has access to pre-check-in.
Create Portal Users
Once your patients and accounts have been created, link a Patient Portal user for each. This is the key for messaging and sharing information with your patients’ families. PCC EHR can quickly create Patient Portal users directly from each patient’s Account Demographics.
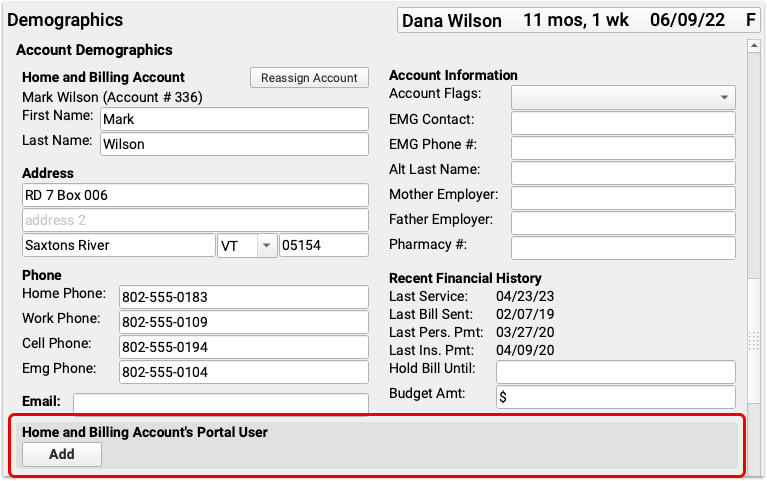
At the bottom of the Account Demographics click the “Add” button under Home and Billing Account’s Portal User. If you’ve added both a Home and Billing account, each will have their own, labeled “Home Account’s Portal User” or “Billing Account’s Portal User”. Click “Add” to create a portal user to link to the selected account.
The “Add” button creates a new patient portal user for the selected account. The portal user’s name is filled in automatically. Select a phone or email address to use as the Portal Sign-In. The phone or email you select here will be used to sign in to the patient portal.
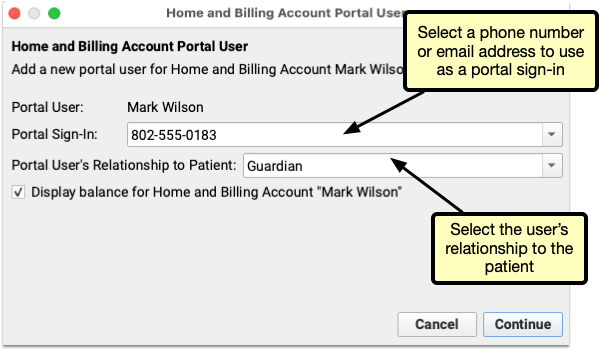
Click “Continue” to create the portal user.
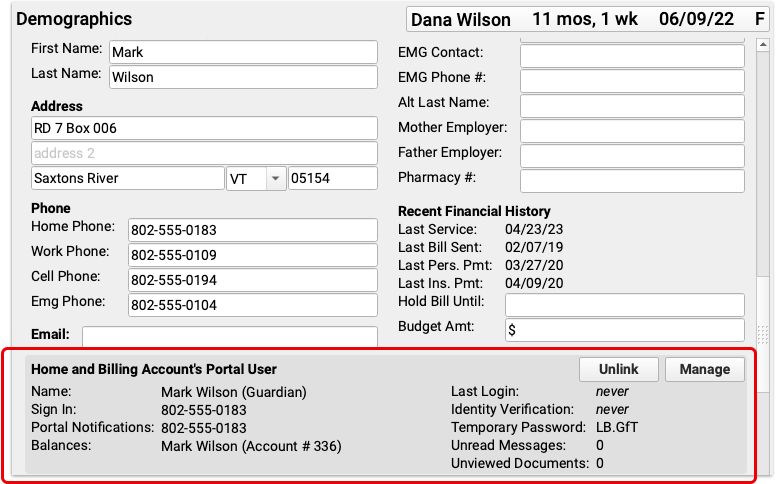
The portal account you selected appears in Account Portal User section. If needed, use the “Unlink” button to remove the portal user from this account.
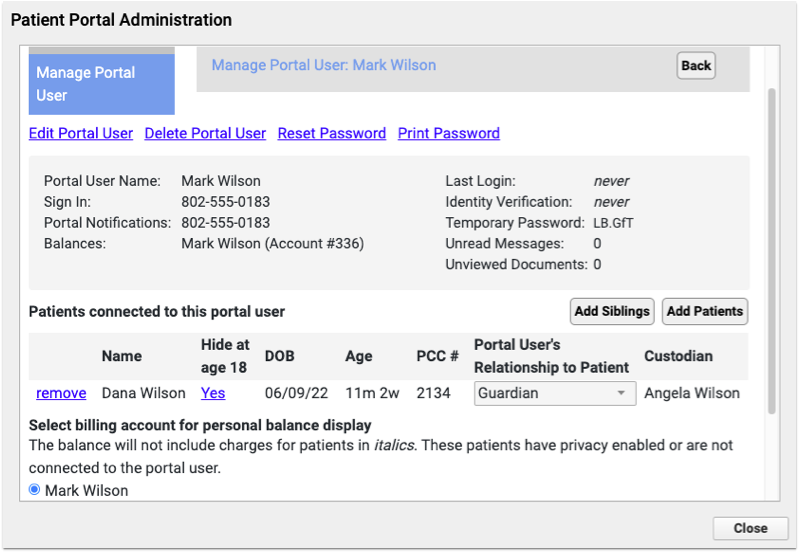
In some cases siblings will share a Home or Billing Account, but not be connected to the same patient portal user.
The Account Portal User section will indicate this situation with the text “Patient… is not connected to this account’s portal user. Manage portal user to add this patient”.

Clicking “Manage” will open the Patient Portal Administration and automatically connect this patient to the portal user.

Blended Families and the Siblings Component
The Siblings Component shows other patients associated with the same home or billing account allows quick access to siblings and other patients who share a home or billing account. Care should be taken when assigning Billing and Home accounts.
In the case of blended families, patients who share a billing Billing or Home account appear in the Siblings Component. So if a parent appears as the billing account for their biological children and a step-child and the home account of just the step-child, both the step-child and biological children will be linked to each other in the siblings component.

Adding Unlinked Patient Portal Accounts.
If needed, a Patient Portal account can be created for users other than the PCC EHR Home or Billing account, such as a second parent or other guardian. Unlinked Patient Portal accounts should be created through the Patient Portal Administration, found under PCC EHR’s Tools Menu.
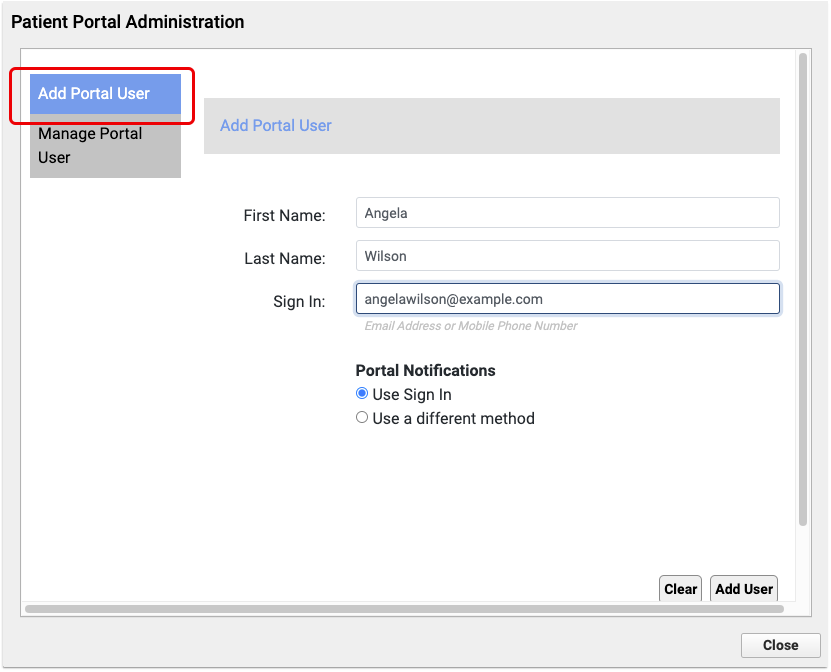
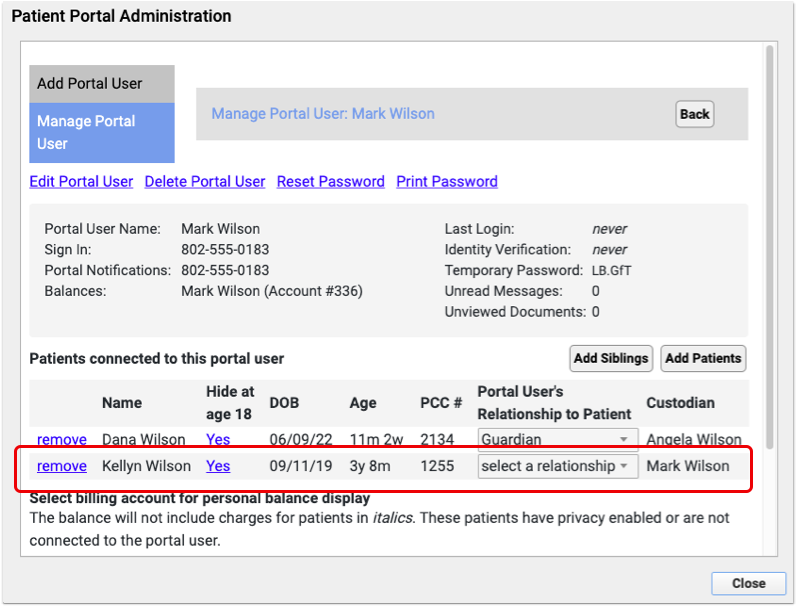
Once the account is created for the new user, click “Add Patients” to select the patient to add to this user.

Once added, this new user will have access to the patient data within Pocket Portal