Schedule a Walk-In or “Add-On” Patient Visit
Follow the procedure below to create a visit for a patient in PCC EHR.
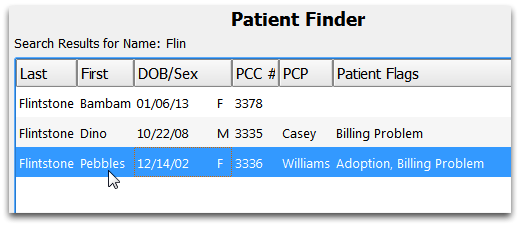
Enter the Patient’s Name and Click “Find” or Press Enter
Type the Patient’s name in the Find search box at the top of the screen. Press Enter or click “Find” to perform the search.

You can also search by phone number, chart number, and birth date. You can even set up custom search values.
Double-Click on the Patient Name
From the search results, choose a patient and double-click on their name.
Click “Create Visit”

If the patient already has a visit today, the chart note navigation buttons will appear. Otherwise, click “Create Visit”.
Enter Visit Details and Click Save
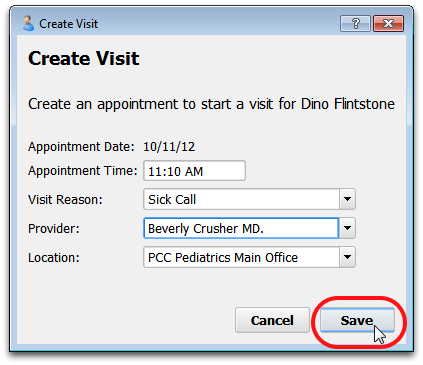
Choose an appointment time, visit reason, clinician, and location. The default time will be entered when you click “Create Visit”.
Begin Charting
A chart note for the visit will open immediately, and you can begin charting.
Check In and Followup On Tasks
The new appointment will appear on the Schedule screen. Your staff can use the Checkin tool to check insurance eligibility, confirm demographic information, and perform other functions.
Note: After you create a walk-in appointment for a patient, you may review their chart, begin charting the visit, or return to the Schedule screen. The patient’s new appointment will be waiting on the Schedule when you are ready to see the patient.