Patient Pre-Check-In
Contents
Once enabled by PCC, the Patient Pre-Check-In process begins in the Patient Portal. Pre-Check-In is available seven days before the patient’s appointment, and two days prior to the appointment, the patient’s billing account will receive a Portal message that pre-check-in is available.
Patient Portal Users Required: Pre-Check-In requires a patient to have a patient portal user linked to their Billing or Home account.
Watch a Video : View a short video demonstrating Pre-Check-In through the patient portal
Pre-Check-In in The Patient Portal
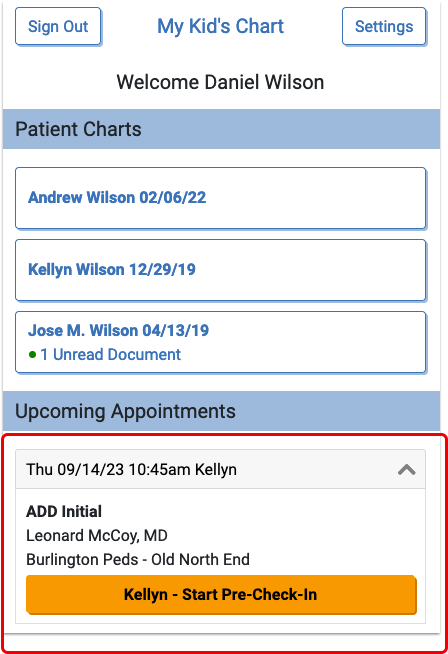
When the billing account Patient Portal user logs into PCC’s Patient Portal, they will find and click an orange “Start Pre-Check-In” button for each patient with an appointment scheduled within the next seven days.
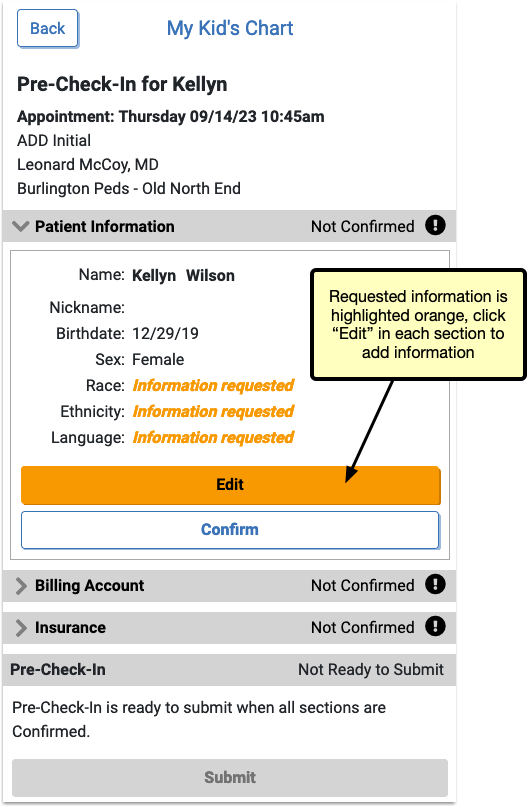
Pre-Check-In includes three sections to be completed and confirmed: Patient Information, Billing Account, and Insurance. By clicking “Edit” below Patient Information, portal users can update existing information and add any requested information.
Patient Information
When editing, any information missing is highlighted in orange.
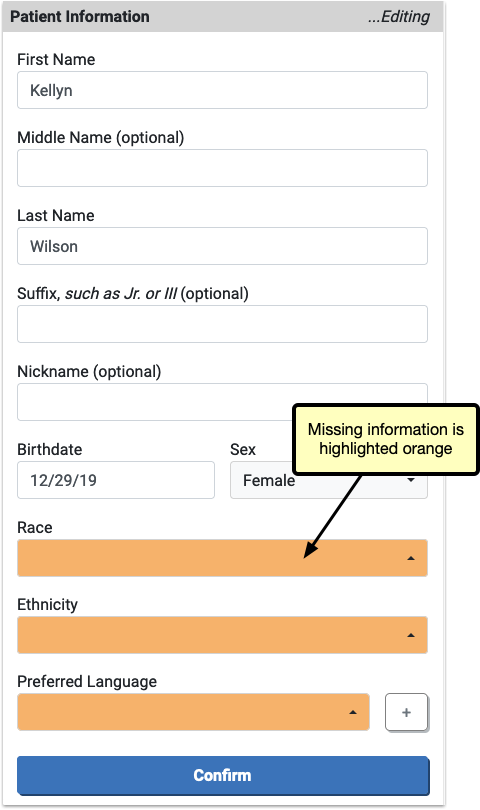
The information already on file for this patient can be edited by the portal user.
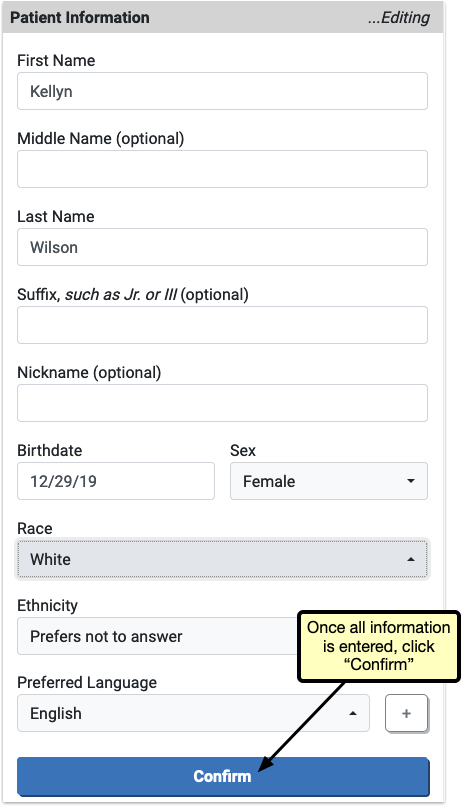
After completing any edits to Patient Information and any requested information is filled out, the user will click “Confirm” to save the changes.
Billing Account
The Billing Account section works the same way as Patient Information: the user will edit any existing information, fill out any orange highlighted missing information, and then click “Confirm”.

After completing and confirming Billing Account information, Insurance is the final section to complete.
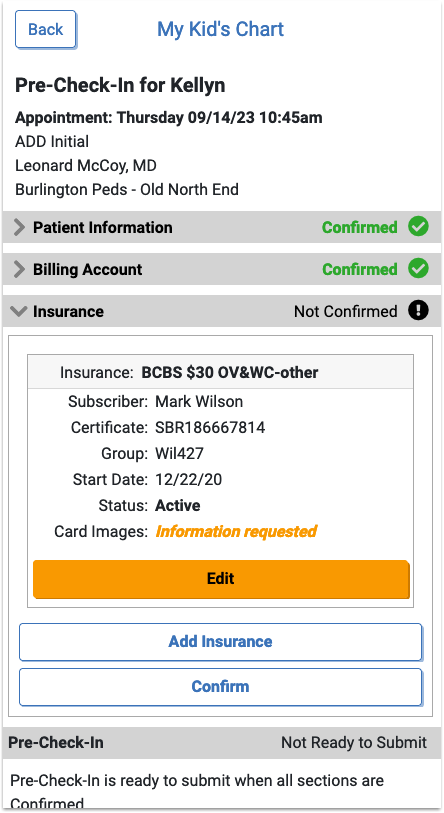
Insurance
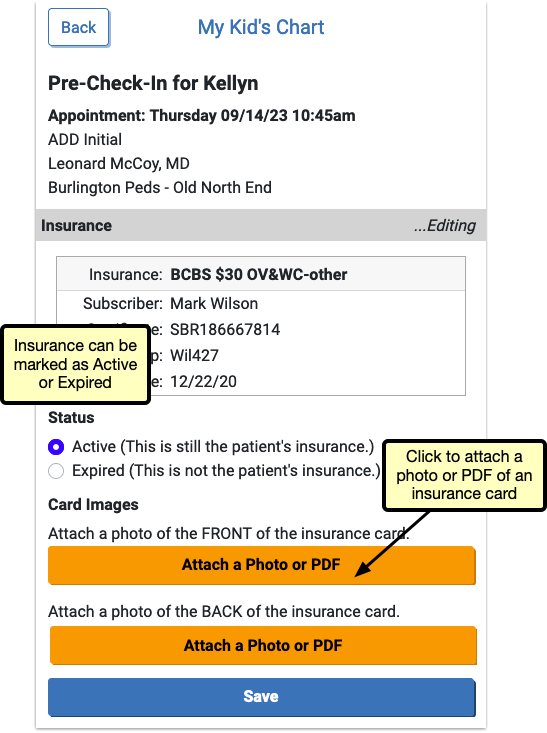
In Insurance, users can click “Edit” to confirm that the existing insurance is still active, or mark it as expired if it’s no longer valid. By clicking “Add Insurance” users can enter a new insurance.
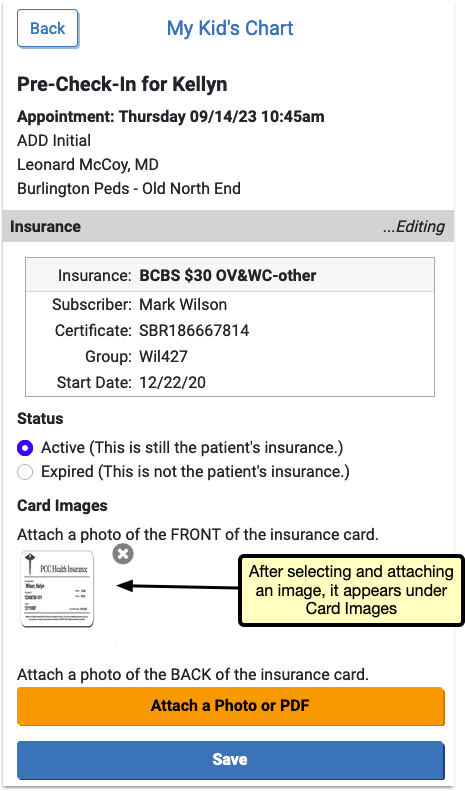
Both “Add Insurance” and “Edit” include the option to upload an image or PDF of the front and back of the patient’s insurance card. These images will be added to an automatically created “Pre-Check-In Insurance Cards” category in PCC EHR, or to a document category selected in Document Administration.
When all three sections have been completed and confirmed, each will be marked “Confirmed” in green, but can be edited again by re-opening the section and clicking “Edit” if needed.
Click “Submit”.

Optional: Pay Personal Balance
If your office has enabled portal payments, the Pre-Check-In confirmation page includes the option to make a payment for any patient with a personal balance.

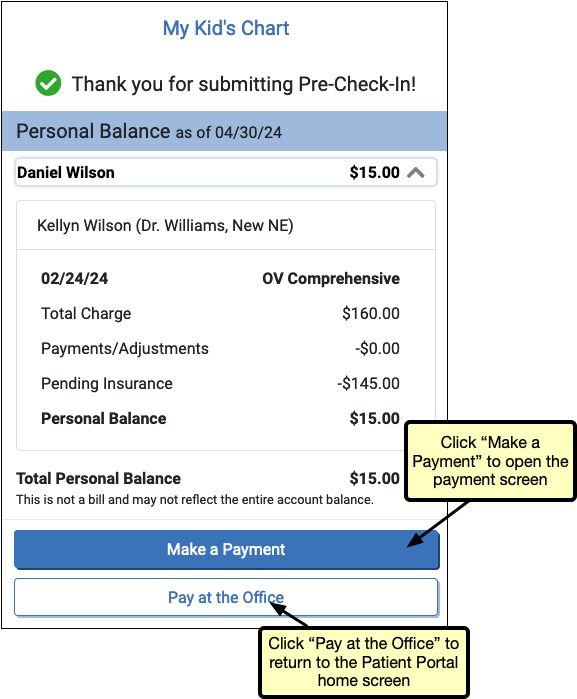
Users can review the details of the balance by clicking the arrow next to the balance. The “Make a Payment” button opens the payment screen, where the portal user can complete a payment. If the user prefers to pay at the office, clicking the “Pay at the Office” button will return the user to the patient portal home screen.
After completing Pre-Check-In, users without a personal balance will be redirected back to the patient portal home page.
Pre-Check-In in PCC EHR
A visit’s Pre-Check-In status is indicated on the Schedule queue by a clipboard icon.

An empty, gray clipboard icon indicates a visit where Pre-Check-In is available through the Patient Portal, but has not yet been completed by a user. A filled, orange clipboard appears on visits where Pre-Check-In has been completed through the Patient Portal, but not yet reviewed and imported by your practice. The checked, green clipboard signifies that Pre-Check-In is complete and imported. Visit reasons not configured for Pre-Check-In will have no icon.
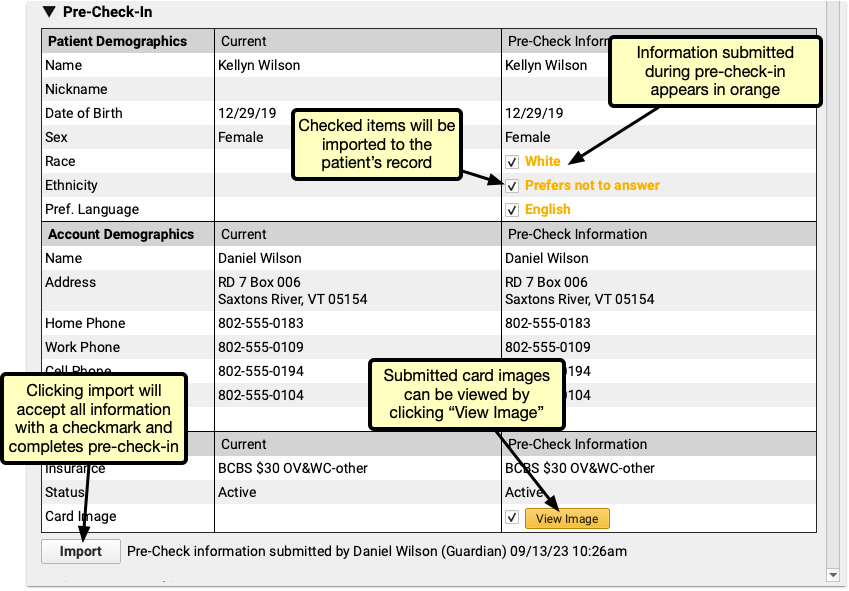
When a portal user completes Pre-Check-In in PCC’s Patient Portal, the submitted information appears in Patient Check-In. All information added, edited, and confirmed by the portal user appears under the rightmost “Pre-Check Information” column. New or updated information appears in orange, with a checkbox.
By default, each checkbox is checked. If you decide that the submitted pre-check-in information should not be imported, uncheck the box. Insurance card images can be viewed by clicking the “View Image” button.
Click “Import” to import all checked information and overwrite the current information.
Adding a New Insurance
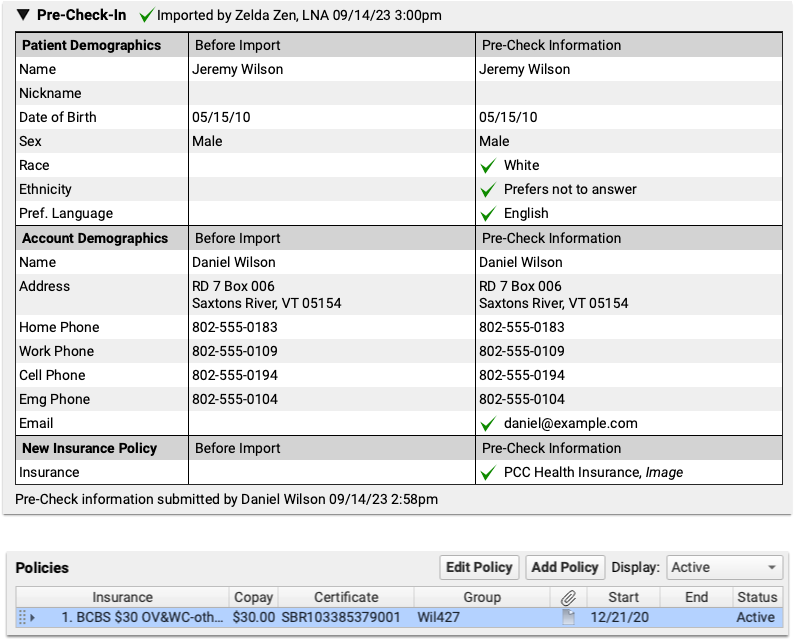
If, during pre-check-in, a patient has no insurance, or a user adds an additional insurance, you’ll need to add that insurance during Check-In through PCC EHR.

A “New Policy Imported via Pre-Check-In” line appears under the Policies component in PCC EHR.

Select the policy and click “Edit Policy” to open and enter the details of the policy.

The images submitted via pre-check-in appear at the bottom of the window, click “View Document” to review the insurance cards for the insurance details.
If the patient has siblings and the insurance is the same as those siblings, the sibling’s policy will appear at the top of the Insurance drop-down menu, and will automatically fill in the policy details.

With pre-check-in data imported, and any new insurance added, pre-check-in is complete, and you can continue your check-in process as usual.
Add Additional Pre-Check-In Users
When a patient has more than one patient portal user associated with their account, those additional patient portal accounts can be added to Pre-Check-In, and complete Pre-Check-In from their own account.
When Pre-Check-In is enabled, a component called “Pre-Check-In Recipient” appears in each patient’s demographics component. In edit mode, it includes a drop-down menu listing all other patient portal users linked to the patient.
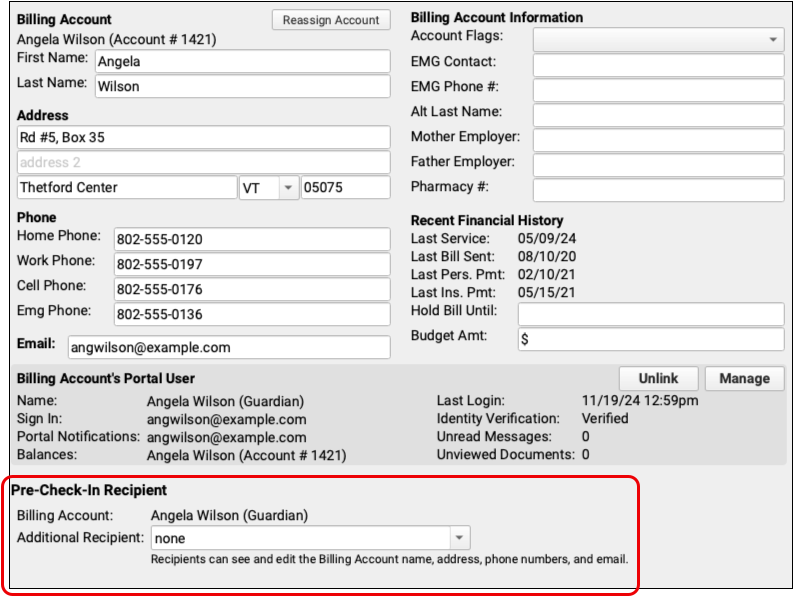
Select an patient portal user linked to this patient to receive the Pre-Check-In notification and option to complete Pre-Check-In.
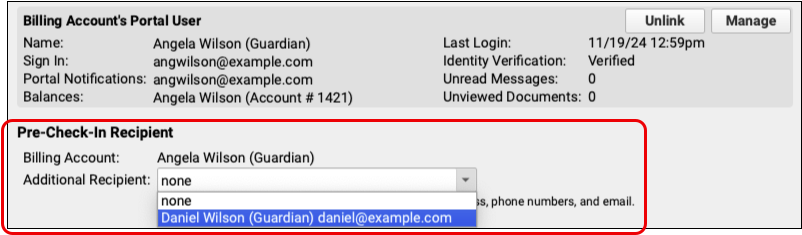
After selecting a user and saving your changes, additional users can be added the same way.
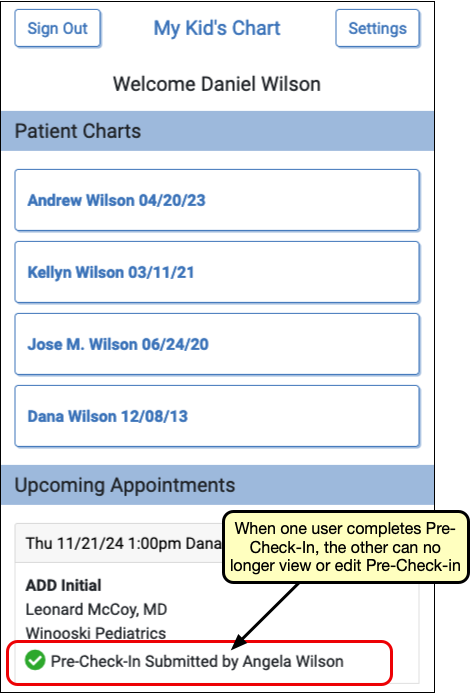
Once a user begins Pre-Check-In, the additional users will be notified that Pre-Check-In is in progress on the patient portal home page.
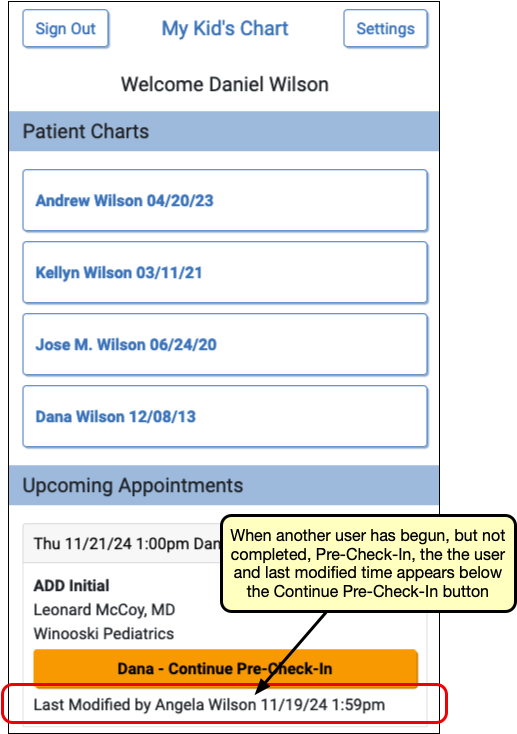
Any Pre-Check-In recipient can continue Pre-Check-In, but once any user submits Pre-Check-In, check-in is complete, and ready to be reviewed and imported in PCC EHR.