PCC 8.13 Migration Considerations
The PCC 8.13 release includes new features that may need configuration and for which you may want to do extra planning or training. Read below to learn more, and share relevant details with your physicians and staff.
Read the PCC 8.13 Release article for complete details on these features.
Contact PCC Support for information about these or any features in PCC 8.13.
Contents
- 1 Configure Options for PCC 8.13’s New Lab and Radiology Requisition Forms
- 2 Check Your Flu Shot Configuration for Optimal Reporting
- 3 Prepare to Securely Retrieve Patient Records from Other Healthcare Providers
- 4 Review and Update Your Practice’s Default TOS Discount Type
- 5 Configure Form Letters for Encounter-Specific Needs
- 6 Create a Form that Includes Multiple Vitals Measurements
- 7 Configure Forms to Automatically Include a Provider Signature
- 8 Transition to Post Charges in PCC EHR
- 9 Update Your Windows 7 PCs
Configure Options for PCC 8.13’s New Lab and Radiology Requisition Forms
As your practice implements the new lab and radiology requisition forms, you should review and update your configuration for in-house labs, document categories, and custom form needs.
Exclude In-Office Lab Orders from Outbound Requisition Forms
When you use the new Lab Requisition forms in PCC 8.13, you can easily and automatically prevent in-office lab orders from appearing on outbound lab requisitions. Certain kinds of lab tests are done at your practice and should not appear on outbound lab requisitions.
Review and Update Your In-Office Lab Facilities
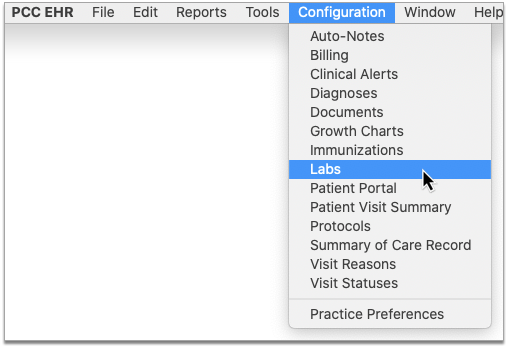
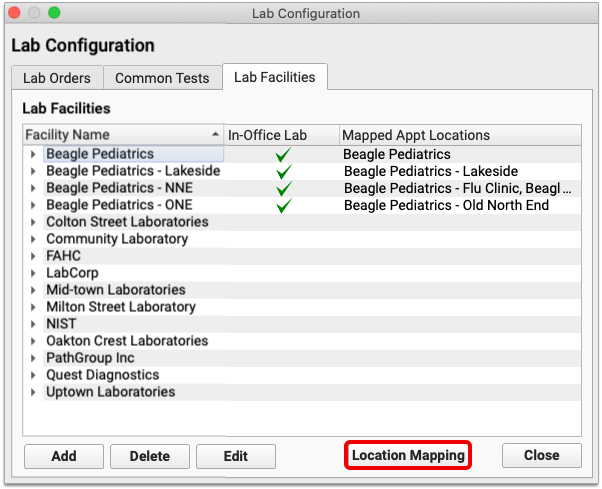
Open Lab Configuration from the Configuration menu in PCC EHR. Click the Lab Facilities tab.
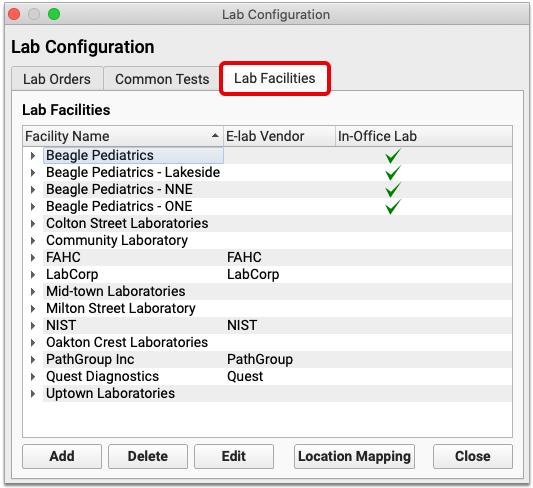
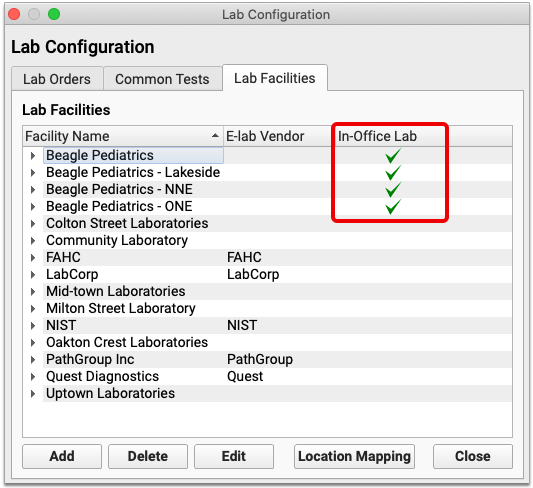
A green check appears in the In-Office column beside lab facilities which are considered to be internal to your practice.
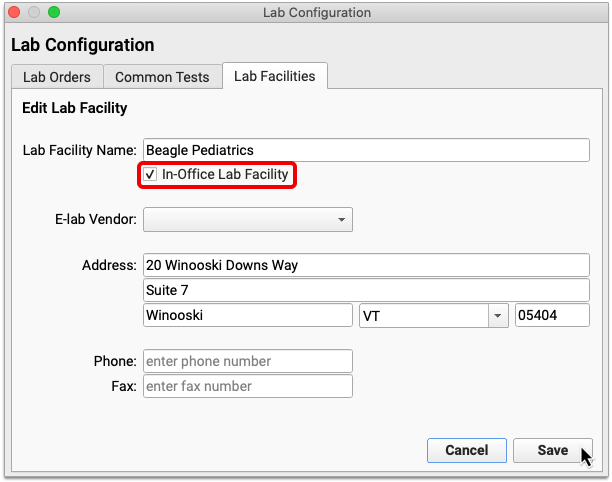
You can edit a facility by double-clicking it, or selecting it and clicking the “Edit” button. Check or uncheck the “In-Office” box within the lab facility settings, then click “Save”.
Once you have configured all of your in-office facilities, map them to your appointment locations.
PCC Will Configure As Many In-Office Facilities As It Can: When Release 8.13 is deployed to your practice, PCC will look for lab facilities which are mapped to an appointment location and automatically designate those in-office facilities.
Multi-Location Practices: Map In-Office Lab Facilities to Appointment Locations
Within the Lab Facilities tab, click the “Location Mapping” button. Map each of your appointment locations to an in-office lab facility.
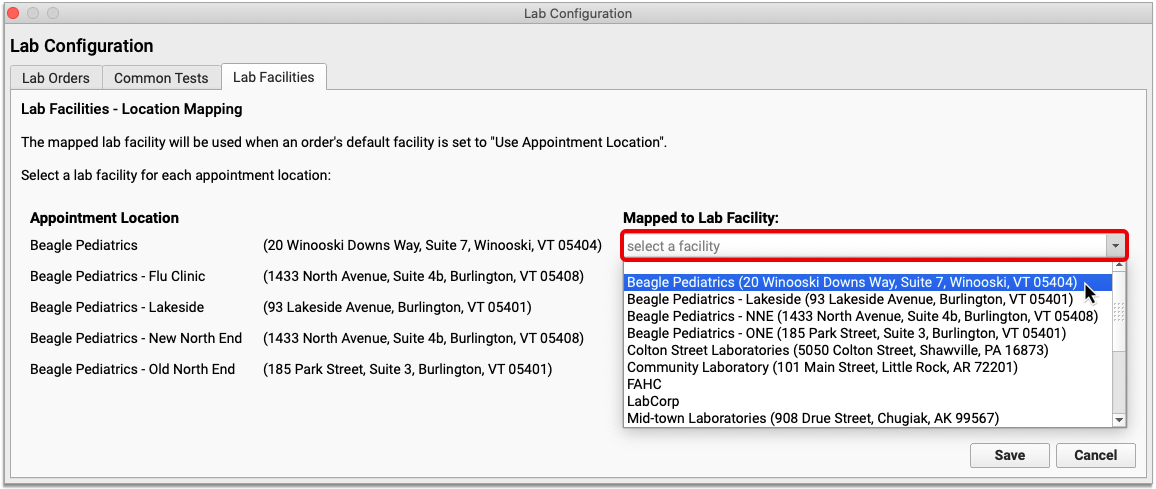
Once all appointment locations are mapped to a lab facility, click “Save”.
Next, check that your in-office lab tests are configured to use an internal lab facility by default.
Configure a Default Facility for In-Office Lab Tests
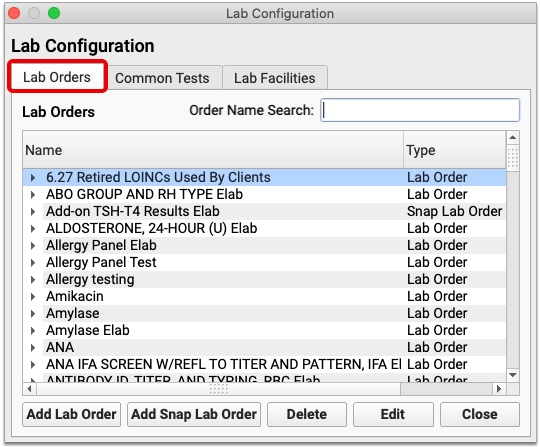
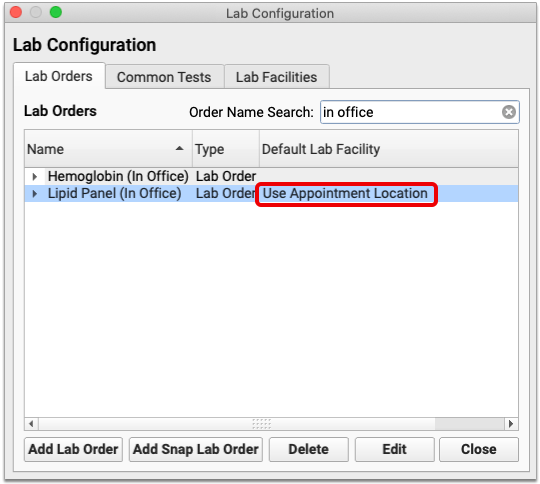
Click the Lab Orders tab. If all of your in-office lab orders follow a similar naming convention, use the search box to narrow down the list.
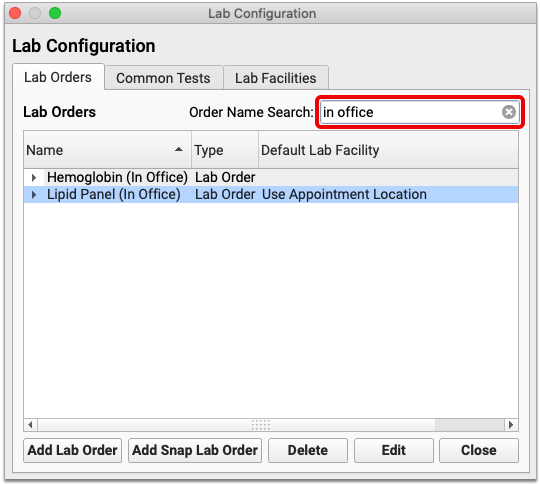
If you are a multi-location practice, check that “Use Appointment Location” appears in the Default Lab Facility column beside each in-office lab order. Single location practices should see the name of their in-office lab facility.
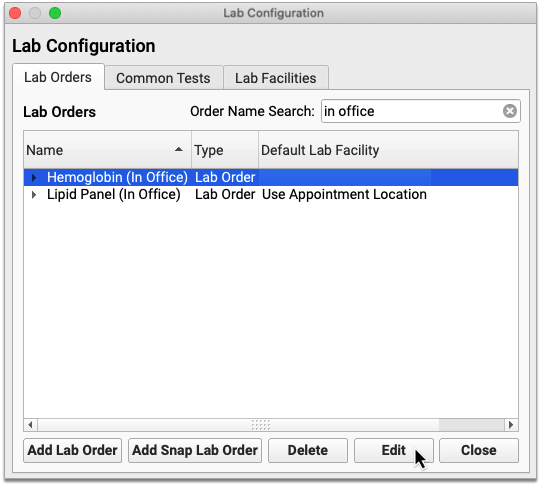
If you need to edit an order’s default lab facility, double-click it, or select it and click the “Edit” button.
Set the Default Lab Facility field to your in-office facility (single location practice) or “Use Appointment Location” (multi-location practice), then click “Save”.
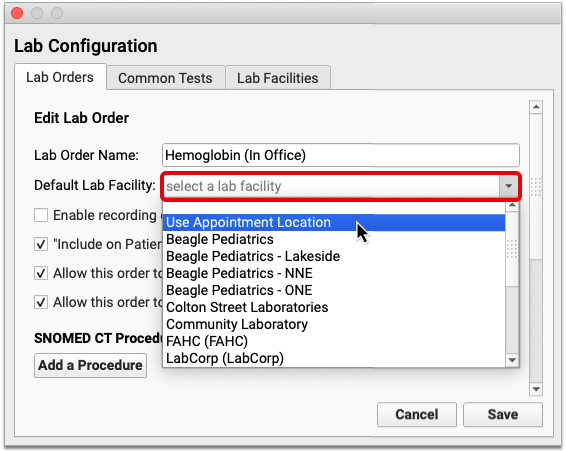
Lab orders which use an in-office lab facility or the appointment location as their default lab facility are prevented from appearing on outbound lab requisitions.
To learn more about how to set up lab orders and facilities, read all about Lab Configuration.
Lab Configuration Changes Take Effect the Next Time Users Log In to PCC EHR: The changes you make to in-office lab facilities and orders will not take effect for users until the next time they log in to PCC EHR.
Configure Default Document Categories for Lab and Radiology Requisitions
PCC 8.13 introduces the ability to create outbound lab and radiology requisitions, but where do requisitions get saved once you have created them?
Two new document categories have been added to PCC EHR: Lab and Radiology. By default, lab requisitions save into the Lab category and radiology requisitions save into the Radiology category.
You can change these defaults in the Document Administration tool.
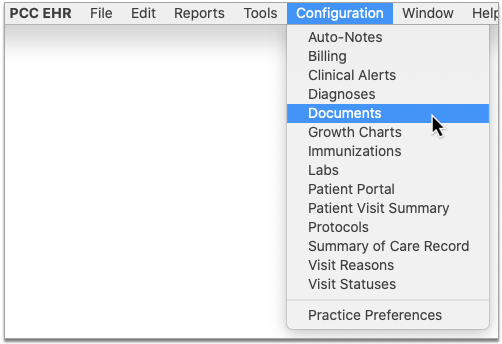
Open the Configuration menu in PCC EHR and click “Documents”.
Open the Assigned Categories tab.
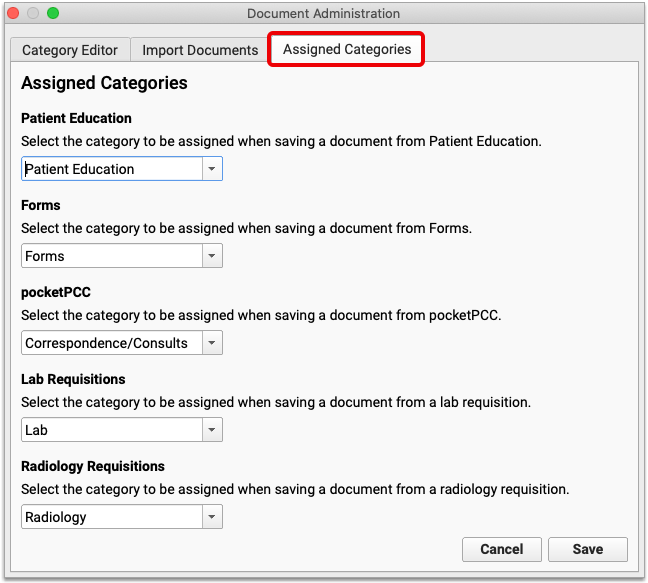
Under Lab Requisitions and Radiology Requisitions, select where you would like each type of document to save by default.
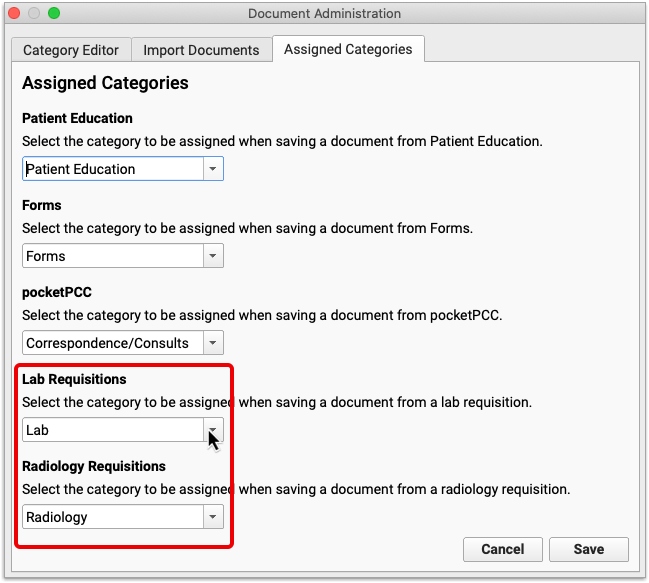
When you are done, click “Save”.
PCC Doesn't Create New Lab and Radiology Document Categories If You Already Have Them: If you already have document categories named Lab and Radiology, PCC will automatically use those existing categories as the default place to save lab and radiology requisitions.
Configure Custom Lab and Radiology Requisitions
PCC provides a stock lab and radiology requisition template to all practices, but offers the option to upload custom templates by special request. Contact PCC Support to learn more about custom requisition form requirements, and to get help adding custom requisitions to your system.
Please note that PCC cannot configure custom lab and radiology requisition forms containing checkboxes at this time.
Check Your Flu Shot Configuration for Optimal Reporting
PCC 8.13 includes new flu shot reports in your Practice Vitals Dashboard. For these and other immunization reporting features to work well, PCC recommends your practice track immunizations by CVX, and not only by procedure code.
Experienced administrators can check this configuration in Practice Management in the Table Editor program (ted). However, it is recommended that most users call PCC Support for help evaluating and updating their immunization configuration.
What Are CVX Codes and Why Are They Important?: CVX codes are codes published and maintained by the Centers for Disease Control which indicate the product used in a vaccination. Immunization measures in your Practice Vitals Dashboard expect a CVX code to be configured for each vaccine your practice administers. Vaccine administrations which are not linked to a CVX code are excluded from Dashboard measures for immunization rates. If you need help evaluating or updating your immunization configuration, contact PCC Support.
Prepare to Securely Retrieve Patient Records from Other Healthcare Providers
PCC 8.13 includes pilot functionality for requesting and retrieving patient records from other healthcare providers.
Although the new functionality is not yet widely available, you can prepare for it by becoming a Clinical Document Exchange Responder straight away.
Clinical Document Exchange Responders allow other healthcare organizations who participate in the Carequality interoperability framework to retrieve their patients’ records for treatment purposes. If you eventually want to be able to initiate records requests, you must first enroll to respond to requests from others.
To become a Clinical Document Exchange Responder, contact PCC Support.
Review and Update Your Practice’s Default TOS Discount Type
When you enter a discount in the Procedures column while posting charges, PCC EHR automatically creates the Discount line in the Payments component for you.
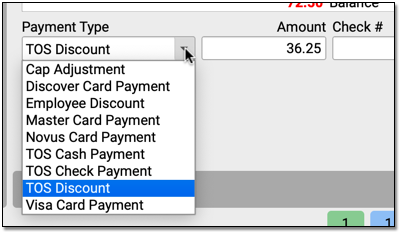
If your practice has many different types of discounts or adjustments that you apply at the time of service, you can change the discount to a different type with the pull-down menu in the Payments component.
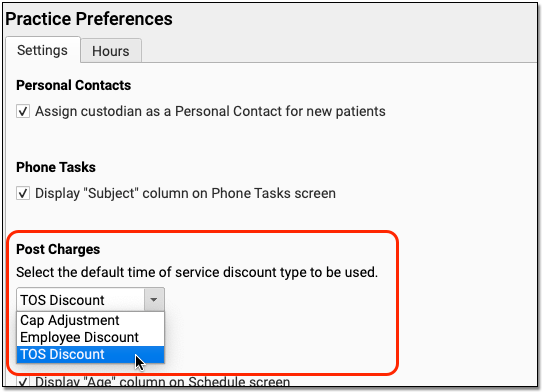
Use the Practice Preferences configuration tool to adjust your practice’s default TOS Discount. During your PCC 8.13 update, PCC copied your practice’s default TOS discount from the charge posting configuration in Practice Management. You can review and update this default in PCC EHR, and pick from any payment type in your PCC system that is marked as an “Adjustment” and is configured for charge posting.
Configure Form Letters for Encounter-Specific Needs
After your 8.13 update, your practice can create forms which populate vitals, provider, and location fields with information from the encounter in PCC EHR where they are generated.
Contact PCC Support for help configuring forms that pull in data from the encounter where they are generated.
Once encounter-specific forms have been added to your system, learn how to use them! Read Generate Patient Forms with Encounter-Specific Information in PCC EHR.
Create a Form that Includes Multiple Vitals Measurements
You can now include multiple vitals measurements per-visit on patient forms in PCC EHR. For example, if you take multiple blood pressures during a visit, you can include some or all of those measurements on a form.
If you would like to create form templates which allow you to include multiple vitals measurements per-visit, contact PCC Support.
Configure Forms to Automatically Include a Provider Signature
You can now create form templates in PCC EHR which automatically generate with a provider signature. Lab and radiology requisitions can also be configured to include an automated provider signature.
Automatic signatures can either be based on the provider who sees a patient, or a patient’s primary care provider.
Contact PCC Support for help configuring forms and requisitions which automatically generate with a provider signature.
Transition to Post Charges in PCC EHR
PCC introduced Post Charges in PCC EHR in 2020 with PCC 8.12. PCC 8.13 expands that functionality by adding TOS discounts, hospital charges, administrative fees, a new Billing History chart section, and other improvements.
Your practice may decide that now is the time to expand the use of Post Charges, so that your front desk, billers, and other staff can more quickly enter encounter and administrative charges and queue up a claim, all inside PCC EHR.
Turn on Post Charges for Appropriate Users
Before your staff can can post charges in PCC EHR, you must grant permissions to a user role. Administrative users at your practice automatically have access to Post Charges. You should review your user roles and decide which other users can post charges and queue up an insurance claim.
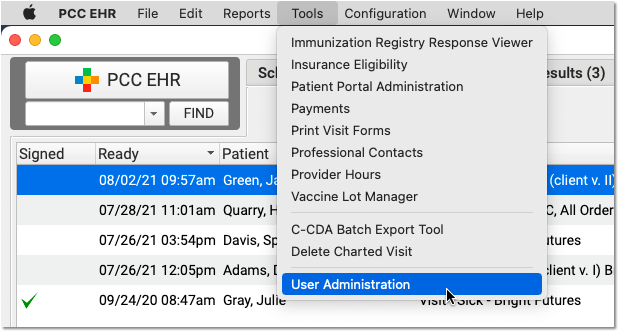
Open the User Administration tool and visit the Roles tab.
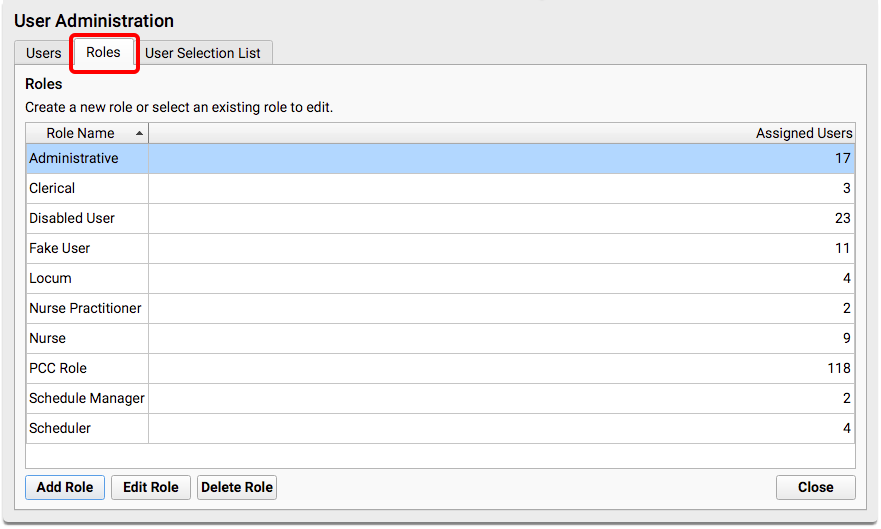
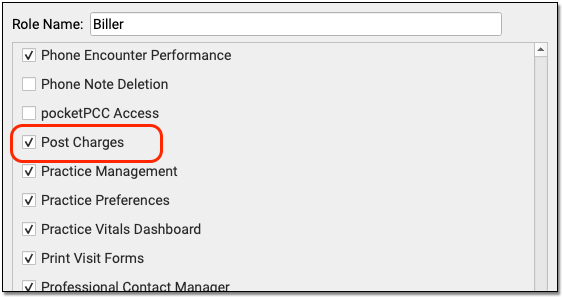
You can create a new “Biller” role, or use an existing role.
When you edit the role, add the new “Post Charges” permission.
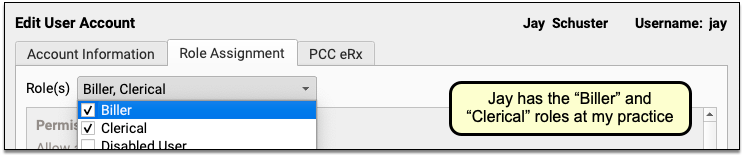
Next, review each user at your practice who will post charges and add the role.
For a more detailed guide to setting up roles and configuring user permissions, read Set User Roles for Permissions and Security.
Configure Your Practice’s Patient Details Protocol for Post Charges
As you post charges in PCC EHR, you can review a customizable Patient Details ribbon.
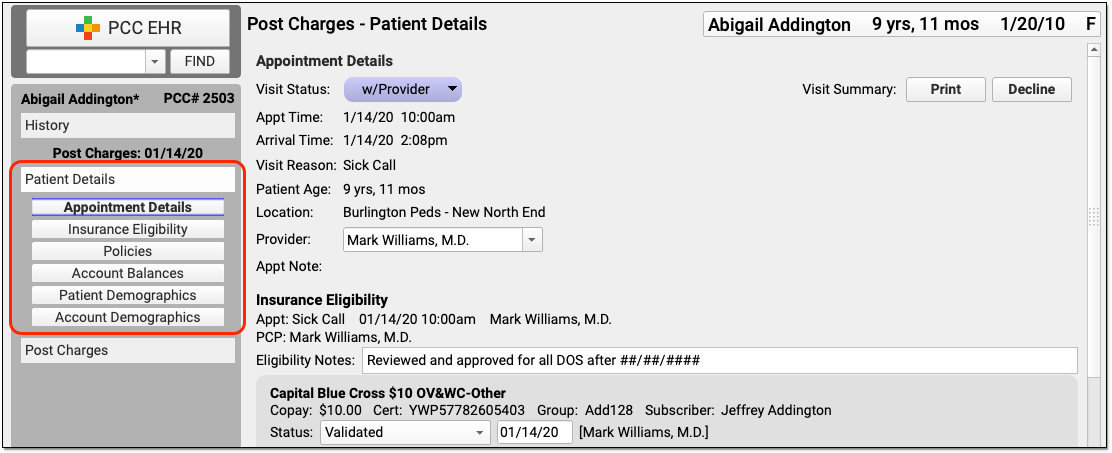
You can customize the Patient Details protocol to include any components your practice will need when they post charges.
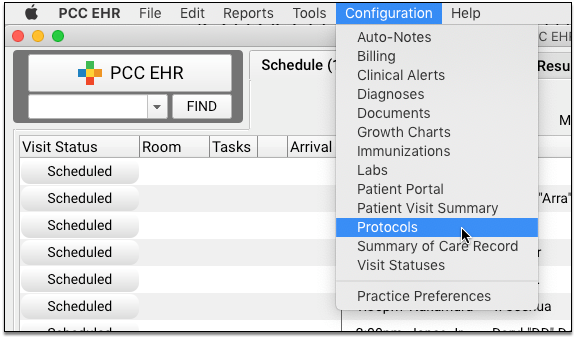
Select “Protocols” from the Configuration menu to open the Protocols Configuration window.
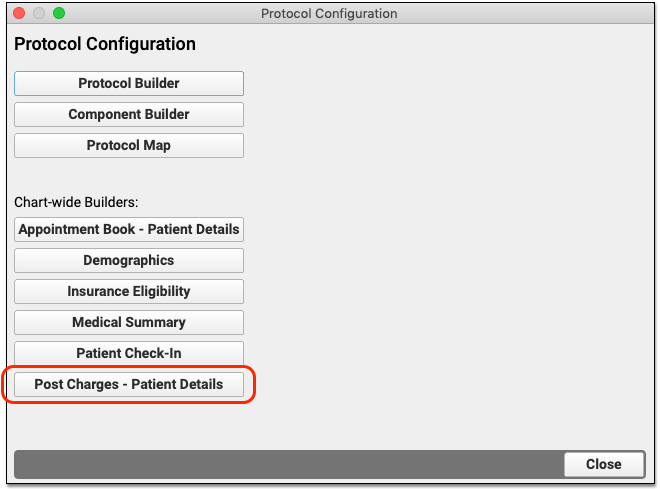
Click “Post Charges – Patient Details” to customize the protocol.
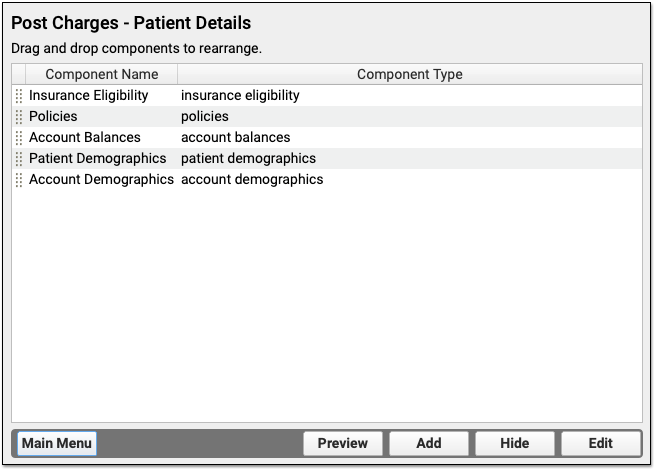
To learn more about how to add and customize components on a protocol, visit the Configure Chart Notes and PCC EHR Components section of learn.pcc.com.
Adjust Your Practice’s Workflow and Train Staff
When your practice decides to use PCC EHR to post charges, you will have many questions: When will you generate a TOS receipt? What admin fees does your practice add during billing? Who is watching the Schedule screen in PCC EHR, and do you watch for a signature before you post charges? How are you tracking “add ons” by the provider after charges are posted? You can work with your practice to develop a Post Charges workflow in PCC EHR. Your PCC Client Advocate can help by answering questions, customizing your electronic encounter form, and more. Get in touch!
Complex Billing Configuration Available: As you work in Post Charges, you may see due amounts change based on your selection and your practice’s configuration. PCC supports configurations for price schedules, copay rules, capitated plans that adjust off charges immediately, and Medicaid plans (where nothing reverts to personal due). Your practice can customize the billing behavior of any procedure for any insurance policy. The correct amounts and adjustments will appear in the Procedures component automatically.
Update Your Windows 7 PCs
Microsoft has ended all support for Windows 7, along with Windows Server 2008 (R2). Mainstream support for Windows 7 ended in 2015, and extended support ended on January 14th, 2020.
PCC EHR requires a workstation running on Windows 8 or higher (or MacOS 10.14 or higher). For more information, read Hardware Guide: Your Personal Computer and Equipment.