Configure Pre-Check-In
Select a Pre-Check-In Document Category
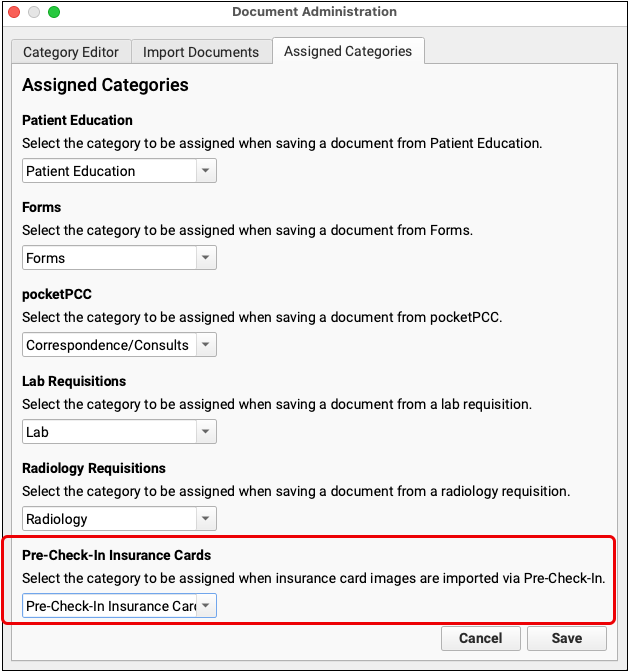
When Pre-Check-In is enabled, a new document category called “Pre-Check-In Insurance Cards” is automatically created. By default, insurance card images are added to this category. If you already have an insurance card category, or prefer to create a category with a different name, you can manage how Insurance Card Images are categorized through the Document Administration tool in PCC EHR’s Configuration menu.
Pre-Check-In Insurance Cards appears at the bottom of the Assigned Categories tab. Select your existing category in the drop-down menu, and click save.
Select Visit Reasons for Pre-Check-In
PCC EHR’s Visit Reason Editor includes two Pre-Check-In configuration options, so your practice can set which visit reasons should use Pre-Check-In and which should not.
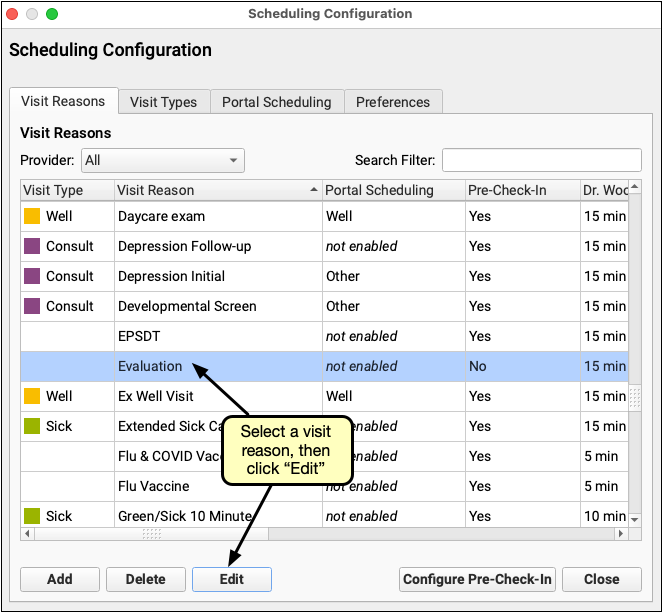
By default, all visit reasons are set to use Pre-Check-In. Open Scheduling from PCC EHR’s Configuration menu. In the Visit Reason tab, select a visit and click “Edit”.
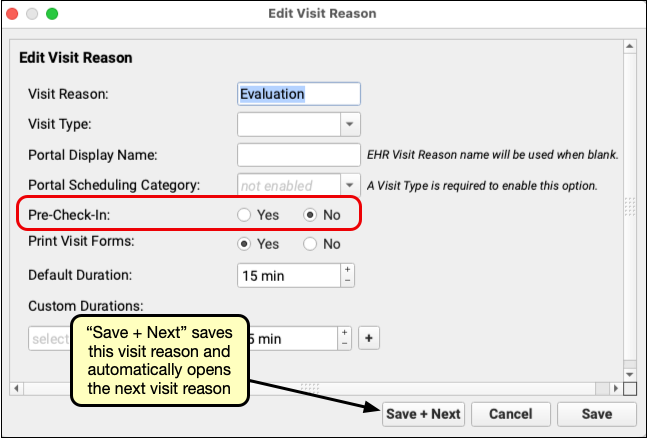
Edit Visit Reason includes a “Pre-Check-In” line with a “Yes” and “No” button. Selecting “No” will disable Pre-Check-In for the selected visit reason.
Patients scheduled with a visit reason set to “No” will not find the orange “Start Pre-Check-In” button when they log into the Patient Portal and will not receive the notification inviting them to complete Pre-Check-In.
Click “Save” to save your work and close the window or click “Save + Next” to save and automatically edit the next visit reason in your list.
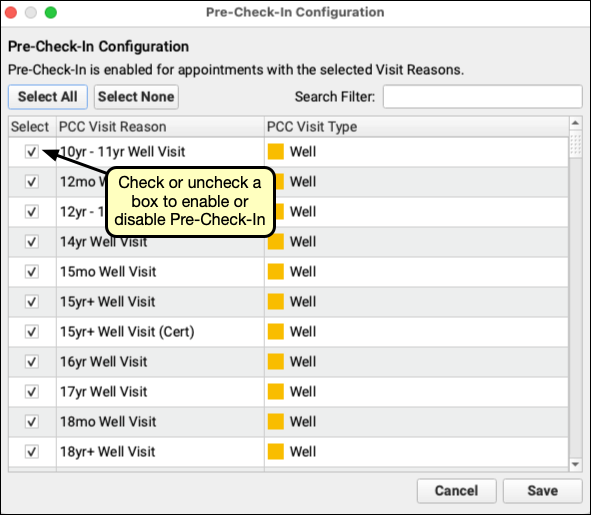
You can configure multiple visit reasons by clicking “Configure Pre-Check-In “ on the Visit Reason Configuration window. 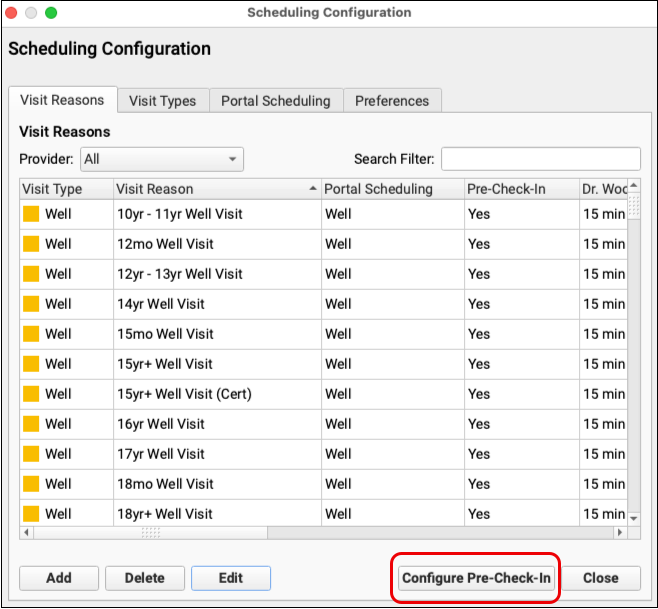
Pre-Check-In Configuration lists all your Visit Reasons with a column of check boxes. Use the Search Filter to narrow the list to the visit reasons you need, or work through the list line by line. Unchecking a box will disable Pre-Check-In for that visit reason.
