2024-08 Draft of Billing Features in PCC 10.1
PCC 10.1 includes new and updated tools for working with insurance policies, autoposting ERAs, sending personal bills, and more.
Contents
- 1 Instantly Review a Patient’s Active Policies
- 2 Edit Insurance Plans in PCC EHR
- 3 Enter a Custom Transaction Date When Autoposting ERAs
- 4 Automatically Change Expected Copay to $0 When a Patient Has Medicaid
- 5 Review a Posted ERA for Special Cases
- 6 Review Provider Level General Adjustments on ERAs
- 7 Review Procedure Names as You Manually Post Insurance Payments
- 8 Review Detailed Claim History in PCC EHR
- 9 Read Claim Acknowledgements and Other Responses
- 10 Send Personal Bills in PCC EHR
- 11 Review a Log of Bills Sent
- 12 Edit Your Practice’s Billing Messages
Instantly Review a Patient’s Active Policies
While working with a patient, click on the Patient Information banner to see a list of their active insurance policies.


Instant access to policy information can be useful when selecting immunizations, making lab order and prescription decisions, or when speaking to a family about outstanding balances.
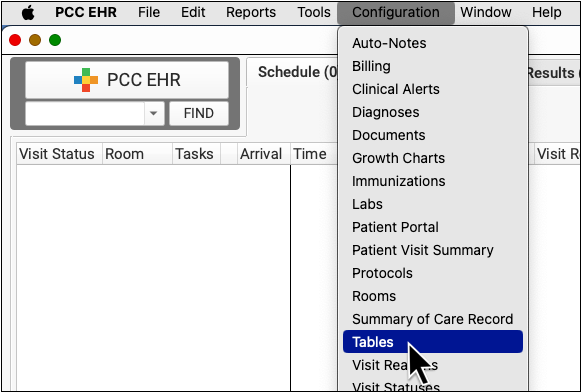
Edit Insurance Plans in PCC EHR
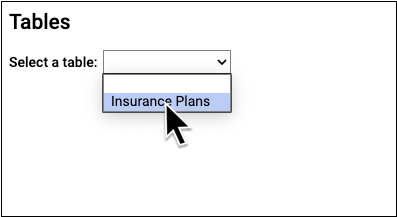
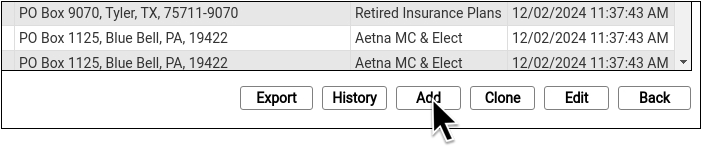
When you need to edit your practice’s list of insurance plans, open the Tables tool and select the Insurance Plans table.
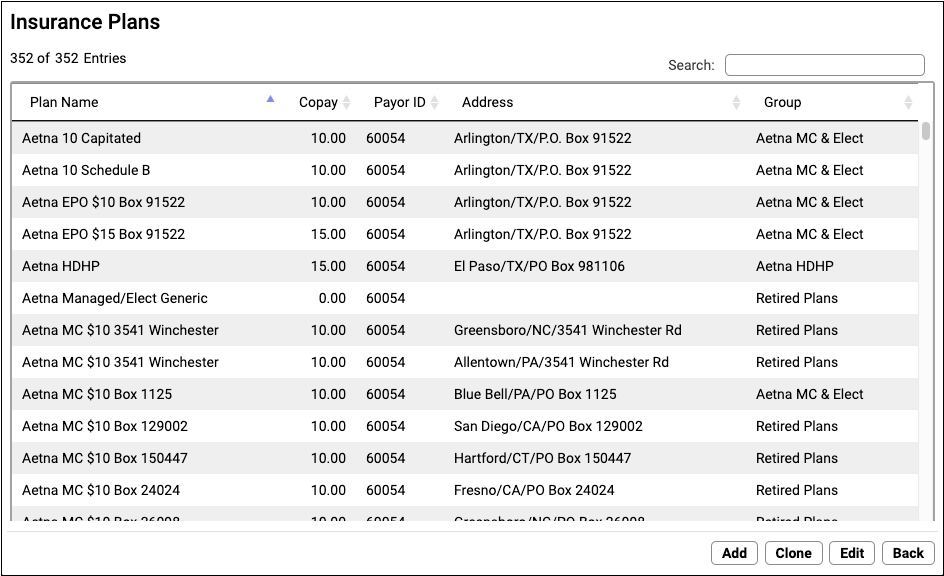
Click on a column header to sort plans. Use the Search field to find a plan.
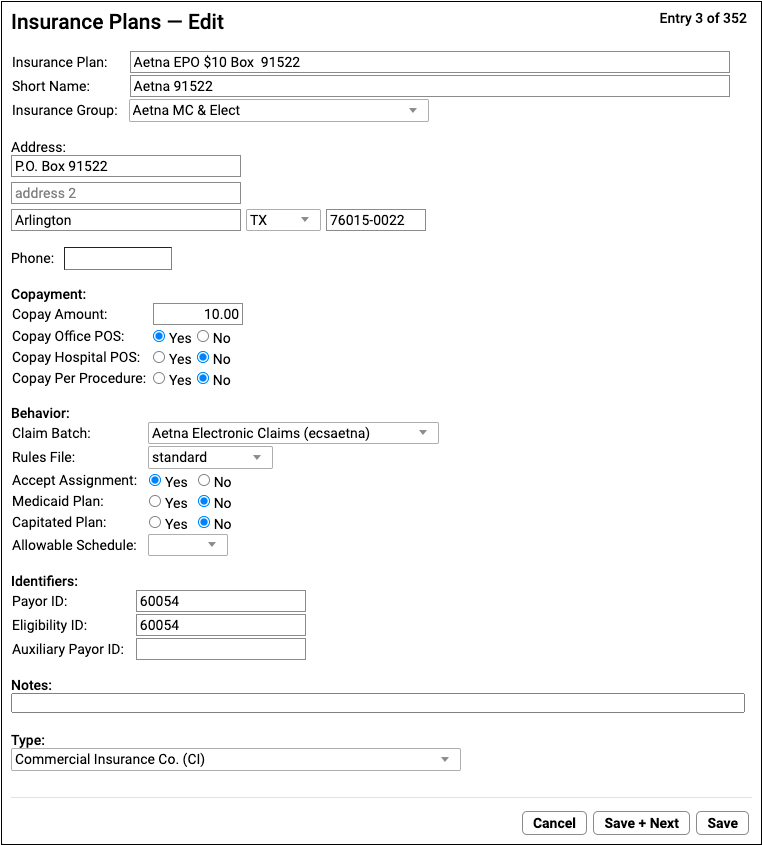
Double-click to open a plan and review details.

When you need to add a new plan to your system, click “Clone” or “Add”.

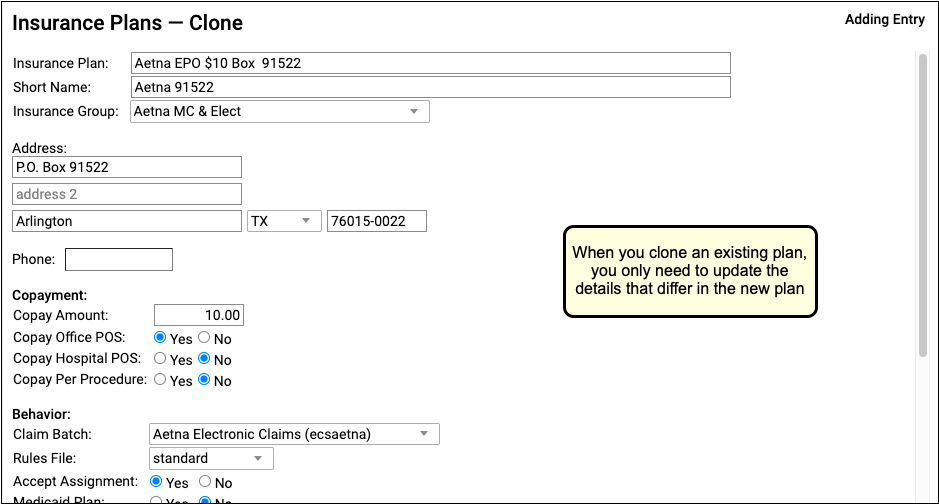
Cloning an existing plan ensures that important configuration settings will carry over to the new plan.
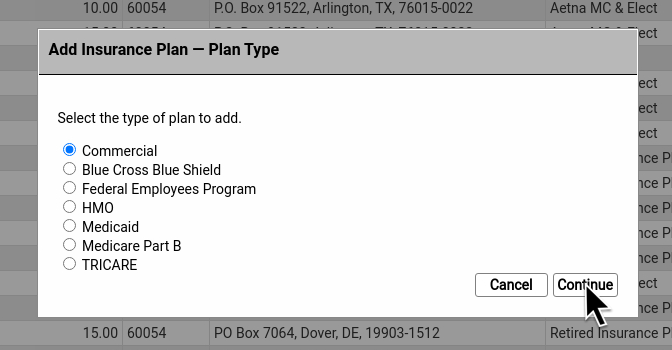
When you add a plan from scratch, PCC EHR prompts you to indicate the type of plan.
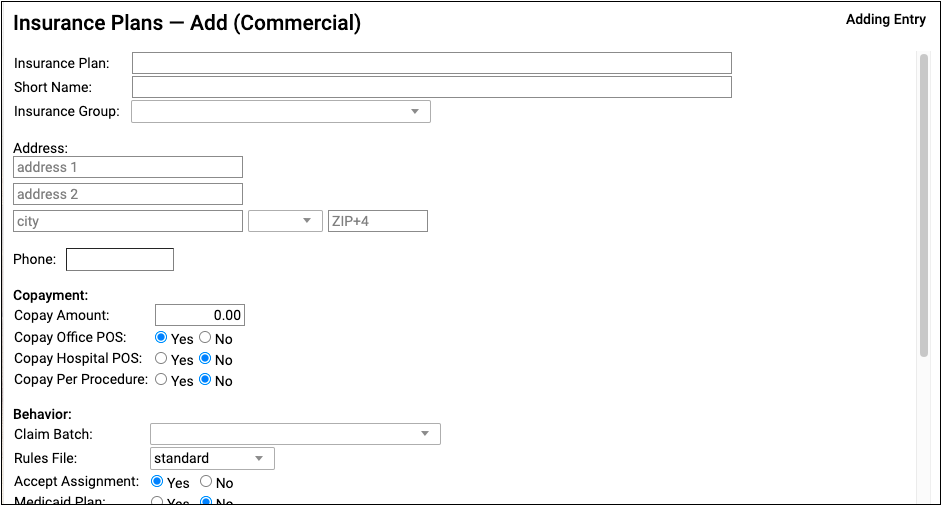
For a detailed how-to procedure and a reference to each of the settings for insurance plans, read Update Insurance Plans on Your PCC System.
Enter a Custom Transaction Date When Autoposting ERAs
When you autopost an ERA in PCC EHR, you can now optionally override the payor’s remittance date and enter a different transaction date.
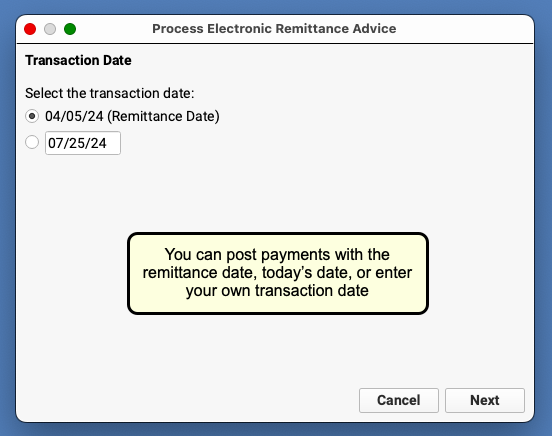
You can accept the default (the Remittance Date on the ERA), select today’s date, or enter a custom date. Click “Next” to continue. When PCC EHR enters the payments and adjustments from the ERA into your system, it will use the transaction date that you indicated.
For a complete guide to autoposting insurance payments, read Post Insurance Payments.
Automatically Change Expected Copay to $0 When a Patient Has Medicaid
When you autopost ERAs from a private insurance payor in PCC EHR, and a patient also had an active Medicaid policy for the date of service, the expected copay will be reduced to $0.
Normally, when you process a payor’s ERA, PCC EHR updates the expected copay to match the amount specified by the payor. However, if a patient also has a Medicaid plan active for that date of service, the expected copay amount should be $0 and any personal balance due should be billed to Medicaid.
PCC EHR will only override the payor’s copay expectation when a patient has a policy configured as a Medicaid plan, with the Medicaid setting set to “Yes”. PCC also supports custom configuration for other types of plans, such as Medicaid HMOs. Contact PCC Support if you need help.
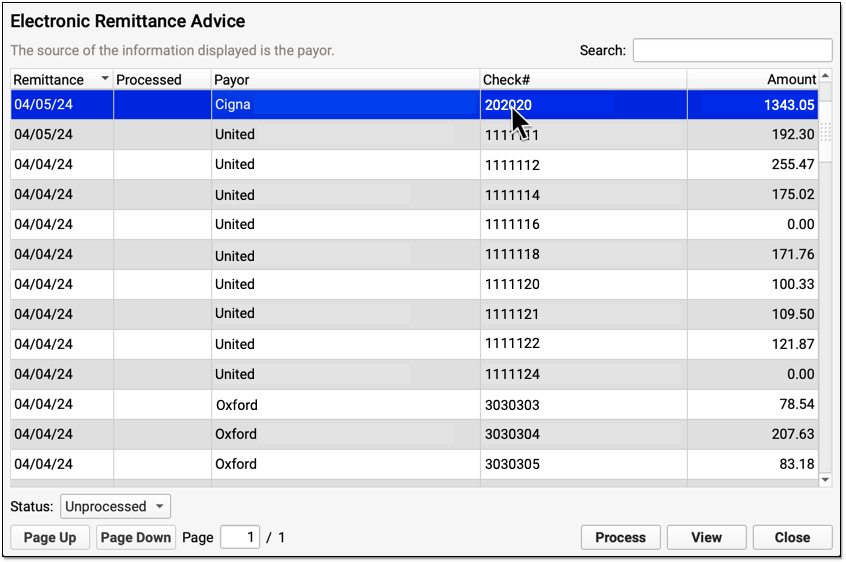
Review a Posted ERA for Special Cases
After you autopost an ERA, you can use the Special Cases filter to find circumstances that may require your attention.
You can see a summary of both Posting Exceptions and Special Cases in the Autopost Processing Summary.
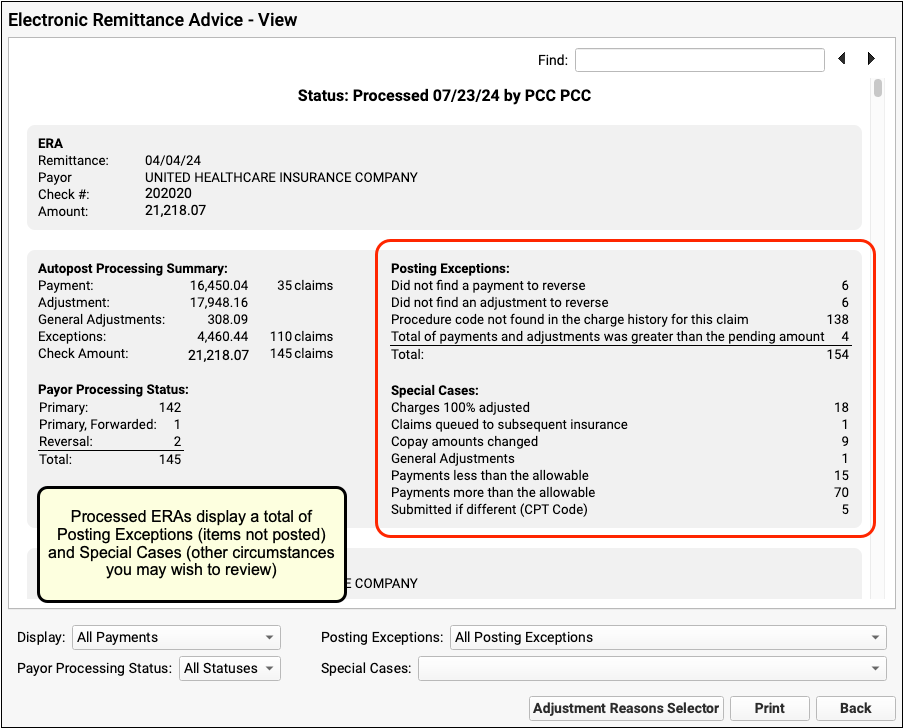
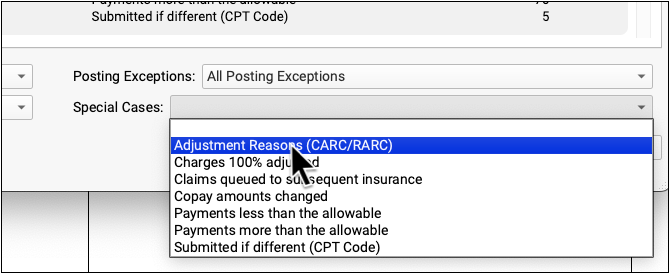
To take a look at all claim responses with one of the special cases, select it from the filter at the bottom of the screen.
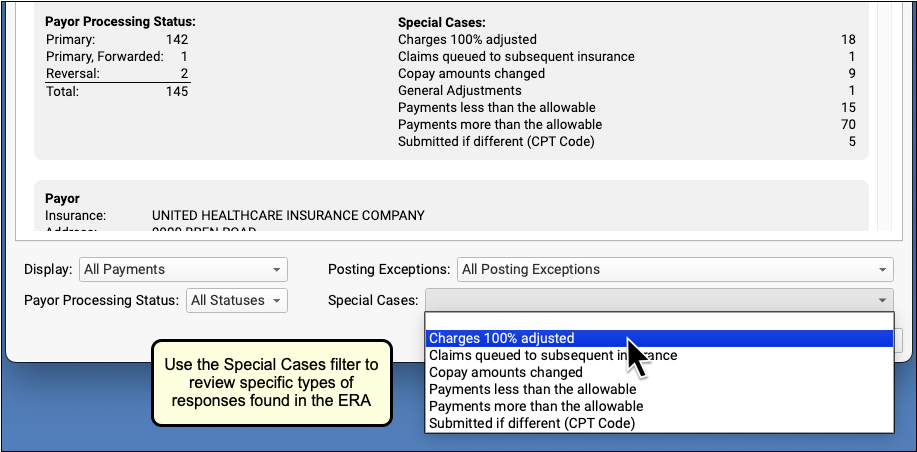
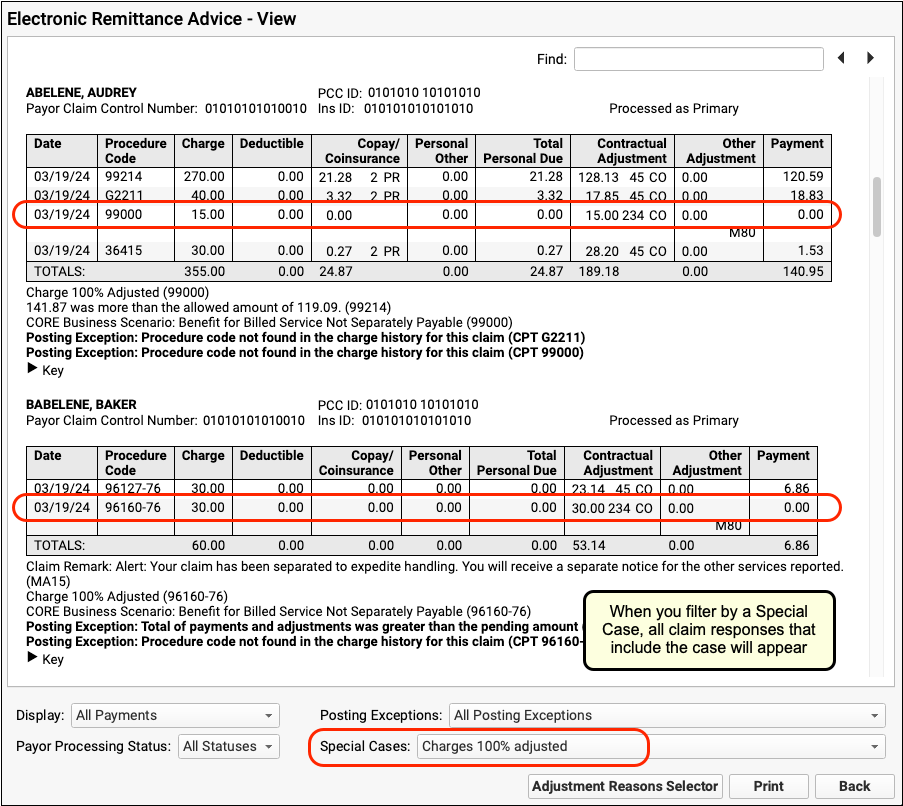
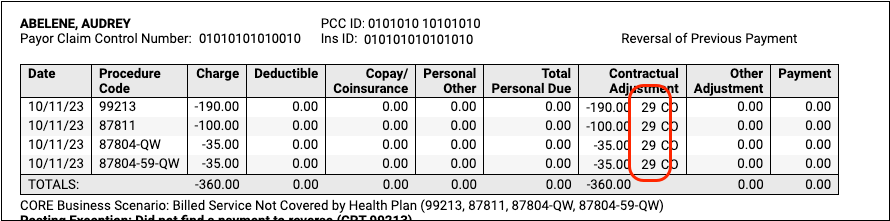
The ERA will change to display claim responses that include the special case. In the example above, the ERA is filtered to show only those claim responses where a charge was 100% adjusted.
Review a Posted ERA By Adjustment Reason
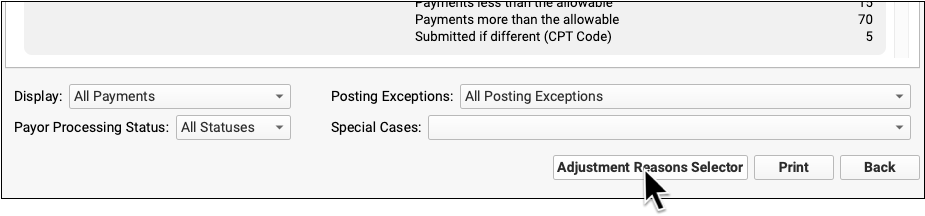
You may wish to review all the responses on an ERA that included specific CARCs and RARCs.
First, click “Adjustment Reasons Selector” to select adjustment reasons.

Find and select the adjustment reasons you are looking for.
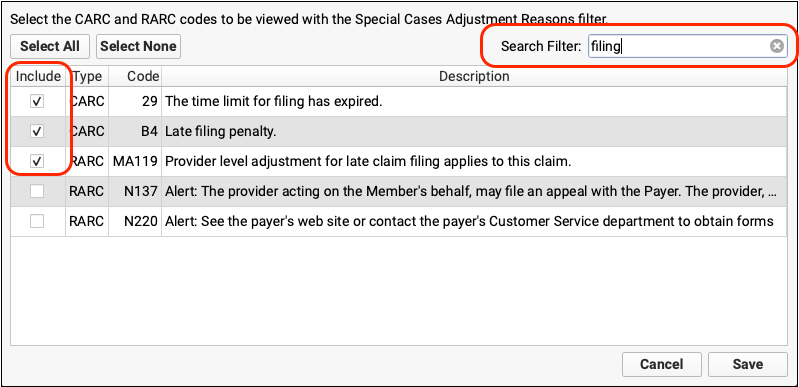
Click “Save”, then select the Adjustment Reasons special case.
The ERA will be filtered to display only encounters that include your selected adjustment reasons.
Review Provider Level General Adjustments on ERAs
Insurance payors sometimes include sections on ERAs that are not associated with specific claims. In PCC 10.1, these provider level adjustments (also known as “general adjustments”) will appear along with other responses in the Electronic Remittance Advice tool.
After you autopost an ERA in PCC EHR, any general adjustments will be indicated in the totals and in the Special Cases list in the Autopost Processing Summary.

General Adjustment sections appear at the bottom of an ERA, underneath other encounters. You can optionally use the Special Cases filter to find them quickly.
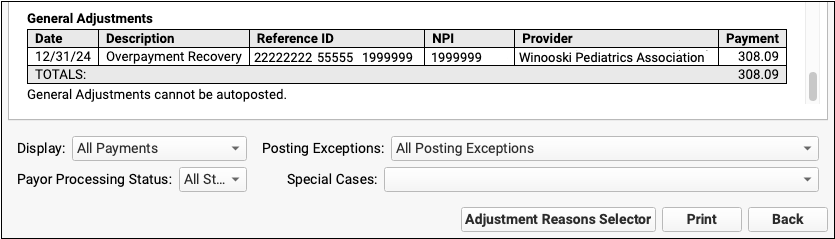
The most common reason for one of these adjustments is when a payor communicates about a takeback but fails to specify the encounter.
Review Procedure Names as You Manually Post Insurance Payments
As you enter payments and adjustments in the Insurance Payments tool in PCC EHR, you can click on a billing code to review the names of the procedures.
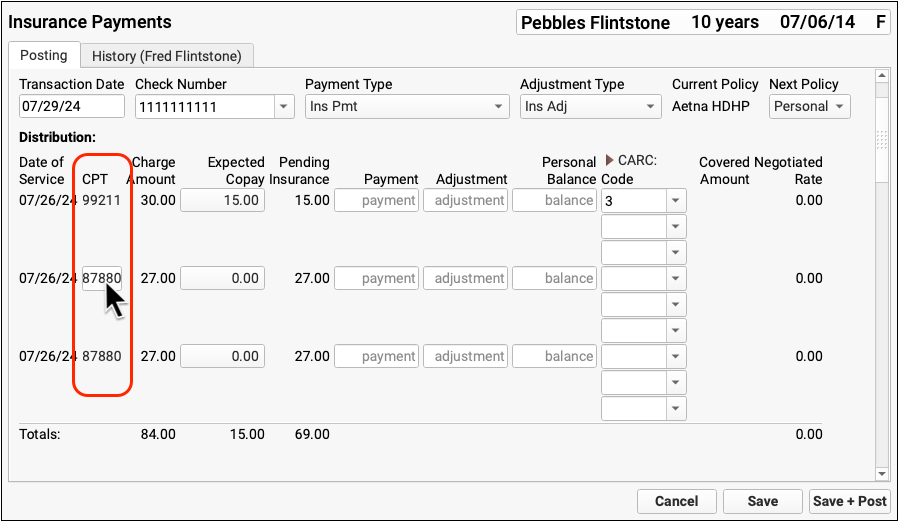
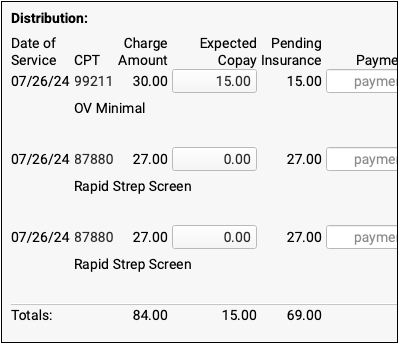
Click on any code to show or hide all procedure names.
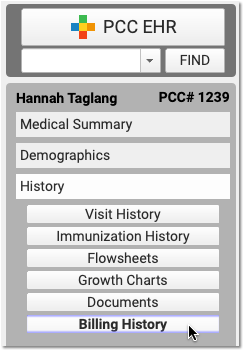
Review Detailed Claim History in PCC EHR
When you want to know the status of a claim and when it was accepted and paid, open the Billing History in the patient’s chart and select the encounter.

Use the Claim History component to review the complete history of claims for the encounter. You can see when a claim was queued, held, delayed, processed, received by the payor, and more.
For each event, you can see the date, the event, and the insurance plan. When available in your system’s records, the component also displays: additional details, the claim ID, and the user who performed the action.
If an encounter was submitted multiple times, the claim history will show you each submission along with claim acknowledgements and other events.

For a reference to all possible claim events in a claim history, read Work with a Patient’s Billing History.
Read Claim Acknowledgements and Other Responses
When you need to dig deeper into a problem claim, you may want to review the claim submission log, acknowledgement, or the electronic response from the payor. When an electronic record is available for a claim event, you can click on a link to open it.

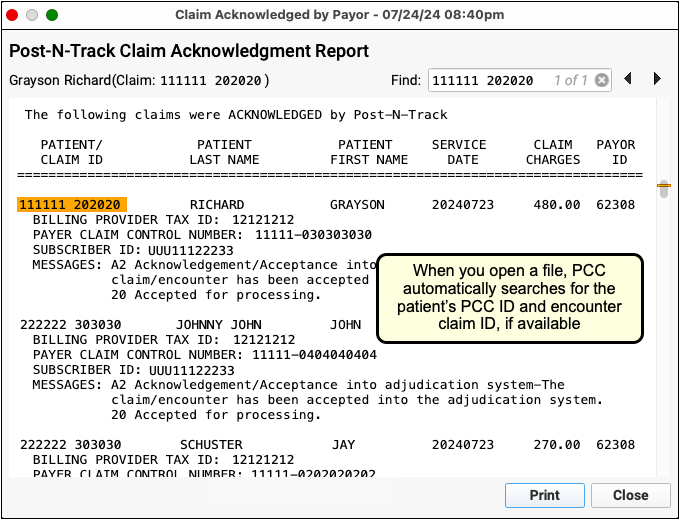
PCC EHR can display claim acknowledgements, rejections, and other responses for most claims.
Send Personal Bills in PCC EHR
Follow the procedure below to send personal statements to families.
Open the Bills Tool
When you are ready to send out personal bills, open the Bills tool in PCC EHR.

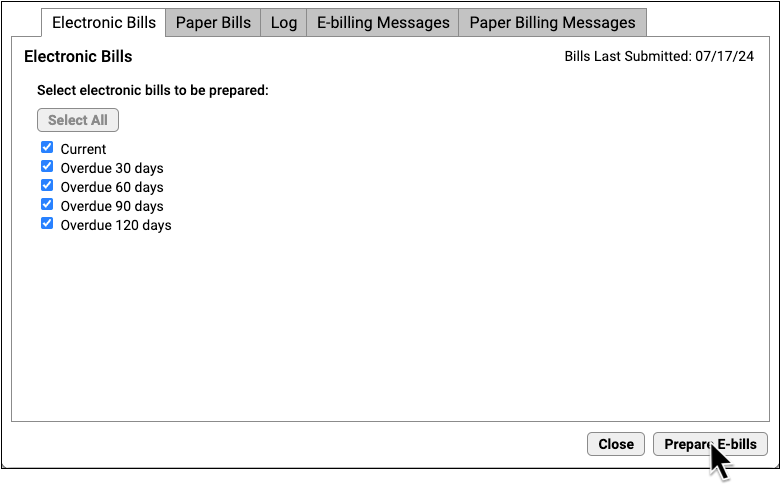
Select Ebills or Paper Bills
If your practice sends some or all bills out electronically to a service, you can select whether you are sending e-bills or paper bills.

Select Age of Bills to Send
Optionally adjust which bills you wish to generate, based on age of the oldest balance on the bill. Or click “Select All”.
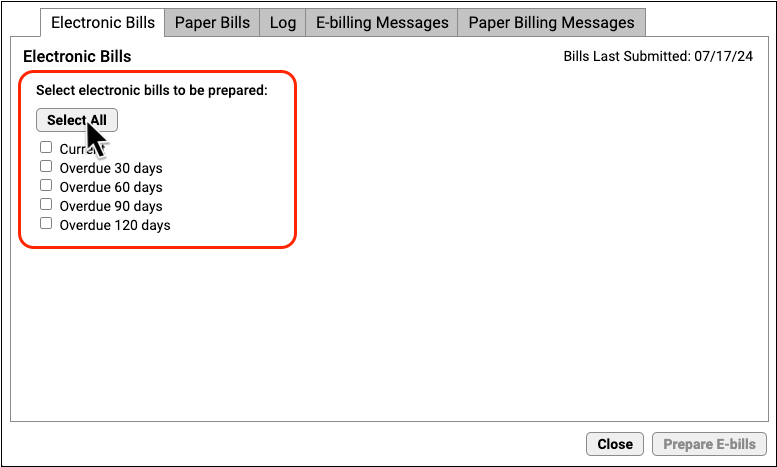
For example, your office may wish to send current bills to your electronic printing service but print 90+ or 120+ bills manually.
Click Prepare E-bills
Click “Prepare E-bills” (or “Prepare Bills”) to process account balances and prepare bills. They will not be sent yet.
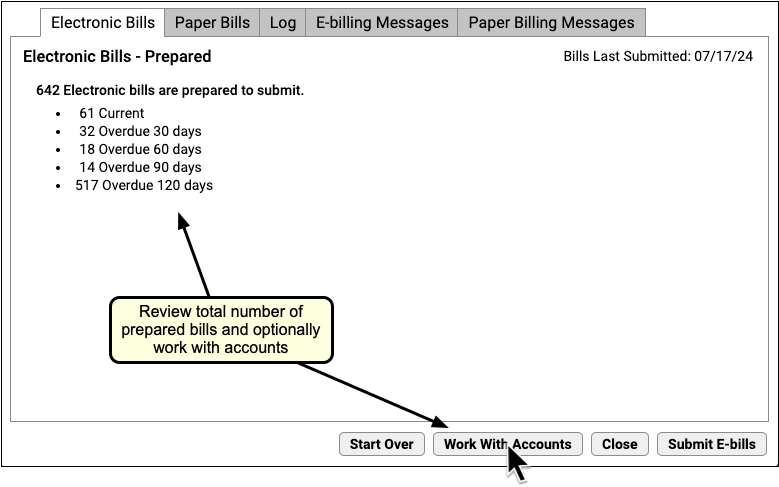
Review Totals and Optionally Work With Accounts
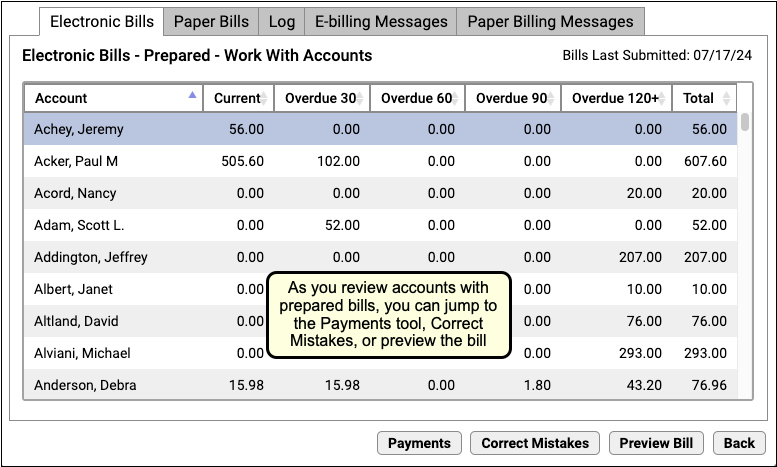
Review the total number of prepared bills. Optionally, click “Work With Accounts” to see all families for whom a bill was prepared.
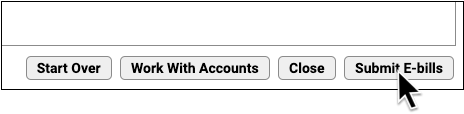
Click “Submit E-bills” To Send Bills
When you are ready to send out the bills, click “Submit E-bills” (or “Submit Bills”).
When bills are sent, the account’s individual bill cycle and “Last Bill Sent” date will be updated, indicating that they have received a bill this month.
Automatic Billing Cycle: Depending on your practice’s configuration, PCC automatically tracks each account’s monthly billing cycle so a family won’t receive more than one bill per billing period. With cycle billing, you can run bills every day and the system will only generate bills for accounts that had their last bill sent more than 28 days ago or incurred new charges. To learn about your practice’s cycle billing settings, contact PCC Support.
Review a Log of Bills Sent
Use the Log tab in the Bills tool to review when and how your practice generated bills.
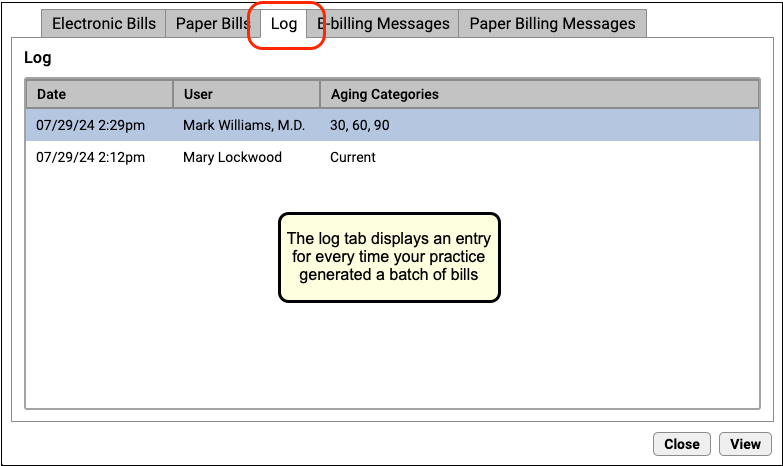
Double-click on an entry to see details of the bill run.

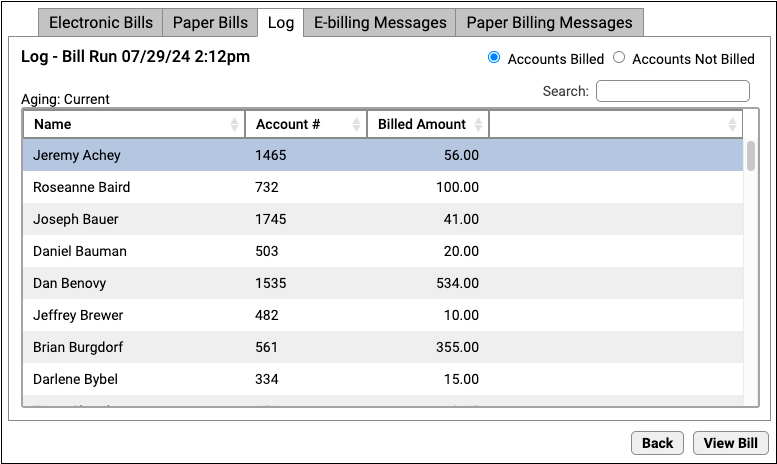
The log of the bill run displays each account that received a bill, their account number, and the amount billed. You can click “Accounts Not Billed” to see a list of accounts that did not receive a bill.
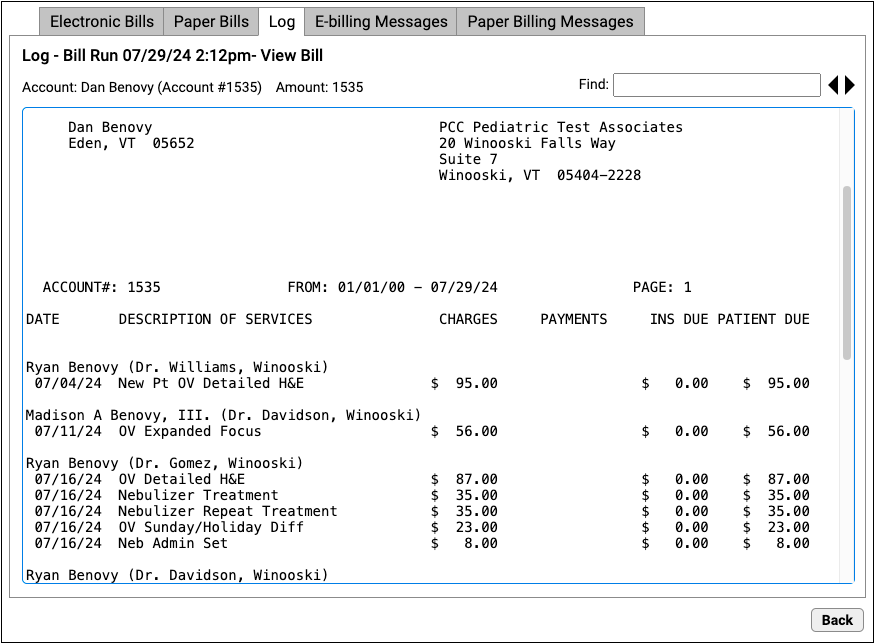
Double-click on a family to see the text that appeared on their bill.

Edit Your Practice’s Billing Messages
Personal bills include a text area that displays a custom billing message from your practice. You can adjust the billing message that appears for both electronic bills and bills you print at your office.
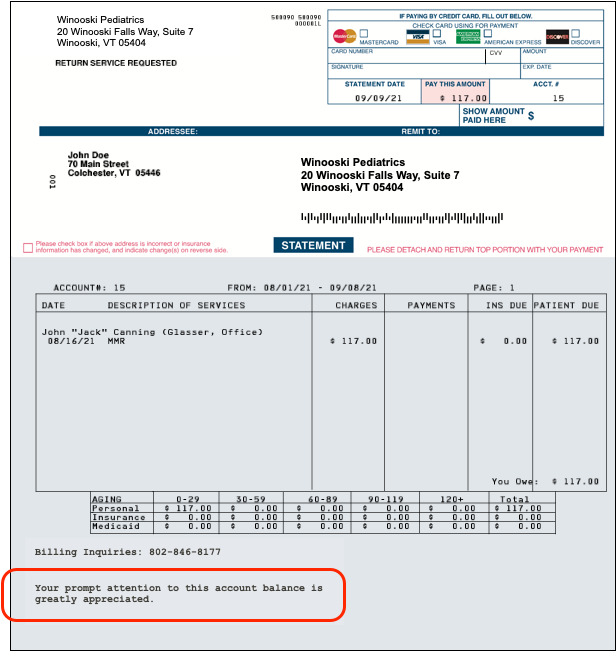
In the Bills tool, click on either the E-billing Messages or Paper Billing Messages tab to review your current billing messages.
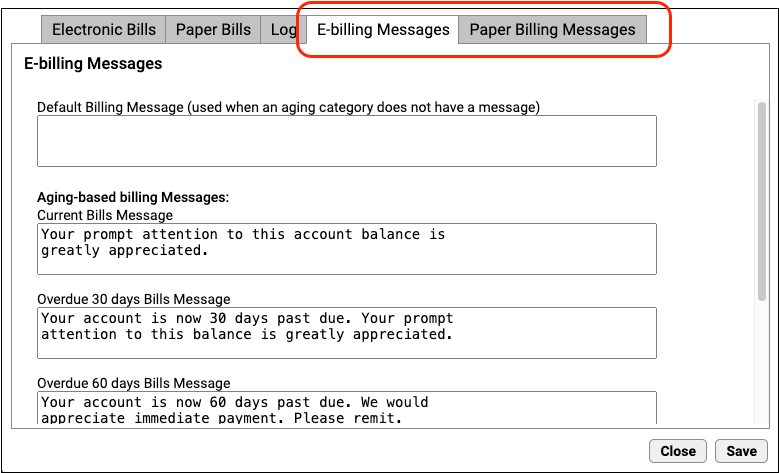
You can enter a default bill message for all bills and optionally enter bill messages for each bill age category (bills containing balances that are 30, 60, 90, or 120 days past due). As you type, the fields automatically constrain your message to the printing limit for bills printed by the electronic billing service or at your practice.
Click Save to save any changes to your billing messages.