Patient Portal Self Scheduling
Contents
Streamline your scheduling and reduce appointment requests with Patient Portal Scheduling. Your patients and families can now schedule themselves through the Patient Portal with just a few clicks.
Configure Portal Scheduling: Portal Scheduling requires configuration before using. To learn how to enable, configure, and manage Portal Scheduling, jump to Configure Self Scheduling in Patient Portal on this page. Download a self-scheduling setup checklist here.
Video: Watch a video overview about configuring and using patient self scheduling here.
Scheduling as a Patient Portal User
Select a Visit Category and Patient
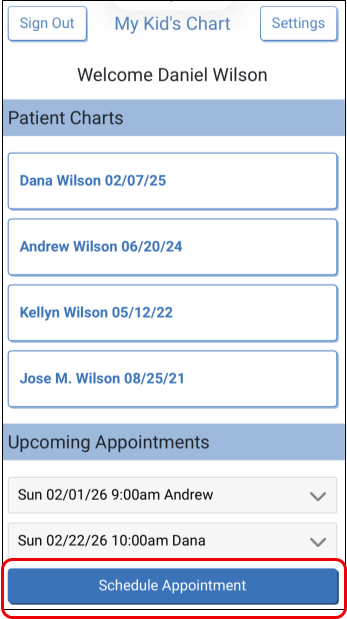
From the patient portal home page, click “schedule appointment” to begin.
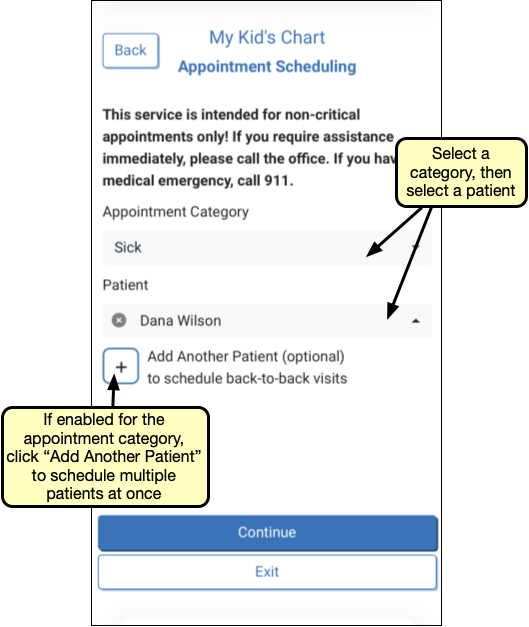
Select a patient and visit category. If enabled in Portal Scheduling Configuration, additional patients can be scheduled by clicking the “Add Another Patient” button.
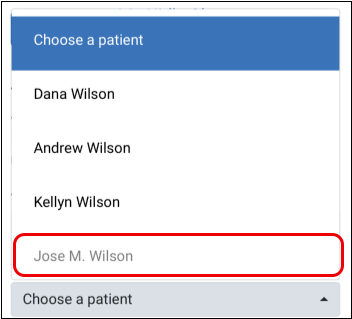
Patients with privacy enabled, or who have a status flag that prevents scheduling, or are assigned to a care center that does not use patient portal scheduling, cannot be selected and are marked with “Please Call to Schedule”.
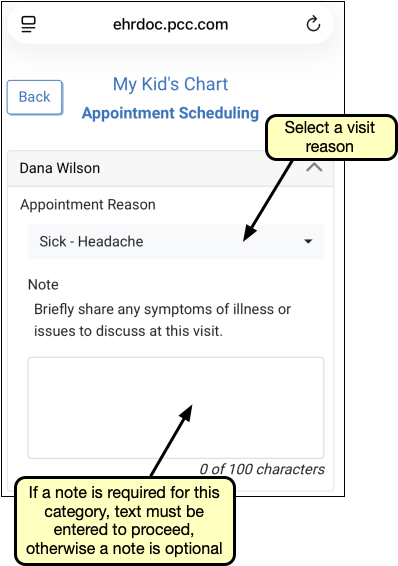
Select a Visit Reason and Add a Note
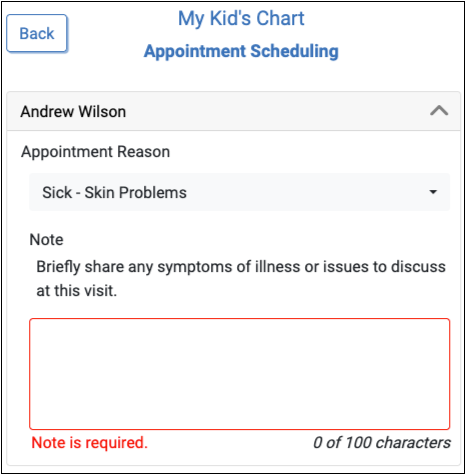
For each patient, select a specific visit reason within the category, then optionally add a note such as symptoms, discussion subjects, or other information relevant to this appointment.
When scheduling multiple patients, the visit reason type for each patient must match. After selecting a visit reason for the first patient, the remaining patients will be limited to visit types color coded to match the first selected visit reason.
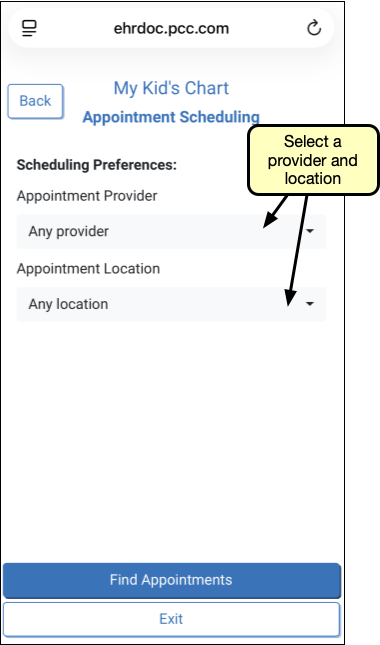
Select a Provider and Location
Select a provider and location from the “Appointment Provider” and “Appointment Location” menus. “Any Provider” and “All Locations” are available options and will check for availability across all available providers and all available locations.
When scheduling in the Vaccine Only category, you do not have the option to select a provider, all available providers are considered for vaccine only appointments.
Select an Appointment Time Slot
The patient portal will find and offer all available appointment time slots that match the visit category, provider, and location you selected. If no matching time slots exist the portal will display “There are no appointments that meet your criteria.”
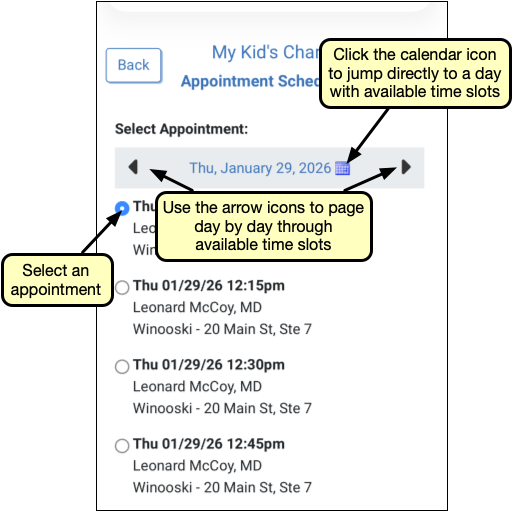
Use the arrow buttons to page day-by-day through available appointment time slots, or click the calendar icon to view available dates a month at a time.

After finding and choosing an appointment time slot, click “Select Appointment”.
Confirm and Schedule
Review the date, time, location, provider, note and visit reason for each patient. Then click “Schedule” to complete scheduling.
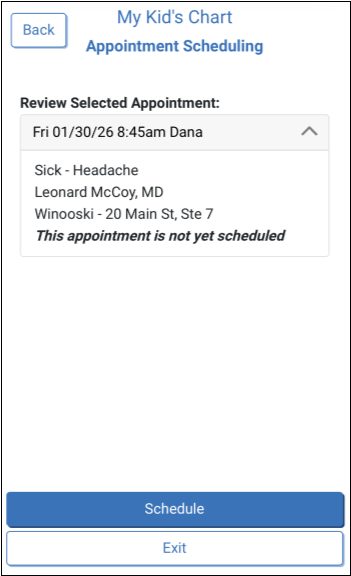
At any time, prior to clicking “Schedule” you click “back” to return and change selections in a previous step, or click “Exit” to return to the patient portal home page without making an appointment.
The appointment immediately appears in the Appointment Book and on PCC EHR’s Schedule queue, where it can be reviewed, rescheduled, and managed just like any other appointment.
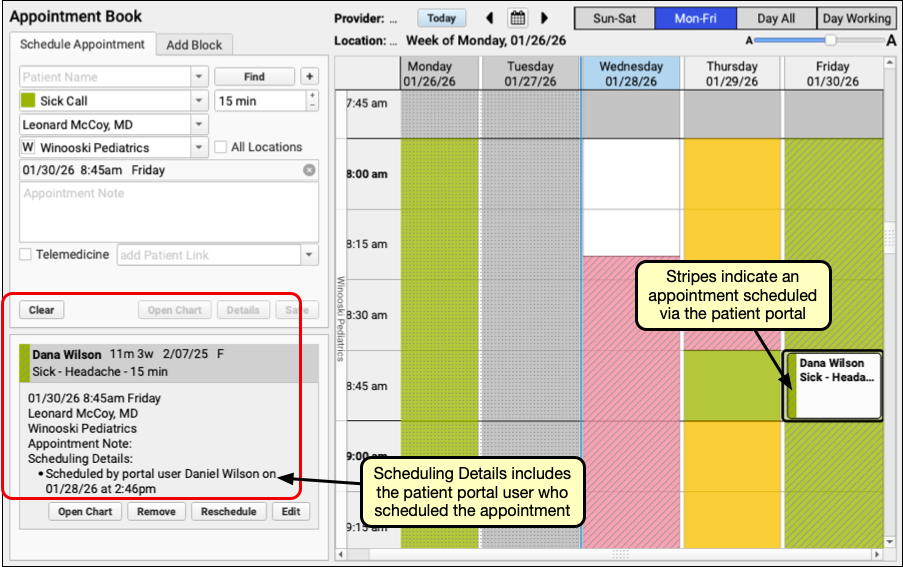
Appointments scheduled through the patient portal marked with a stripe pattern in the Appointment Book and the visit reason column of the Schedule queue.
Configure Self Scheduling in Patient Portal
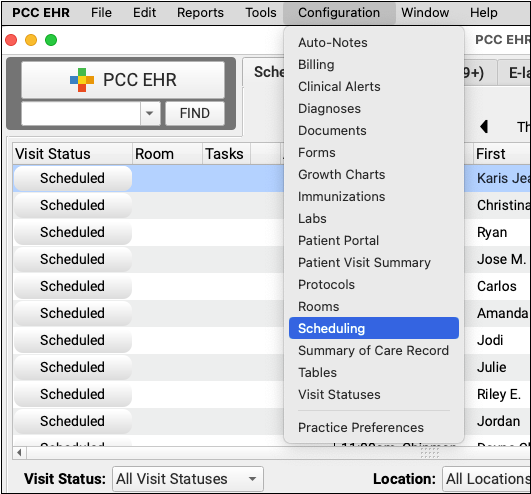
Patient Portal Scheduling is configured through PCC EHR’s Scheduling Configuration tool in the Configuration menu. Your practice can complete configuration of Portal Scheduling then make it available to your patients and families.
Portal Scheduling Prerequisites: Self scheduling uses PCC EHR’s Visit Types feature to link patient portal scheduling to Appointment Book. If your practice has not set up visit types, configure visit types before continuing.
Open the Scheduling tool from PCC EHR’s Configuration menu, and select the Portal Scheduling tab.
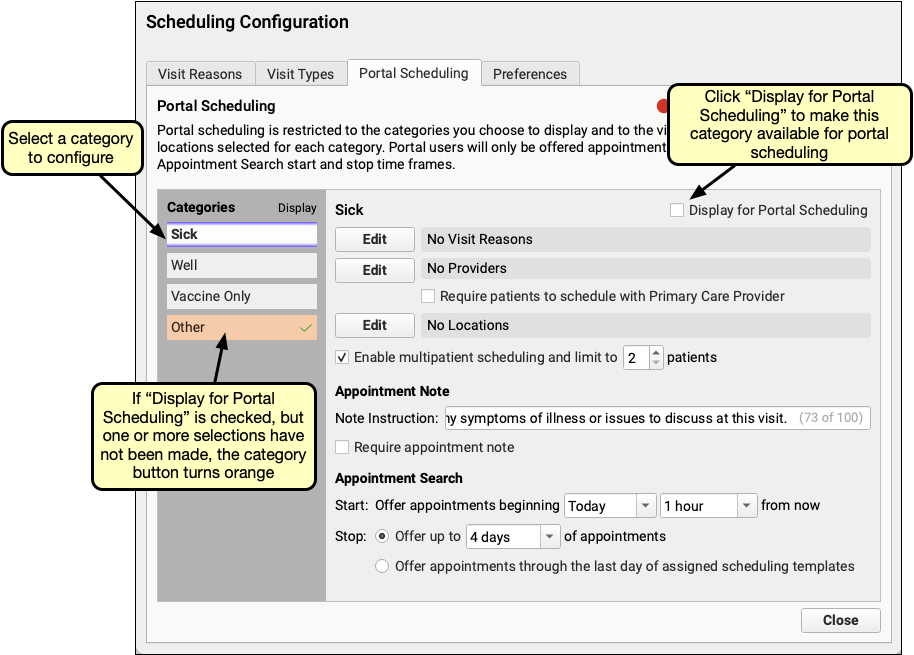
To manage each Portal Scheduling category, click on the category’s button on the left side of the portal scheduling configuration tab.
As you make your way through Portal Scheduling Configuration, the category button for any category enabled but not completely configured, will appear in orange. The edit button for Visit Reasons, Providers, or Locations will also appear in orange for enabled categories where no selection has been made.
Configure Portal Scheduling Categories
For each scheduling category, do the following:
Select Categories to Display
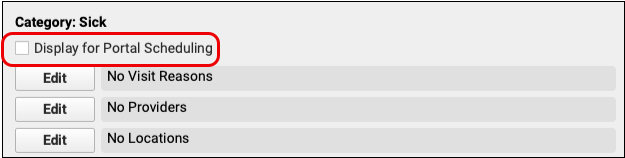
Each category is optional. For each category you intend to use, check “Display for Portal Scheduling”.
Select Visit Reasons
Click “Edit” on the Visit Reasons line. Visit reasons you choose here will be available for scheduling through the patient portal under this category.
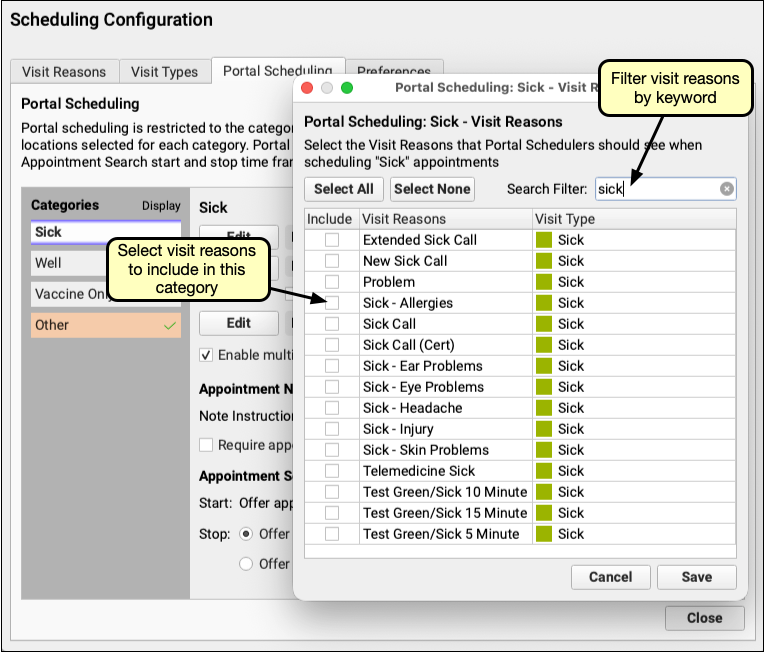
Ensure that you’re selecting appropriate visits for each category. The Well category begins searching for available appointment time slots using the patient’s Next Physical Due Date. Adding visit reasons other than well visit reasons may push the first available appointment too far into the future to be useful.
For the Vaccine Only category, some practices may find it helpful to create a separate visit reason for each vaccine, such as a COVID Vaccine visit or a Flu Vaccine visit.
After making your selections, click “Save”.
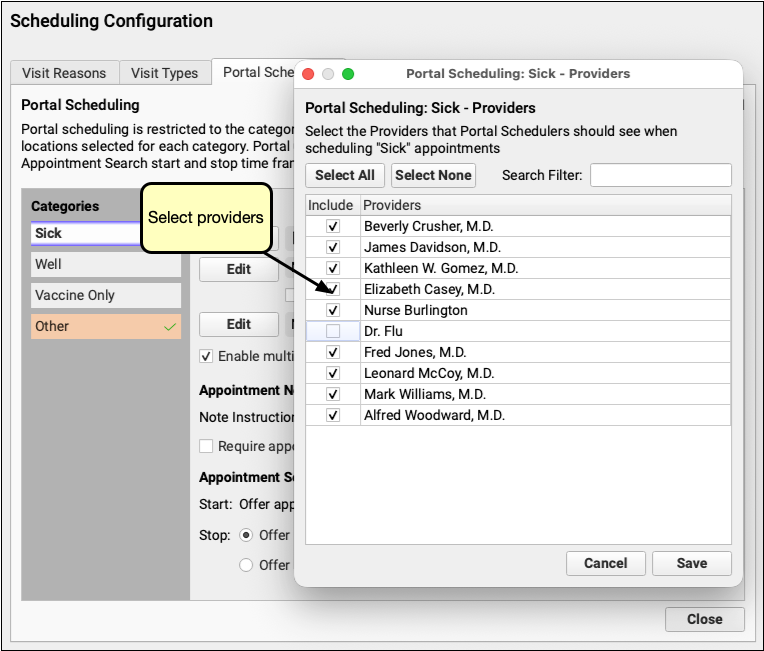
Select Providers
Click the “Edit” button on the Providers line to choose providers for the category.
Select the providers that handle the visit reasons you selected above. You may wish to exclude providers that are placeholders for scheduling, such as an “Office” or “Flu” provider, or specialists who you would prefer to schedule over the phone.
The Vaccine Only category will not offer patient portal users the option to select a provider when scheduling. You are selecting providers who schedule for your Vaccine Only appointments, but when scheduling, all matching time slots for all providers you select here are offered.
Click “Save”.
Select Locations
Click the “Edit” button on the Locations line.
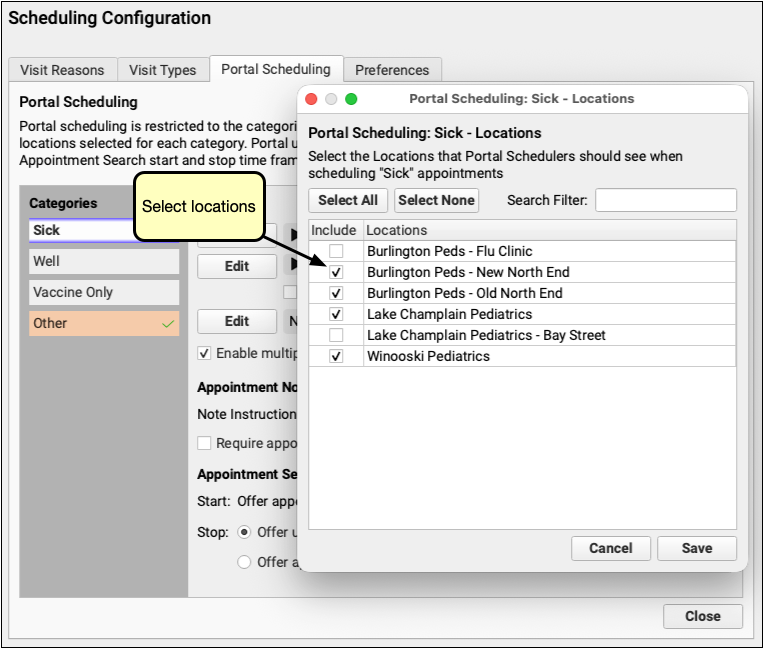
As with Visit Reasons and Providers, select which locations should be available for portal scheduling. If you have locations that have odd hours or need more attention when scheduling, such as a pop-up flu clinic, you may wish to leave those unchecked.
Click “Save”
Configure Portal Scheduling Search
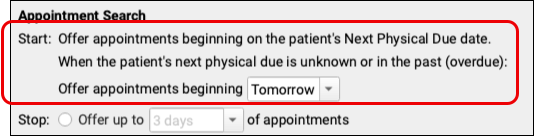
Set the appointment search range for each category. The patient portal searches for time slots matching the criteria set during scheduling. The range of time from first available time slot to the last is set under “Appointment Search”.
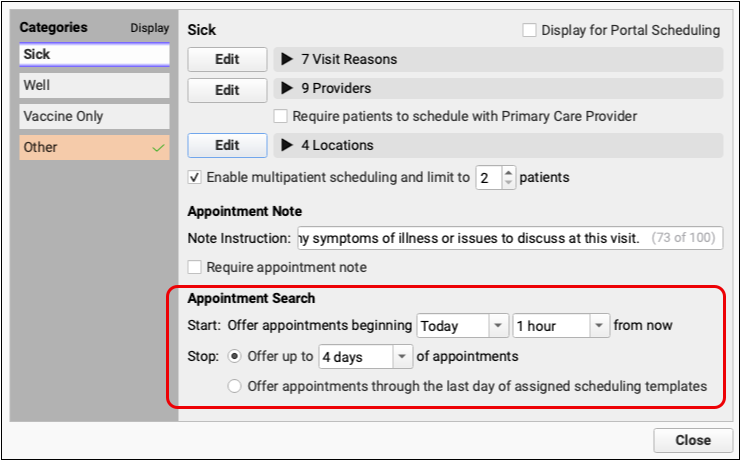
“Start” sets the earliest time slot the patient portal offers for this category.
The Sick, Other, and Vaccine categories can be set to offer appointments beginning the day of scheduling, “Today,” or the following day, “Tomorrow.” If “Today” is selected, indicate how soon appointments should be offered, from 10 minutes to 3 hours.
The start date for a Well Visit uses the patient’s Next Physical Due date. If that due date is in the past or is blank, portal scheduling will offer appointments beginning on the current or following day, depending on your choice here.
“Stop” is how far into the future visits in that category can be scheduled.
The patient portal can be set to limit appointments for each category from from 1 day in the future to 18 months in the future. You may wish to limit sick visits to a matter of days or a week, as it is unlikely someone will need to schedule a sick visit a month in the future.
Alternately, allow the patient portal to offer appointments through the end of your assigned schedule, so users can schedule visits as far into the future as Appointment Book is configured.
Set Multipatient Scheduling
By default, multipatient scheduling is enabled for each scheduling category and is set to a maximum of two patients. When available, patient portal users can select additional patients, up to the maximum set here.
Enable or disable multipatient scheduling using the checkbox under each scheduling category, and set the maximum number of patients.

Configure Portal Scheduling Preferences
Open the Preferences tab in the Visit Reasons Configuration tool from the Configuration menu.
Patient Portal Scheduling uses Visit Types to determine which visit time slots to offer based on the visit reason selected.
The first option “Portal schedulers are only offered slots designated with a Portal Visit Type” allows your practice to designate specific time slots in a provider’s Scheduling Template as available to Patient Portal Scheduling. This does not prevent Appointment Book users from scheduling within those slots, it simply opens the selected time slots to the Portal Scheduling tool.
The second option “Portal schedulers are offered all slots matching the color of the Visit Reason” maximizes the available slots. Any open time slot color coded as a sick visit or a well visit is available to Portal Schedulers, provided they match the visit types, providers and locations you specified in the Portal Scheduling tab. With this option, no other configuration is needed. Just enable patient portal scheduling in Patient Portal Configuration, and you portal users can begin scheduling themselves.
Set Flags to Prevent Portal Scheduling
Assign account or patient flags to prevent patients from being scheduled through the patient portal.
Open the Preferences tab in Scheduling Configuration. Click “Edit” for Account or Patient flags and select any flag that should prevent a patient from being scheduled through the patient portal.
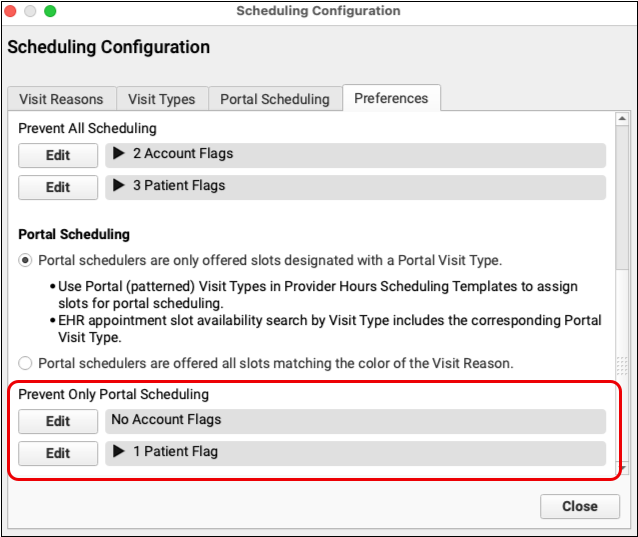
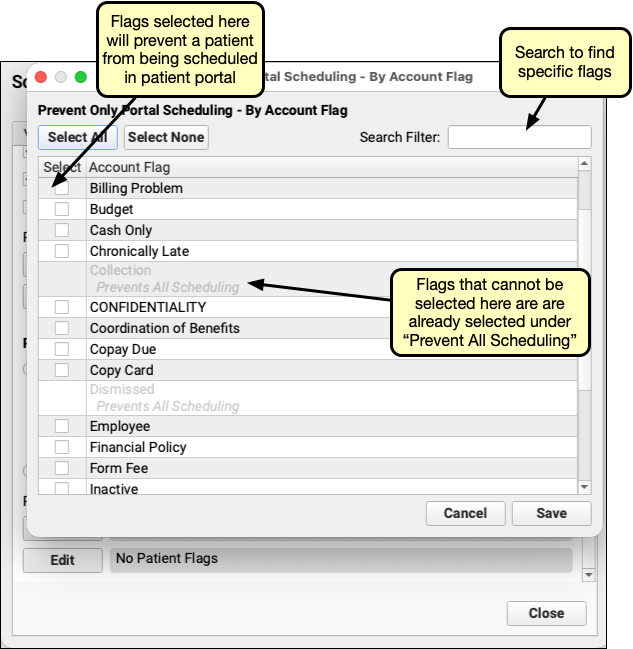
Flags already checked under “Prevent All Scheduling” will not be available to select, since preventing all scheduling already prevents patient portal scheduling.
Any patient or account with a flag you select here can only be scheduled through the Appointment Book. If a patient portal user attempts to schedule a patient with a flag that prevents portal scheduling, the patient cannot be selected and will be marked with “Please Call to Schedule”.
Update Your Scheduling Templates for Portal Scheduling
If you selected “Portal schedulers are only offered slots designated with a Portal Visit Type” open Provider Hours from PCC EHR’s Tools menu. Click the Scheduling Templates tab.
The Visit Type menu includes a “Portal” version of each visit type for the reasons you assigned to a Portal Scheduling Category.
Select the portal versions of each type, and mark time slots as available for portal scheduling, as you did when setting up scheduling templates. Time slots marked as portal visit types will appear with a striped pattern over the visit type color.
Portal visit types function the same as the other visit types, it only indicates that those time slots slots are available to the Portal Scheduling. This has no effect on scheduling using the Appointment Book.
Review Your Visit Reasons
The Visit Reasons tab includes a Portal Scheduling column, which displays the category of each visit reason, Sick, Well, Vaccine Only, Other, or not enabled.
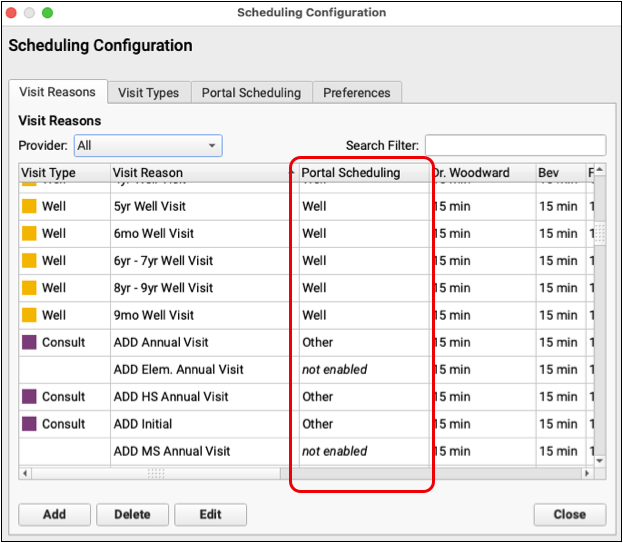
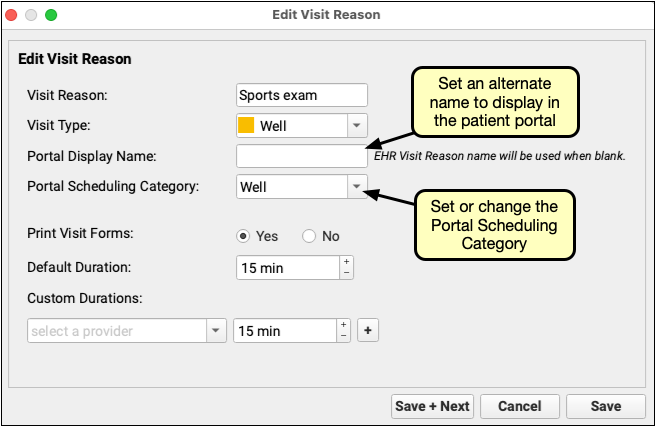
Click “Edit” to open any visit reason, and manage that visit reason’s Portal Scheduling options.
The Portal Scheduling Category for the selected visit reason can be set or edited You can set an alternative Portal Display Name to appear in the patient portal instead of the Visit Reason name.
Select Care Centers
If your practice uses PCC EHR’s Care Centers option, each of your care centers can decide independently if they want to make patient portal scheduling available to their patients.
Click the “Edit” button under “Care Centers Offering Portal Scheduling” in the Scheduling Configuration tool. Select which care centers allow scheduling through the patient portal.

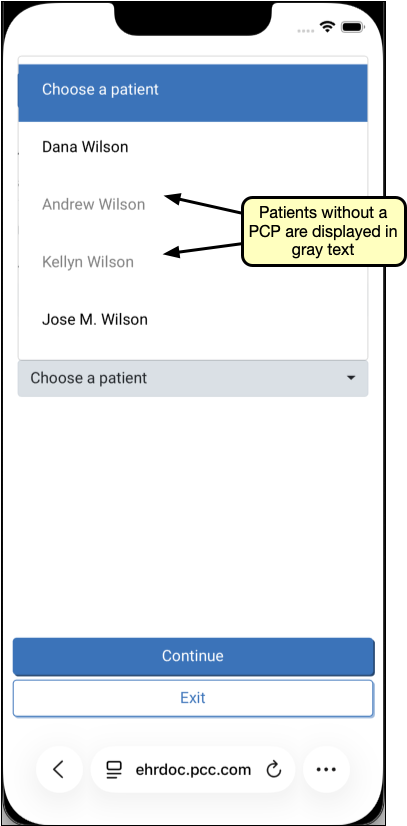
After selecting one or more care centers, only patients assigned to those centers can be scheduled through the patient portal. Patients assigned to care centers not offering portal scheduling will appear in gray text with the note “Please Call to Schedule”.
Optional: Require an Appointment Note While Scheduling through the Patient Portal
When configuring Portal Scheduling, you can require an Appointment Note for each scheduling category, so patients and families must add an appointment note to complete scheduling.
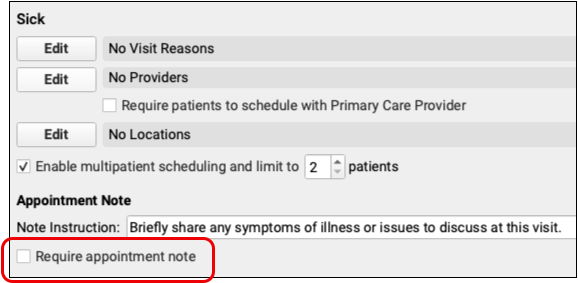
Each category includes a “Require appointment note” option below the appointment note instruction field. Check the box to force users to enter text within the appointment note field before they can continue to schedule the appointment.
Your practice can optionally configure the note instruction text, which appears above the appointment note field.
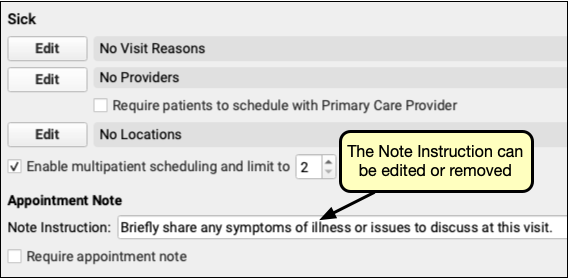
Edit the Note Instruction text field to provide instructions or request specific information from portal users, or remove the text entirely.
Review your Appointment Note Instructions.: Review your Note Instruction for each category to let patients and families know what information you need in an appointment note. For example, the Vaccine category’s Note Instruction field is blank by default, so consider adding an instruction to include which vaccines are needed in the Appointment Note.
Require Patients to be Scheduled with their PCP when Scheduling in the Patient Portal
For each scheduling category you can optionally require patient portal users to schedule appointments only with their assigned primary care provider.
In a given category Check the box labeled “Require patients to schedule with Primary Care Provider”.
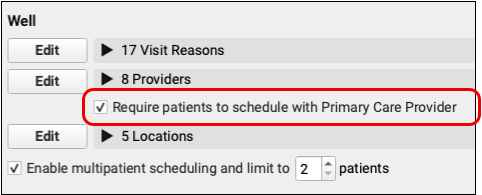
When checked, families can only schedule their patients with their primary care providers.
Patients without a PCP, or with a PCP not configured for patient portal scheduling, will appear in gray text on the Choose a Patient menu.
If a portal user attempts to select a patient without a PCP, they will be prompted to call to schedule.
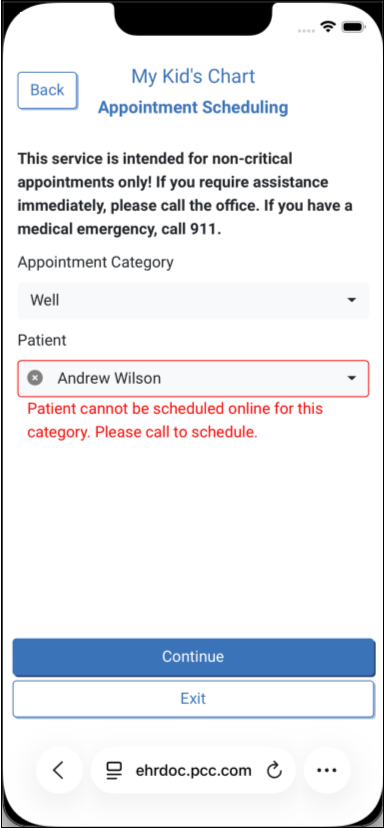
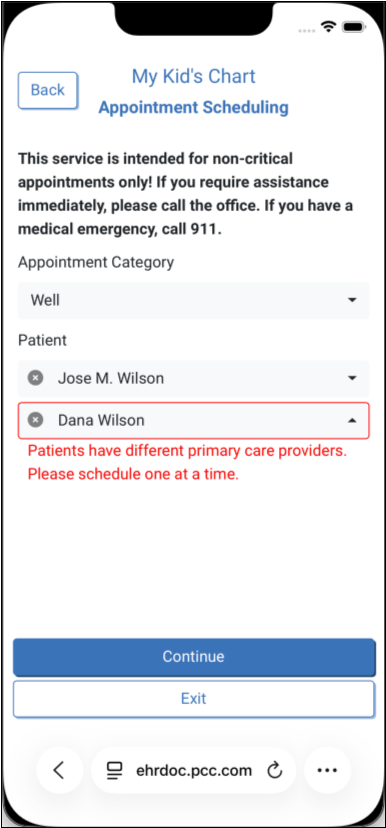
When scheduling multiple patients, all patients must have the same PCP.
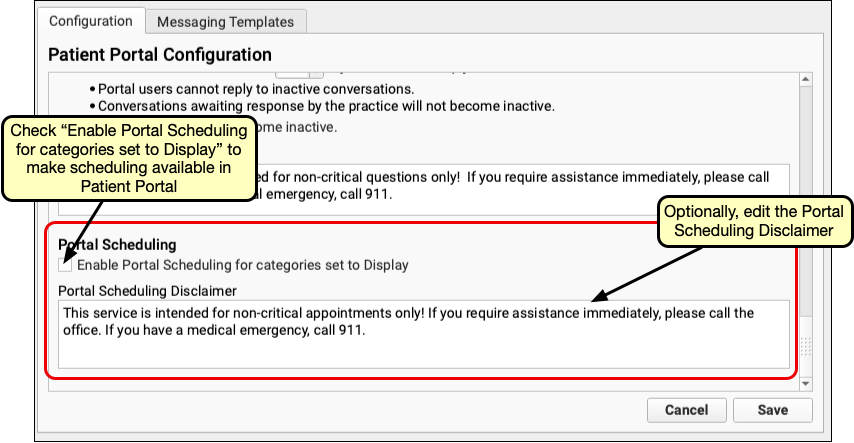
Enable Portal Scheduling and Portal Scheduling Disclaimer
Finally, open Patient Portal Configuration from PCC EHR’s Configuration menu, and check “Enable Portal Scheduling for categories set to Display”. With that box checked, Portal Self Scheduling is available to all your patient portal users.
Also in Patient Portal Configuration review and, if needed, edit the Portal Scheduling Disclaimer, to ensure that the text displayed to portal users reflects your practice’s needs.
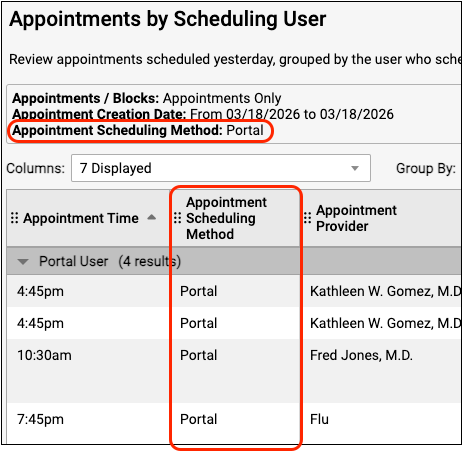
Report on Appointments by Scheduling User
Your practice can review appointments created through Portal Self Scheduling with the Appointments by Scheduling User report in the Appointment category. Appointments made through patient portal Self Scheduling are grouped together as scheduled by “Portal User”.