Configure Incoming CHADIS Questionnaire Results
When your patients, parents, and other users complete a CHADIS questionnaire, the results are automatically returned to PCC EHR, so you can review results quickly, without logging in to CHADIS at all.
To configure results, and ensure that incoming results are matched to the correct visit type, begin by linking questionnaires to orders through the Protocol tool in PCC EHR’s Configuration menu.
Open Protocol Configuration
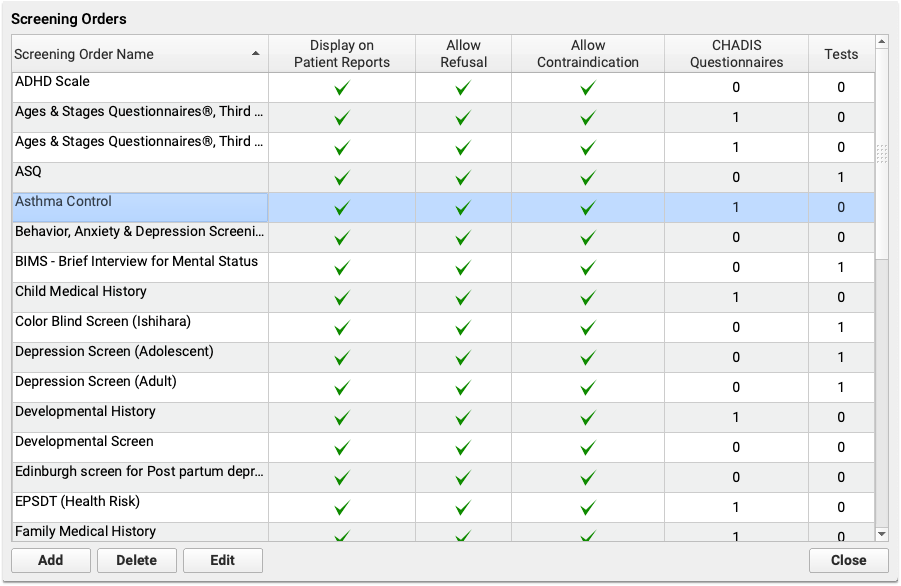
In Protocol Configuration, select Component Builder, and open the Screening Orders component.
Any of these orders can be associated with a CHADIS questionnaire.
Open Questionnaires
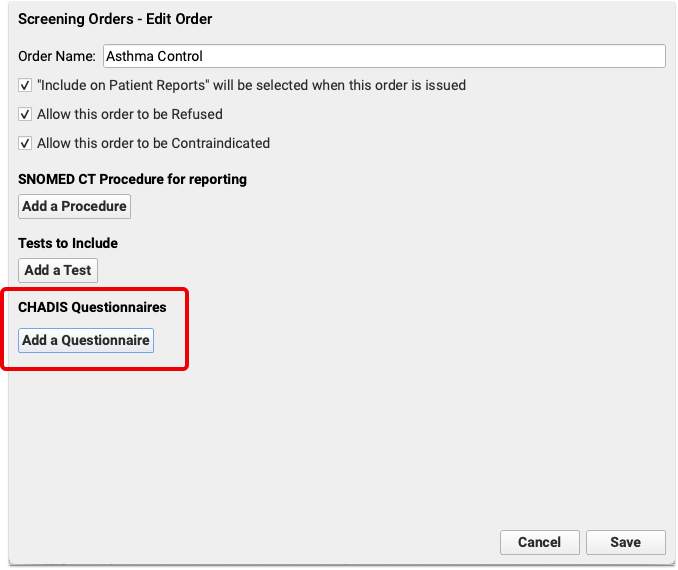
Click “Add a Questionnaire” to open the full list of CHADIS questionnaires.
Select Questionnaire
Select one or more questionnaires to link it to the screening order selected above. You can use the search box in the upper right corner of the window to narrow the list of questionnaires and find exactly the questionnaire you need.
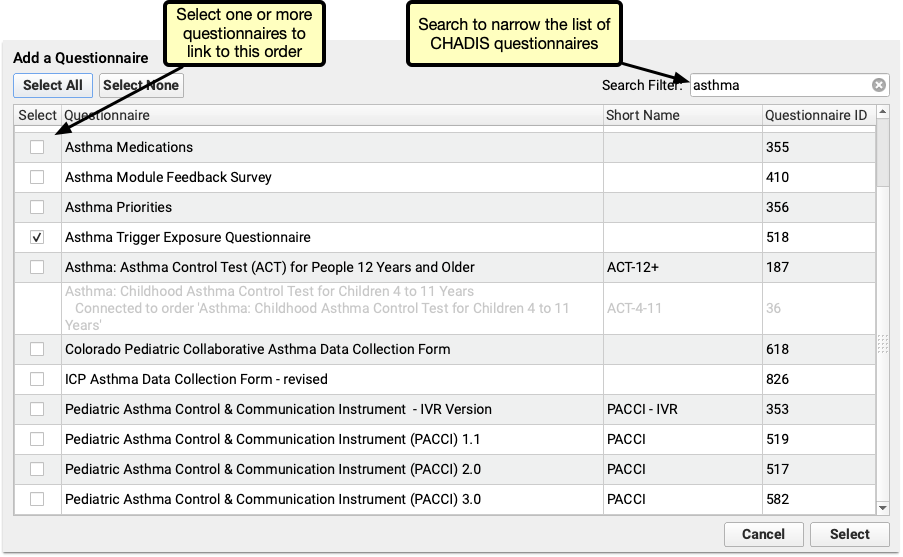
Each Questionnaire Can be Assigned Once: Each order can have multiple questionnaires assigned to it, but each questionnaire can only be associated with a single order. If a questionnaire is gray and cannot be selected, that questionnaire is already assigned to an order.
Some things to consider as you’re adding questionnaires to orders:
- The simplest configuration is to add one order per questionnaire. For example, if you use CHADIS questionnaire #947, ADHD Developmental Intake Form, then create an order called “ADHD Developmental Intake Questionnaire” and assign the questionnaire to it.
- For questionnaires that have different versions sorted by age, consider assigning all ages to a single order. Assigning all ages to one screening order, means you only need to configure billing for one order, rather than a separate order for each age.
- Some questionnaires have different versions based on the respondent. For example, the Pediatric Symptom Checklist questionnaires include versions for both the parent and patient. Assigning both to the same order will group the results together in the visit, making it easier to compare the two without and closing two separate orders.
- Consider the workflow for incoming results. If results require creating a task, such as manually updating medical history, assign those medical history questionnaires to a single order, and then assign one task from that order.
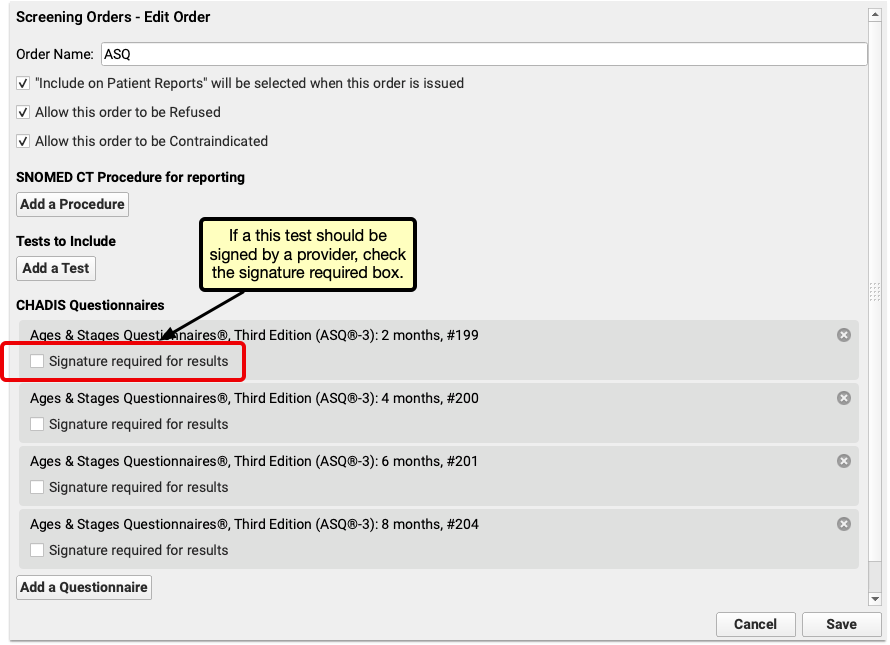
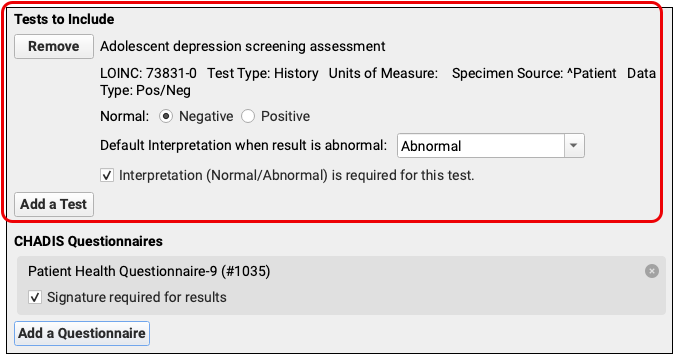
Decide If a Signature is Required
If a signature should be required on the results when they arrive, check the signature required box. Any questionnaire that requires a signature will appear on the signing queue when the result arrives.
Link LOINC codes to Screening Orders
To track CHADIS screening questionnaires for Clinical Quality Measures and PCMH, add matching tests to each Screening Order. Under the “Tests to Include” heading, click “Add a Test” and select the appropriate test. When tracking for Clinical Quality Measures, depression screenings require a result before they will appear in CQM reports.
Tasks are automatically assigned a due date the same day as the visit, so that tasks won’t appear on the task list before the patient arrives.
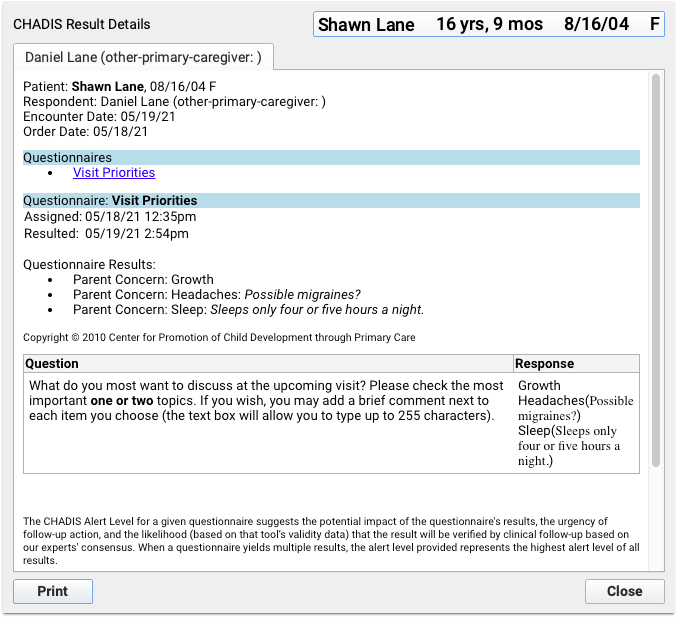
When a provider opens the visit, the results are available to review. New tasks can then be assigned and results entered.

Clicking “Details” opens the CHADIS results. If an order includes results from multiple respondents, each respondent’s results will have their own tab.
If a CHADIS result arrives that has not been assigned to a patient or portal user, results will appear unassigned in the messaging queue.
Unassigned results are similar to documents or lab results. Select them, search for the patient and assign them to a visit. Once results are assigned the patient and visit, they can be reviewed, signed and marked complete.