Work On ERA Responses That Can’t Be Autoposted
Sometimes your PCC system can’t automatically post something found on an ERA. Maybe the family paid for an encounter already, the payor changed the procedures on the claim, or your practice made changes to the encounter after you sent the claim.
After you autopost ERAs, use the Posting Exceptions worklist in the ERA tool to address each claim response that could not be autoposted.
Process ERAs
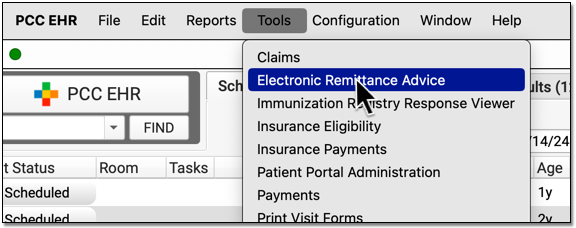
Open the Electronic Remittance Advice tool and process ERAs.


Exceptions are added to the Posting Exceptions worklist whenever you process an ERA that contains something that could not be autoposted.
Review Unposted ERA Responses
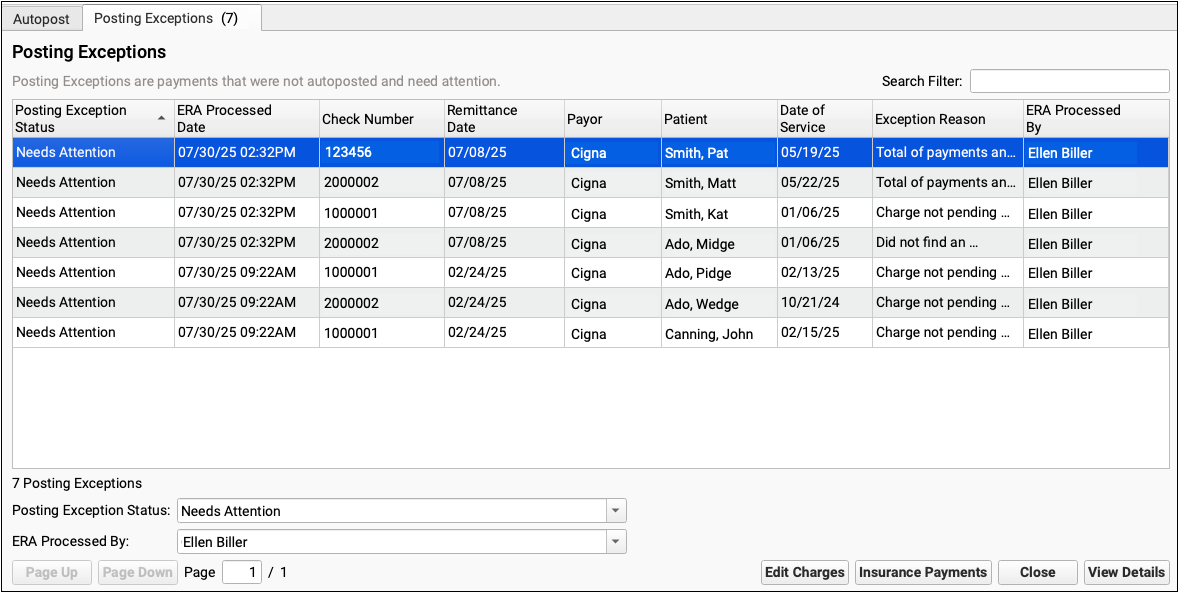
Click on the “Posting Exceptions” tab to review claim responses that could not be autoposted.


For each encounter, you can see the status, the date the ERA was processed, the check number, the remittance date from the ERA, the payor, the patient, the date of service, the exception reason, and the user who processed the ERA.
You can click column headers to sort the list, search, or use filters at the bottom to find specific encounters you wish to work on.
Posting Exception Status: By default, each ERA response that cannot be autoposted is assigned a posting exception status of “Needs Attention”. By filtering by this status, you can isolate the encounter responses that still need to be addressed.
Work On a Posting Exception
Double-click on a posting exception to review more details and address it.


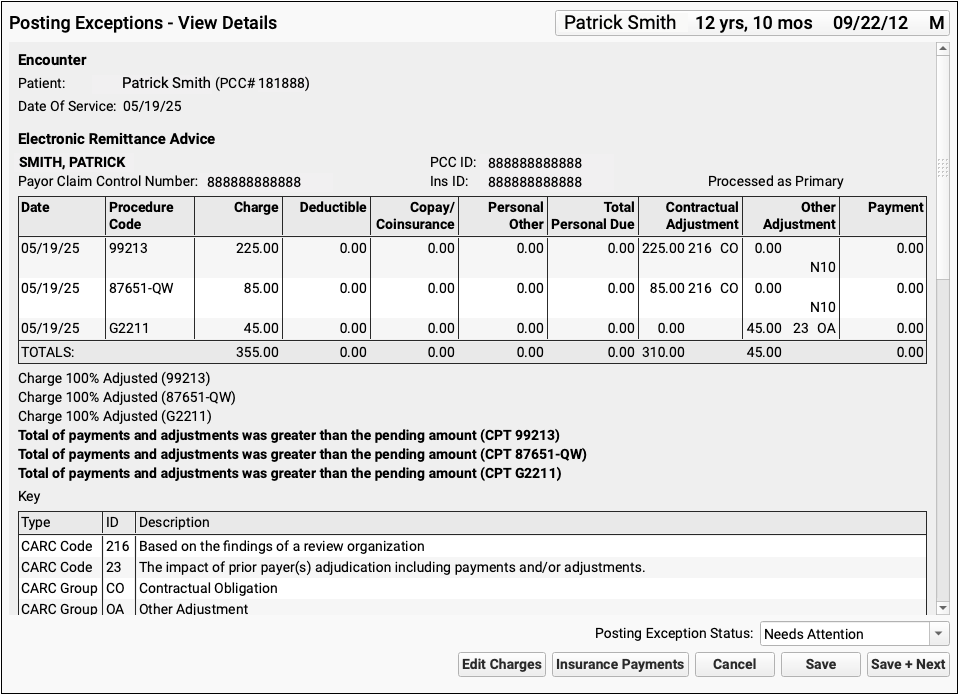
The Posting Exceptions – View Details screen includes the full ERA section that couldn’t be autoposted, encounter details, and billing tools.
Understand Why Payments Cannot Be Autoposted
To understand the full story of what’s happened with an encounter and why the ERA couldn’t be autoposted, you can review the section of the ERA that pertains to the encounter.

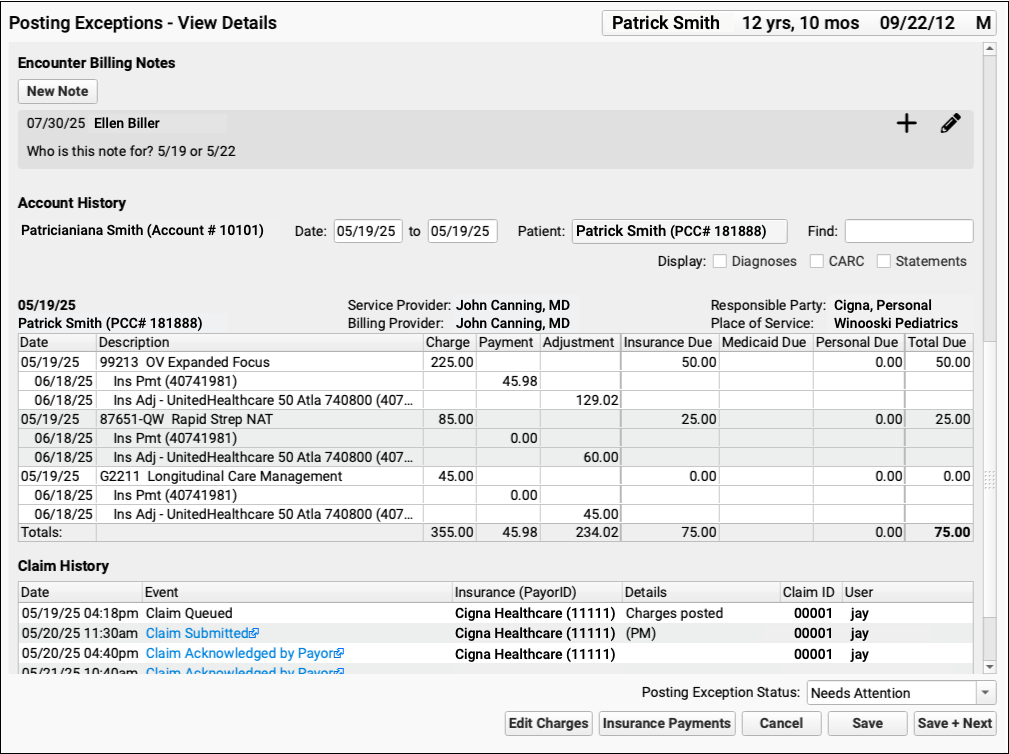
Scroll down to review the Encounter Billing Notes, Account History, and Claim History sections to review what’s happened with the encounter so far.

If PCC EHR Can't Find the Encounter: If a payor sent you an ERA response that doesn’t match an encounter that your practice billed, some of these billing-related components will not appear.
Edit Charges and Other Encounter Details
You may need to edit something about the encounter in order to post the payor’s response. Click “Edit Charges”.

On the Edit Charges screen, you can edit diagnosis and charge information, change the responsible party for charges, and more.
For more information about using Edit Charges, read Edit Encounter Charges and Other Claim Information and Resubmit a Claim.
Manually Post the ERA or Edit Insurance Payments
When you are ready to post the ERA manually click “Insurance Payments”.

If the encounter can be identified, the Insurance Payments tool will open to the payment screen and you can manually post details from the ERA.
You can also use the Insurance Payments tool to edit previously posted payments, perform takebacks, and more.
Add a Note About the Exception’s Resolution
After you’ve taken action to address a posting exception, you can optionally add a new encounter billing note.

By adding a note, you’ll have a record of what happened if there are more issues with the encounter later.
Update the Exception’s Status
After you address an exception (or discover it is invalid and safe to ignore), update the exception’s status.

When you update the status, you mark the posting exception to indicate it cannot be posted, is a duplicate, is invalid, or has now been addressed manually. This will remove it from the default Posting Exceptions worklist. Later, you can revisit resolved exceptions using the Posting Exceptions Status filter on the worklist.
