Respond to Claim Rejections
If unaddressed, rejected claims result in lost revenue. Use the Rejected Claims worklist to review and respond to every claim rejection sent to your practice.
Video: Watch Respond to Claim Rejections to learn more.
Contents
Open and Review the Claim Rejections Worklist
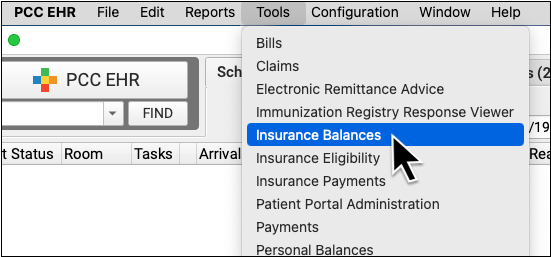
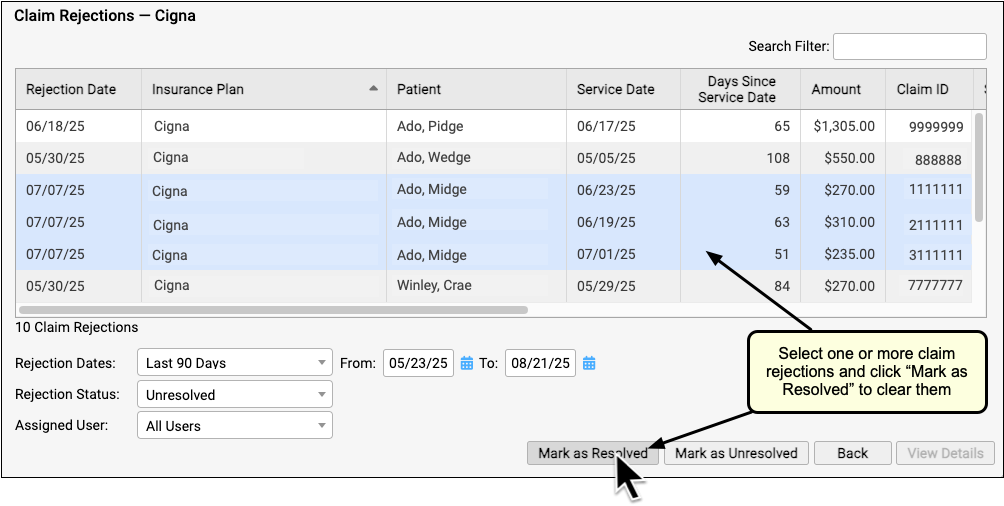
To review claim rejections sent to your practice from payors and clearinghouses, open the Insurance Balances tool and visit the Rejected Claims tab.
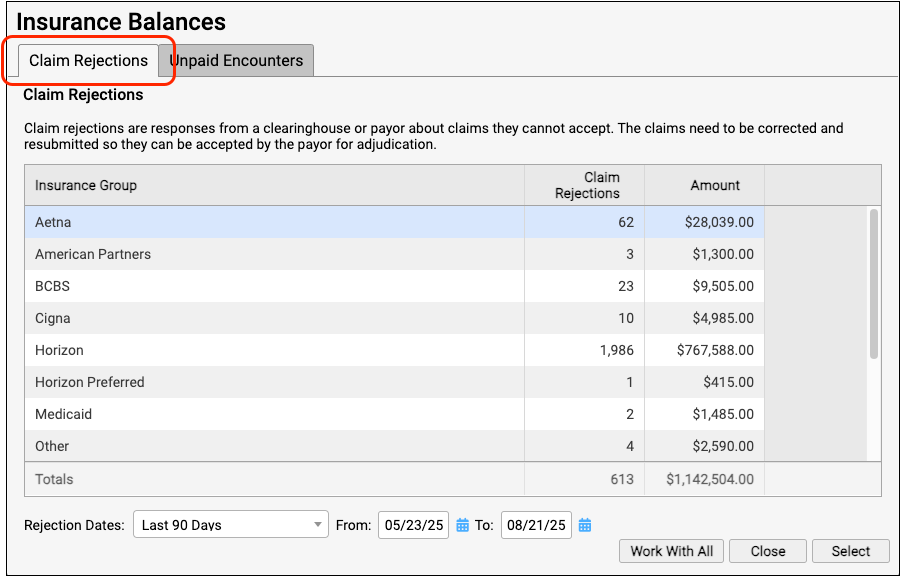
The Claim Rejections overview summarizes unaddressed rejections sent to your practice. Totals are aged and shown for each insurance group.
Double-click on a single insurance group or click "Work With All" to view the rejections worklist.

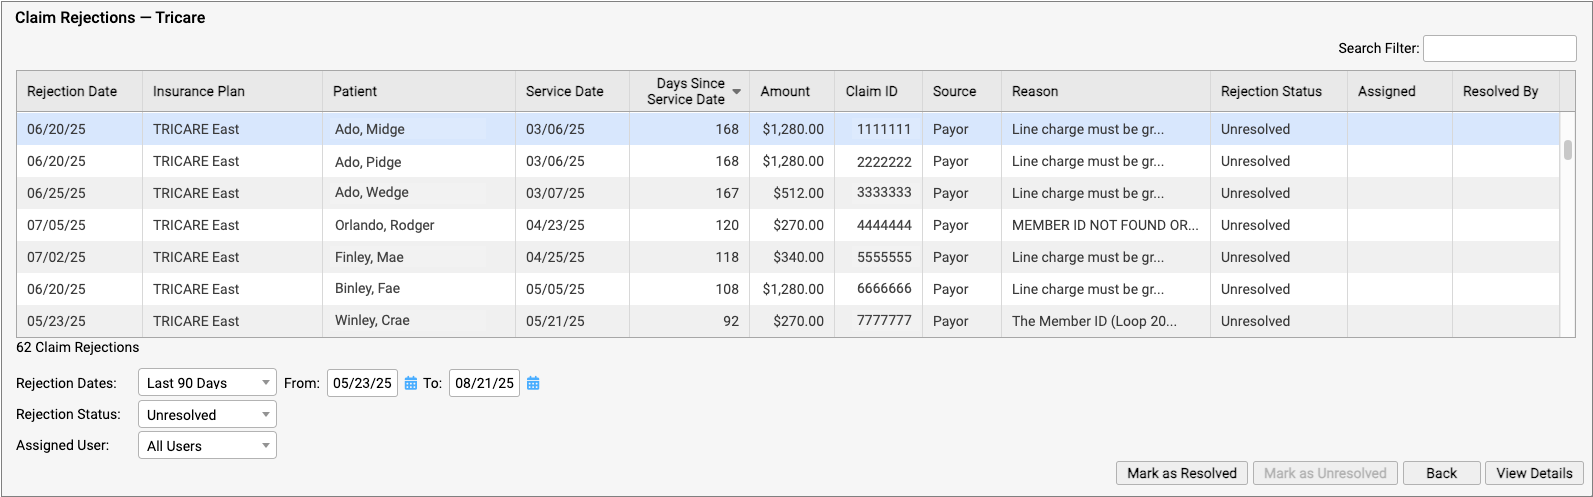
For each rejection, you can see key details about the rejection and the claim, including the number of days since the date of service and the rejection reason. You can also see a Rejection Status (which defaults to "Unresolved") and whether the rejection is assigned to a user and who resolved it.
You can filter the list to isolate rejections you need to work on. You can select an age or enter a date range, limit the list to resolved or unresolved rejections, or filter by assignee. You can enter a search term in the Search Filter field to find rejections based on a patient name or claim ID, for example.
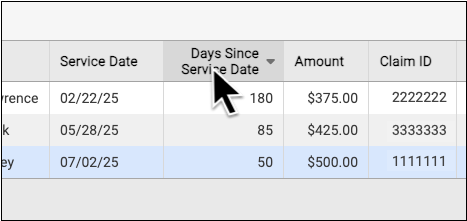
You can also sort the list by any column, making it easy to target rejections based on age or the amount on the claim.
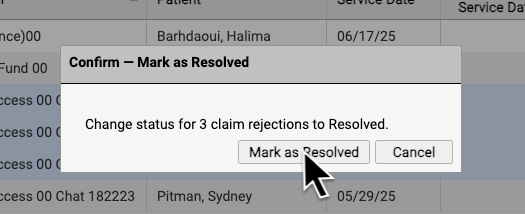
If you are certain a rejection or rejections are now resolved, you can select them and click "Mark as Resolved".
By reviewing and resolving every claim rejection sent to your practice, you can ensure that no claims slip through the cracks.
Each Rejection is a Point-in-Time Response: Rejections are similar to email messages or other incoming communication. Your practice might handle a billing problem for an encounter using a different tool, and an encounter's balance may already be paid off. The rejection from the payor remains on the Rejected Claims worklist for your review until you mark it as resolved.
Troubleshoot a Specific Rejection
Double-click on a rejection to review more details.

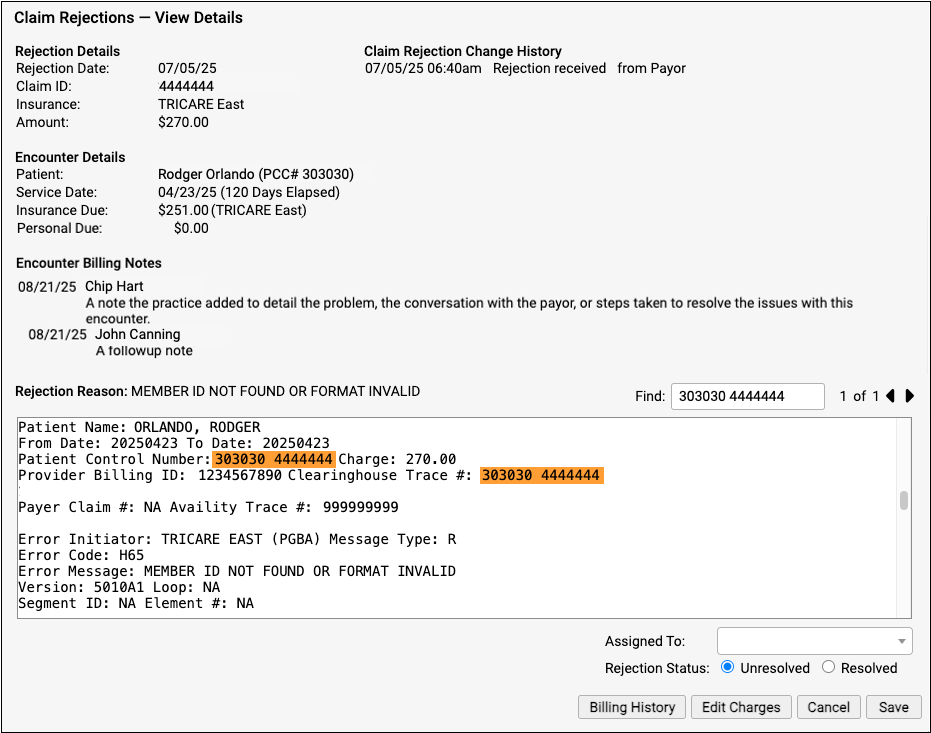
The Claim Rejections - View Details screen provides information and tools that will help you understand and respond to the rejection.
-
Rejection Details: The Rejection Details section indicates when your PCC system received the rejection, the claim ID indicated by the payer, the plan, and the amount on the claim.
-
Encounter Details: The Encounter Details section shows the patient, their date of birth, their member ID, the date of service, and how much is currently due from insurance and the family. If the "Insurance Due" amount is now $0.00, the rejection may already be resolved or else your practice may have changed the responsible party for the charges.
-
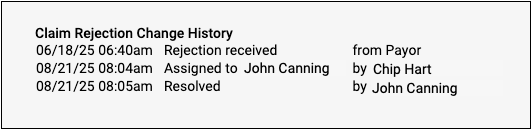
Claim Rejection Change History: Any time anyone at your practice assigns or changes the status of this claim rejection, it is logged in the Claim Rejection Change History.
-
Encounter Billing Notes: If you or someone at your practice has entered encounter billing notes (sometimes called "visit billing notes" or "oops notes"), the Encounter Billing Notes section will display those notes. If you’ve contacted the payor and submitted a claim multiple times, you can review your practice’s notes to better understand the history of the rejection.
-
Rejection Reason: When your PCC system receives the rejection from the payor or clearinghouse, it attempts to extract a reason summary from the data. That summary is listed on the screen as the "Rejection Reason", and the complete rejection data file is shown so you can review it.
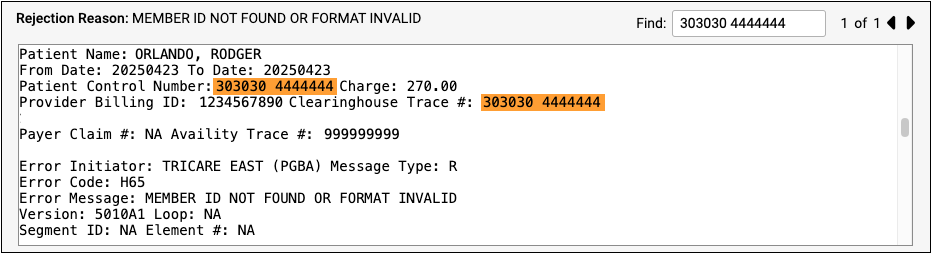
Different payors and clearinghouses send different types of electronic communication. A single file may include responses to many different claims, so the search field of the Rejection Reason is automatically filled with the Claim ID, making it easier to navigate the electronic file from the payor. If the claim ID appears multiple times in the electronic file, you can use the Find field's next and previous buttons to review the details.
Assign a Rejection to a User or Mark It as Resolved
You can optionally assign a rejection so it can be addressed later by yourself or another person at your practice.
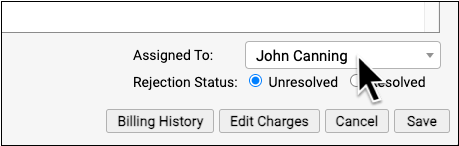
When you are finished addressing a rejection, click "Resolved" to change its status.
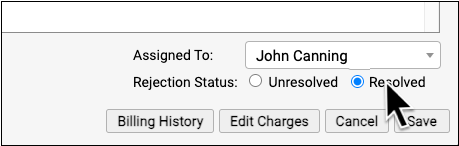
PCC EHR tracks whenever a rejection is assigned or resolved and displays a log in the Claim Rejection Change History at the top of the screen.
Is the Claim Rejection Resolved?: If you mark a rejection as "Resolved" without resubmitting or filing an appeal, your practice may not receive payment. If you queued up a new claim, you can resolve the original rejection. If the payor rejects the replacement claim, a new rejection (with a new claim ID) will appear on the Rejected Claims worklist. Your practice can also catch rejected claims by reviewing all unpaid encounters on the Unpaid Encounters tab.
View More Encounter Details and the Encounter’s Claim History
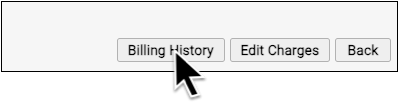
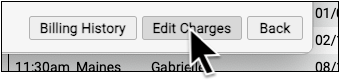
After reviewing the rejection, you may want to dig deeper into claim history, payor responses, and additional encounter information. Click “Billing History” to review more encounter details.
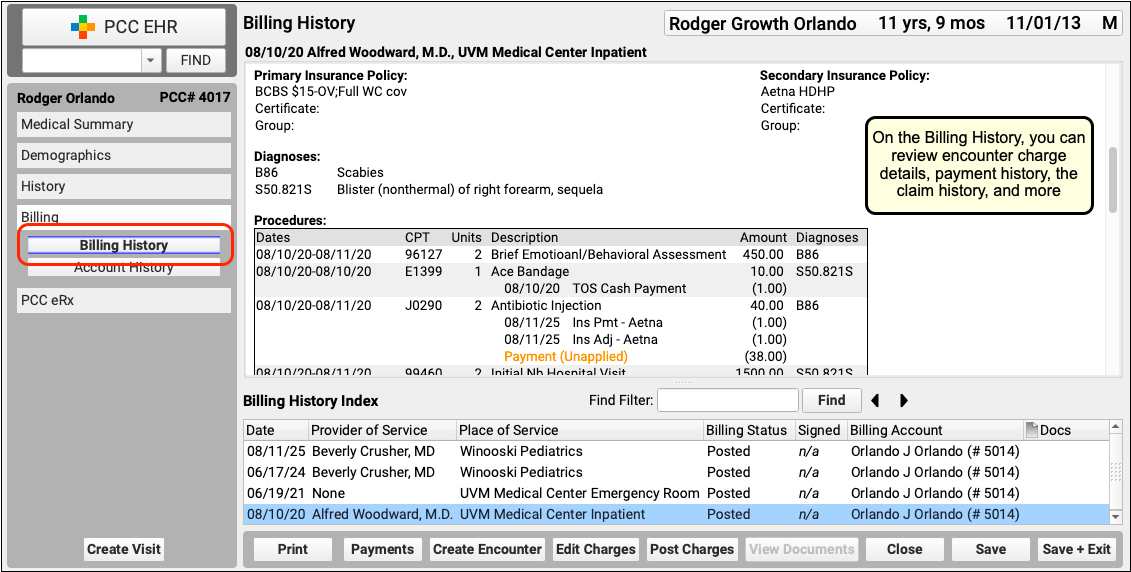
On the Billing History for the encounter, you can review full charge and payment details. The Claim History shows you all insurance billing activity and includes links to review the payor acknowledgements, posted ERAs, and more.
Review Patient Policies, the Complete Account History, and More
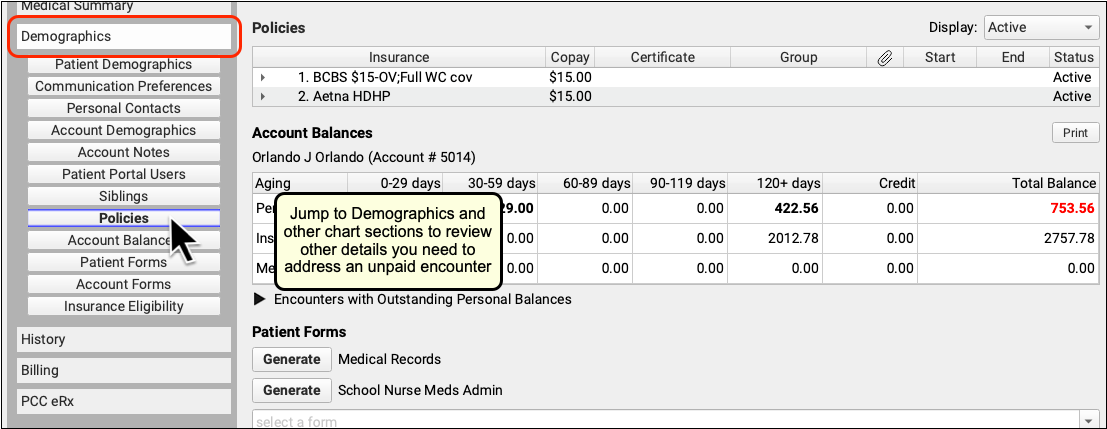
If you need to review more information about the patient and the account, you can navigate to other sections of the chart. For example, after clicking "Billing History", click "Demographics" to review insurance policies.
Or, to see the encounter and all financial transactions for the patient's billing account, visit the Account History.
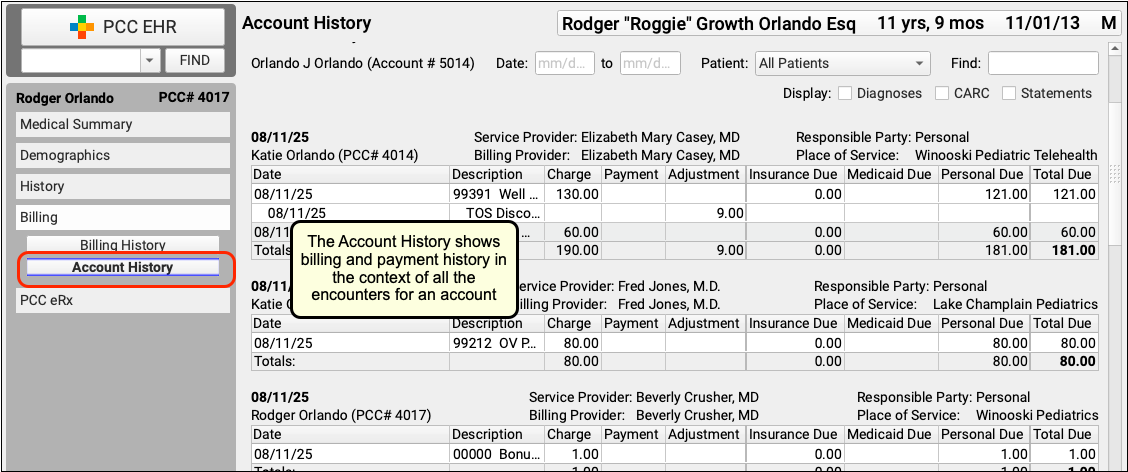
By reviewing the full account history, you can see every event linked to each encounter and also understand the encounter in the context of the family's billing record.
Review Eligibility for the Encounter's Date of Service
If you want to check if there are eligibility records for an encounter's date of service, click "Edit Charges" and then "Patient Details" to see the eligibility component for that encounter.

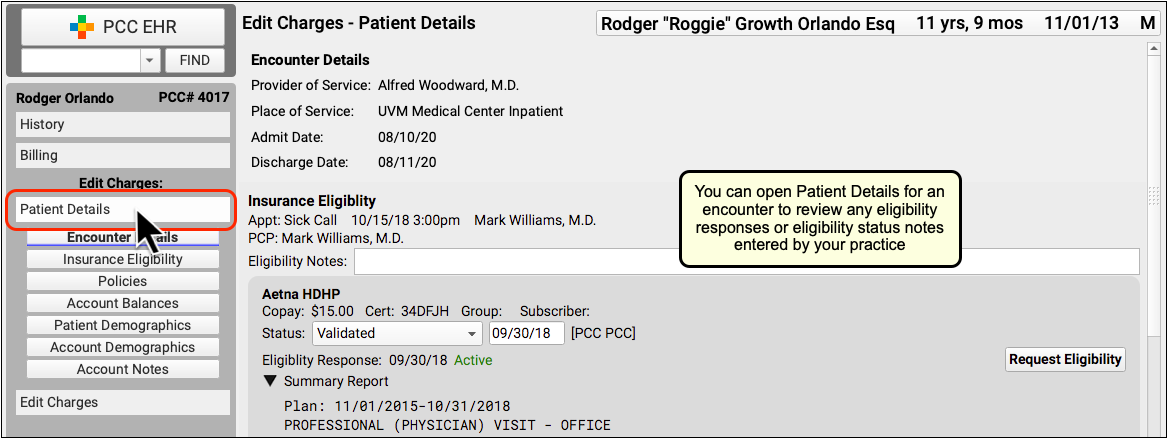
If your practice confirmed eligibility for the patient, either automatically or manually, you can review the results and any notes added at the time.
Edit Encounter Details and Submit a New Claim
If you need to edit some aspect of the encounter and then optionally file a new claim, click "Edit Charges".
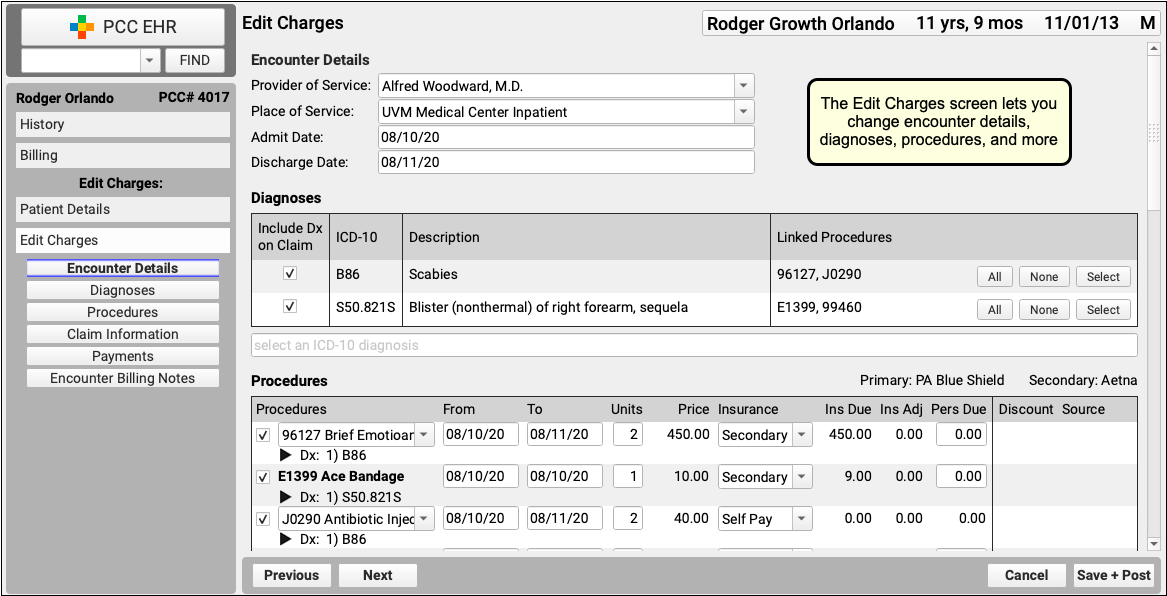
On the Edit Charges screen, you can change encounter details, diagnoses, procedures, and more.
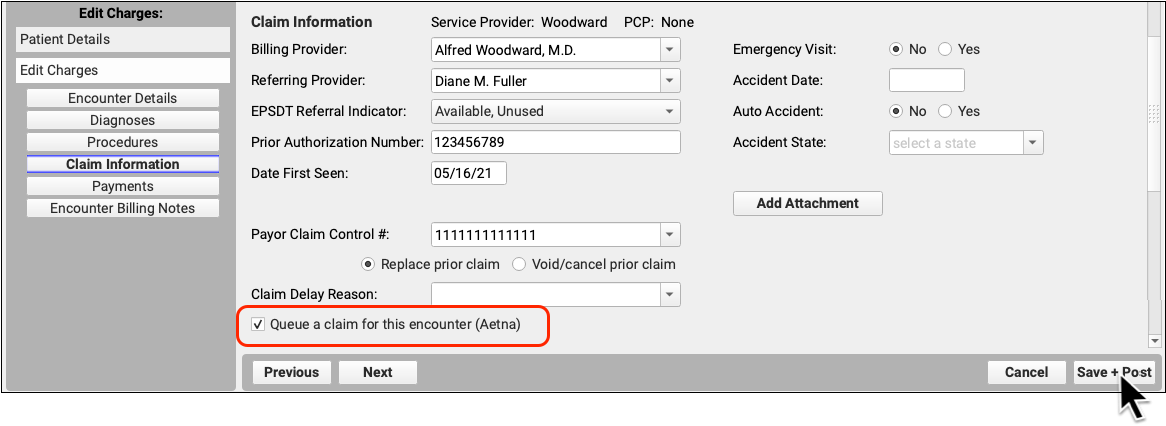
If you need to file a corrected claim, you can review and adjust the responsible party for each charge, enter claim information, and queue up a new claim.
To learn more, read Edit Encounter Charges and Other Claim Information and Resubmit a Claim.