Set Up a Brother ADS Scanner
Read the procedures below to set up and configure a Brother ADS-XXXXX scanner.
Prepare for Setup
You will need to take the following actions before you can set up your scanner.
Contact PCC Support to Set Up Scanner Bucket
If you do not have an existing scanner bucket, call or email PCC Support at (800)722-7708 or support@pcc.com to request a new scanner bucket.
Replacing an existing scanner?: If you are replacing an existing scanner you can use your old scanner’s bucket. To find your existing bucket number, log in to PCC EHR, select Documents from the Configuration menu, visit Import Documents, and choose a bucket from the “File Source” column.
Find Your Wireless Information
Ask your Office Manager, Managing Provider, or local IT person for the name of your office wireless network and password.
Connect Your Scanner to Your Wireless Network
Follow the steps included with your device to connect to your wireless network. You can also search for instructions on the Brother Tech Support site here. If you need assistance, call PCC Support.
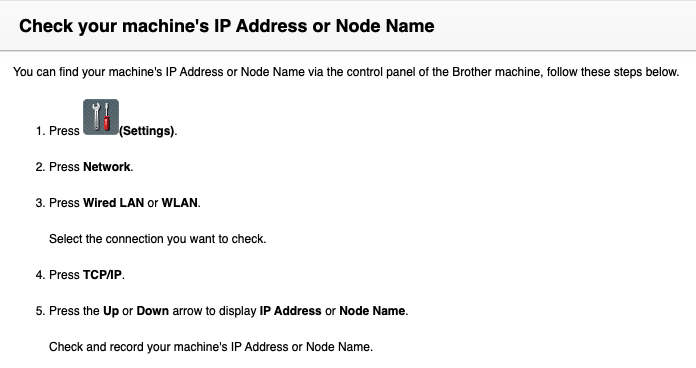
Find Your Scanner’s IP address
Turn on your scanner and use your scanner’s control panel to follow the steps in this image. Choose WLAN for step 3 if you are using a wireless internet connection.
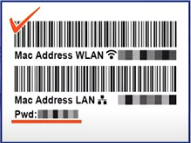
Find Your Scanner’s Default Login Password
The default password is either “initpass” or the password located on the back or bottom of the machine after “Pwd”.
Configure Your Profile Settings
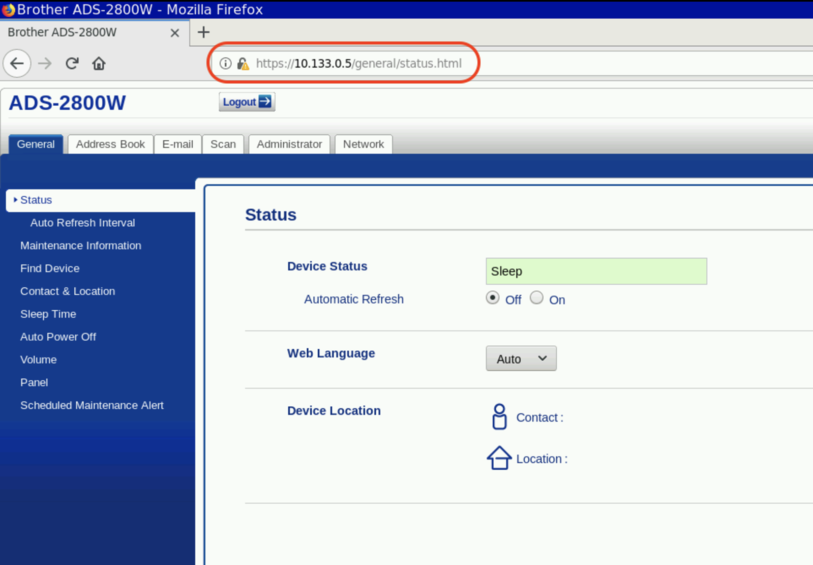
Access Your Scanner in a Browser Window
Open a web browser and type the IP address of your scanner. (Example: https://10.40.1.112) Log in with your Login Password if prompted.
Sync Date and Time With Server
Select the “Administrator” section and then select “Date & Time”. Enter your current date, time, and time zone. Set Auto Daylight to “On”. Select Synchronize with SNTP server.
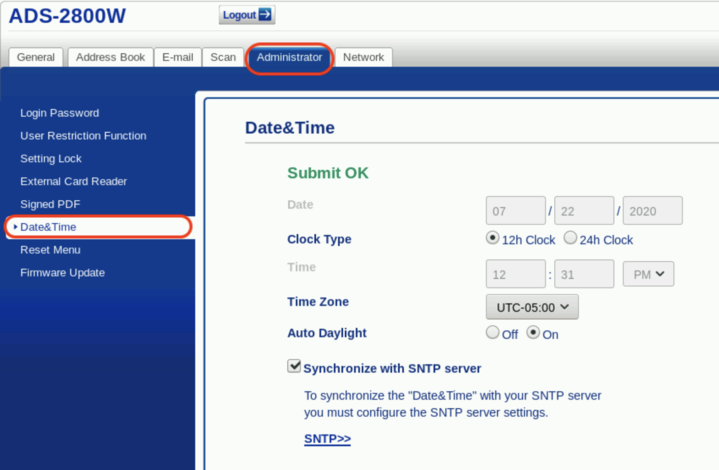
Click “Submit” or “Save” if prompted.
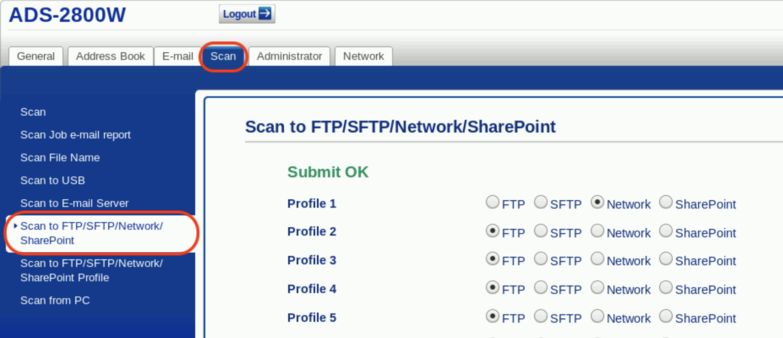
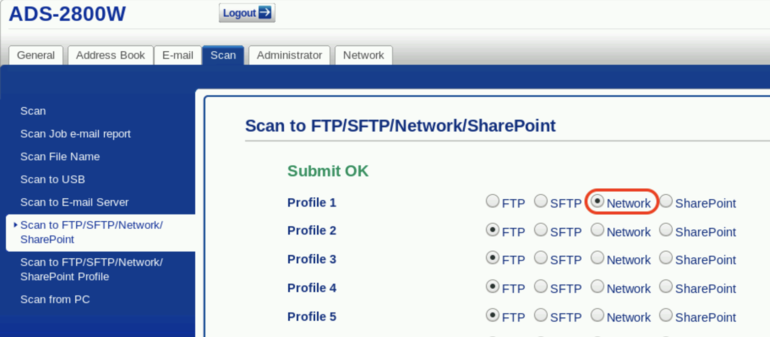
Set Profile to Network
Click on the “Scan” section. Then click “Scan to FTP/SFTP/Network”. Set Profile 1 to “Network”.
Save Profile Settings
Click “Save” at the bottom of the page.
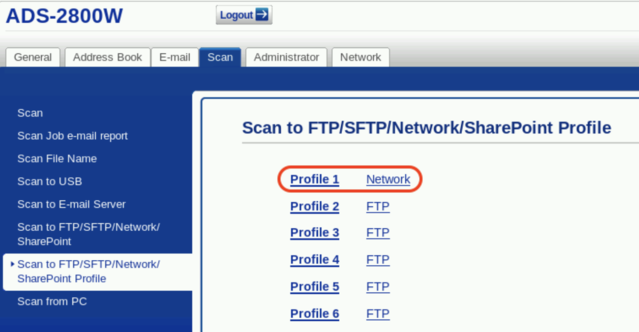
Confirm Profile Settings
Click on the “Scan” section. Then click “Scan to FTP/SFTP/Network Profile” and confirm that Profile 1 is set to “Network”.
Set Profile Path
Click on “Profile 1” and set or verify the following:
- Profile Name: PCC EHR
- Network Folder Path: \\acro\scanning\bucket### (Example: \\gkp\scanning\bucket001)
- File Name: Use default
- Quality: Color 150-200 dpi
- File Type: PDF Multi-Page
- Document Size: Letter or Auto

Continue Setting Profile Path
Scroll down and set the following:
- Enter the scanning username: nobody
- Enter the scanning password: nobody
- Reenter the scanning password: nobody
- Leave all other settings on the default.
Click “Submit”.
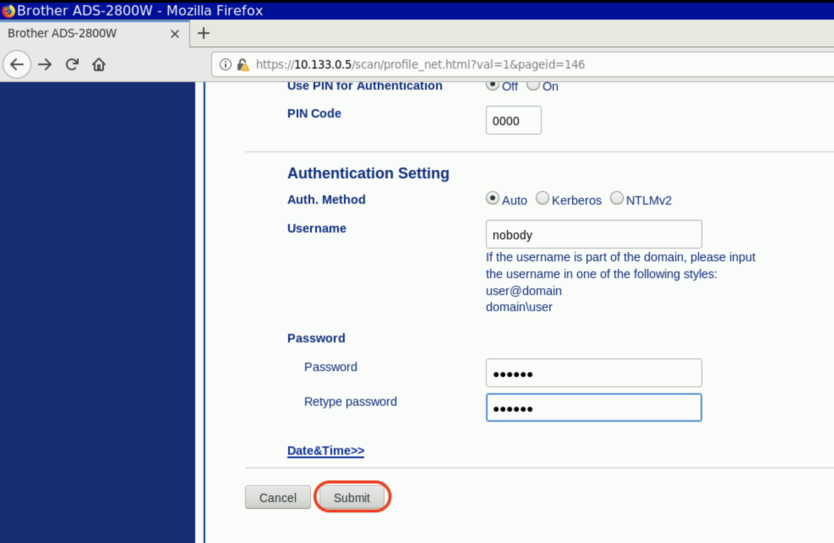
When you click “Submit”, the software will test communication between the scanner and the server. You will see a green “OK” or a red “Failed” to indicate whether your configuration was successful. Call PCC Support for assistance as needed.
Test Your Scanner
Your scanner is now configured. Follow the instructions in your manual to run a test page. Upon completing a scan, your scanned document will appear in the Import Documents tool in PCC EHR. For more information, review this article: Attach a Document to a Patient’s Chart
Downloadable versions of Brother manuals and user guides can be found here.