Add an Attachment Code to a Claim
If a secondary insurance requires the EOB from the primary, or any claim requires a certificate of medical necessity, discharge summary, or other clinical documentation, you can add attachment codes to a visit’s charges, generate a unique attachment ID, and specify the attachment type and method. Attachment information will then be sent with the electronic claim.
When a claim requires an attachment, open the Correct Mistakes (oops) program in the Practice Management and use Visit Status to select the visit’s charges. (For more details, read Edit an Encounter’s Diagnoses, Billing Provider, and Other Claim Information in Correct Mistakes.)
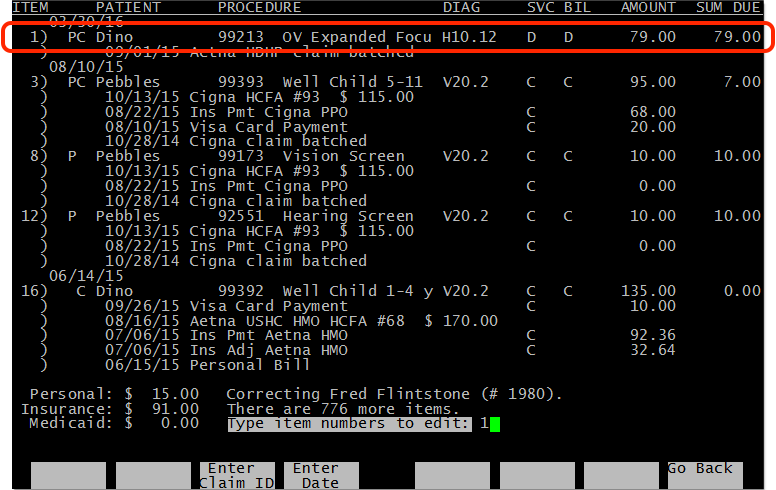
Next, press Page Down to see the claim information for the visit’s charges.
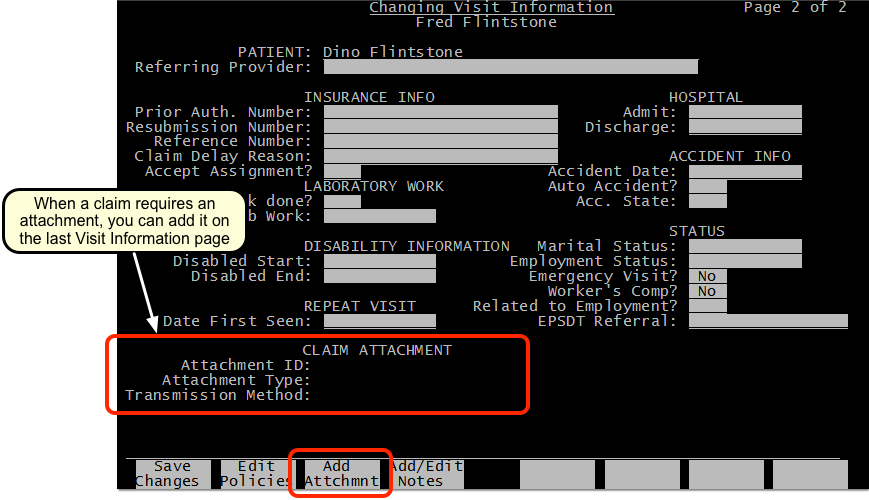

Press F3 – Add Attachment to add an attachment. PCC will generate a unique attachment ID for the selected charges, and you can declare the attachment Type and Method. If you add an attachment by mistake, you can press F3 – Remove Attachment. When you are finished, save your changes and then re-batch the charges to the desired insurance payer.
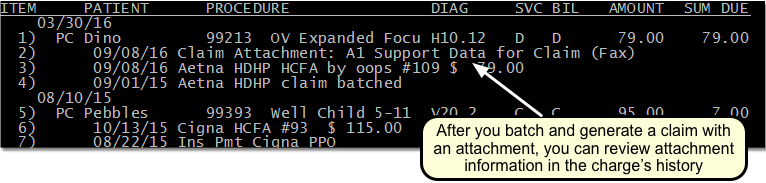
Attachment information will appear on the claim when PCC generates it, and a Claim Attachment billing message will appear in the billing history.
Single Use Only: Attachments require unique IDs. After you re-batch and generate the claim, the Partner billing system will remove the attachment ID, type, and method from the charges. You can review the information in the charge history, but if you need to resubmit the claim you will need to return to the Visit Status screen and add the attachment again.
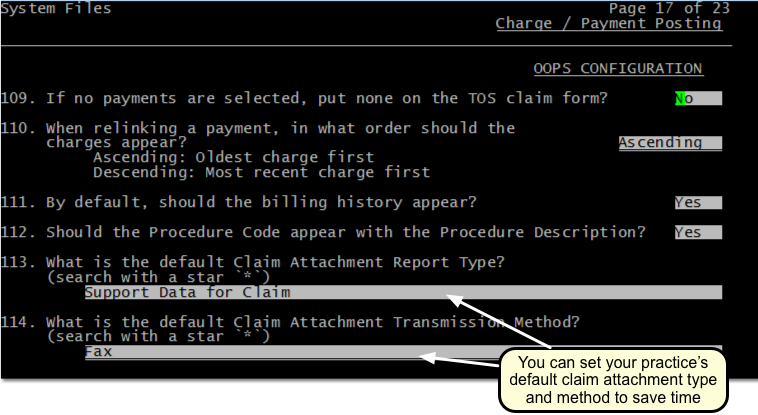
Set Default Values for Attachment Codes on Claims: Your practice can optionally set default values for the attachment type and transmission method in the Charge and Payment Posting section of the Configuration Editor (ced). For example, if you always send attachments via regular mail, you can change the default from “Fax” to “Mail”.