Work with Today’s Patients on the PCC EHR Schedule Screen
The PCC EHR Schedule screen contains a list of patient appointments and tools for using that list.

Each appointment on the list displays: the Visit Status, patient room location, the appointment time, patient name, date of birth and sex, visit reason, the scheduled (or assigned) provider, the billing status of the visit, and who it has been signed by.
Optional fields, which can be turned on and off in the Practice Preferences tool, include the patient’s arrival time, the patients age, and an outstanding tasks indicator.
Open a Chart: While viewing the schedule, you can open any patient’s chart by double-clicking on their name or by selecting them and clicking “Open.” You can also find any patient’s chart by using the search field and clicking “Find.”
Contents
Patient Management
The Schedule screen displays visit statuses and additional information to help you manage patient flow in your office. The green visit statuses indicate the current activity of patients in your office, and you can review room and arrival time quickly.
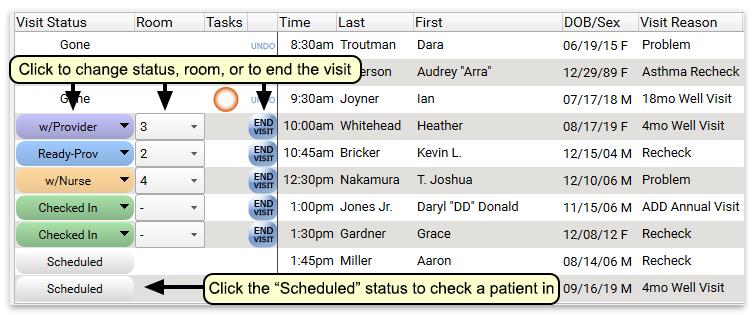
Visit Status and Room
Click on the Visit Status buttons to change the status, and use the pull-down “Room” menu to assign a room. When a patient has left, click “End Visit” and the status will switch to “Gone”. These statuses are customizable; read the Visit Status Configuration document to learn more.
Special Features:
- If you need to return a Visit Status to “Arrived” select the appointment and select “Reset Status to Arrived” from the Edit menu.
- An optional feature in Partner can make the Visit Status automatically switch to “Gone” when you check the patient out.
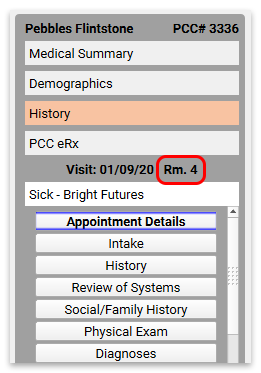
- When you set the patient’s room, the information will appear in the chart for any user.

- Visit Status Counters are an optional feature that can be used to track the number of patients with a specific visit status.
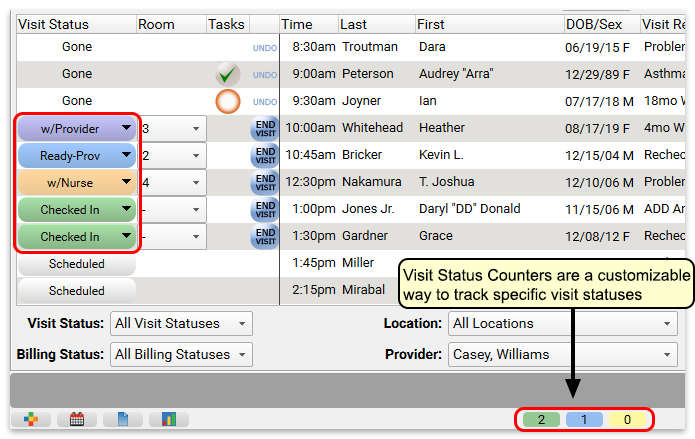
Read the Visit Status Configuration document to learn more about customizing Visit Status Counters.
Telemedicine Visits
Visits scheduled as telemedicine visits will appear with a telemedicine icon in the Room column.

The chart notes for these encounters can contain components that are unique to telemedicine visits. Read more about scheduling, charting, and billing telemedicine visits here.
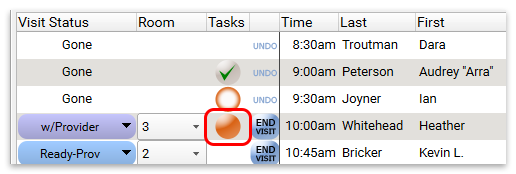
Tasks
The optional “Tasks” column indicates whether or not the patient has outstanding orders with incomplete tasks for the appointment. You can use this column to determine whether or not a patient may go home.
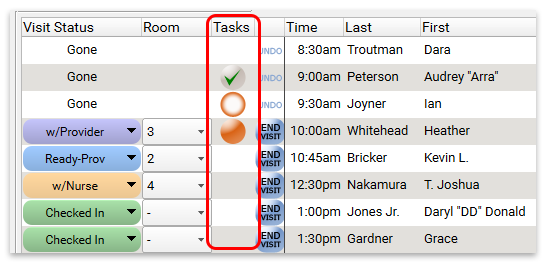
Depending on the orders a patient has and those orders’ statuses, different images will appear in this column:
- Blank: Patient has no orders for this visit.
- Checkmark: All orders are complete (tasks finished, results entered, immunizations administered).
- Orange Ball: Incomplete orders (tasks unfinished, missing lab results, and/or pending immunizations).
- Orange Ring: Incomplete orders, but the patient is done for the day (probably awaiting test results).
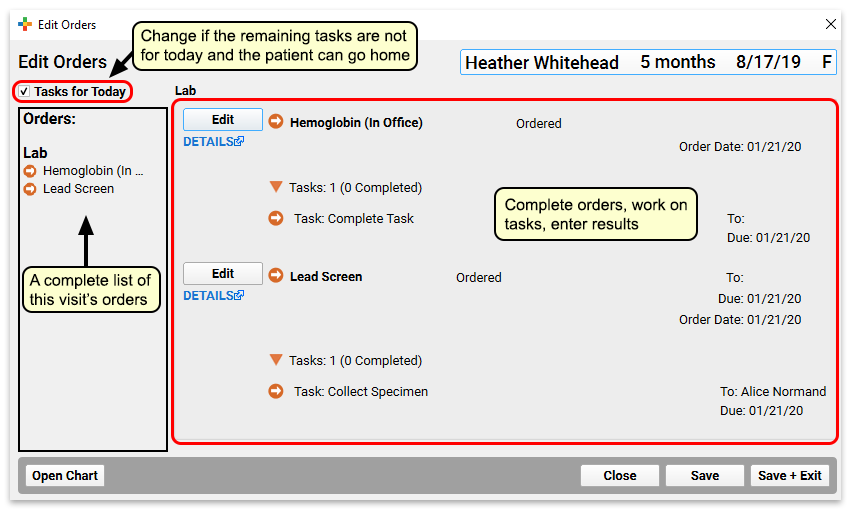
You can click on the tasks column to open a list of all the orders for the visit and work on the orders.
Twice in One Day, or Multiple Days: The Schedule screen, Tasks column, and Edit Orders window deal with each appointment separately. Therefore, if a patient has multiple visits on a single day or across several days, you should look at each appointment entry to check their Task column. Or, use the Visit Tasks queue to review and work with all incomplete orders.
View Appointment Notes on Your PCC EHR Schedule
As you review today’s schedule, you can quickly review appointment notes for each encounter.
If an appointment has an appointment note, you will see a triangle in the Visit Reason column.
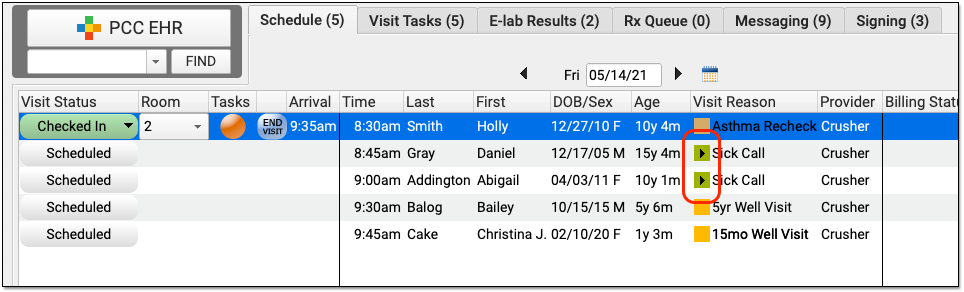
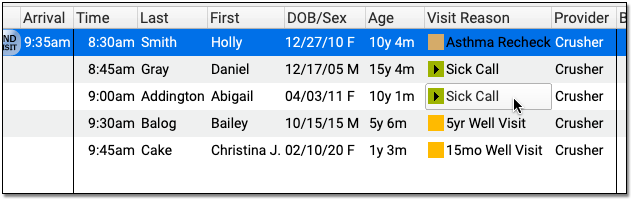
Click anywhere on the visit reason to show the note.
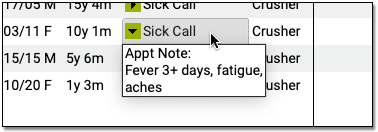
Visit Type Color Code: If your practice defines visit types by color, then the appointment note triangle will also display the color of the visit type. That means anyone at your practice can quickly see which appointments are sick, well, or consults, for example. You can configure Visit Types in the Visit Reasons Editor.
Billing Statuses for Encounters
You can track the billing status of visits from the Schedule Screen.
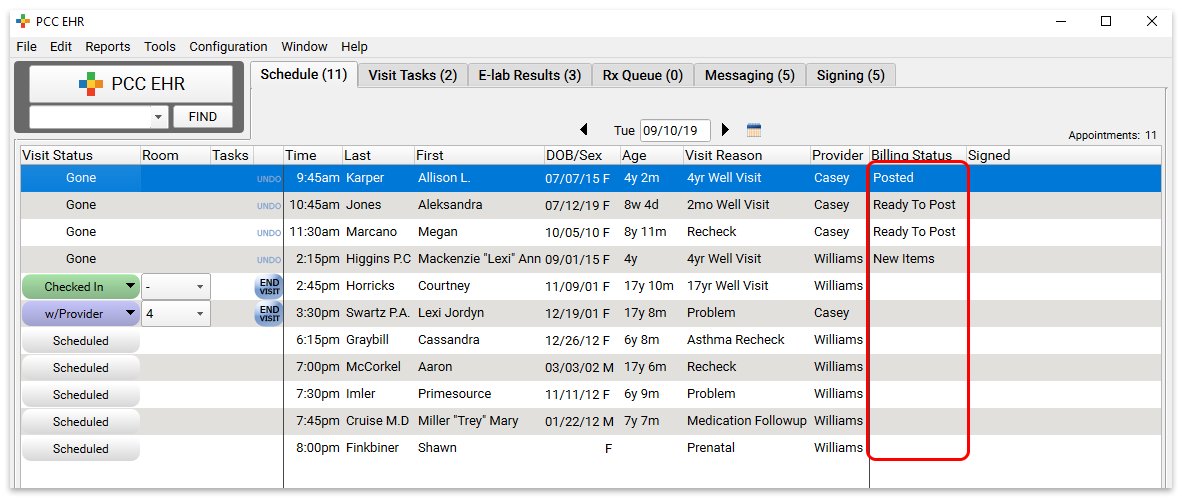
If you are a biller, the Billing Statuses will appear as buttons, which you can use to open the Post Charges window for an encounter.
The billing statuses are:
-
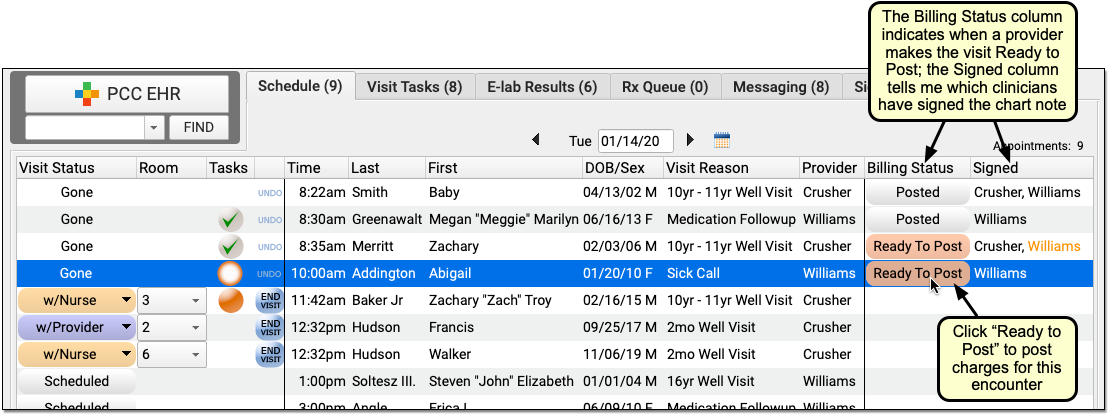
Ready to Post: Once the clinician marks an encounter “Ready for Billing”, it will appear as “Ready to Post” on the Schedule queue.
-
Posted: After someone at your practice reviews and posts the charges, the Billing Status column will indicate that the encounter is “Posted”.
-
New Items: If a diagnosis, lab or order has been added to an encounter after it was posted, it will appear as having “New Items”.
If you are a biller, you may want to use the filters on the schedule screen to see just the encounters with the billing statuses you want.
How Do I Post an Encounter That Is Ready to Post?: To learn more about the billing status and how to post charges, read Post Charges in PCC EHR.
Signing Status of Encounters
The name of every provider who signs an encounter will appear in the “Signed” column.
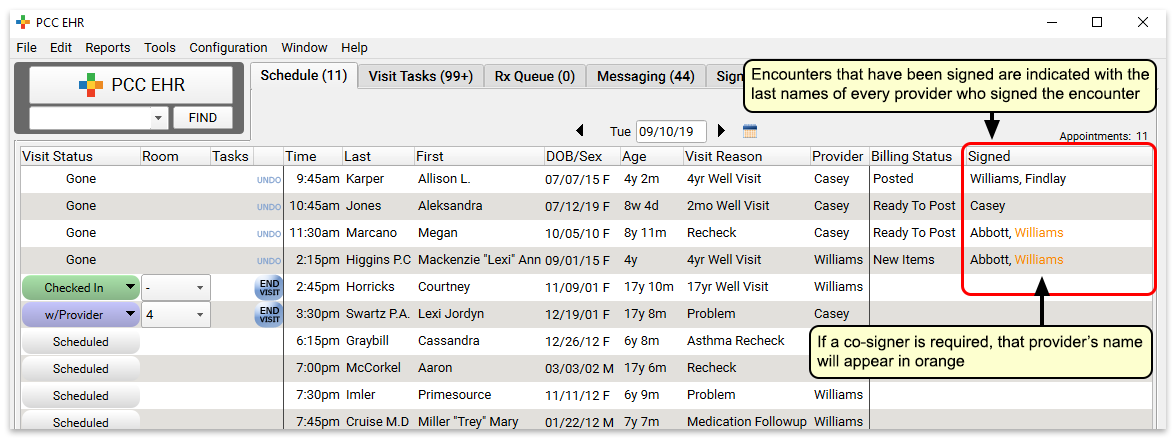
Billers can see whether or not an encounter was signed right from the schedule screen.
Co-signing: If an encounter still needs a co-signer, the designated co-signer’s name will appear in orange until a clinician co-signs the encounter.
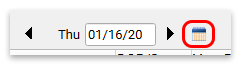
The Calendar
You can enter a new date, or view the next or previous day by clicking the arrow keys. You can also click on the calendar tool and select any date.
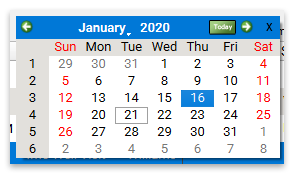
Note: Selecting an old date or a future date provides a quick way to open a patient’s chart directly to the chart note for that visit. You can also open any patient using the Find field and then open an old chart note from the Visit History screen.
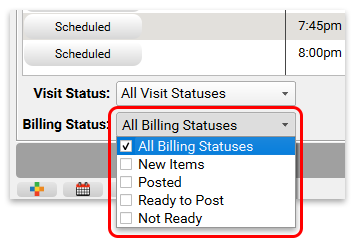
Filter the Appointment List
You can limit which appointments appear using the filters at the bottom of the schedule screen.

Once you have selected filter options, such as viewing only appointments for a specific provider, that selection will remain in effect until you log out of PCC EHR.
Save Your Defaults: Users may wish to see particular providers, locations, or visit statuses whenever they log in. After selecting your specific providers, location, and which patients should appear, click Save My Defaults to save your login settings.
The Ready-Provider Status Counter Number Comes From the Filter Settings on Each User's Schedule Screen: The Ready-Provider Status Counter number is the total number of patients on each user’s customized Schedule screen that have the “Ready-Prov” status. For example, if Dr. Casey is covering for both herself and Dr. Williams, she can change her Schedule to show both sets of patients.
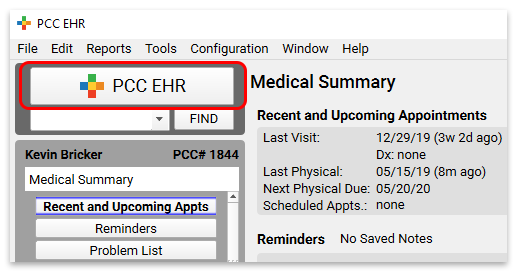
Return to the Schedule (or Other Queue) at Any Time
While viewing a chart, click the PCC EHR logo to return to the schedule, or whichever working queue you last viewed.
Configure the Schedule
For more configuration options, read Configure the Schedule Screen.