PCC 8.3 Migration Considerations
The PCC 8.3 release includes new features that may need extra planning, training, or configuration. Read below to learn more, and share relevant details with your physicians and staff.
Read the PCC 8.3 Release article for complete details on these features.
Contact PCC Support at 1-800-722-1082 for information about these or any features in PCC 8.3.
Contents
- 1 Get Ready for Forms in PCC EHR
- 2 Review and Update User Accounts
- 3 Review and Update Practice Locations and Care Centers
- 4 Are You Ready for PCC’s Appointment Book?
- 5 Implement Barcode Scanning for Immunization Inventory
- 6 Review and Update Immunization Configuration, Procedure Codes, CVX and MVX Codes
- 7 Create a New “Account Balance” Clinical Alert, or Other Account-Based Alerts
- 8 Set Up Addresses in the New Direct Secure Messaging Addressbook
- 9 Update Practice Vitals Dashboard Bookmarks
Get Ready for Forms in PCC EHR
Now that you can generate any form letter from PCC EHR, your practice may want to make adjustments to your normal workflows and office communication around forms. For example, you may need to evaluate:
- Who will generate forms that are needed before the patient is seen, during a visit, or after a visit?
- What new form letters should be set up in chart notes for each visit reason?
- Should all form letters be logged in the patient chart, as well as in the patient portal (MyKidsChart)?
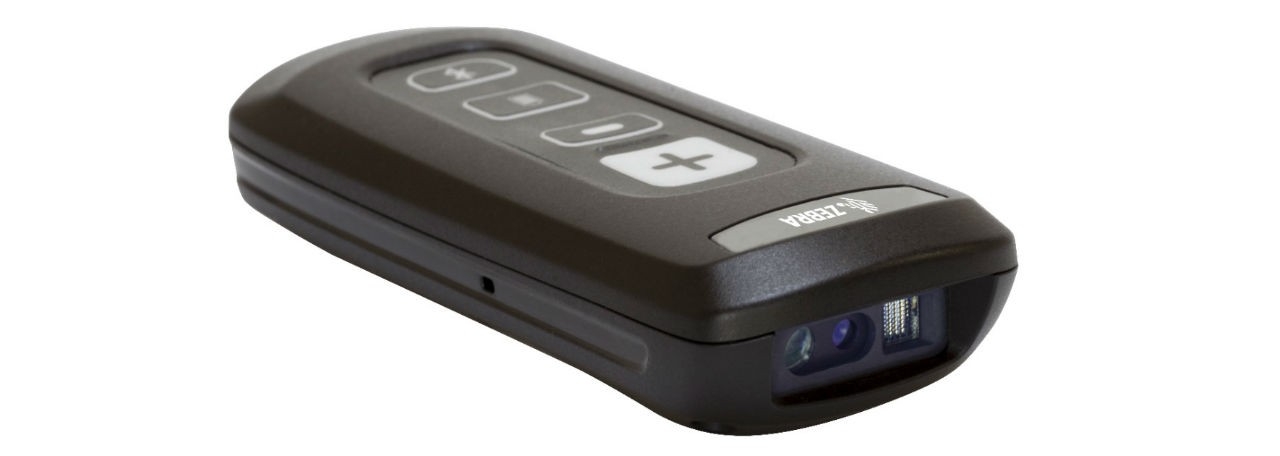
- PCC’s Guide to Pairing a Bluetooth Scanner: Learn how to pair a CS4070 or other Bluetooth scanner with your computer workstation.
- CS4070 Specification Sheet from Zebra: Check out the details on the portable CS4070.
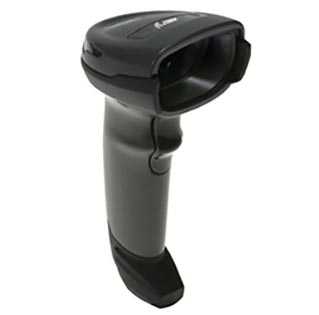
- DS4308 Specification Sheet from Zebra: Check out the details on the corded model, the DS4308.
Once you answer these questions, you can train the right people on the new tools, set up the forms you want to appear on each chart note protocol, and work with your PCC Client Advocate to tweak your form list and create new forms.
Where Should You See the Forms Component, and Which Forms Should Be Single-Click?
You can place the new Forms component on any chart note protocol, decide where it should live on your Medical Summary, Demographics, and other chart note sections, and adjust which forms appear by default.

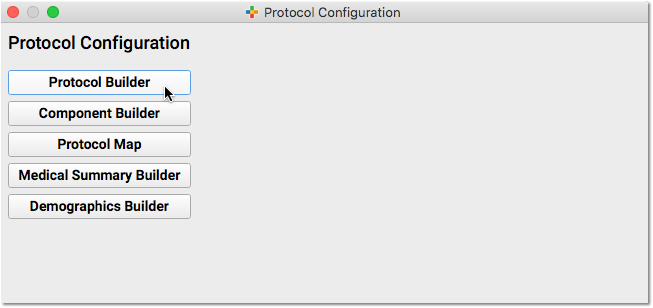
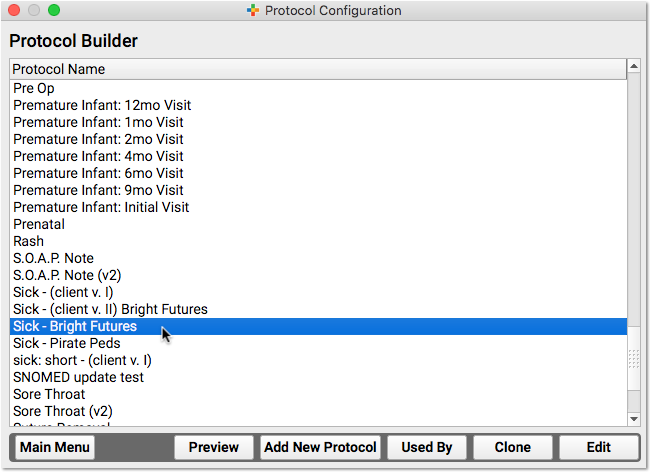
To place (or move) the Forms component, open the Protocol Configuration tool and pick either a chart section or a chart note protocol in the Protocol Builder.
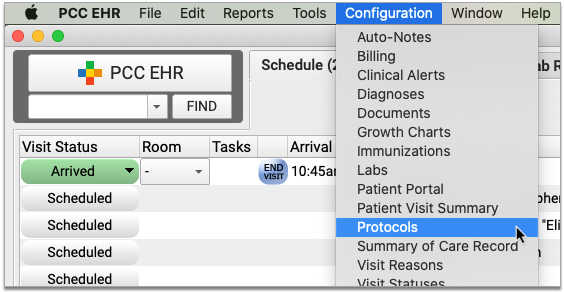
Click “Add” to add the Forms component. Use the tab on the side to slide it to a new location on the protocol.
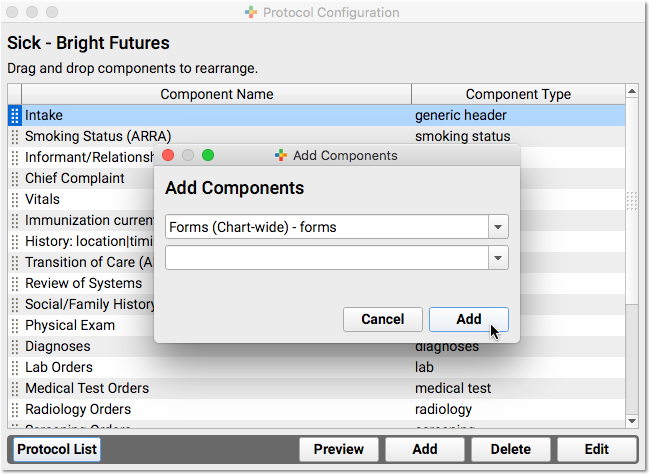
Double-click on the component to set up default forms for that chart note or chart section.
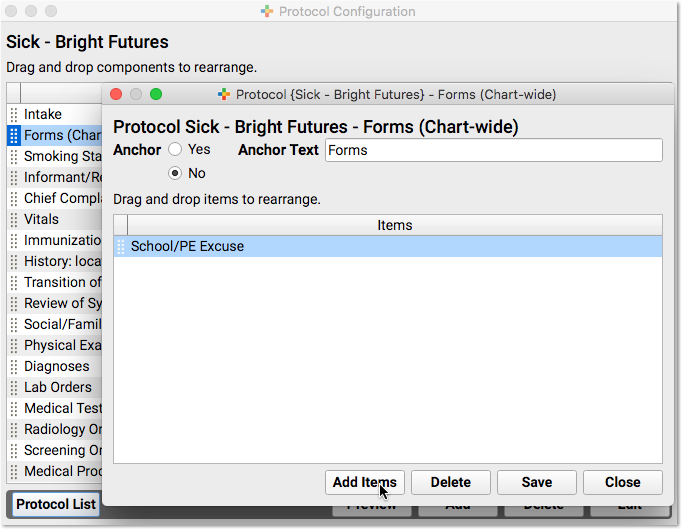
For example, you may want to add the School/PE Excuse form letter to sick visits. If you are adding the Forms component to the Demographics chart section, or configuring it for the Medical Summary, you might want to add form letters that would help your practice with their workflow when using that section of a patient’s chart.
Watermarks, Questions, and Custom Forms: Test Printing on Workstations
If your practice generates form letters that have watermarks, ask form letter questions, or use other special features, you should test those forms from PCC EHR to see if they work as expected.
For example, if you generate a watermark, you may need to adjust the printing settings in your workstation’s operating system to make the watermark print at the right darkness level. And if your PCC Client Advocate helped you set up a custom form with unusual script or information requirements, they may need to make adjustments after your update.
Adjust Default Forms Category
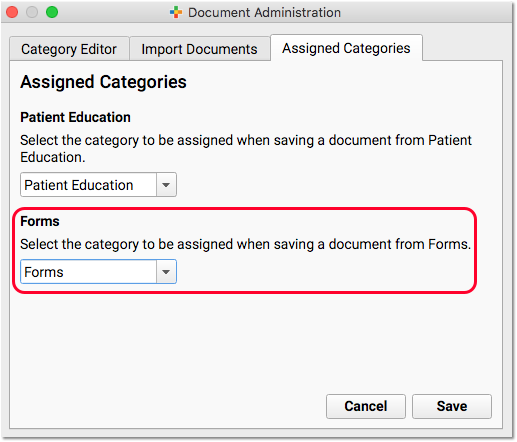
When you generate a form letter, you will have the option to print, as well as save the form letter to both the patient’s chart and the patient portal.
By default, PCC EHR will save a form letter into a Forms category, which you can later review in the Documents section of the patient’s chart.
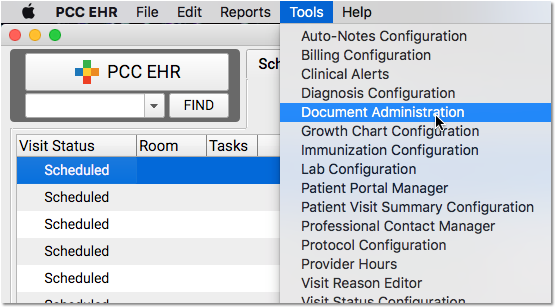
Optionally, you can use the Document Administration tool to change the default save location for forms.
Review and Update User Accounts
As part of the PCC 8.3 release, any PCC EHR user who does not already have an associated Practice Management (Partner) account will be asked for it at login.
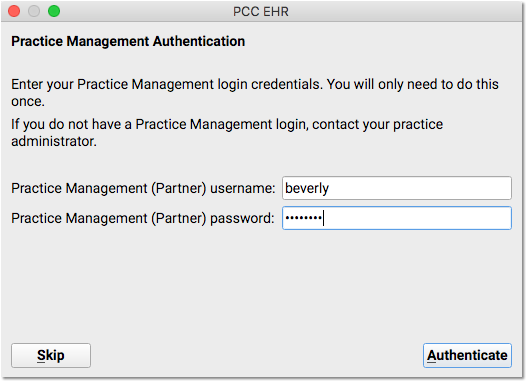
Users can click “Skip”. If they click “Skip” five times, PCC EHR will stop asking. However, associating a Partner account will lead to improved features (both Clinical and Practice Management), and will also mean your system does a better job of tracking who did what for your patients.
You can prepare your practice’s user accounts (and help them avoid the login prompt) by associating an account with each user in the User Administration tool.

Use the PM Column: You can scroll down the “PM” column in your user list to see which users do not yet have an associated Practice Management account.
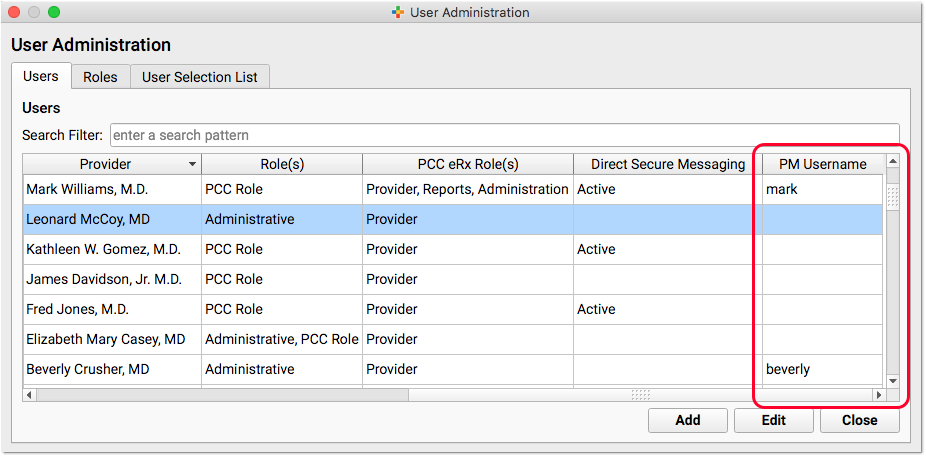
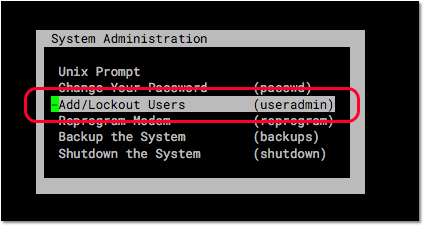
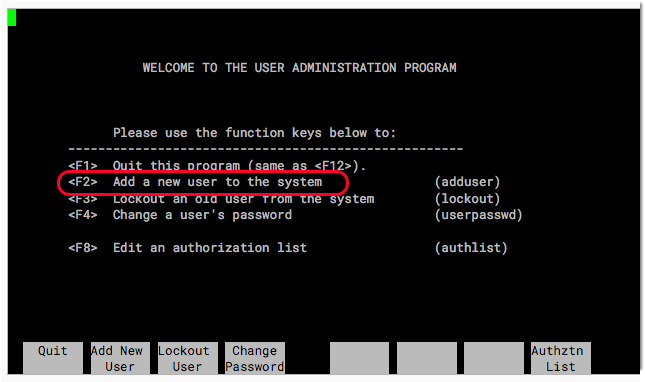
If a user does not have an account on the Partner system, you can create one for them in Partner’s User Administration tool.
Review and Update Practice Locations and Care Centers
If your practice has more than one location, and/or uses PCC’s Care Center features, you may want to review location configuration as part of your PCC 8.3 update.
After your update, all users will be prompted to select a location, and optionally to set it as their default.
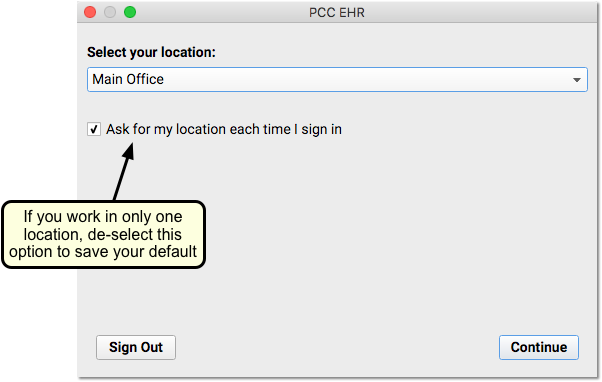
PCC will use this information for scheduling, form letters, and other features. But what locations will appear on that drop-down menu and elsewhere in PCC EHR and Partner?
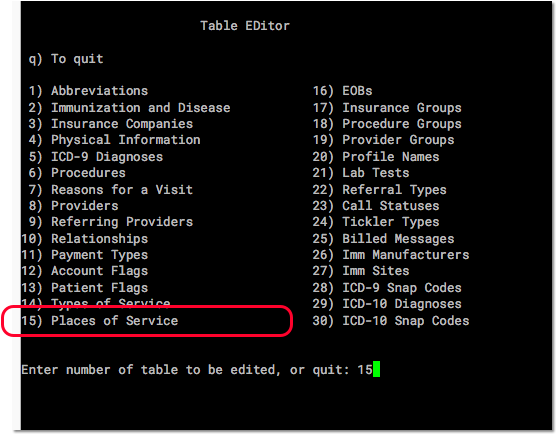
Your practice’s locations are specified in the “Places of Service” table in the Partner Table Editor (ted).
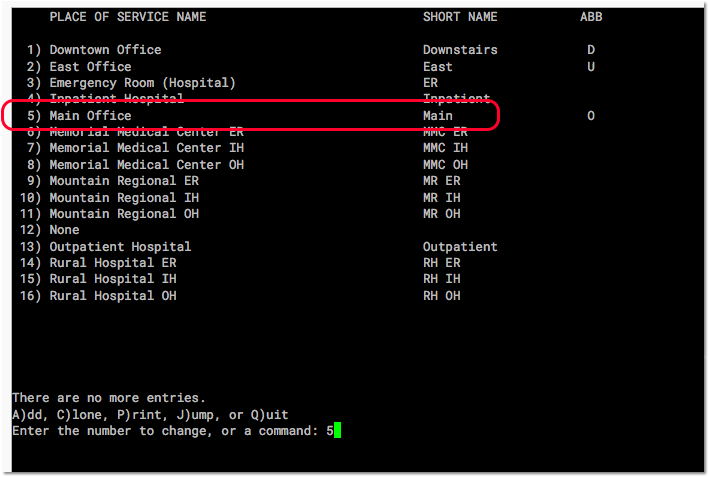
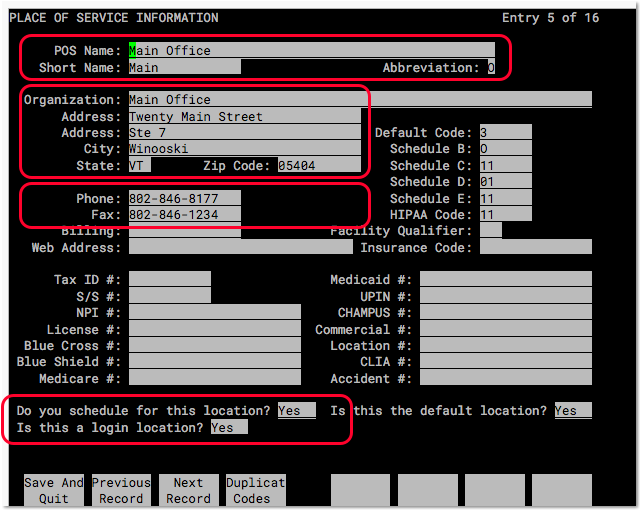
When you edit a location, you should review the location names, location abbreviation, address, and phone numbers to be sure they are what you would want on a form letter. You should also review whether or not you schedule for the location, and whether or not it is a login location.
If your practice uses Care Centers, you will also see a field to set the flag used for that Care Center. Additionally, for each user, you can assign a Care Center in the User Administration tool in PCC EHR.
When you assign a user to a Care Center, that affects PCC EHR location-based functionality. For example, in the Appointment Book, a user who is assigned to a Care Center will only be able to see that Care Center’s location(s) when scheduling. A schedulable provider who is assigned to a Care Center can only have working hours in that Care Center’s location(s), which makes configuration and setup easier for your different practice locations.
Are You Ready for PCC’s Appointment Book?
The PCC EHR Appointment Book is a powerful, user-friendly scheduler that now supports practices with multiple locations, multiple scheduling providers and schedulers, custom visit time lengths, and provides users with an amazing visual scheduling tool. You can save time and see your whole schedule in a clear, graphical layout right in PCC EHR.
Is your practice ready to leave behind the SAM scheduler in Partner and explore the Appointment Book? You can get started by watching the Schedule with the Appointment Book video, and then contact your PCC Client Advocate to learn more.
Implement Barcode Scanning for Immunization Inventory
Beep! How do you get started implementing barcode scanning for immunization inventory at your practice?
Where Are Your Imms? When Do You Enter Your Lots Into Inventory?
First, evaluate how you currently store and load in immunization inventory. Are you using PCC EHR’s Lot Manager to track your lots? Do you have a workstation or laptop that can be easily accessed near your immunization refrigerator?
You can learn more about the Lot Manager in PCC EHR here: Immunization Lots and Vaccine Inventory Management
Recommended Barcode Scanners
Next, you’ll need a barcode scanner. PCC currently recommends two models from Zebra: A handheld, portable model, the CS4070, and a corded model with a lower price, the DS-4308. Both operate well under our testing.
A portable, bluetooth scanner may be easier to use, especially later in 2018 when PCC adds the ability to scan vaccines as you administer them. A corded or “tethered” barcode scanner doesn’t need to be charged, can easily be swapped between devices, and is less expensive. However, for vaccine administration, it might be tricky to carry a laptop and tethered scanner in and out of exam rooms.
Buy a Scanner Directly Through PCC: Based on customer feedback, PCC has decided to do a limited bulk order of the above scanners. That means you can order your scanner(s) directly from us. Place your order here: https://www.surveymonkey.com/r/OrderBarcodeScanner.
Other Barcode Scanners?: We are also testing additional models. If you have experience with other barcode scanners, please get in touch, we’d love to learn about them. Some scanners work poorly with immunization boxes and vials that have a dark background behind the barcode. If you buy a low-quality scanner, you may be dissatisfied with performance.
Figure Out Your Workflow
Finally, get your staff together and play with the scanner in the Lot Manager in PCC EHR.
You’ll notice that if you scan a lot number that is already active, it will open up that lot for you so you can make changes. You may need to adjust your usual workflow for adding lots and how you move/mark boxes to indicate that they’ve been added to your PCC EHR inventory.
Give Us a Call!
Throughout the process, feel free to give us a call. Barcode scanning is new to PCC too, and we want to hear what works for you. We can also help you figure out how to use the new features in the Lot Manager and we can give you the latest news on scanners we are testing.
ThinLinc, Virtual PCC EHR Access: Barcode scanners work great on PC and Apple workstations, whether connecting to your server with the PCC EHR client application or via an RDP connection. They do not work as well with some browser-based ThinLinc connections. Contact your Client Advocate if you wish to perform barcode scanning from a remote location and you use a ThinLinc connection.
Review and Update Immunization Configuration, Procedure Codes, CVX and MVX Codes
PCC 8.3’s tools and reports support the latest flu vaccines, and barcode scanning is based on CVX codes on the immunizations that you administer. That makes the PCC 8.3 update a great time to review your immunization configuration and add, remove, or update details for the immunizations at your practice.
Contact your PCC Client Advocate to help with this process.
If you use a barcode scanner on an immunization that is not recognized by your system, it may mean your system’s CVX codes are not up-to-date. You can learn how to review and fix that by reading the CVX and MVX Codes in PCC article.
You can learn more about adding and updating your system’s immunization procedures by reading the Add and Configure Immunization and Medication Procedures in Partner article.
Create a New “Account Balance” Clinical Alert, or Other Account-Based Alerts
You can now create Clinical Alerts based on any account status. That means PCC EHR can warn your staff if a family has a billing problem, or other issue you track with account status flags.
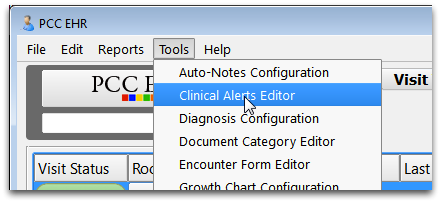
You can edit and update alerts in PCC EHR in the “Clinical Alerts Editor” under the Tools menu.
Set Up Addresses in the New Direct Secure Messaging Addressbook
Does your practice use Direct Secure Messaging to communicate with other health care providers? If you do, you can now use PCC EHR’s Professional Contact Manager to create a practice-wide list of your common contacts and their Direct Secure Messaging addresses. After your PCC 8.3 update, you may want to spend some time in the Professional Contact Manager adding your frequent contacts.


For more information about starting up with DSM at your practice, read the Direct Secure Messaging article.
Update Practice Vitals Dashboard Bookmarks
The underlying web tools used to host your Practice Vitals Dashboard have been updated.
If someone at your practice accesses the Dashboard from an external Web browser and uses bookmarks, they may need to visit dashboard.pcc.com, log in, and create a new bookmark.