Recall Patients with the Partner Patient Recaller
Partner’s Patient Recaller (recaller) is a report engine that creates custom call lists, form letters, and mailing labels for your patients and families. You can create custom searches using thousands of possible criteria combinations, and the Recaller will help you contact those different groups of patients.
Use the Recaller to find the right patients and then print out physical reminders, flu shot announcements, or immunization recalls. You can also use the Recaller to do quick research and reporting on your patient populations.
Contents
- 1 Recall in Partner, or Recall in PCC EHR?
- 2 Partner Recaller Overview: Run the Recaller and Create a List of Patients Based on Criteria
- 3 Partner Recaller Example: Recall Patients for Physicals
- 4 Save and Restore Partner Recaller Criteria Settings
- 5 Partner Recaller Criteria Reference
- 5.1 Introduction: How Do I Find and Select Criteria for a Recall?
- 5.2 Age
- 5.3 Appointments
- 5.4 Appointments (or Procedures) By Provider
- 5.5 Birthday (next)
- 5.6 Date Added to Partner
- 5.7 Date of Last Physical
- 5.8 Date of Last Visit
- 5.9 Date of Physical Due
- 5.10 Diagnoses
- 5.11 Ethnicity, Race
- 5.12 Flags, Account or Patient
- 5.13 Insurance Plan
- 5.14 Procedures
- 5.15 Provider (Primary Care)
- 5.16 Sex
- 5.17 ZIP Code of Custodian
- 6 Partner Recaller Output Reference
Recall in Partner, or Recall in PCC EHR?
The fastest and easiest way to run a patient recall is found in PCC EHR’s Report Library. Read the Recall Overdue Patients for Well Visits article to learn how.
In addition to Well Child recall, your practice can create custom reports based on any criteria.
The article below covers the Partner Recaller (recaller), which provides unique output options (such as generating form letters for a batch of patients).
Partner Recaller Overview: Run the Recaller and Create a List of Patients Based on Criteria
You can use recaller to find and contact patients who need flu shots, patients due for physicals, or any other subset of your patient population. Running recaller works the same way regardless of your goal. Follow the procedure below.
Run the Recaller
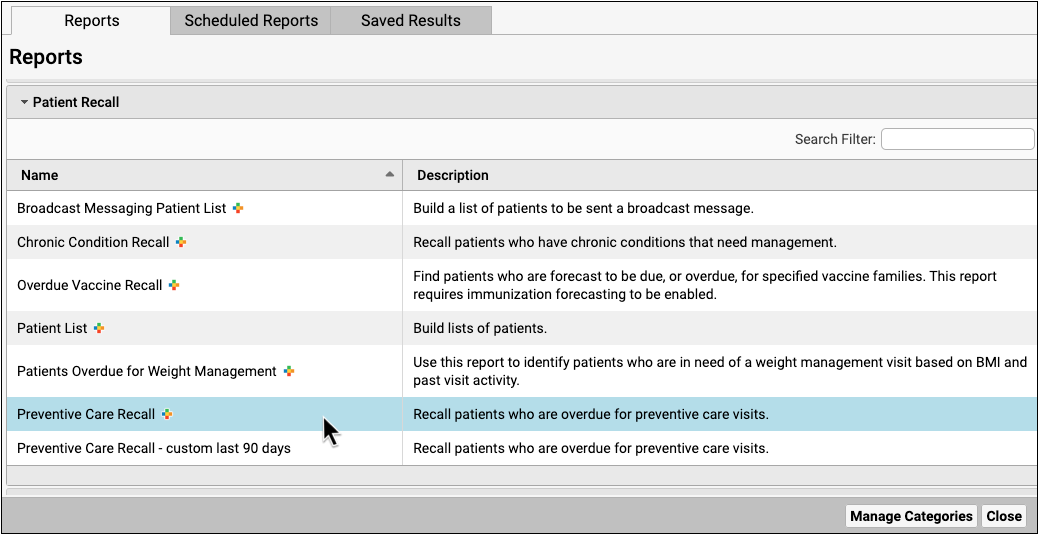
You can run recaller from the Patient/Account Reports window or by typing recaller at a command prompt.

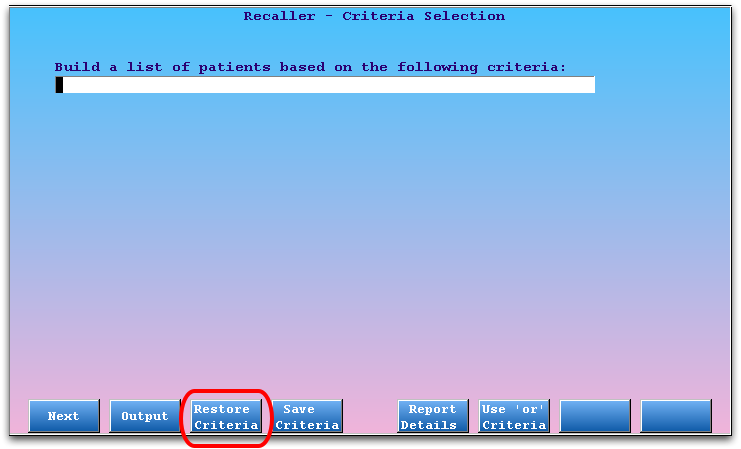
Enter a Criteria to Build a List of Patients
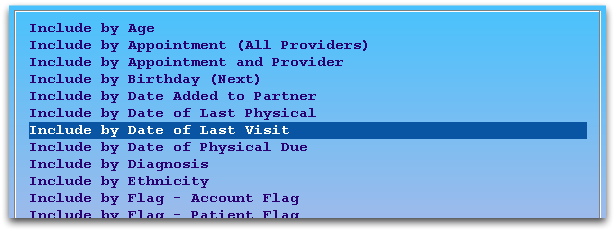
Your patient database includes thousands of patients. Enter one or more criteria that will determine which patients to recall. For a list of possible criteria, enter an asterisk and press Enter.

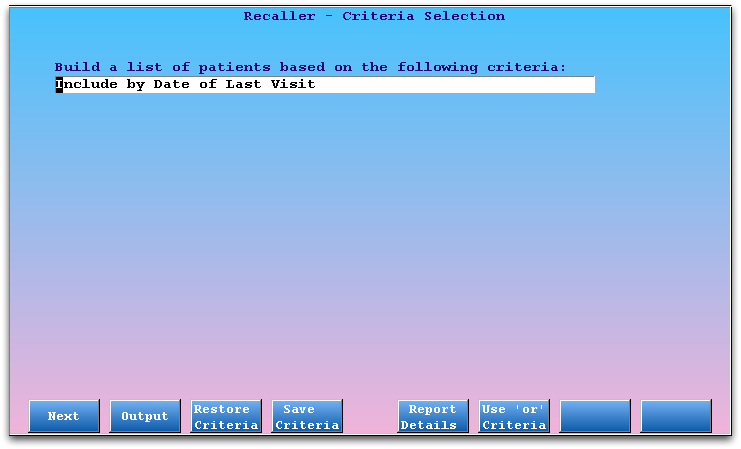
For the example above, the user needs to see all patients who have visited the practice in the past three years, a common way of displaying all “active” patients. They will therefore limit by the patient visit date criteria.
All Patients?: If you want to work with all patients in your database for some reason, enter no criteria and press F2 – Output to continue to the output selection screen. You can skip down to Step 8, below.
Press [F1 – Next]
Press F1 to add the criteria to your report and proceed to select specific details.

Enter Criteria Details
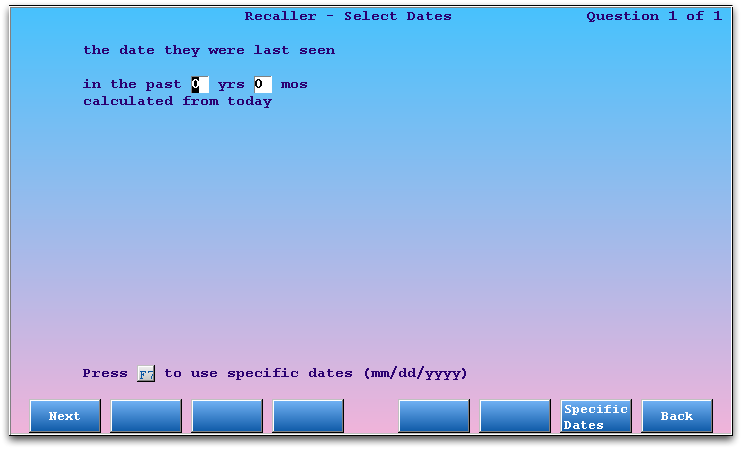
For each criteria item you select, recaller will ask you for details. You will see one or more screens asking you to clarify the criteria.
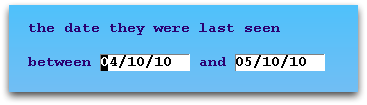
In our example, the user wishes to review a list of active patients, so they will enter a range of the past three years. The user could also press F7 – Specific Dates to find patients who had visited for a specific date range.
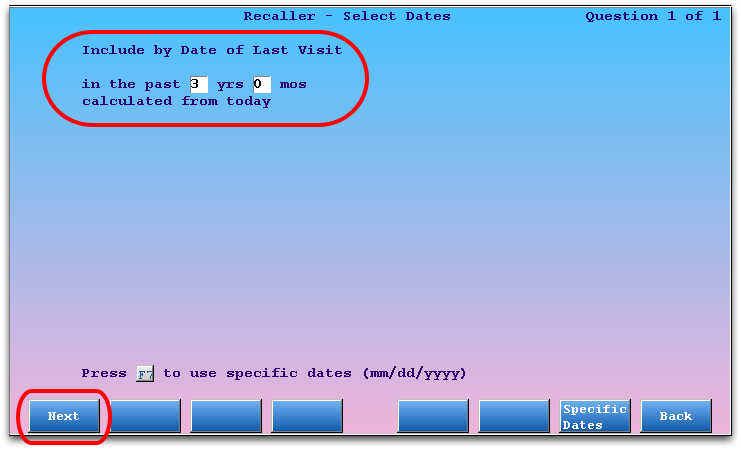
After answering the criteria questions, press F1 – Next.
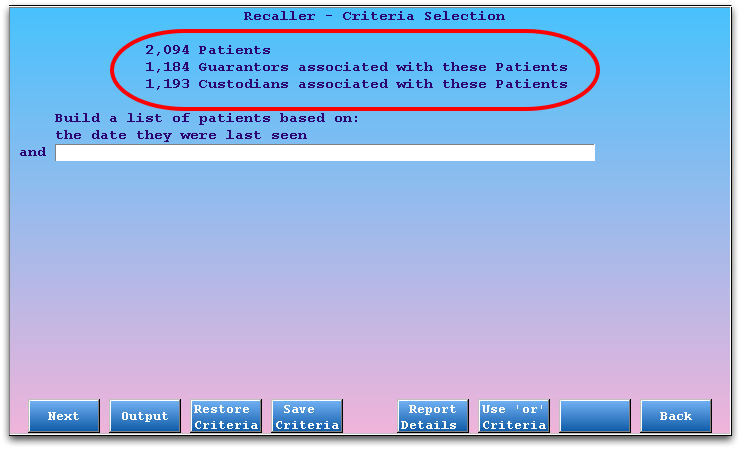
Review Patient Totals
After you have entered criteria details, Partner will return you to the first recaller screen. At the top, you can see the current account and patient totals, based on your criteria so far.
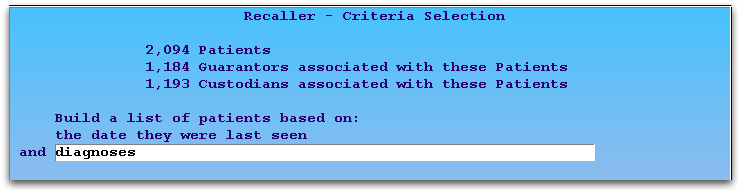
Optional: Add More Criteria
You can add multiple criteria for a more refined recall list. Add a criteria in the “and” fields by using the asterisk (*). Then press F1 – Next and answer questions to enter recall criteria details.
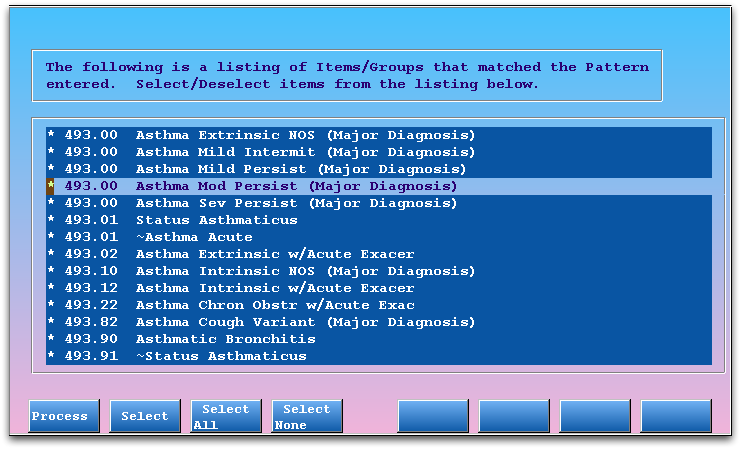
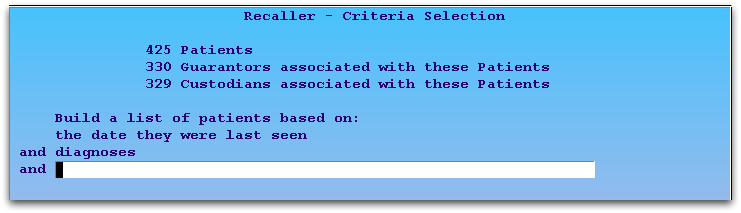
As you add additional criteria, the size of your recall list will shrink as the number of patients who meet all the criteria reduces. In the above example, the office now knows they have 425 patients who have had some kind of asthma diagnosis billed within the past three years.
Note: In the above example, the user wishes to limit the list of active patients to those who have had an asthma diagnosis of any kind. When entering diagnoses, they used the F6 – List By Pattern function. For more information on all recaller criteria and the tools for entering criteria details, read Recaller Criteria Reference at https://learn.pcc.com.
Optional: Review Criteria Details
At any time, press F5 – Report Details to review the details of your selected criteria.
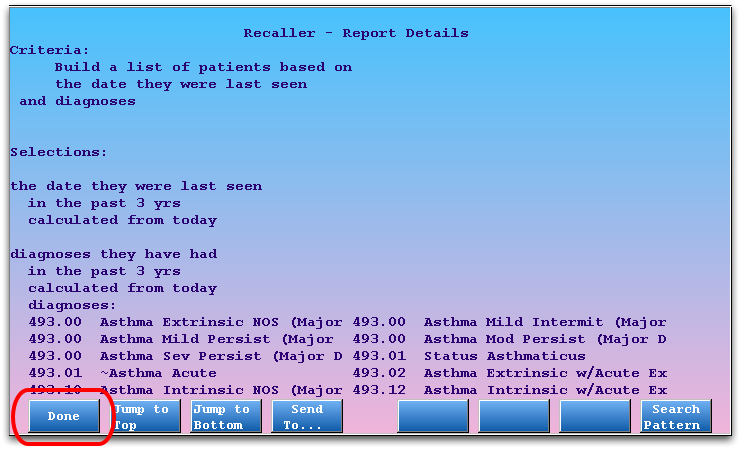
Press F1, or F12 to return to the criteria list screen.
Press [F2 – Output] to Continue
Once you have finished selecting your criteria, press F2 to visit the Output screen.

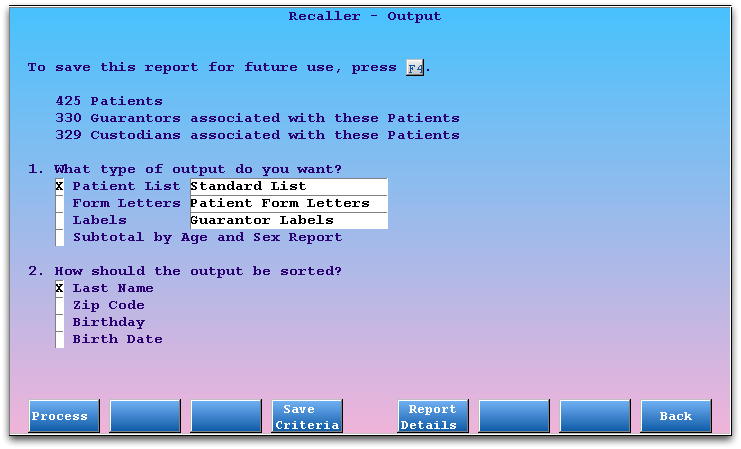
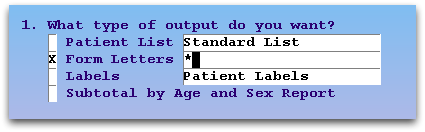
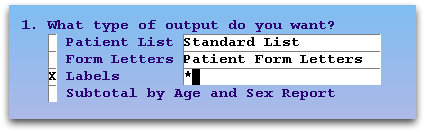
Select Output
Use the first output selection question to choose what the Recaller should produce. The Recaller can create patient lists, form letters, labels, or a special age and sex subtotal report.
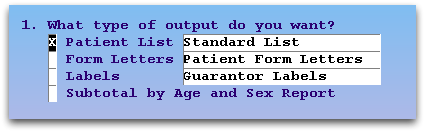
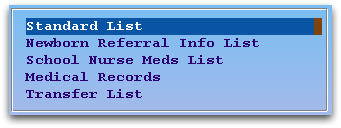
For the first three options, you can use an asterisk to select the specific style of patient list or form letter or label category. Some options, such as form letters or labels, will prompt you for details after you press F1 – Process.
For a guide to all available output formats, read the Recaller Output Reference.
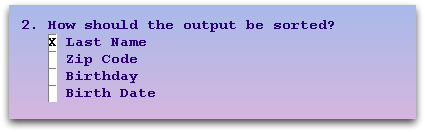
Select Sorting Option
Select whether your lists, form letters, or other output should be sorted by Last Name, ZIP code, Birthday, or Birthdate.
Birthday or Birthdate?: If you are printing physical reminders or birthday cards, you may want to sort the patient list by their birthday, regardless of the year of their birth. If you are generating other materials, by age, you may wish to sort patients by actual birthdate, including the year.
Press F1 – Process to Continue
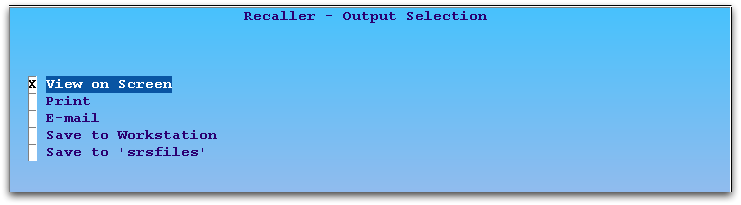
Choose Output Destination
On the Output Selection screen, choose whether to send your resulting output to the screen, printer, e-mail, or file. Then press F1 – Process to continue.
Review Results, Optionally Select New Output
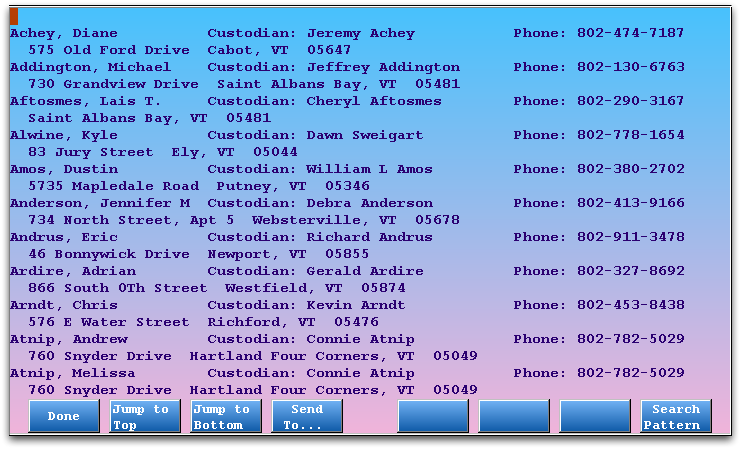
The default output is a patient call-back list, with custodian information, on the screen:
Press F12 or F4 to select a different output. Press F12 twice to return to the Criteria screen and add or change recall criteria.
Partner Recaller Example: Recall Patients for Physicals
Reminding patients and families about their physicals is good for your patients and good for your practice. The Partner Patient Recaller can produce phone lists, form letters, and mailing labels for patients who are overdue for a physical or have a physical due date coming up soon.
Read the steps below to learn how an office could recall for physicals.
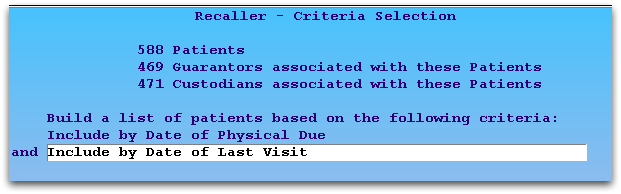
Add Physical Due Date Criteria
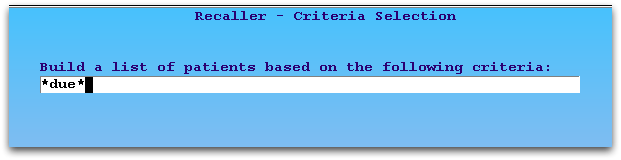
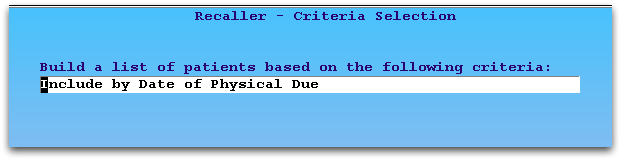
After running the Recaller, select the “Include by Date of Physical Due” for a physical criteria. You can search for it by entering “*due*”, as shown.
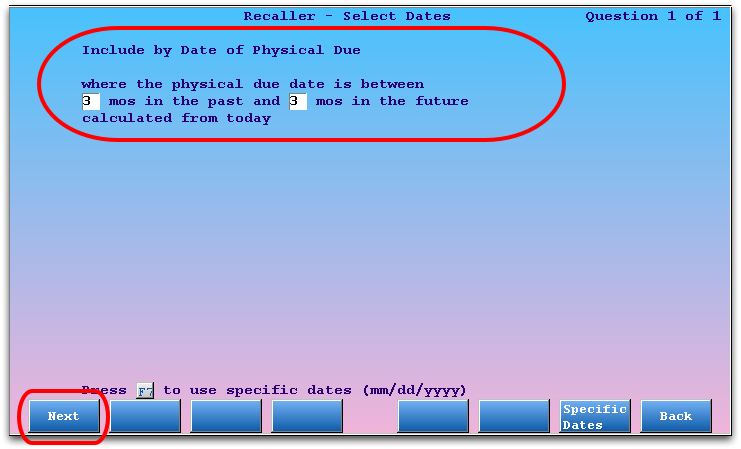
Enter a date range that will include patients who have recently missed their physical due date and/or those for whom the time for a physical is approaching.
Note: A patient’s next-due physical date is set, based on your office’s custom physical schedule, whenever they are billed for a Well Child procedure. You can also change a patient’s physical due date in the Patient Editor (notjane).
Add Last Visit Date Criteria to Find Active Patients
Use the Last Visit criteria to limit your recall to active patients, those who have visited your practice in the past three years or so.
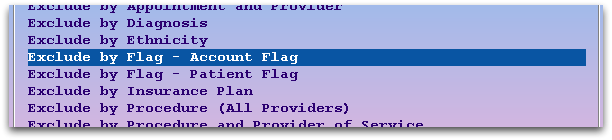
Add Account and Patient Flag Criteria to Exclude Removed Patients
Use the two “Exclude by Flag” criteria to remove Inactive, Dismissed, Deceased, or other sets of patients or accounts that you do not want to include in your recall.
You can also use the Exclude by Flag criteria to remove patients and families who have asked not to be contacted. Read Exclude Patients From Recaller and Notify to learn more.
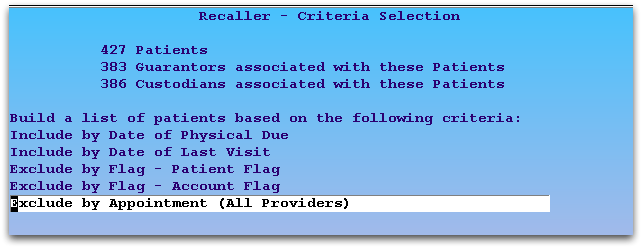
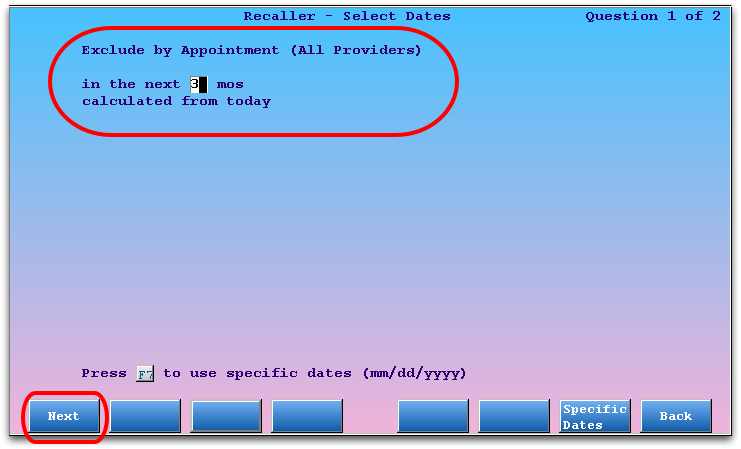
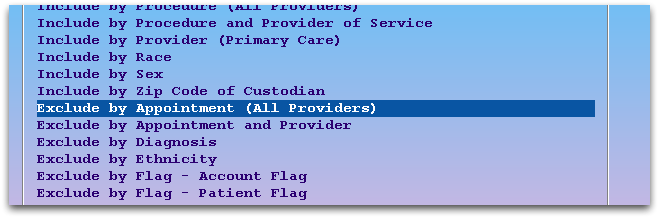
Add Exclude by Appointment Criteria to Avoid Patients with Upcoming Appointments
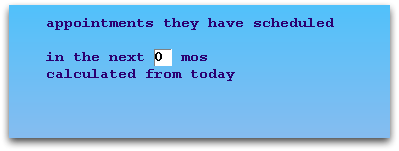
Since you don’t want your Recaller output to include patients who already scheduled an upcoming physical, select the “Exclude by Appointment” criteria. Then enter a date range and select all physical visits.

Optional: Add Additional Criteria
You may also choose to limit your well child recall to certain geographical locations (by zip code), primary care physician, or other criteria.
Optional: Review Criteria
At any time, press F5 – Report Info to review the specific details you have entered for each criteria in your recall.
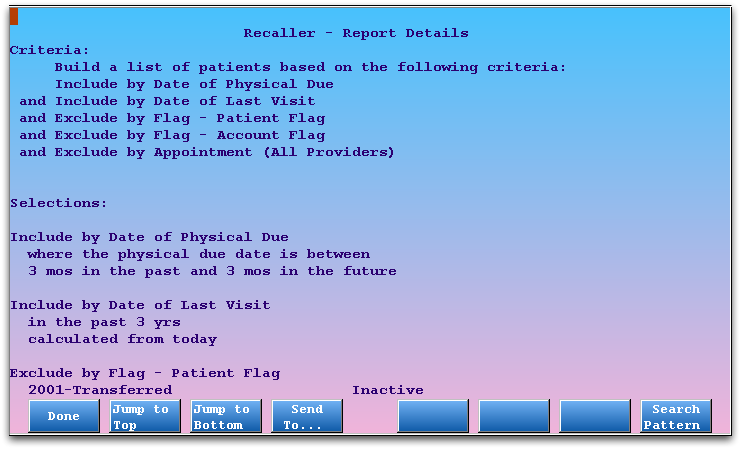
Press F1 – Done to continue.
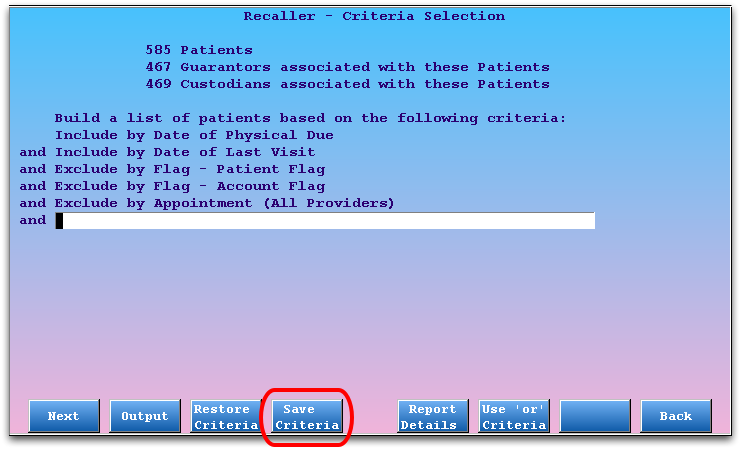
Optional: Save Your Physical Recall for Later Use
You can save and restore your criteria settings for a report so you will not have to rebuild them whenever you run a physical recall. Press F4 – Save Criteria from the criteria screen, enter a name, and press F1.
For a complete guide to re-using Recaller report sets, read Saving and Restoring Recaller Settings.
Select Output, Finish Recall
Press F2 – Output and select your output. You can produce custom form letters, mailing labels, or a simple contact list. For a complete guide to Recaller output, see the Recaller Output Reference below.
Save and Restore Partner Recaller Criteria Settings
You can save, and later restore, complex sets of report criteria for the Partner Recaller. The Partner Recaller has a wide range of criteria, with thousands of possible criteria combinations. After you set up a recall report, you may wish to save the criteria. When you return to the Partner Recaller later, you can restore your old criteria, make adjustments (such as a date range or type of patient to recall), and re-run the output.
Relative Dates: Many of the Partner Recaller’s date-specific criteria use relative dates. For example, if you use the “Last Visit Date” criteria, the report will calculate for the number of days from whatever date you run the report. Since relative dates will keep your reports current and accurate, many types of reports can be saved and restored.
Save a Recaller Report
After entering your report criteria, press F4 – Save Criteria and enter a name and description to save your report.
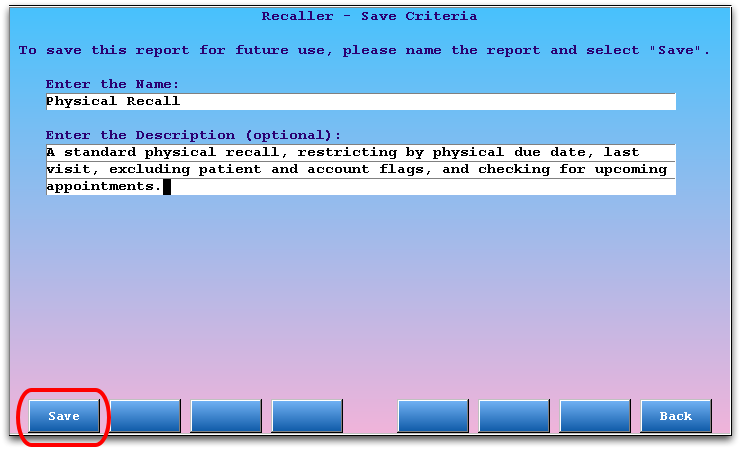
Press F1 – Save to save your report.
Restore a Recaller Report
Press [F3 – Restore Criteria] to restore a set of Recaller criteria.
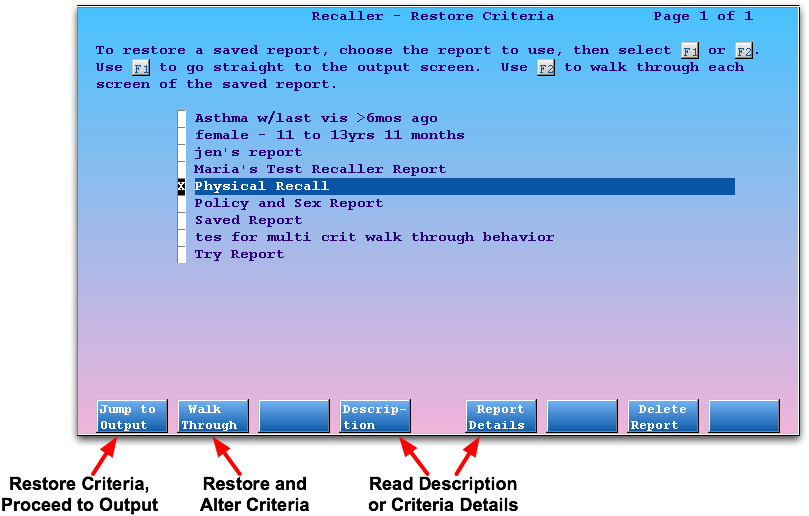
Arrows for the two options, one is “Restore Recall Criteria, Jump to Output”, “Restore and Review/Alter Criteria”
Choose from your list of criteria and then press F1 – Jump to Output to proceed to the report’s output.
Which Report Did I Want, Again?: If you have trouble discerning the report you wish to restore, you can select one and press F4 – Description to review the description or F5 – Report Details to read the details of the criteria settings.
Walk-Through Instead: If you want to restore a report and then tweak it, making slight changes to the criteria used for the recall, press F2 – Walk Through instead of F1. You will see the list of the recall’s criteria. You can then use F1 – Next to walk through each criteria and adjust dates or selected items.
Delete Old Reports: Select any Recaller report on the Restore Criteria screen and press F8 – Delete to delete it.
Partner Recaller Criteria Reference
When you run the Partner Recaller, you begin by adding one or more criteria to limit the output. The criteria determine which patients will be part of your recall.
How do each of the Recaller criteria work? What would each one be useful for? The catalog of criteria options below explains the purpose and effect of each criteria, as well as how to fill them out.
Introduction: How Do I Find and Select Criteria for a Recall?
Selecting and Searching for Criteria: You can use an asterisk to see a list of all available criteria. Criteria are listed in alphabetical order, separated into “Include by” and “Exclude by” lists.

You can also search for a criteria by surrounding a search term with asterisks (i.e., enter “*due*” to search for criteria with the word “due” in the description).
You can add several different criteria, building a more and more refined list of patients for your recall. For examples of selecting and entering criteria, read the examples above.
Age
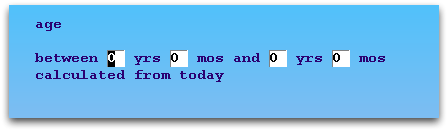
Select the age criteria in order to limit your recall according to patient’s age or date of birth.
When you select the age criteria, the Recaller will prompt you to enter an age range.
Optionally, you can press F7 – Specific Dates to enter a birth date range.
Uses: The age or birth date criteria can create a list of all patients of a certain age. You could use this criteria to recall certain patient age groups for flu shots or other services.
Appointments
Select an appointment criteria to include or exclude patients based on appointments in the Partner scheduler, either for any provider or a specific provider.
When you select an appointment criteria, the Recaller will prompt you for an appointment date range and a visit reason or reasons.
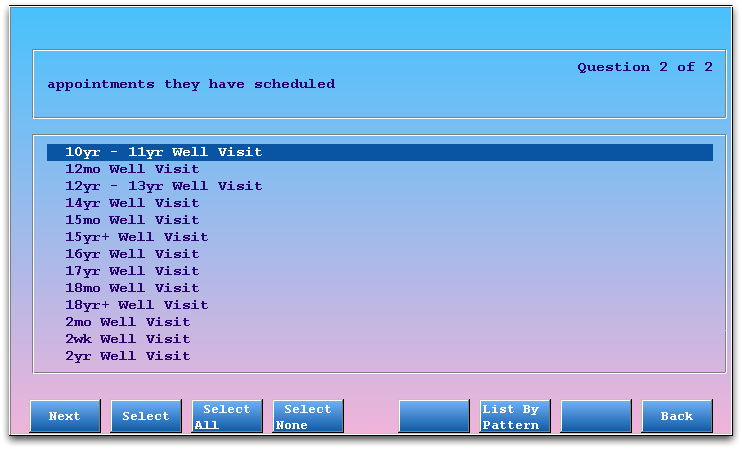
Use Select All: You may only care about a patient’s appointment date, regardless of the visit reason. Note that you can use the Select All function on the Visit Reason screen to remove that item from the Recaller’s filtering.
Uses: An appointment-based recall helps you exclude patients with scheduled appointments from physical reminders. You could also find all patients who are scheduled for a certain visit reason.
Appointments (or Procedures) By Provider
You may wish to see a list of all patients who have had certain procedures or appointments with a specific provider or providers. Use the “By Provider” criteria in the lists.
These criteria work like the procedures and appointments criteria, described in the sections above, except that the Recaller will also ask you to specify which providers should cause the patient to be included or excluded from the recall.
Uses: You can use these criteria to create a list of all the patients a certain provider performed a Well Child diagnoses for, or find out how many recheck visits are in the schedule for a certain nurse.
Birthday (next)
Use the upcoming birthday criteria to find patients with birthdays occurring within a specified future time frame.
When you select this criteria, the Recaller will ask you how far forward it should look when collecting birthdays.

Optionally, you can press F7 – Specific Dates to enter a birthday date range.
Uses: You could use this criteria to send birthday cards.
Date Added to Partner
Select the Partner date criteria to recall patients based on when they were added to the Partner system.
When you select this criteria, the Recaller will prompt you to enter a time frame.
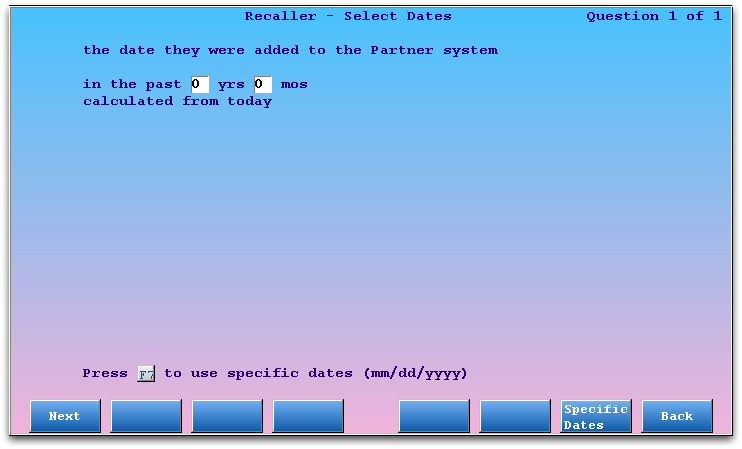
Optionally, you can press F7 – Specific Dates to choose a precise date range.
Uses: This criteria can help you find new patients or families, regardless of their visit history. You could create a list of all patients added to your Partner system in the past year. During a data conversion from another billing system, this recall criteria could list precisely those patients added to your system on a certain day.
Date of Last Physical
You can build a list of patients based on the date of their last physical.
After selecting this criteria, the Recaller will ask you to input a range of time within which the patient’s last physical must have occurred to be included in the recall.
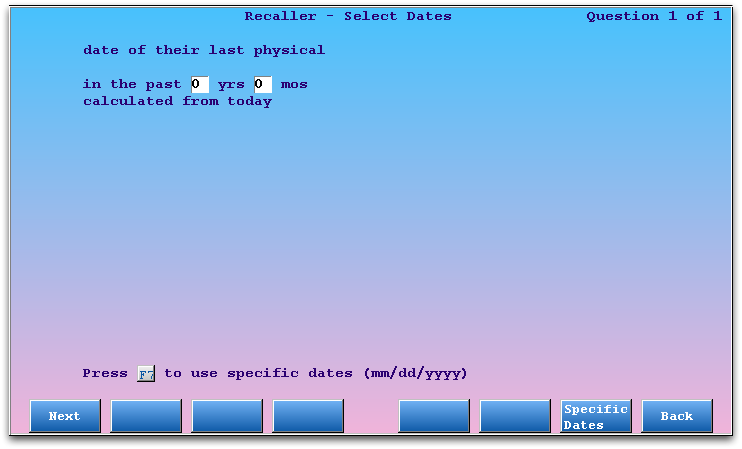
Optionally, you can press F7 – Specific Dates to enter a specific date range instead of a time relative to today.
Date of Last Visit
Select the patient’s last visit date criteria in order to limit your recall to all patients who were seen within a specified time frame.
When you select this criteria, the Recaller will prompt you to enter a length of time to search for past patient appointments.
The Recaller will run a search relative to today (the time you run the report) and include patients with visits in that time period. Optionally, you can press F7 – Specific Dates and enter a precise date range.
Uses: The visit date criteria is often used to limit a recall to active patients, as determined by those who have visited your practice within the past three years. You could also use it to create a list of patients whose last visit was several years ago so that their charts may be archived.
Date of Physical Due
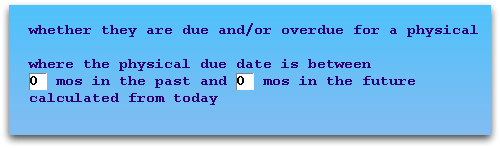
Select the physical due date criteria in order to limit your recall according to a patient’s physical schedule.
When you select the physical due date criteria, the Recaller will prompt you to enter a time frame for when the patient’s next physical is due. Keep in mind that this may include both patients who are overdue for a physical or will be due for one soon.
Note: Partner enters a “Due Date for Next Physical” into a patient’s record when their guarantor is billed a Well Child procedure during checkout. It uses a customizable physical schedule for your office, originally based on the AAP’s recommendations. Run the Patient Editor (notjane) to see any patient’s next physical due date.
Uses: The physical criteria can help you find all patients who are overdue for a physical or have a physical due during the coming months. You can use the Recaller to print mailing labels for reminder postcards.
Diagnoses
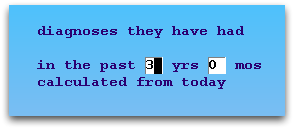
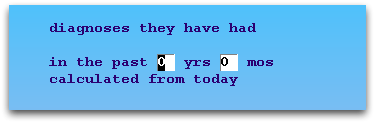
Select a diagnoses criteria to include or exclude patients who have received certain diagnoses.
When you select a Diagnoses criteria, the Recaller will prompt you to select a date range and then a diagnosis or diagnoses.
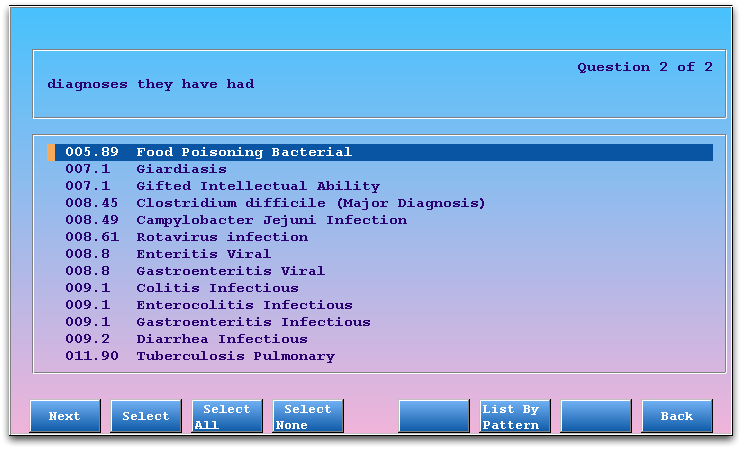
Uses: A diagnoses recall is ideal for finding all asthma patients, all ADD patients, or all patients suffering from any other diagnoses, in order to remind them of services or opportunities. You could also run a recall using a list of diagnoses to remind high-risk patients of a flu clinic.
Ethnicity, Race
Use the ethnicity and/or race criteria to limit your recall to specific ethnicity or race, based upon the U.S. Federal Government’s standard values.
The Recaller will ask you to select races/ethnicity to include or exclude.
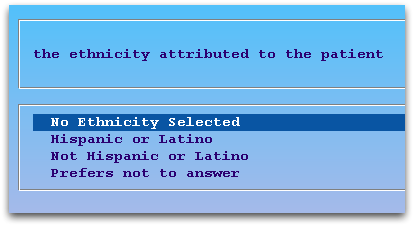
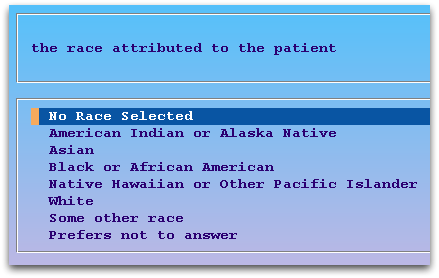
Note: Race and ethnicity are stored in the Patient Editor (notjane) or in the Demographics section of the patient’s electronic chart. These criteria will only be useful if your practice collects this information.
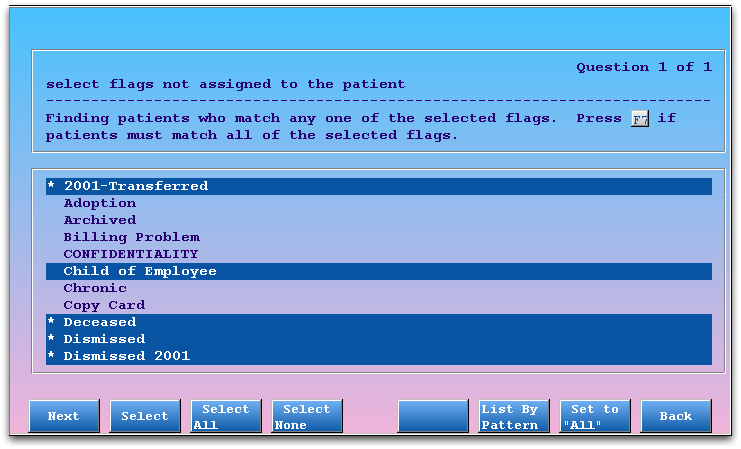
Flags, Account or Patient
Select one of the four status flag criteria to filter Recaller results by patient or account status flags. You can include or exclude by patient or account flags.
When you select any of the status flag criteria, the Recaller will prompt you to select the flags.
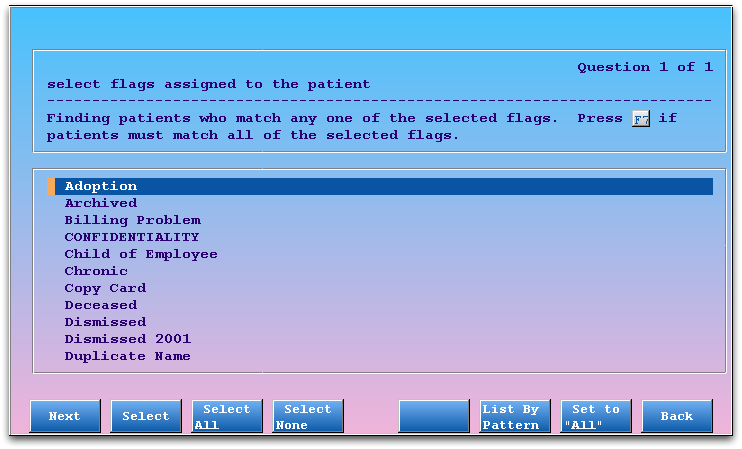
Any, or All?: By default, when you are including patients by flag, any of the selected flags will cause them to be included in the recall. When you are excluding by flag, the Recaller will knock them out of the recall if they have any one of the selected flags. You can change these default behaviors by pressing F7 – Set to All/Any. For example, if you want to recall patients who are both Special Needs and Referred, you would select both flags and then press F7 to indicate that patients needed all flags to be included in the recall.
Auto-Selected: You may notice that certain status flags are already marked for exclusion by default. You can set the default behavior for excluding flags in the Table Editor (ted).
Uses: Status flags are used to categorize and mark accounts and patients for a wide variety of reasons, any of which may be a good reason to recall a patient or exclude them from a recall. If a patient record is flagged deceased, dismissed, or transferred, for example, you would want to exclude them from a physical reminder recall. You could also use the Recaller to send a form letter to all accounts flagged “Collection”, or to exclude all families that have asked not to receive recall messages.
Insurance Plan
Select an insurance plan criteria in order to limit your recall to all patients who have (or do not have) specific insurance plans.
When you select an insurance plan criteria, the Recaller will prompt you to select a plan or group of plans.
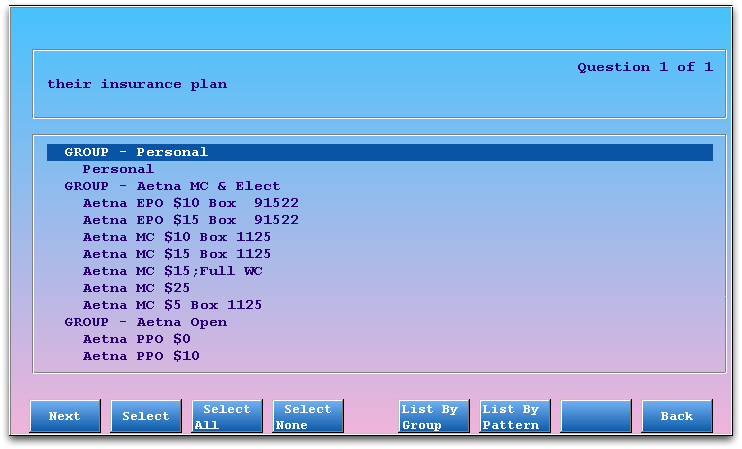
Use function keys at the bottom of the screen to select individual plans, all plans, deselect all plans, list and select plans by insurance group, or search for a plan.
Uses: You may need to contact all families under a certain insurance plan to inform them of a change in policy or that you are dropping the plan. You may wish to inform your patient population of a new service, but only inform patients with insurance policies that permit the service.
Procedures
Select a procedure criteria to find or exclude patients who received (were billed for) certain procedures.
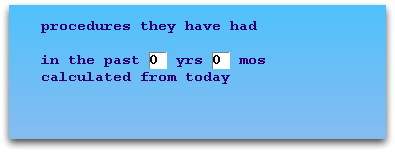
When you select a procedures criteria, the Recaller will prompt you to select a date range and a procedure or procedures.
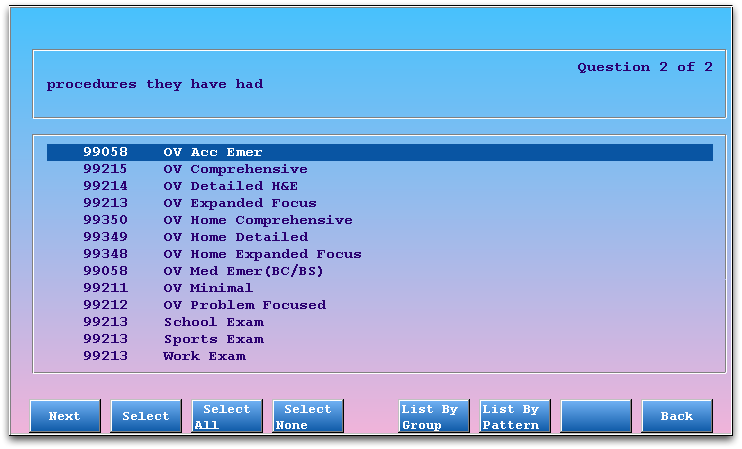
Uses: A procedure recall is ideal for performing an immunization recall when you discover a bad immunization lot. You could also combine the exclude procedure criteria with the “Patient’s Date of Birth” criteria to find all patients of a certain age who have not received a specific immunization or other recommended procedure.
Provider (Primary Care)
Select the primary care provider criteria to include only a specific provider’s (or providers’) patients in a recall.
When you select this criteria, the Recaller will prompt you to select providers or provider groups.
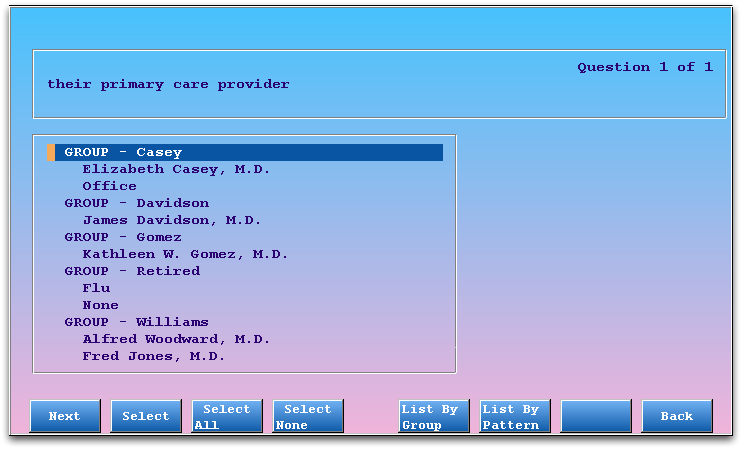
Note: Primary care provider information is stored in the Patient Editor (notjane). This criteria will only be useful if your practice assigns this information.
Uses: Add this criteria to limit your recall to a subset of your providers. You may need to inform all of a provider’s patients that a physician has new office hours or that he or she is retiring.
Sex
Select the sex criteria to find only male or female patients.
When you select the sex criteria, the Recaller will prompt you to select male or female patients.
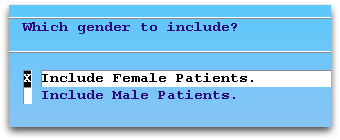
Uses: You can limit any recall, for any reason, to one sex or the other. You could use the sex criteria to send Gardasil information, for example.
ZIP Code of Custodian
Select the ZIP code criteria to find patients living in a certain area.
When you select the ZIP code criteria, the Recaller will prompt you to enter a ZIP code or ZIP code range.

Uses: A ZIP code recall could help you notify families and patients of regional issues, such as a new office location or new city and state ordinances.
Partner Recaller Output Reference
After you select criteria or restore a saved Recaller report, use the Output screens to specify what you will generate with the Recaller results. You can create patient lists, form letters, mailing labels, or a subtotal report.
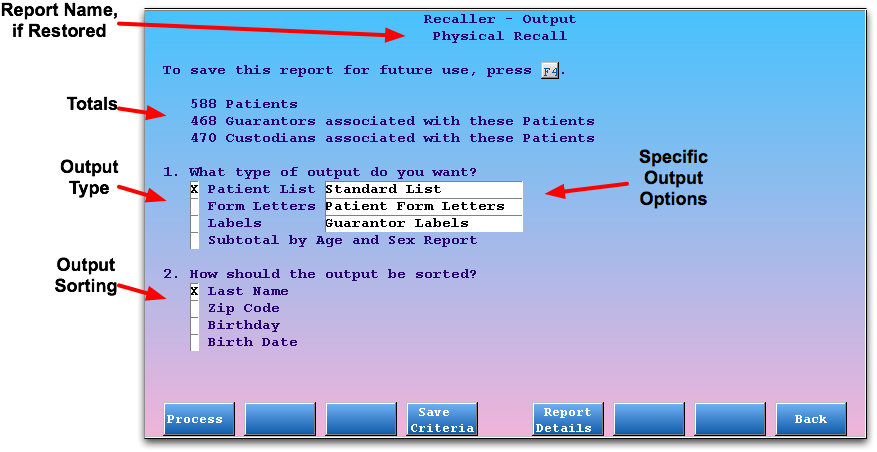
After you select an output type and a sorting method, press F1 – Process to proceed to additional output questions or the final output selection screen.
Read below to learn details on each section of the Output screen and options, along with information about the additional questions or screens for each output type.
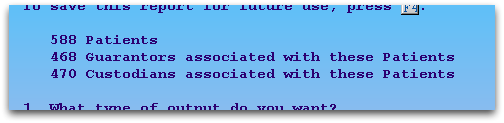
Totals
The top section of the screen indicates report totals. Since the Recaller finds patients by both patient and family characteristics, it lists patient, guarantor, and custodian totals. These numbers will differ because some families have more than one patient meeting your recall criteria, and patients may have different custodians and guarantors.
Recaller Output Types
The first question on the Output screen asks what type of report output you wish to generate.

Patient Lists
A patient list includes basic information about each found patient. You might use a patient list to contact a list of patients by phone, or export the list to another program or an auto-calling system.
After checking off “Patient Lists”, use the asterisk (*) to select the specific patient list.
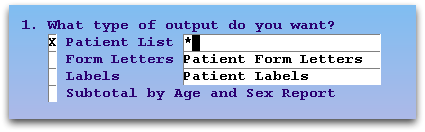
Customize Patient Lists: Patient lists work just like form letters, described below, except that they use only a line or two for each patient.. You can create a patient list using waffle, including any text and patient or account variables. PCC Support can move your custom lists from the form letter section to the list section.
Form Letters
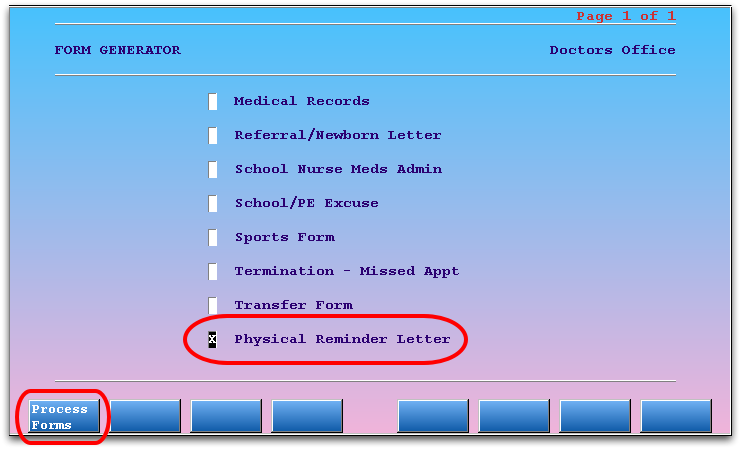
You can output a form letter for each patient found in your Recaller results. Select the Form Letters option, and then choose which list of form letters to select from.
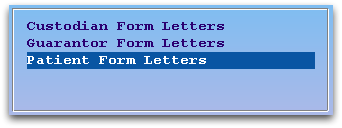
When you press F1 – Process, the Recaller will prompt you to choose a specific form letter and may ask you form-letter specific questions.
Custom Form Letters: You can create, edit, and share form letter templates using the waffle program.
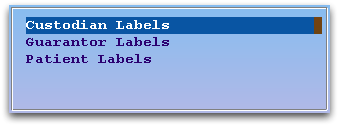
Mailing Labels
You can create printable labels, formatted to standard Avery sizes or your own custom label. Select the Labels output, and then indicate whether you want one label for each patient, custodian, or guarantor.
When you press F1 – Process, the Recaller will prompt you to select or design your label.
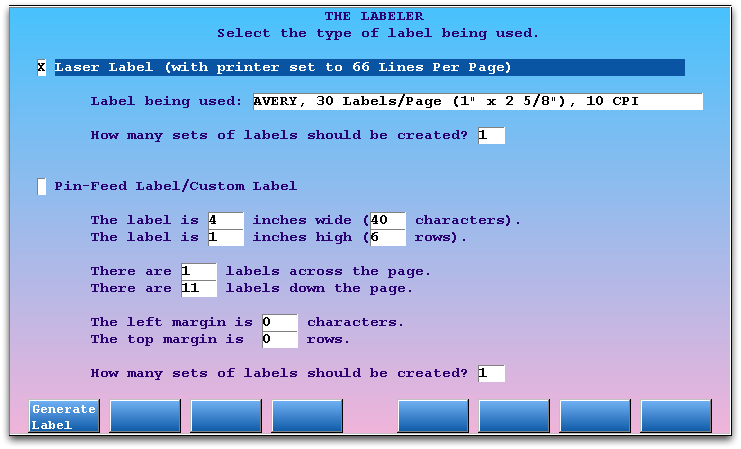
Laser Labels: Select the Laser Labels option, select your Avery label, and put the labels in your printer’s drawer or manual feed. Note that your printer should be configured to 66 lines per-page. PCC Support configures all printers to 66 lines per-page during our installation visit to your office, but you may want to create a test recall with only a few patients before printing a large batch.
Pin-Feed or Custom Labels: Select the Pin-Feed Labels option, enter your label dimensions, and load the labels into your printer.
Multiple Sets: If you need two or more copies of each label, enter a number for the “How many sets of labels should be created?” question under the Laser Labels or Pin-Feed Labels sections.
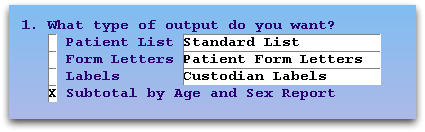
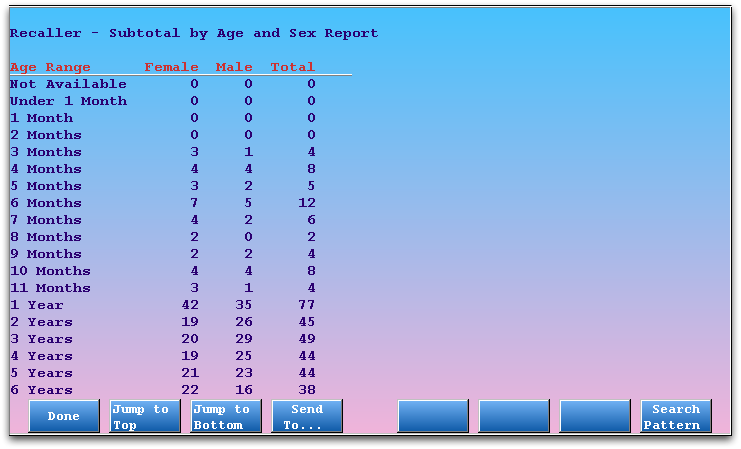
Subtotal By Age and Sex Report
Sometimes, instead of contacting a list of patients, you may wish to view detailed totals of the patients found by your Recaller criteria. Select the Subtotal By Age and Sex Report and press F1 – Process.
Recaller Sorting Options
After selecting your output type, you can indicate a sorting method. You can sort the output, whether it is a list or a stack of form letters, by last name, zipcode, birthday or birth date.
Birthday or Birthdate?: If you are printing physical reminders or birthday cards, you may want to sort the patient list by their birthday, regardless of the year of their birth. If you are generating other materials, by age, you may wish to sort patients by actual birthdate, including the year.
Output Selection
After choosing an output, pressing F1 – Process, and answer any additional questions. The Recaller will display the standard Partner Output Selection screen.
You can view the results on the screen, send them to a specific printer or e-mail address, or save the results to a computer or the srsfiles program. You could also review items on the screen first, and then press F12 or F4 to return to these options and send the output to the printer.
For more information about the Partner default Output Selection screen, read Report Destination Selection.