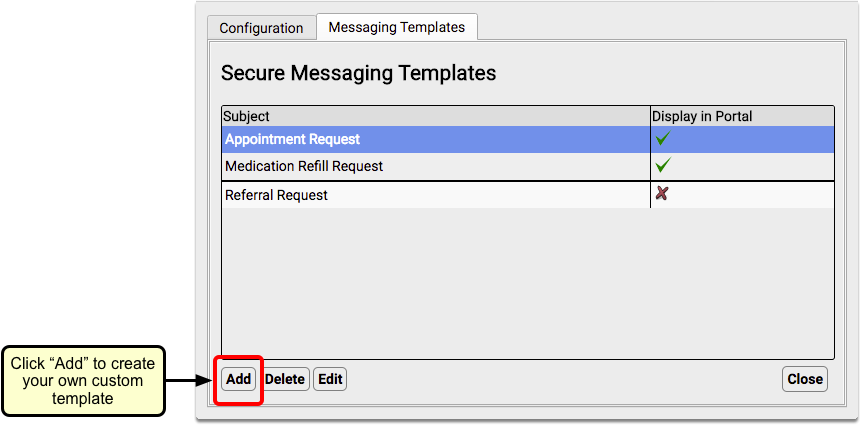
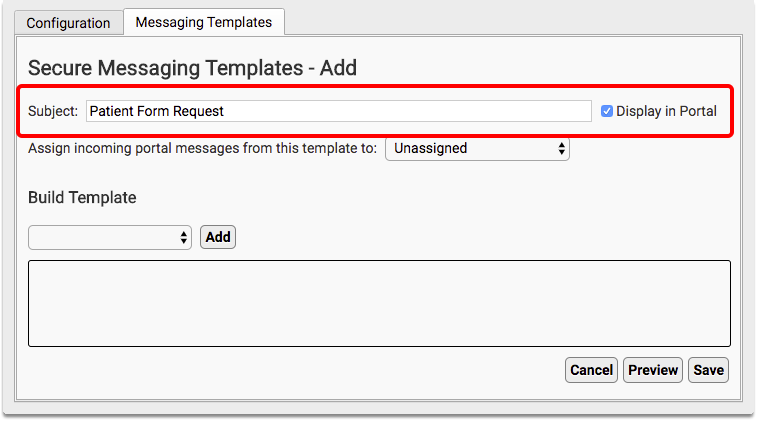
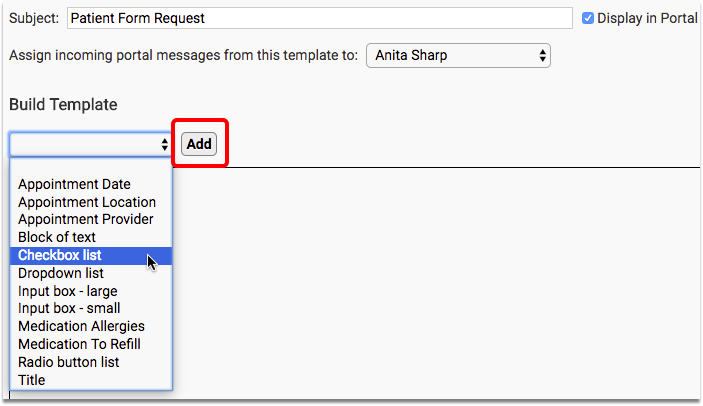
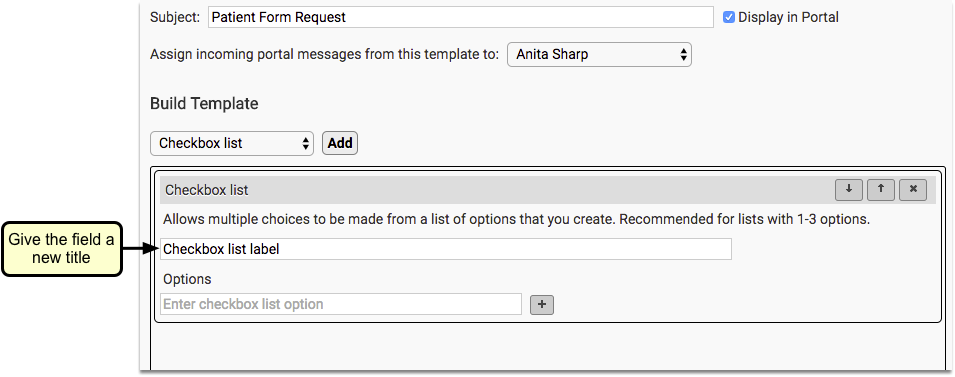
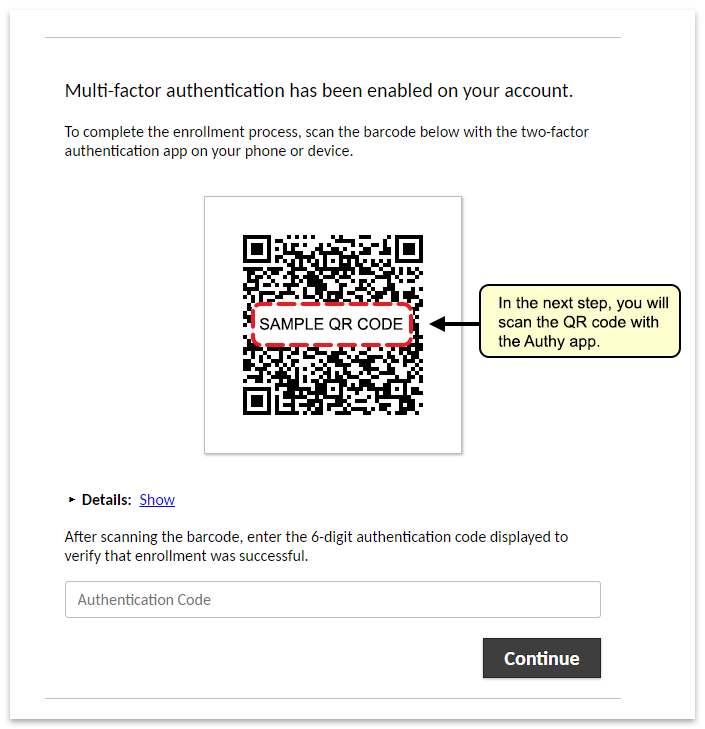
In March of 2019, PCC will release version 8.7 of our electronic charting and practice management software to all PCC users.
The PCC 8.7 release includes due dates for tasks, menu and Practice Management window improvements, new features and improvements in the Appointment Book, reporting enhancements, and more.
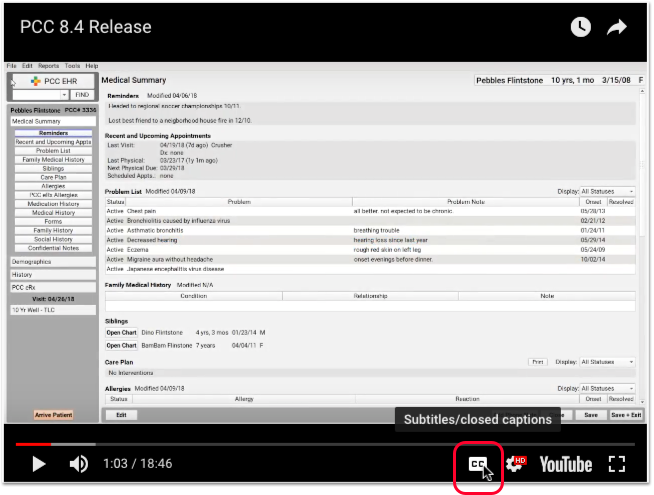
Watch a Video: Want to see a video summary of everything in this release? Watch the PCC 8.7 Release Video
Implementation: PCC 8.7 includes features that require configuration and user-specific software training. Read about the features below and then review the PCC 8.7 Migration Considerations article.
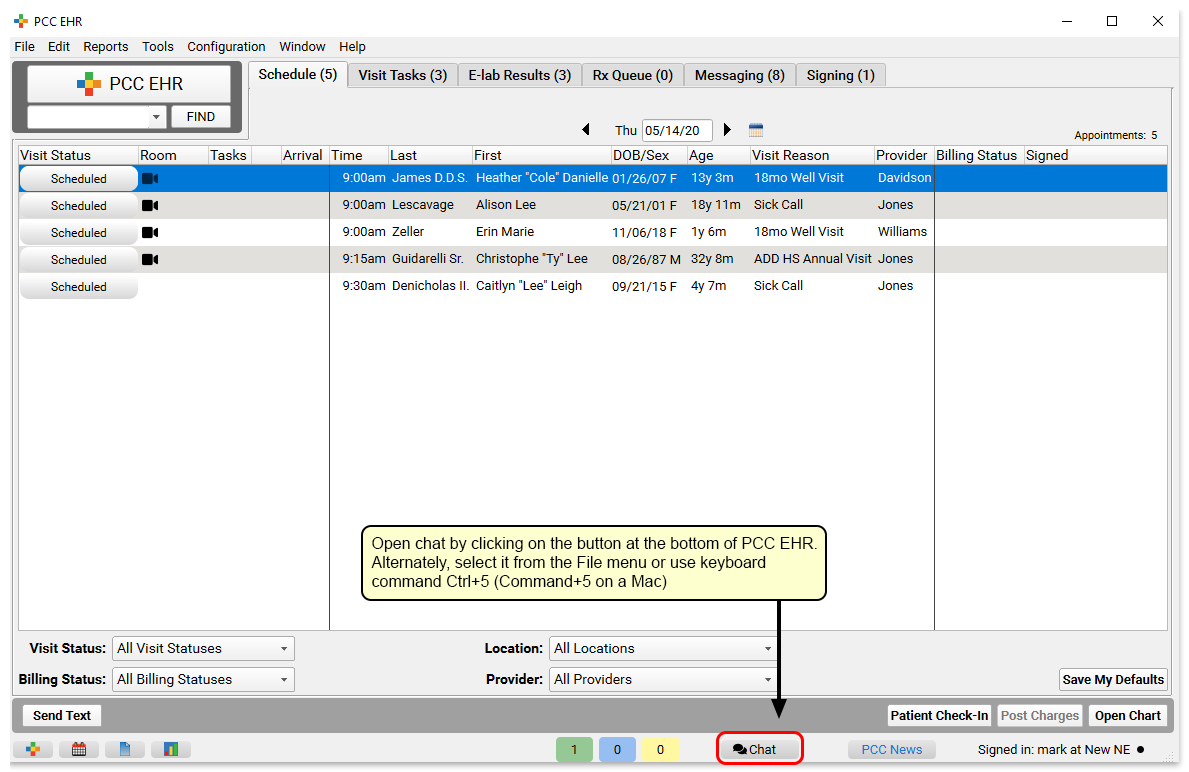
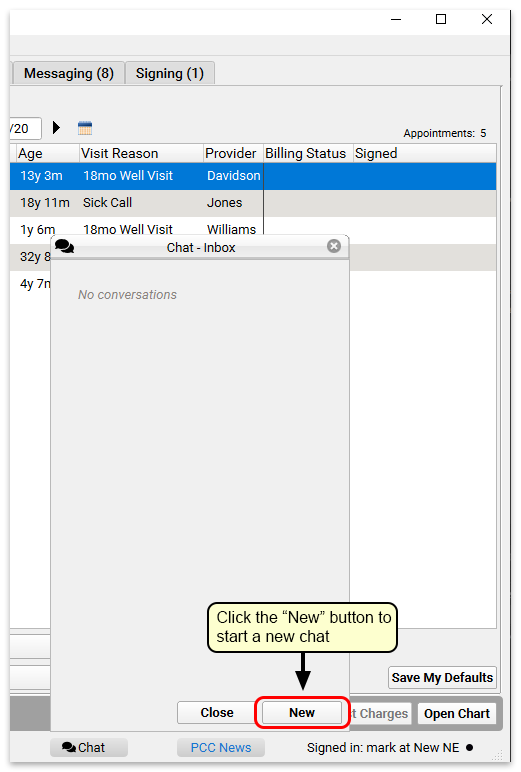
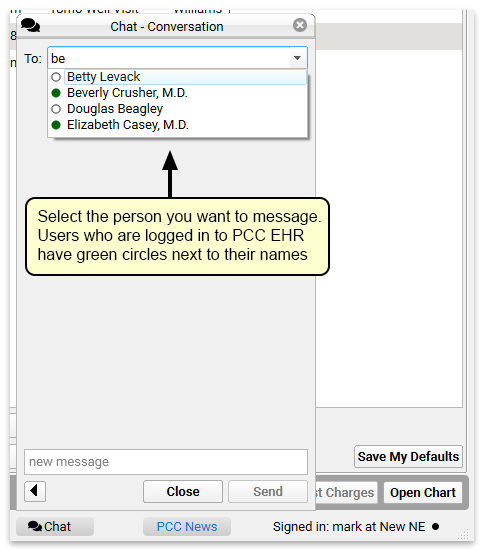
Read below to learn more, and contact PCC Support for information about these new features or about any PCC product or service.
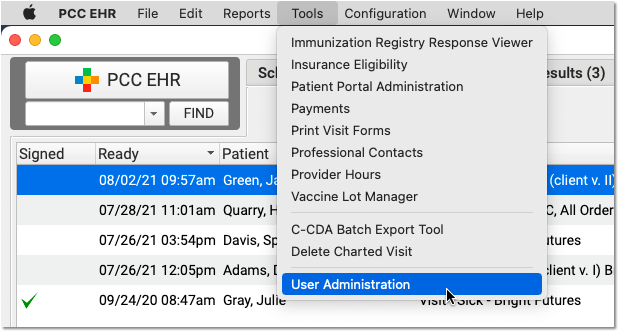
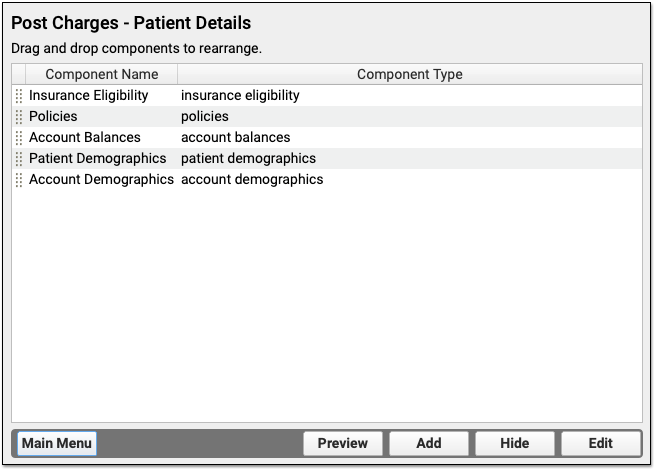
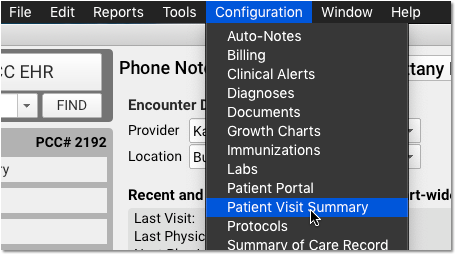
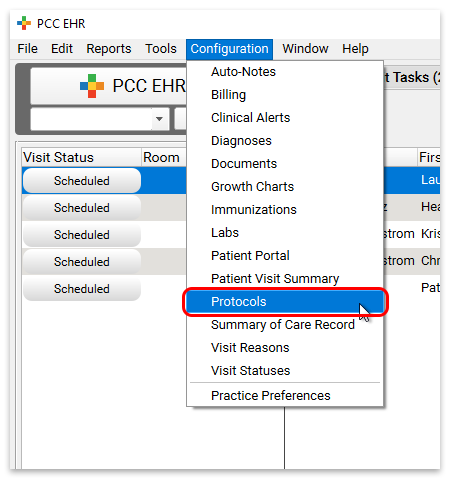
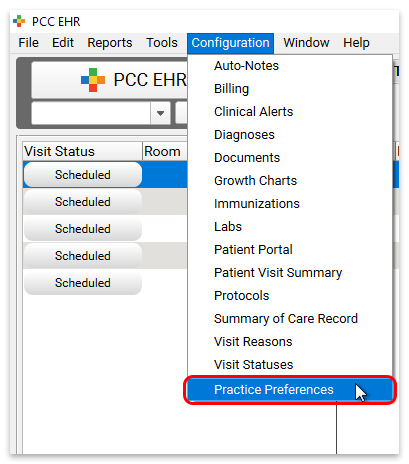
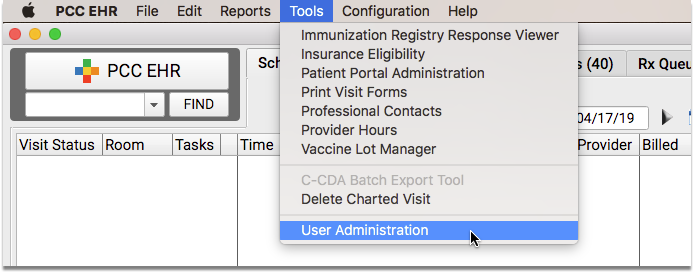
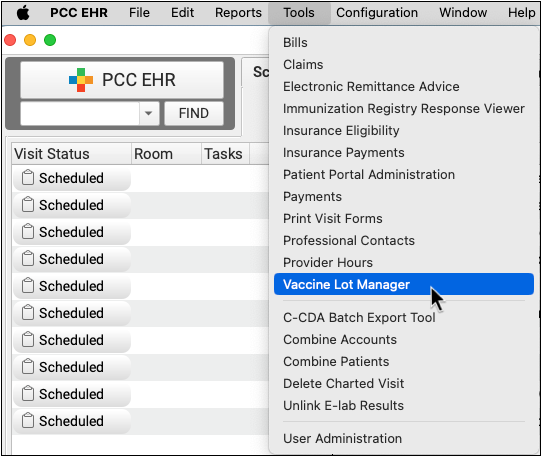
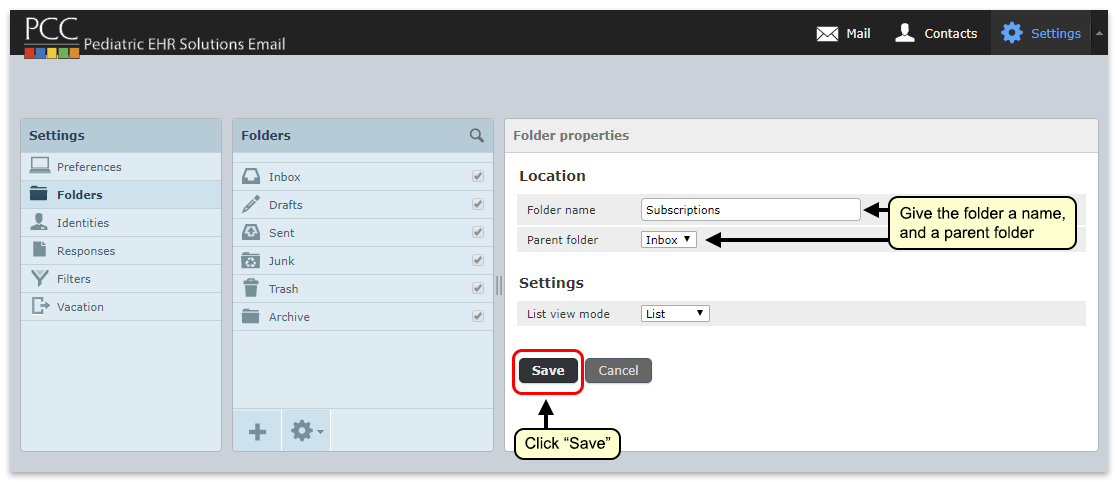
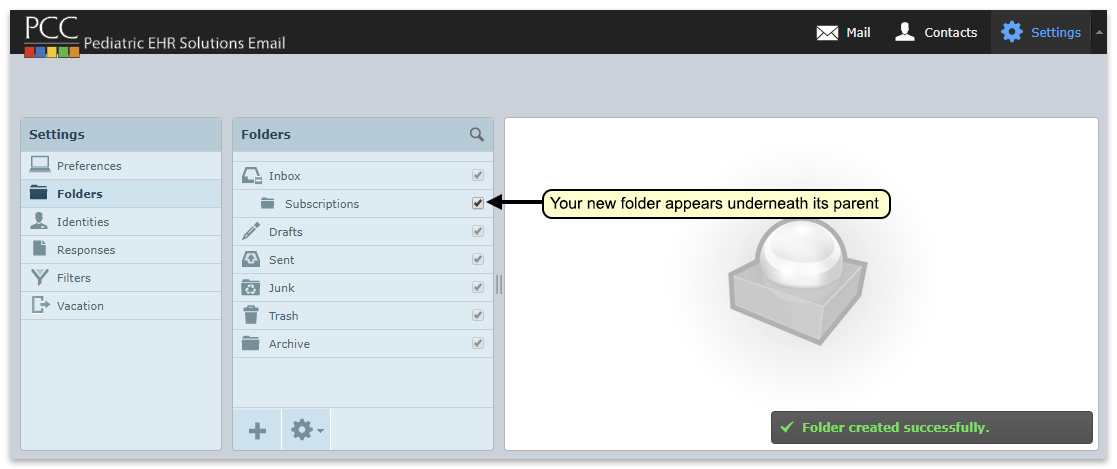
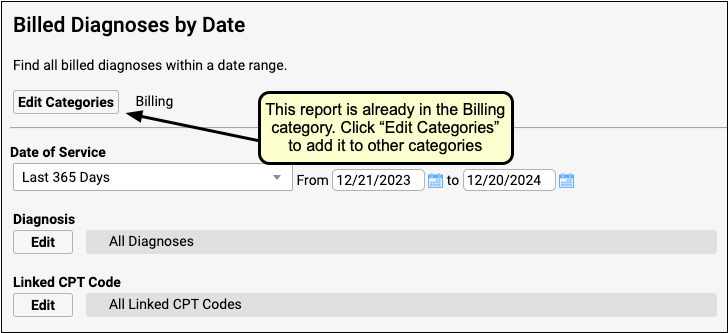
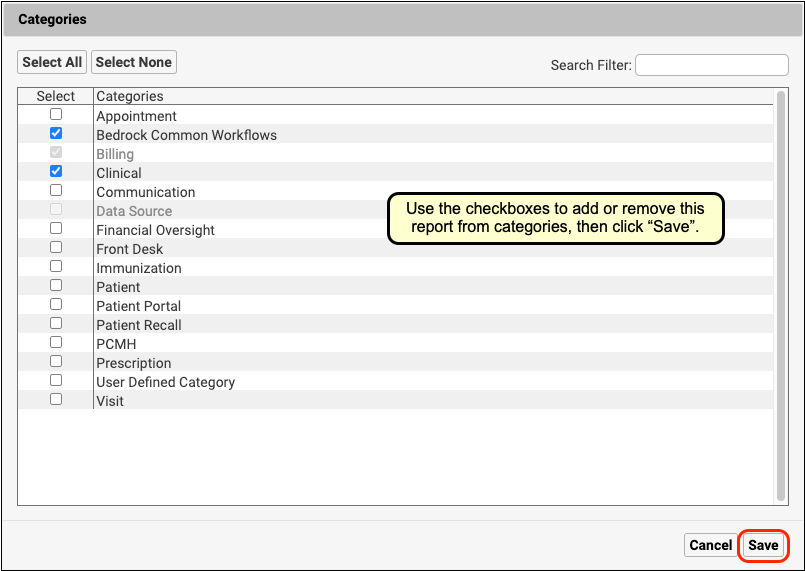
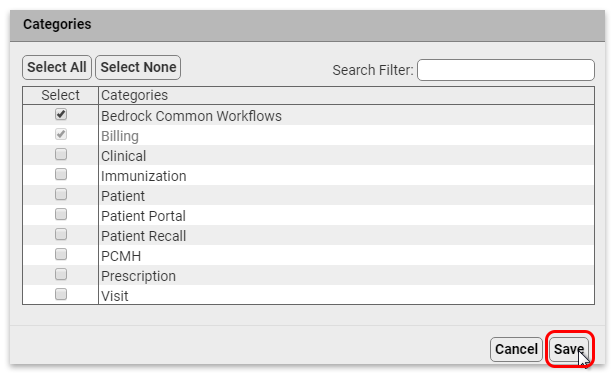
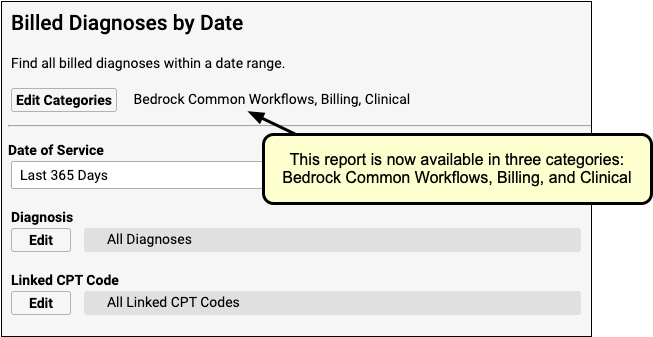
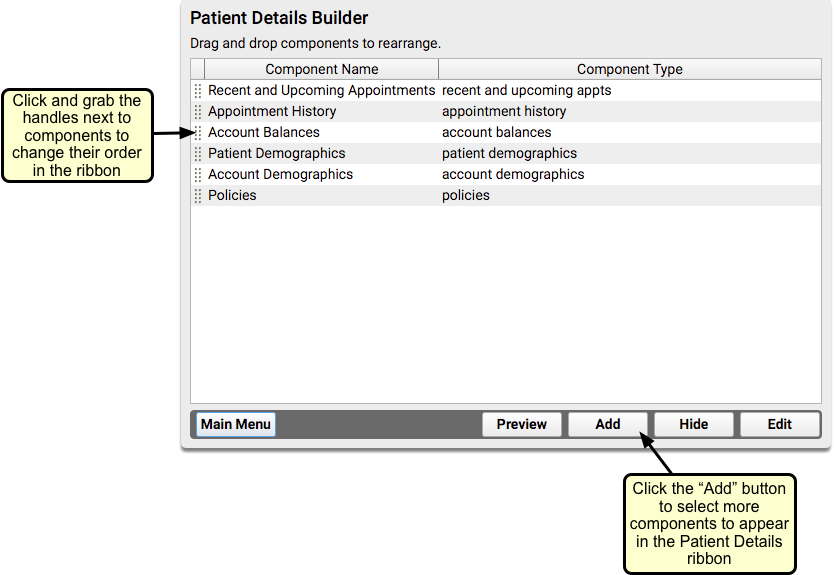
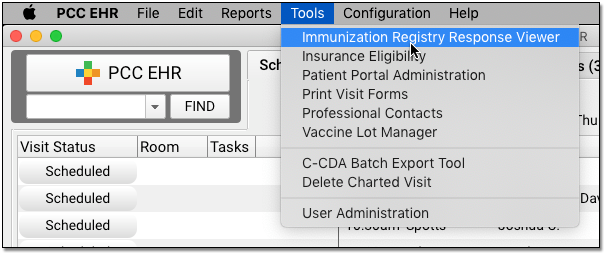
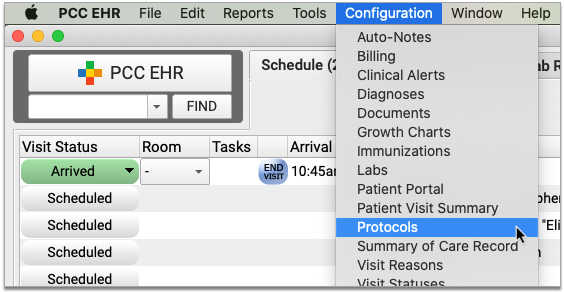
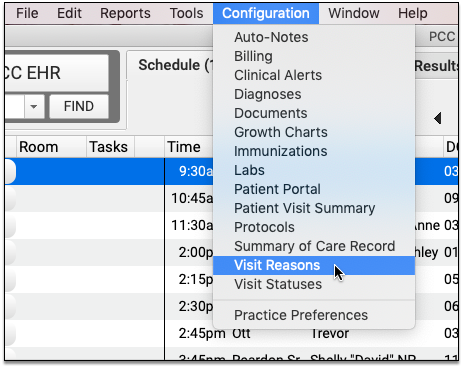
Find What You Need More Easily with Better Menus in PCC EHR
PCC 8.7 includes a new menu organization to make it easier to find the tools you need.
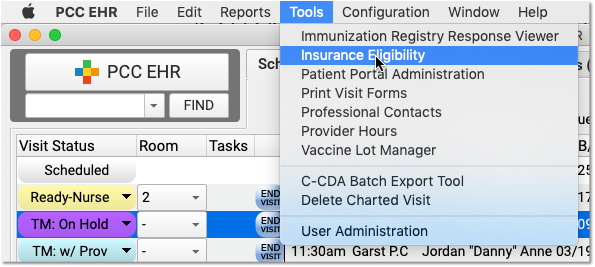
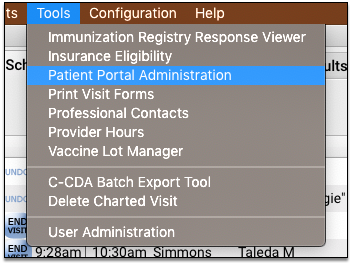
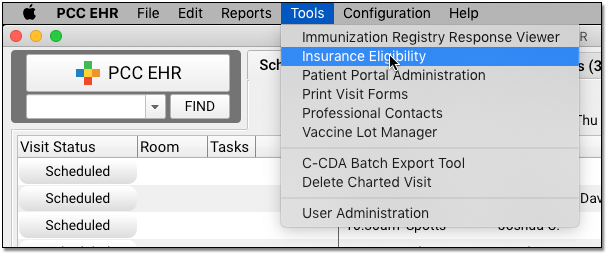
In the updated Tools menu, you’ll find the tools you or your staff need on a day-to-day basis. This includes some items that were formerly in the “Reports” and “Configuration” menus.
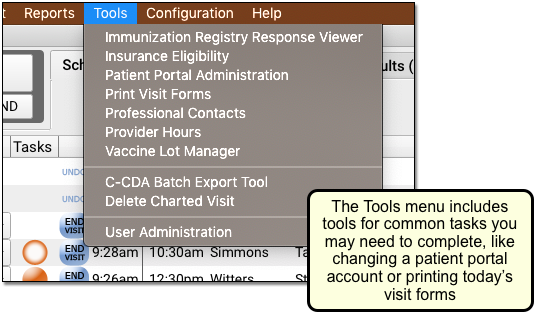
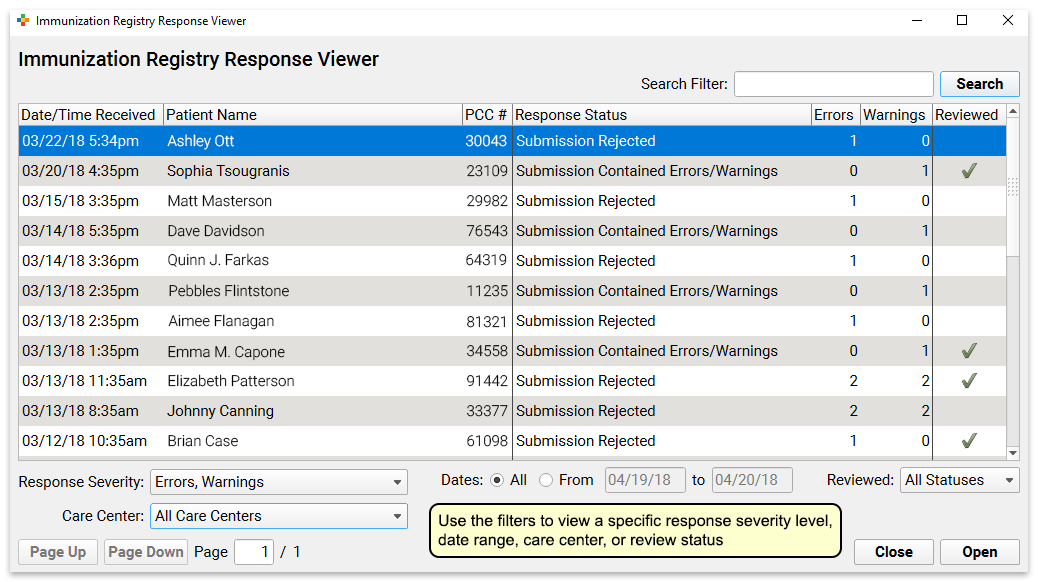
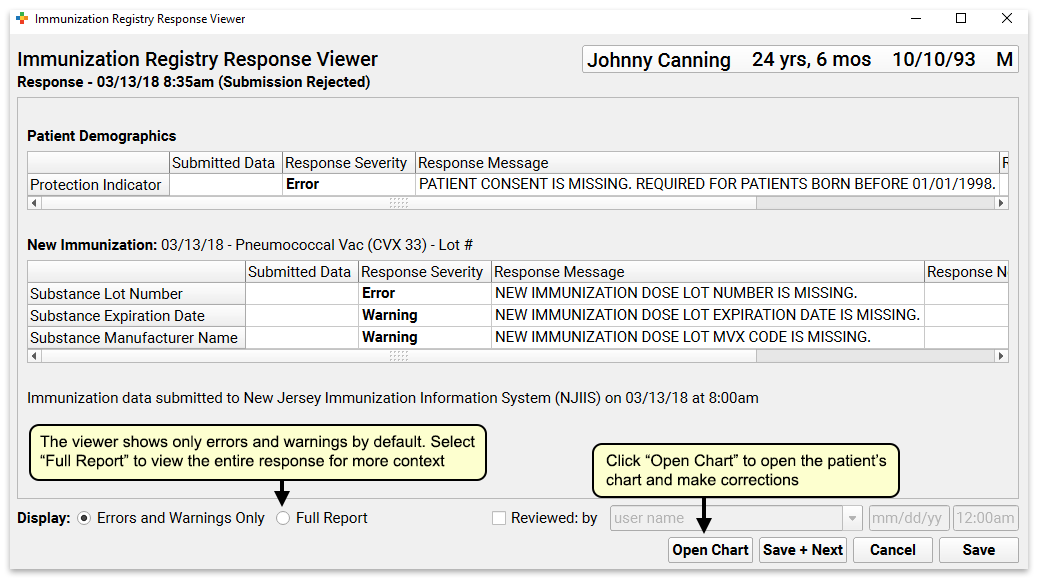
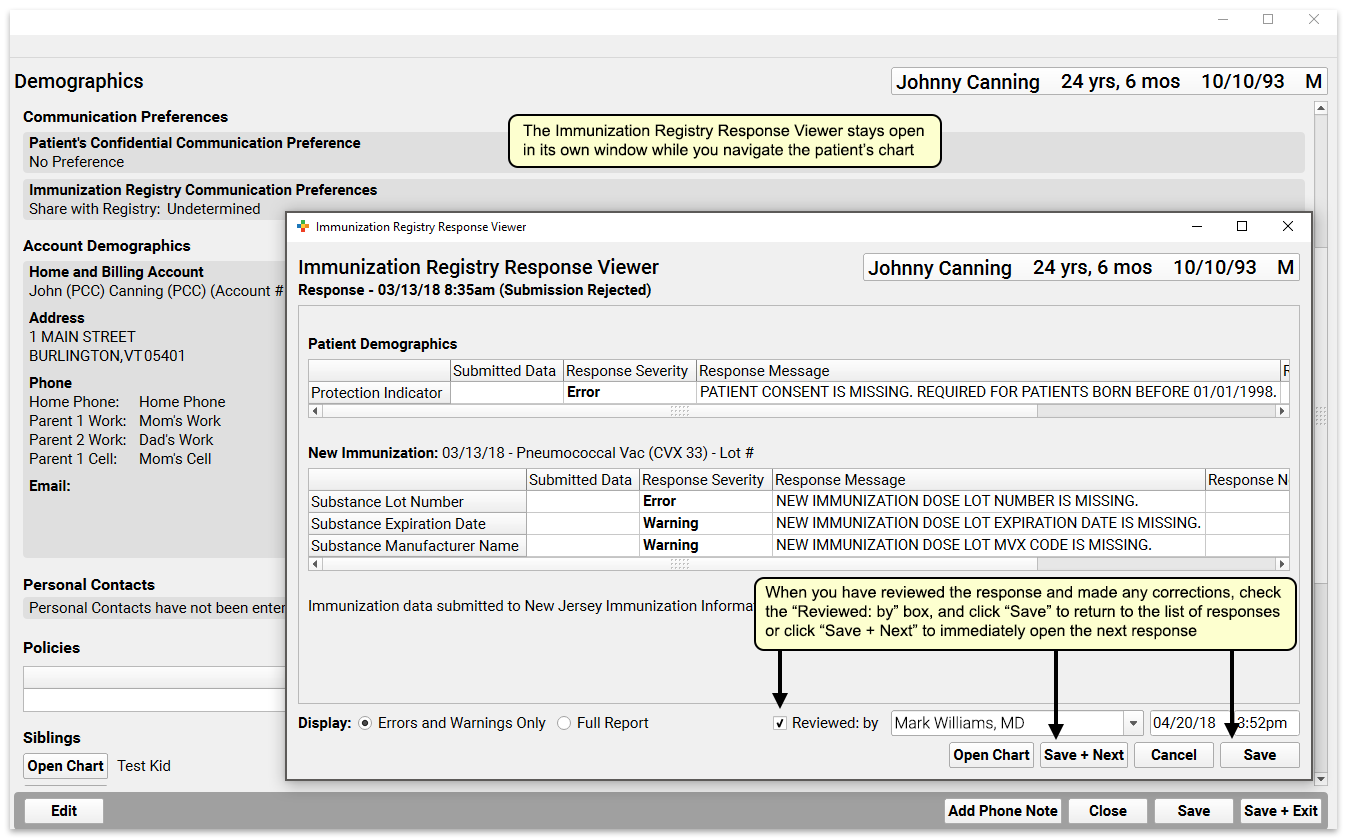
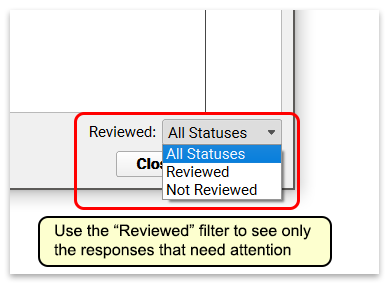
Whether you are reviewing immunization registry responses, checking eligibility for tomorrow, updating a provider’s schedule, or performing other daily operations, the Tools menu gives you fast access to the tool you need.
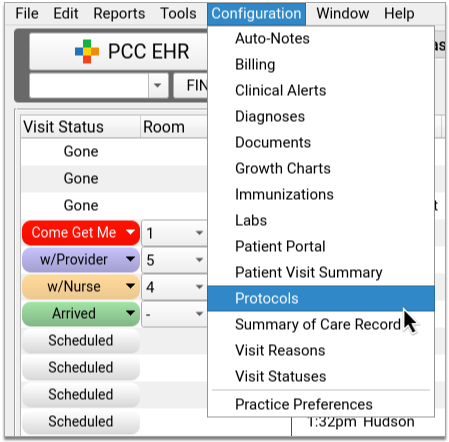
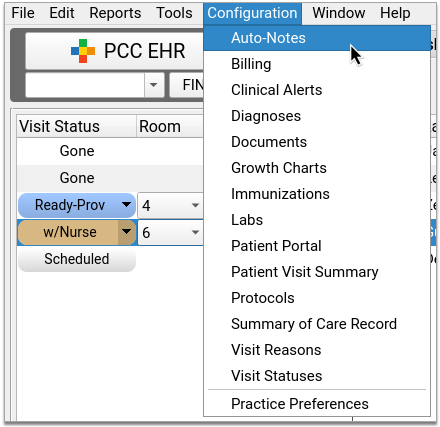
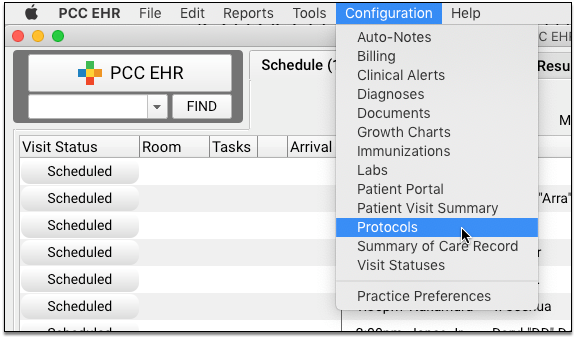
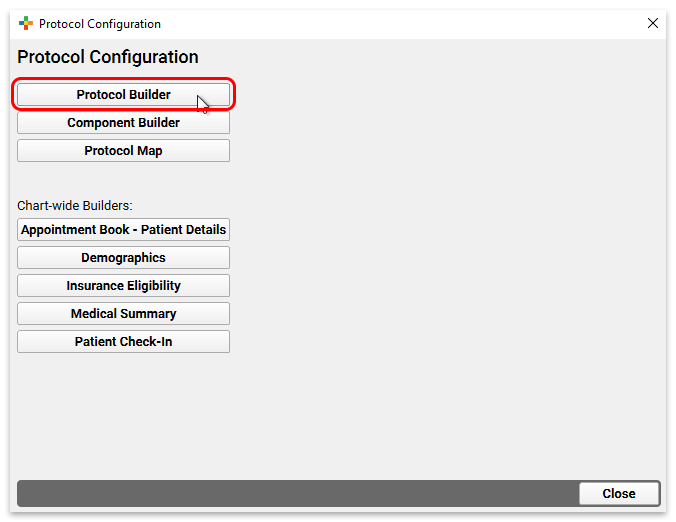
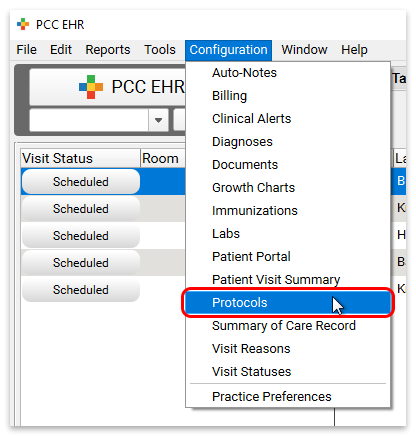
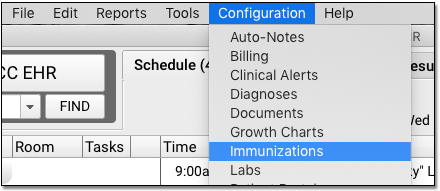
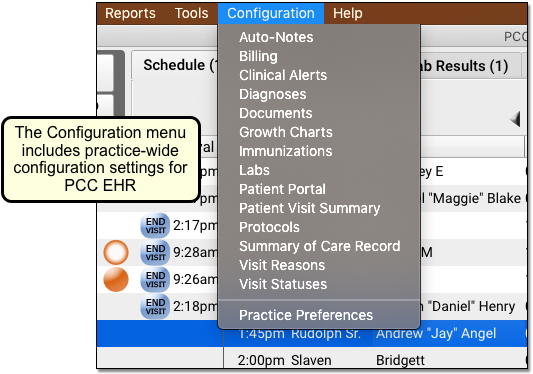
Under the new Configuration menu, you’ll see options for setting your practice’s configuration… these are the “set it and forget it” settings for how your practice uses PCC EHR and other PCC features.
Additional Menu and Tool Adjustments
PCC 8.7 updates a few other common menu selections, creating new specific tools with a clearer purpose.
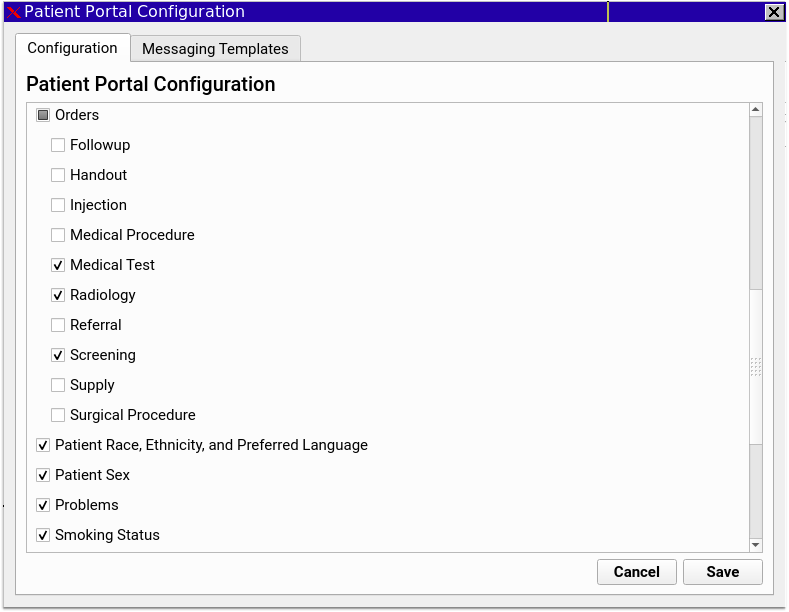
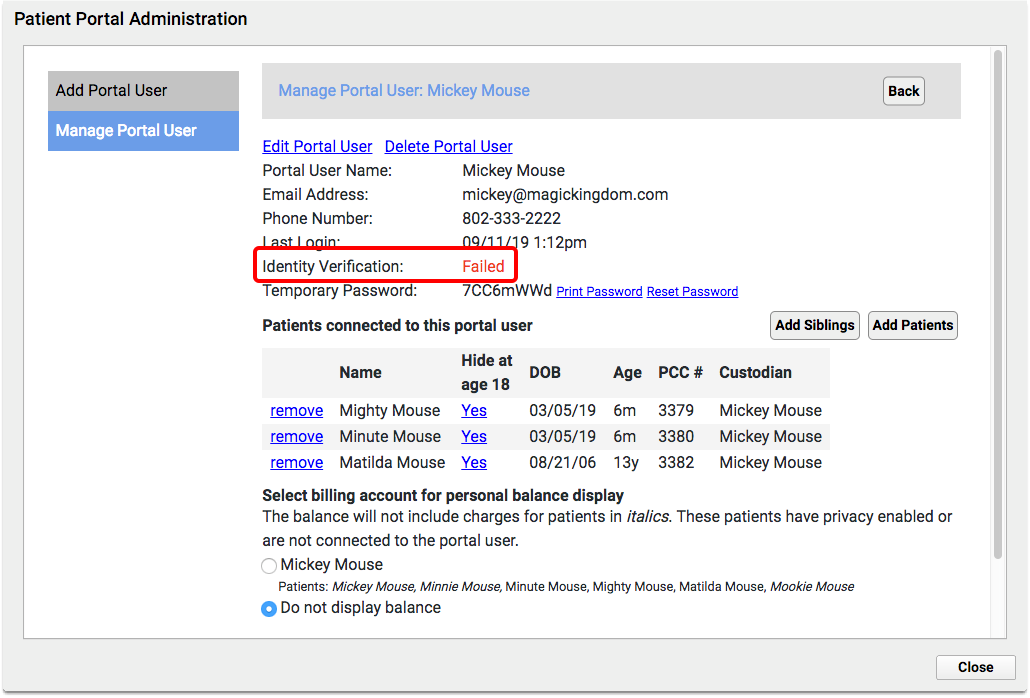
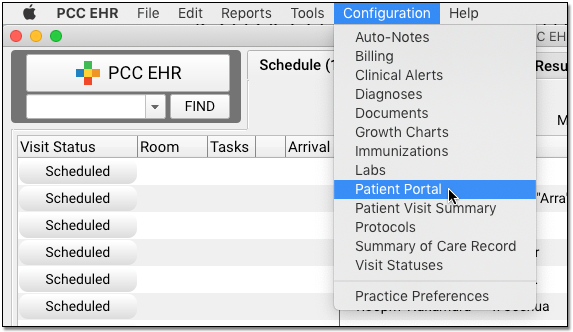
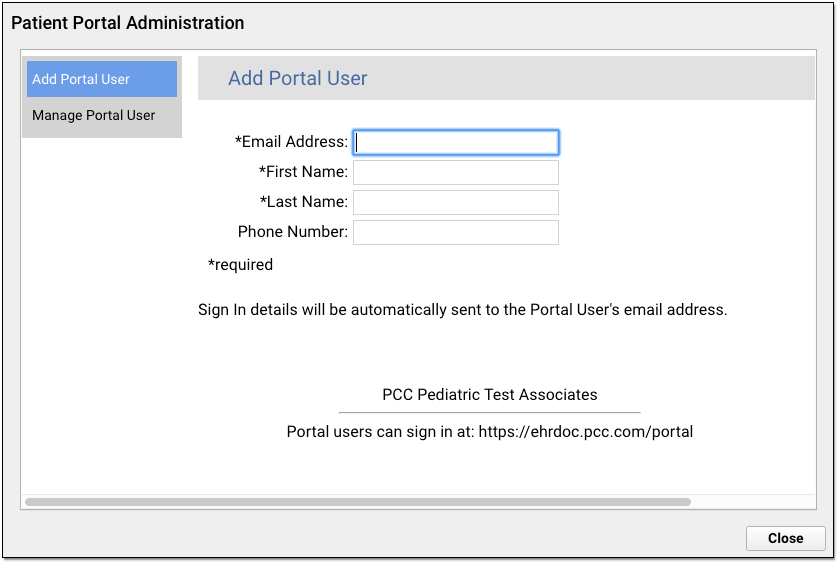
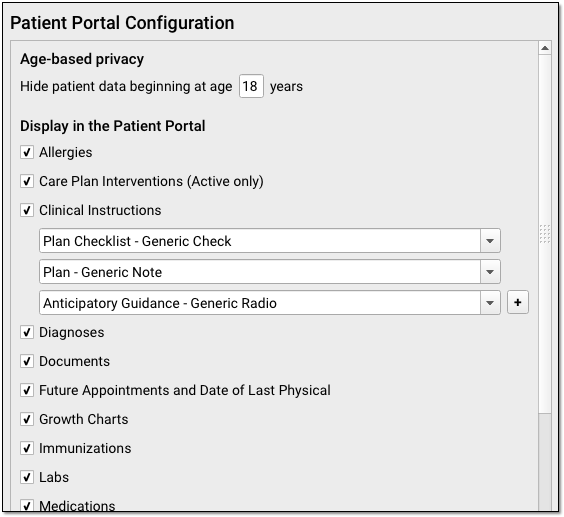
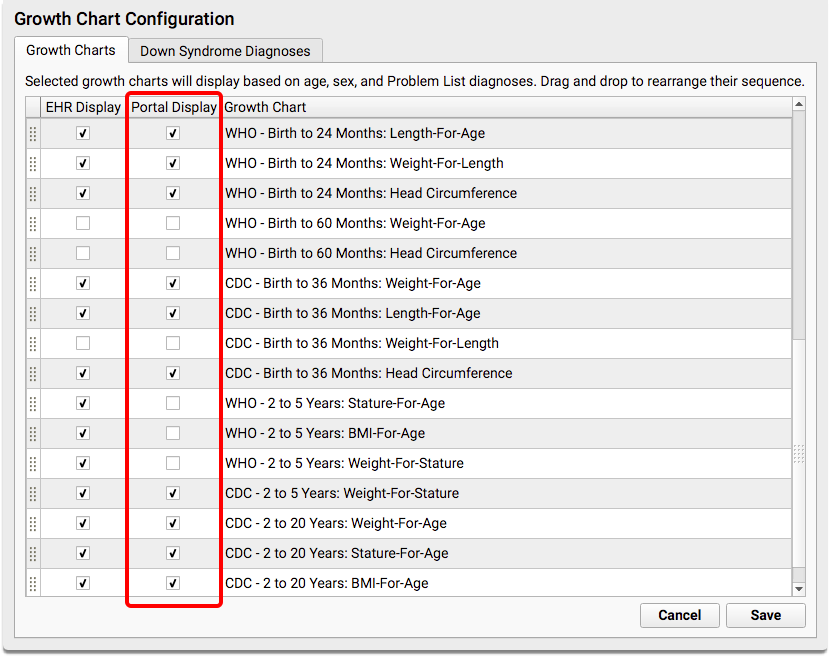
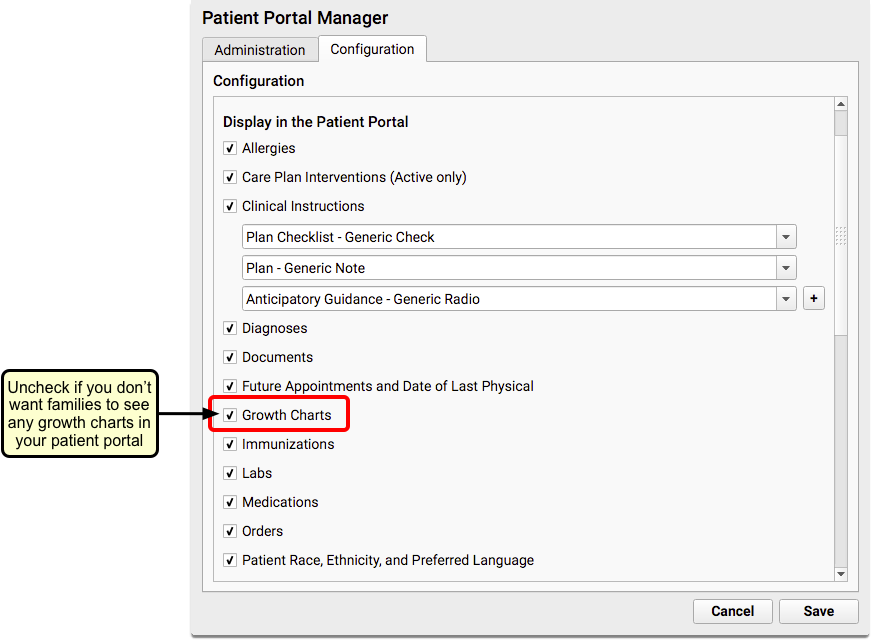
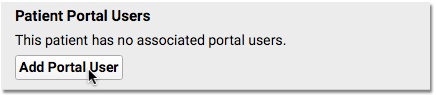
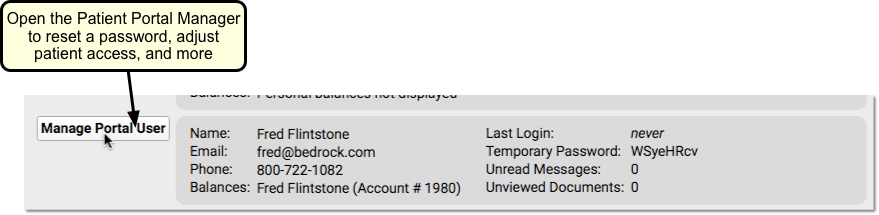
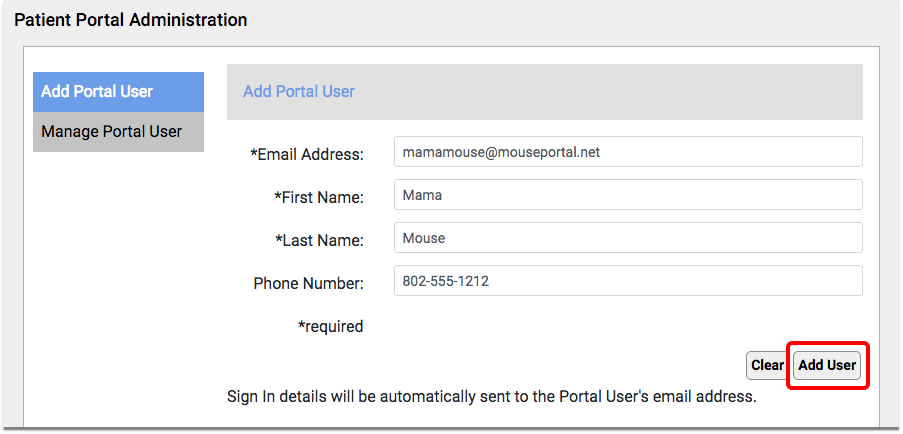
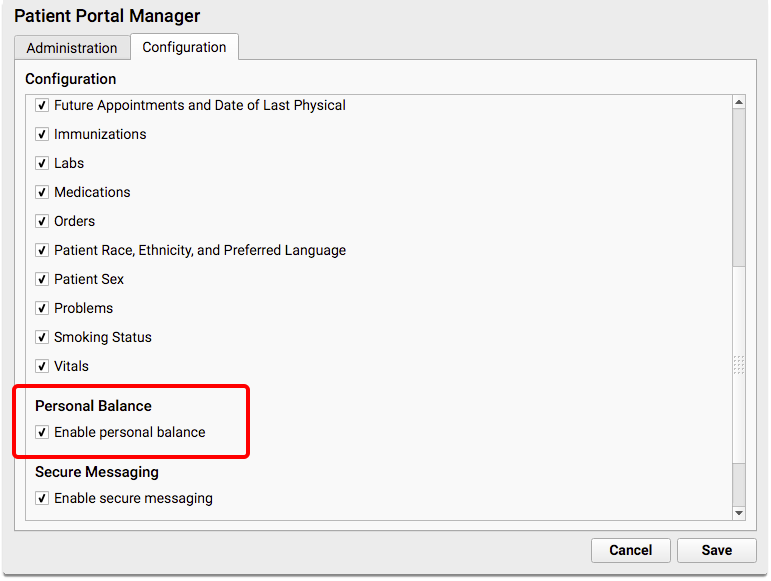
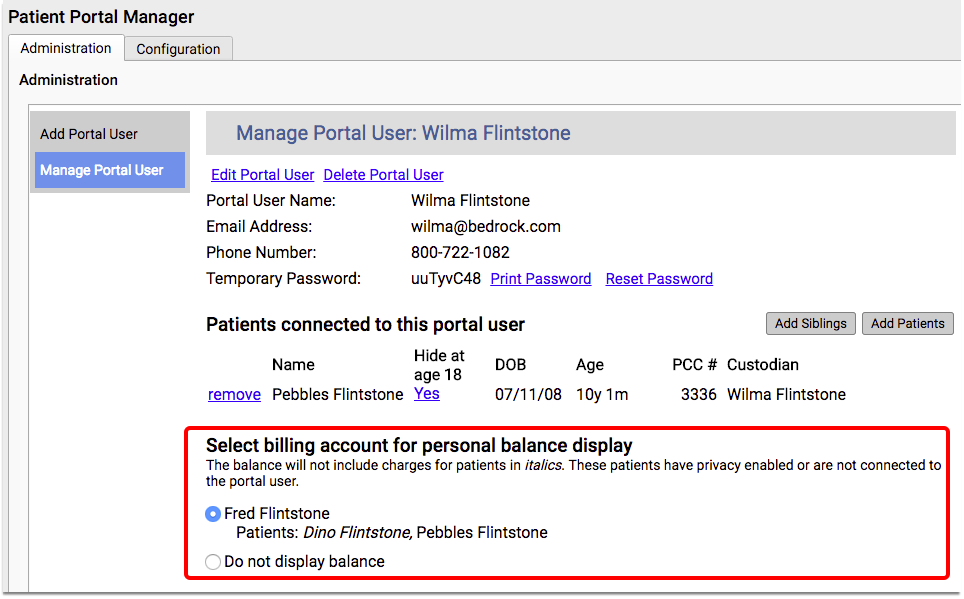
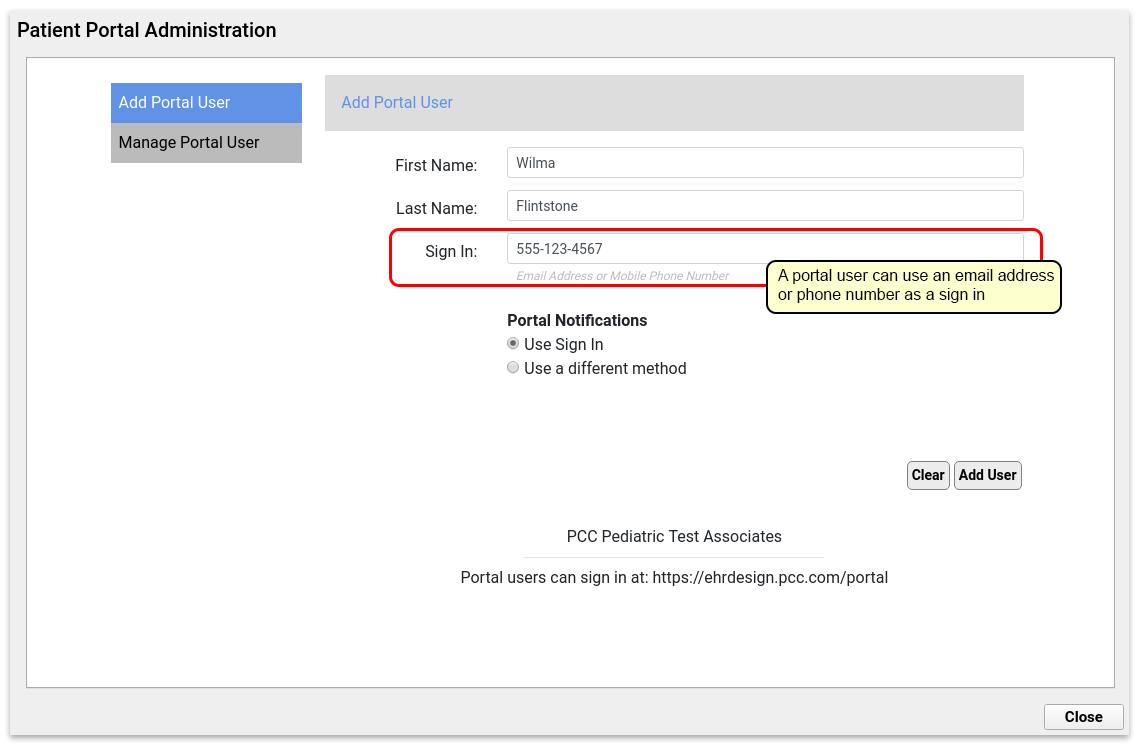
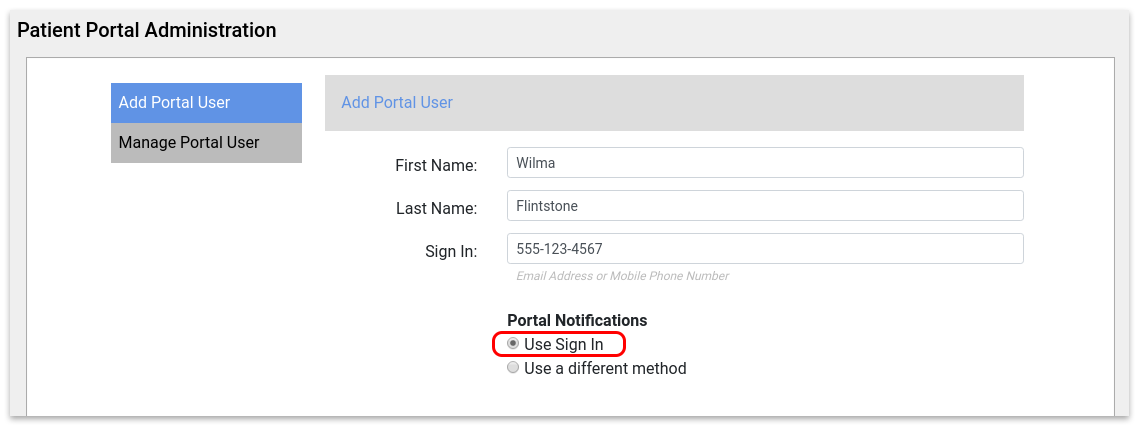
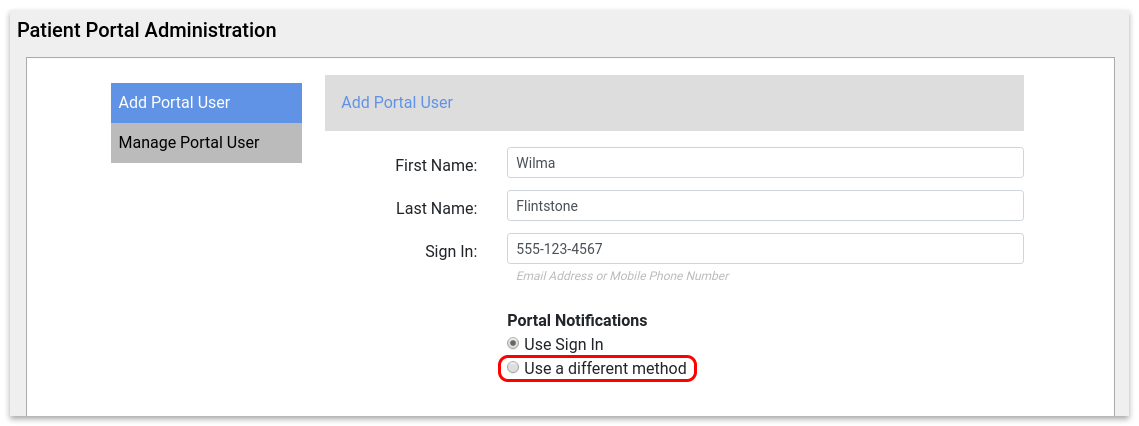
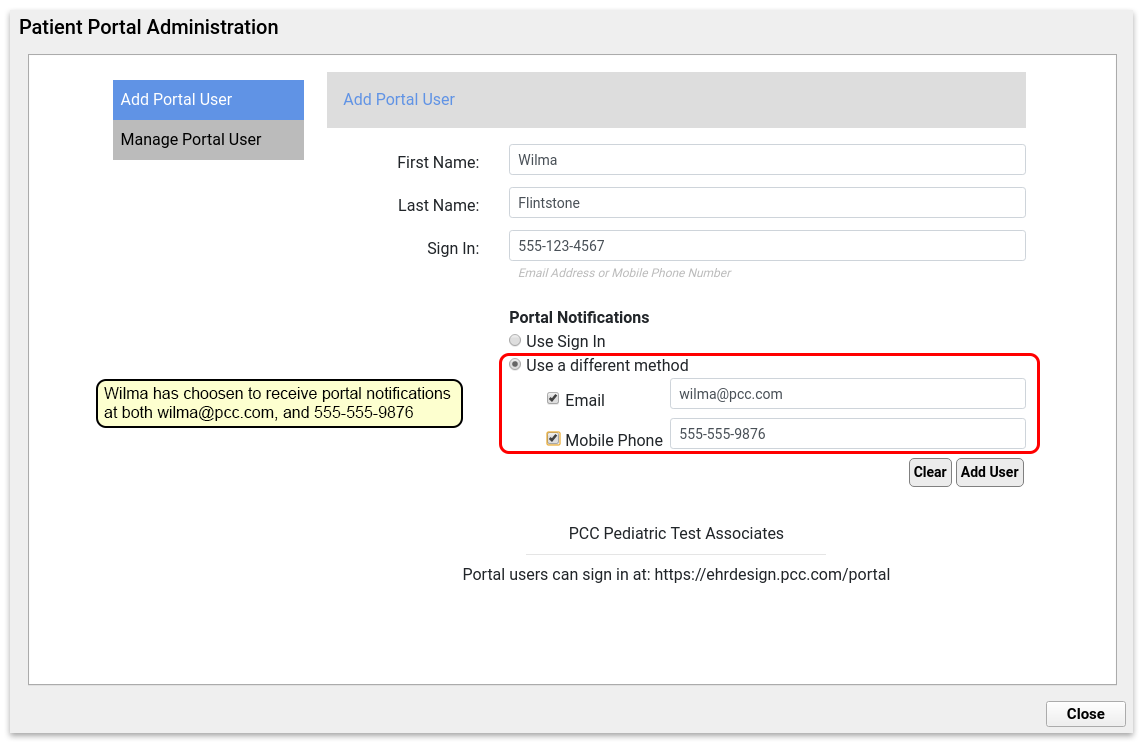
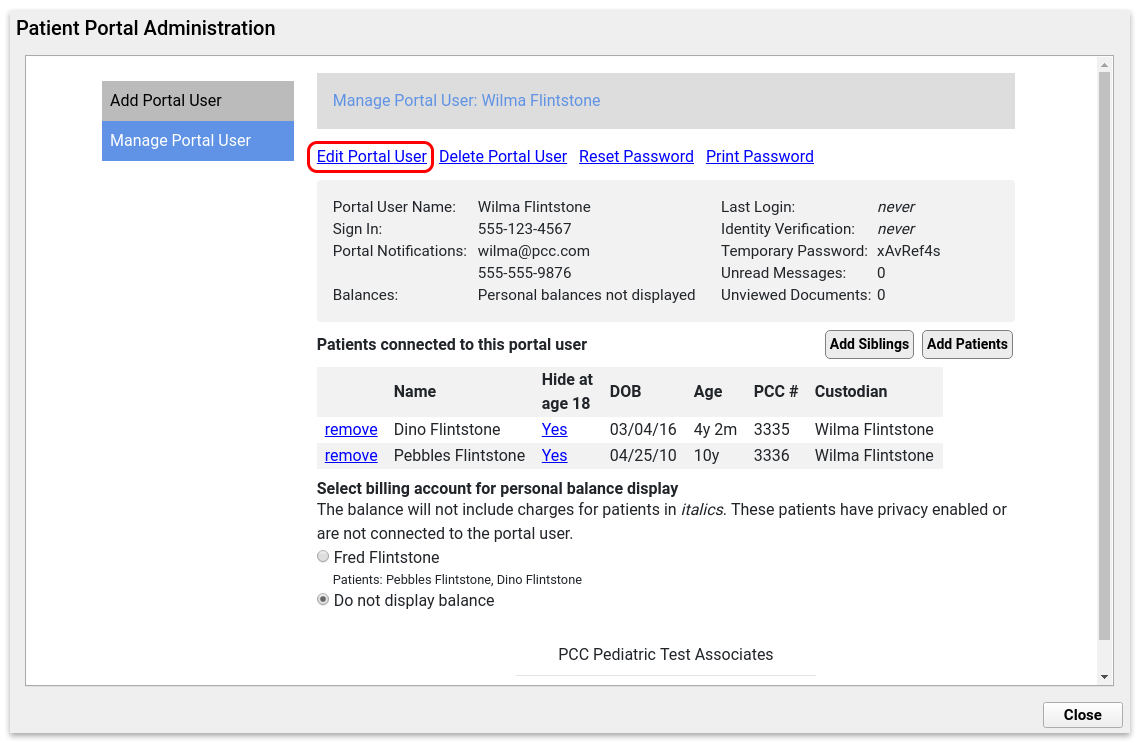
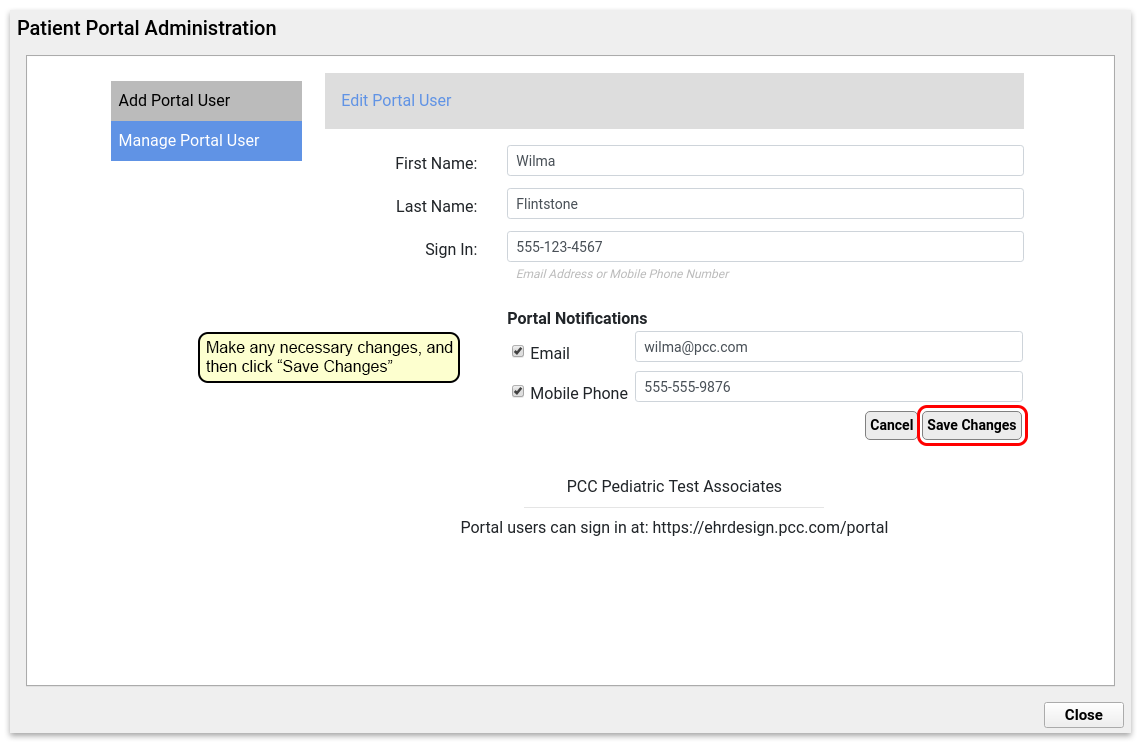
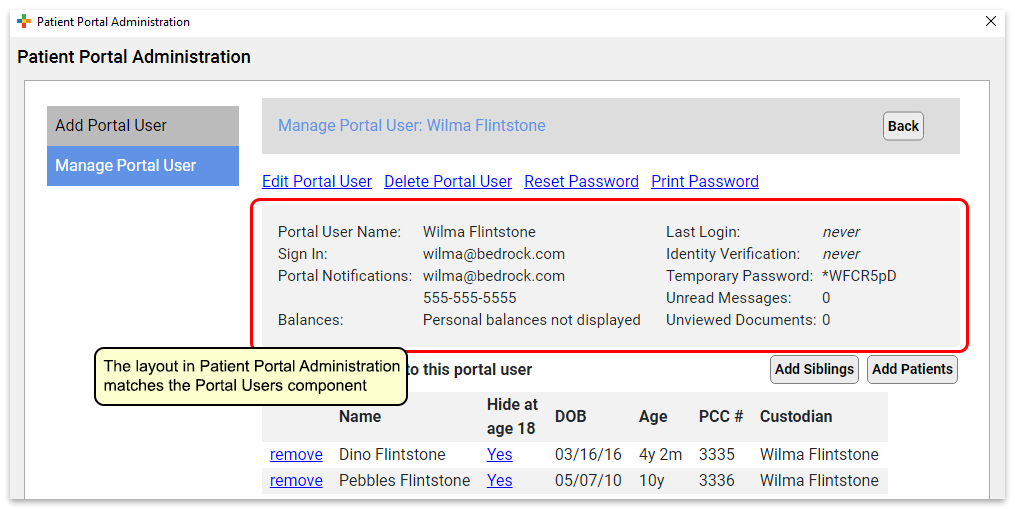
Patient Portal administration is now split into two tools. When you need to help a family with their Patient Portal account, use the Patient Portal Administration tool, under the Tools menu.
However, if you need to change the settings for your practice’s patient portal, such as turning off Growth Charts, use the Patient Portal Configuration tool.
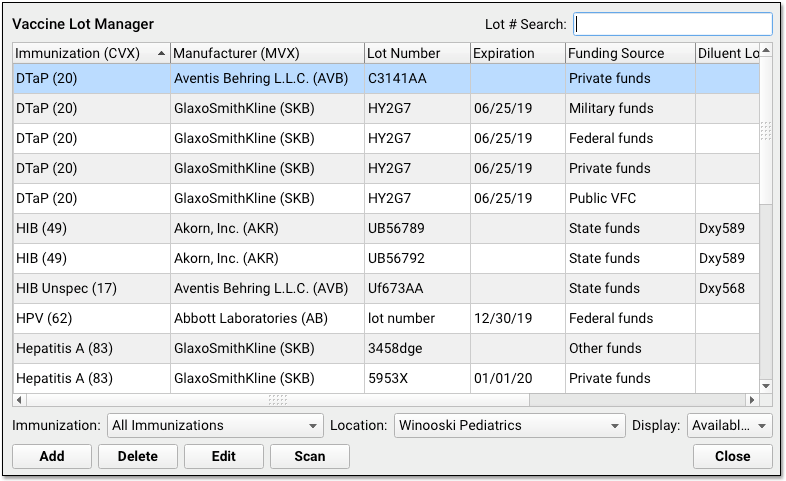
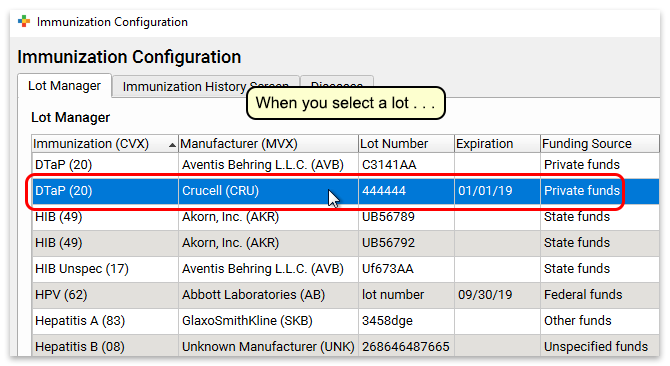
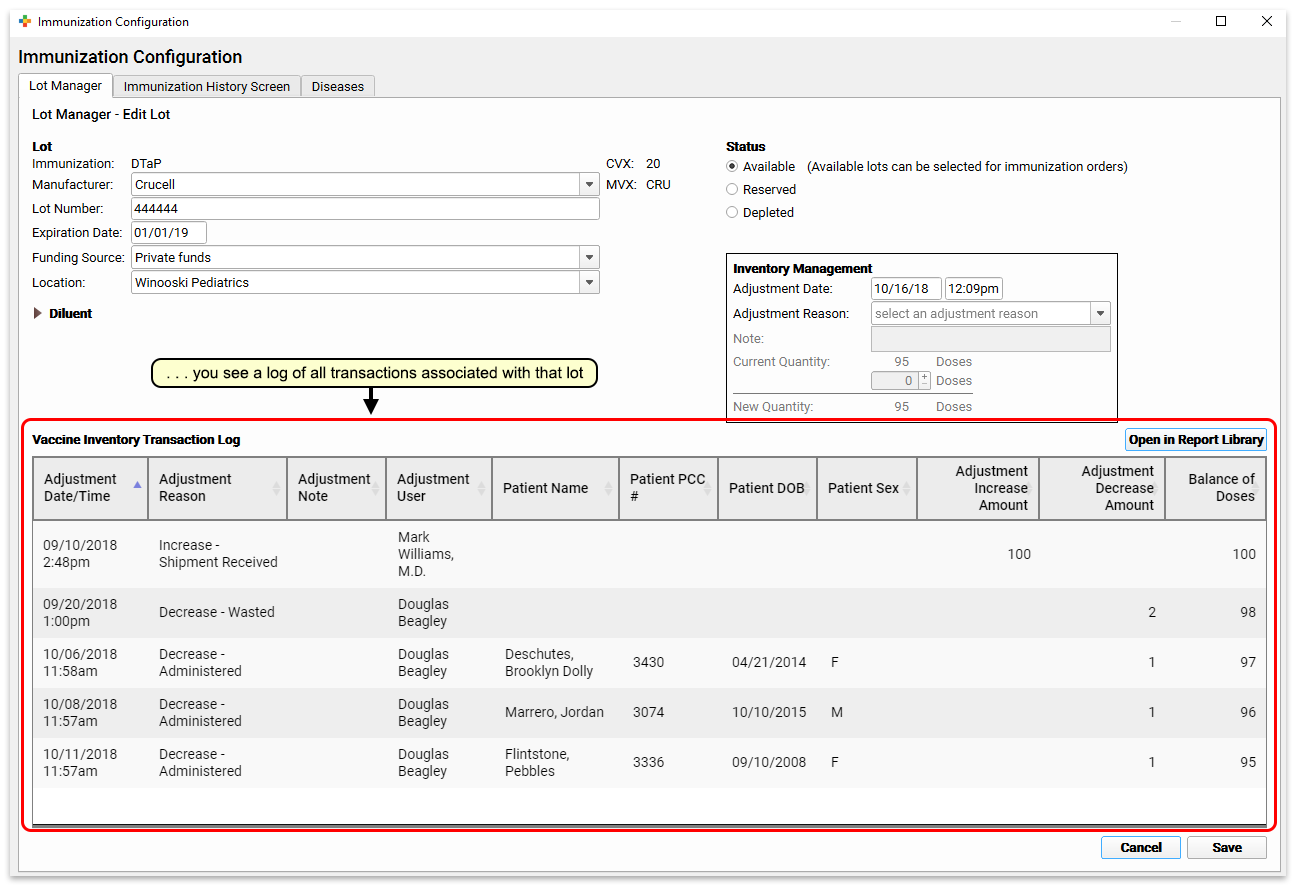
If you are a nurse, you might use tools like the Vaccine Lot Manager every day. Now it is under the Tools menu.
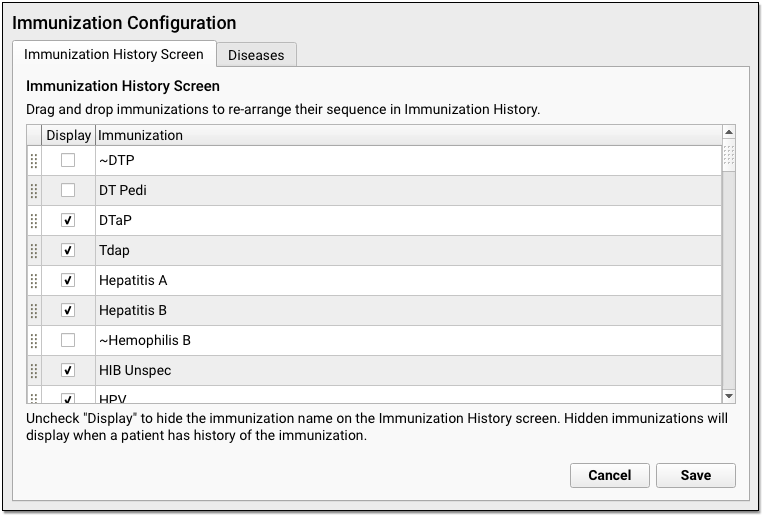
However, if you need to configure specific details of what immunizations appear in the chart by default, or how your practice displays diseases in the chart, you can use the Immunization Configuration tool.
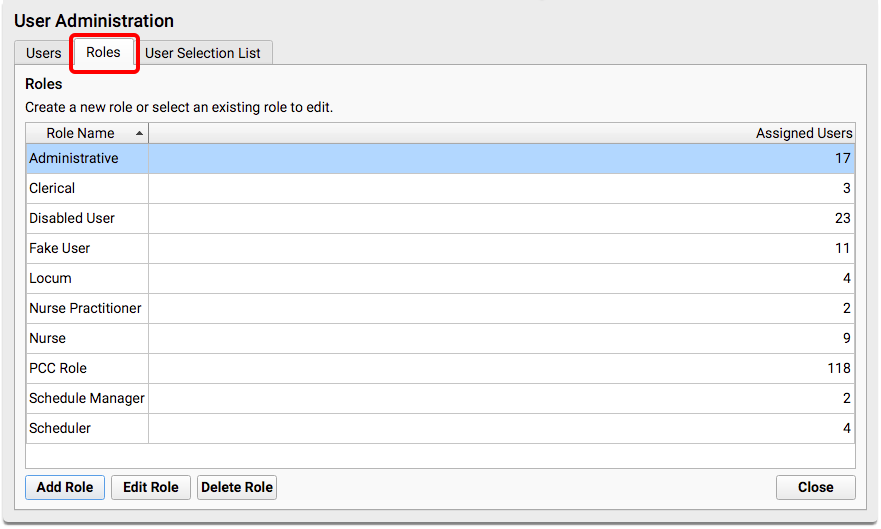
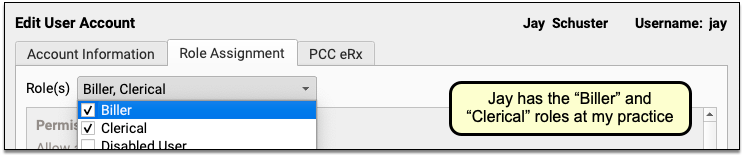
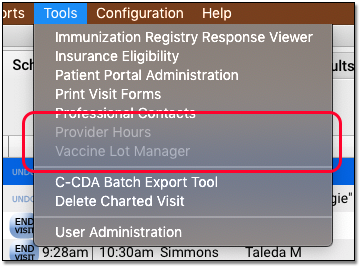
Disabled Menu Items: If you don’t have a user role with permission to use a PCC EHR tool or make configuration changes, you’ll see grayed out menu entries. Contact your practice’s PCC system administrator or your PCC Client Advocate for help.
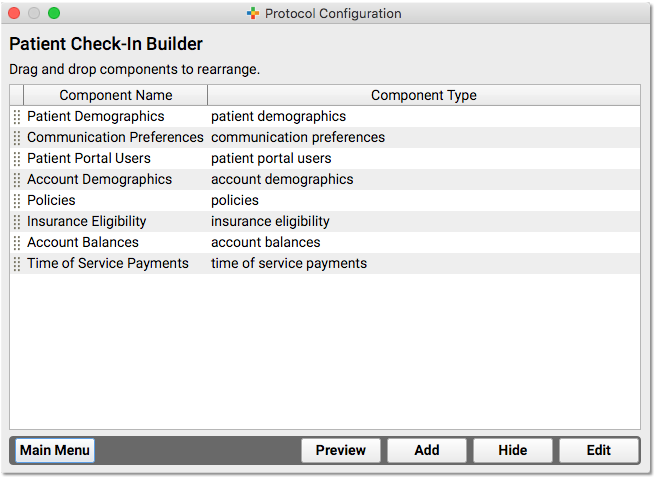
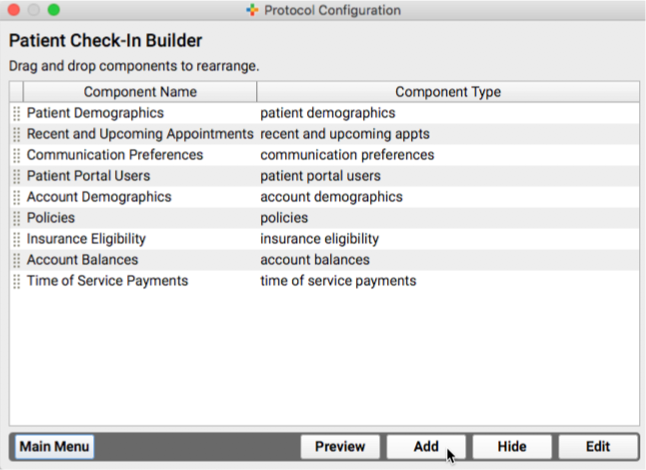
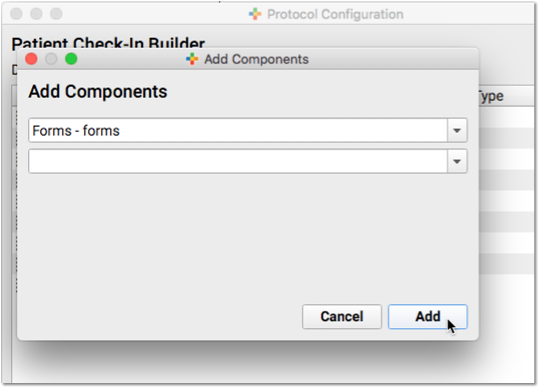
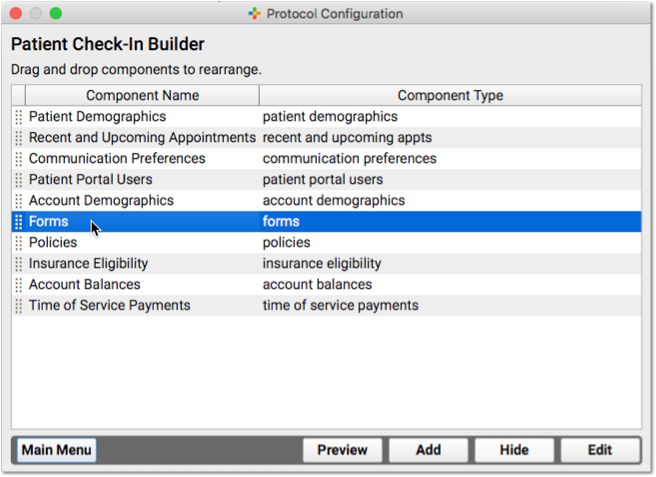
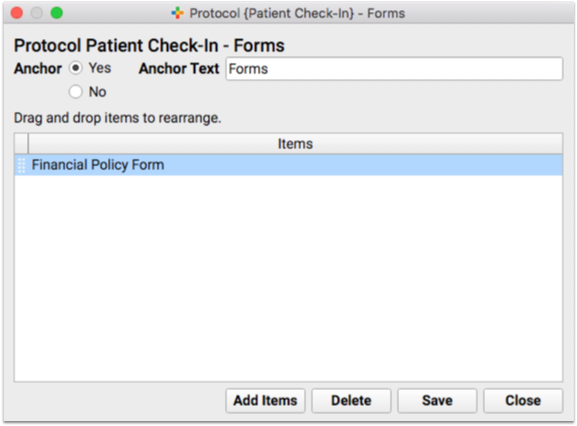
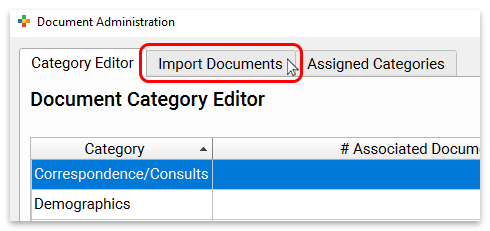
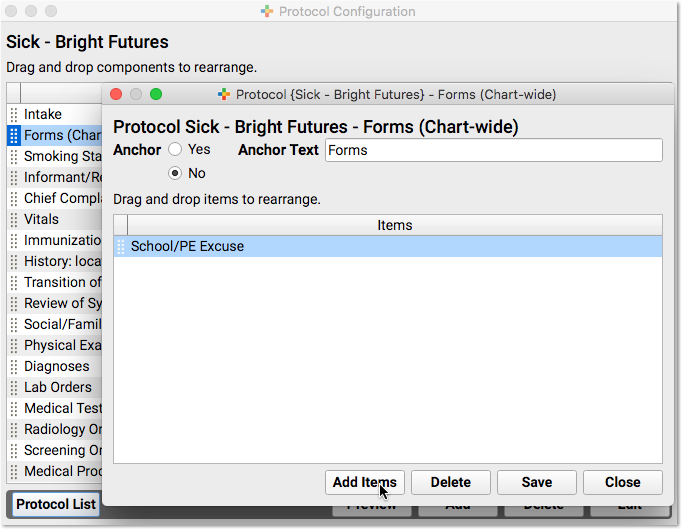
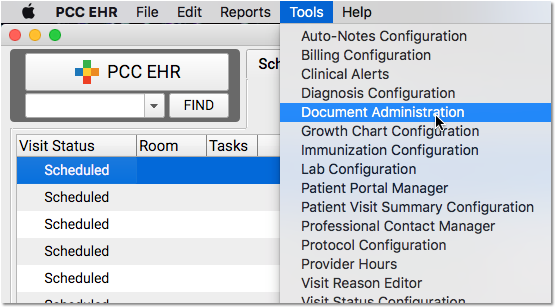
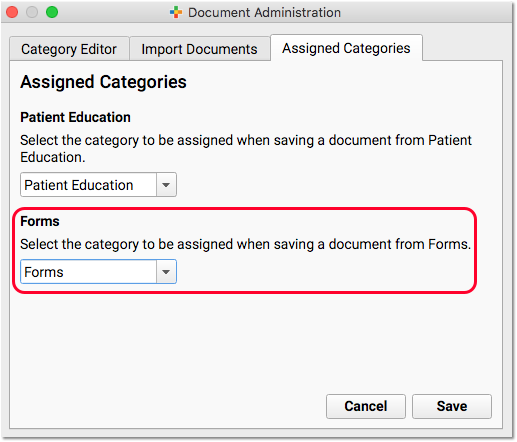
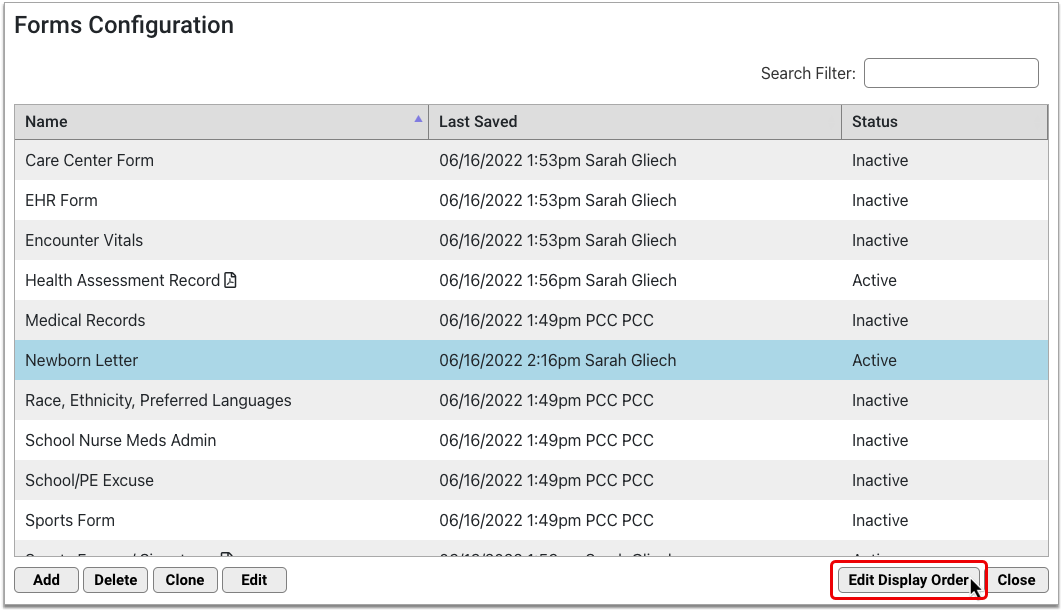
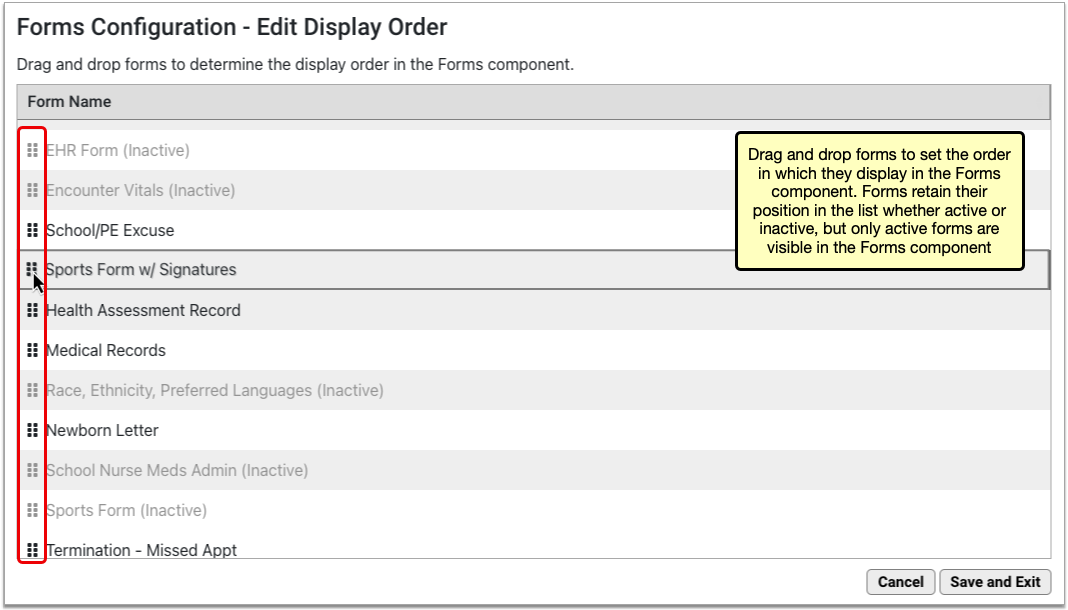
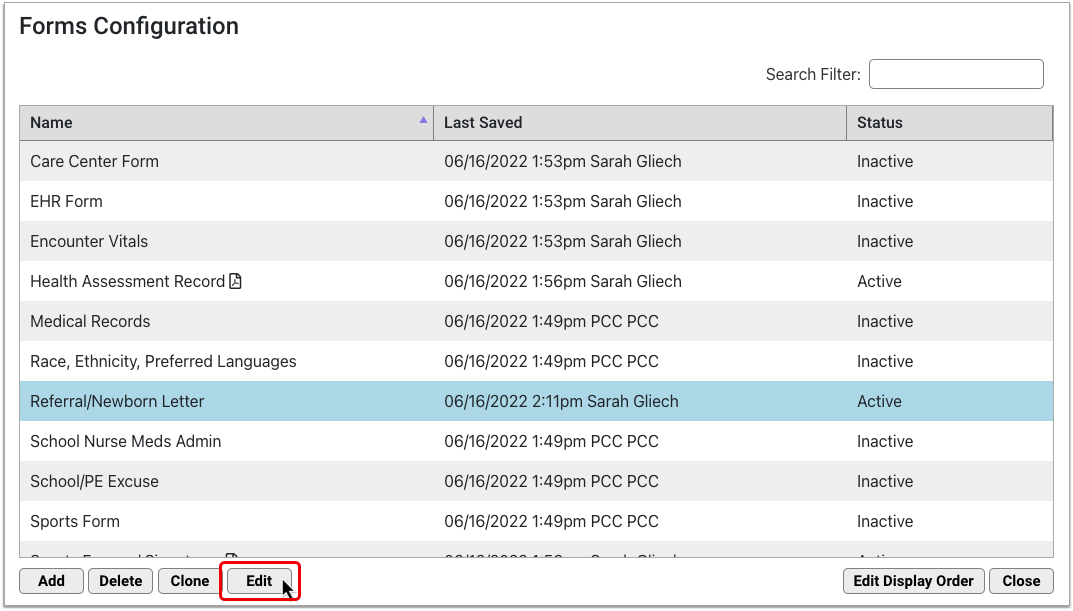
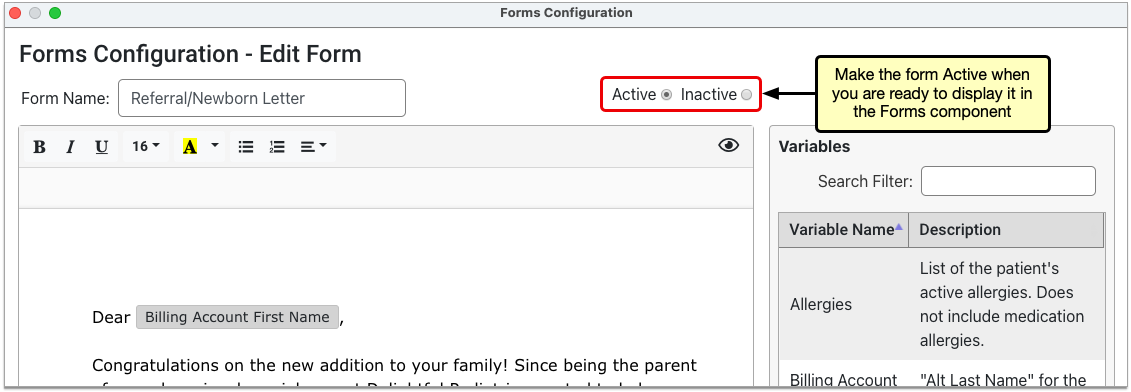
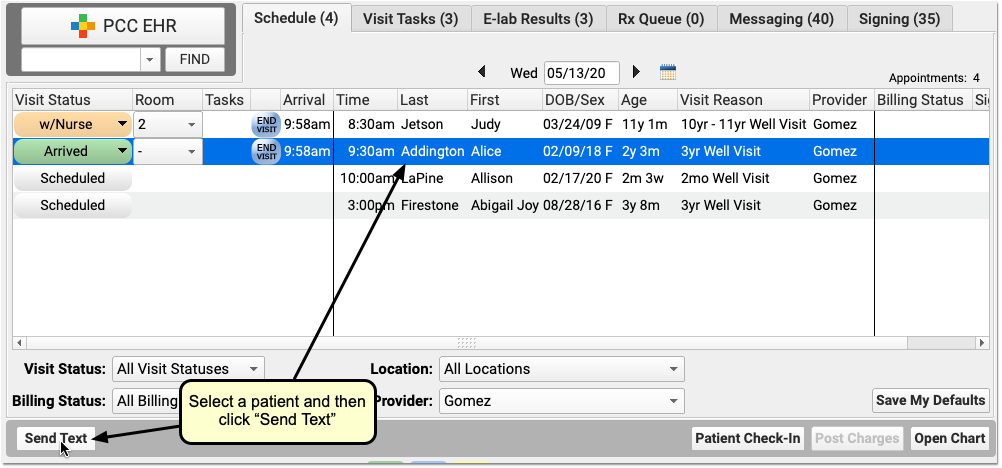
Generate Visit Forms in PCC EHR
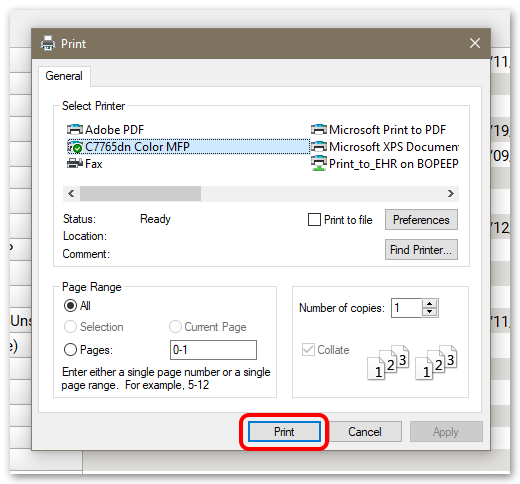
Use Print Visit Forms tool to print all forms for upcoming appointments
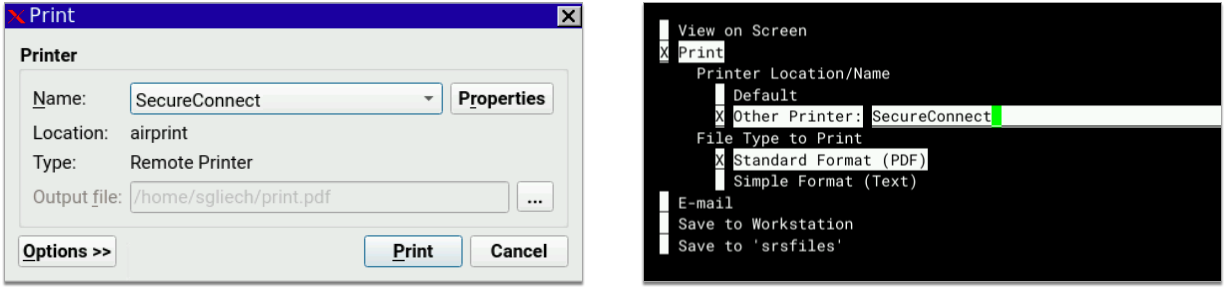
You can use the new Print Visit Forms tool to generate all the forms you need for appointments on a given day.
Open Print Visit Forms from the Tools Menu.
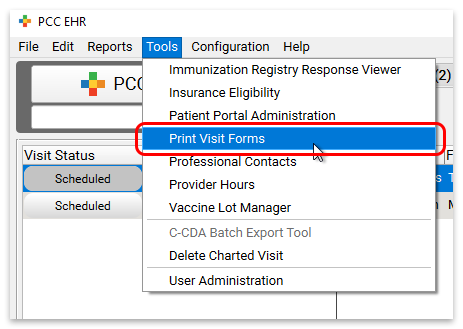
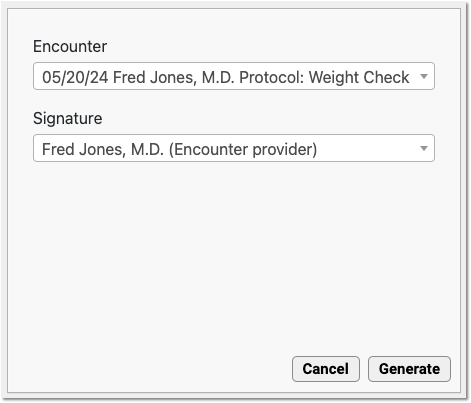
Select a date, location, and provider, and click “Print Visit Forms”.
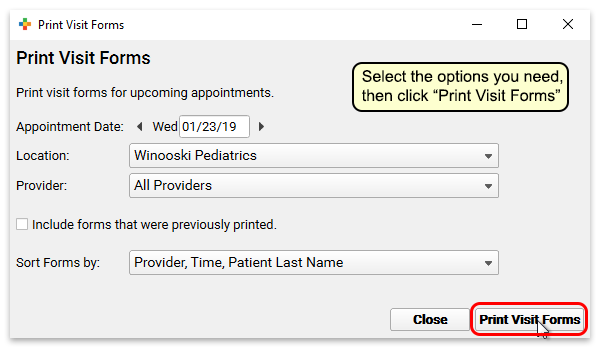
Then use your system’s print dialogue to print the forms.
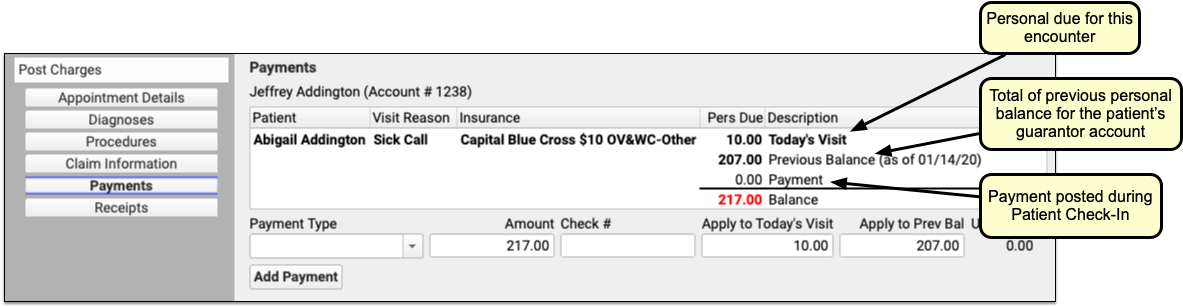
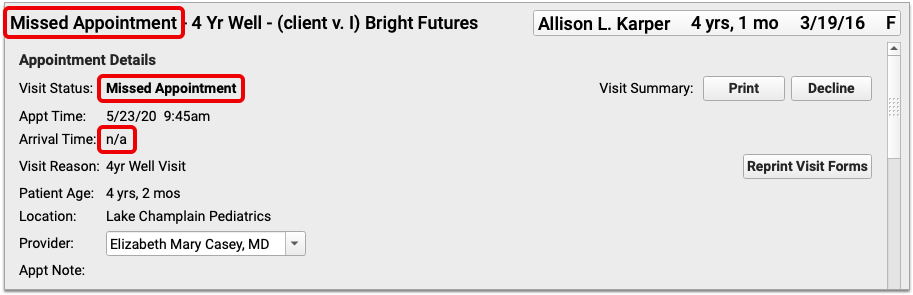
Print or Reprint Visit Forms During Patient Check-In
You can print visit forms as you check in a patient, or right from the patient’s chart.
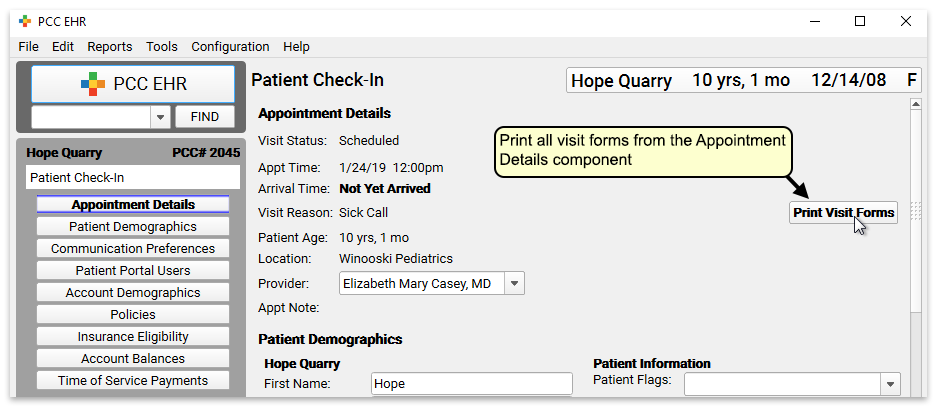
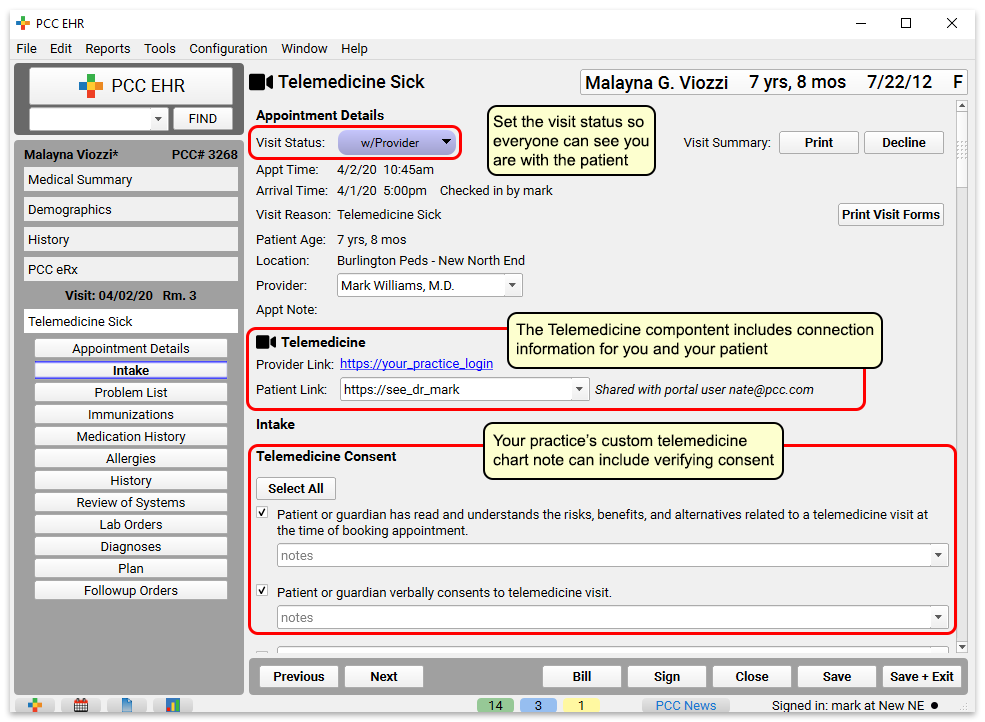
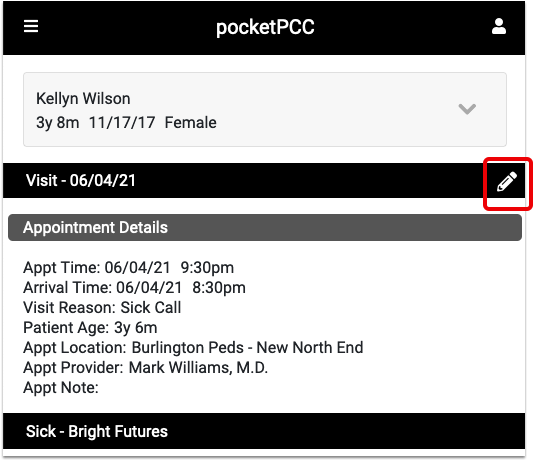
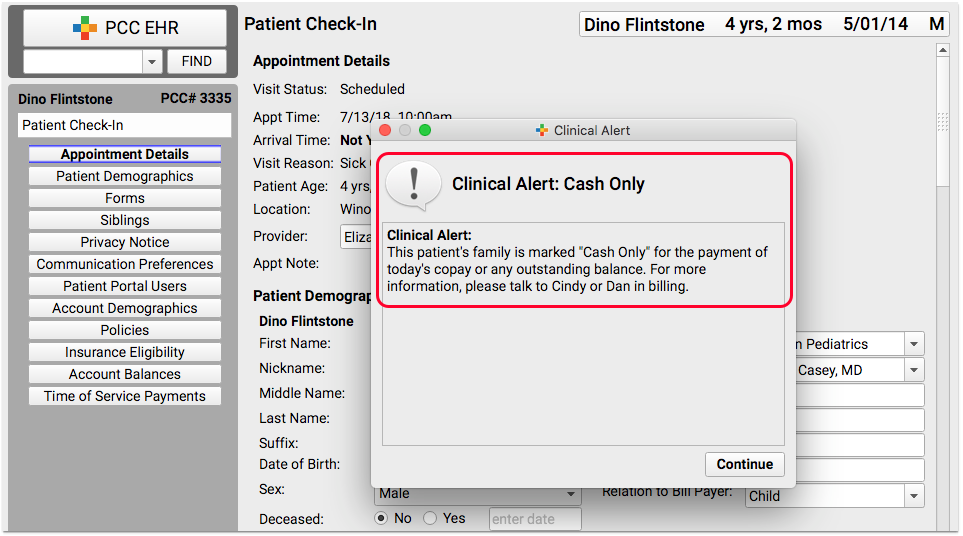
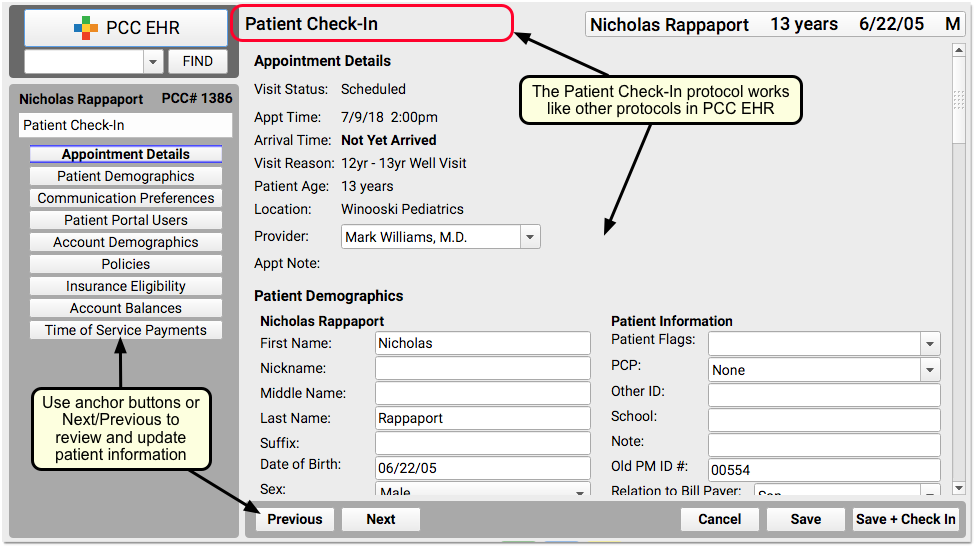
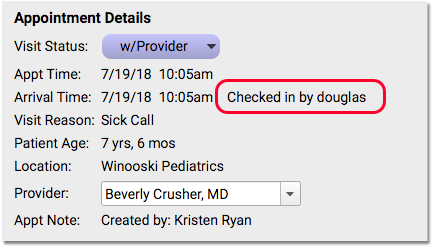
Appointment Details Component: This button appears anywhere you use the Appointment Details component—in Patient Check-In, and also in chart notes.
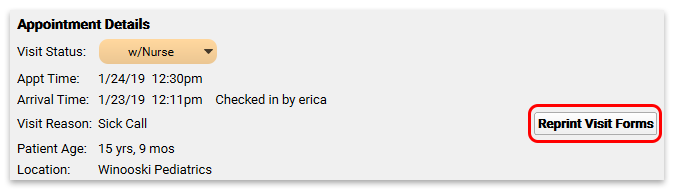
Reprint Visit Forms: If you have already printed the forms once, the button text will read “Reprint Visit Forms.” Click the button to print the forms a second time if necessary.
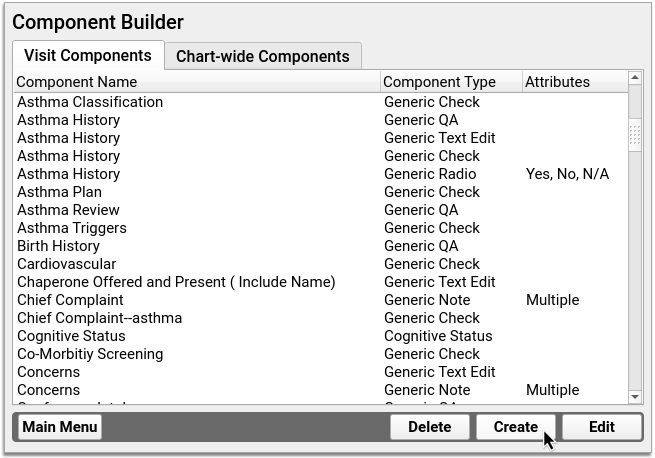
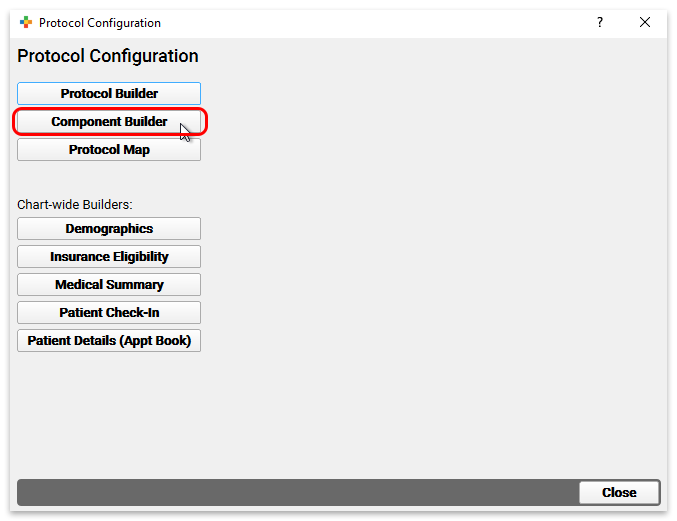
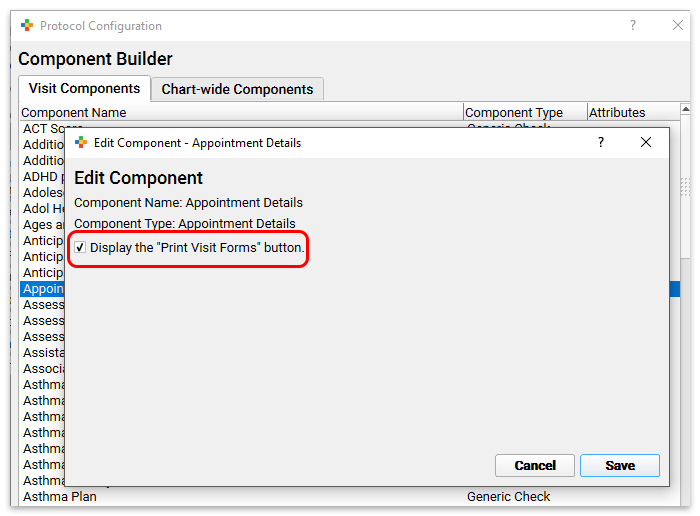
Disable Form Printing: You can remove the Print Visit Forms button from charts and Patient Check-In by editing the Appointment Details component in the Component Builder.
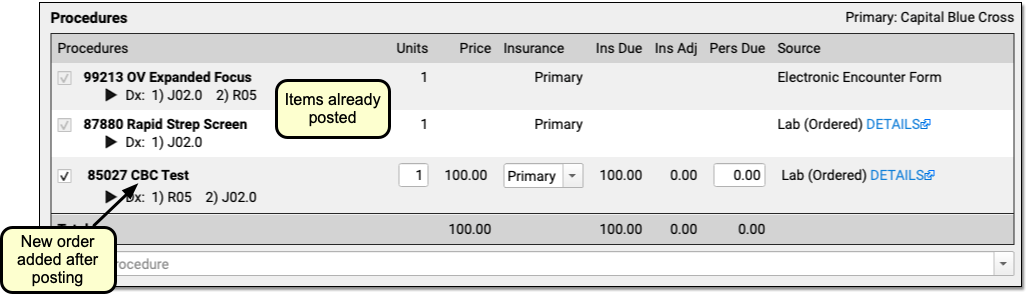
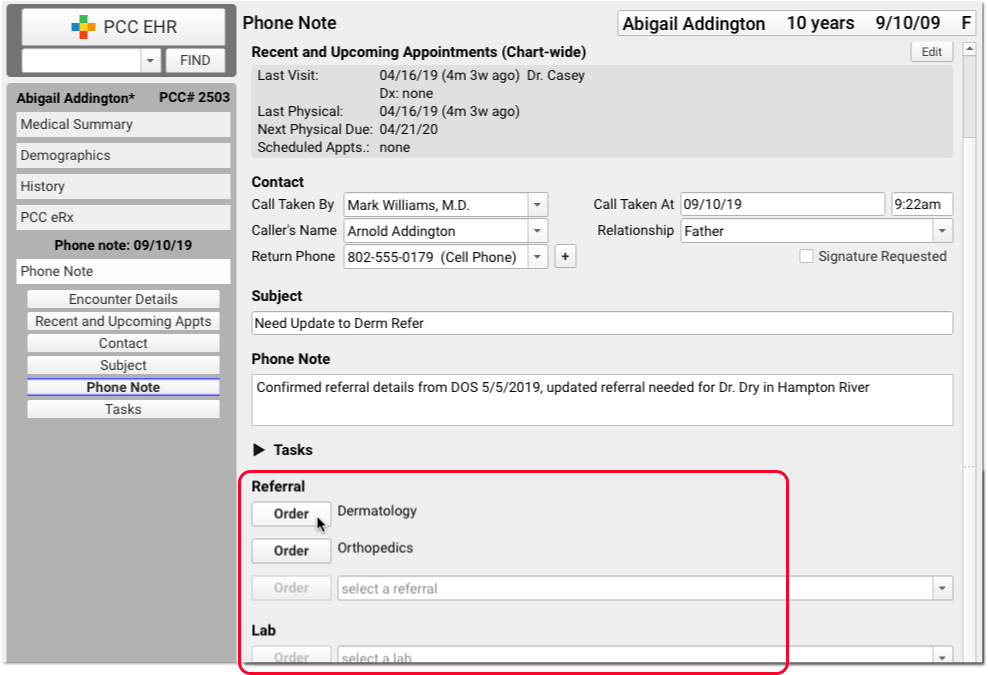
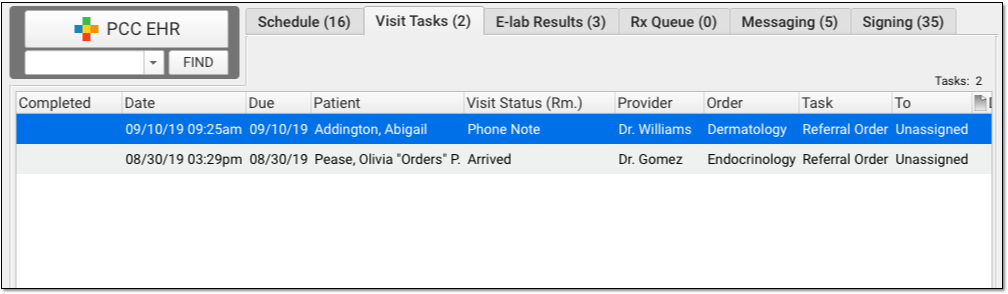
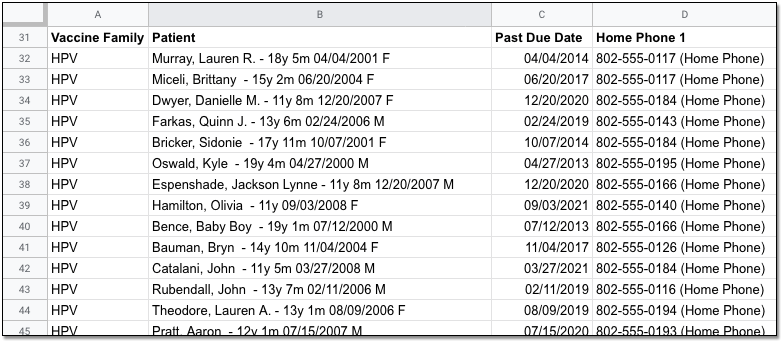
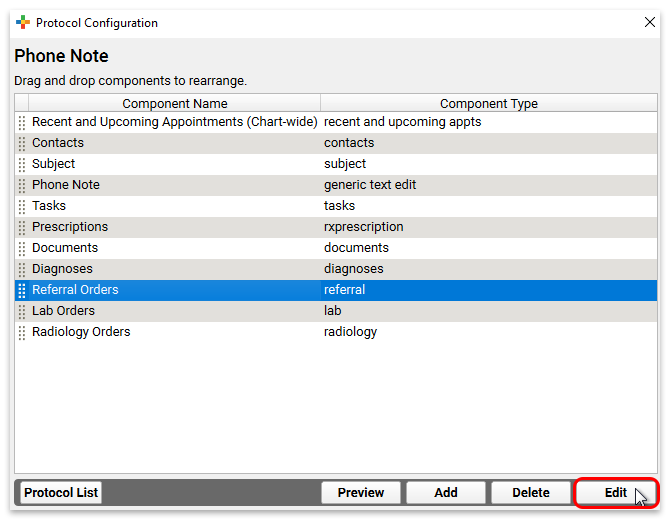
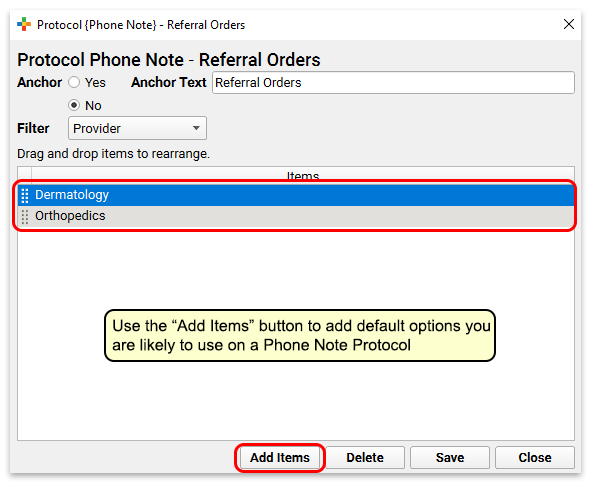
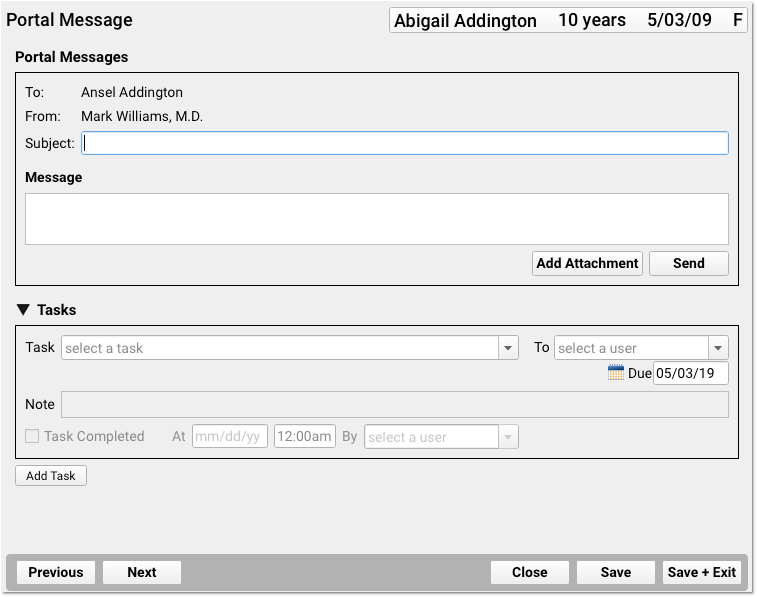
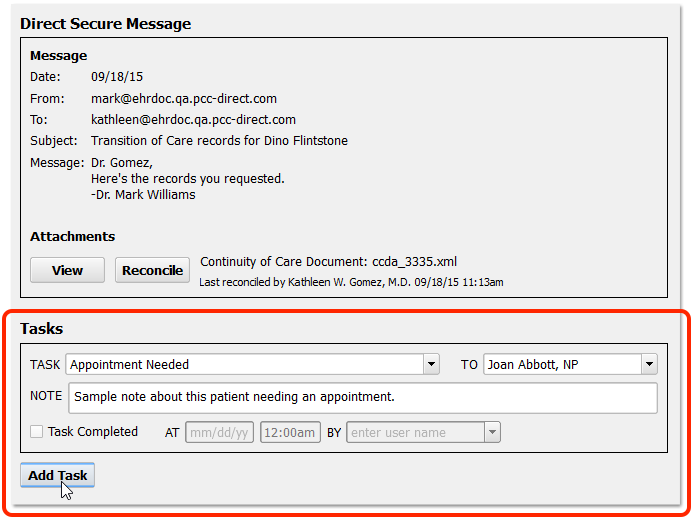
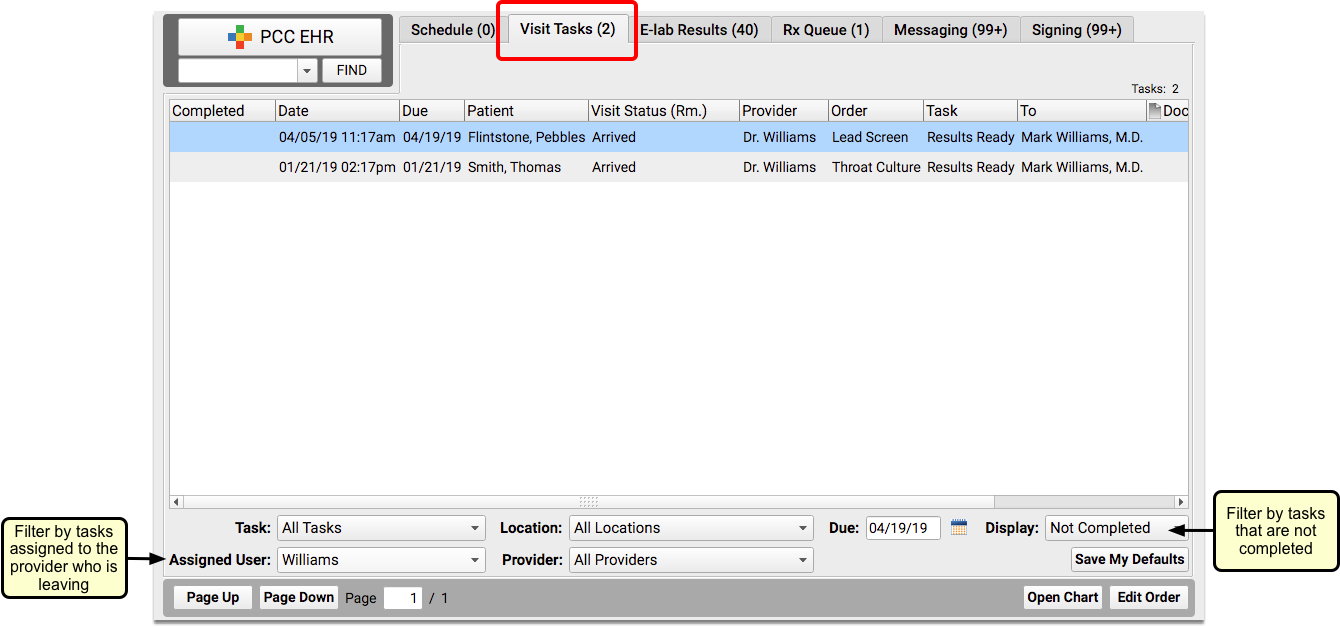
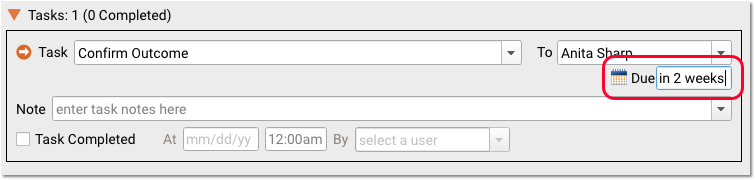
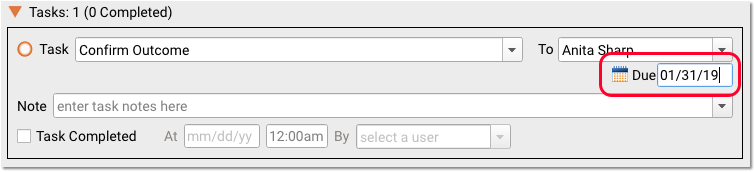
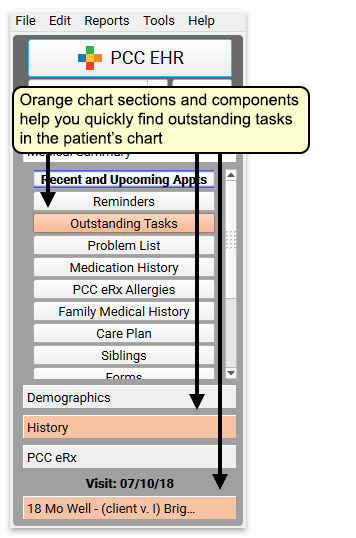
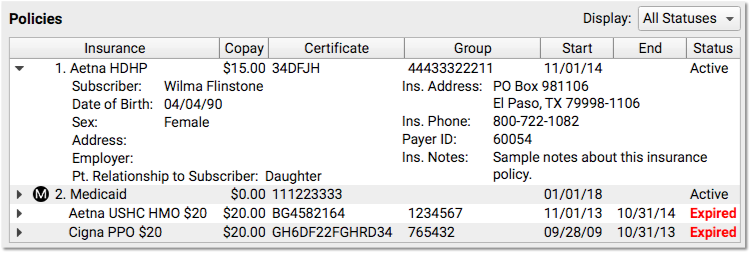
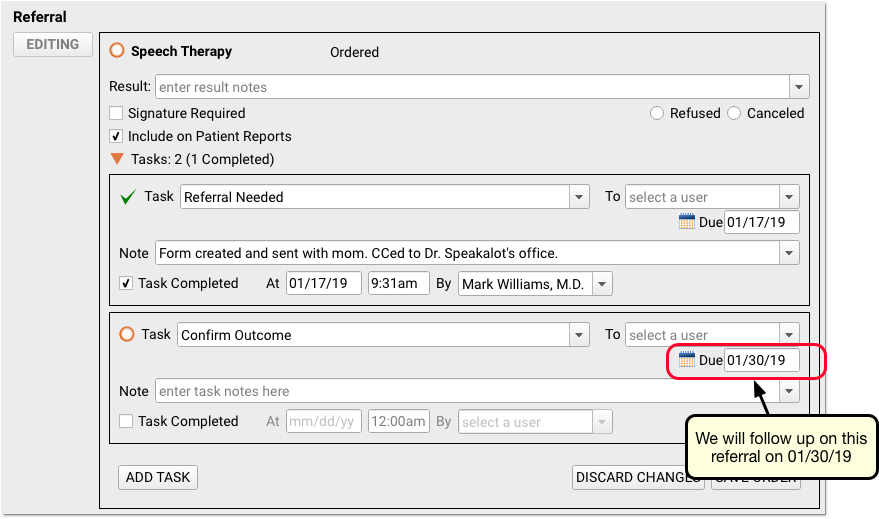
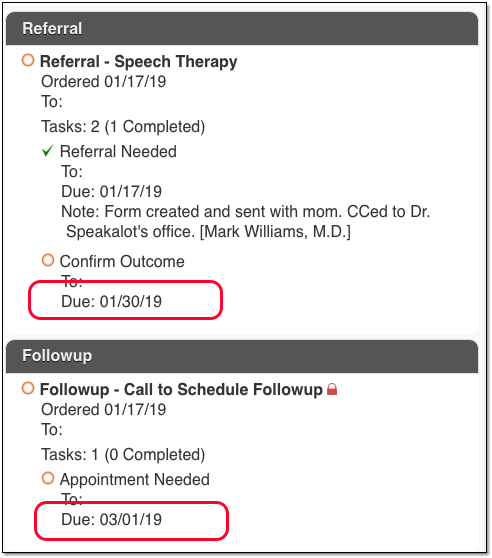
Add Due Dates to Orders and Tasks
In PCC 8.7, you can add a due date to a task and then use PCC EHR’s tools to track down work that needs to be done today or later.
If something is not due today, you can edit the due date right on the order.
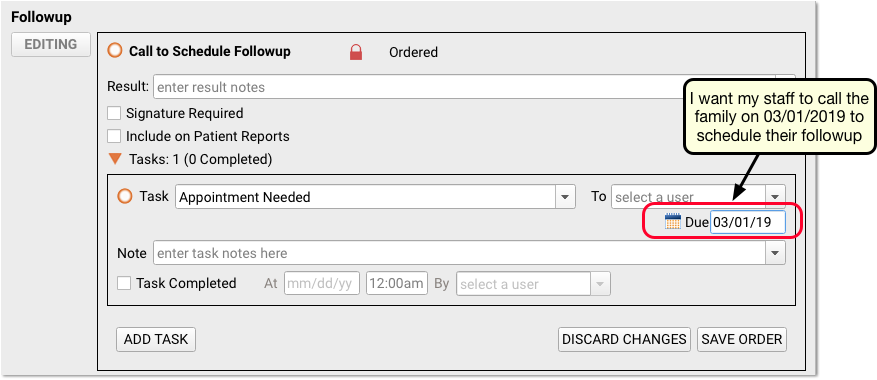
When should you follow up on referrals or labs? Can you remind yourself to call a family in two months to schedule a followup? By setting a due date for a task, your practice can make sure to follow up on items that are not meant for today.
When you create a task, the default due date will be today. You can change it at any time, and edit orders to update their due dates.
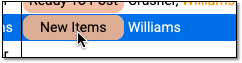
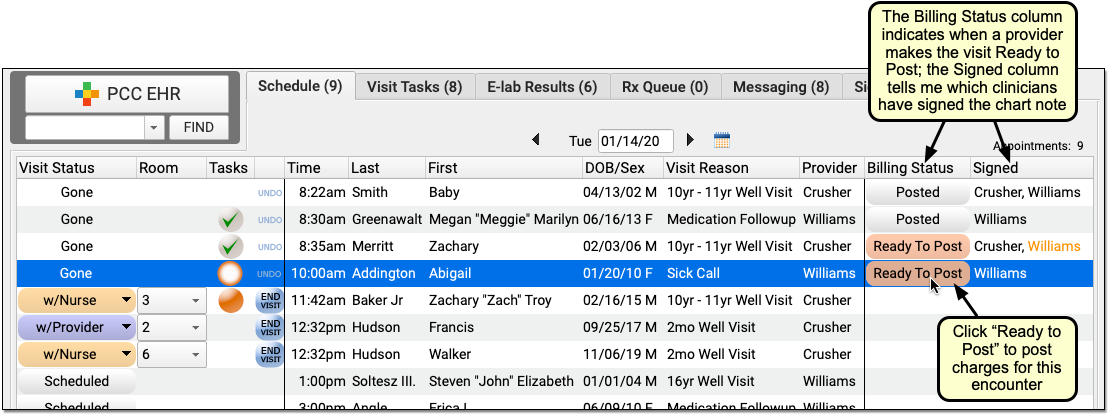
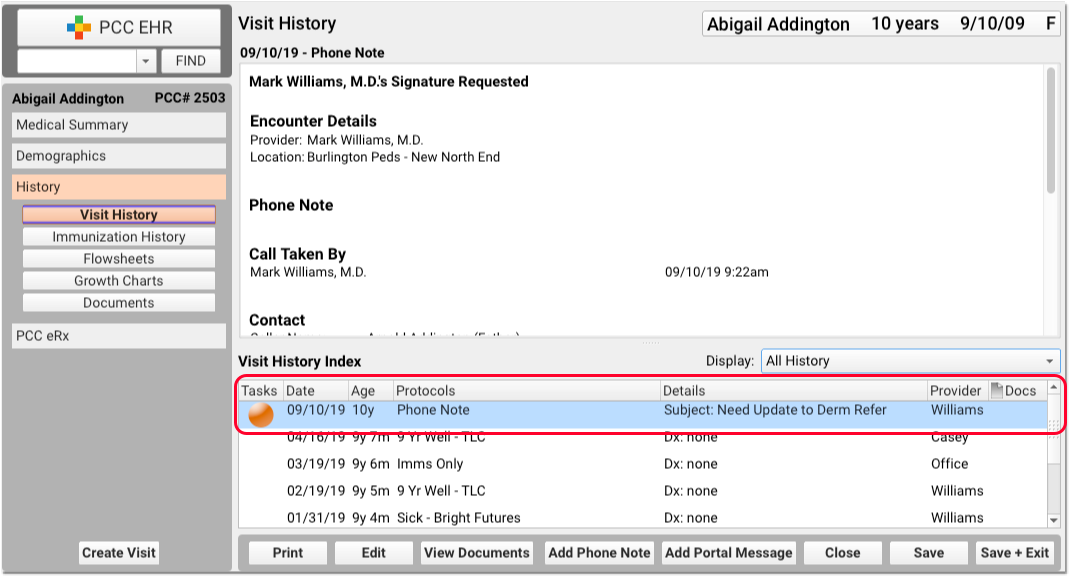
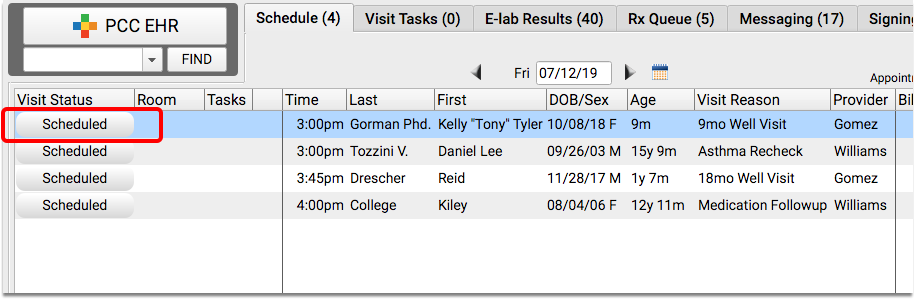
When a task is not due today, the order will appear with the orange ring indicator, so you can tell at a glance that it is task for the future, and not due today.
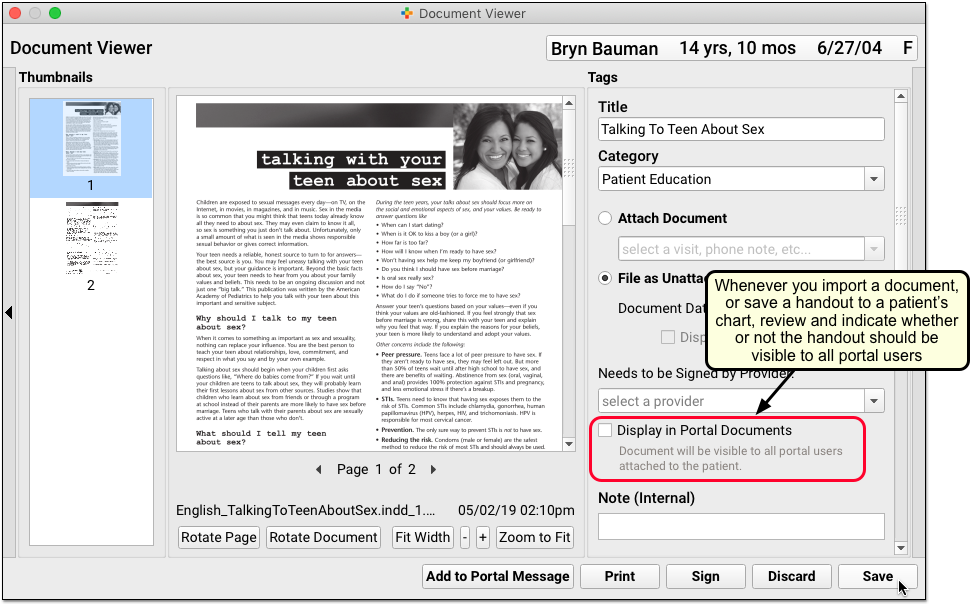
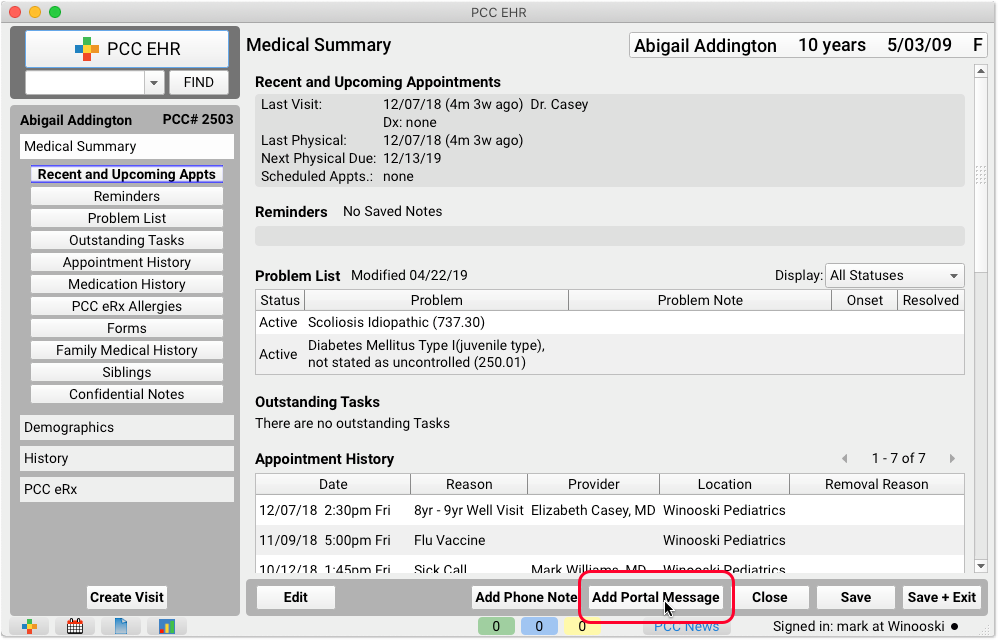
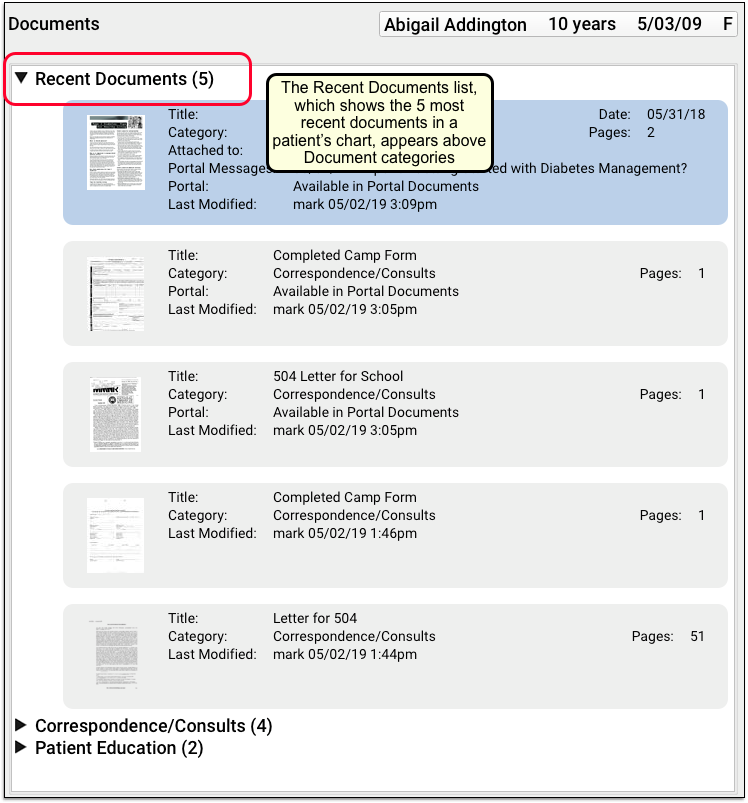
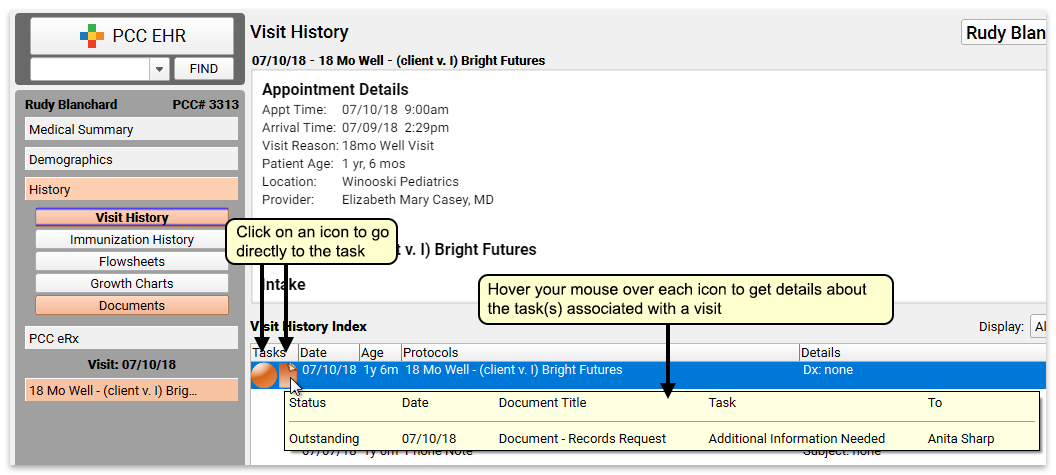
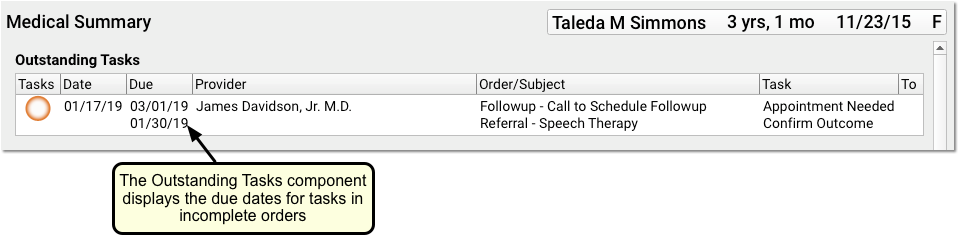
You’ll see the new due date field wherever you review orders and tasks: on Visit Tasks and Messaging queues, on chart notes, when you hover over an order in the Visit History Index, in the Document Viewer, in the Documents section of the chart, in the Outstanding Tasks component, and when you edit any order.
Following Up: What Happens When a Task is Due?
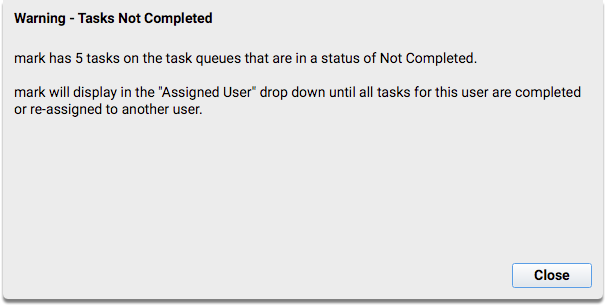
When a task becomes due (or it is past due) it will appear on the Visit Tasks or Messaging queue.
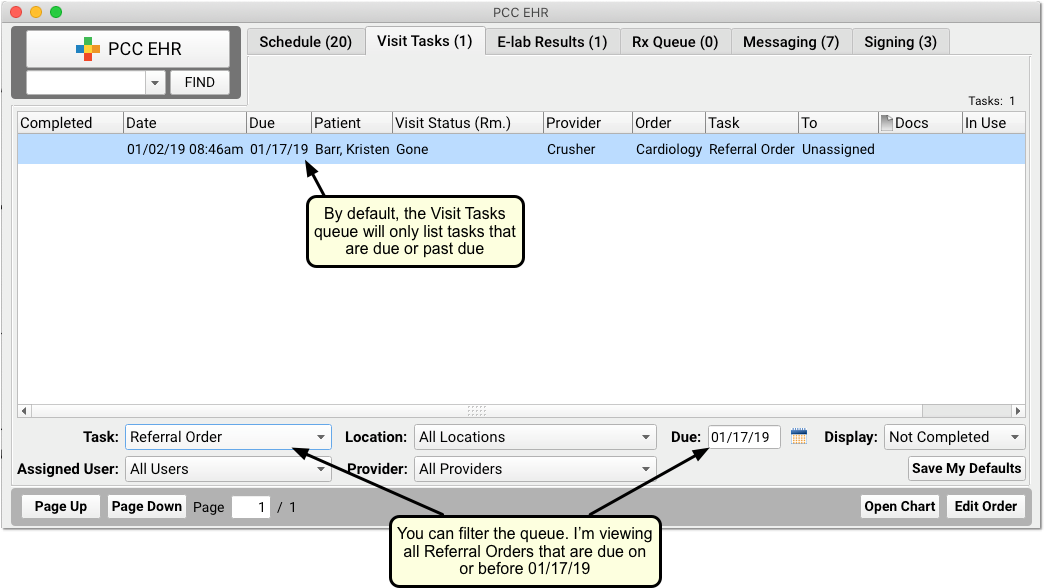
Your queues will only show you what needs addressing today. A task won’t show up until its due date. If you get to the office on Monday and you want to see tasks that are coming up for the week, you can use the “Due” date filter to look at tasks due by Friday or any future date.
You can also track incomplete tasks on the Outstanding Tasks component.
An orange ring indicates that tasks are not due yet. When the day arrives, the task will appear on your Visit Tasks or Messaging queues, and the indicator will automatically become solid.
Due Date Shortcuts
You can type “in 2 days”, or “2 months” to automatically calculate the date the task should be completed.
You can use many other shortcuts to speed up indicating when a task should be due. Enter a number and “days”, “weeks”, “months”, or “years”, with any of several abbreviations. Spaces are optional.
| Days |
Weeks |
Months |
Years |
| in # days |
in # weeks |
in # months |
in # years |
| # day |
# week |
# month |
# year |
| #d |
#w |
#m |
#y |
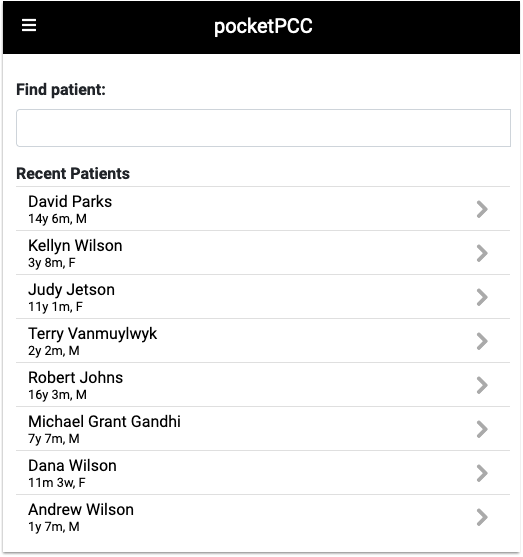
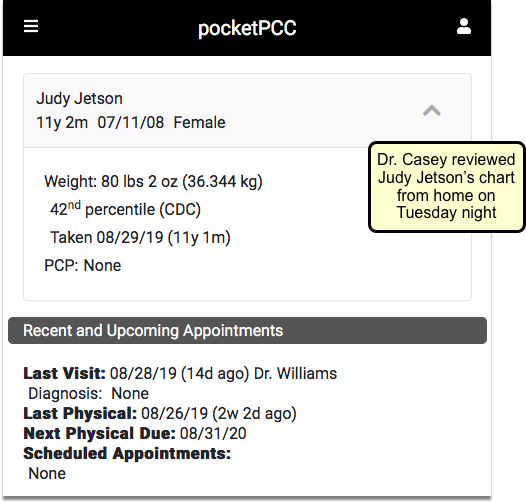
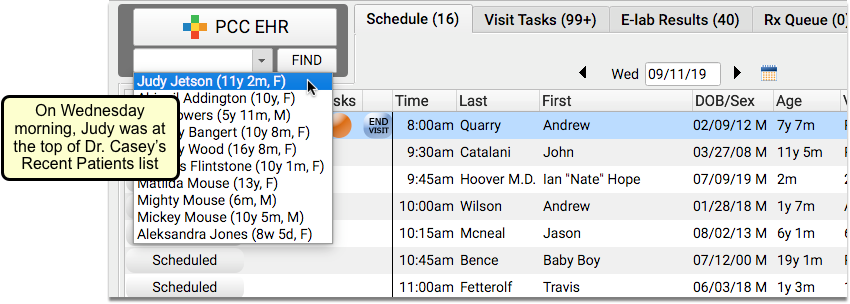
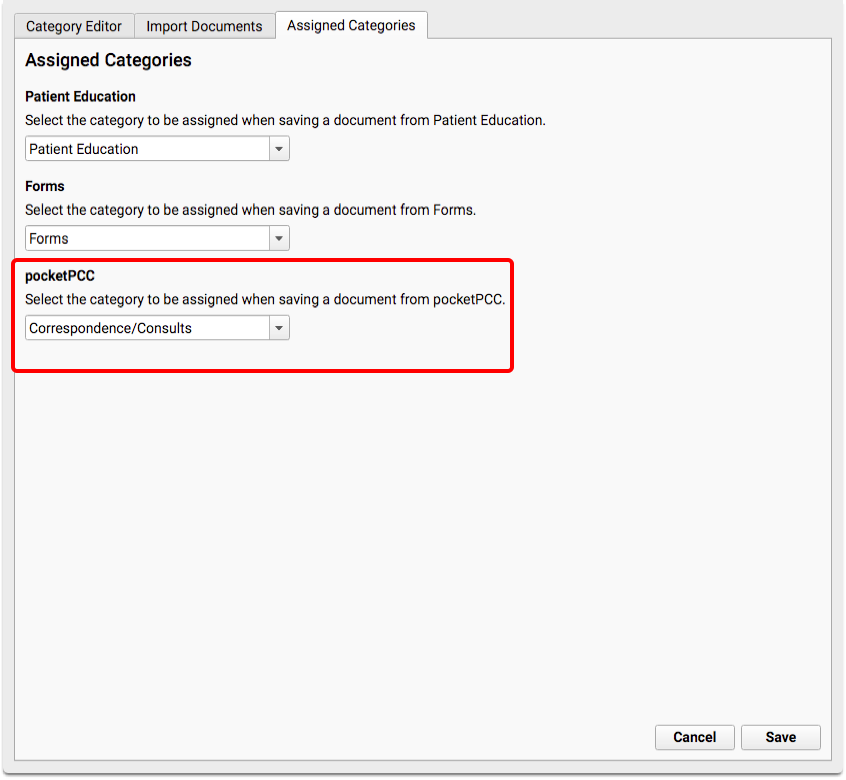
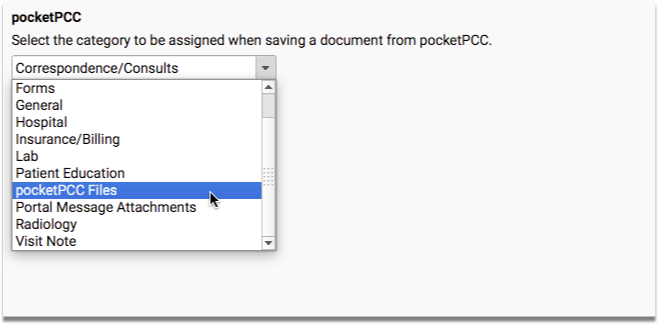
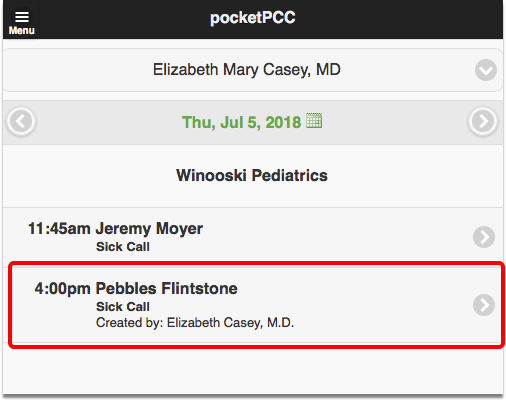
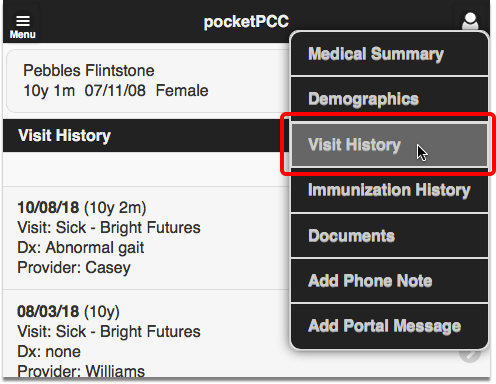
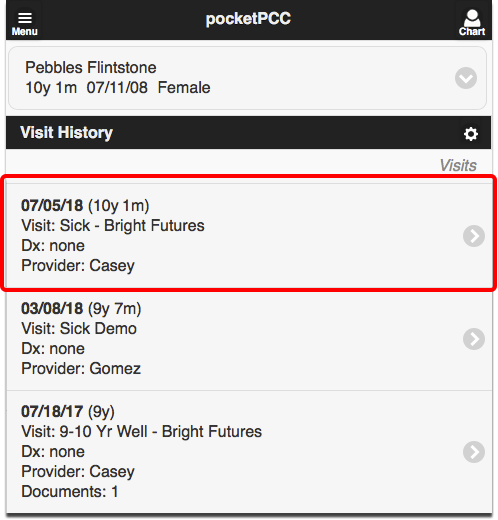
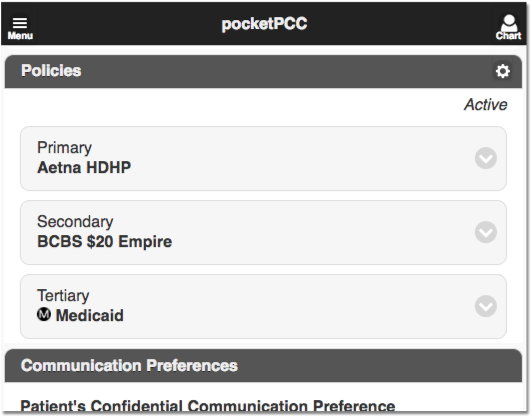
Due Dates in pocketPCC
You’ll see due dates on your tasks wherever they appear, including in pocketPCC.
When you create a new task, the default due date will be today and you can change it at any time.
Improvement to the Edit Orders Window
When you click on the orange task indicator on the Schedule screen, you can review the orders for that visit and make sure they are all done.

In PCC 8.7, if there’s an incomplete task on an order, the navigation icon on the left will display that task’s status–even if the order itself is marked as complete. (Formerly, it would show the order’s overall status, which could lead to missed tasks.)
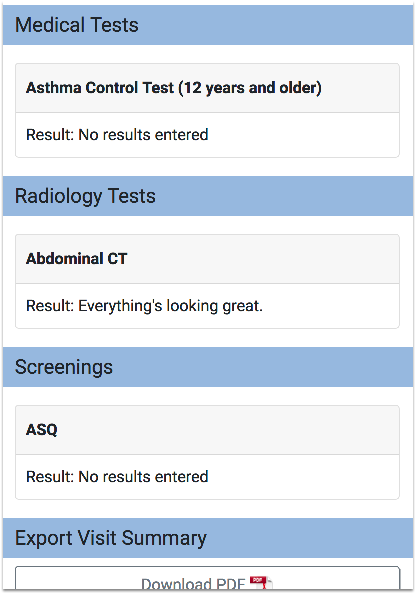
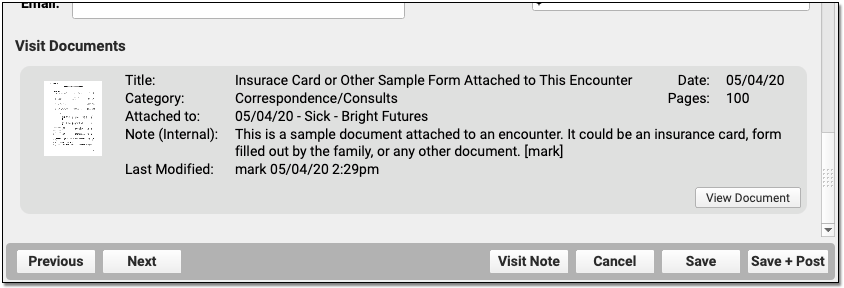
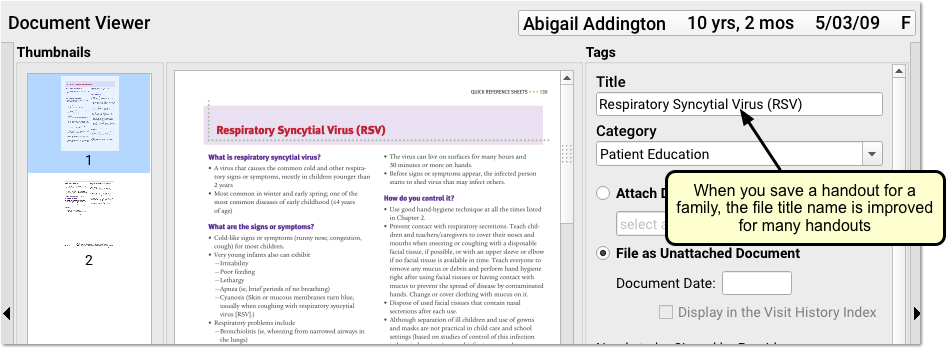
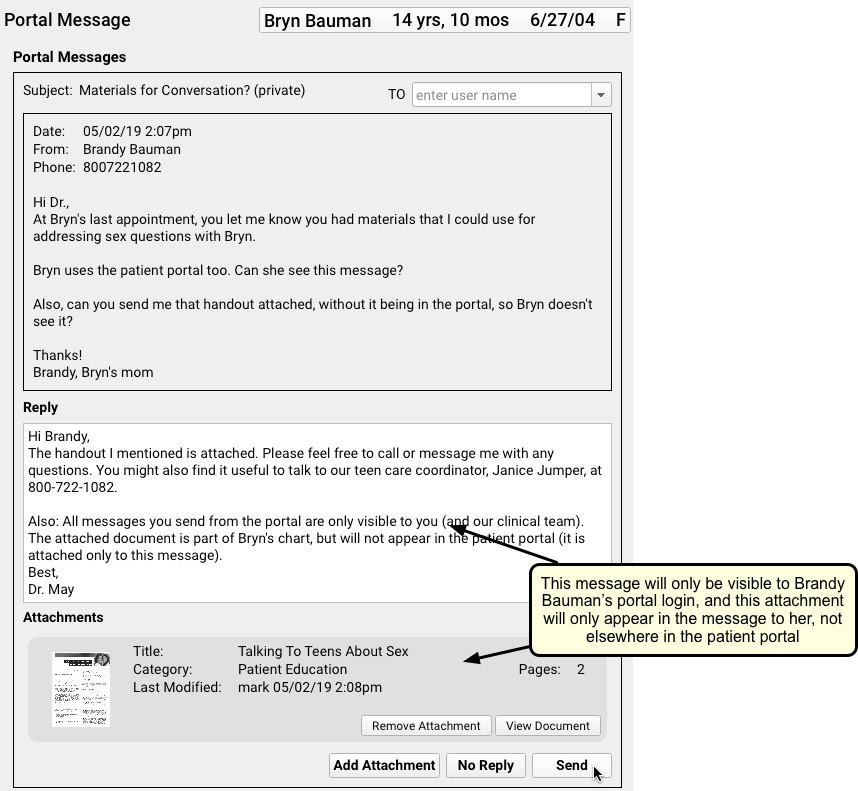
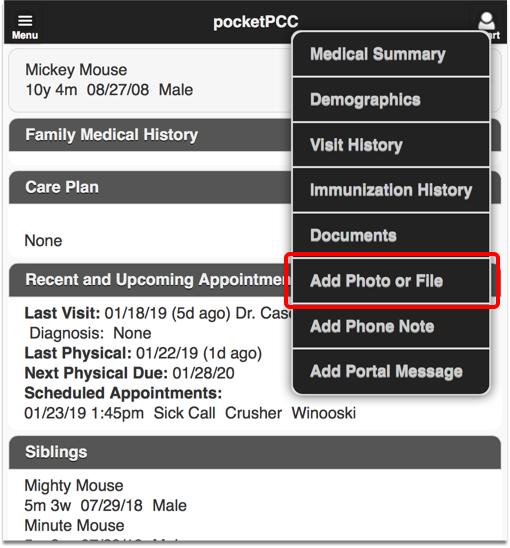
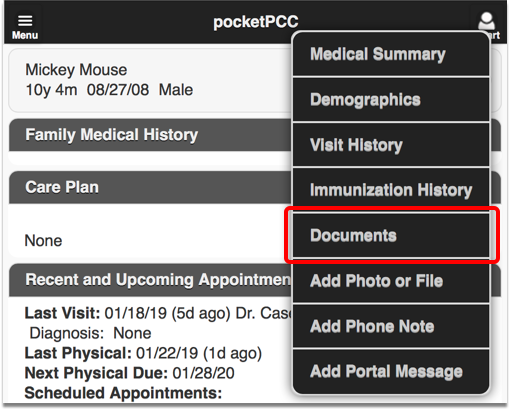
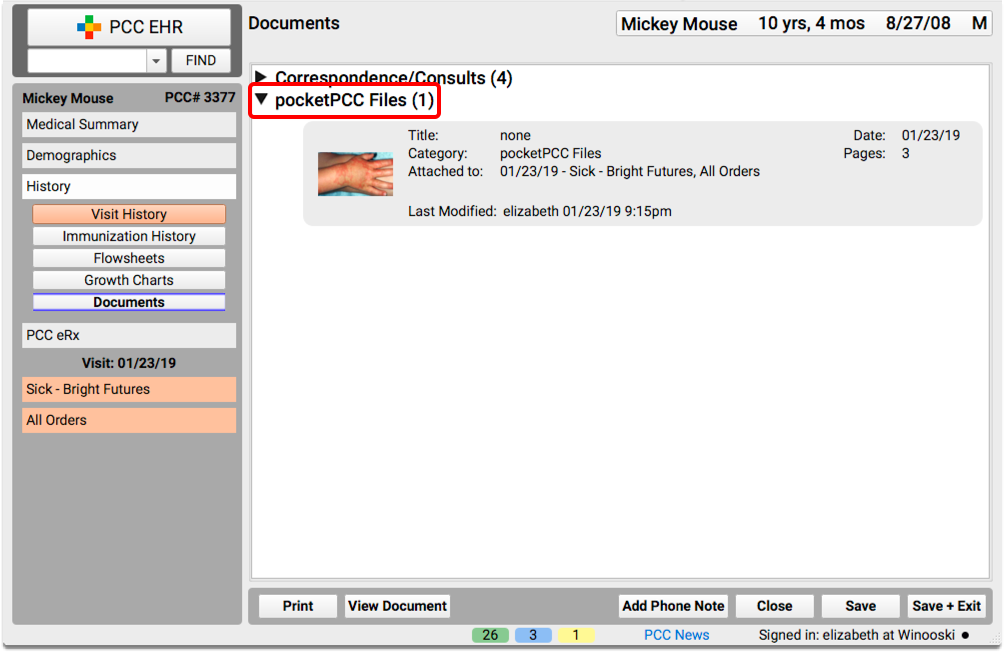
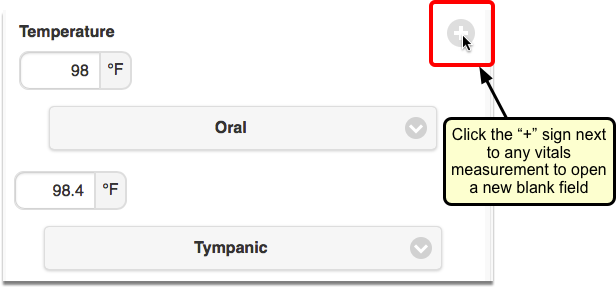
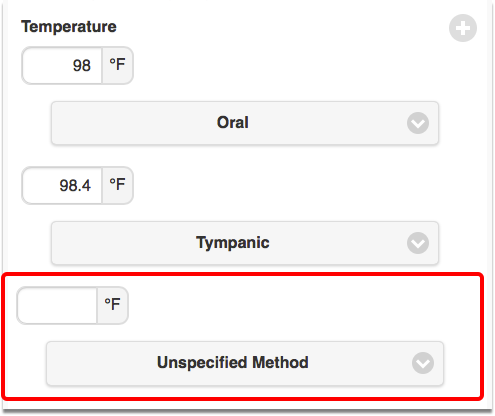
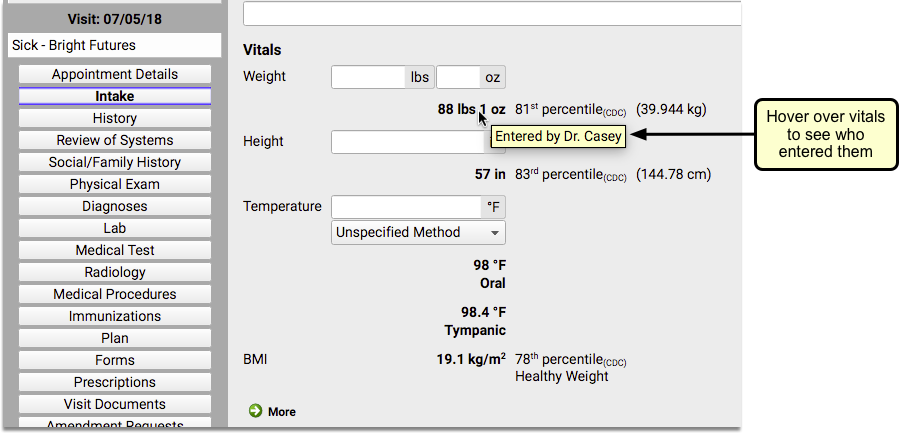
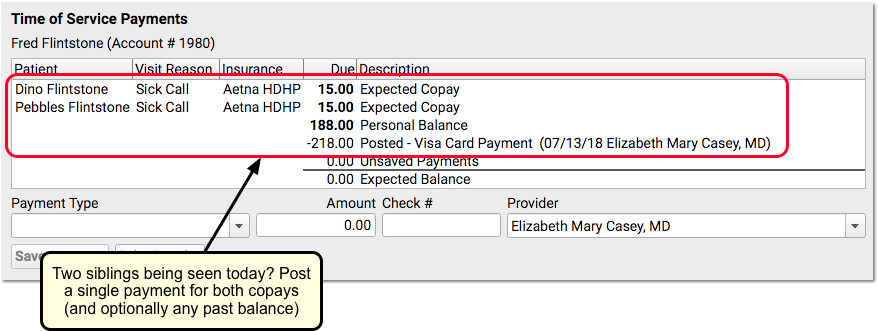
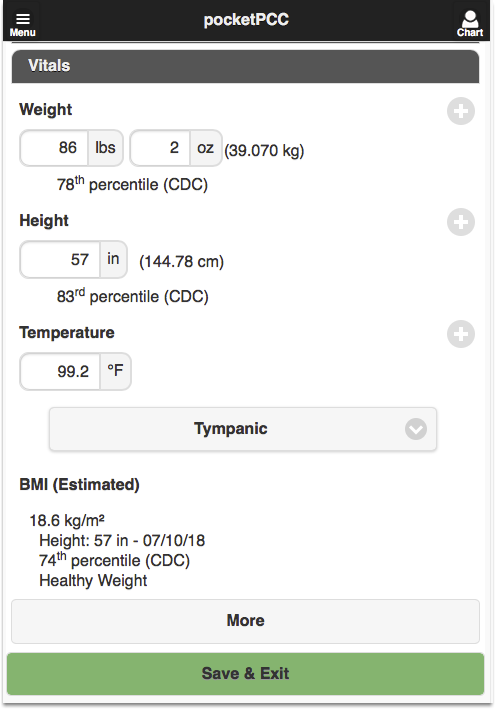
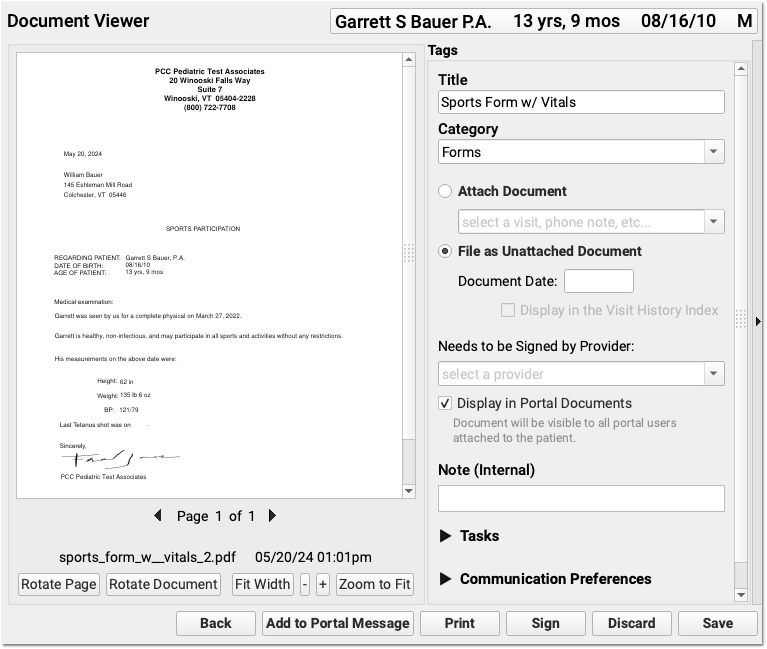
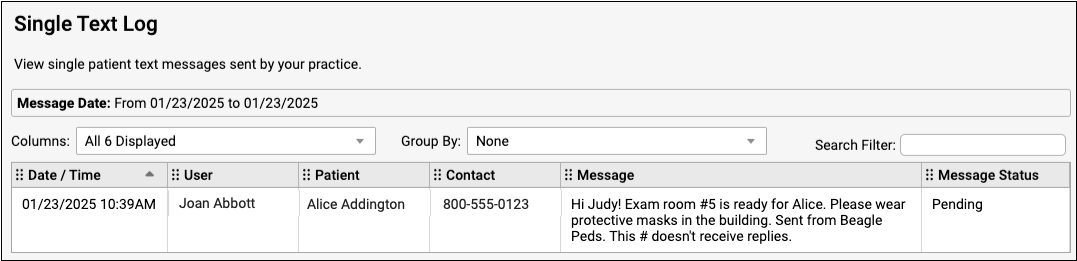
Use pocketPCC to Take Photos and Add Them to Patient Charts
A picture is worth a thousand words. Rather than try to describe a patient’s rash in your chart note, with PCC 8.7 you can take a photo with your mobile phone and upload it right into the chart.
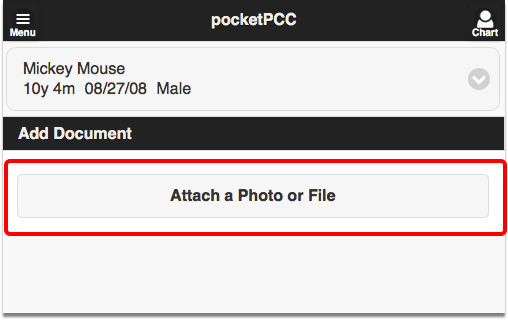
Add Files/Photos
The new “Add a Photo or File” chart menu option in pocketPCC allows you to add photos and files from your mobile device directly into the patient’s chart.
You can add a photo you take during an office visit, or upload a form or photo that the family emailed you.
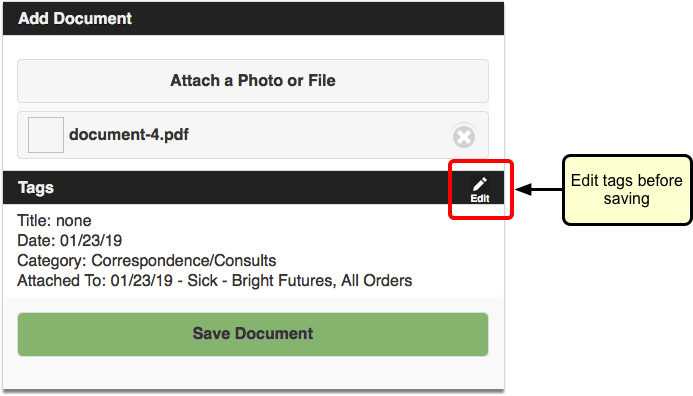
You can attach multiple photos or files, and then click “Save Document”.
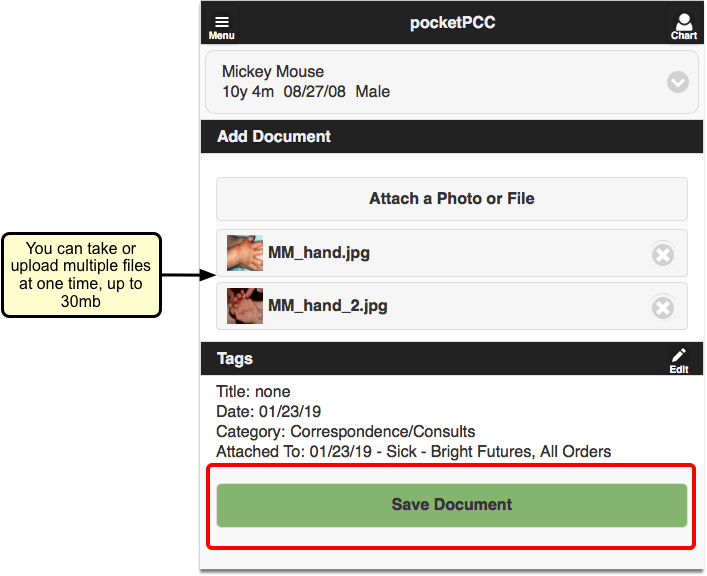
The photos/files will be attached to the current day’s visit by default. If the patient does not have a visit today, the item will be added as an unattached file.
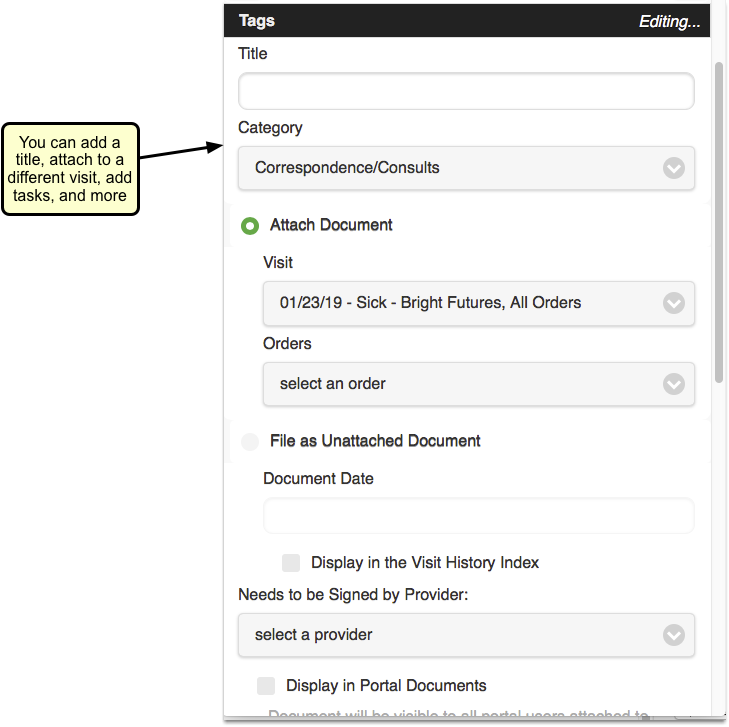
If you want to change the visit attachment or add a title, tasks, or signature requirements, edit the tags before saving.
Does the Photo or Document Also Save to My Device?: Under normal conditions, the photo you take from pocketPCC will not save to your mobile device. However, if you take the photos before launching pocketPCC, or if your phone automatically saves photos to your camera roll or gallery, you may end up saving private health information to the device. PCC is not responsible for the security of your workstations or portable devices, and you should review your device’s operation and take appropriate precautions.
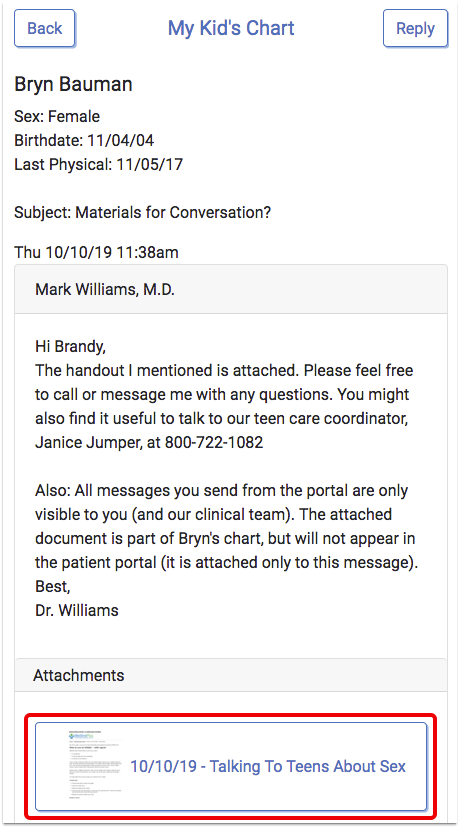
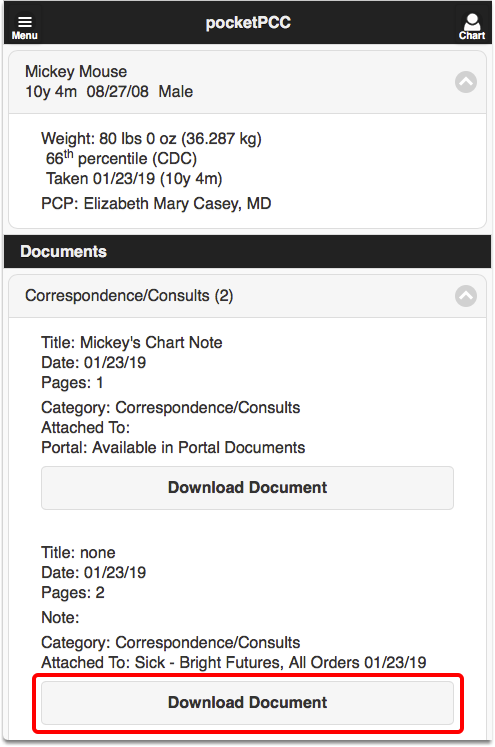
View Files/Photos in PCC EHR
You can view the photos and/or files in PCC EHR within the visit chart note, or anywhere else that Documents appear.
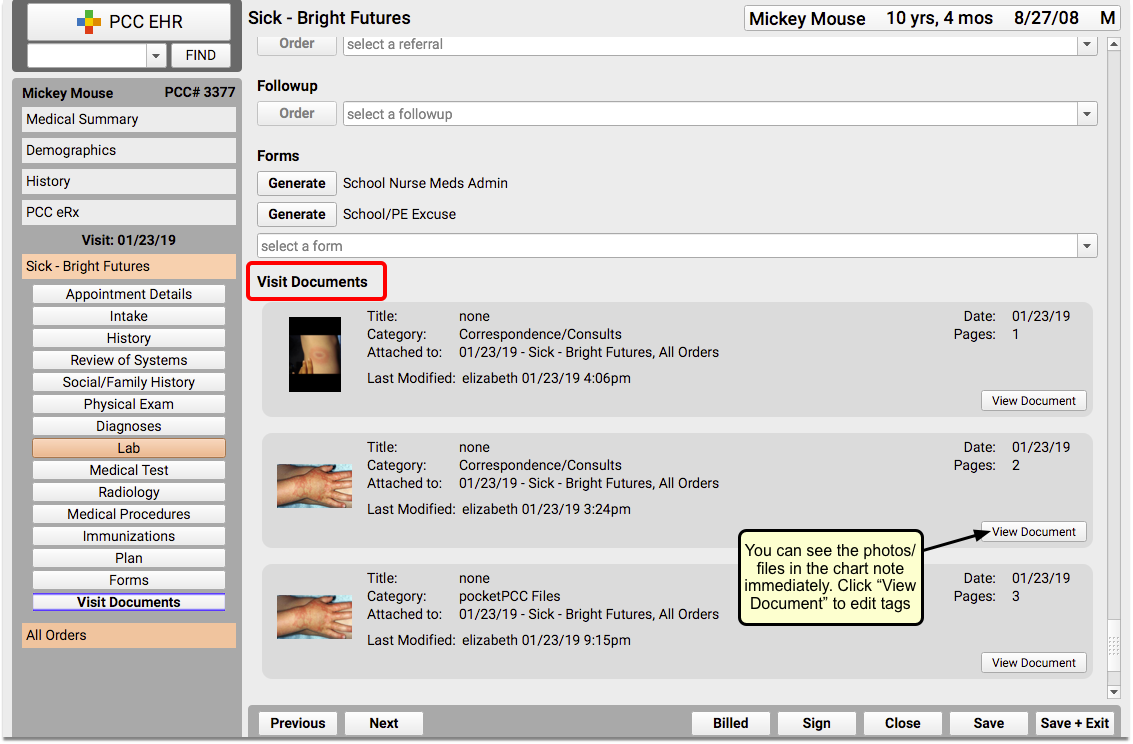
You can also edit tags from PCC EHR.
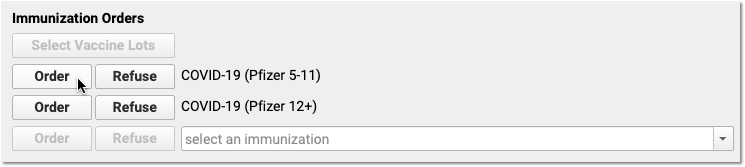
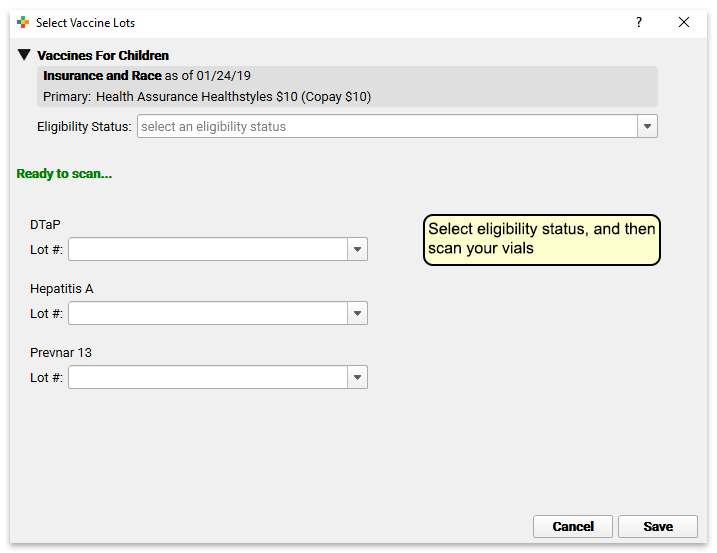
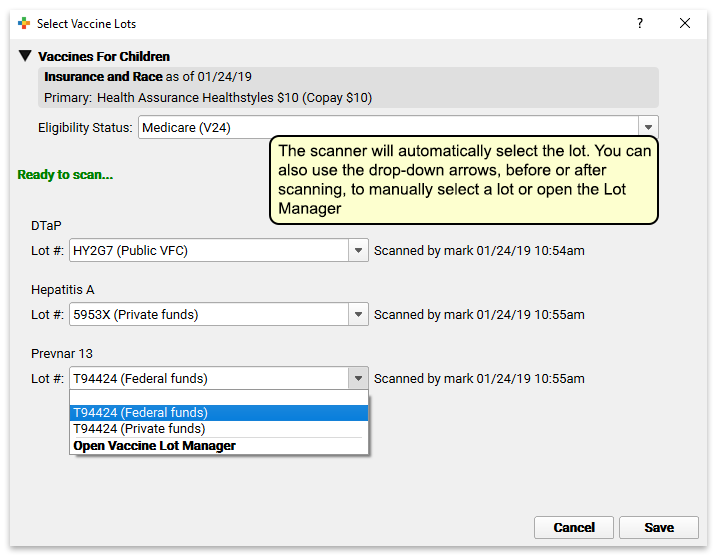
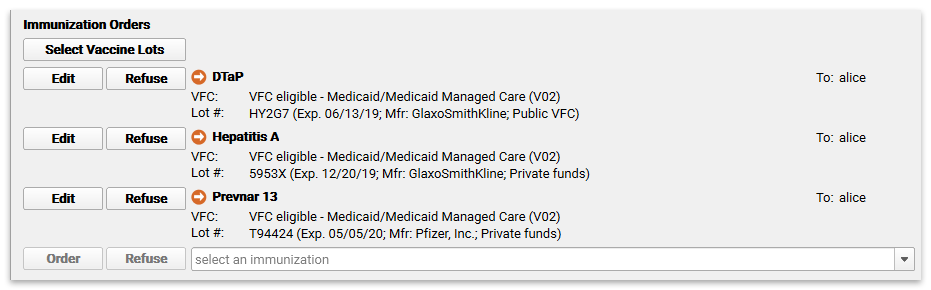
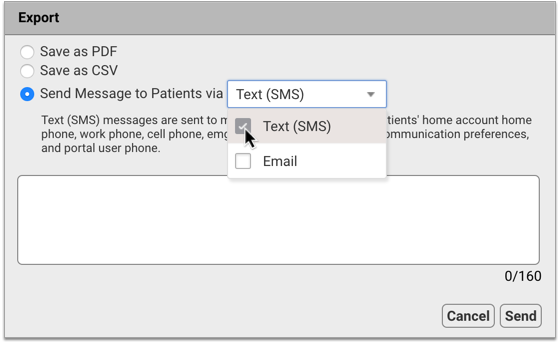
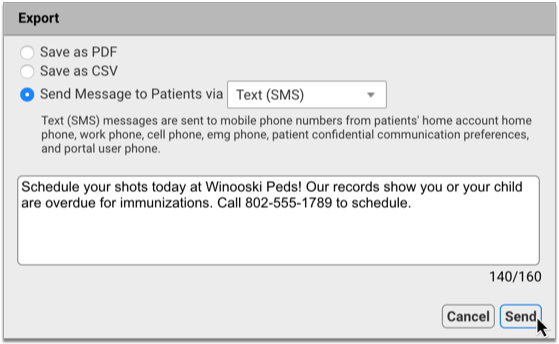
Track Immunization Administrations with Barcodes
When you administer vaccines, you can now select a lot by scanning the barcode on the vial with the Select Vaccine Lots window. You can access the Select Vaccine Lots window anywhere you can edit orders; in a patient’s chart, in the “Edit Orders” window from the schedule screen, and in orders that appear on the Visit Tasks queue.
Once one or more immunization orders have been placed, click “Select Vaccine Lots”.

Then scan the barcode(s) on the immunization packaging. PCC EHR will match it with an active lot in inventory.
Manual Selection: You can use the new Select Vaccine Lots window to manually select lots by clicking on the drop-down arrows if you prefer to, or if you do not have a scanner.
If there are multiple identical lots (perhaps for private and state funds), PCC EHR will prompt you to select the appropriate funding source with a radio button.
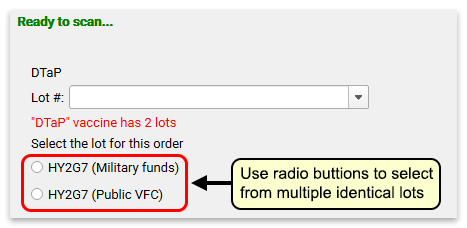
Pick Lots with Fewer Clicks: Even without a scanner, the Select Vaccine Lots button can be useful, allowing you to select multiple lots from one screen, using fewer clicks.
Error Protection: If a barcode is invalid, the vaccine has not been ordered, or the lot is expired, depleted or reserved, PCC EHR will alert you and will not let you add the lot to your order.
Scan from Within an Immunization Order
As well as the “Select Vaccine Lots” button, you can use the new “Scan” button within each order to scan a vaccine individually.

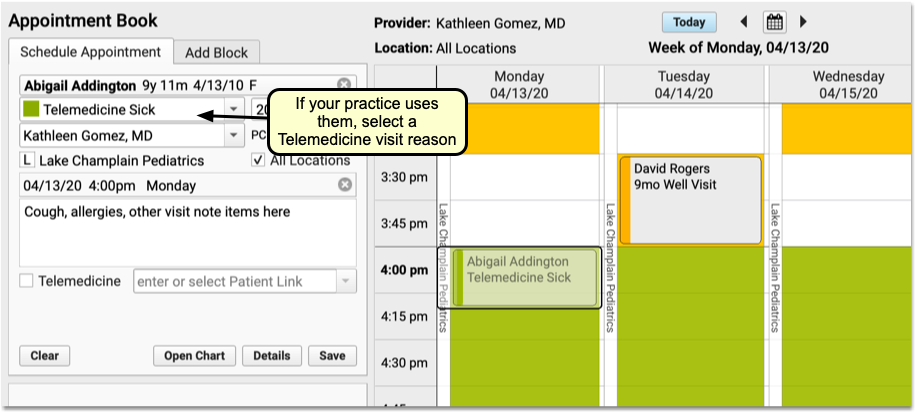
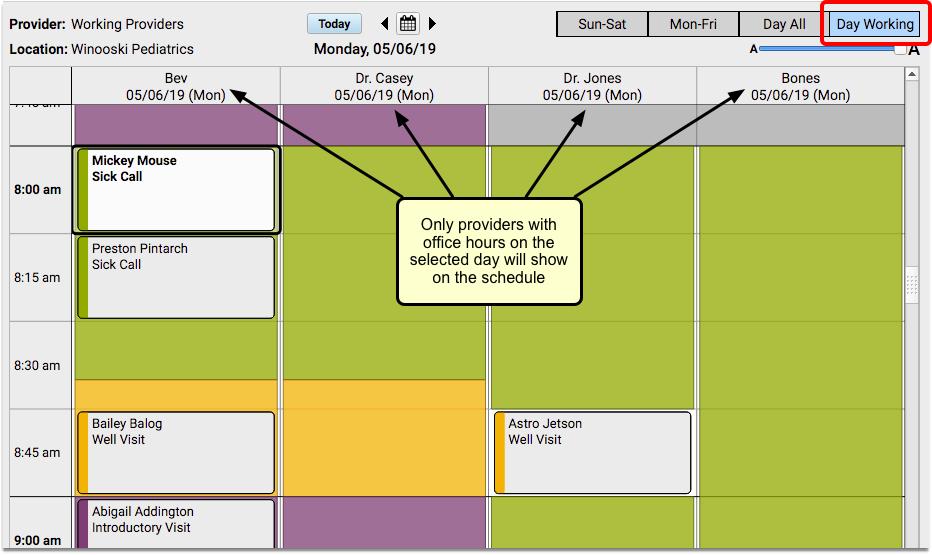
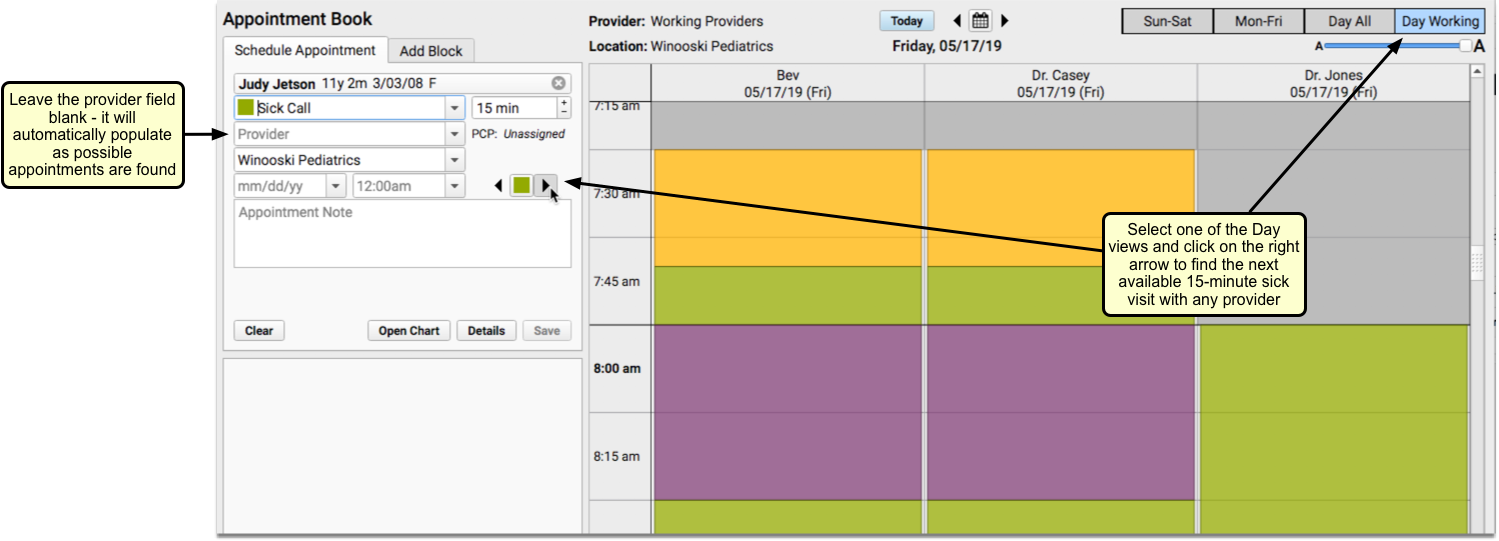
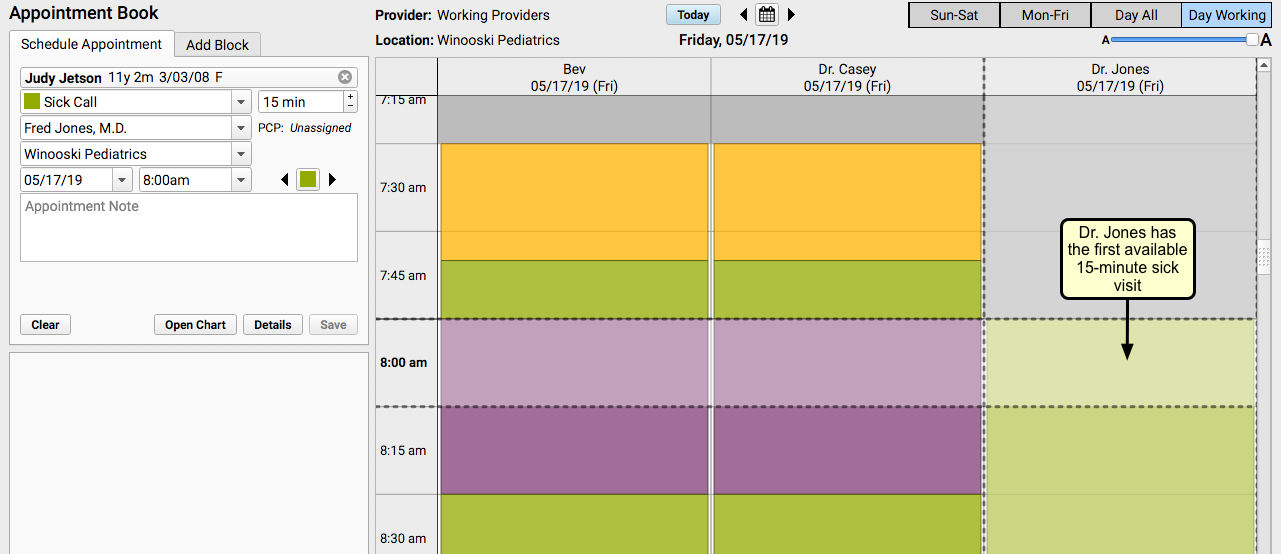
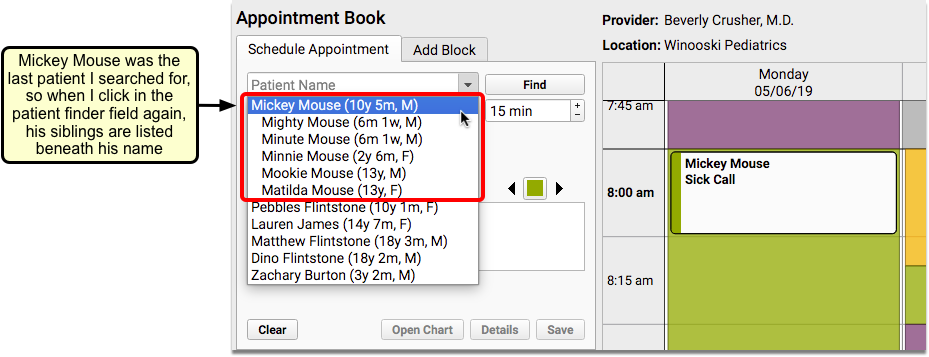
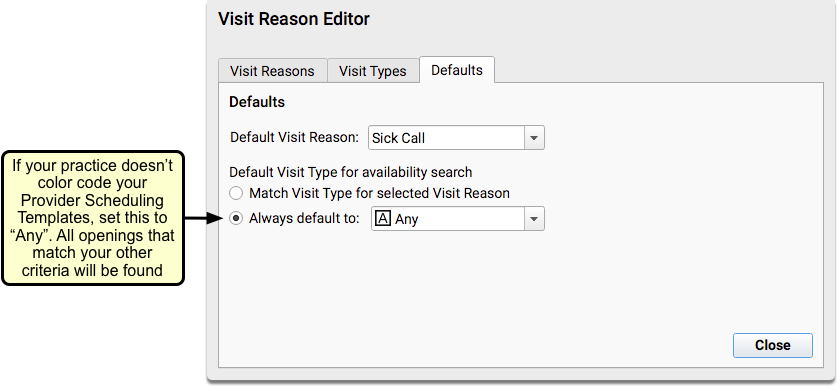
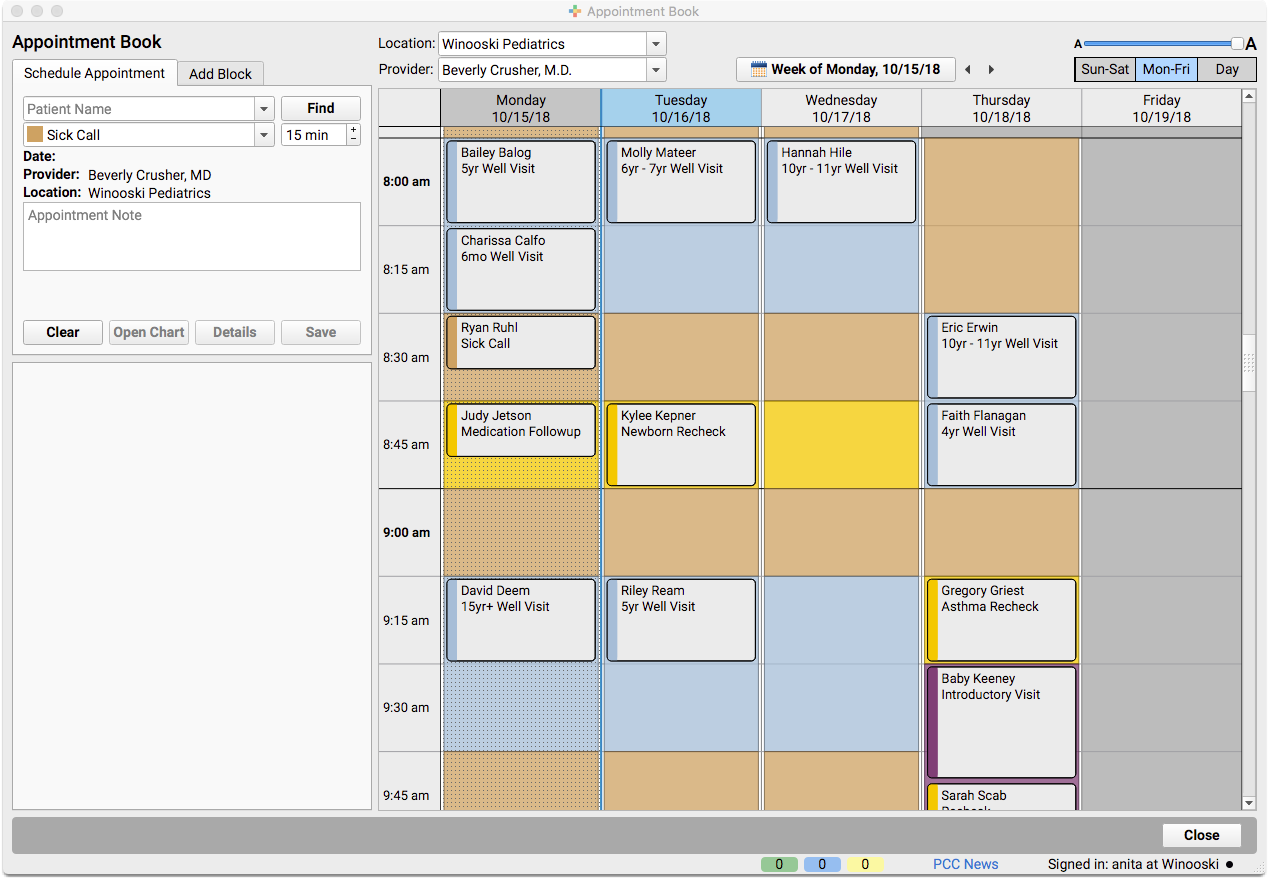
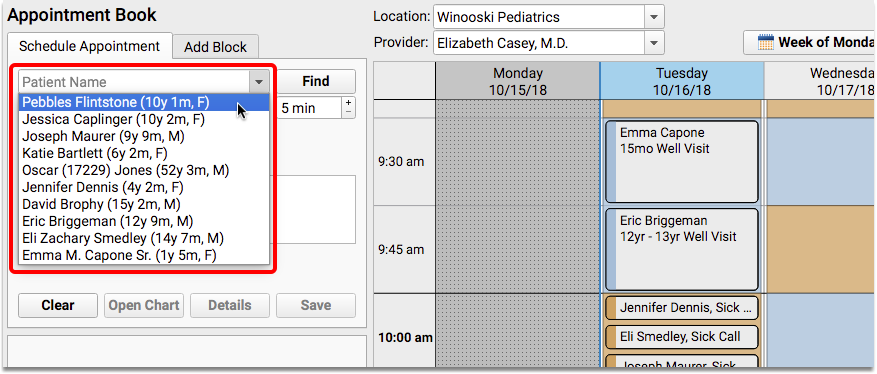
Smart Scheduling Features Added to the Appointment Book
Often when scheduling, parents don’t ask for a specific date, but will inquire what you have tomorrow, or in two weeks, or three months. With PCC 8.7, you can use smart scheduling terminology when searching the calendar at your practice. The calendar browsing feature has also been updated to make it easier to jump to future dates for visual scheduling.
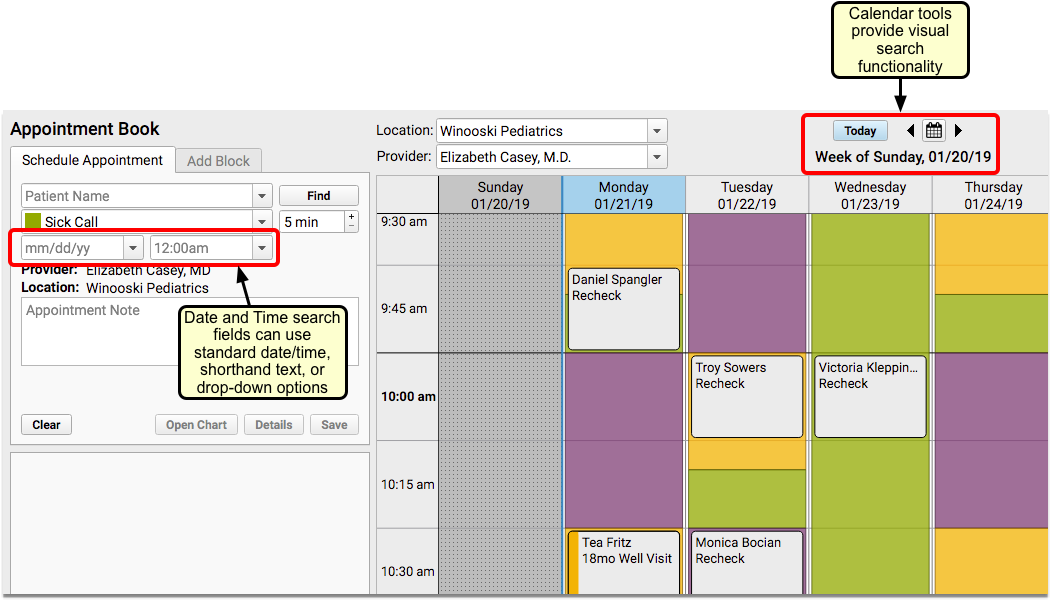
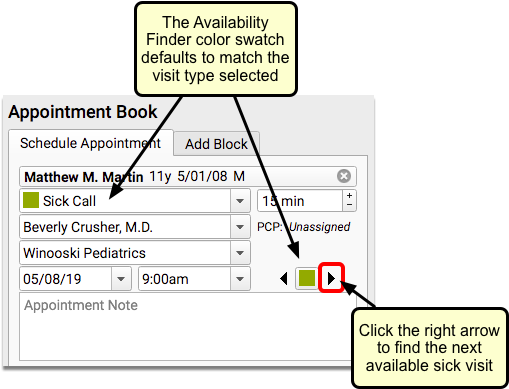
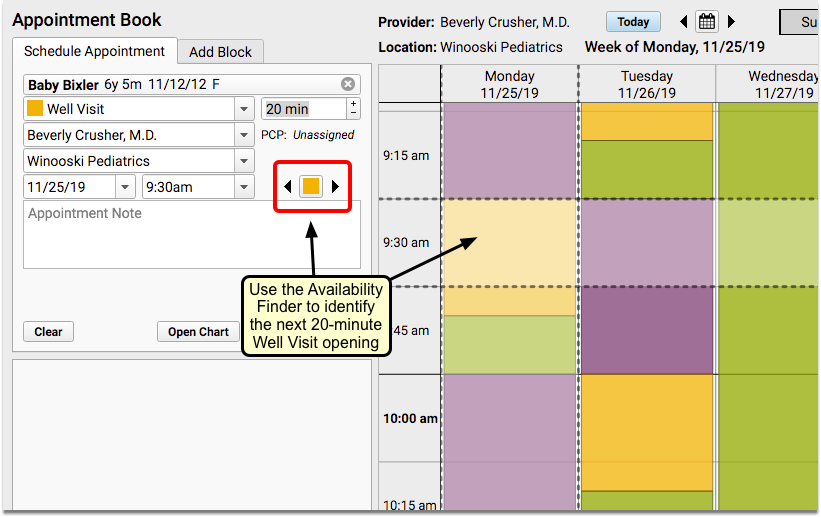
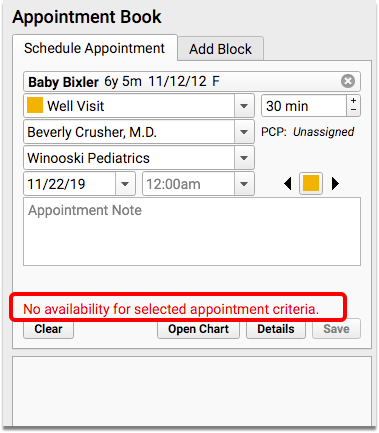
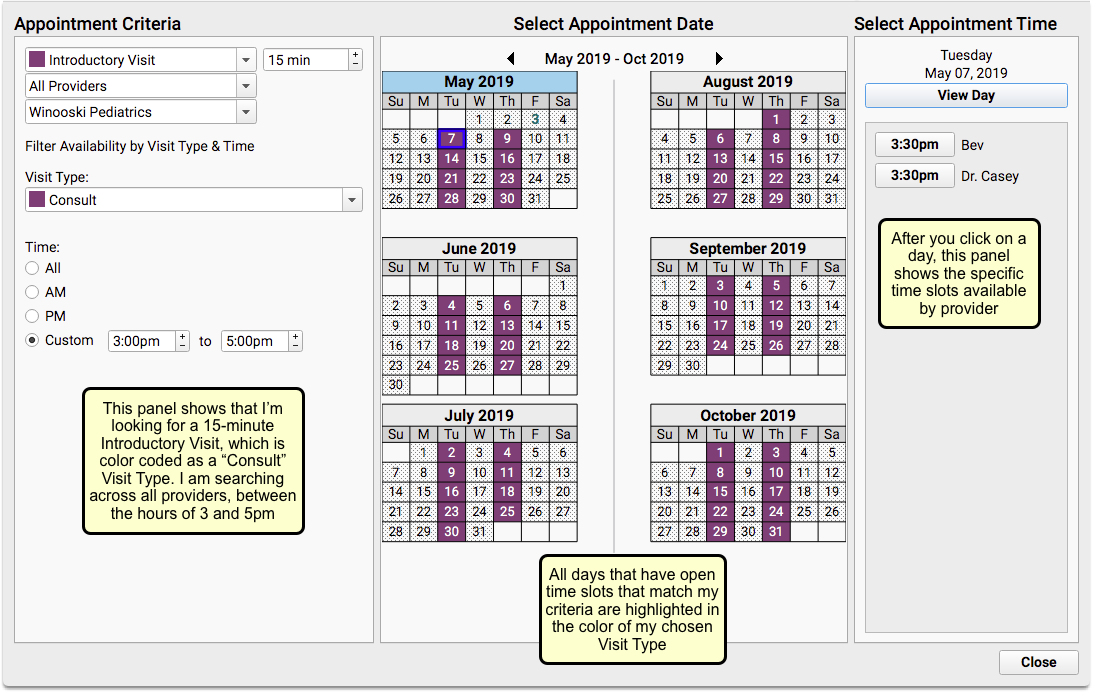
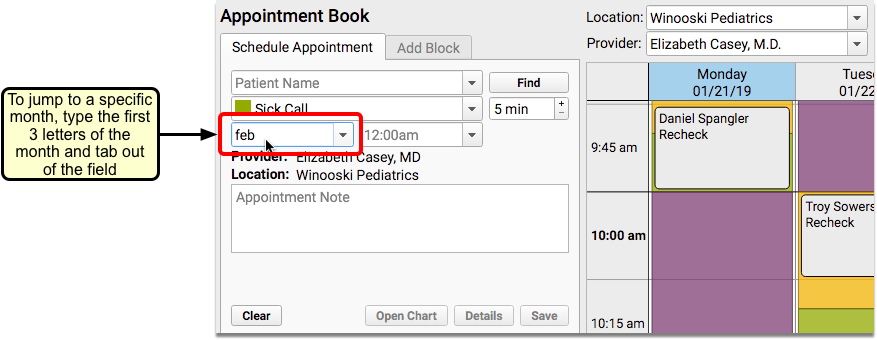
Enter Dates and Times to Search for Appointments
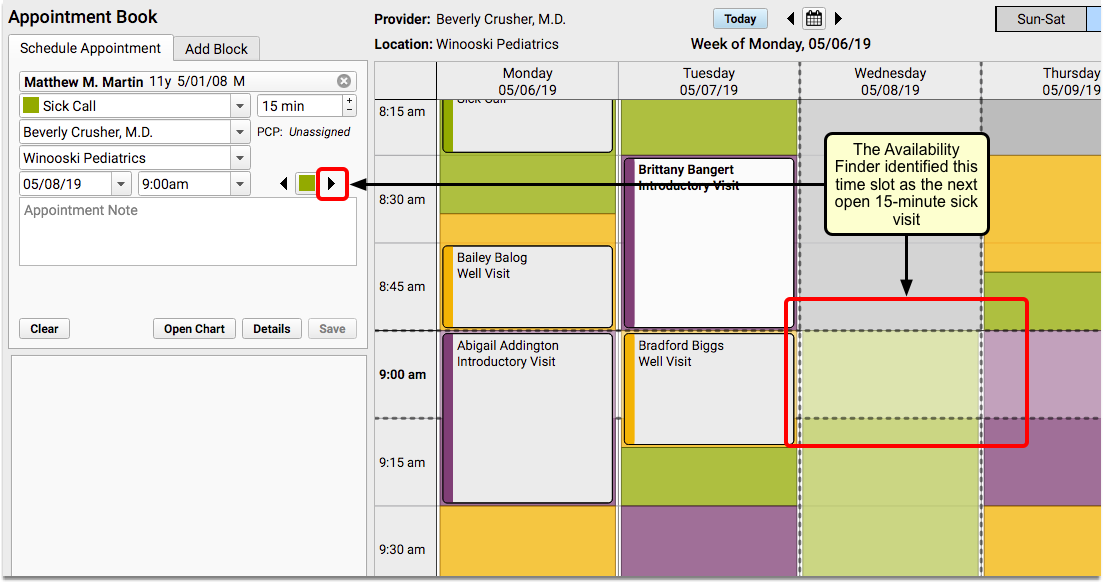
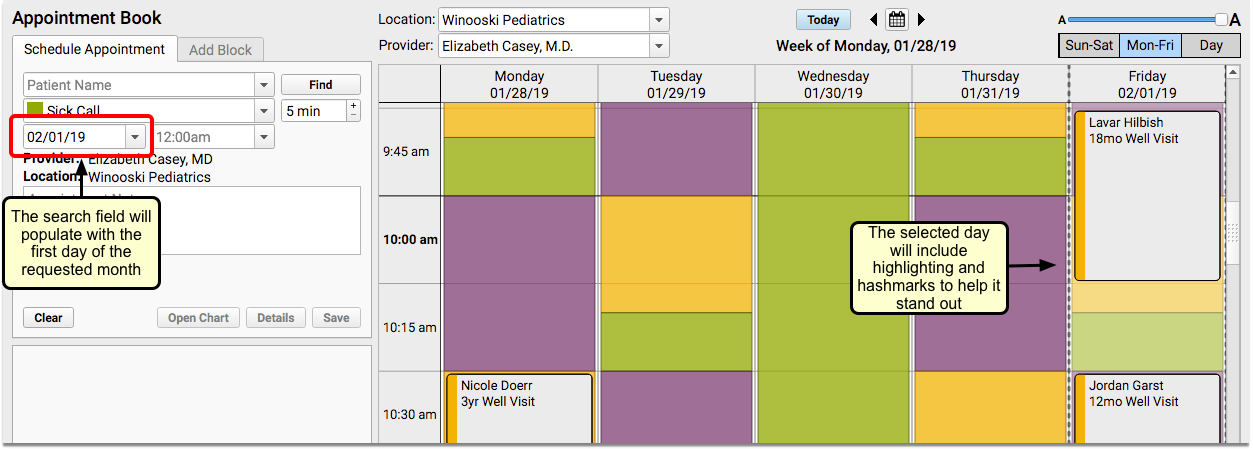
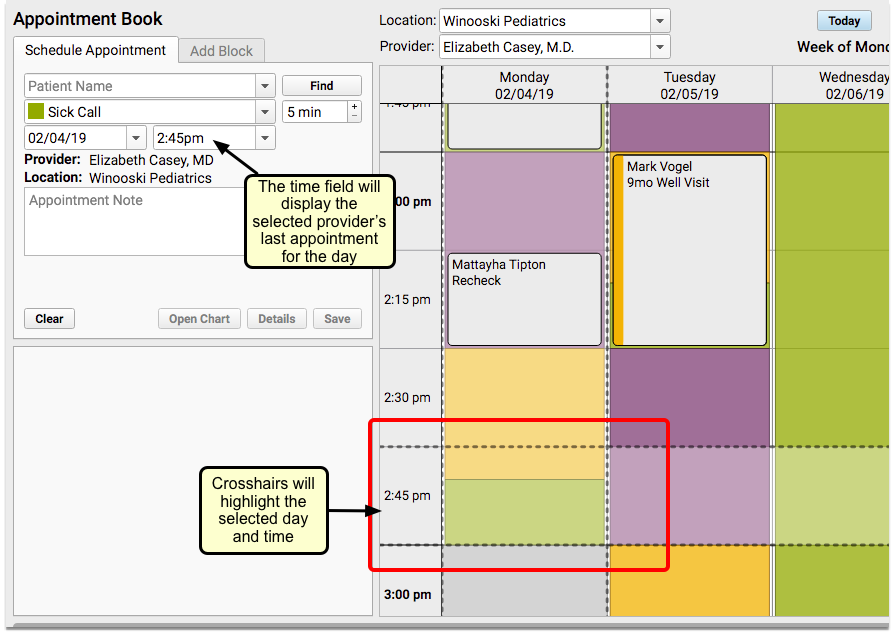
The new date and time search boxes offer a few different ways to search for appointments. You can enter a specific date, use the drop-down options, or enter shorthand text. For example, you could enter the first three letters of a month, the letter “T” for today, or “2 weeks”, and the date that corresponds with your search command will appear.
The calendar will use hashmarks and highlighting to focus the date and time selected in the search fields.
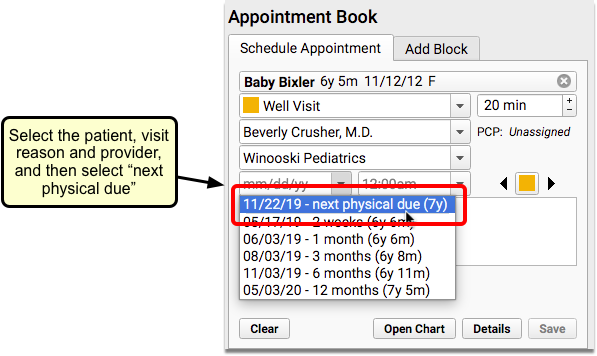
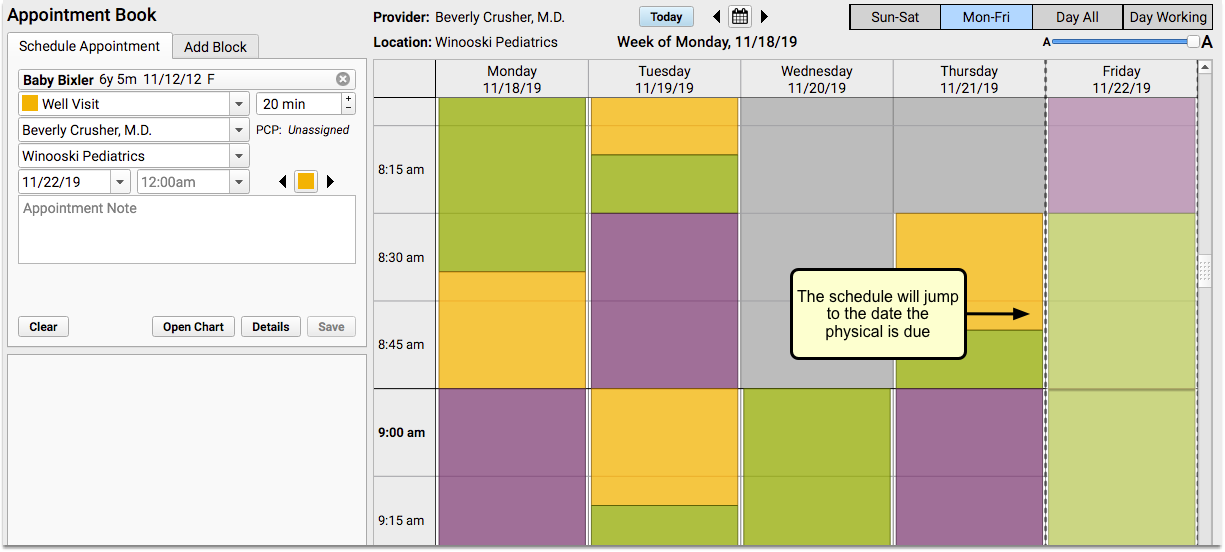
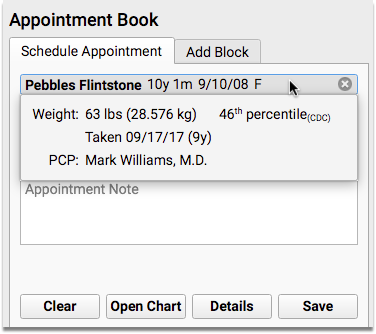
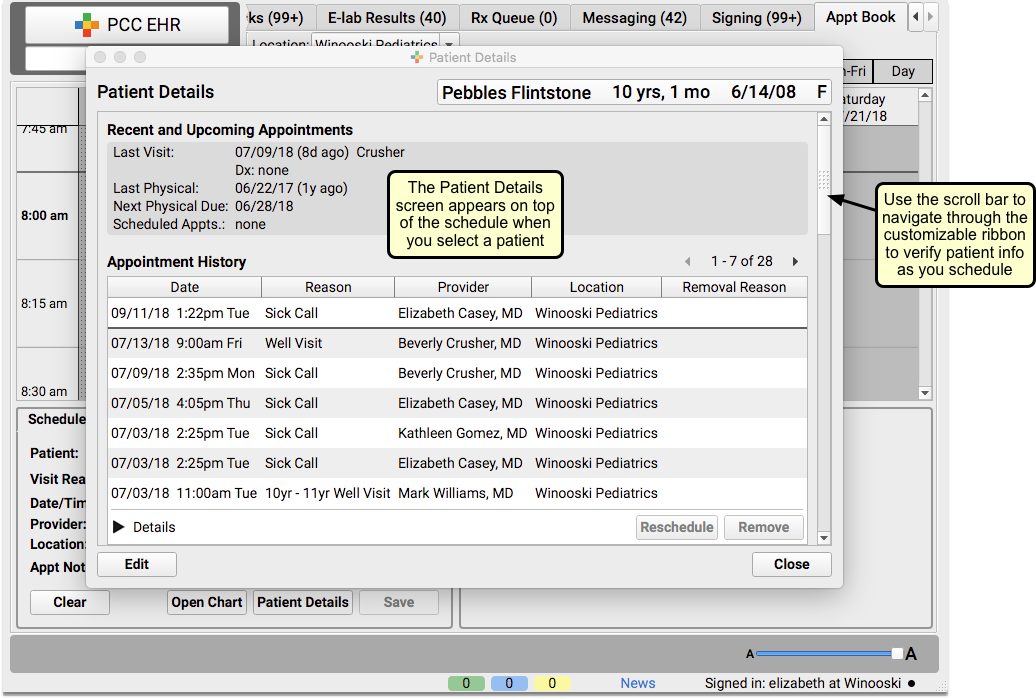
You can select from pre-configured drop-down options in both the date and time fields. For example, if you have a patient selected and choose the “next physical due” option, the date that they are due for a physical, as well as the age they will be on that date will populate the date field.
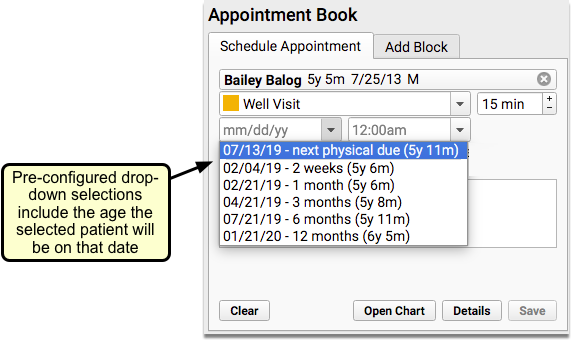
If you select “beginning of day” or “end of day” in the Time search field, you will be taken to the first or last time slot that the provider has hours that day.
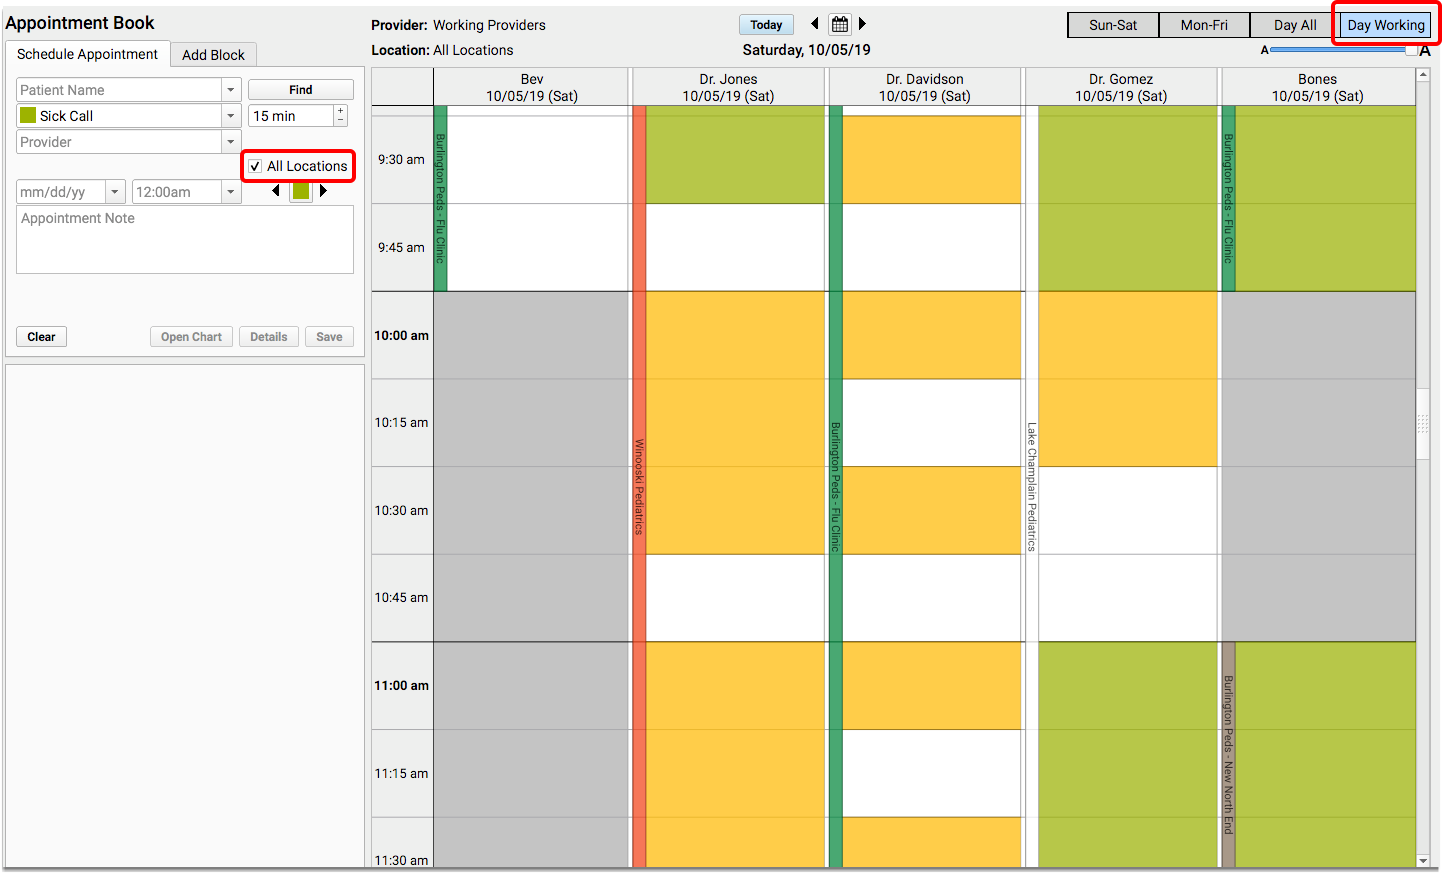
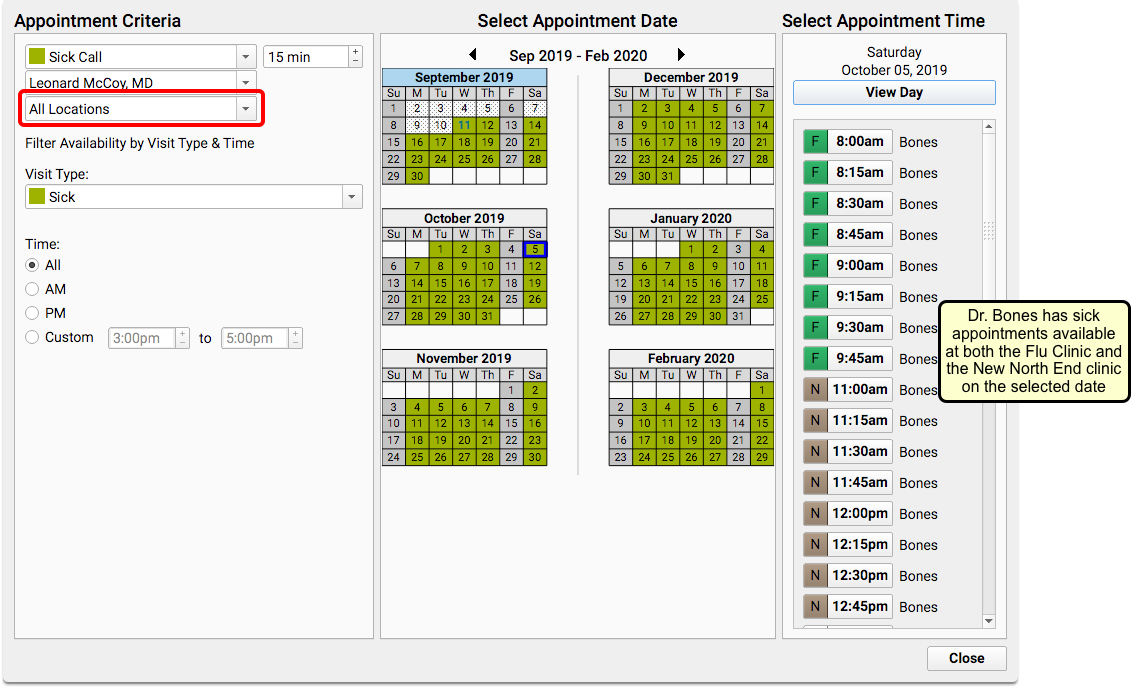
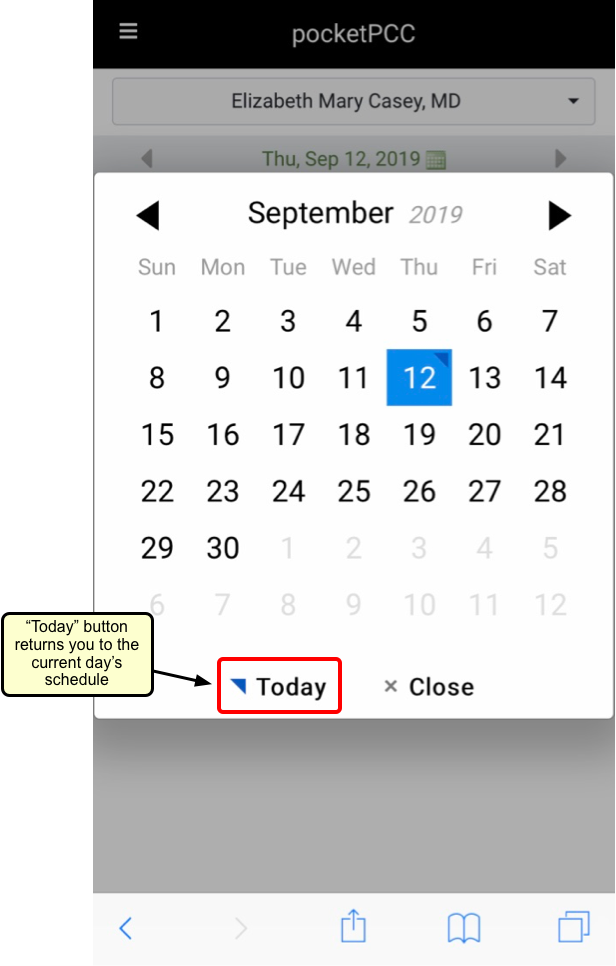
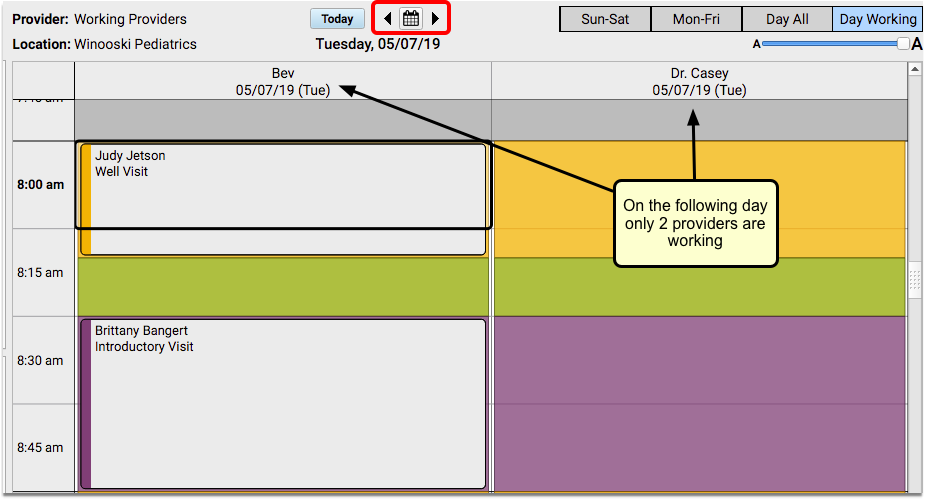
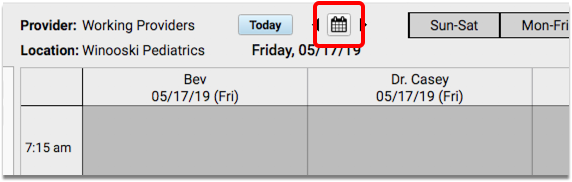
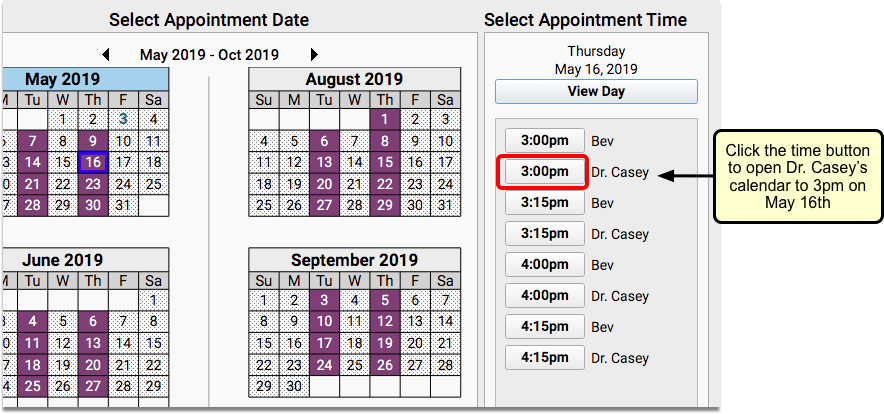
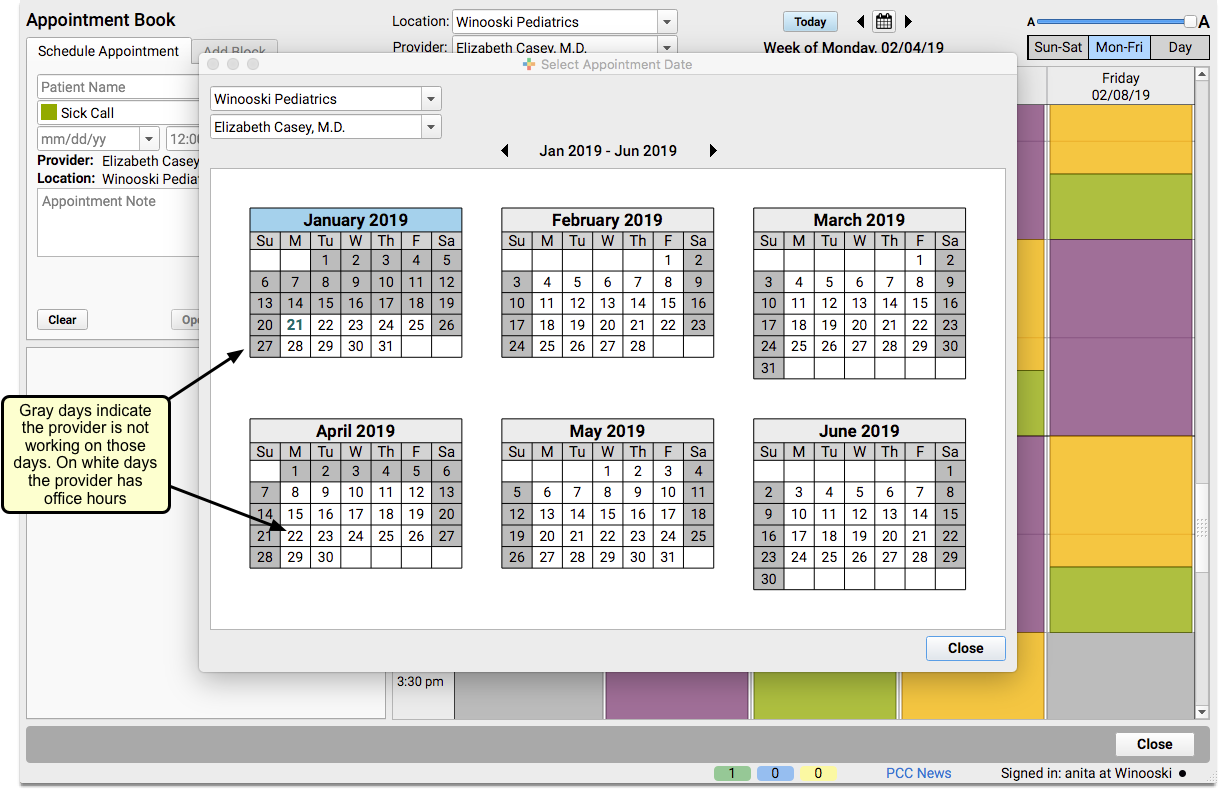
Use New Calendar Search Window to Jump to Any Day
In addition to the added search fields, the calendar search functionality is now easier to use in PCC 8.7. There’s now a calendar window showing you six months into the future, which makes it easier to find the day you need.
The calendar shows you the provider hours for the selected provider and location.
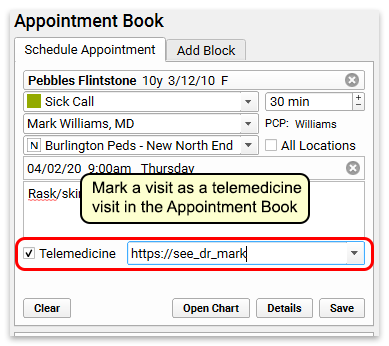
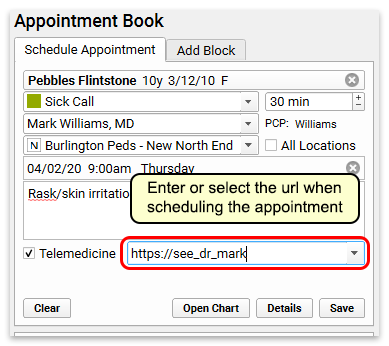
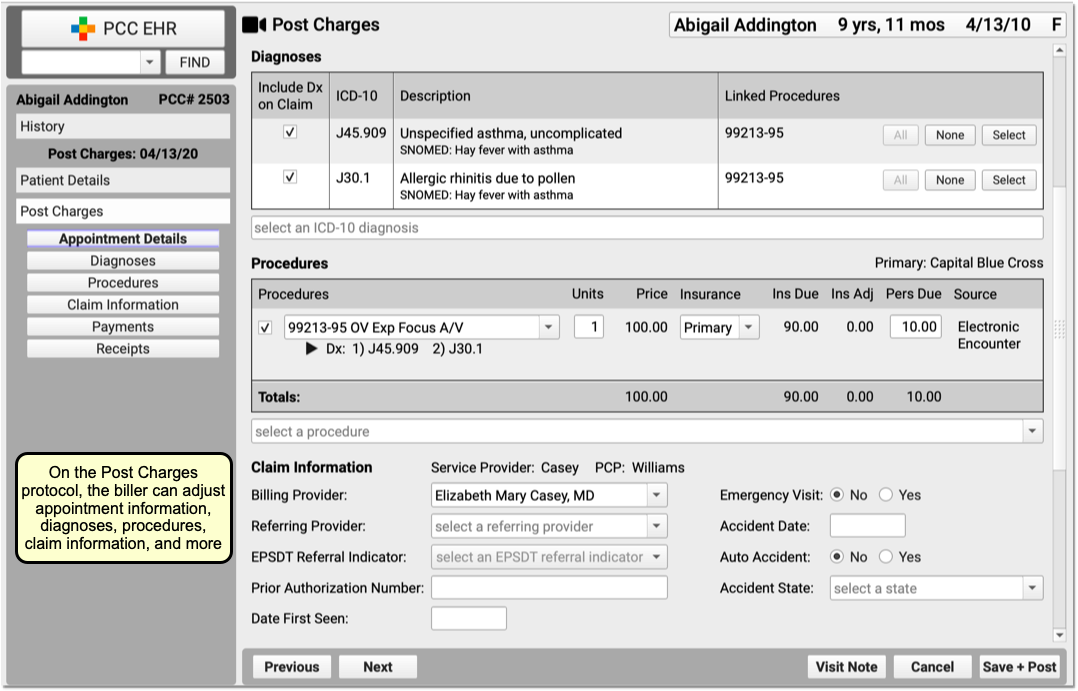
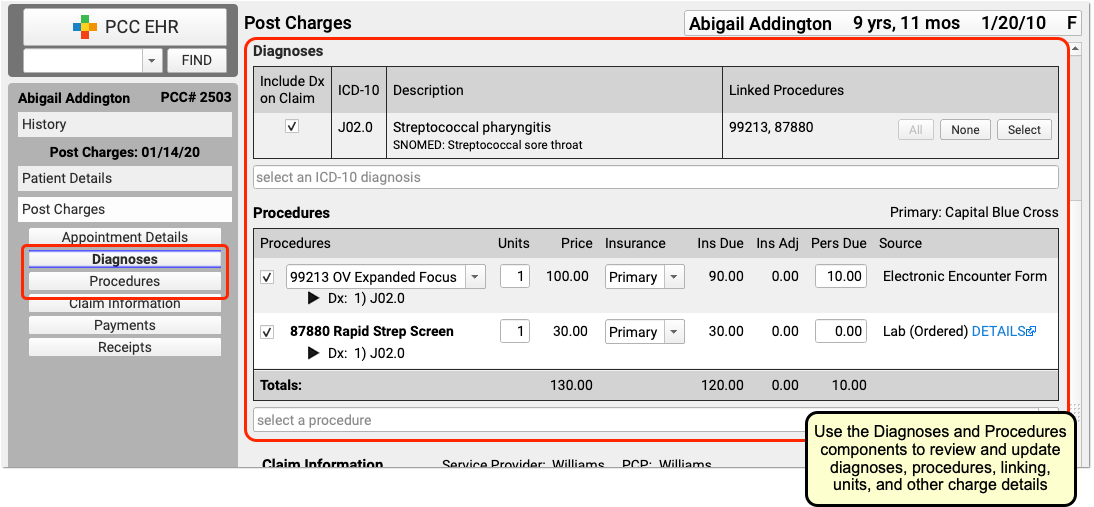
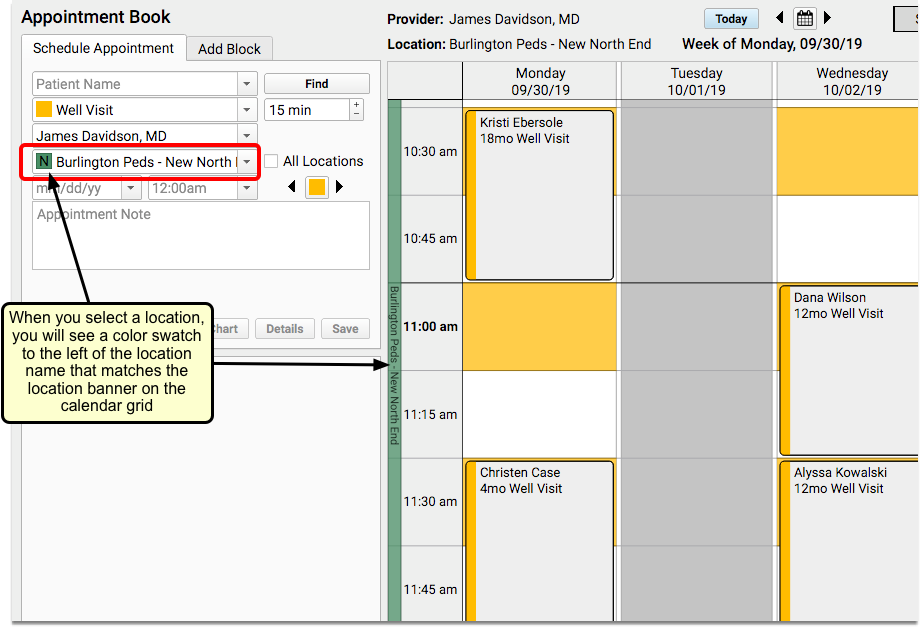
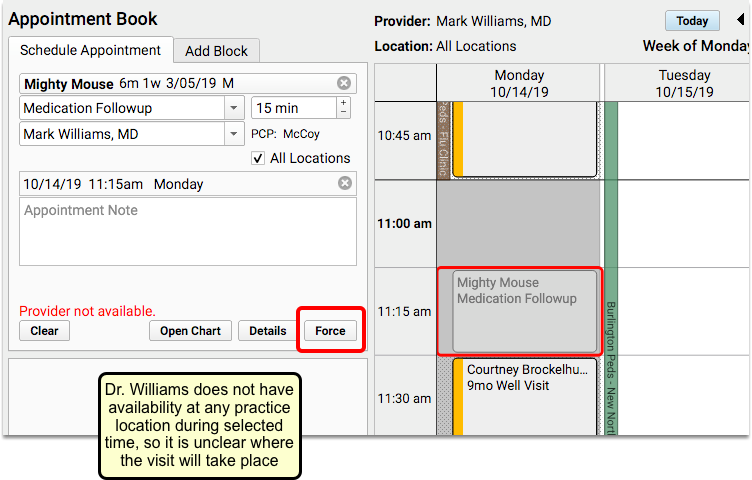
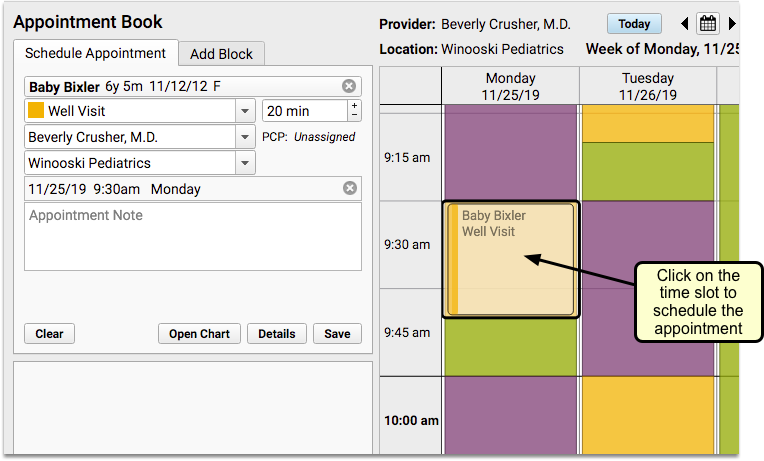
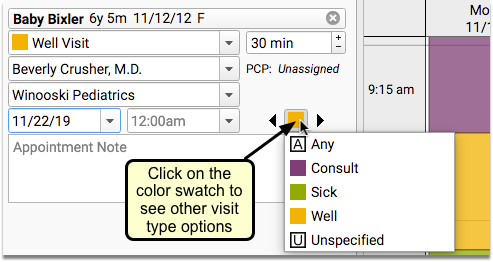
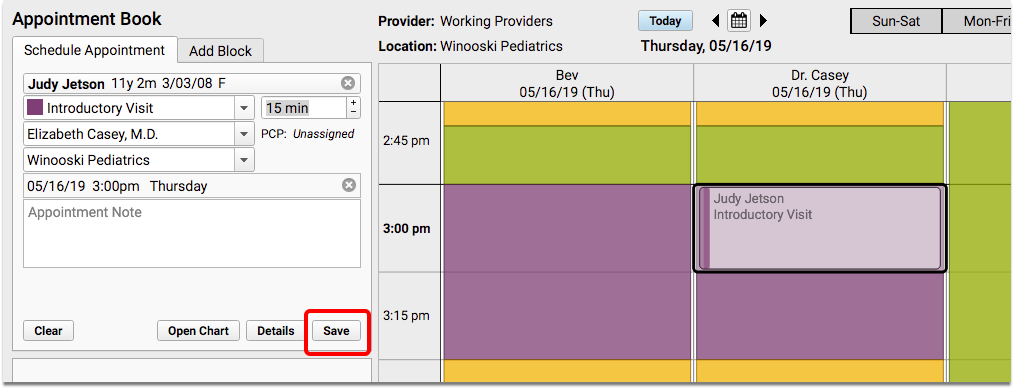
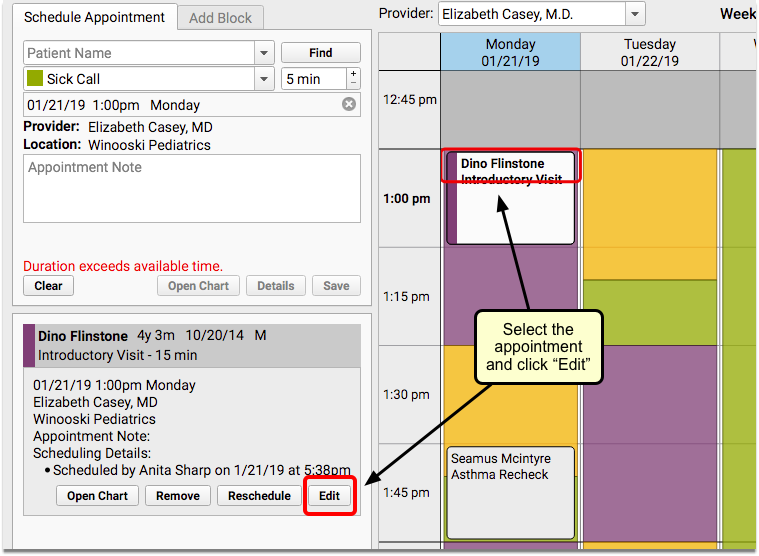
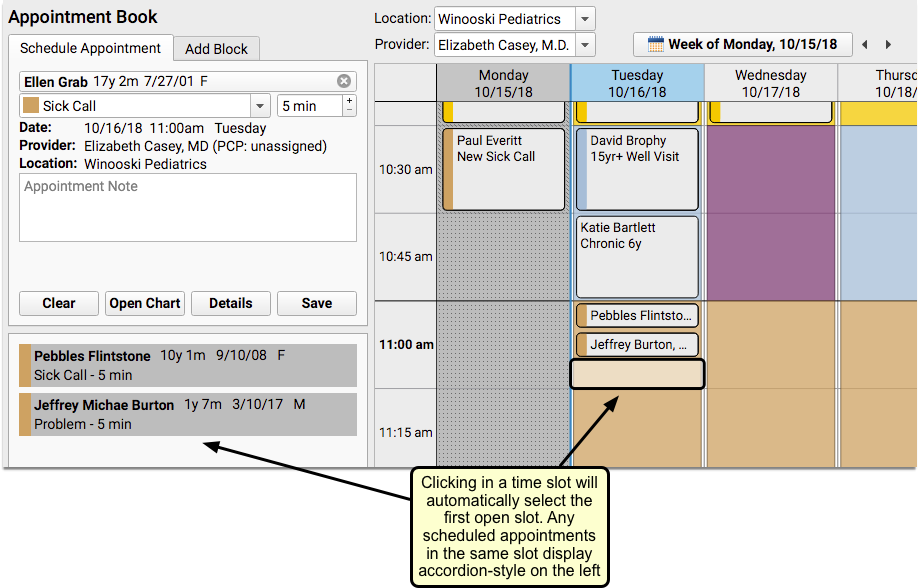
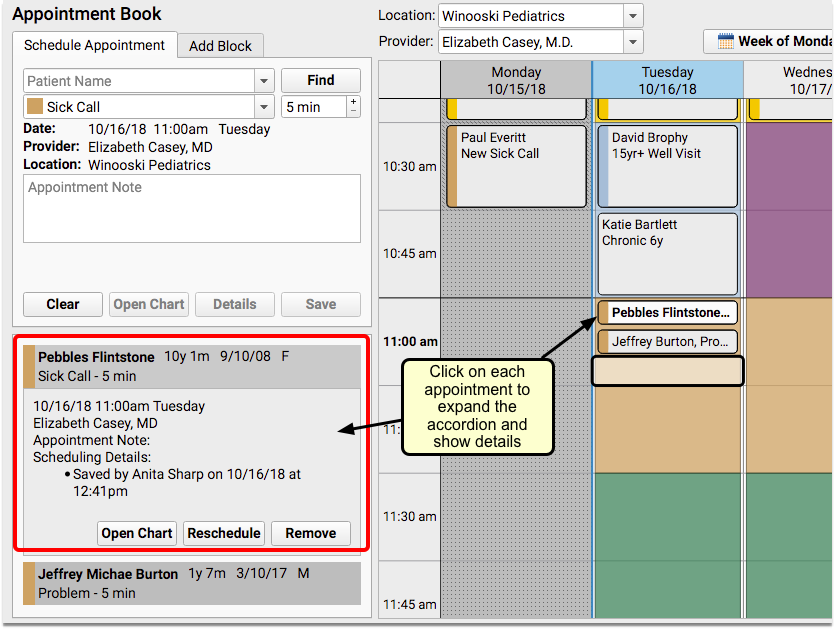
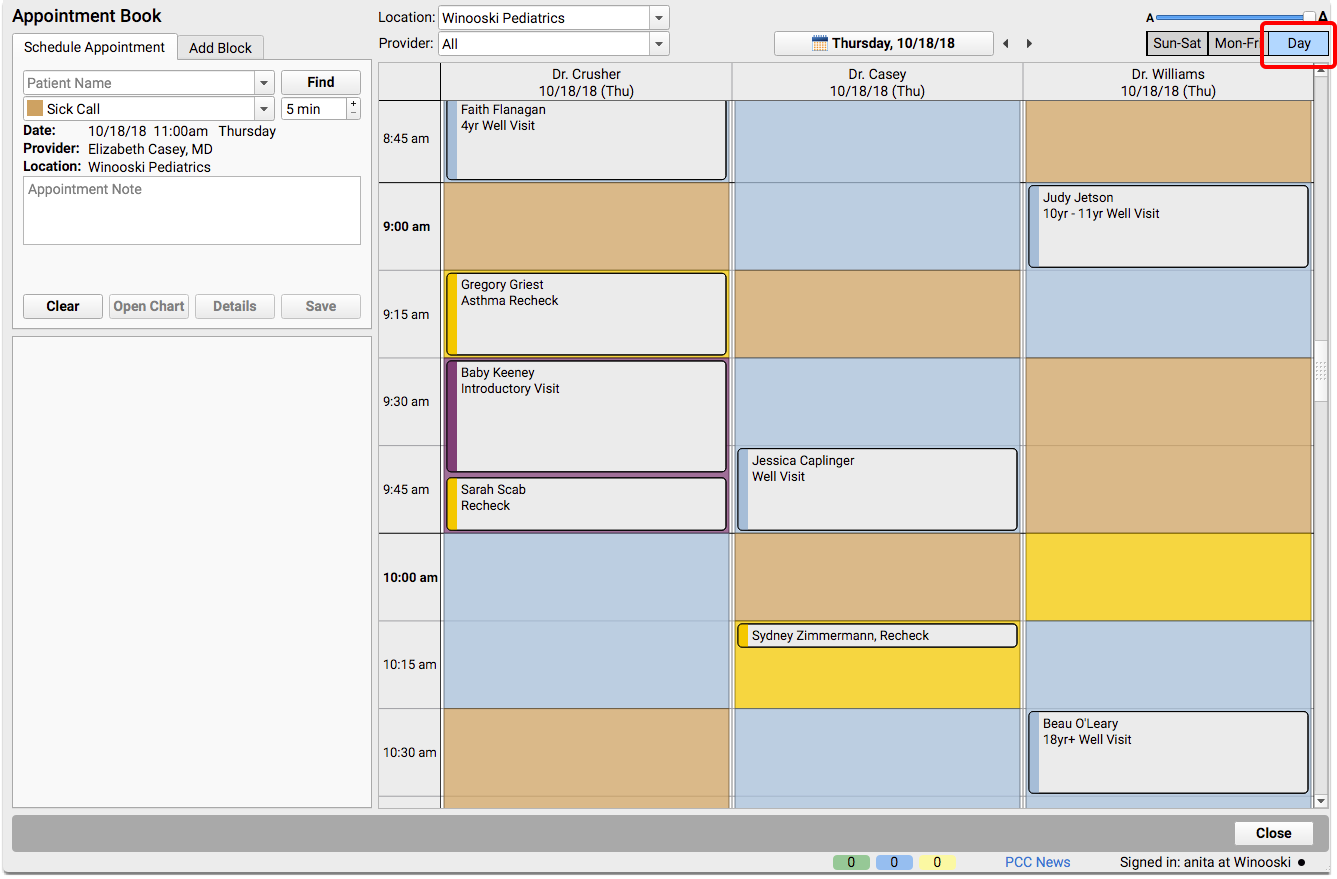
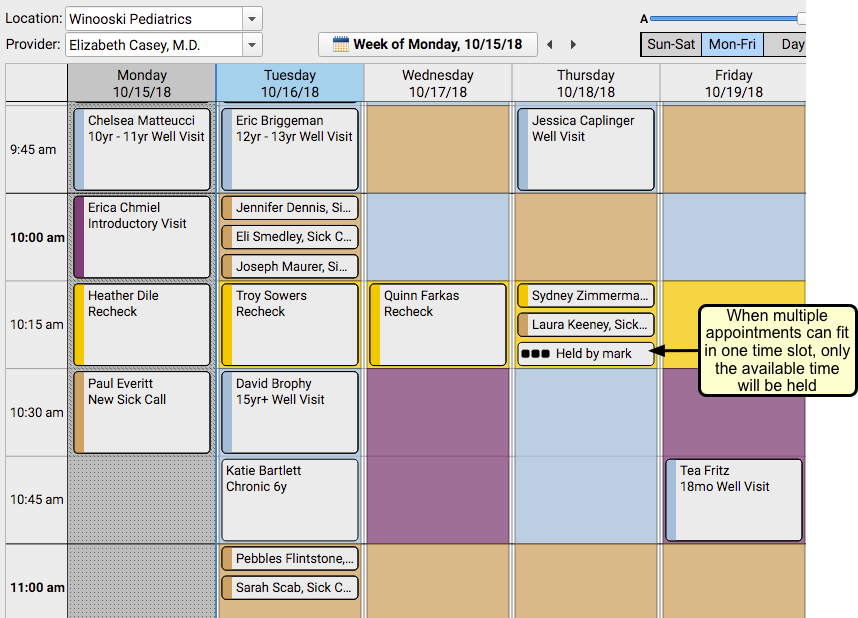
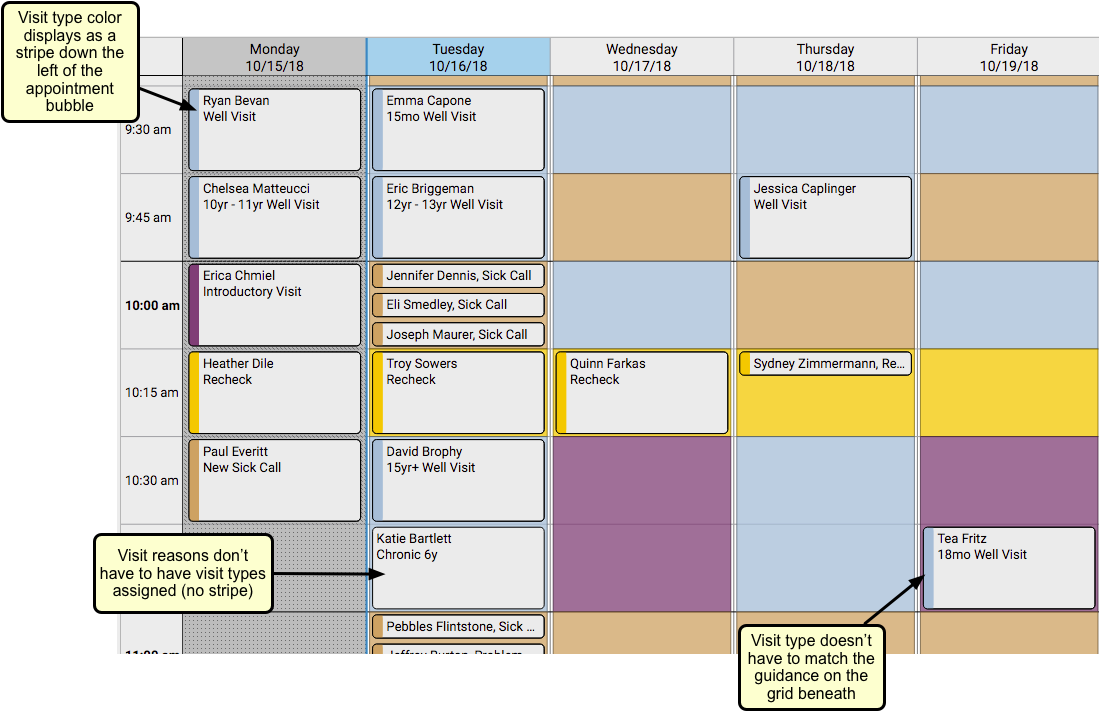
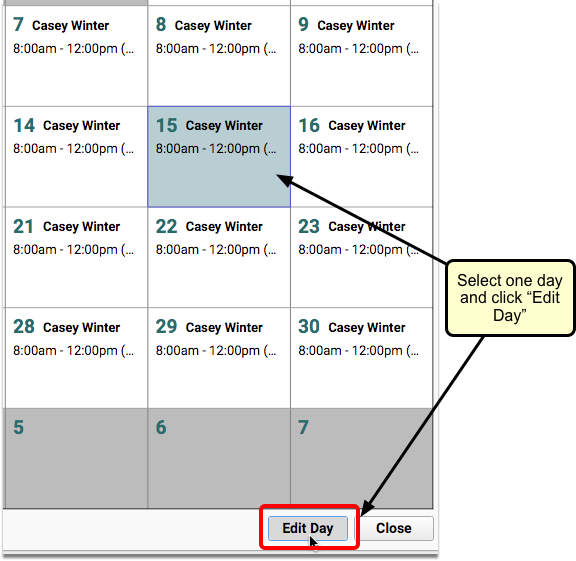
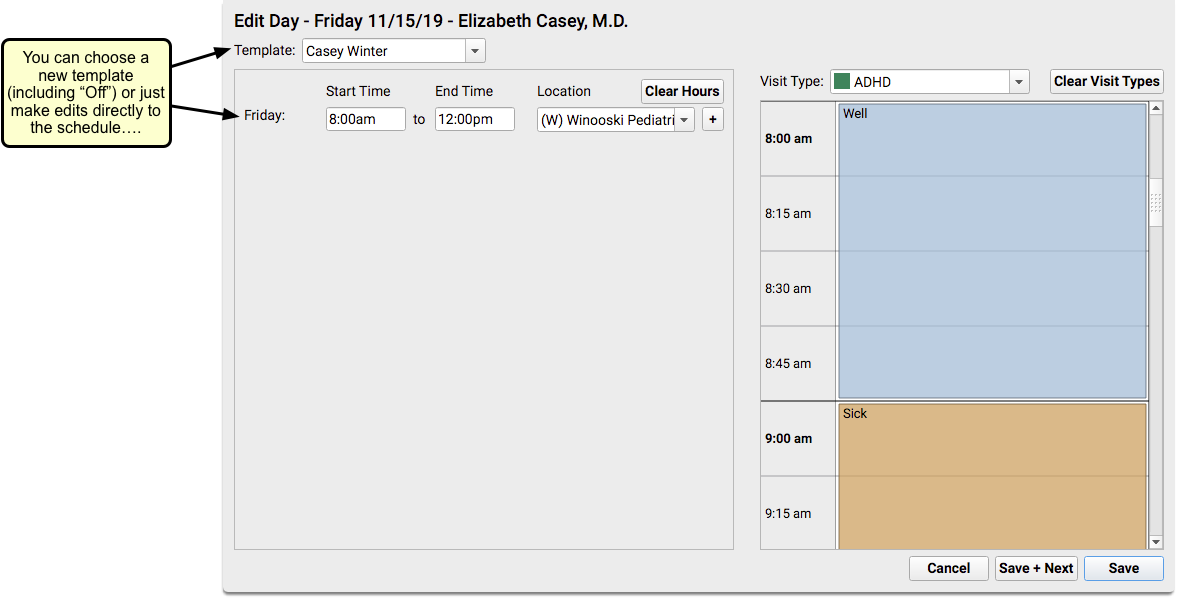
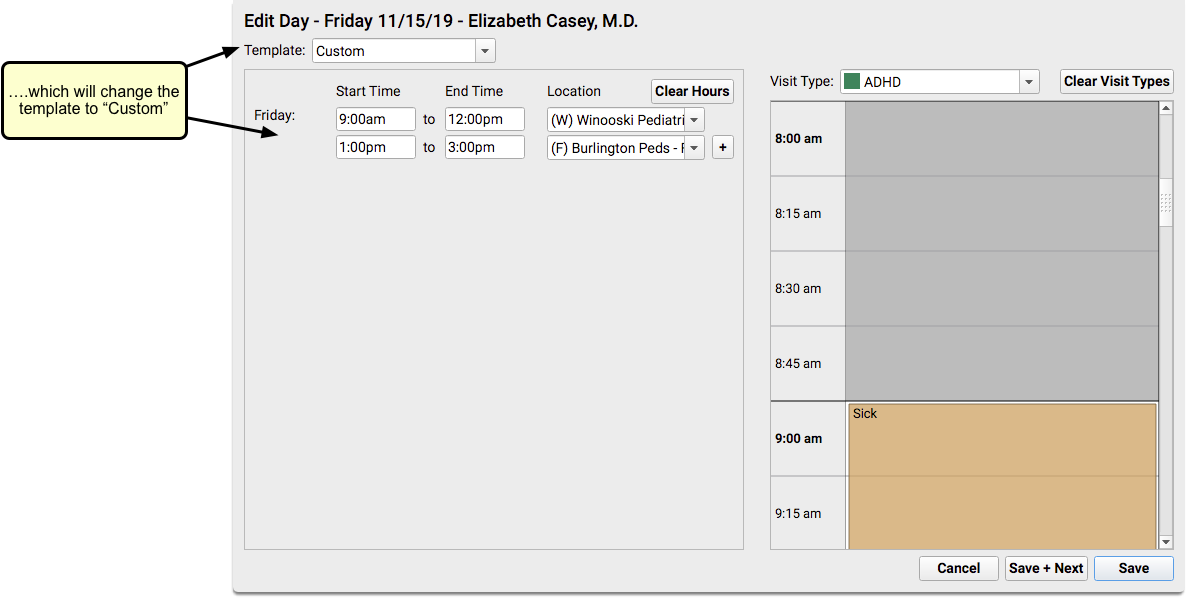
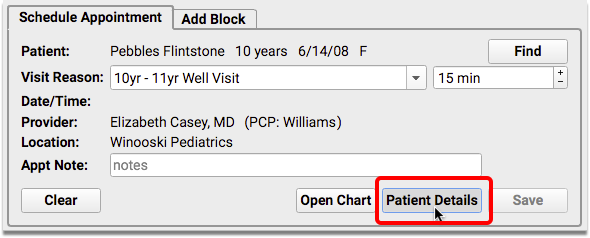
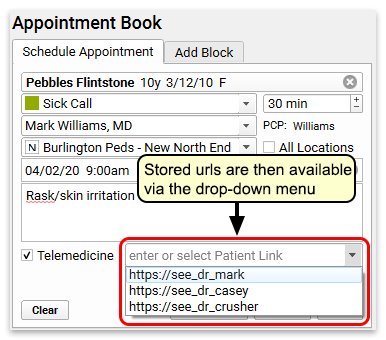
Edit Details of Scheduled Appointments in the Appointment Book
Sometimes you need to edit appointment details without changing the appointment time. For example, a well visit might turn into a sick visit, or the length of an appointment could need to be extended.
In PCC 8.7, you can make changes to the details of an appointment that has already been scheduled in the Appointment Book, without having to reschedule it.
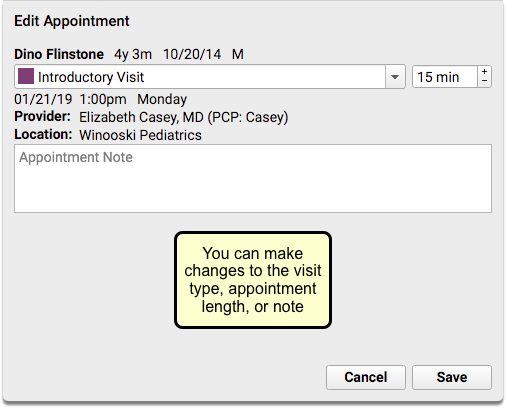
Click “Edit” to change the visit reason, duration, and/or the appointment note.
Make changes in the Edit Appointment window and click “Save” to continue.
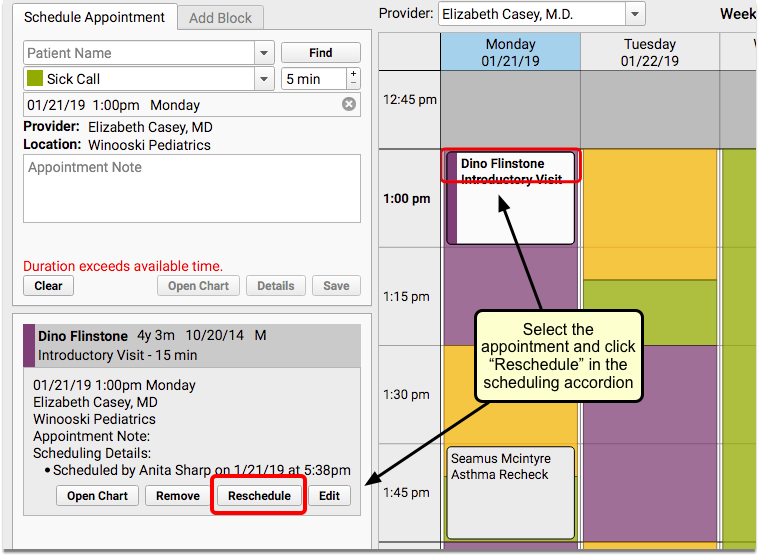
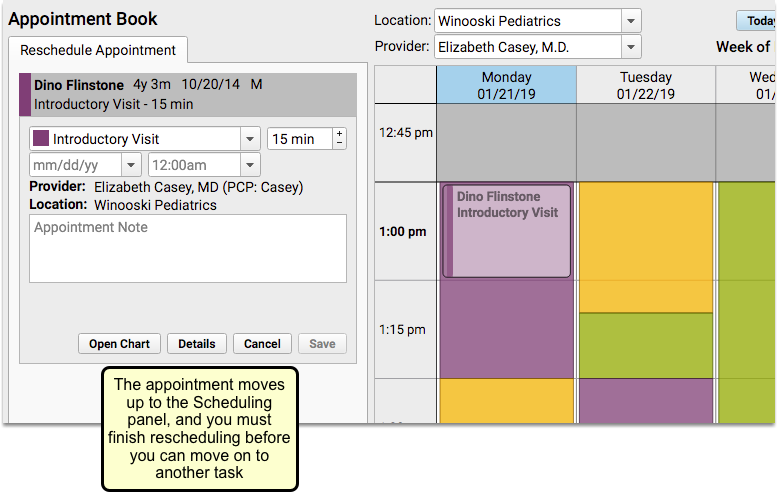
Reschedule Appointments More Easily
PCC 8.7 streamlines the rescheduling process in the Appointment Book, providing a clean and clear interface that makes the job easy without getting lost in your schedule.
When you click on “Reschedule”, the appointment moves to the “Reschedule Appointment” tab.
Complete the reschedule and click “Save” to continue.
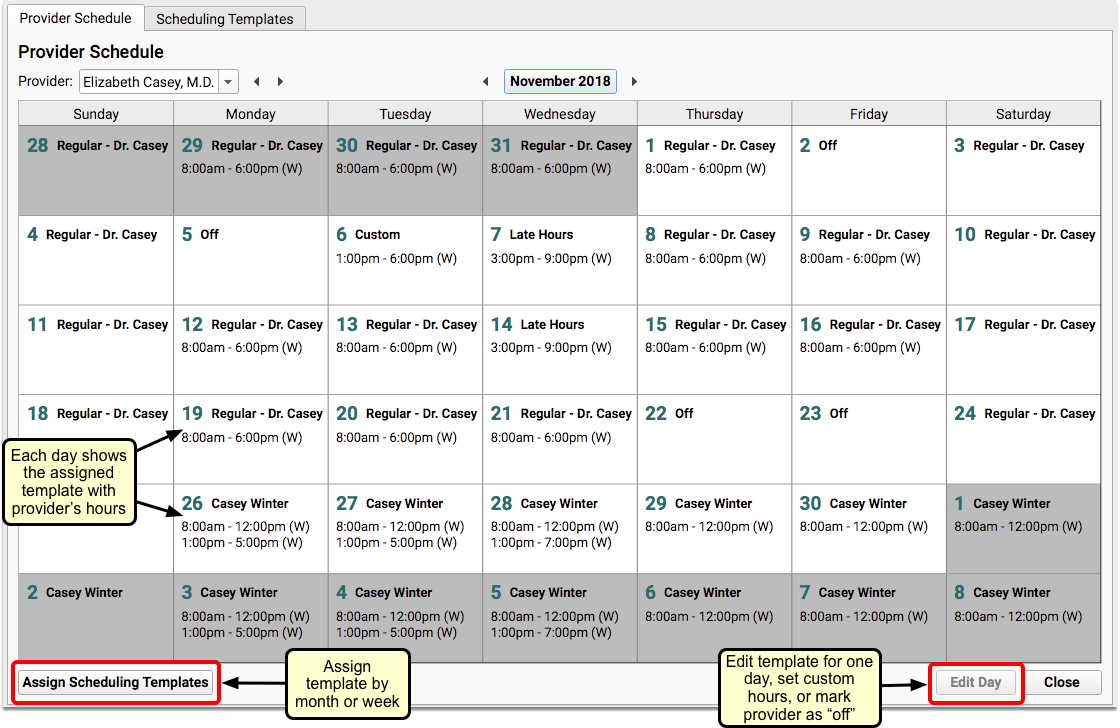
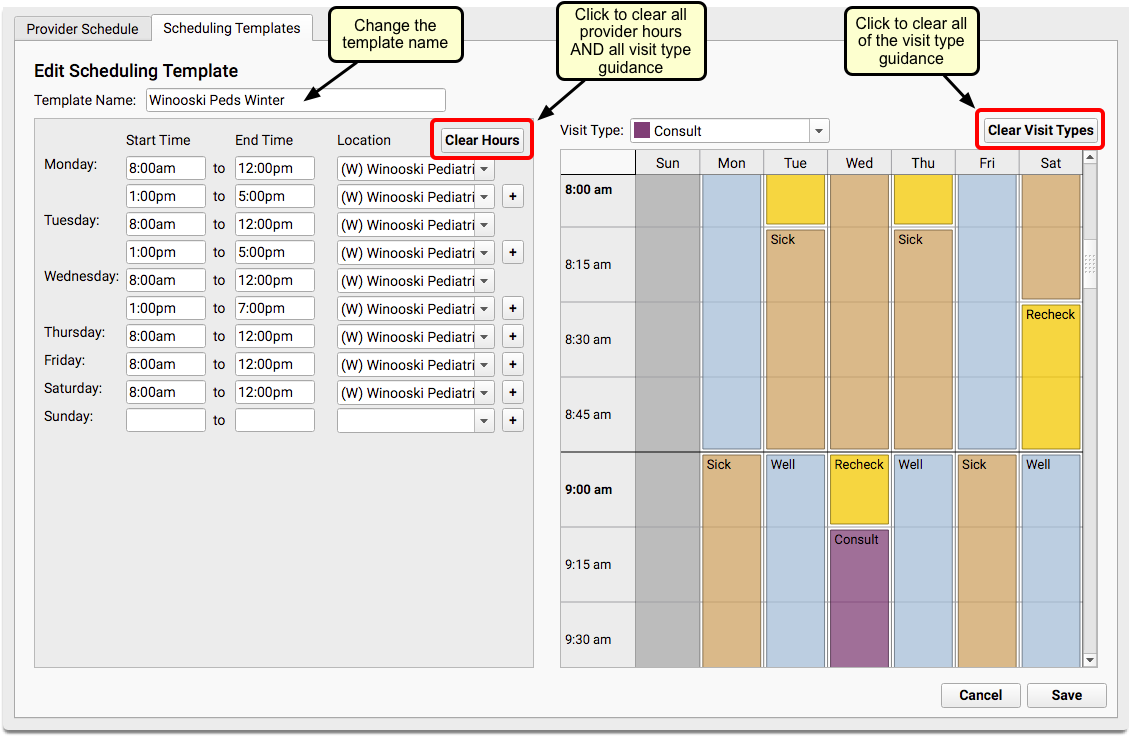
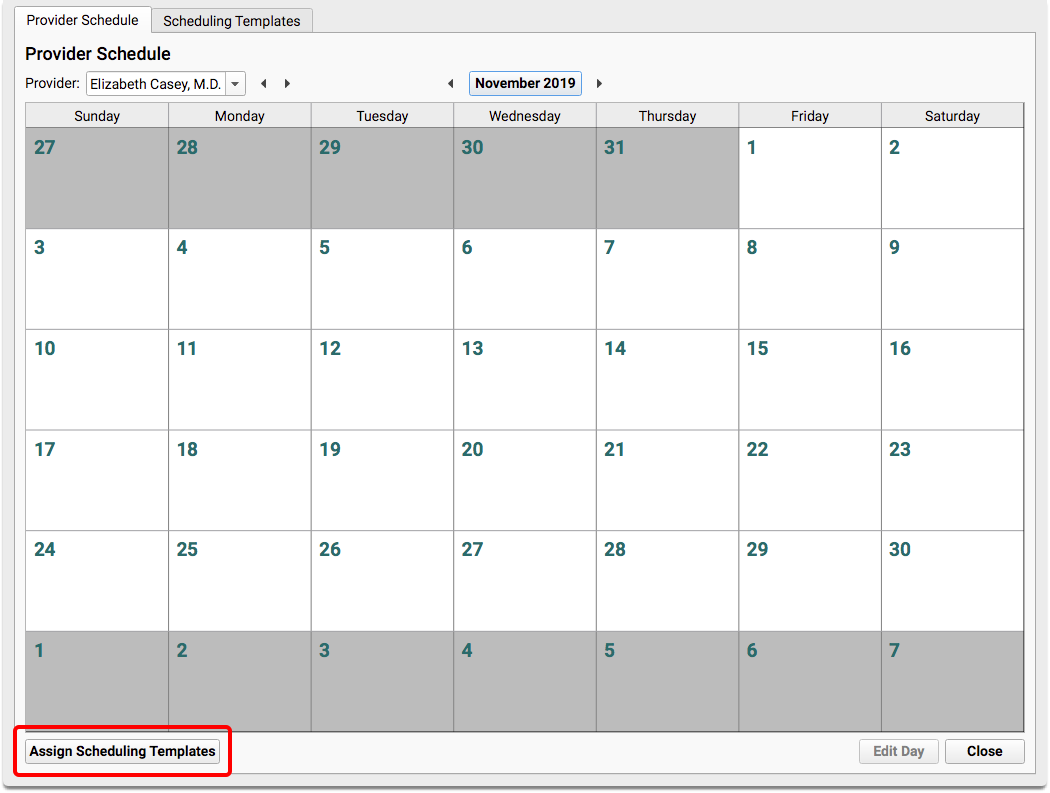
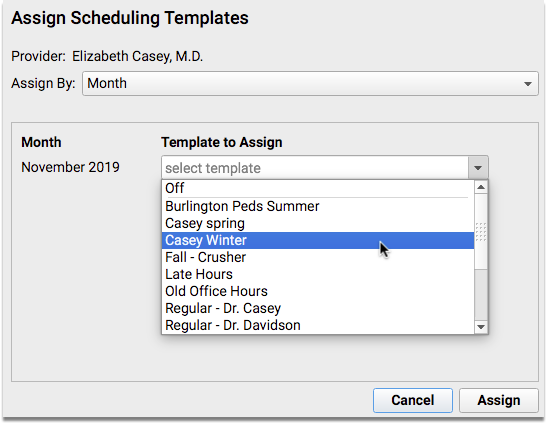
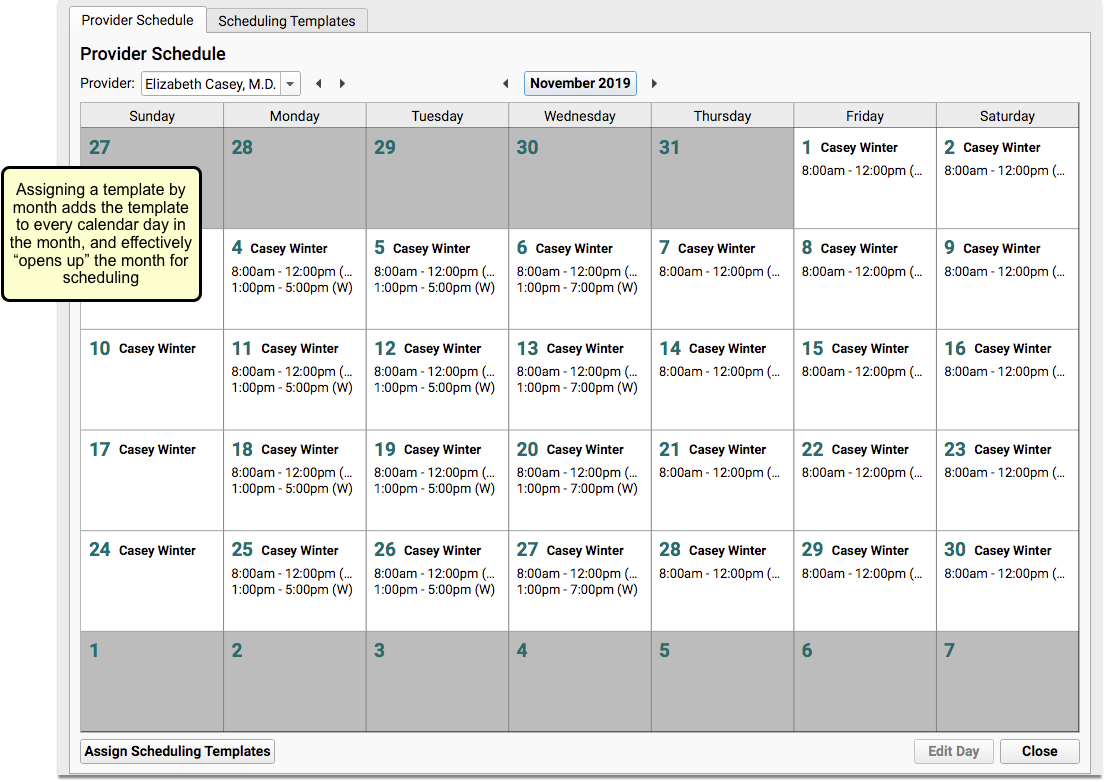
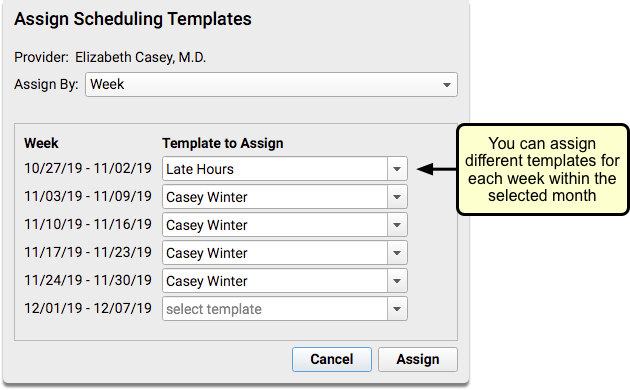
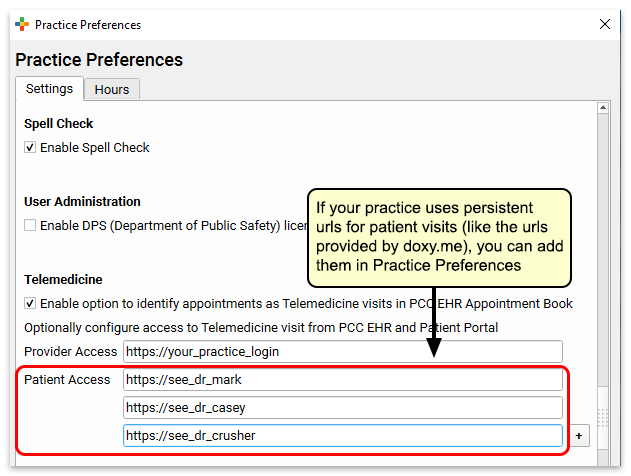
Set Up Your Appointment Book Before You Turn It On
With PCC 8.7, your practice can configure the Appointment Book before you switch over officially from SAM.
Your Client Advocate can help you set up visit reasons, templates, provider hours, and open up your calendar, all in advance of turning on the scheduling functionality.
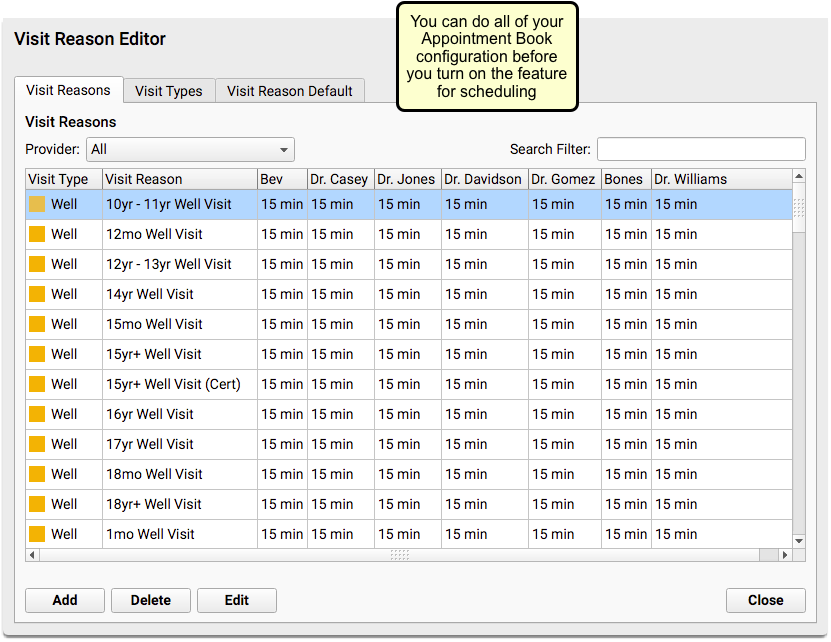
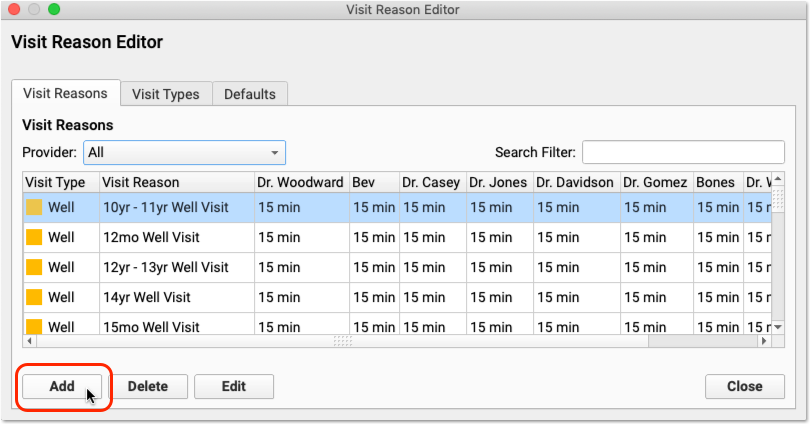
Something to Consider Before Editing Visit Reasons: Keep in mind that any changes you make to visit reasons in the Appointment Book configuration will be immediately updated in SAM, as well.
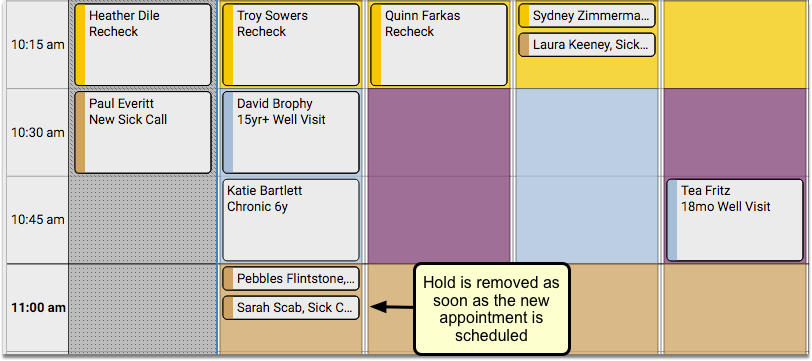
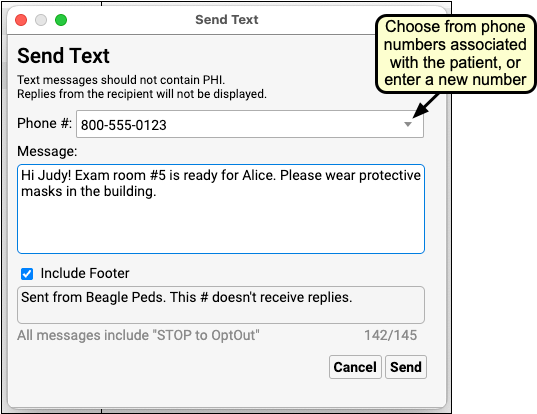
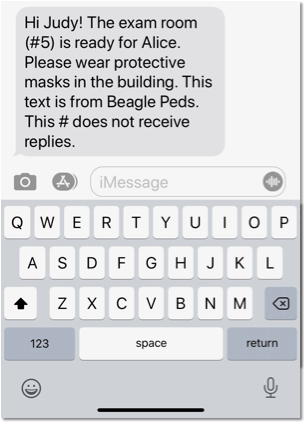
Better Cancellation Features Between the Appointment Book and PCC’s Notify Service
PCC’s Notify service sends families notifications about upcoming appointments. Optionally, your practice can allow the family to cancel their appointment from the notification email or text message.
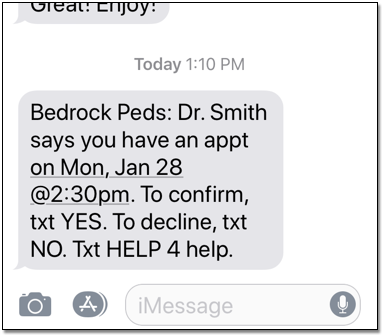
In PCC 8.7, the Appointment Book fully supports these cancellation features:
- Your practice can review a report of which families canceled appointments and then manually cancel them in the Appointment Book.
- Or, with PCC 8.7, your practice can optionally configure PCC so that an appointment will be cancelled when the family selects the cancel option or texts “No” to the confirmation message. When a family cancels an appointment, that slot will be available for your practice to schedule right away, without any intervention.
To review these options and optimize how PCC’s Notify service works with your PCC Appointment Book, get in touch with your Client Advocate.
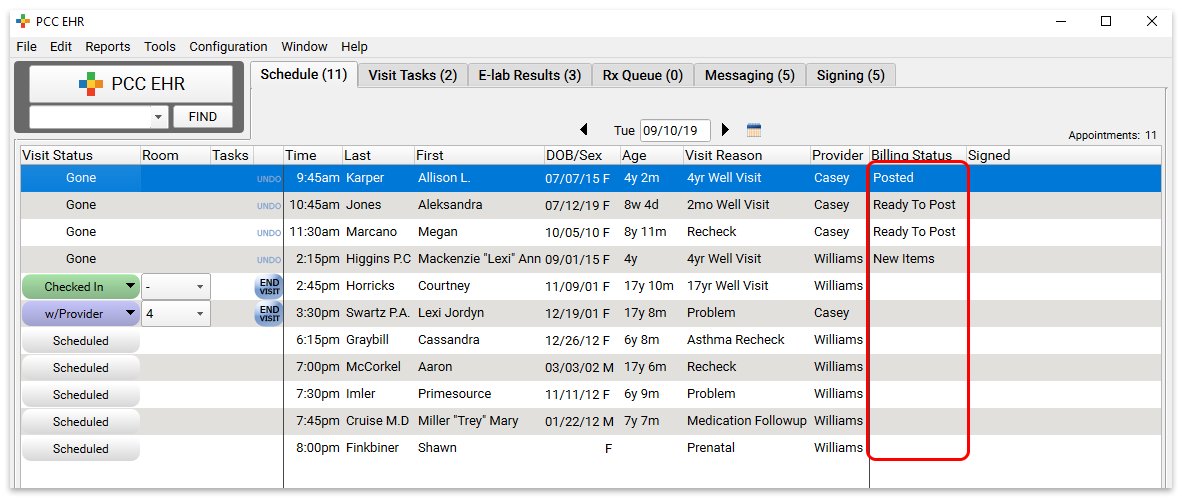
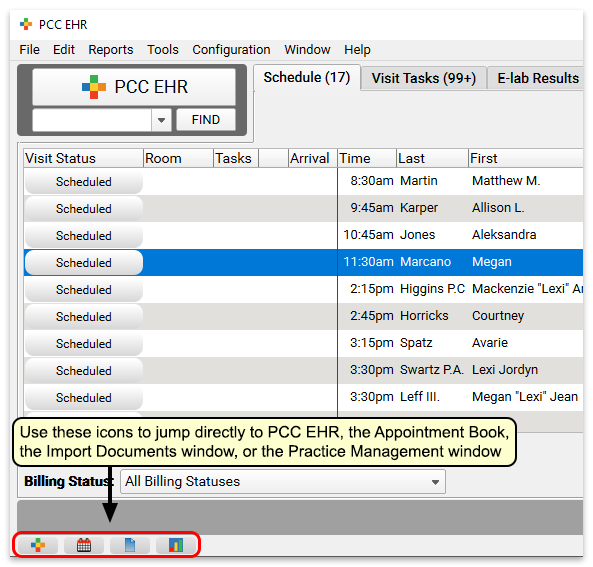
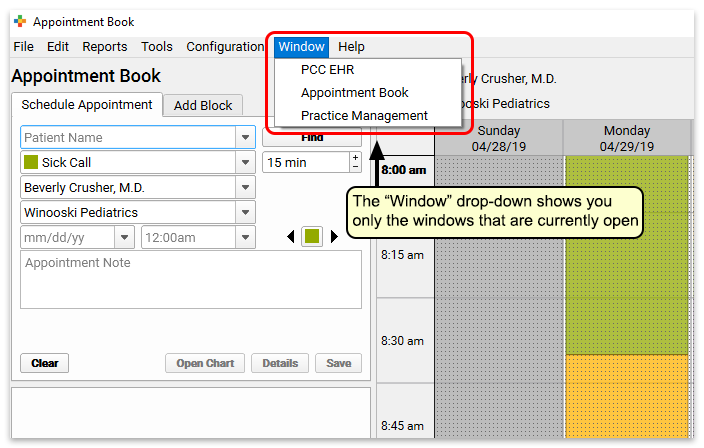
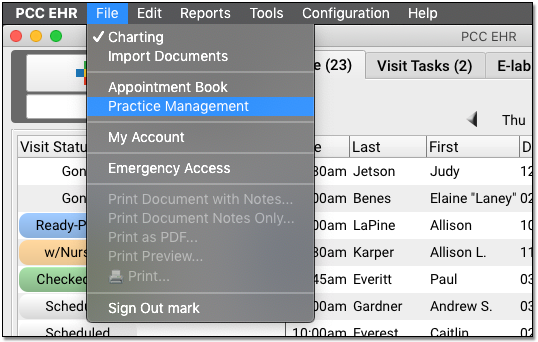
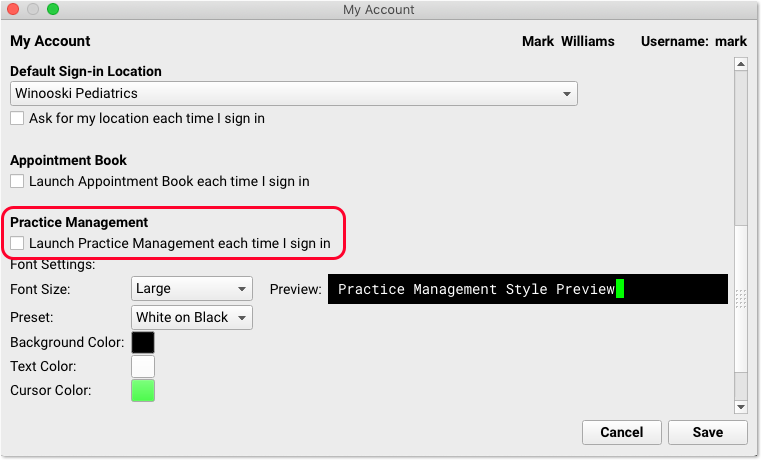
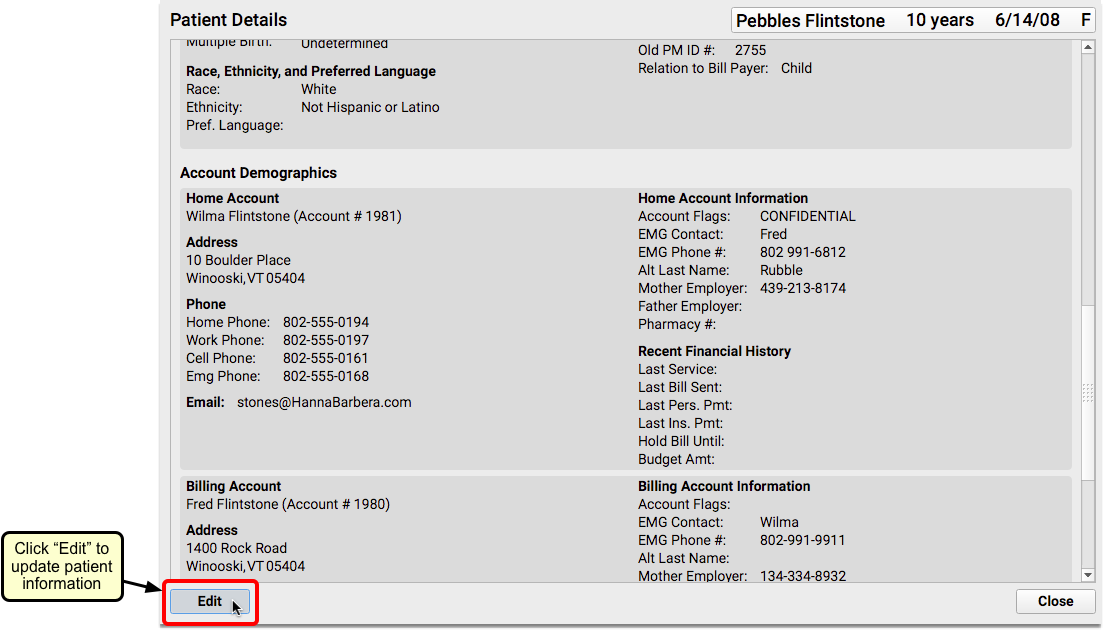
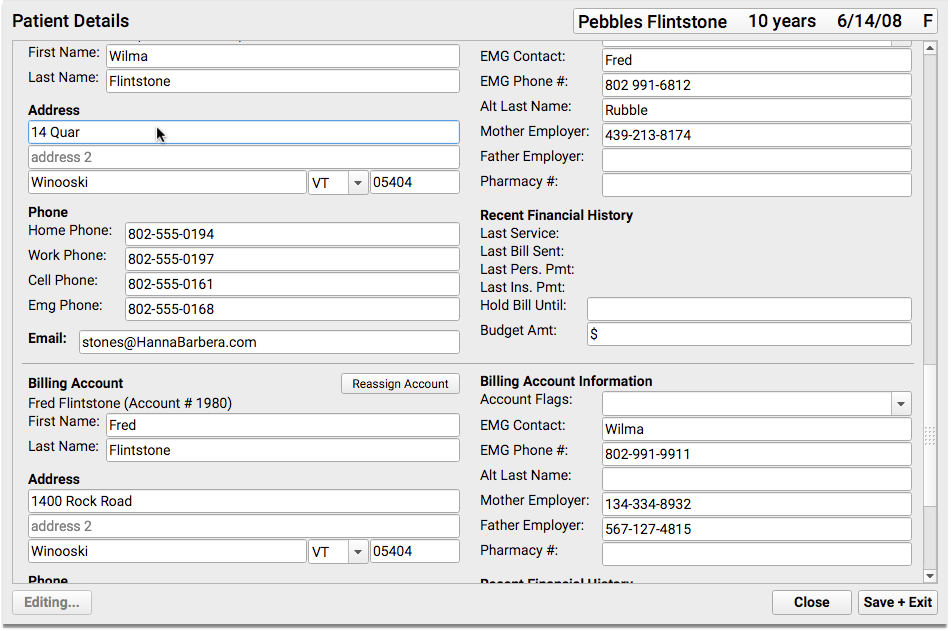
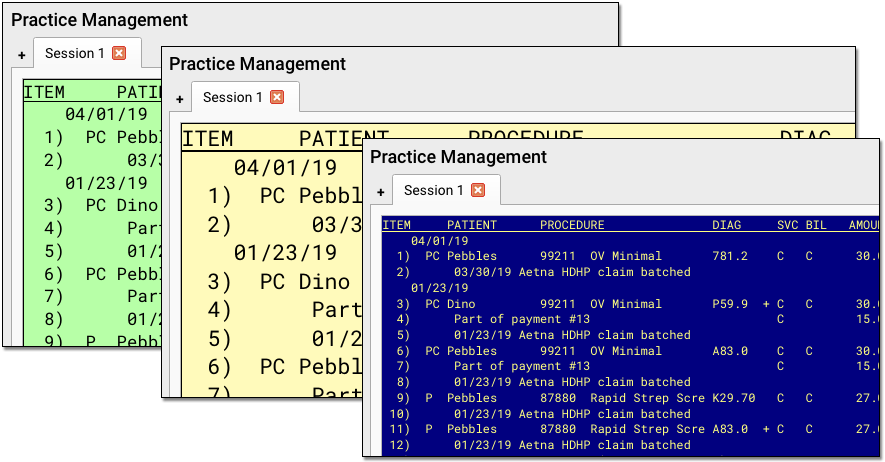
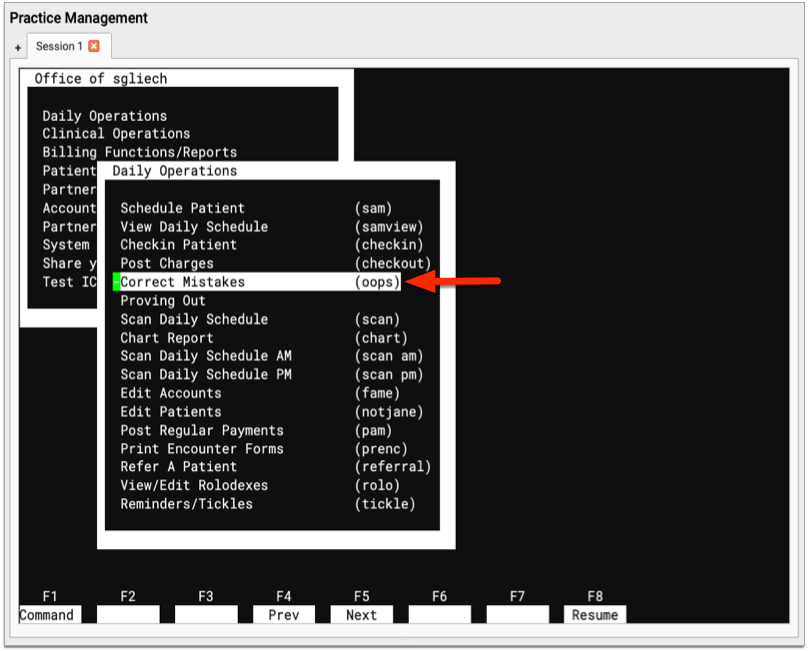
Keep Your Practice Management Window Open in PCC EHR
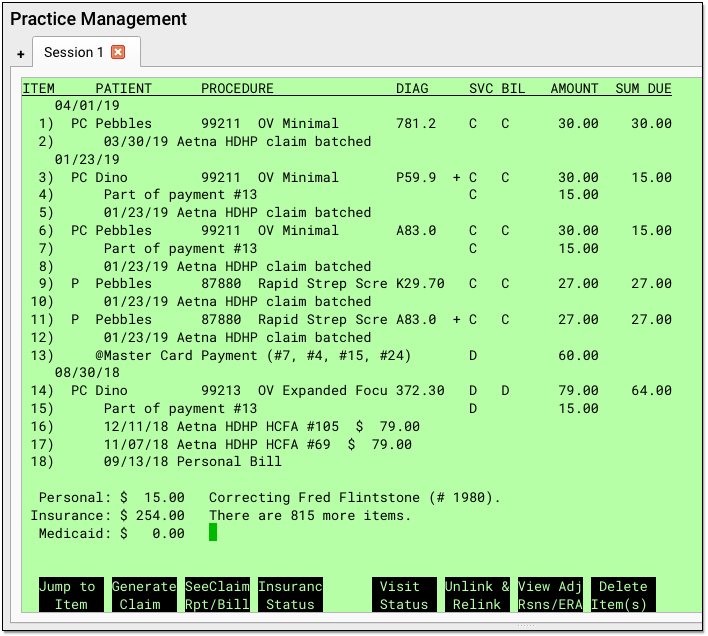
Do you work with PCC’s Practice Management tools, and need to switch back and forth between PCC EHR functions and Partner functions? Practice Management now lives in a separate window.
You can navigate quickly between the main PCC EHR window and your Practice Management window with your workstation’s keyboard shortcuts (command + ~ on MacOS, Alt + Tab on Windows) or window management tools. You can even place the window on a second monitor.
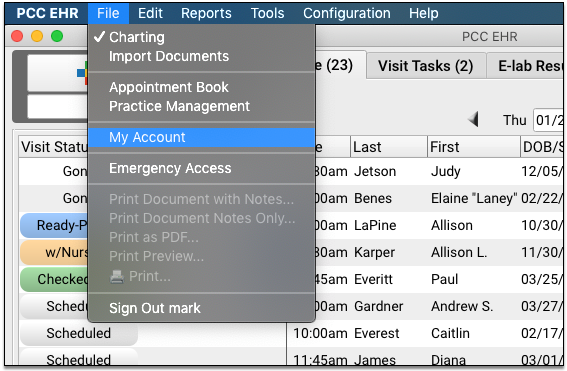
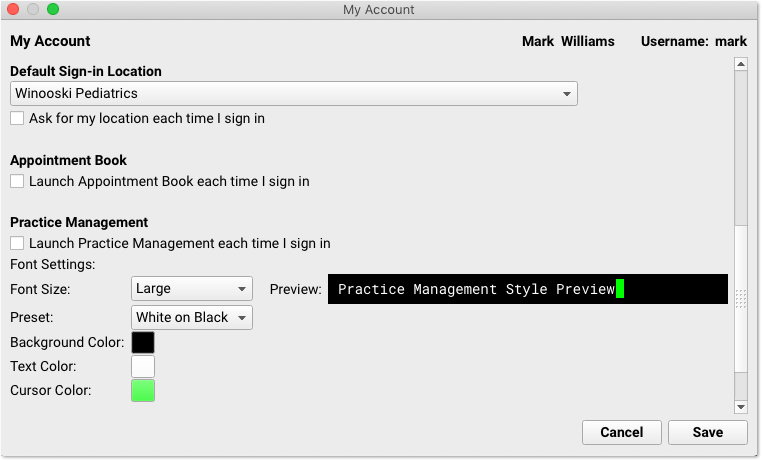
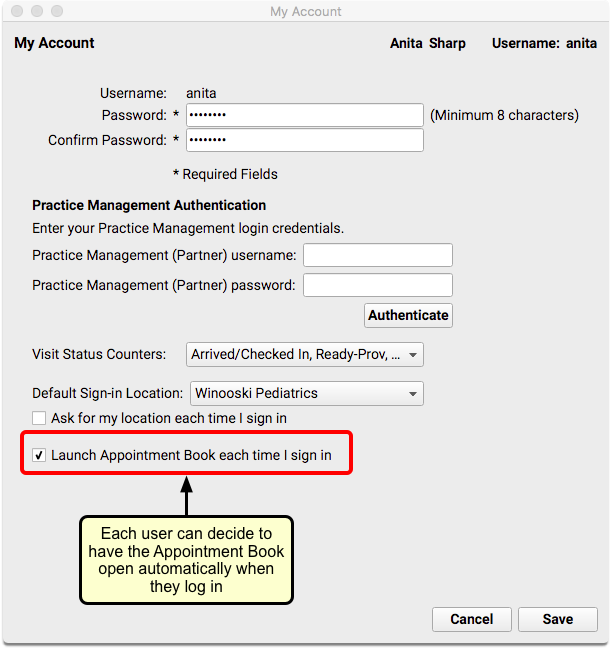
If you want your Practice Management window to open immediately when you log into PCC EHR, you can select the “Launch Practice Management each time I sign in” option in the My Account tool.
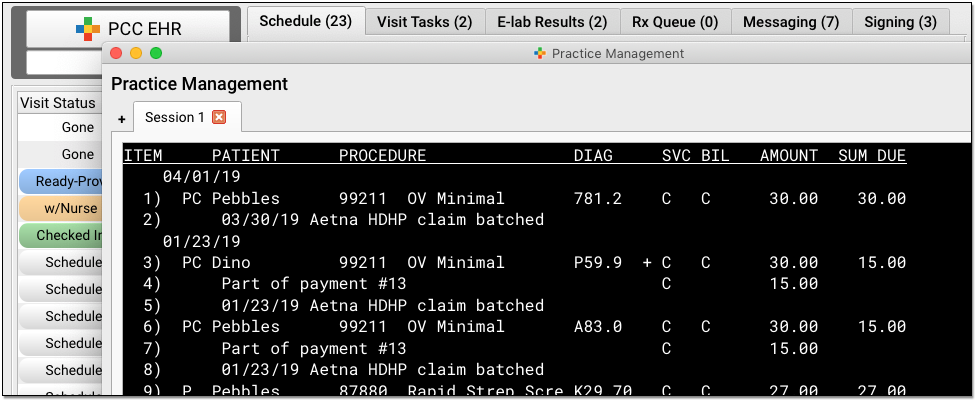
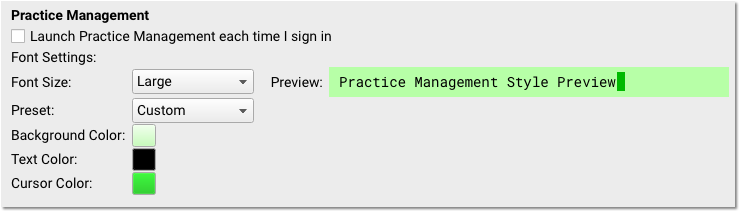
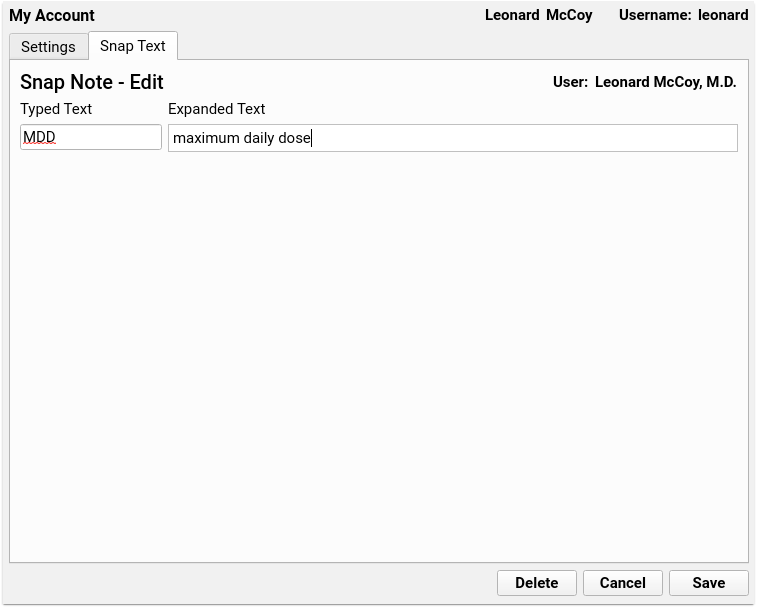
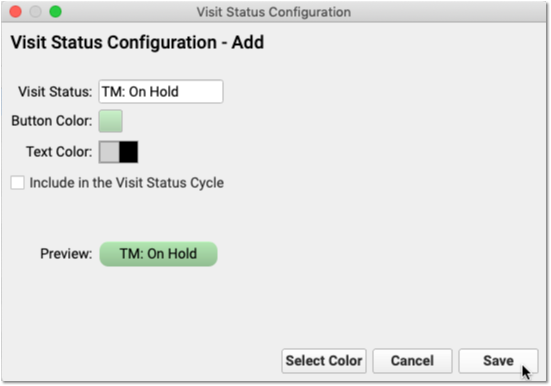
Customize the Font Size and Color of Your Practice Management Window
When you are tracking down a billing issue for an account, you want your screen to be as clear and easy to read as possible. The PCC 8.7 update improves the default white text of your Practice Management window for better legibility. You can also select your own preferred font size, font color, background color, and cursor color.
When you want to adjust your Practice Management window’s appearance, open the My Account tool.
You can choose a Small, Medium, or Large font. You can select a preset color option (white on black or black on white), and you can override those presets with your own preferred Background Color, Text Color, and Cursor Color.
As you make adjustments, a preview panel on the right will show you the final result. By using these tools, you can customize the Practice Management window’s appearance so it will be readable and easier on your eyes.
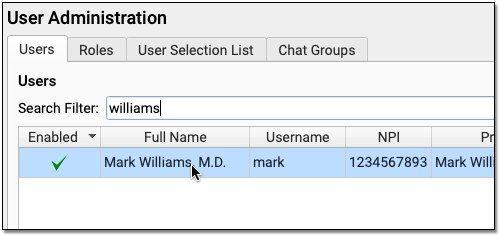
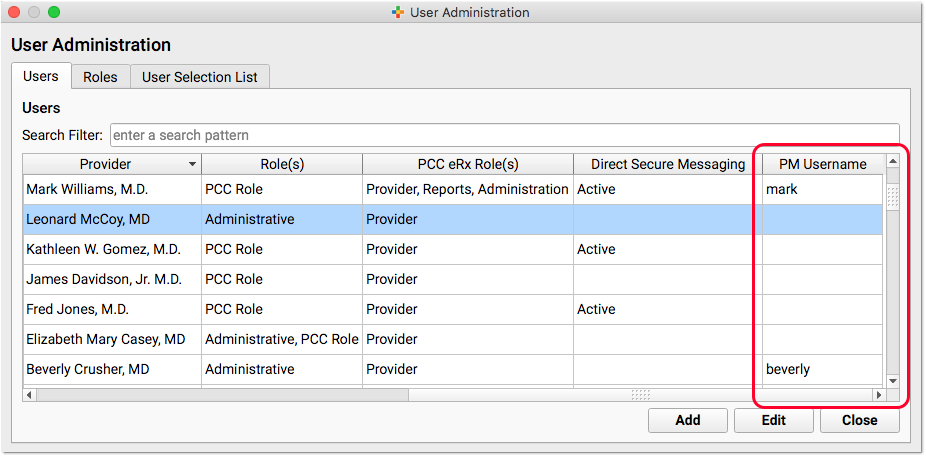
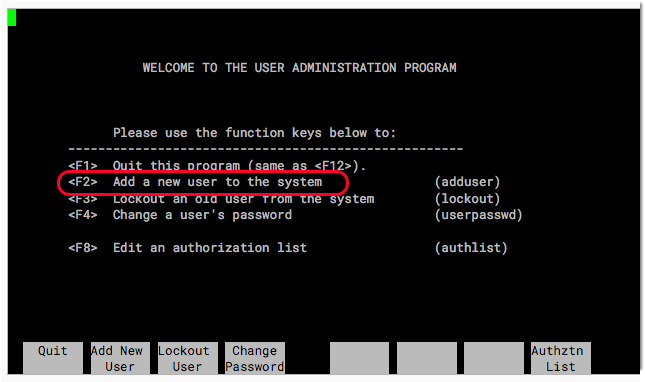
Customize Practice Management Window For Your Staff: All the users at your practice can make the above changes themselves in the My Account tool. You can also make these changes for them in the User Administration tool.
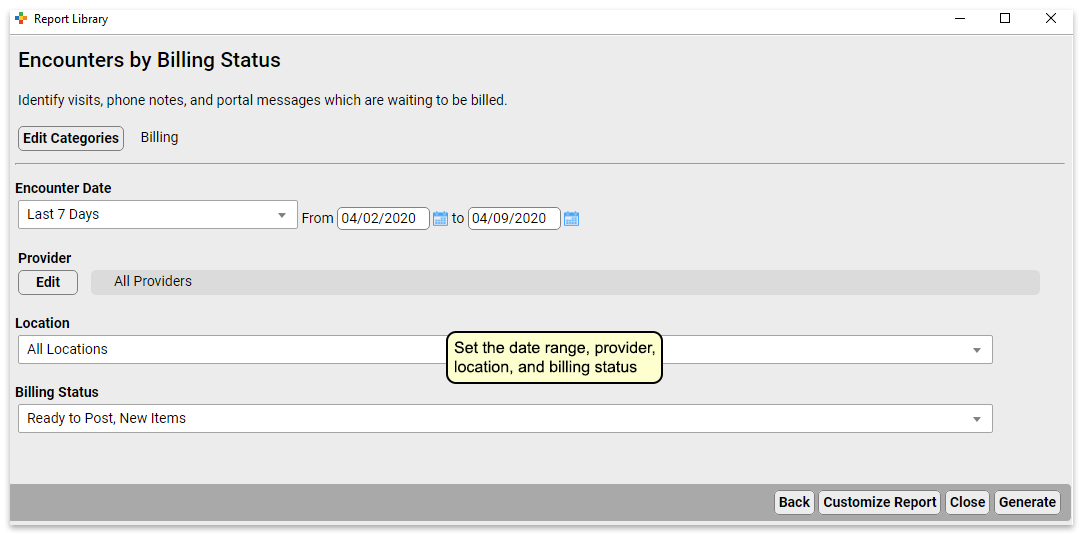
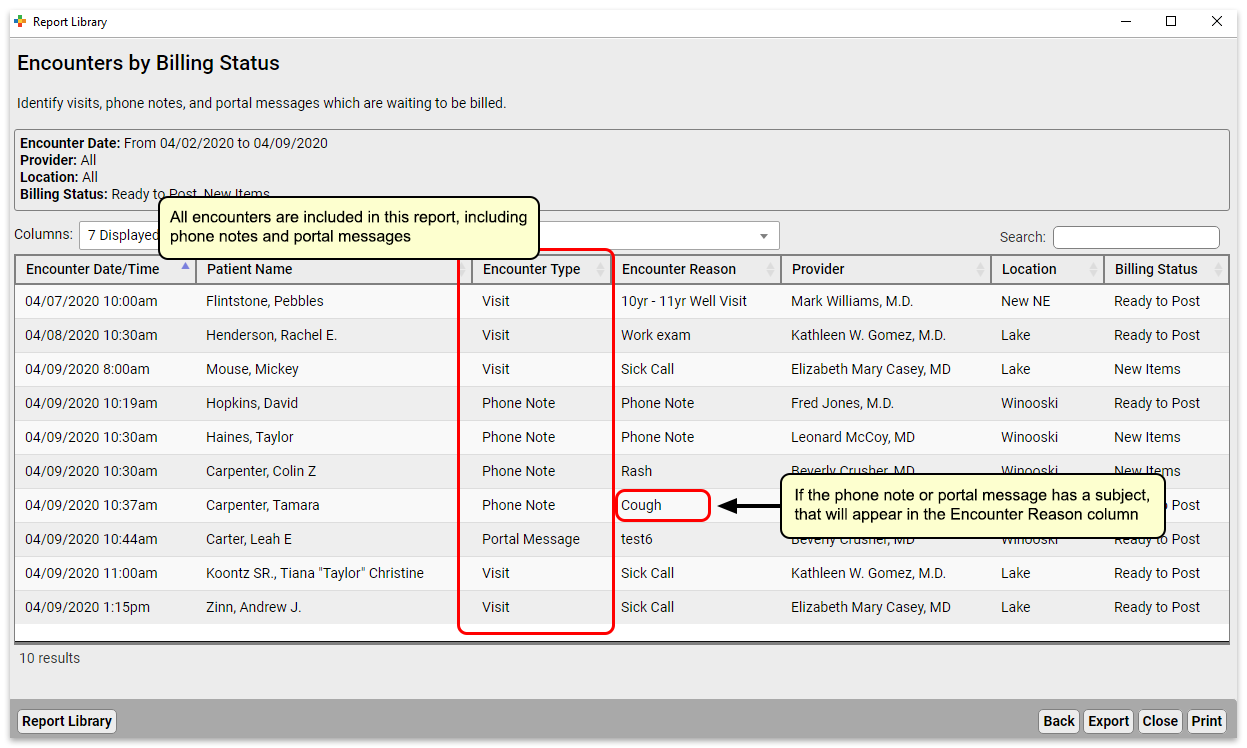
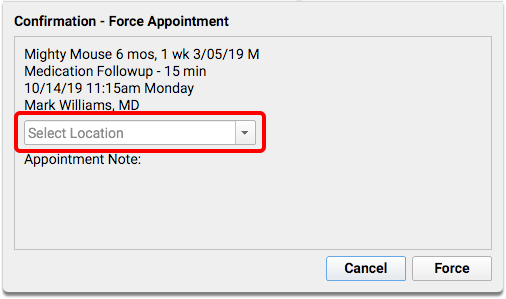
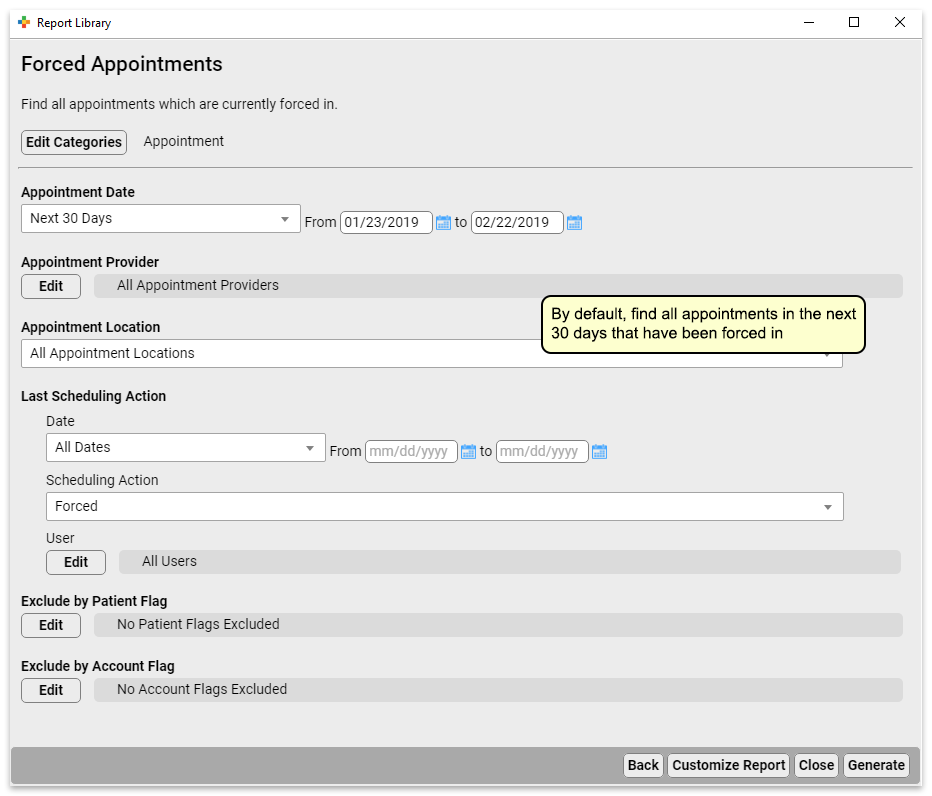
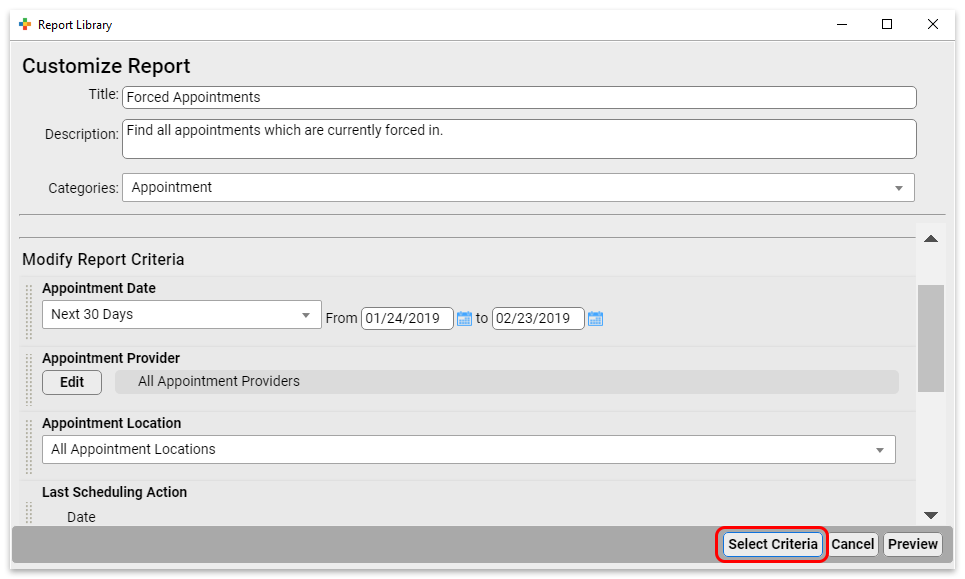
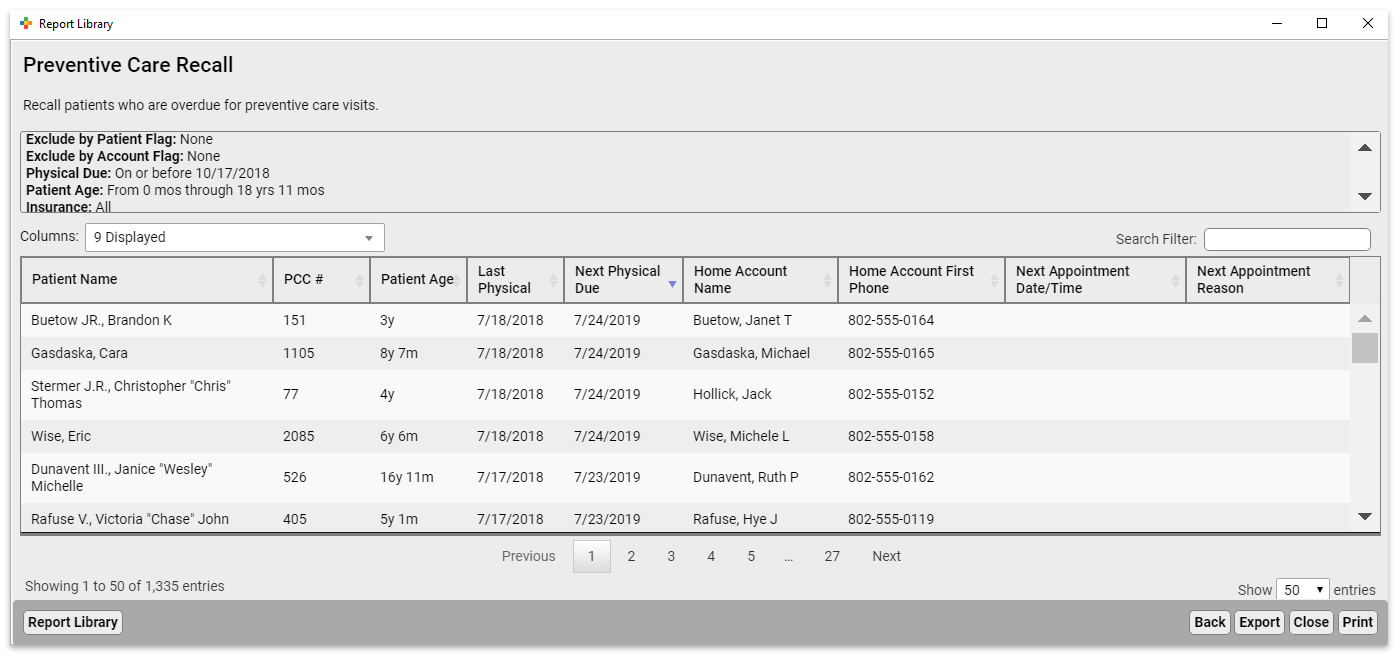
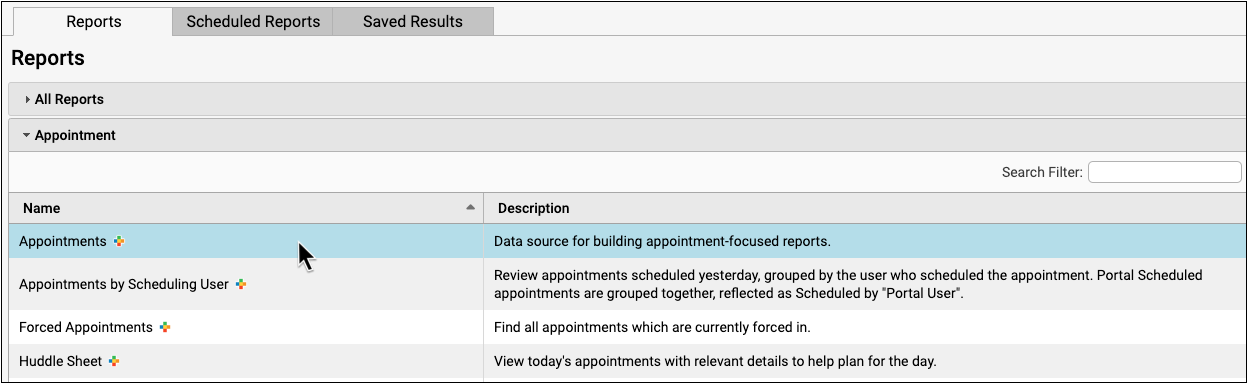
Find Forced Appointments
Use the “Forced Appointments” report to find all appointments that have been forced into the schedule.
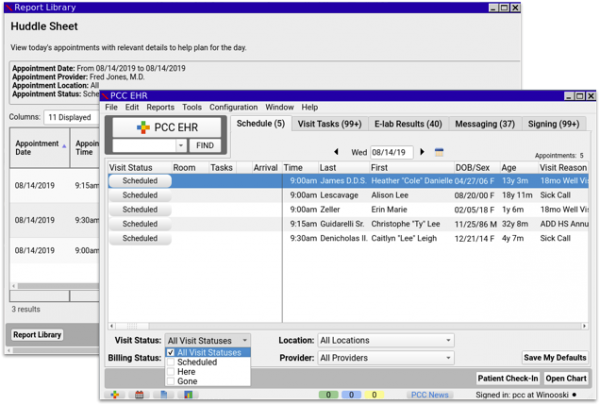
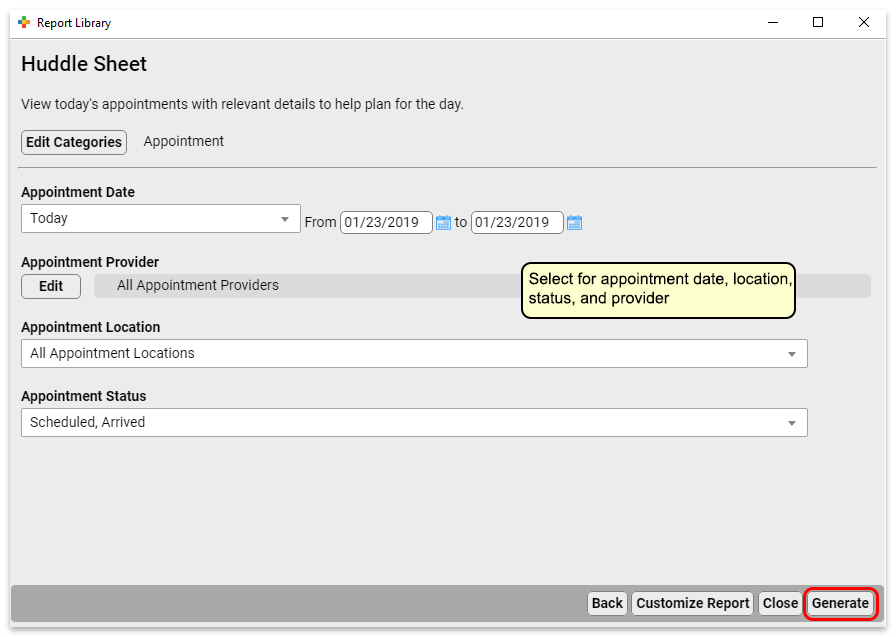
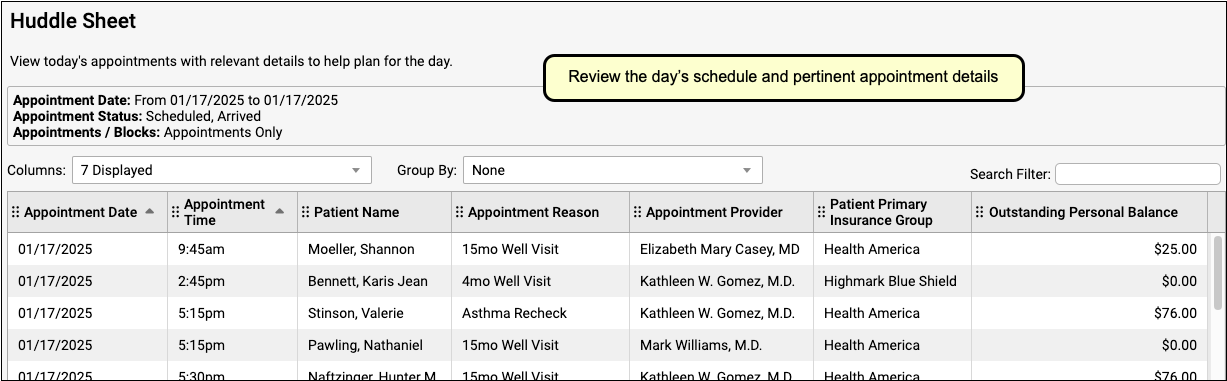
Create Daily “Huddle” List for Your Morning Meeting
Use the new “Huddle Sheet” report to generate a list of all appointments on a date or range of dates that you can use to prepare for the day.
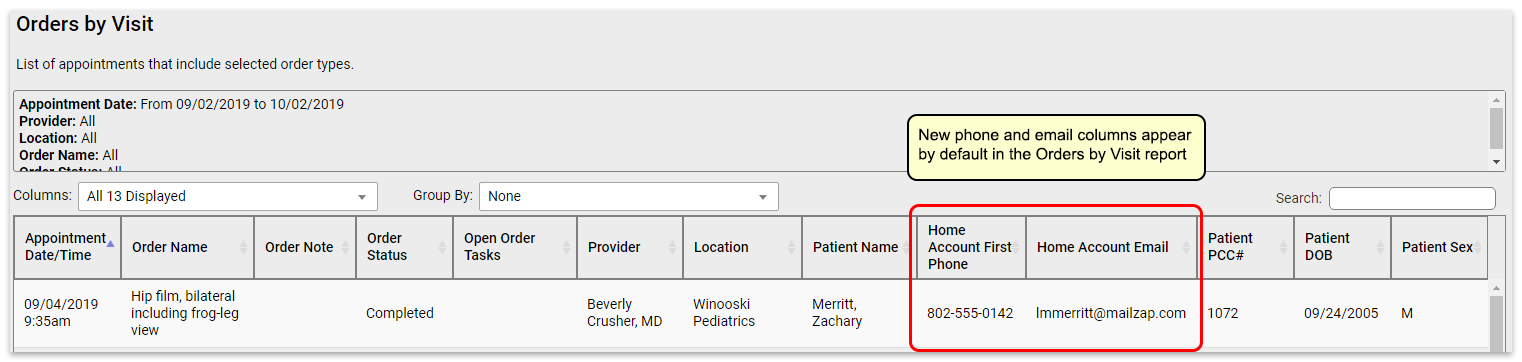
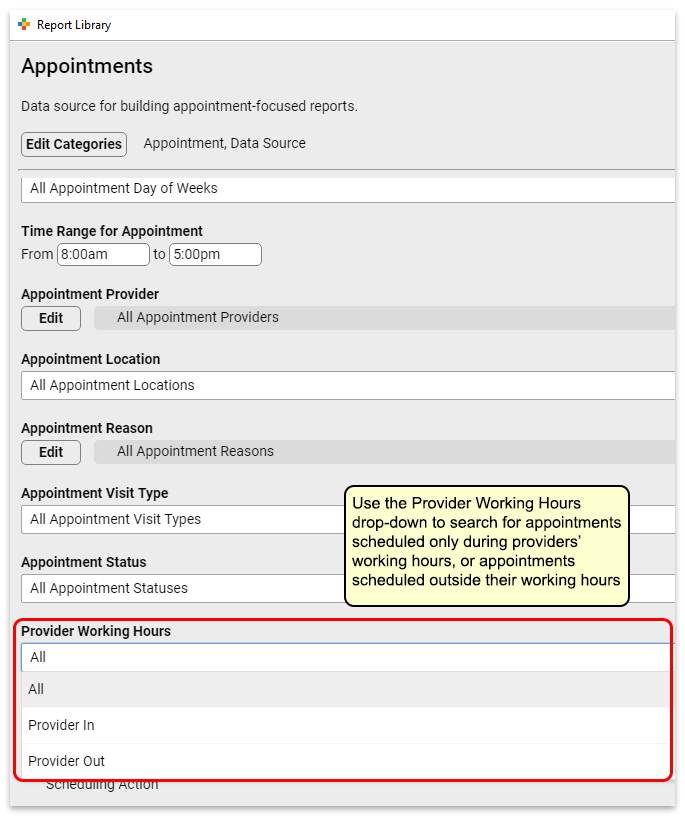
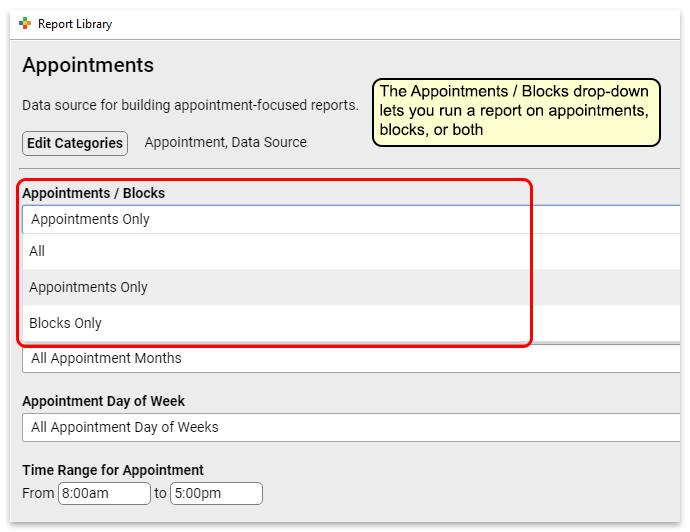
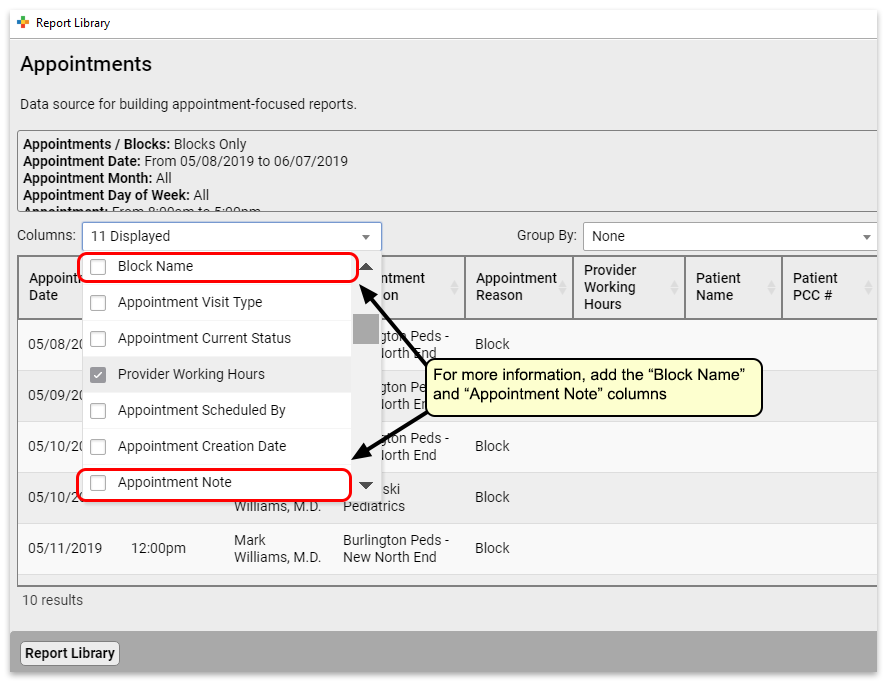
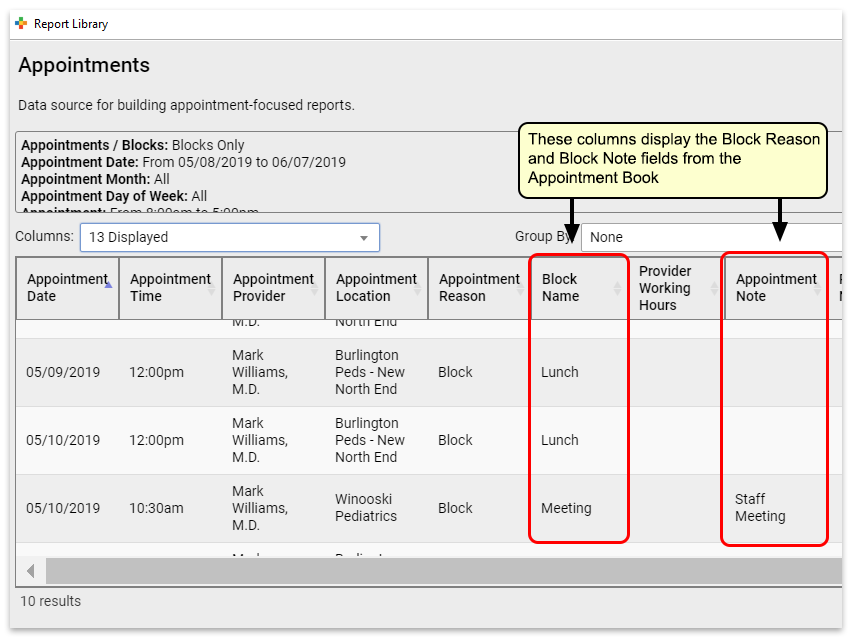
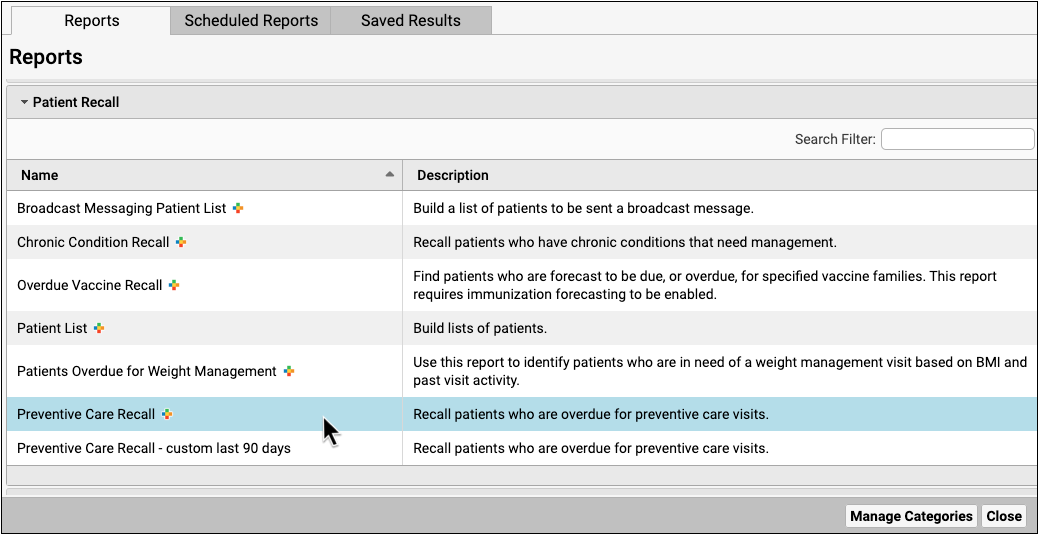
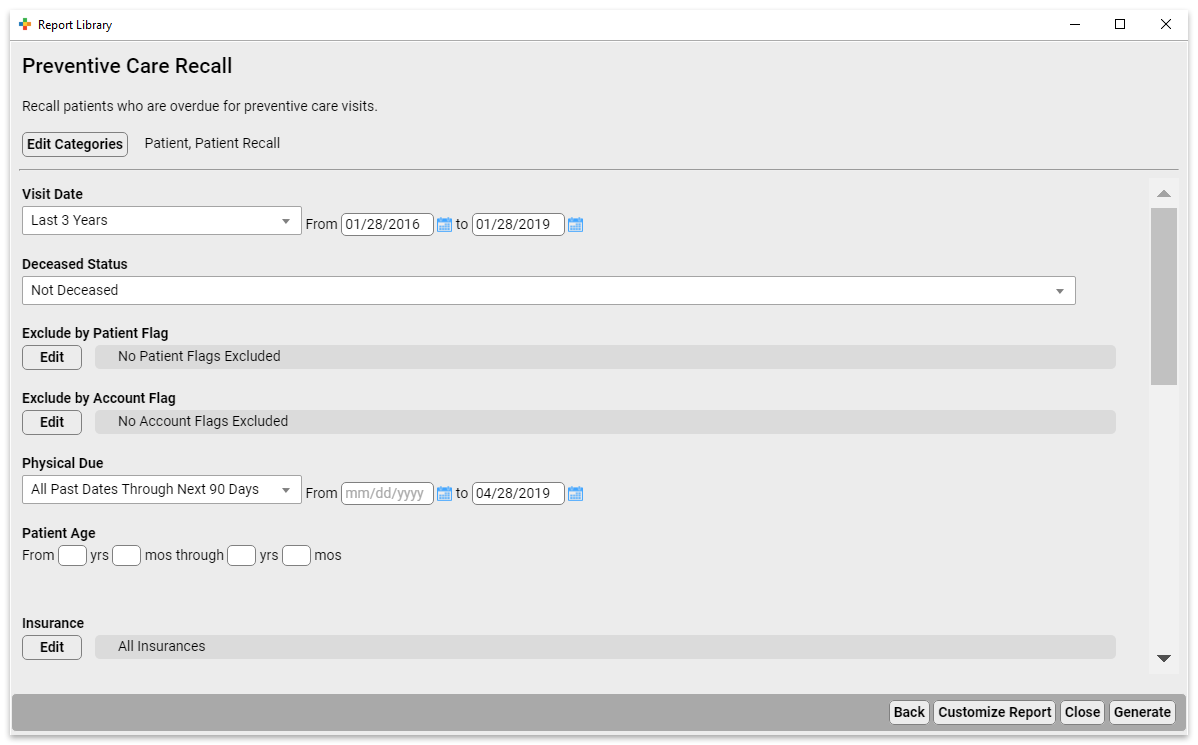
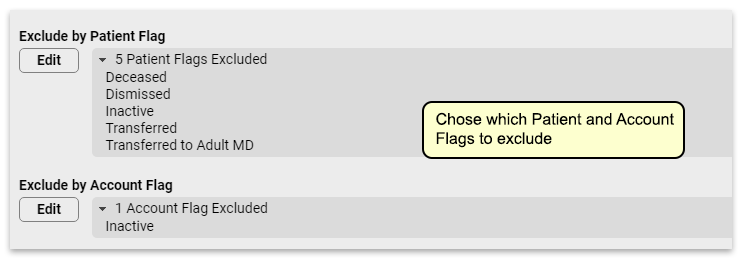
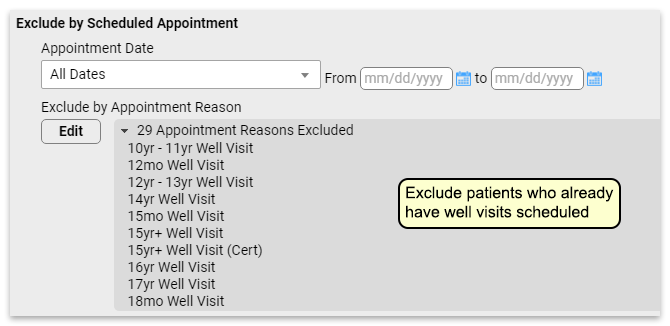
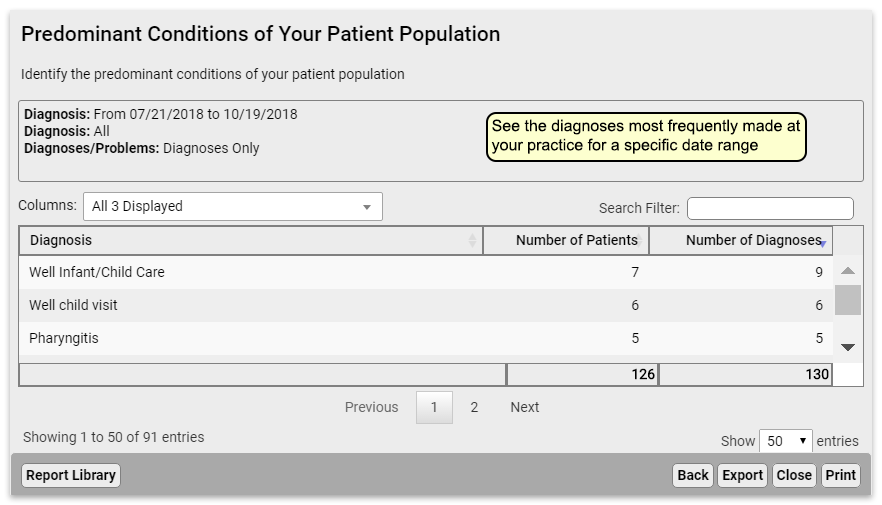
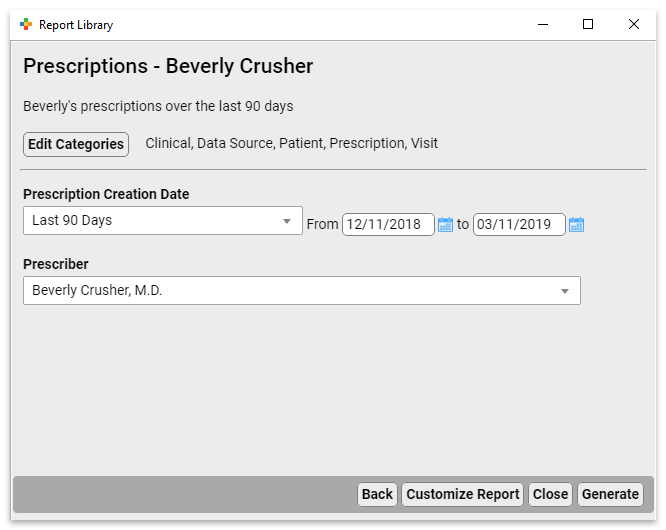
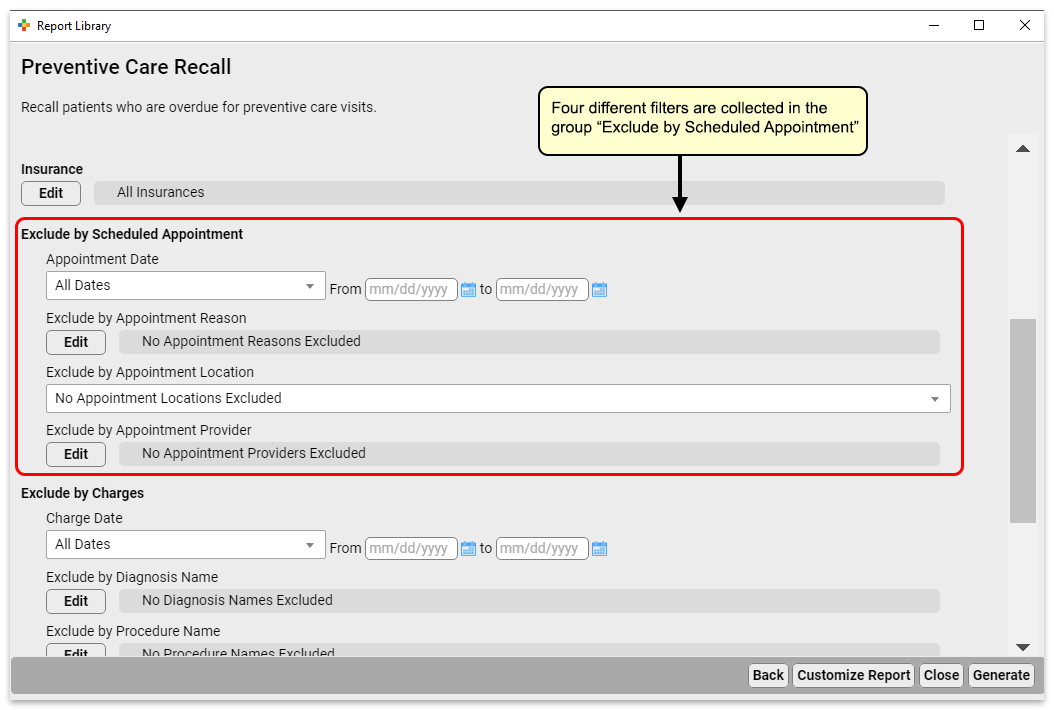
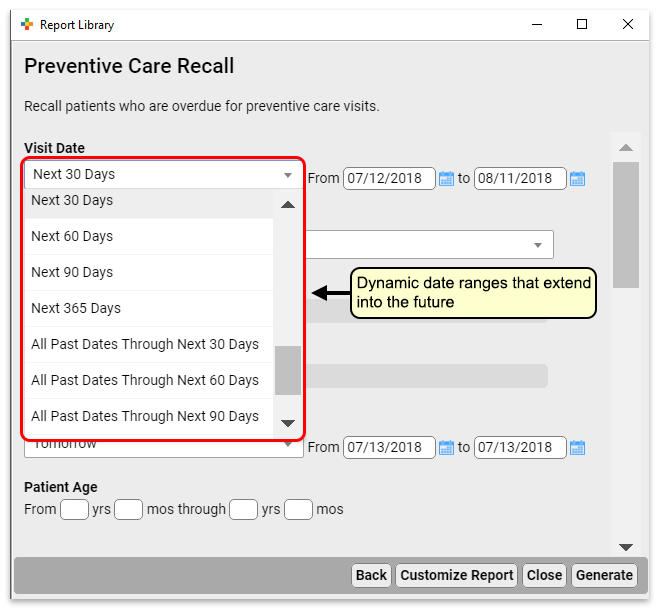
Create Custom Appointment Reports
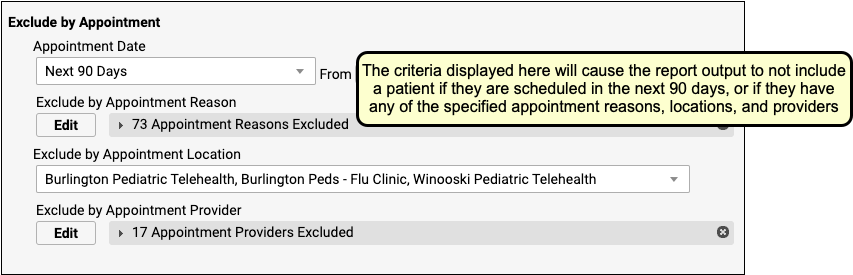
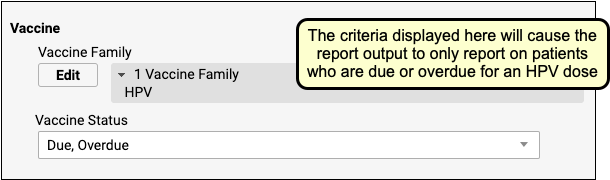
The new Appointments report provides all the filters you need to create custom appointment-based reports.
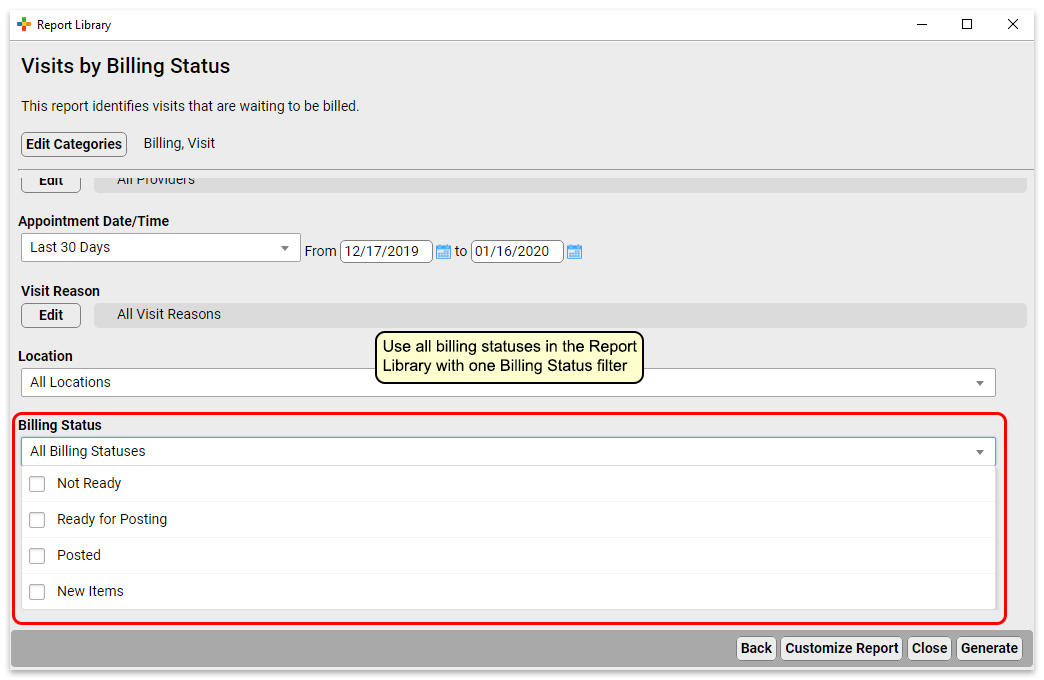
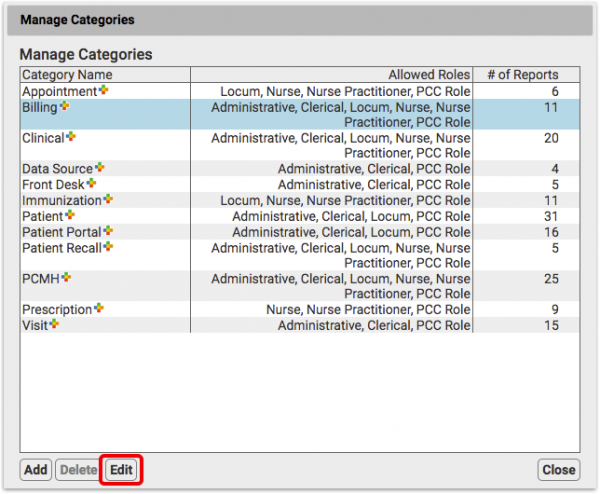
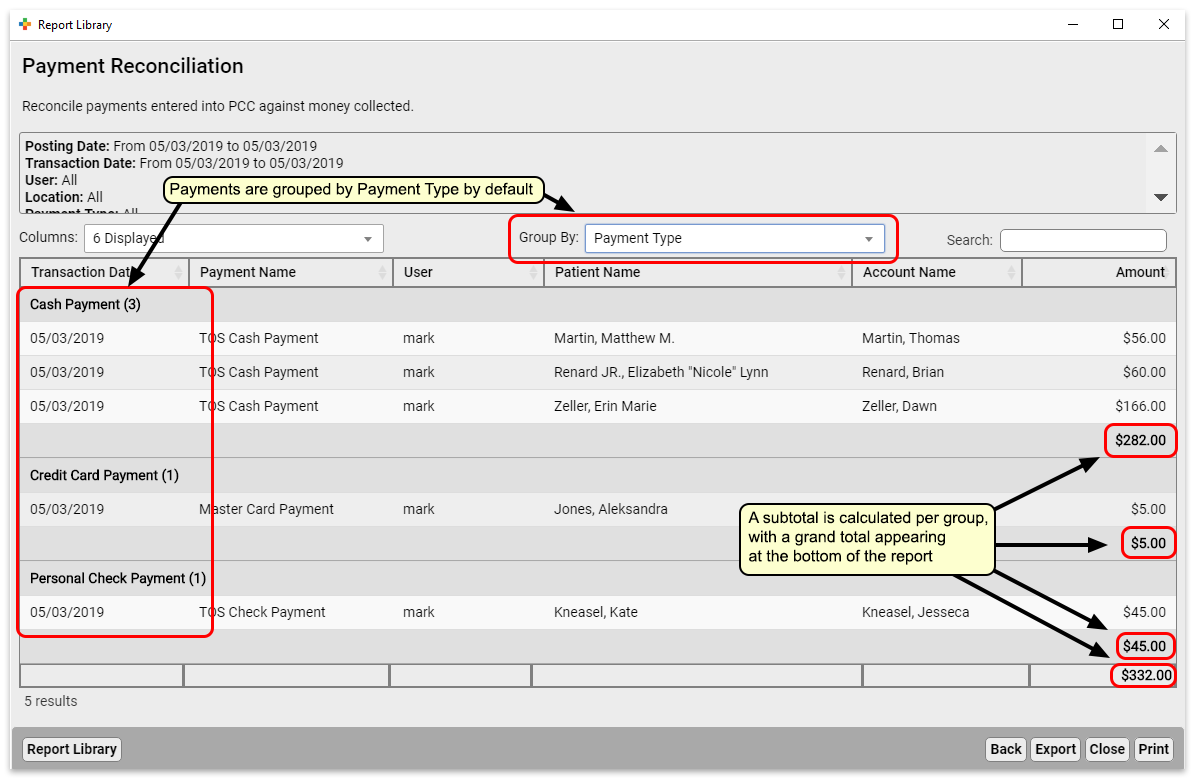
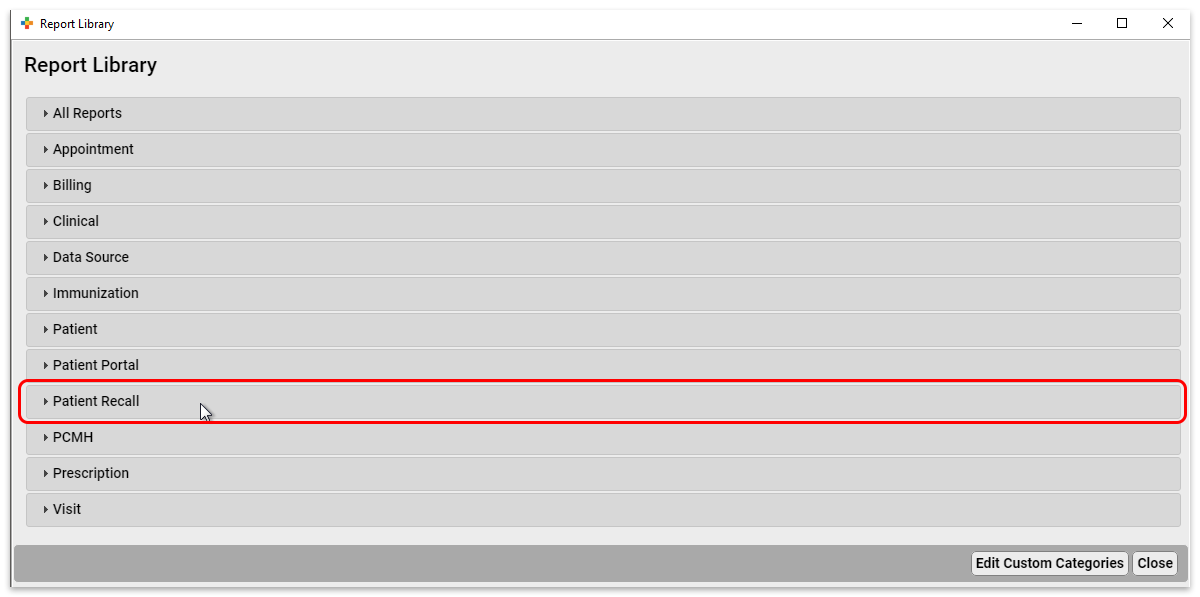
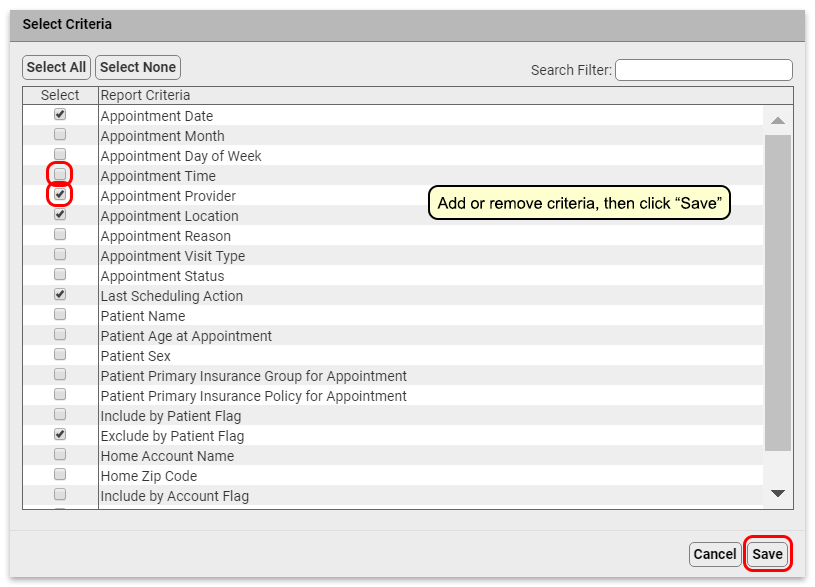
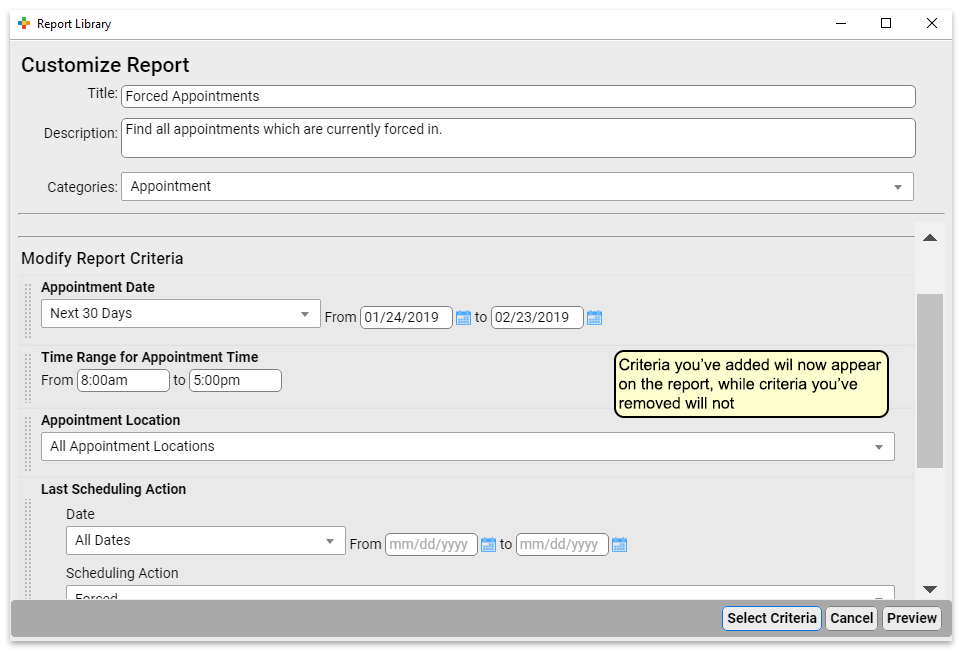
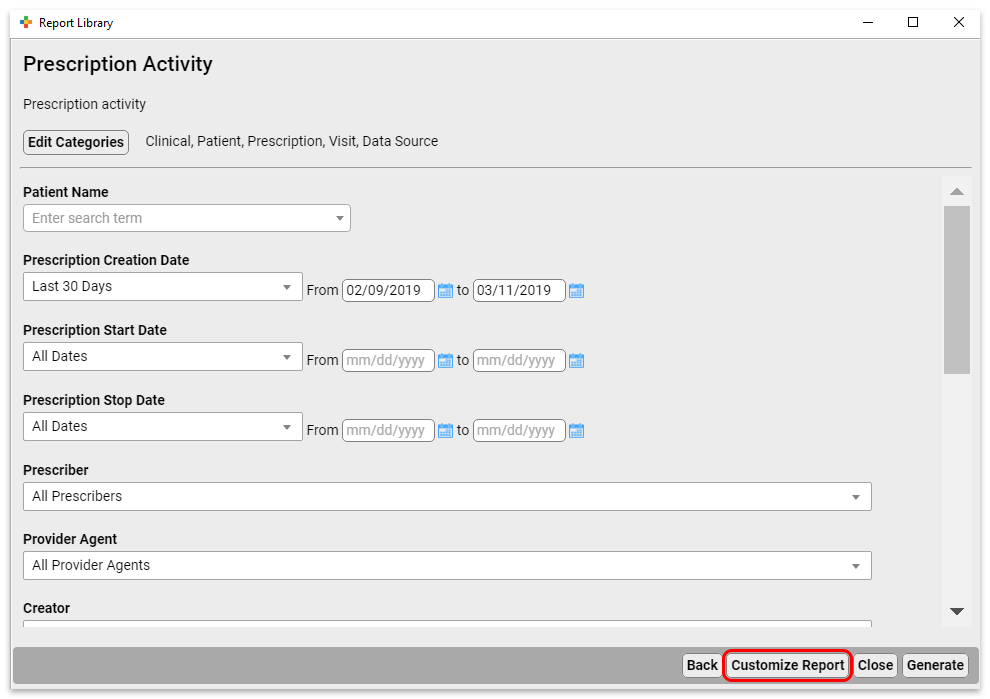
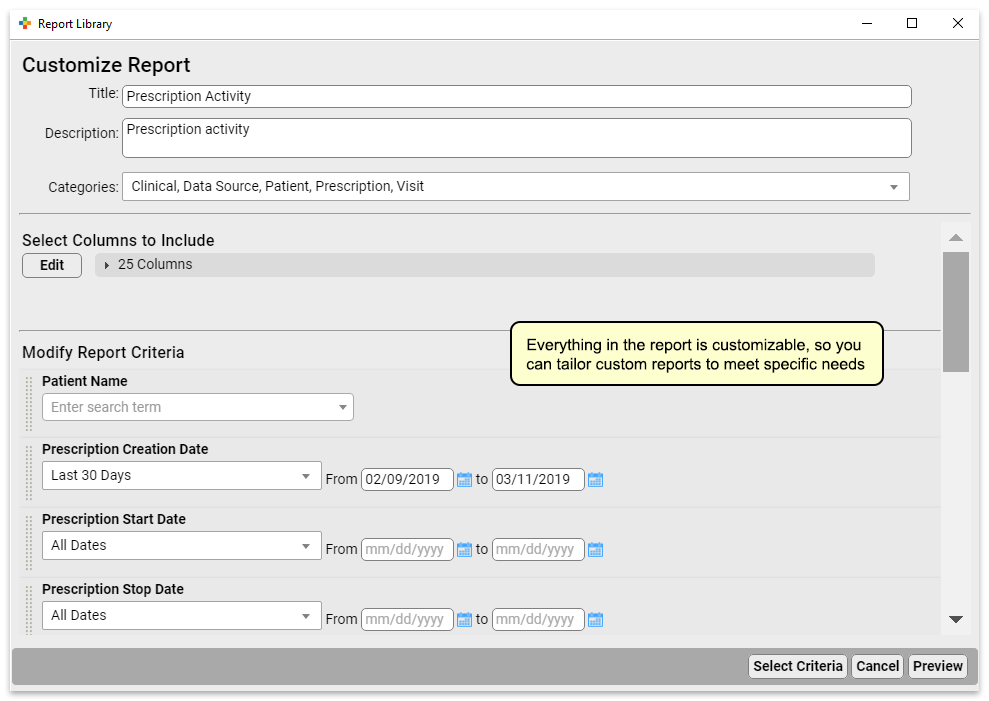
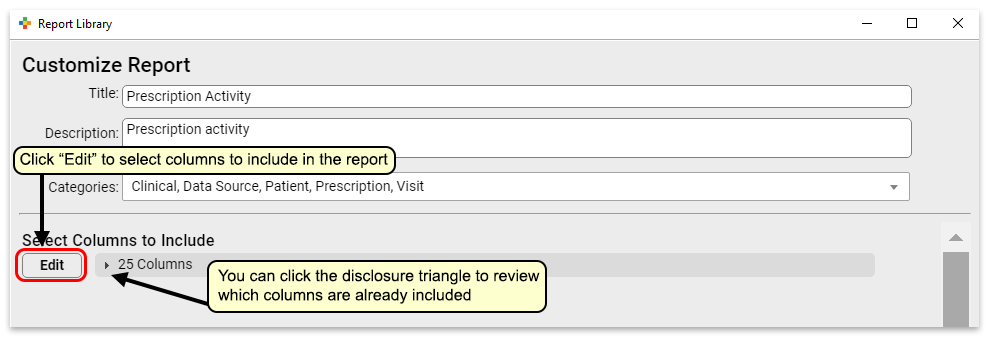
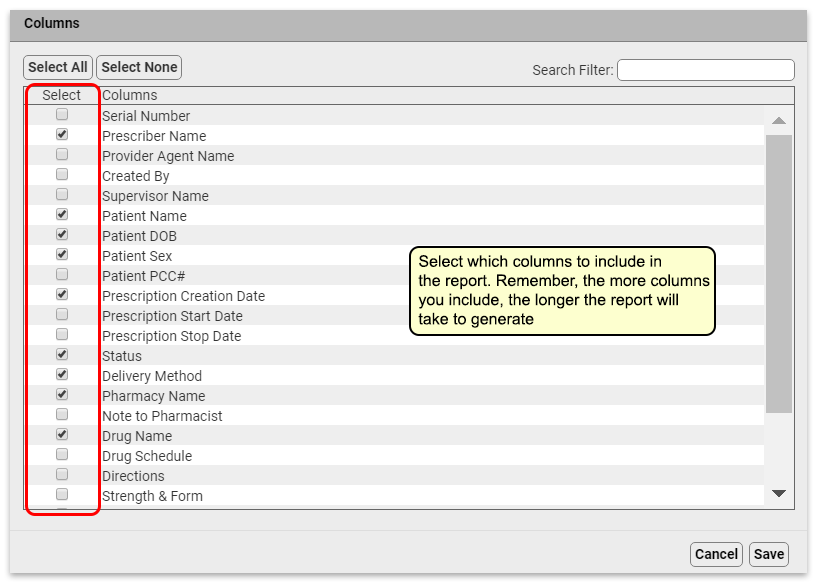
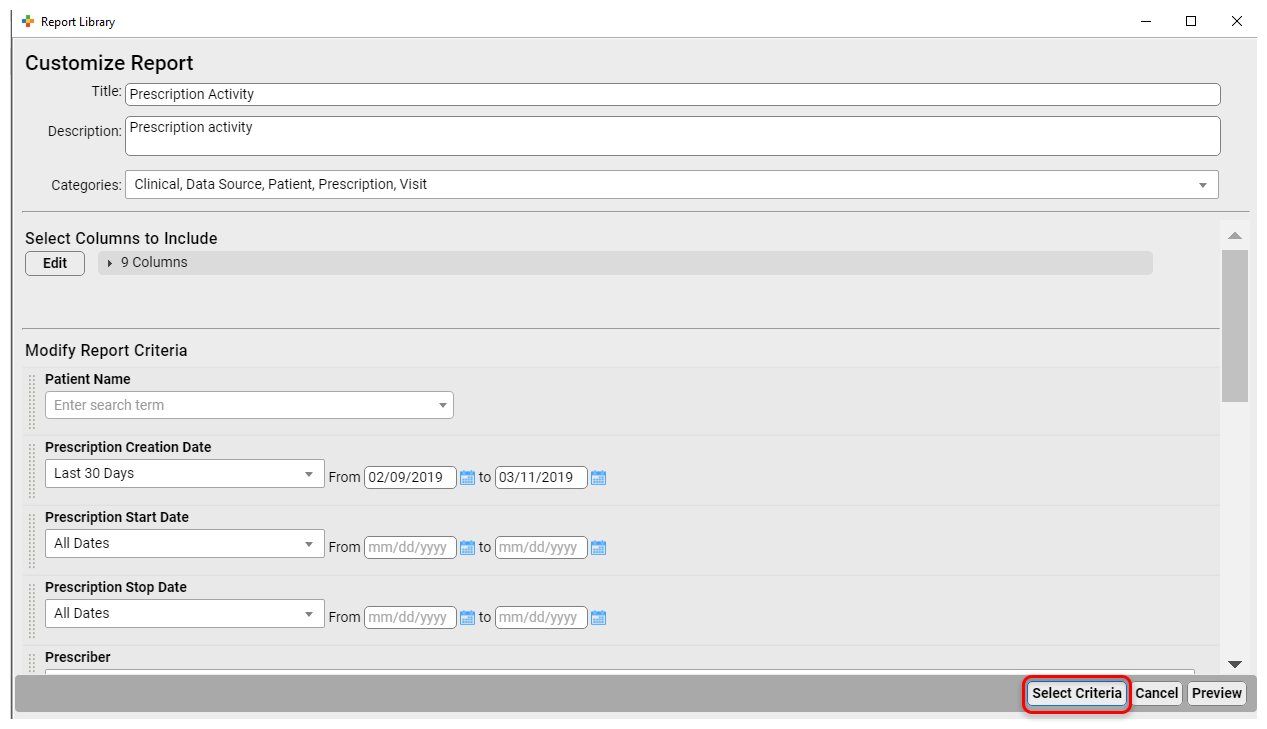
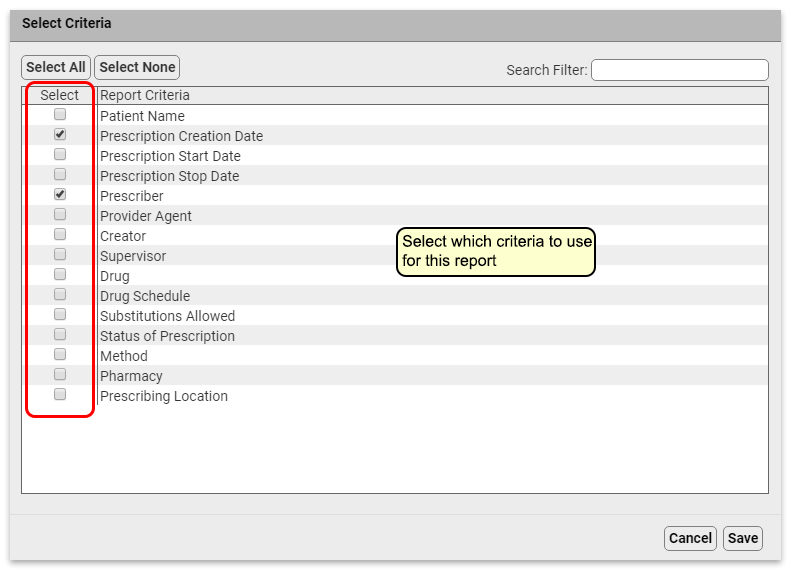
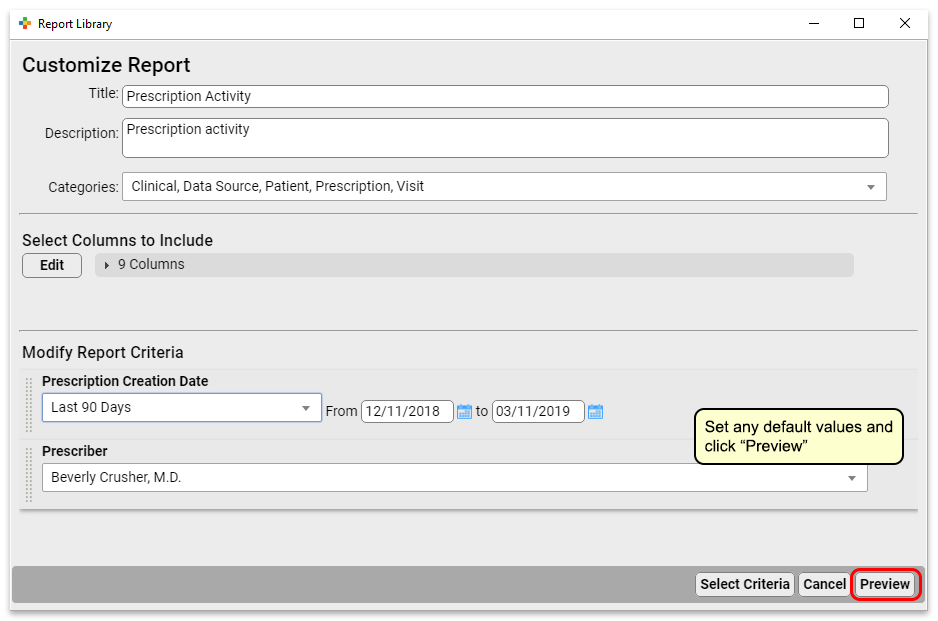
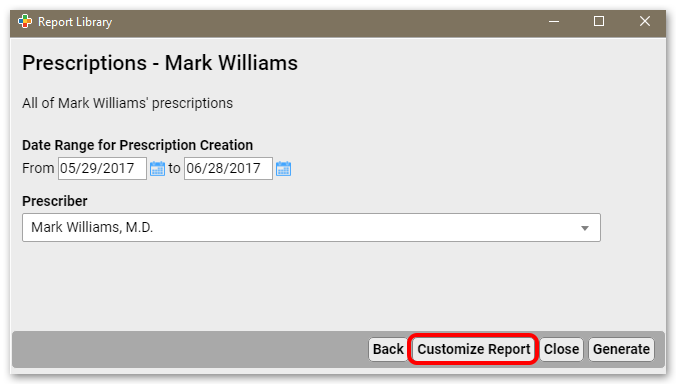
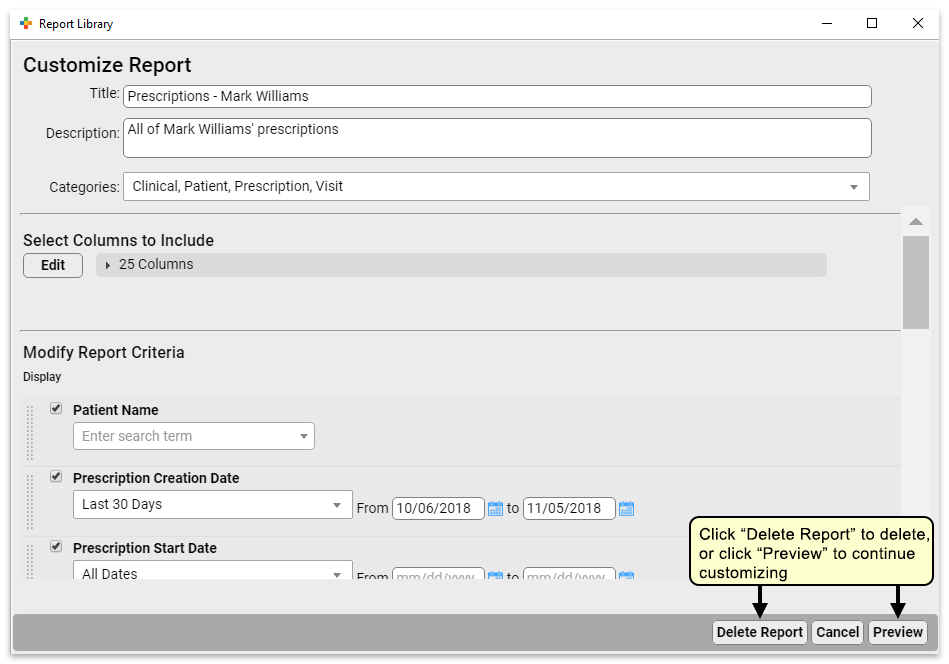
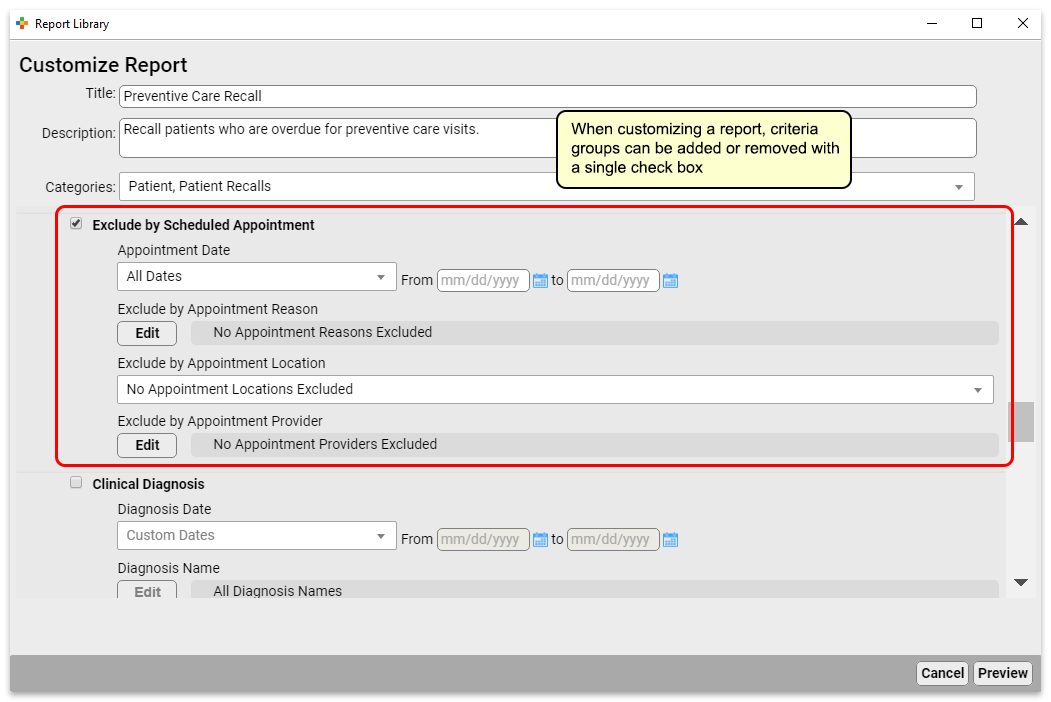
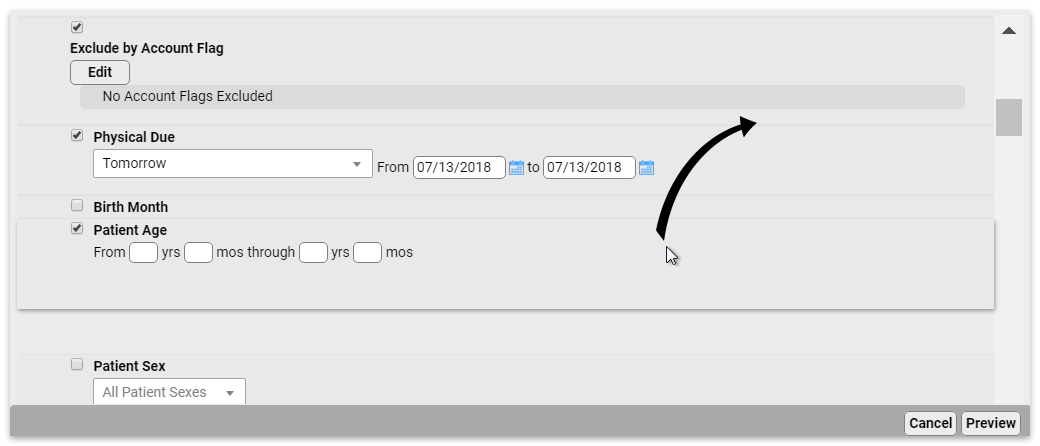
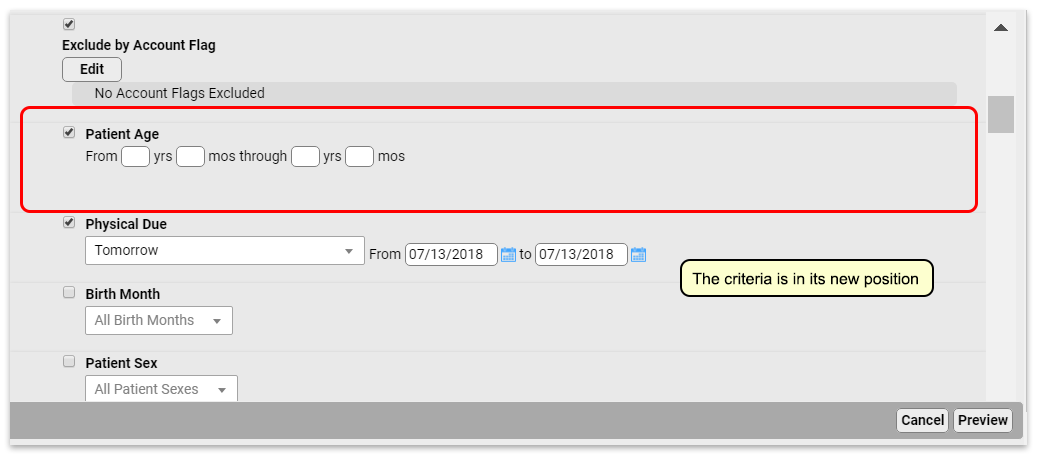
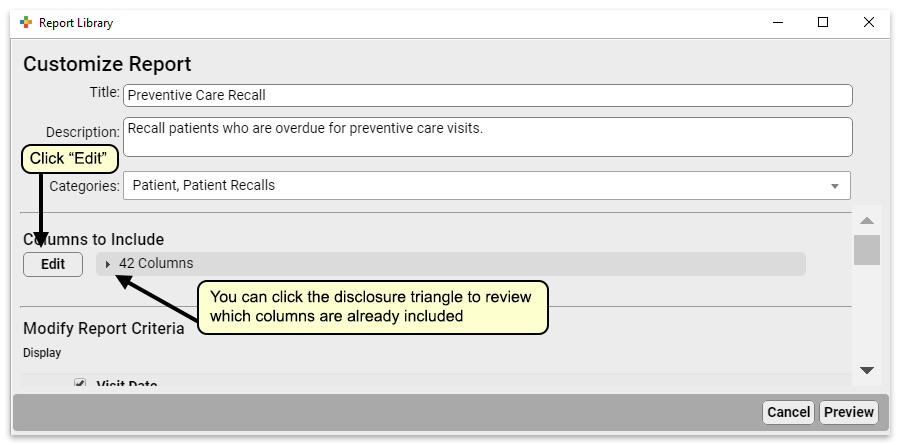
Remove Unused Criteria from Custom Reports
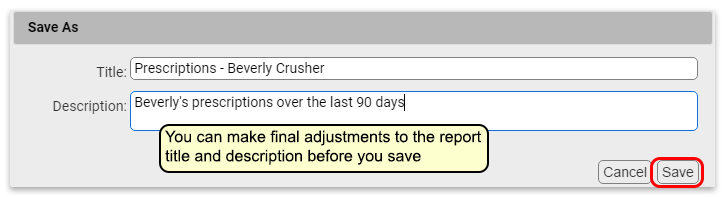
When you edit a report in the Report Library, use the Select Criteria button to add or remove criteria from the report.
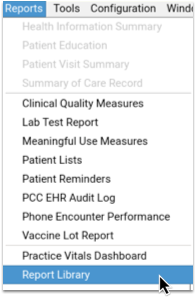
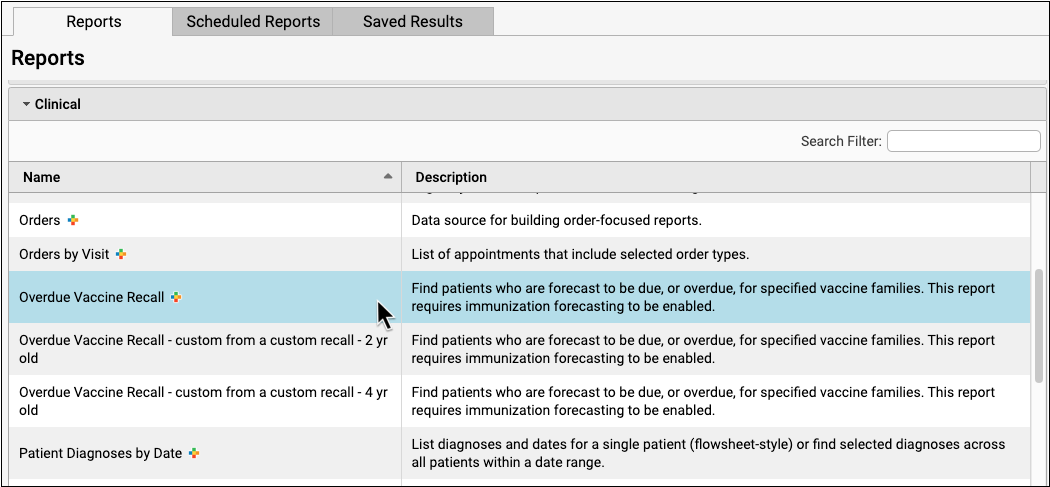
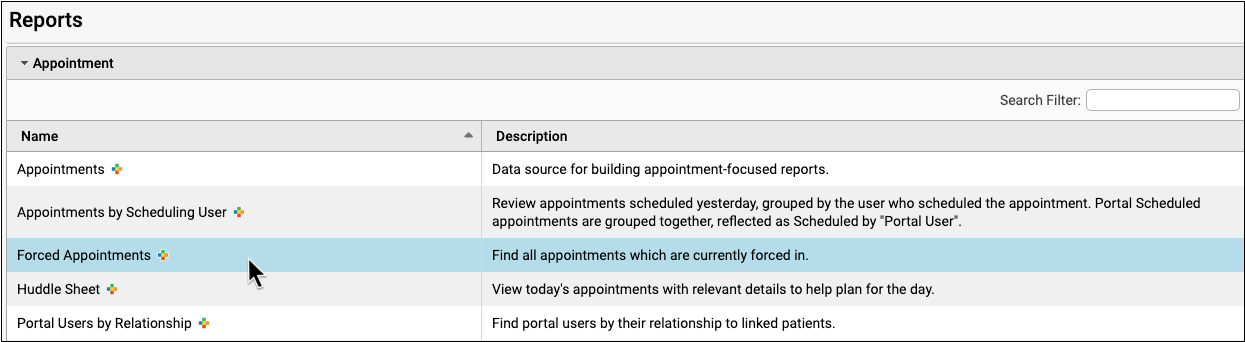
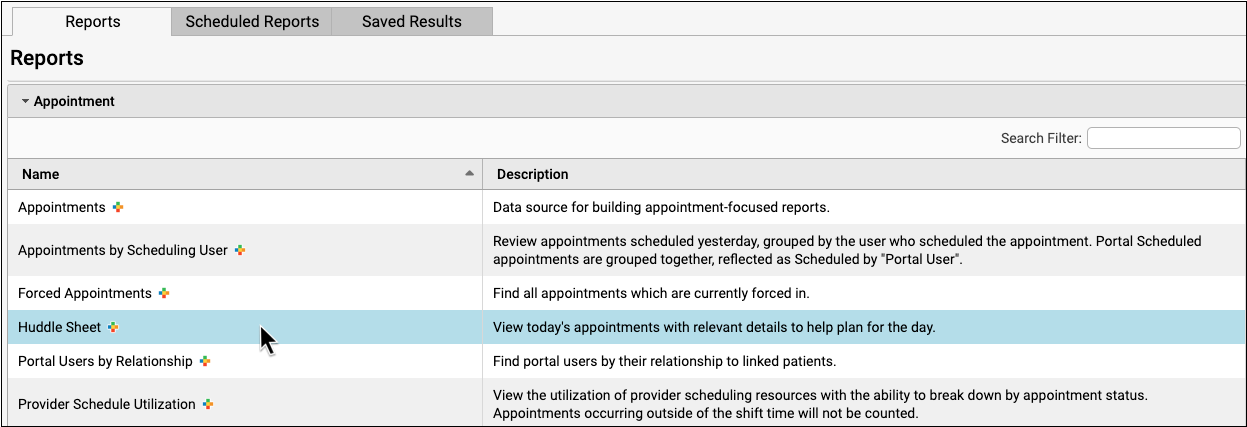
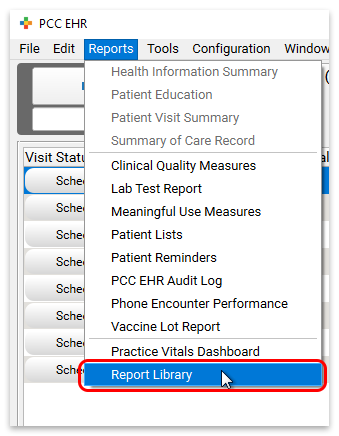
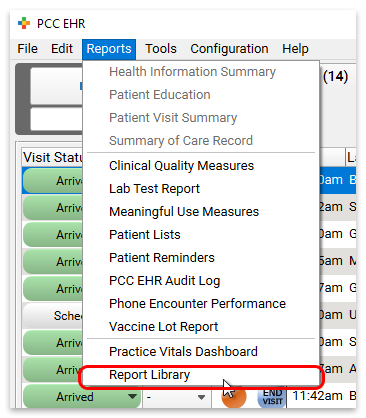
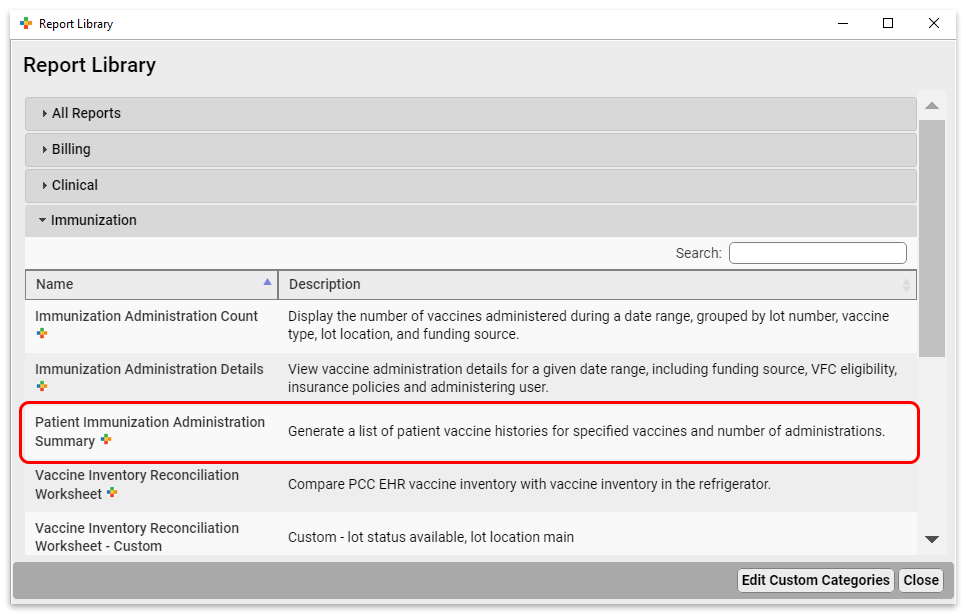
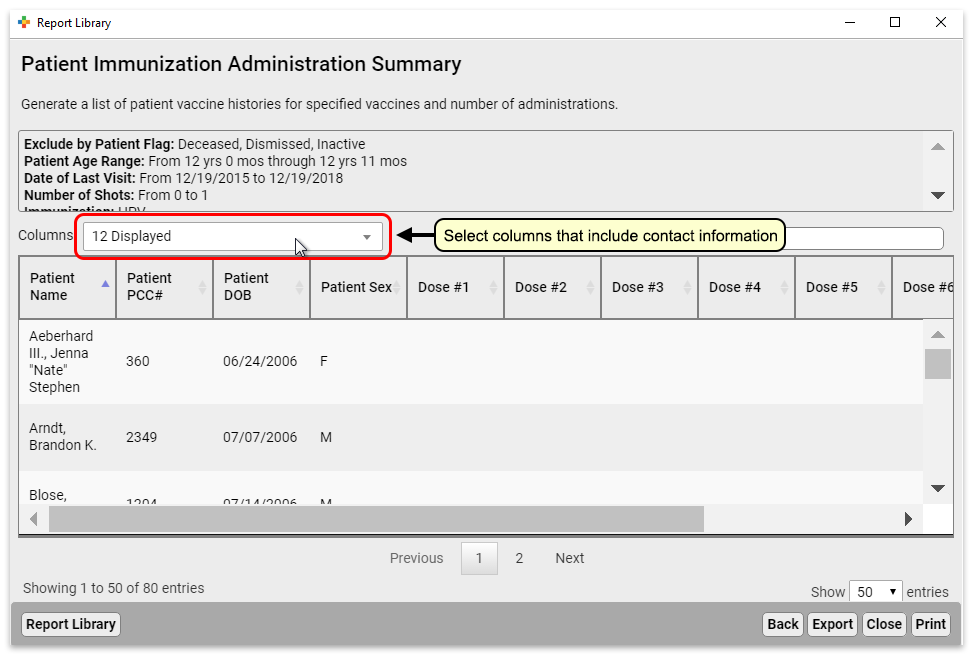
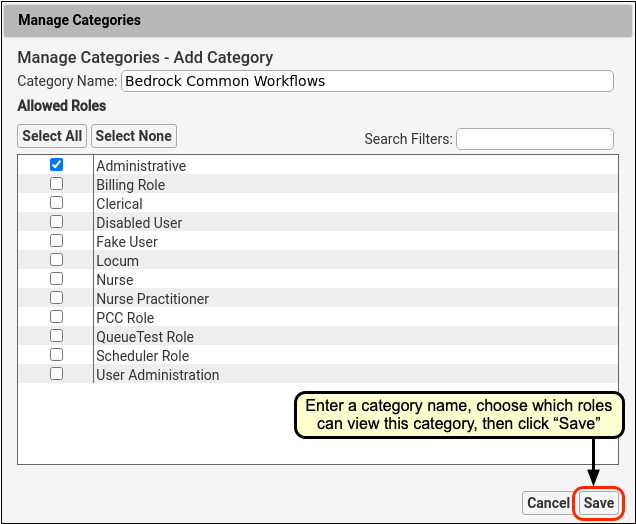
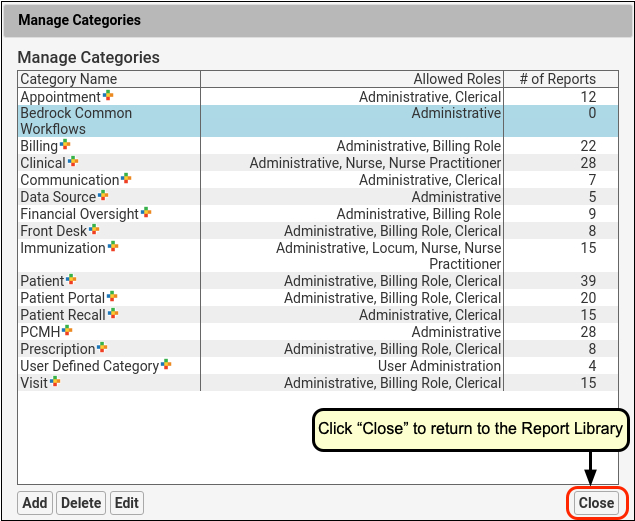
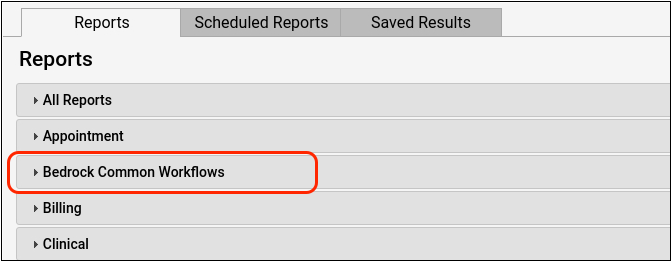
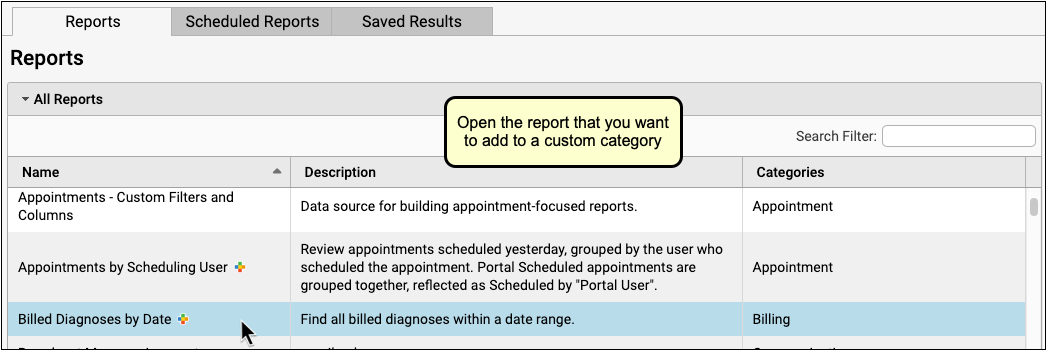
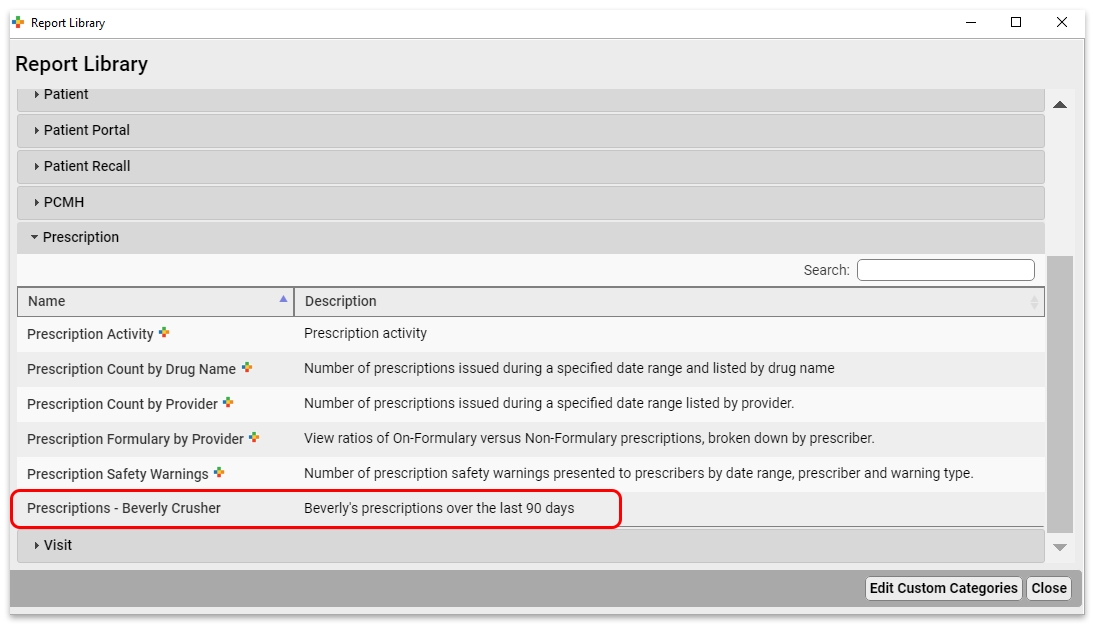
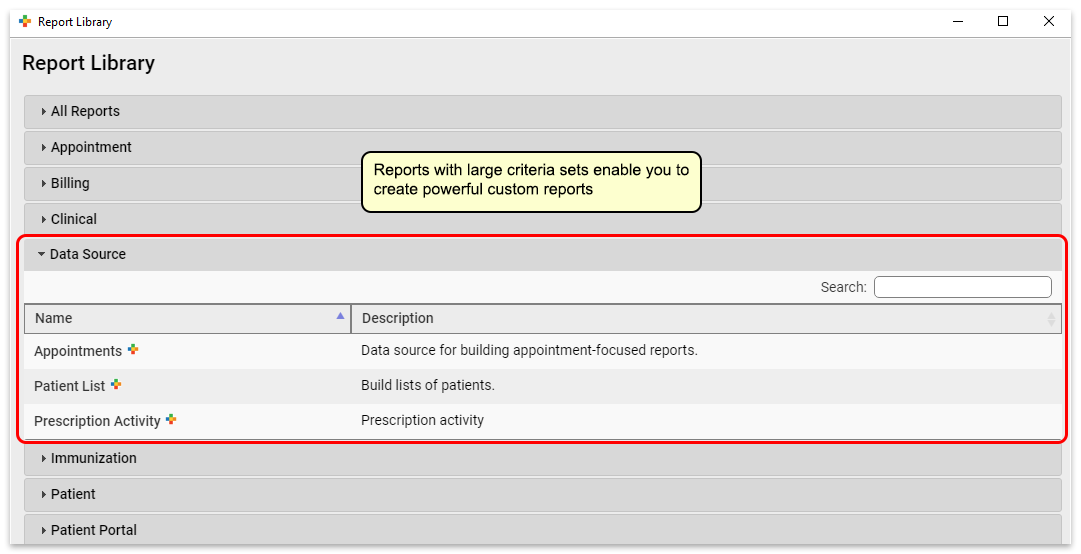
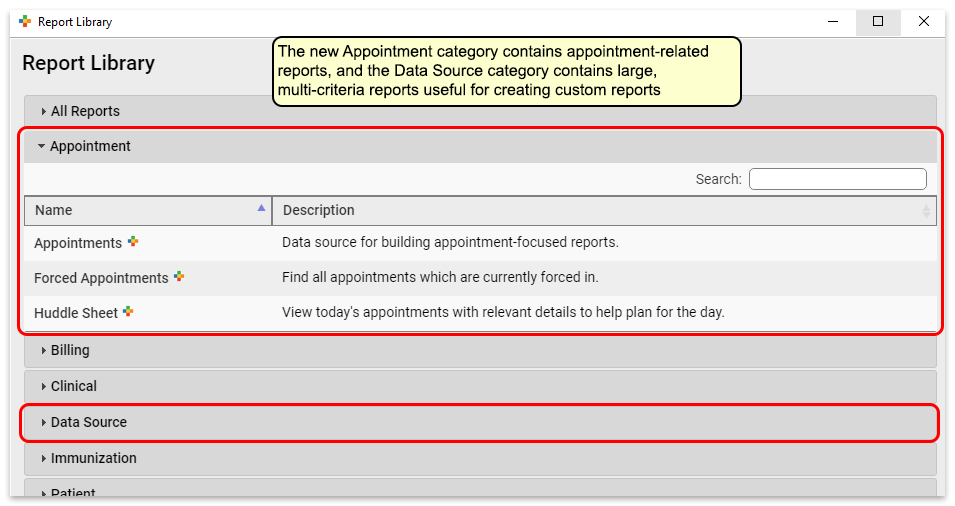
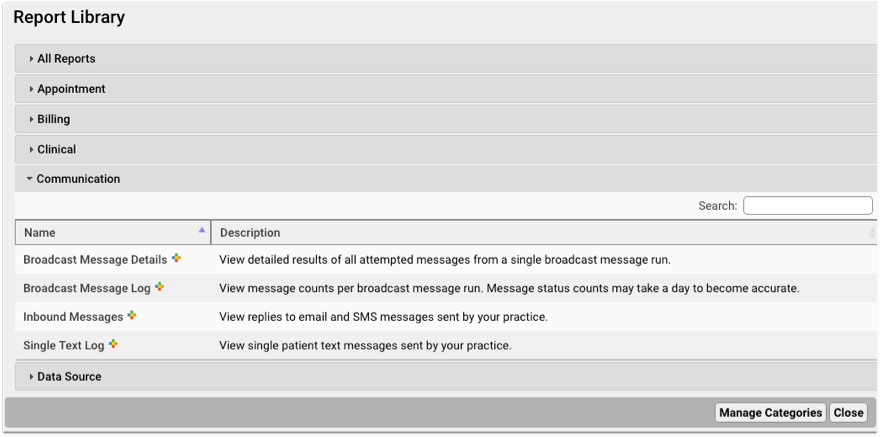
New Report Categories
The Report Library in PCC EHR includes two new report categories. The “Data Source” category includes all “parent” reports. The “Appointment” category contains reports related to scheduling.
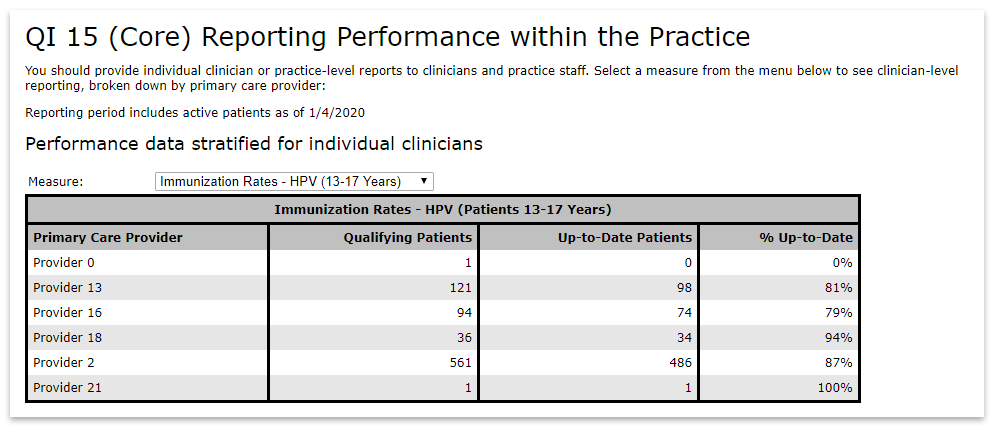
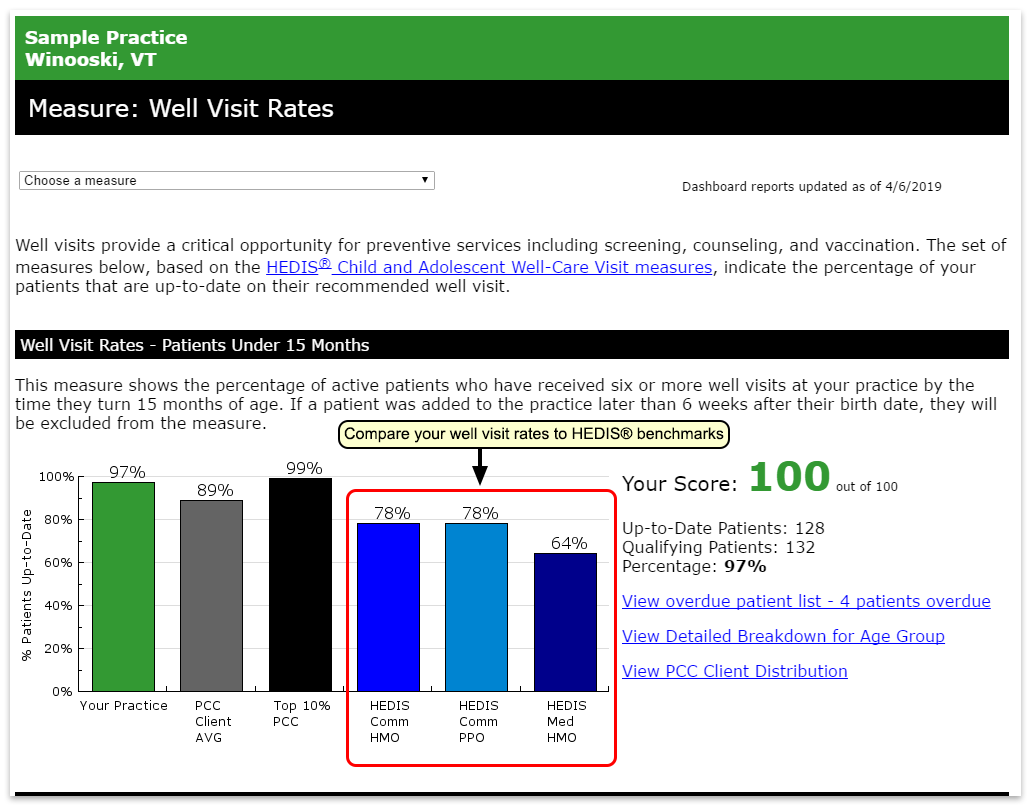
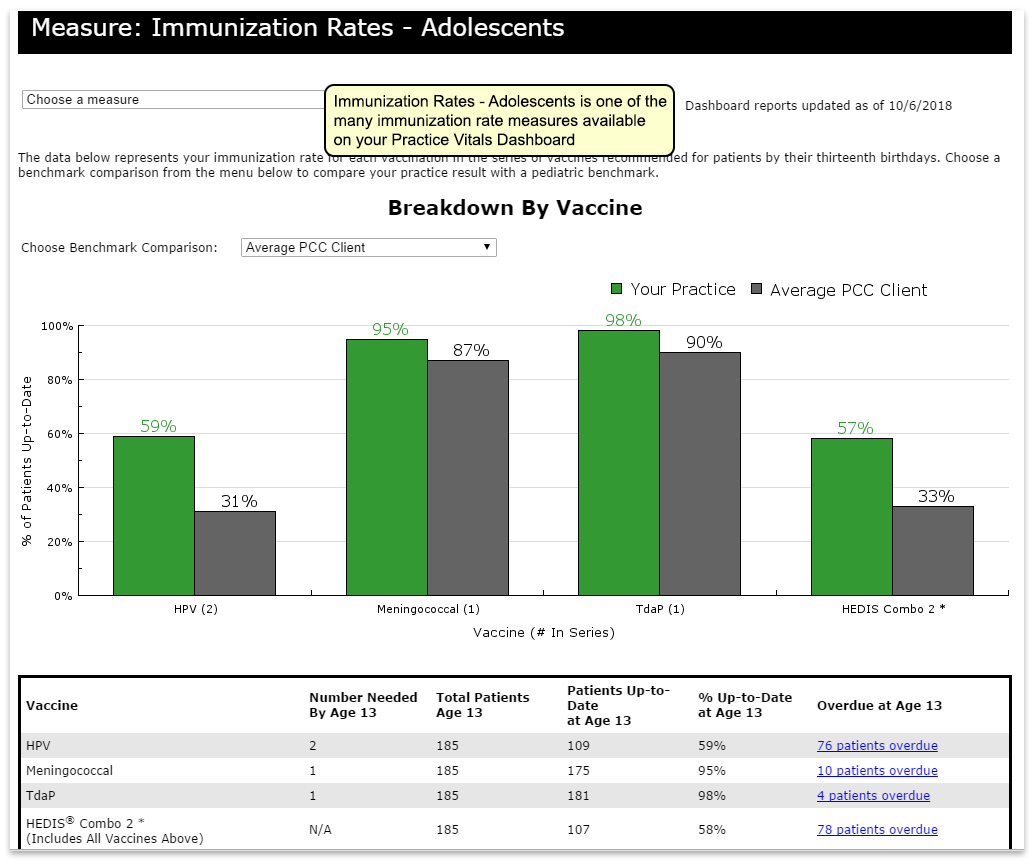
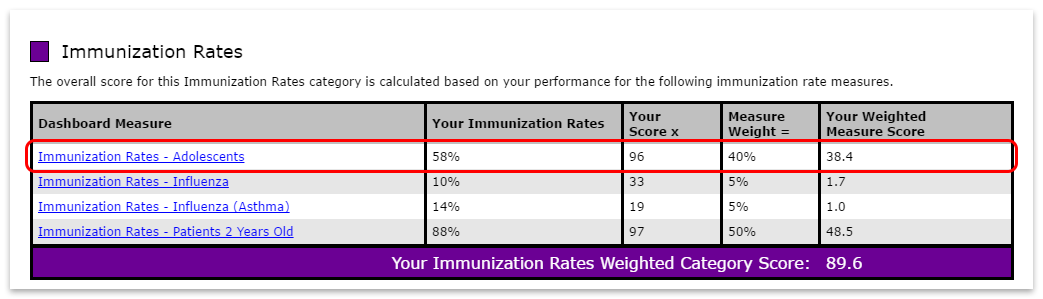
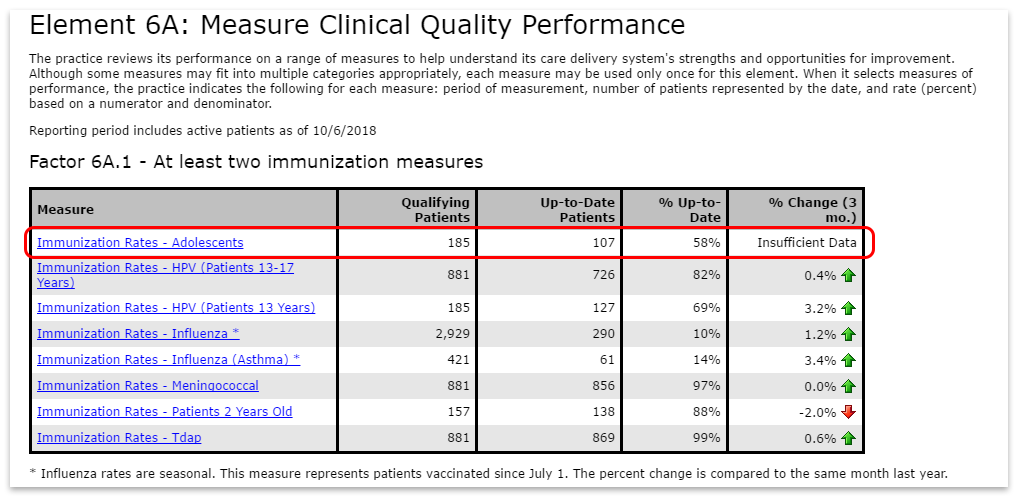
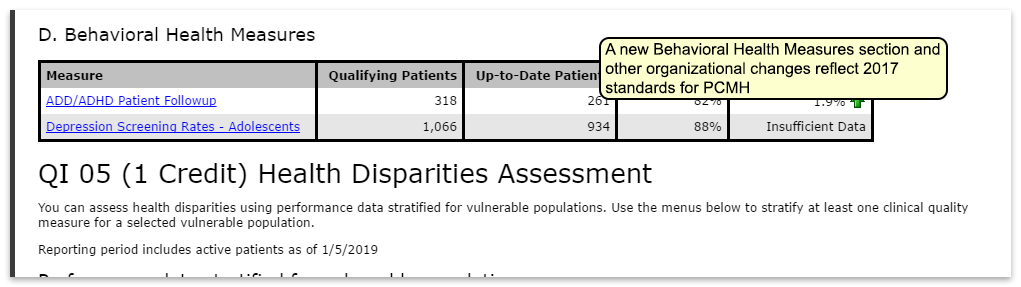
Update to Developmental Screening Rates – Adolescents Dashboard Measure
PCC has updated this measure in order to better reflect HEDIS requirements.
- The measure name has been changed to “Depression Screening Rate – Adolescents”.
- The age range, which used to be 11-21, has been changed to 12-21.

PCMH Dashboard Updates
The PCMH Dashboard has been updated to reference the NCQA 2017 PCMH standards and guidelines. All sections and descriptions have been renamed to match the 2017 standards.
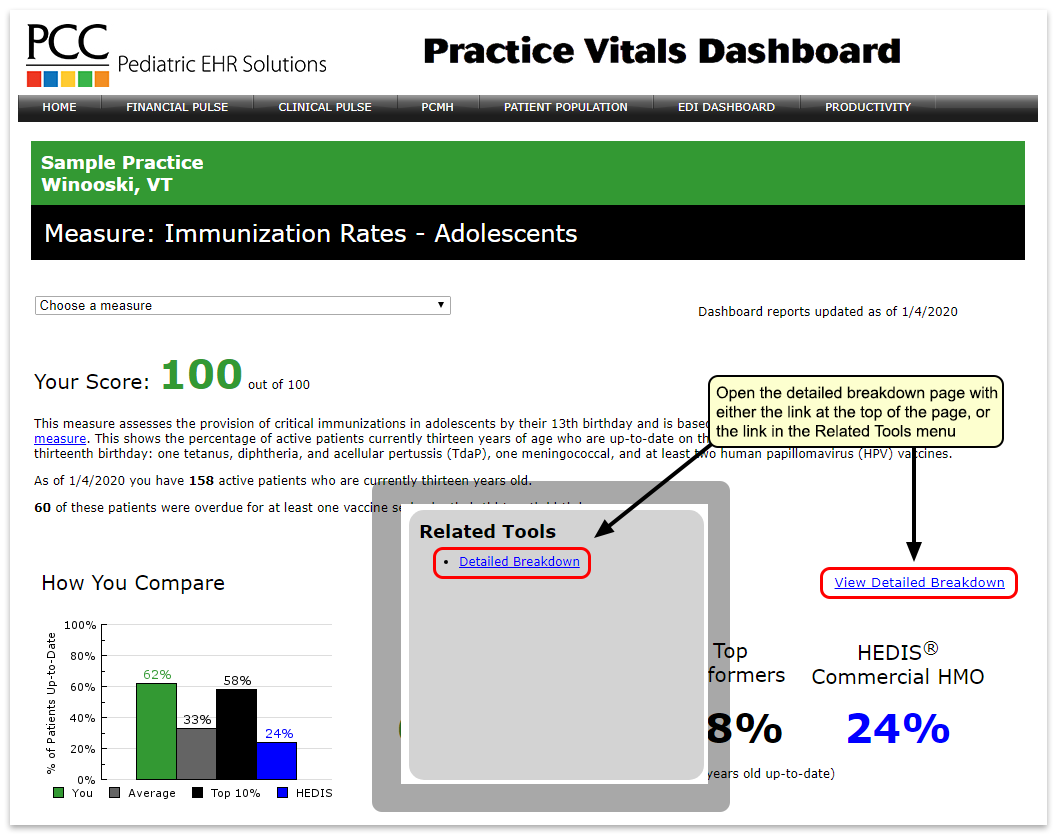
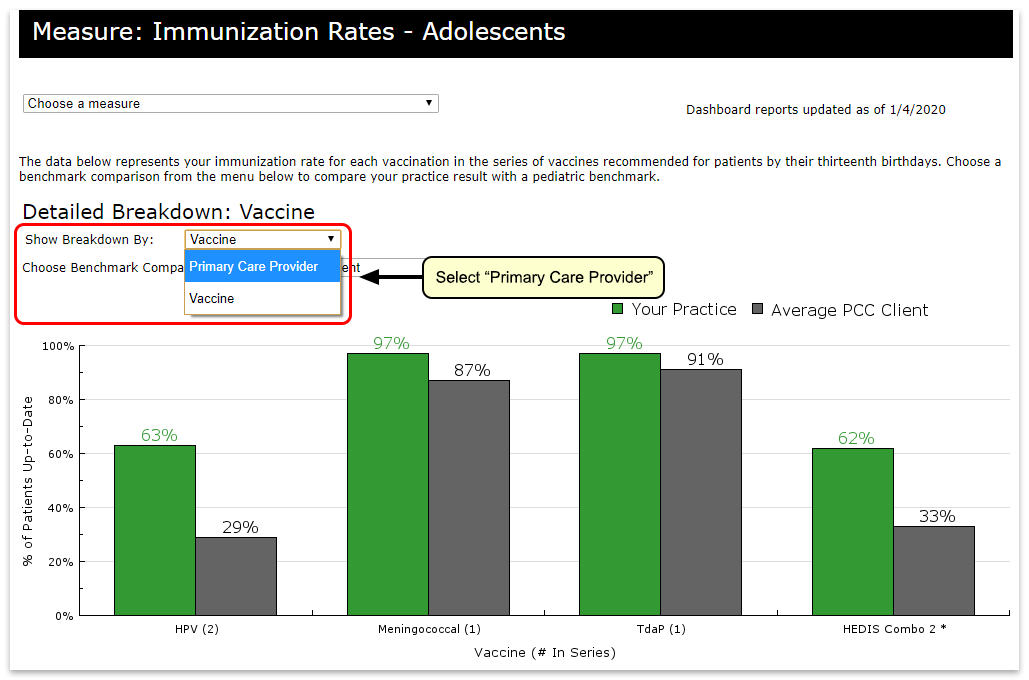
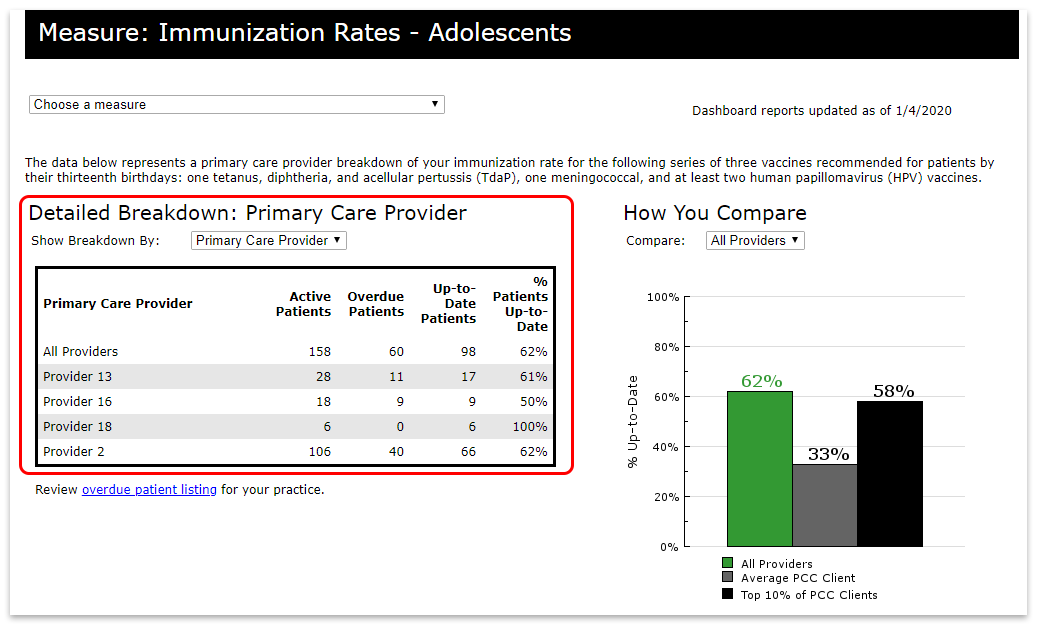
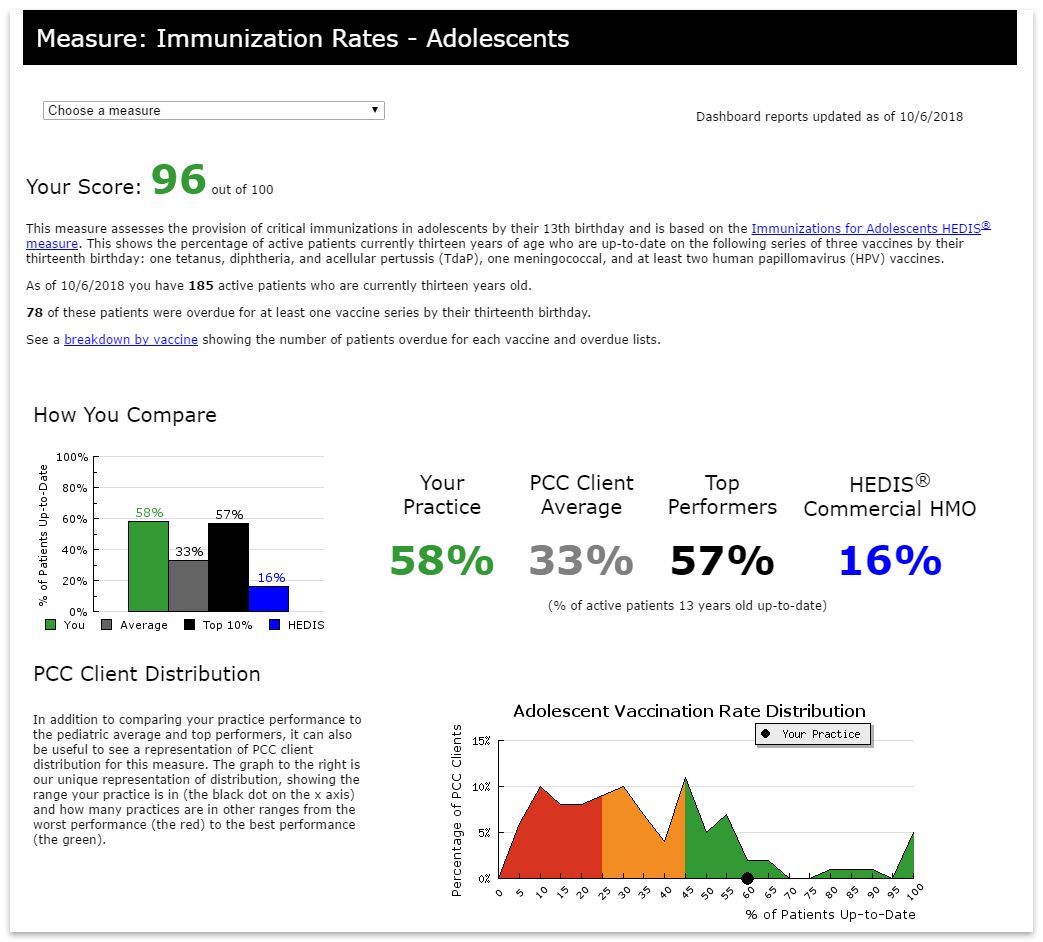
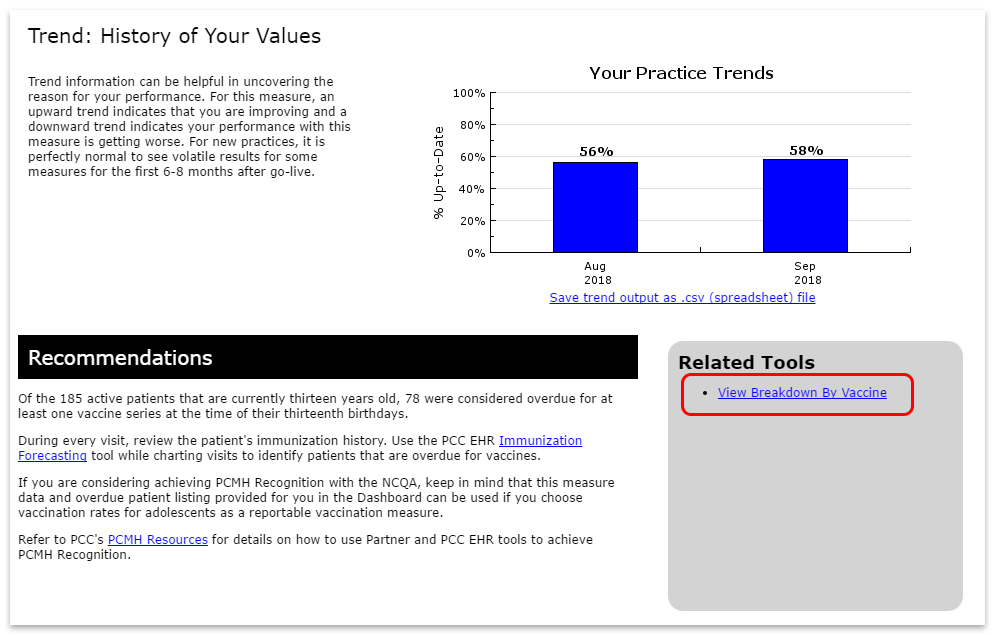
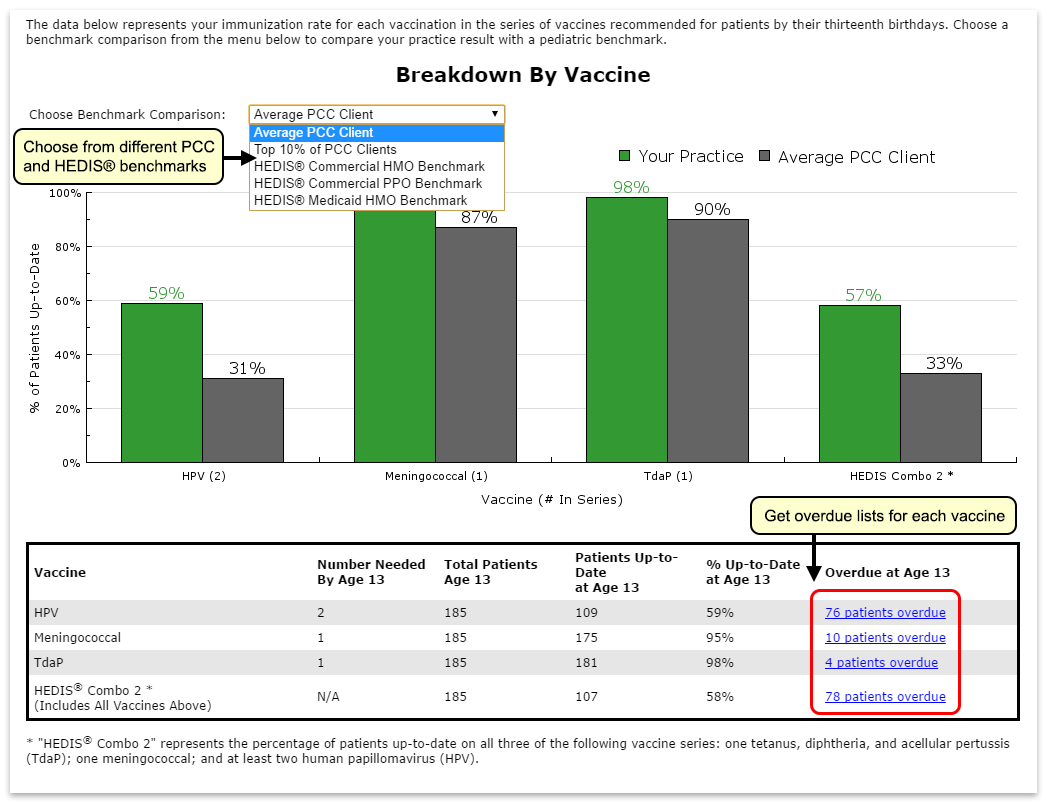
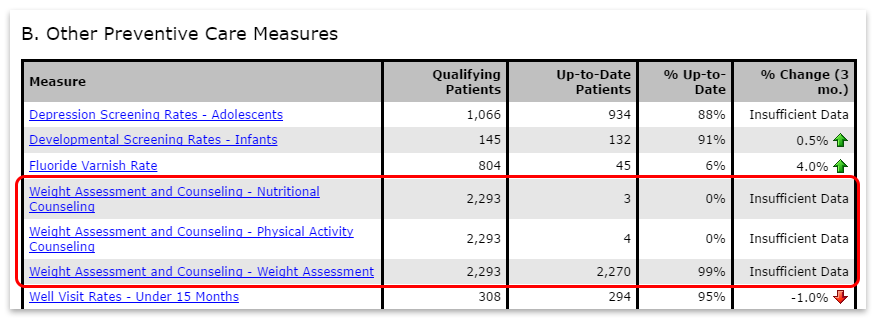
New Dashboard Measures for Weight Assessment and Counseling for Nutrition and Physical Activity
PCC 8.7 introduces three new Dashboard measures:
- Weight Assessment and Counseling – Nutritional Counseling
- Weight Assessment and Counseling – Physical Activity Counseling
- Weight Assessment and Counseling – Weight Assessment
These measures are based on the HEDIS Weight Assessment and Counseling Measure. All three of these are represented on the same page.
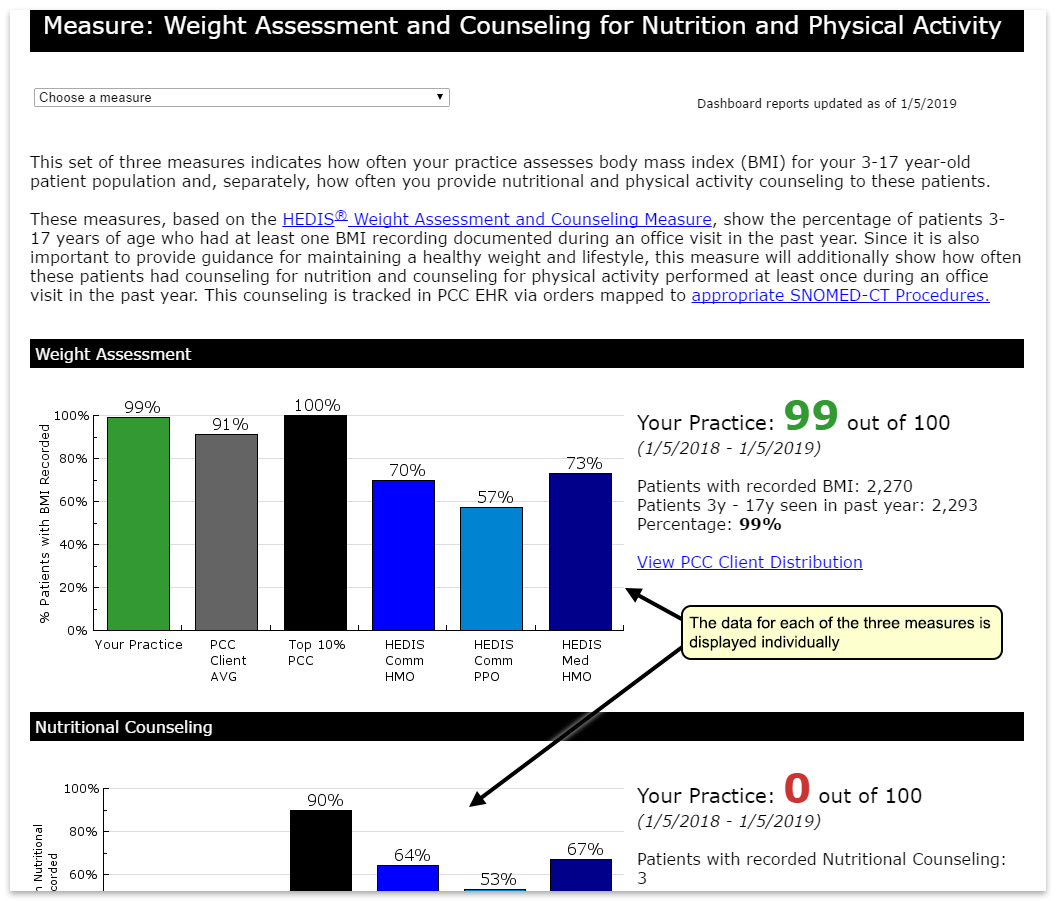
These measures also appear on the PCMH dashboard under “B – Other Preventive Care Measures”.
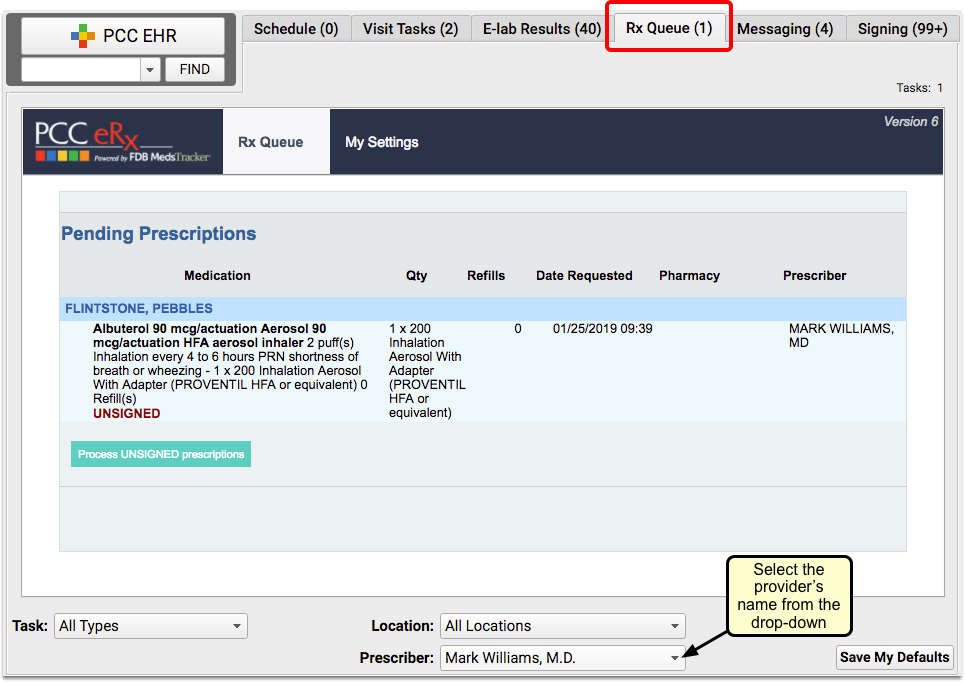
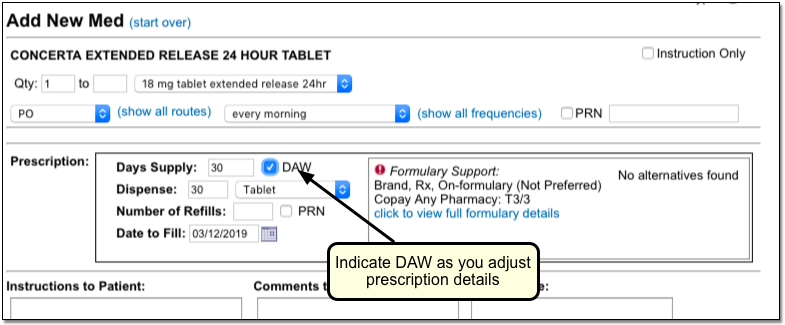
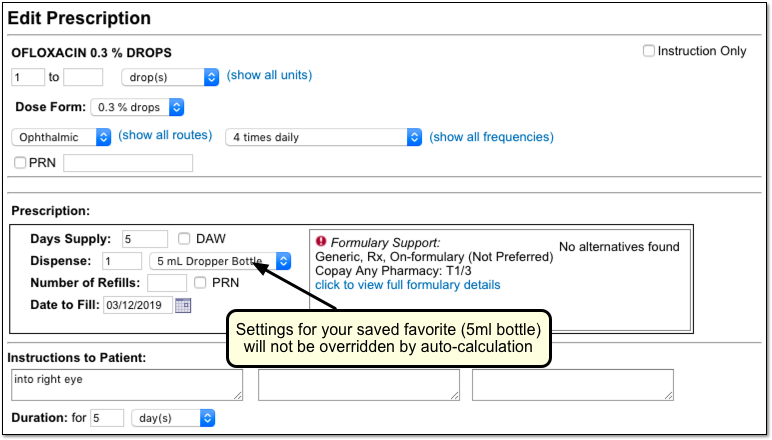
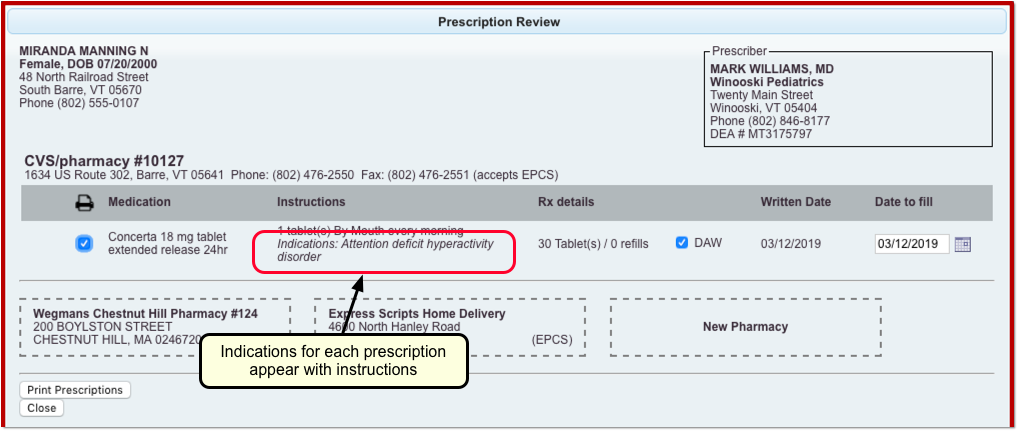
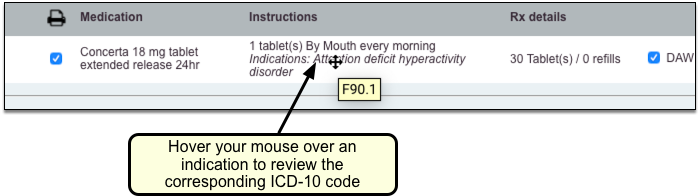
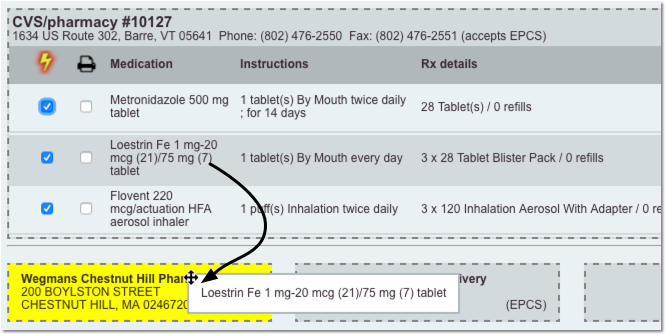
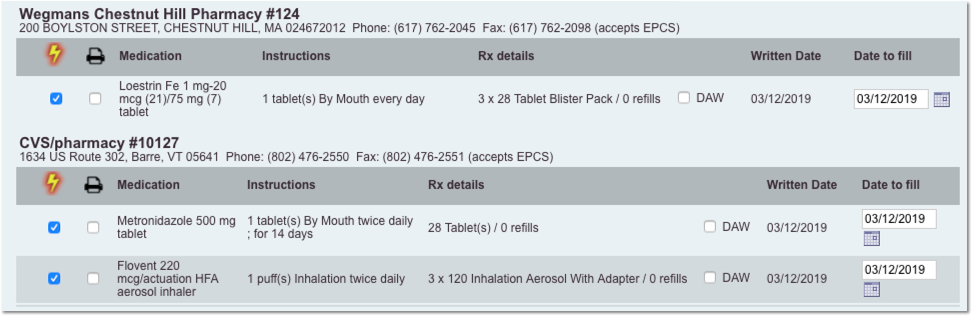
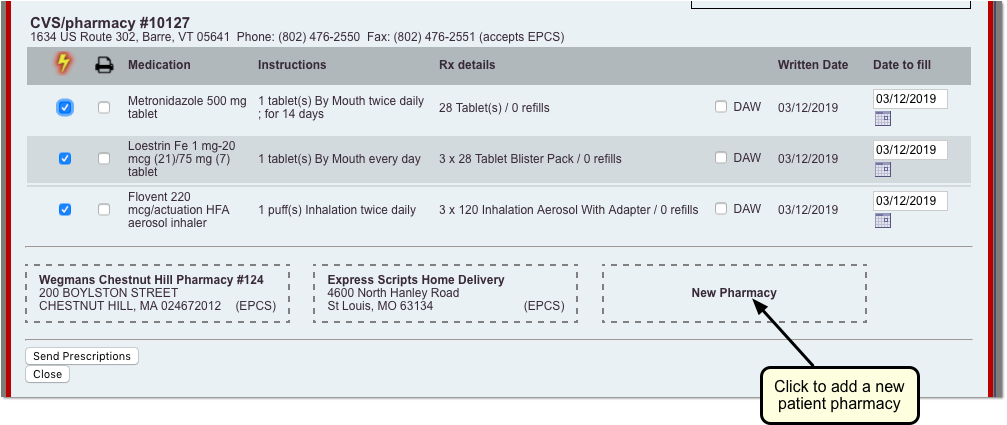
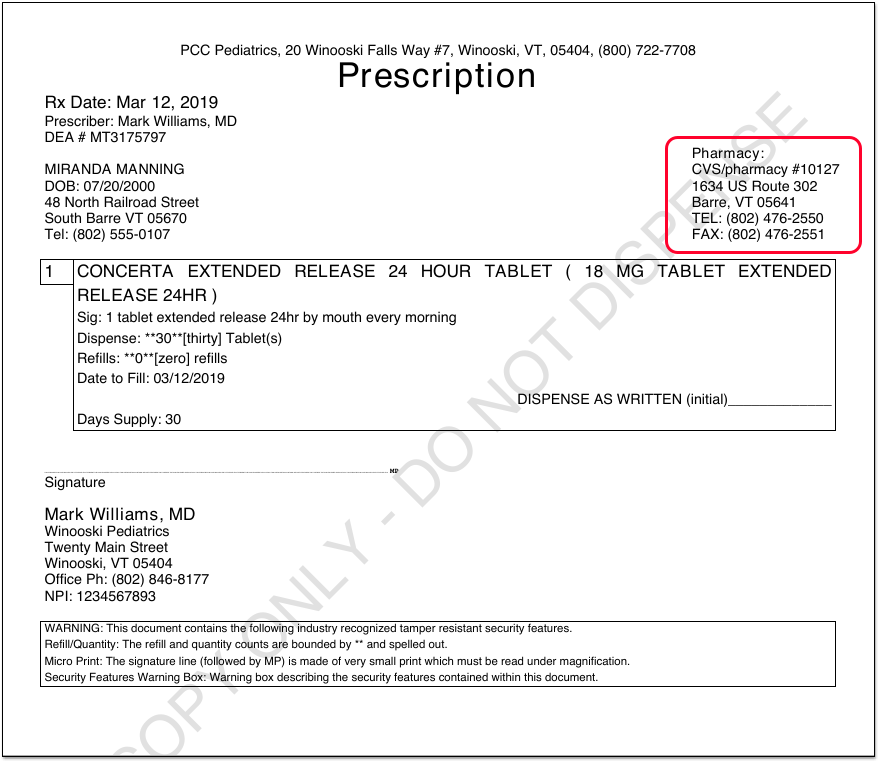
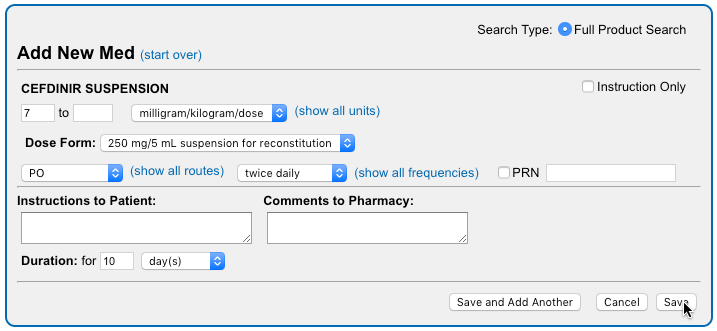
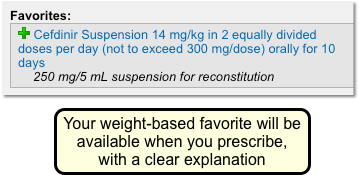
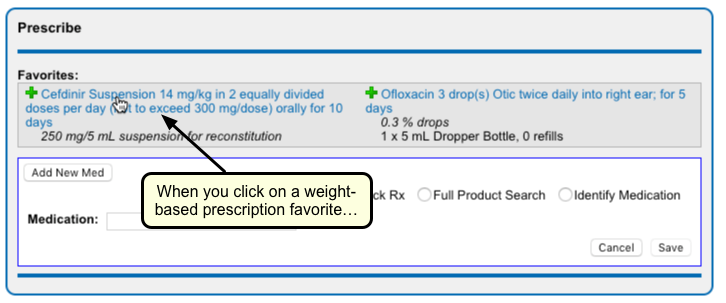
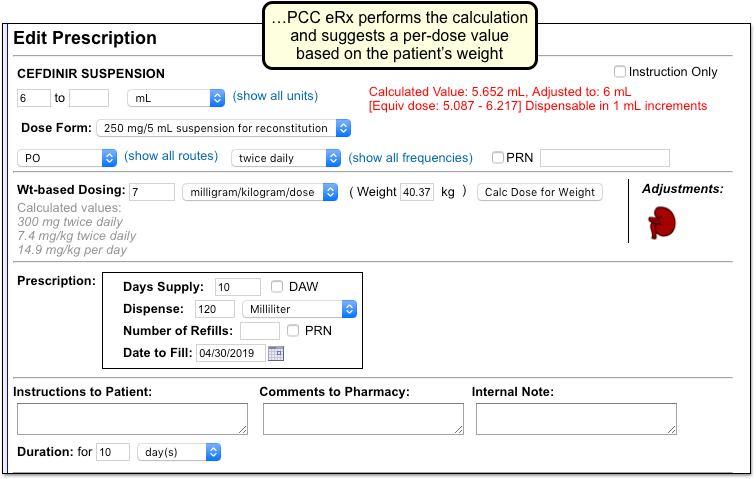
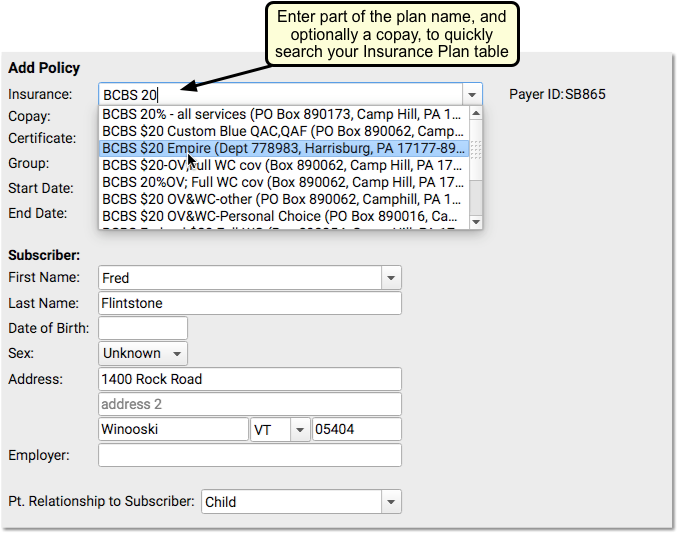
Optionally Include Comments to Pharmacy on Printed Prescriptions
By default, the comments to the pharmacy for a prescription are only sent electronically. They do not appear on printed prescriptions, as this field is designed to be a communication between the prescriber and the pharmacist.
During the PCC 8.7 release cycle, PCC added the ability to include Comments to Pharmacy on your printed prescriptions. Practices use Comments to Pharmacy for coupon codes, flavor requests for liquids, “dispense in 2 bottles”, and more.
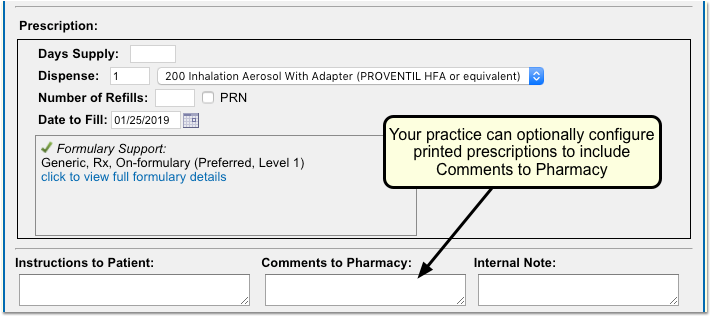
If you would like to change your practice’s configuration so that comments to the pharmacy appear on printed prescriptions, contact your Client Advocate.
Family Will See These Comments: If your practice decides to make the change, all Comments to Pharmacy will appear on printed prescriptions, where patients and families may view the comments. Inform your prescribers so that they do not use that field for comments intended only for the pharmacy staff.
4-Quad and 2-Half Printing: Comments to Pharmacy are not currently available on 4-quad or 2-half prescription printing. For information about your prescription printing configuration, contact your Client Advocate.
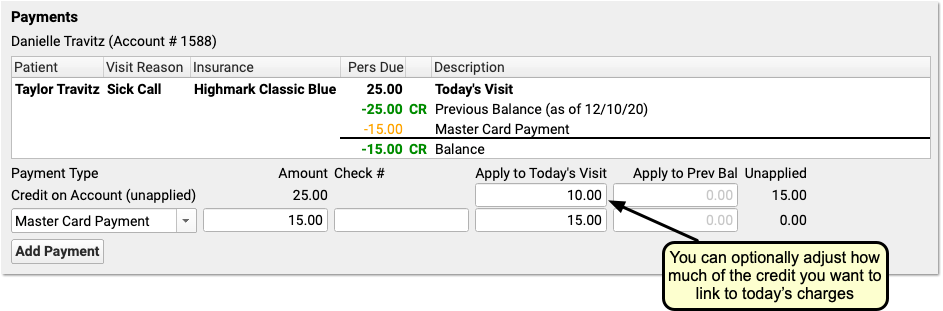
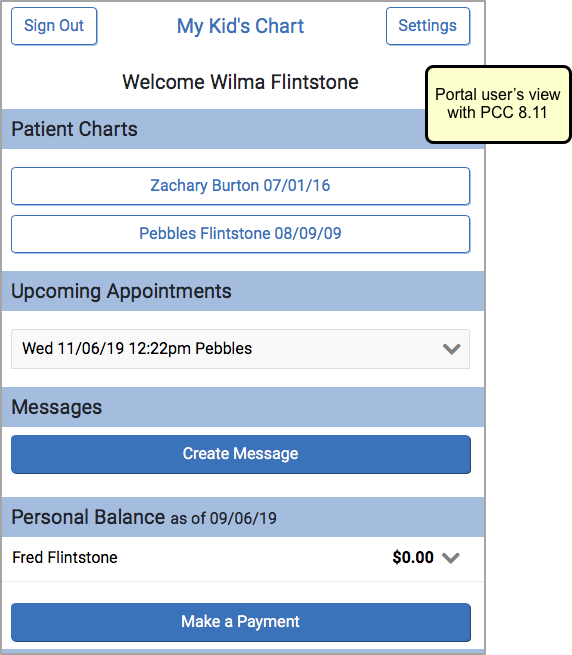
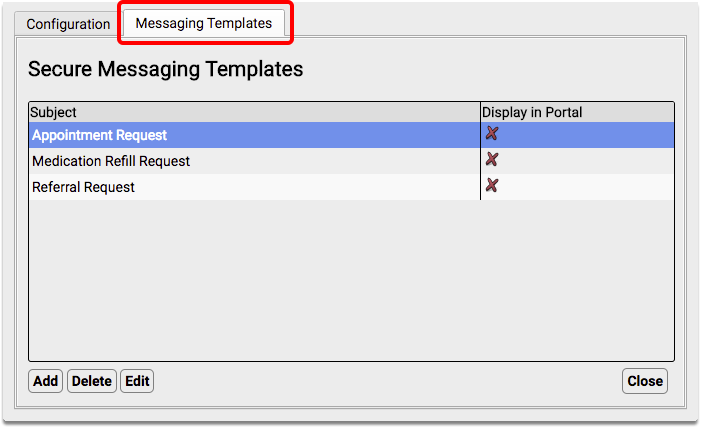
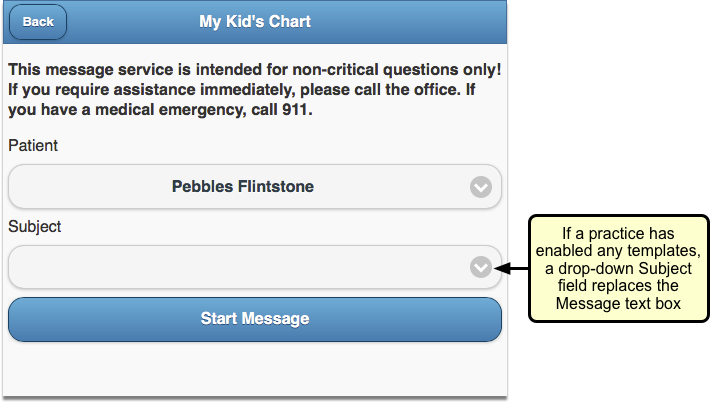
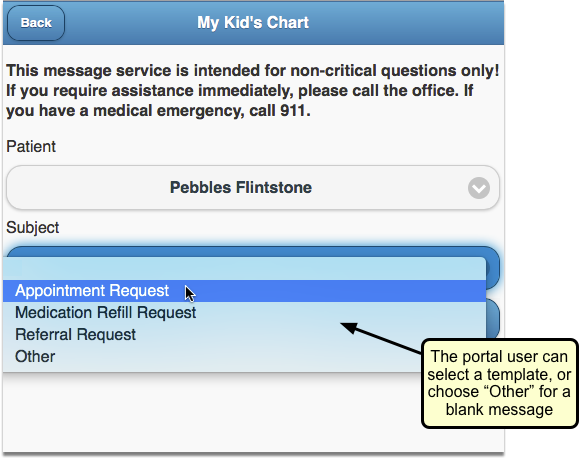
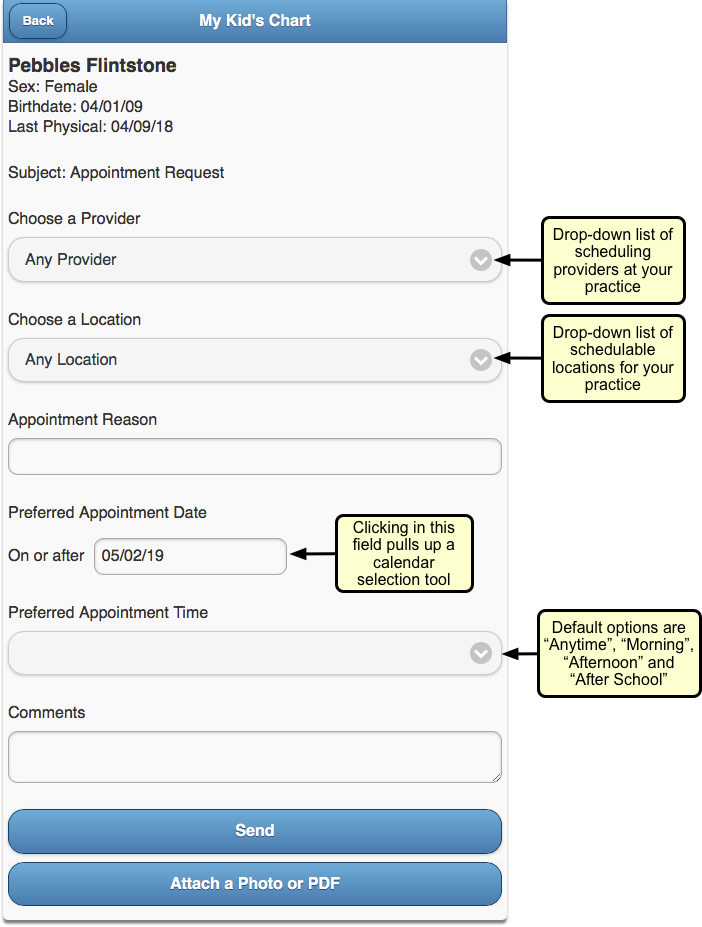
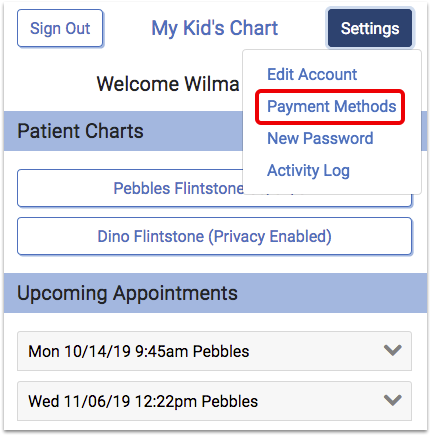
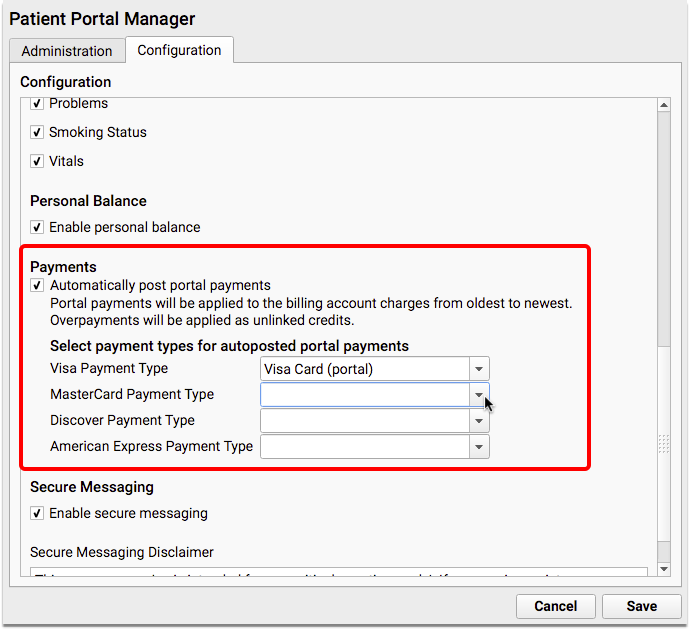
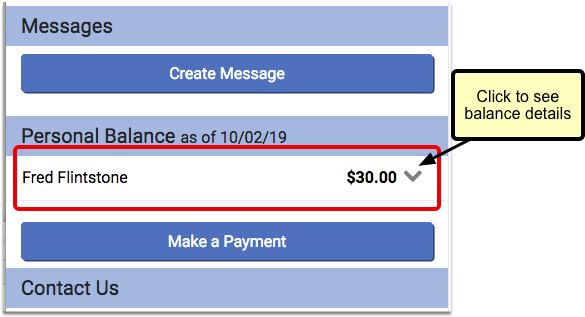
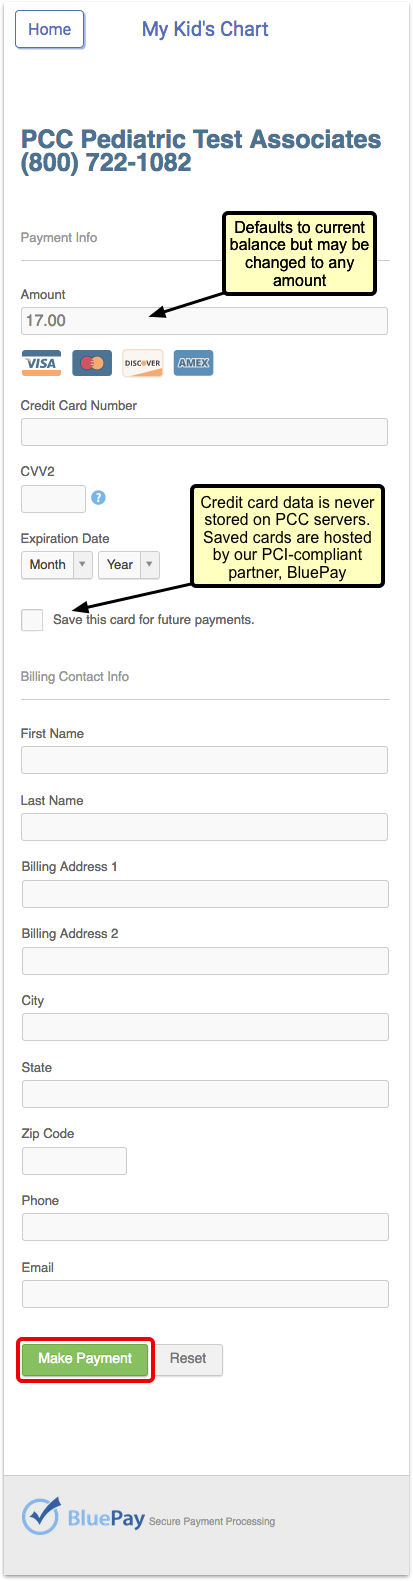
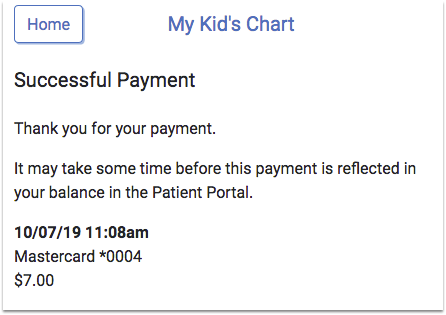
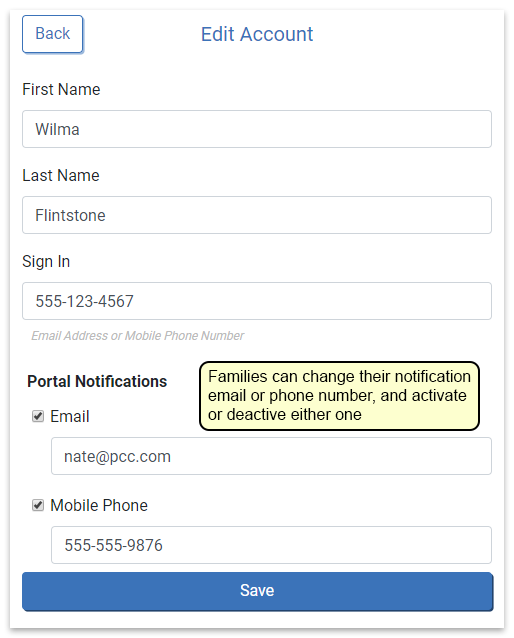
Families Can Store Multiple Credit Cards in the Patient Portal
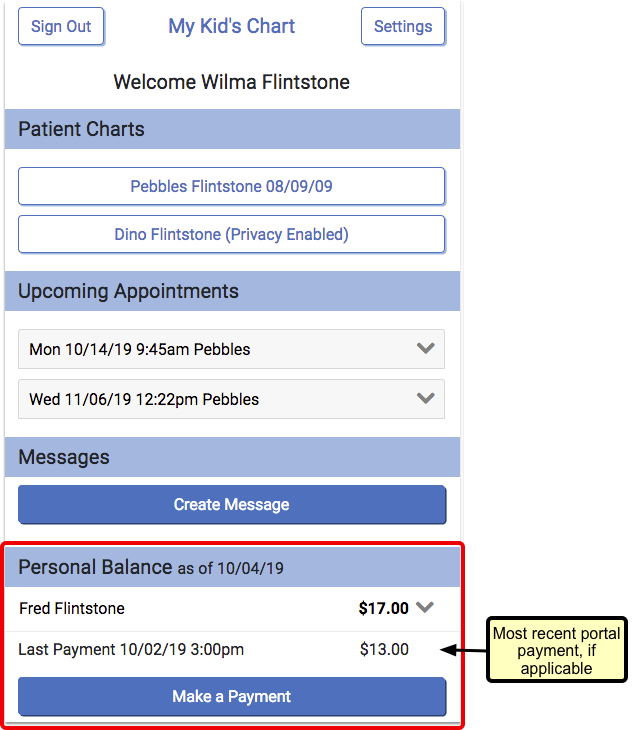
In PCC 8.7, families are able to save multiple credit cards and select which card to use when making a payment through the patient portal (My Kid’s Chart).
Portal users with more than one credit card stored will choose one card to be the “preferred” card. When a portal user makes a payment, their preferred card will be selected by default.
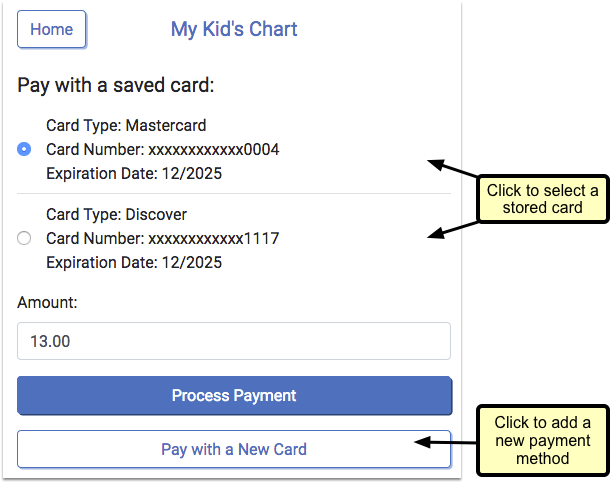
The user can select a different card for the current payment by clicking the drop-down and choosing another stored card.
Add A New Credit Card
If the user clicks “Pay with a New Card”, they can add a new card that will both be used for the current payment and stored for future use.
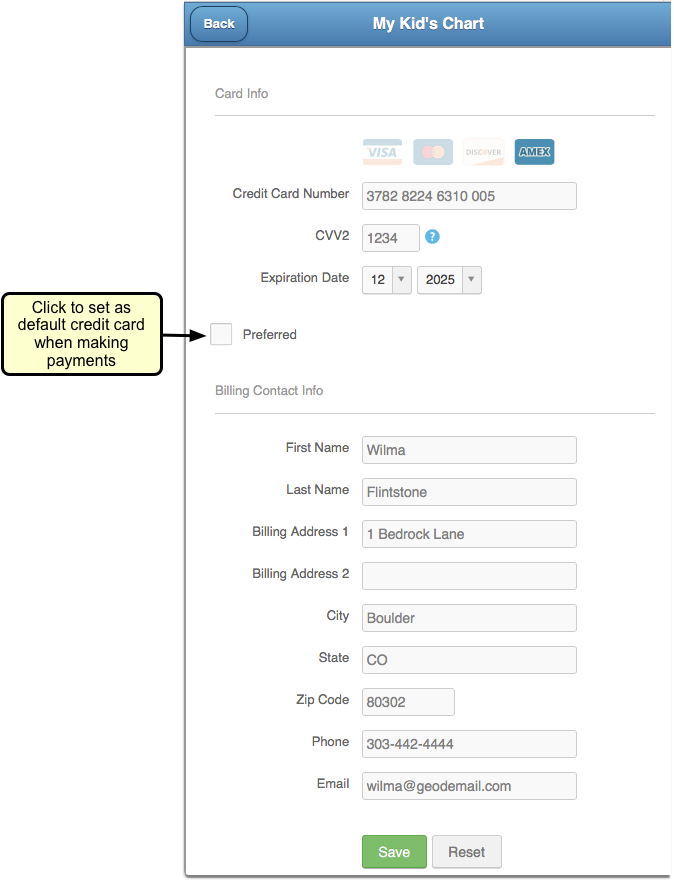
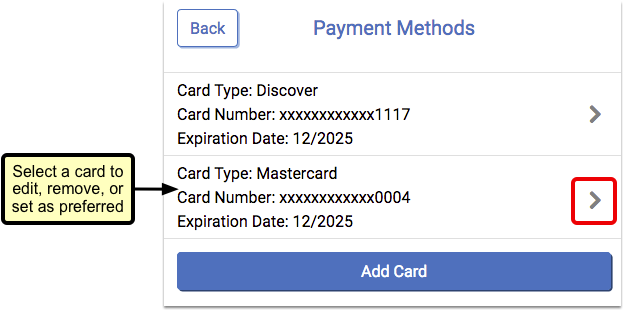
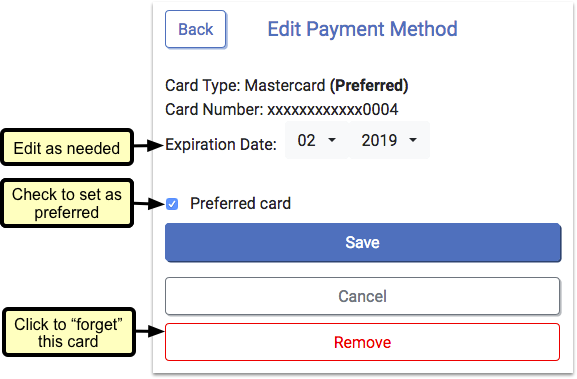
Manage Stored Cards
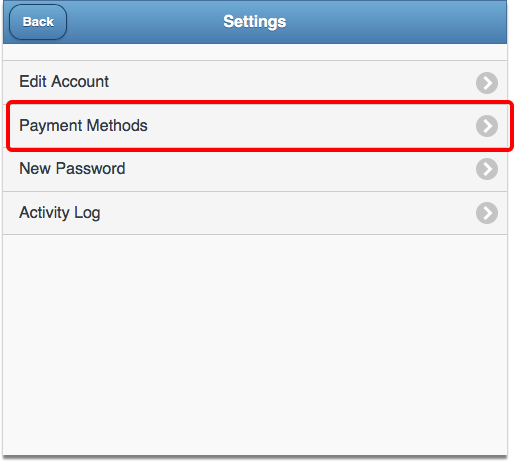
The patient portal now includes a “Payment Methods” setting, where portal users can add a new card or edit their stored cards outside of the payment screen.
Portals users can select a card to make edits. They can update the expiration date or change their preferred card. If a user no longer wants the card to be stored, they can remove the card.
Expired cards will appear in red.
Cleaner Secondary Claims
In PCC 8.7, when you generate a secondary claim it will only include the most recent CARC codes and CARC amounts. That means only the required information will be submitted on the secondary claim, and claim processing can proceed without error or intervention.
Sometimes secondary claim submissions could include payment amount and adjustment information that exceeded the actual value of a visit’s charges. PCC’s claim process stopped those claims as invalid. You might have seen an error in your Bad Claims Report when you submitted claims: “The total posted CARC adjustment(s) and insurance payment cannot exceed the charge amount.”
PCC 8.7 fixes this problem. The claim processing software will collect the most recent payment and adjustment information for the claim and use it to submit a clean secondary claim to the patient’s secondary policy.
More Details For Insurance Billers: Here’s a more detailed explanation of what used to occur, and how PCC 8.7 corrects the problem: A patient is covered by two policies, and there were multiple claims sent to the primary policy due to a provider out-of-network or some other error. Once the problem was fixed, a new primary claim went out. Then your practice received a partial payment and an adjustment, and the charge dropped to the secondary insurance. This process all worked well. However, as PCC processed the secondary claim, it saw a CARC code and CARC amount that covered the full amount of the charge, along with a partial payment and adjustment with CARC information. At this point, the claim processing software saw adjustment and payment information that exceeded the total amount of the original charge, and that led to the secondary claim not being sent. You’d see the claim in your Bad Claims Report, and you might not have known how to handle the problem and get the claim sent.
New and Updated Interfaces Available in PCC 8.7
With each release, PCC’s Interoperability team expands and updates PCC’s direct connections, partnerships, and integrations with insurance payers, immunization registries, and more. Here are the clinical and financial interoperability updates for PCC 8.7:
-
New and Updated Immunization Interfaces: As part of the PCC 8.7 release, PCC updated our immunization registry interfaces for Wisconsin (WyIR), Oregon (ORALERT), and Pennsylvania (PASIIS).
-
Updated Clinical Interfaces in PCC EHR: PCC updated clinical data interfaces with MedLabs Diagnostics.
-
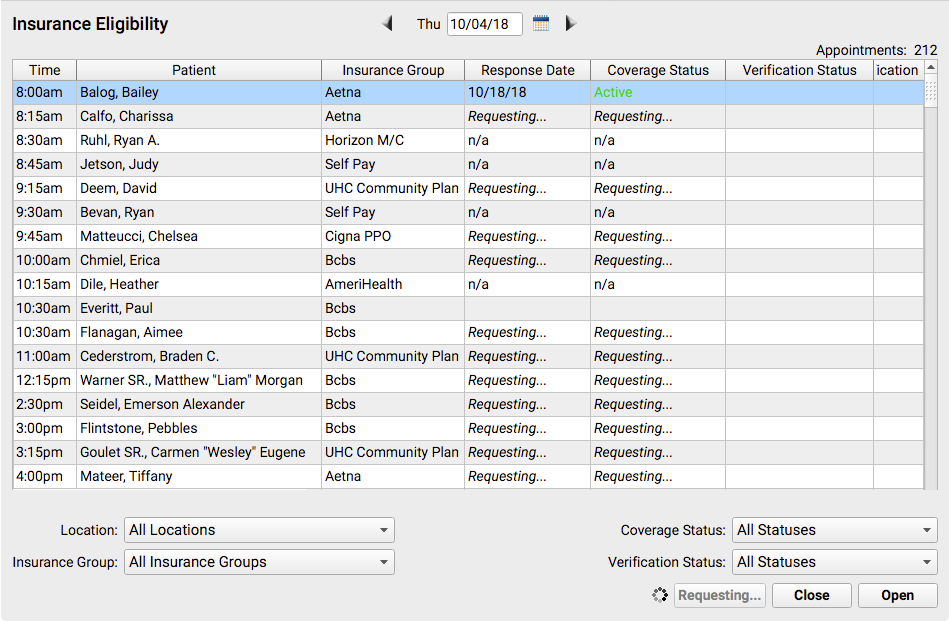
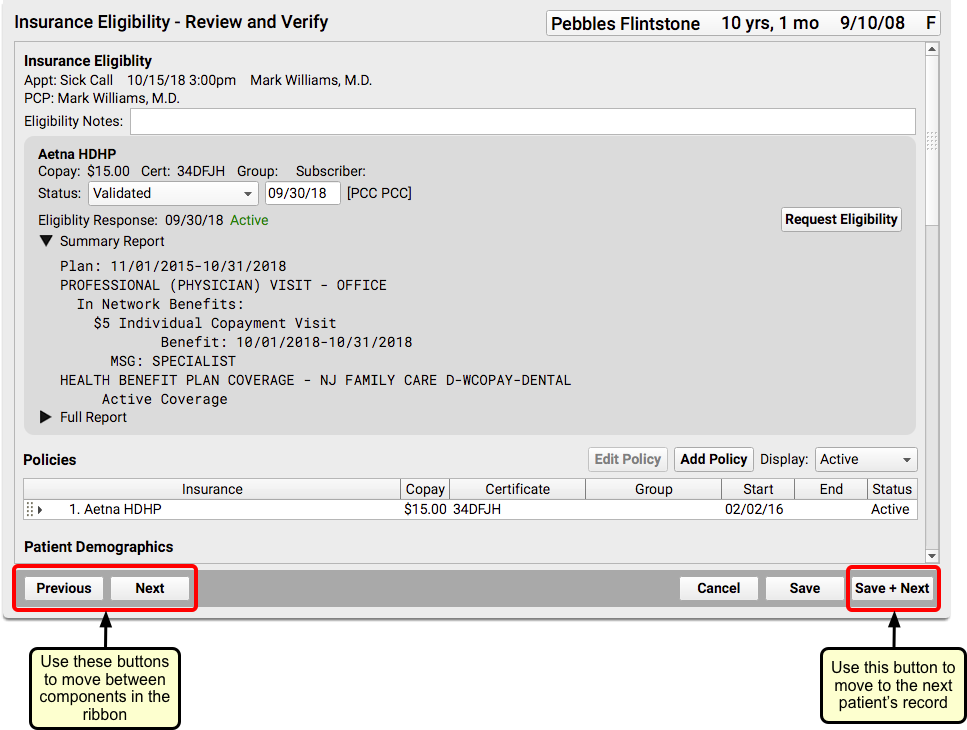
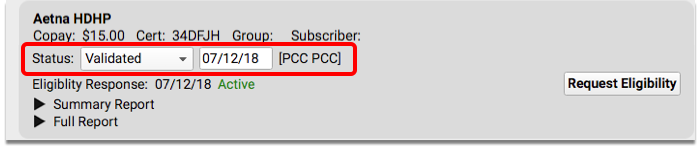
New Insurance Eligibility and Financial Interfaces: PCC improved claim submission for Driscoll Health and eligibility services for Amerihealth Caritas, Aetna Better Health Louisiana, Washington Medicaid, and BCBS/Horizon of New Jersey. We also completed a transition of many eligibility connections from Anthem to Availity.
If your practice would like to take advantage of these connections, or you have another interface need, contact your PCC Client Advocate.
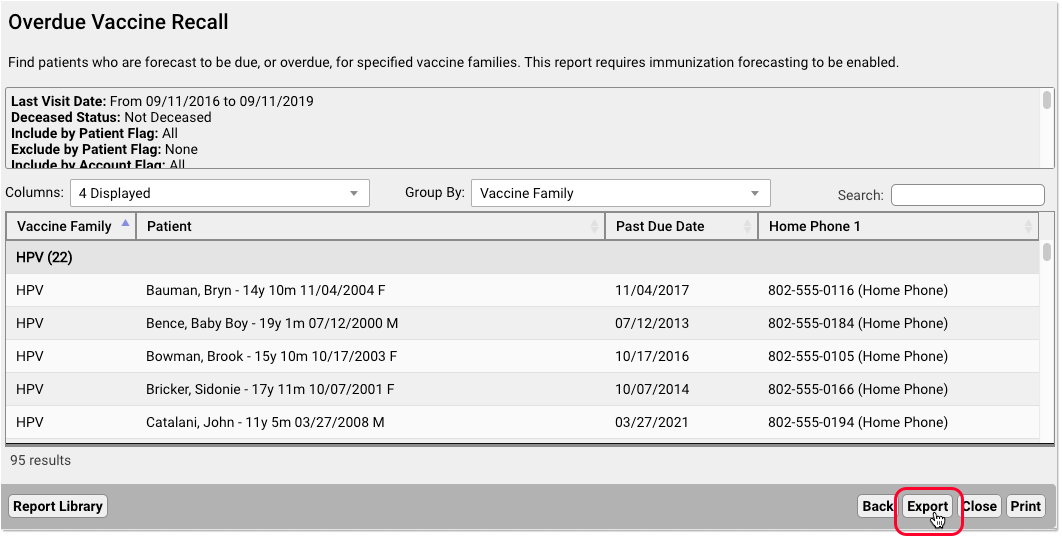
Immunization Forecasting is Up to Date
During the PCC 8.7 release cycle, PCC updated your immunization forecasting schedules to meet the latest CDC ACIP schedules and to correct unusual schedule scenarios or errors in forecasting.
PCC EHR automatically reviews each patient’s immunization record and provides a table showing any immunizations that were missed, are recommended soon, or that occurred outside of the CDC’s ACIP schedule.
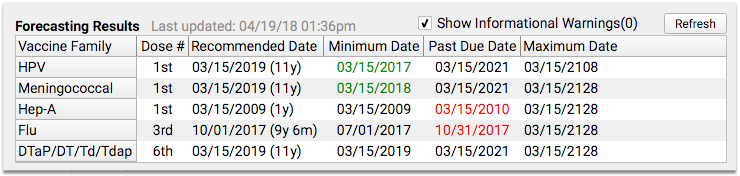
PCC uses immunization logic and calculation services provided by Immucast by STC. During the PCC 8.7 release cycle, STC applied their latest patch (5.18.8), updating and correcting immunization schedules and bringing your system’s Immunization Forecasting in line with the latest ACIP recommendations.
Here’s a summary of the most notable updates:
-
Better Handling of 4th Dose Grace Period: For children 7 years or older, the grace period was not always considered when evaluating DTaP dose 4, which could result in an inaccurate forecast for Tdap. This has been corrected.
-
Invalid Additional Dose Prevented Booster Forecast: If a child completed their primary series of DTaP before age 7, and then received an additional dose, that dose was preventing the age 11 Tdap forecast. Forecasting will now consider the additional dose as invalid so the age 11 shot will be appropriately recommended.
PCC has tested all adjustments to the immunization schedules. Please get in touch if you’d like to learn more about the updates, or if you observe a forecasting result or warning that doesn’t match your expectation.
To learn more, read the guide to PCC’s Immunization Forecasting features.
Other Feature Improvements and Bug Fixes in PCC 8.7
In addition to the features described above, PCC 8.7 includes these smaller improvements and squashed bugs.
-
Improved Scheduled Provider Appointment Reporting: The PCC 8.7 update improves your scheduling database capabilities by migrating to a more modern database. You may notice different totals on scheduling reports. For example, if the provider who saw the patient was changed in PCC EHR, scheduling reports in the Practice Management (Partner) system will now properly reflect that change. This change will only affect appointment records and is not related to the provider billed for a visit.
-
Improved Reporting of Pre-PCC Appointment Data: When your practice first came online with PCC EHR, we may have converted your visit data from your previous EHR or Practice Management system, if any data was available. We did that by linking up appointment records to chart records, if available. Or, if we had a record of an appointment, we added that appointment as an “Historical EHR Visit”, for example, to make sure the patient’s past records could appear in the Visit History for the patient. You’ll now see these visit reasons in Partner-based reports, like SRS, and you can now report on appointments from that data migration. You can filter out those visit reasons if you do not wish to include that data.
-
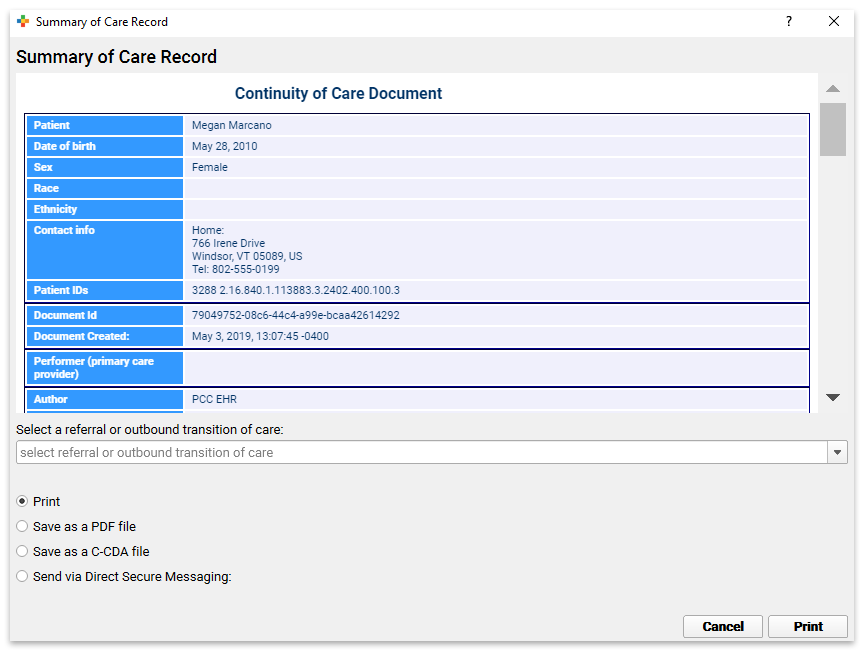
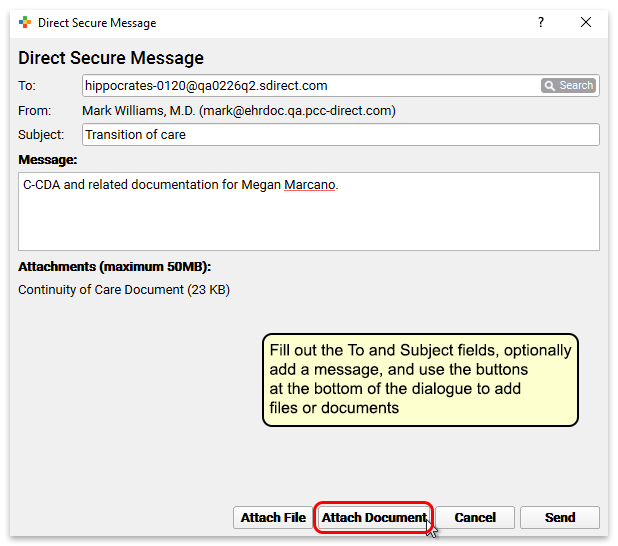
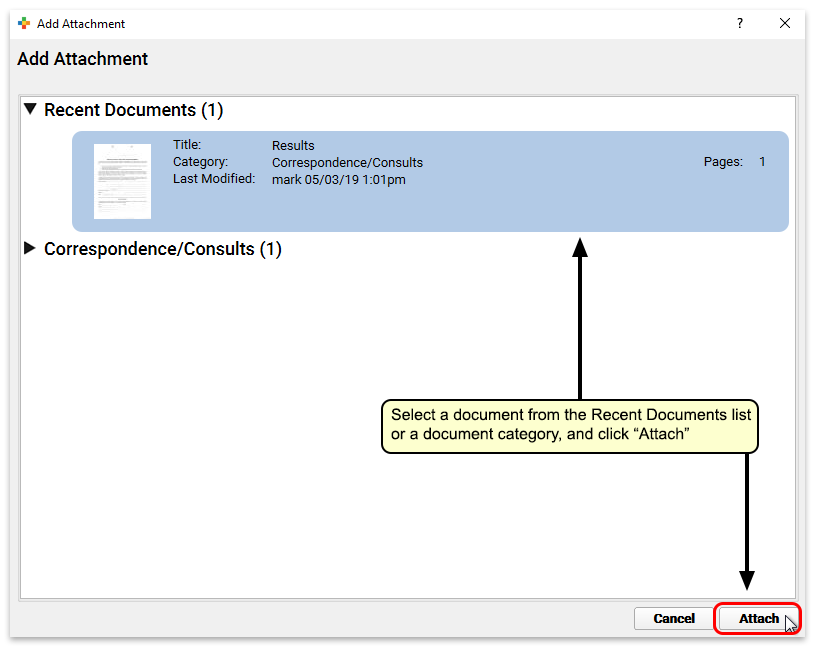
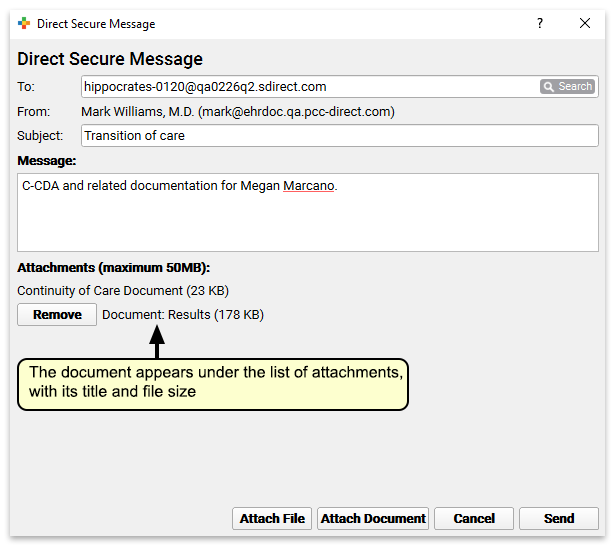
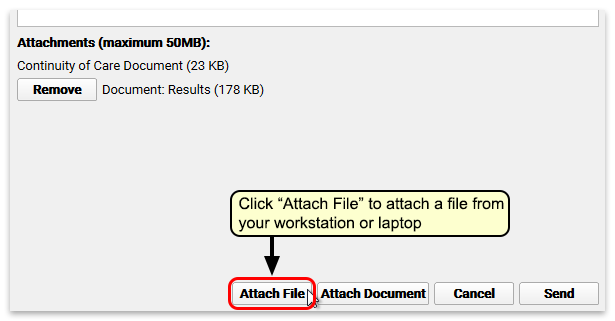
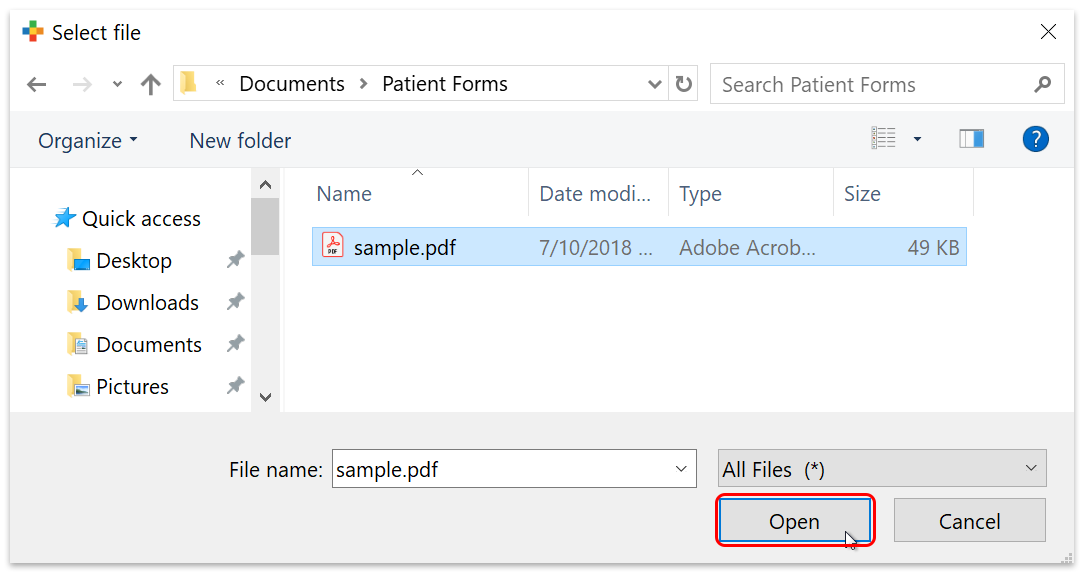
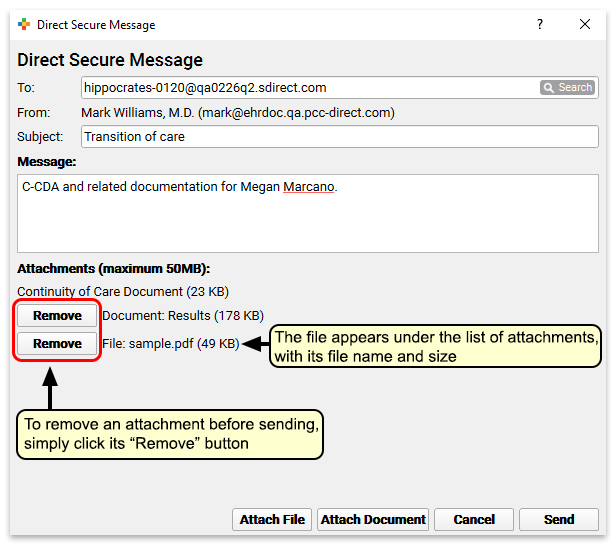
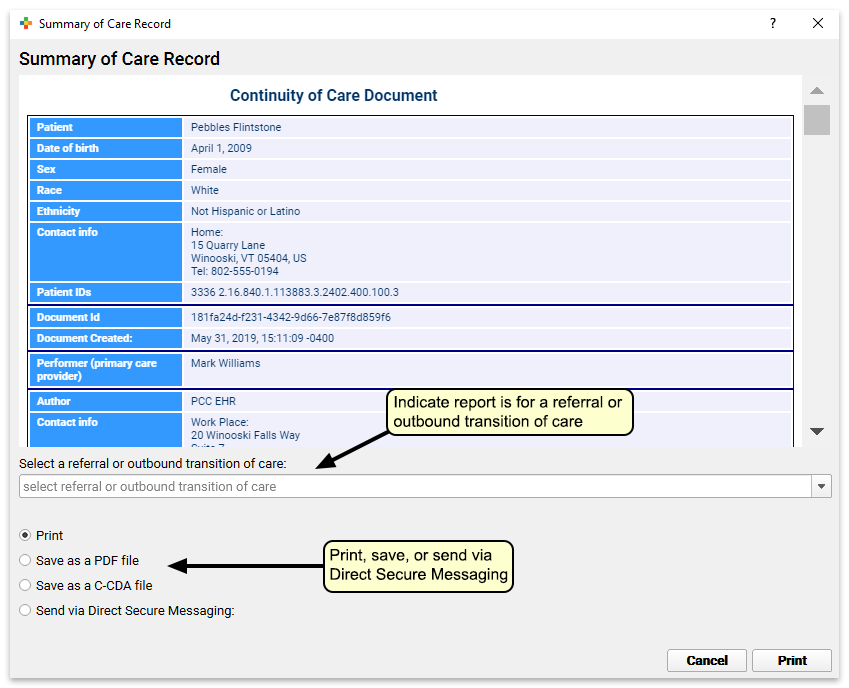
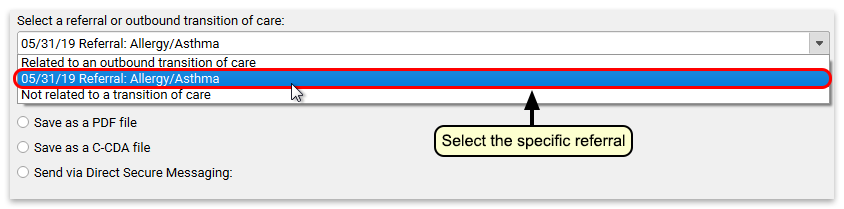
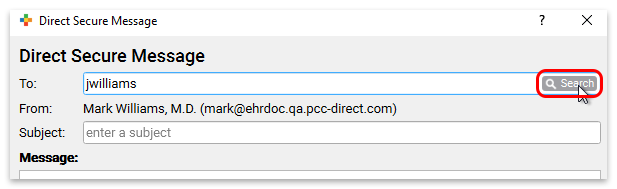
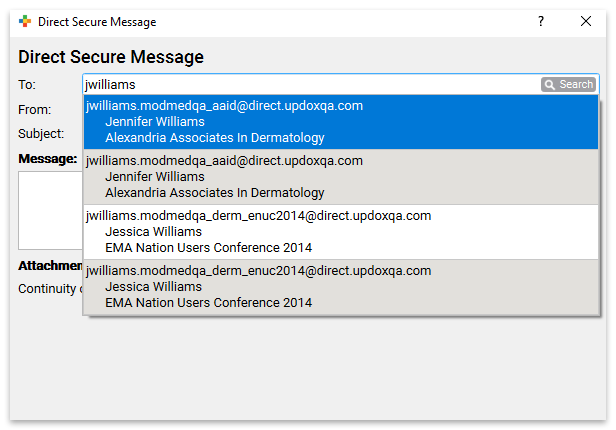
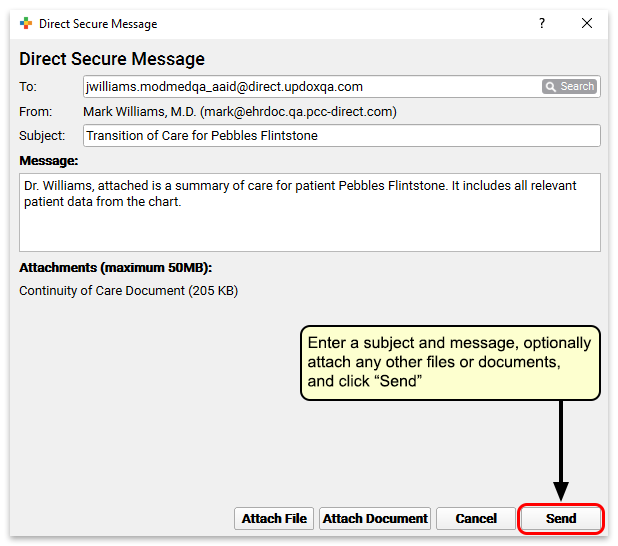
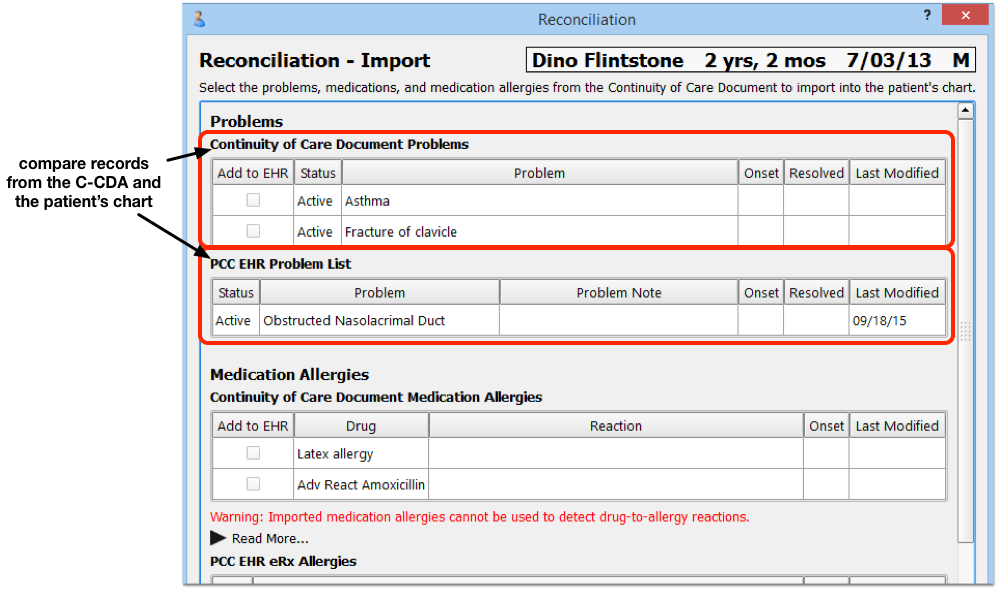
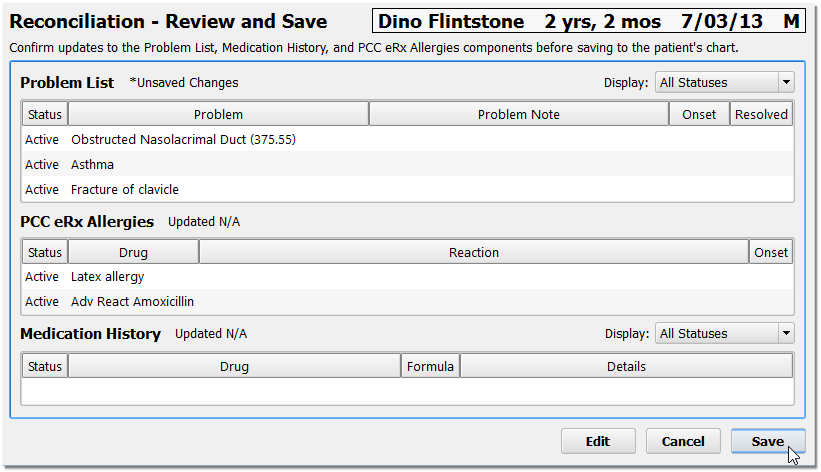
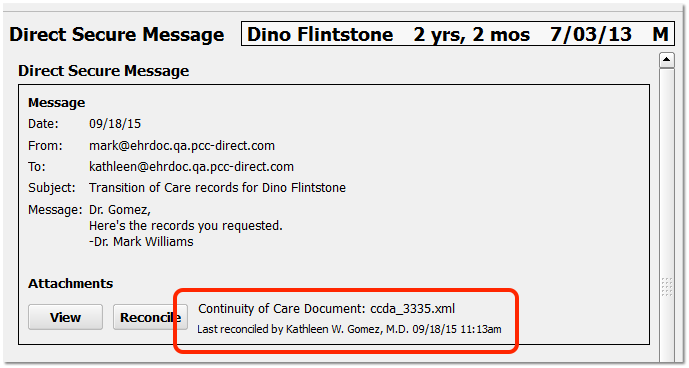
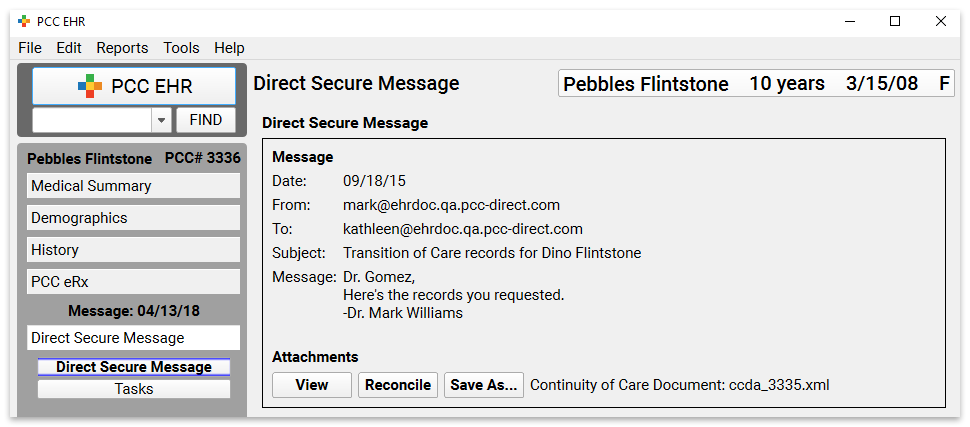
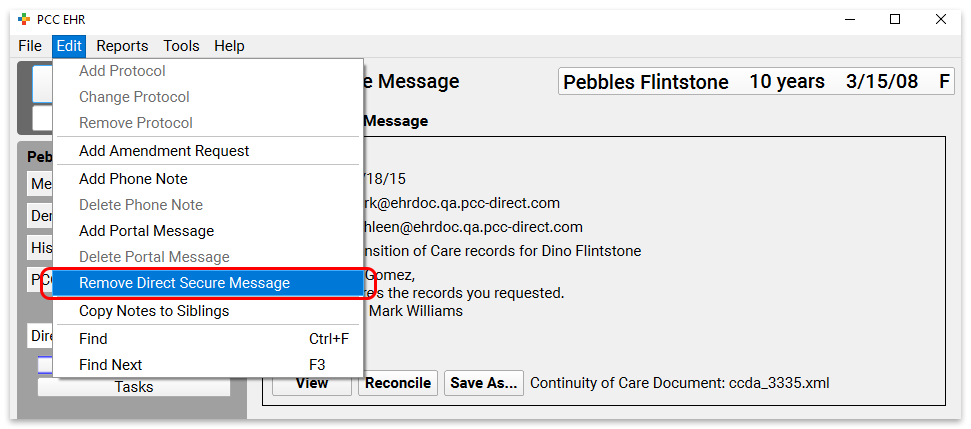
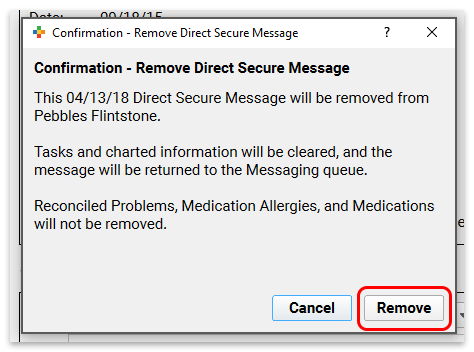
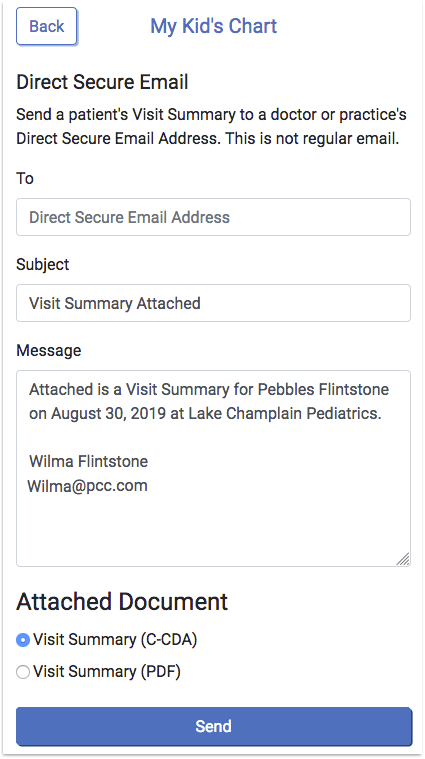
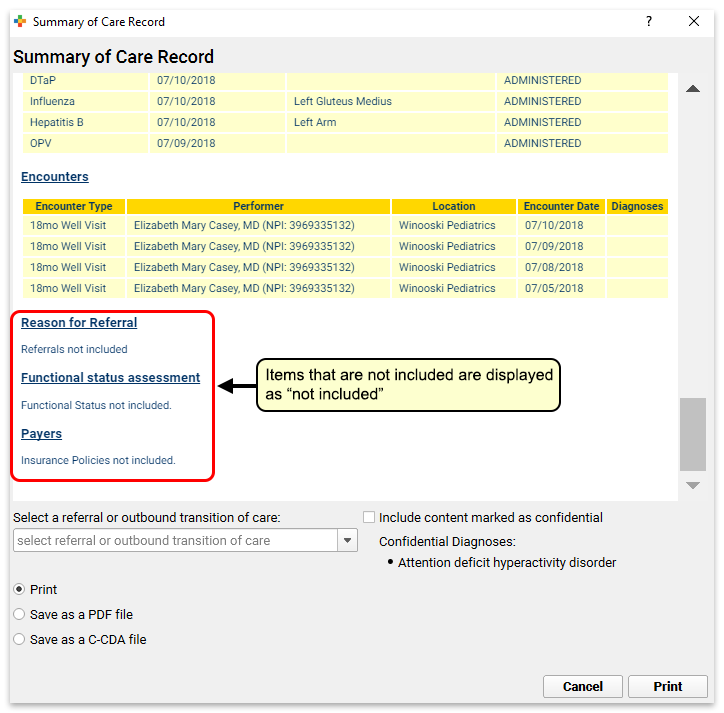
Generate Summary of Care Faster: The Summary of Care report, which creates a C-CDA that you can export or send to another practitioner using Direct Secure Messages, now opens and generates more quickly.
-
Chart Open Time Improved: PCC 8.7 includes a number of improvements to how charts open. The database is now optimized to store more useful data in its memory cache, billing information (used to display past balances) is now gathered more efficiently, and a new early-morning cache warm up helps to make chart opening faster at the beginning of the day. Some practices will see charts open several seconds faster.
-
New VIS for Hep B: You can indicate you have provided the most recent Hepatitis B VIS form, which notes that a 2-dose series is available. For more information, you can review the CDC’s Hepatitis B VIS page.


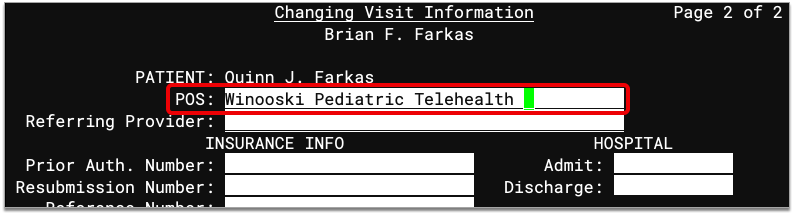


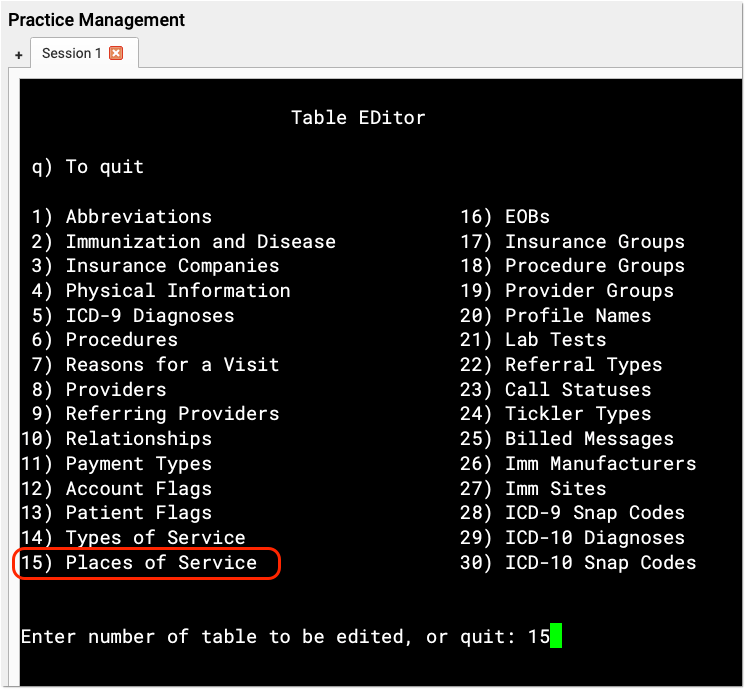
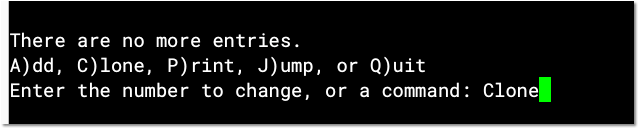
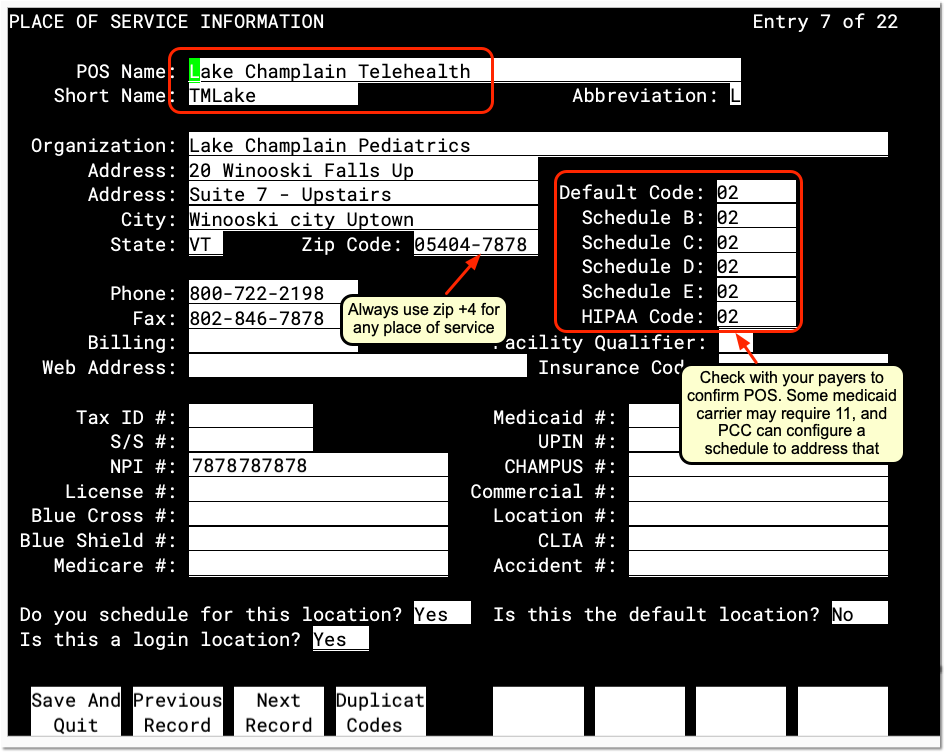
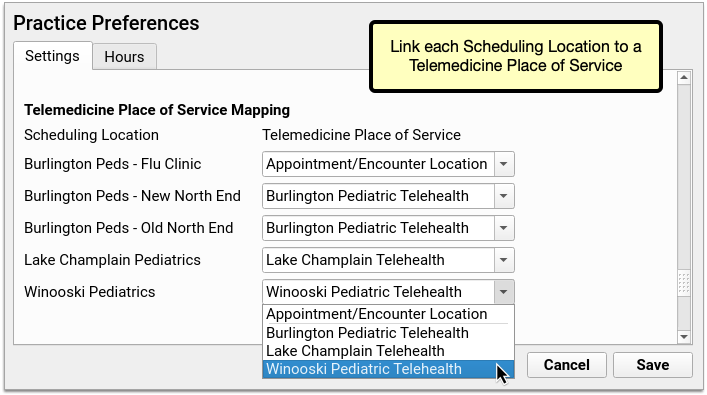
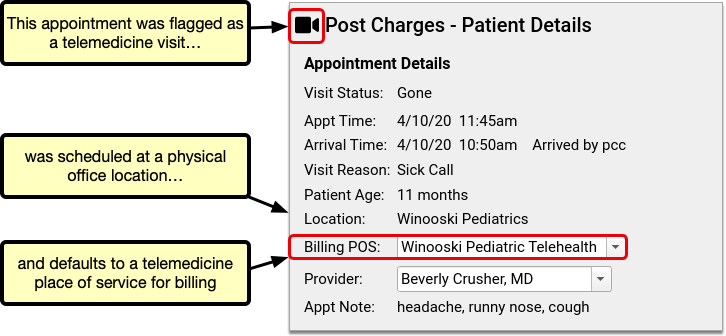
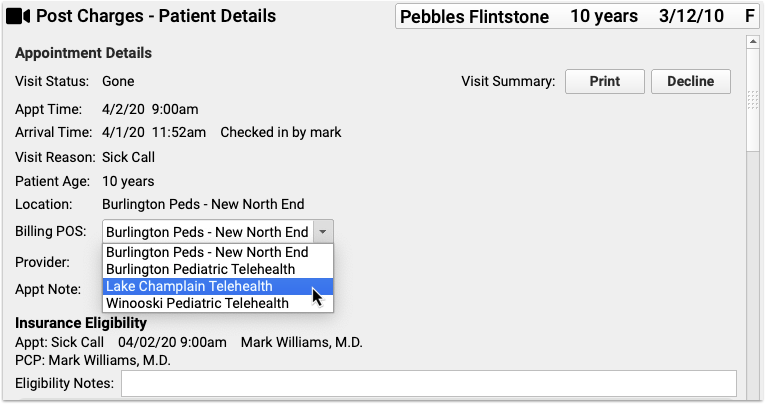
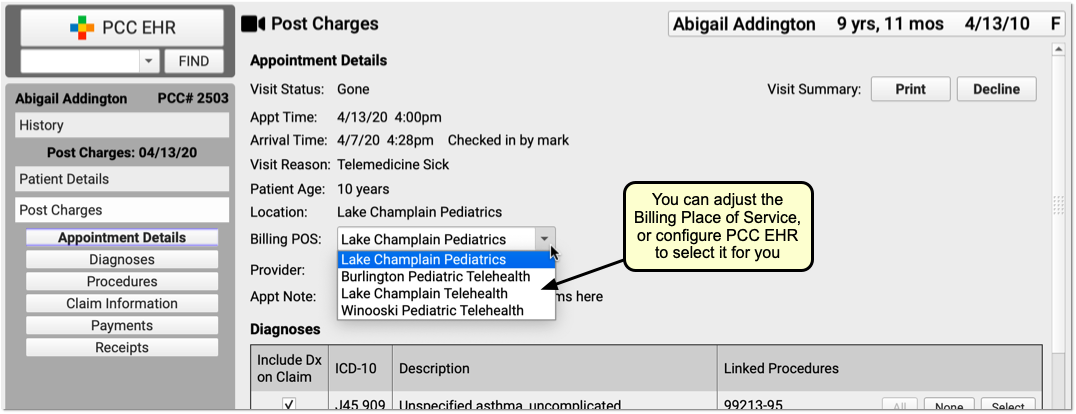
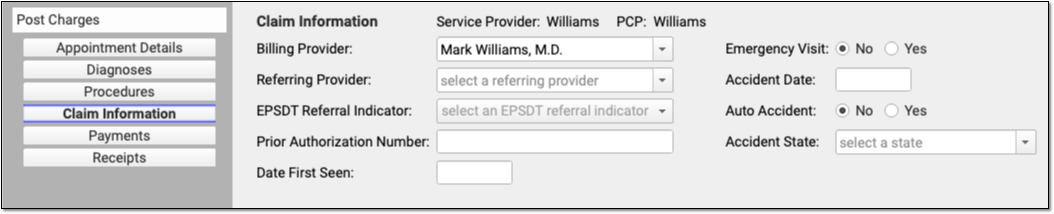
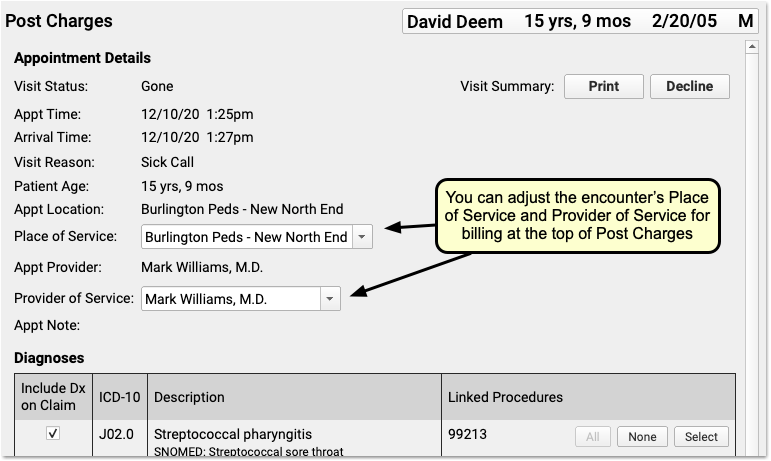
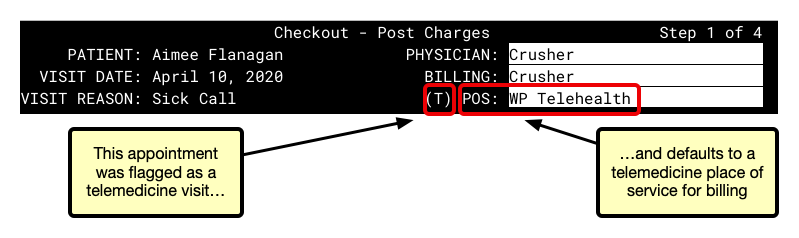 If you need to change the billing place of service on the fly for a particular visit, clear out the ‘POS’ field, type in an asterisk (*), and then type ‘Enter’ to see your other options. Highlight an item in the list using your arrow keys and type ‘Enter’ confirm your selection.