Manage Incoming E-lab Test Results
Your hospital or a 3rd-party lab vendor (such as LabCorp or Orchard Trellis) can send lab test results directly to PCC EHR. Read the procedures below to learn how to import an e-lab result into a patient chart, delete an incoming test result sent to your practice in error, or return an e-lab result back to the queue.
Does PCC Interface With My Hospital or Lab Vendor?: Before PCC EHR can receive lab test results, your practice must have an active interface with that lab provider. PCC offers dozens of lab interfaces, and we can work with your lab vendor to develop a new connection. For more information, visit PCC Interoperability, or contact PCC Support at 800-722-7708.
Video: Watch how to Add E-lab Users and Import E-lab Results.
Contents
Import an E-Lab Test Result
Use the procedure below to review incoming e-lab results and attach them to a patient’s chart and a specific encounter and order.
Open the Queue of Incoming E-lab Results
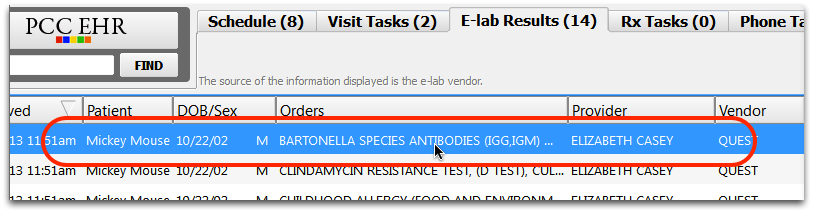
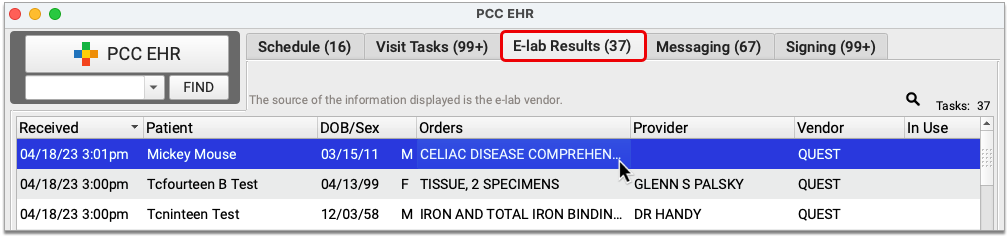
When you are ready to work with incoming lab results, click on the E-lab Results tab to view the queue.


The files in this queue come from lab vendors, so the patient names and clinicians may not precisely match those in your system.
While viewing this queue, you can click on any column header to sort. You can also filter the list by Provider.
Select a Results File
Double-click on any results file to open it.
Review Results File
After opening a results file, you can read a summary of its contents.
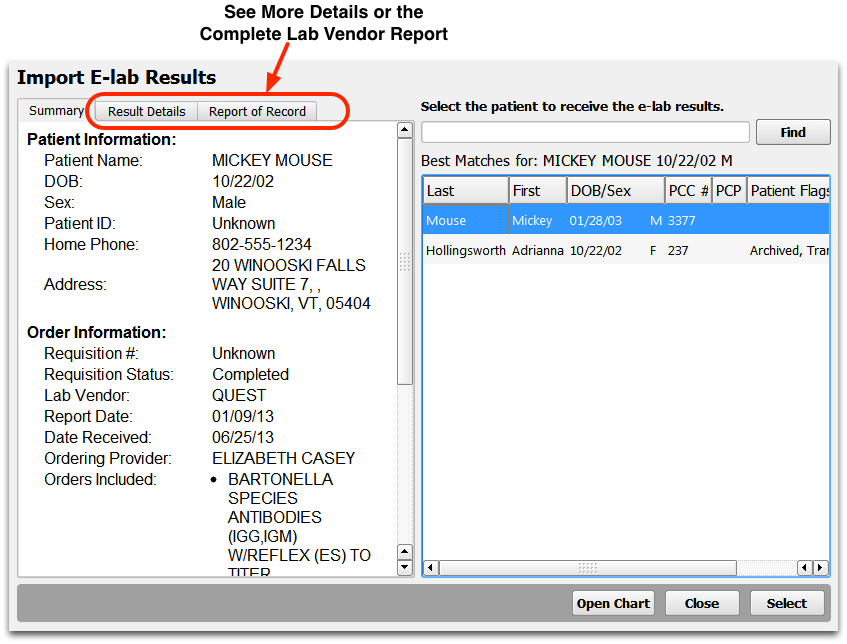
On the Summary tab, you can see basic patient and order information. Click on the Result Details tab to review more information about the lab results, or click on the Report of Record tab to see the original file as formatted by the lab vendor or hospital.
Select a Patient
PCC EHR will automatically search for the patient and display the best matches. Double-click to select the patient.
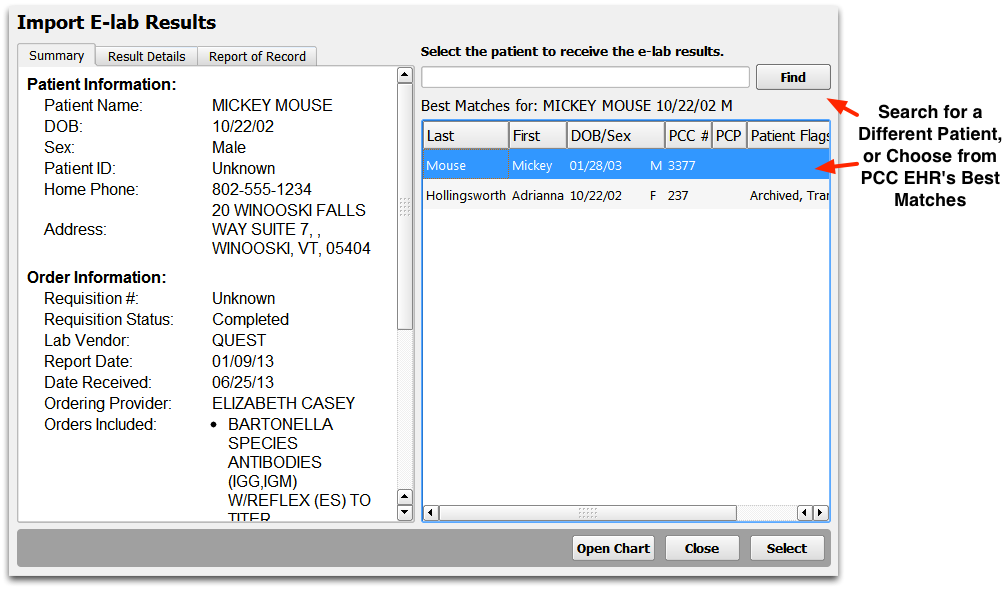
Optionally, you can use the Find field to find any patient.
Select a Visit
Next, select the specific visit during which the orders were created.
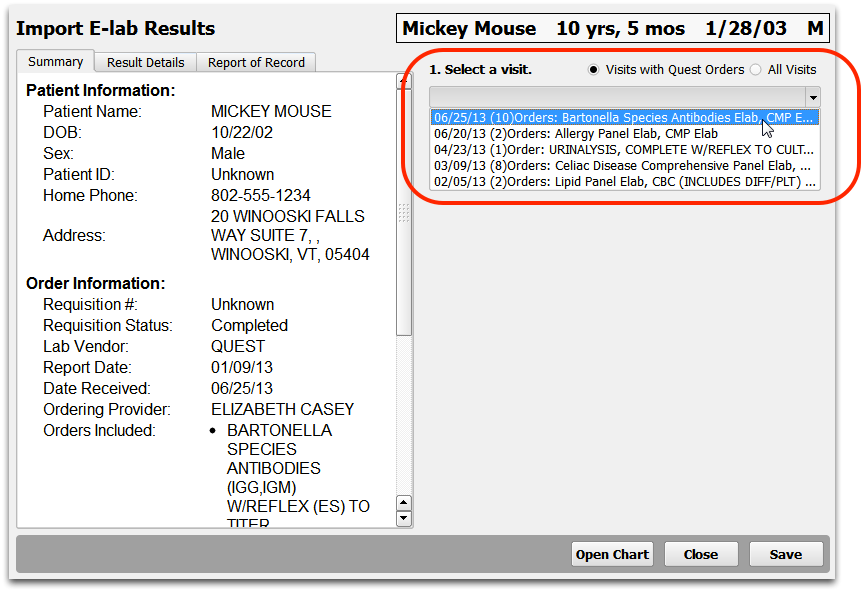
By default, PCC EHR will show you all visits that contain matching lab orders so you can select the correct appointment.
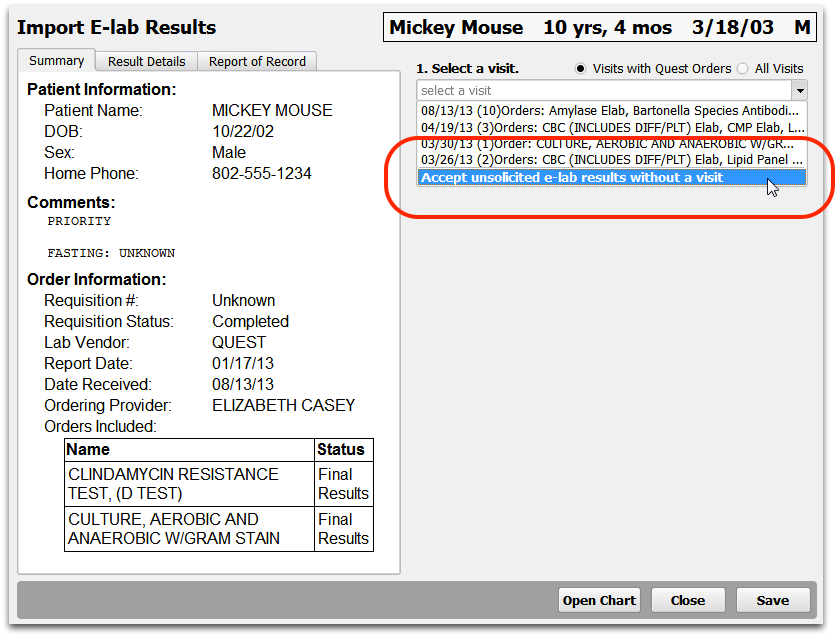
Sometimes your practice may receive e-lab results that do not match an order in the patient’s chart. You can pick any visit with labs from the vendor, or pick another visit.
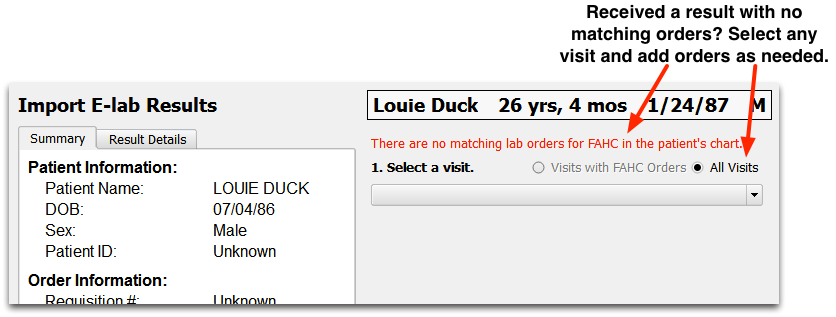
Import an Order w/ No Visit?: If a hospital or lab vendor sends unsolicited lab results to your practice, or “copies” results to you from a different care provider, you can place those results into the patient’s chart without selecting a visit date.
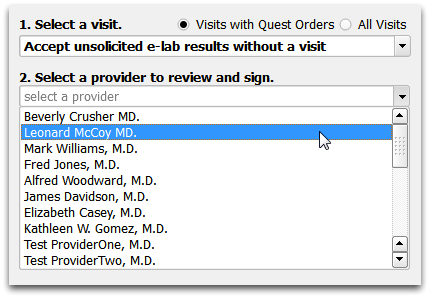
After choosing “Accept unsolicited…”, you will be prompted to select a provider. You may also need to select a facility if you have more than one facility from that vendor.
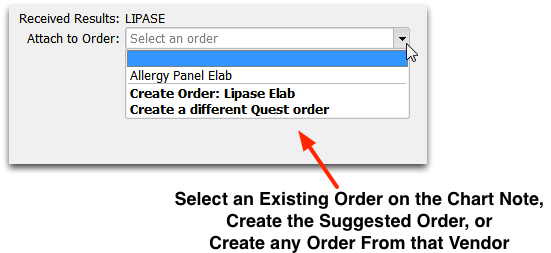
Verify Matching Orders, Select Alternatives or Create Missing Orders
After you select a visit, PCC EHR will match the e-lab results with the patient’s orders.
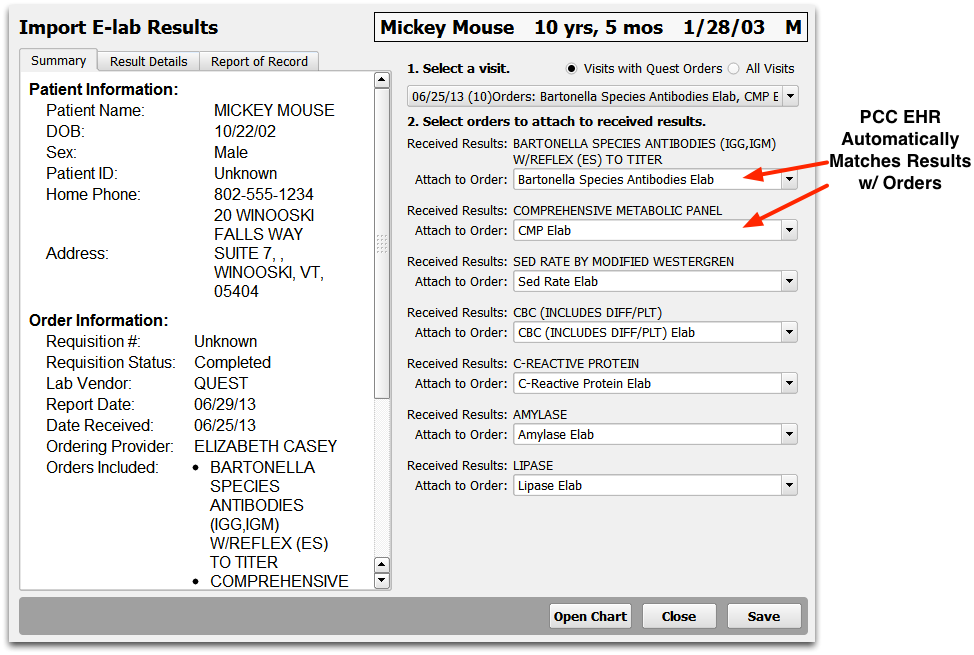
If all matching is complete and correct, you can click Save to finish and return to the queue.
If a match does not look correct, or no matching order was found, you can use the pull-down menus to specify an order. You can pick an existing order from the selected appointment, create an order of the suggested type, or create any order for the same vendor.
Save and Continue
Click Save to finish the import and return to the E-lab Results queue.
Next Steps: Review e-Lab Results in the Patient’s Record
After importing e-lab results, clinicians and other users can review results wherever they look at lab orders. Results will be visible on the Signing queue, for the physician’s review and signature, and they will appear on the chart note in the patient’s Visit History. Results will also appear on the patient’s Flowsheets.
Next Steps: Sign Results, Create Phone Tasks
All e-lab results appear on the Signing queue for the physician’s review.
From the signing queue, the physician can review results and optionally create a follow-up phone task.
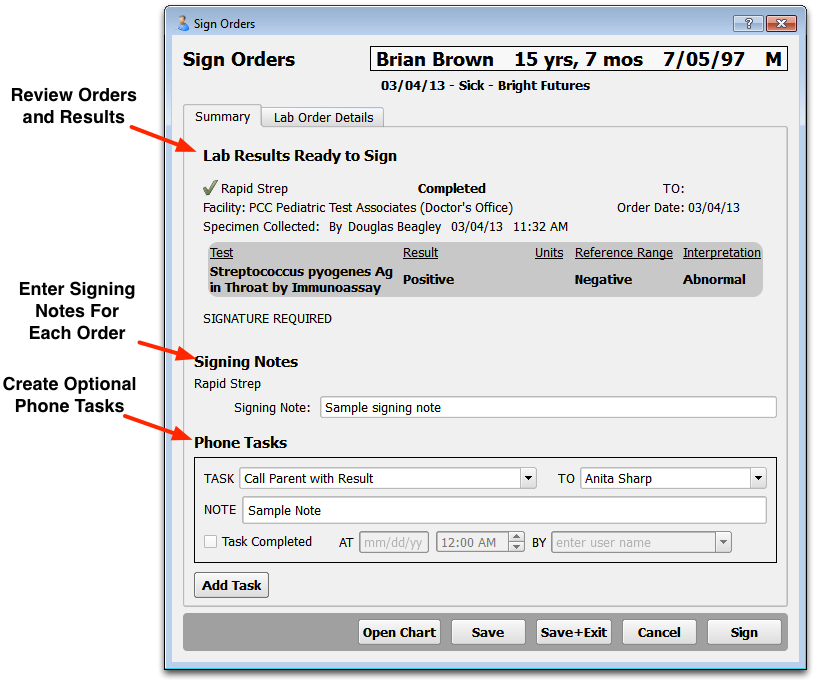
Phone Tasks will appear on the Messaging queue, where nurses and other clinicians can respond to the task and take action.
Delete an Incoming E-Lab Test Result
When your practice is sent an e-lab result that is not for your patient, you should delete it and inform the sender.
Not Reversible: Deleting an incoming e-lab result is permanent. No record remains on your PCC EHR database. Double-check the patient information and speak with the referenced provider before deleting.
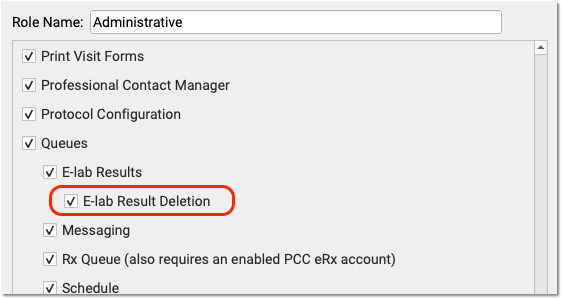
Determine Who Has Permission to Delete an E-Lab Result
Since deleting an e-lab is a permanent erasure of medical information, your practice should only grant delete permissions to a specific role at your practice. The first step in deleting an e-lab result might be to figure out who has that permission.
Your practice’s System Administrator can open the User Administration tool and grant the “E-lab Result Deletion” permission to a role. Then they can assign that role to specific users.
For more information, read Configure User Roles and Permissions.
Alternatively, find a colleague who has permission to delete e-labs. Ask them to delete the result. They can use the steps below.
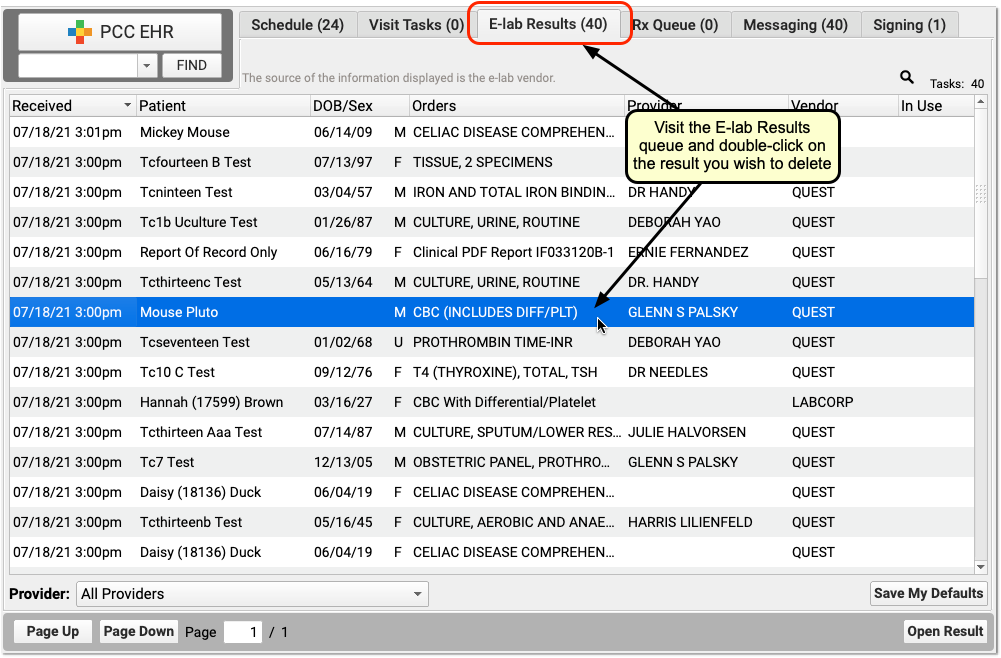
Find and Open the E-Lab Result You Wish to Delete
Visit the E-lab Results queue, find the e-lab sent to your practice in error, and double-click to open it.
Review Ordering Provider and Patient Name
Deleting an e-lab result is permanent. Before you delete an e-lab result, double-check that the patient is not associated with your practice and that the provider is not affiliated with your practice. If appropriate, contact the ordering provider.
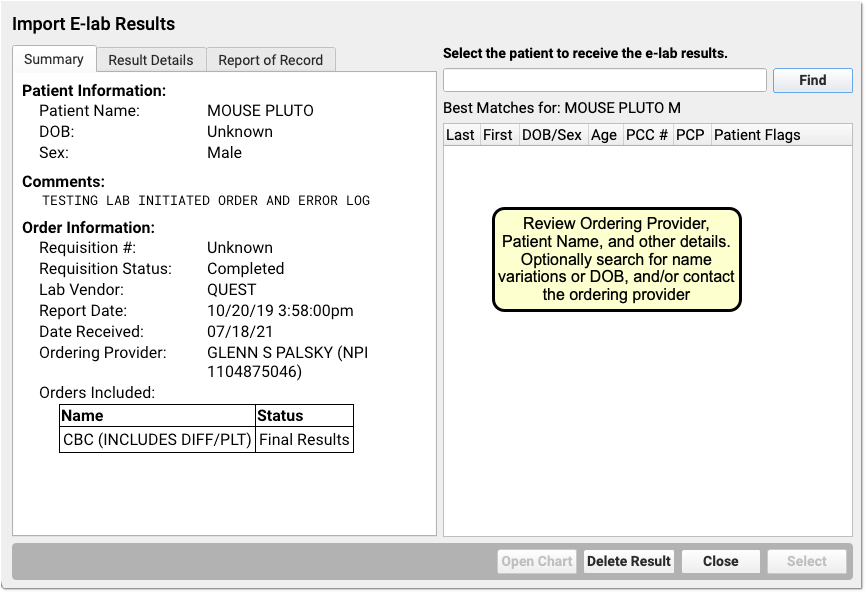
Click “Delete Result”
Click the “Delete Result” button to delete the e-lab result.

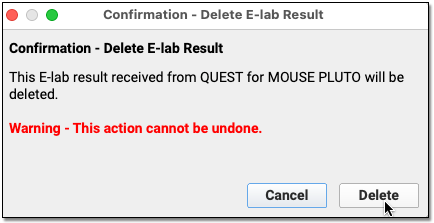
Confirm Deletion
Review the warning alert and click “Delete” to confirm deletion.
Unlink E-lab Results from a Patient or Encounter
You can unlink electronic laboratory results that were attached to the wrong patient or encounter and send them back to the E-lab Results queue.
Video: Watch how to Unlink an E-lab Result from a Patient’s Record.
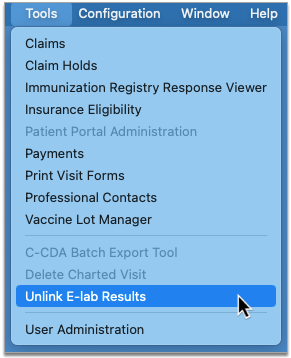
Open the Unlink E-lab Results Tool
Open the Unlink E-lab Results tool from the Tools menu in PCC EHR.
By Permission Only: Users must have a role that has the “E-lab Result Unlinking” permissions in order to access the Unlink E-lab Results tool. You can configure user roles and permissions in the User Administration tool in PCC EHR.
Find the Result to Unlink
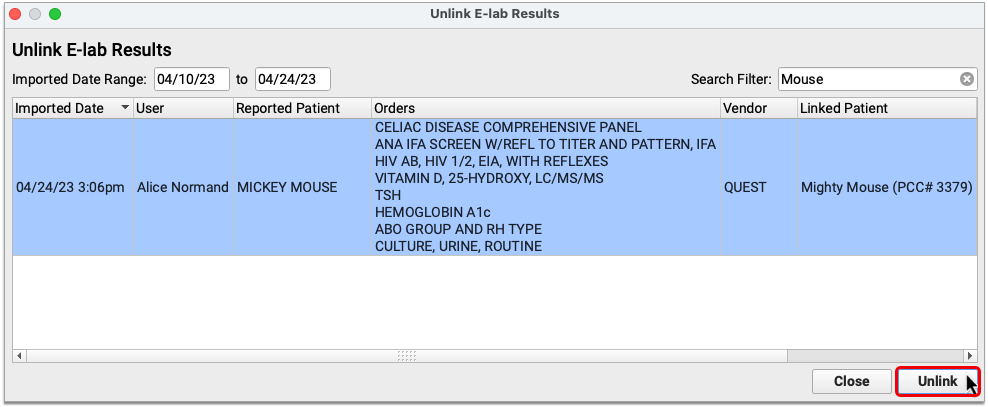
In the Unlink E-lab Results tool, find the result that needs to be unlinked. Use the Imported Date Range and Search Filter fields to focus your search.
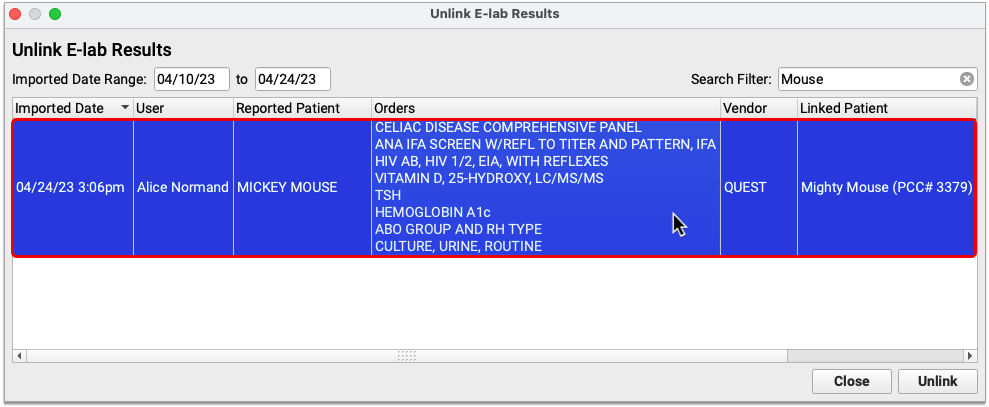
You can use the Search Filter to search by the patient name reported in the e-lab result, the user who linked the result to a patient in PCC EHR, the test orders included in the e-lab result, the name of the laboratory that ran the tests, the name of the patient who was linked to the result, the date of the encounter that the result was attached to, or the name of the protocol that the result was attached to.
Unknown User: If the user who linked a lab result displays as “Unknown”, it indicates that the result was imported prior to your practice receiving PCC 9.7. All e-lab results received and linked to patients after PCC 9.7 will be attributed to the user who did the linking.
Select and Unlink the Result
Once you find the result that needs to be unlinked, select it from the list then click the “Unlink” button.
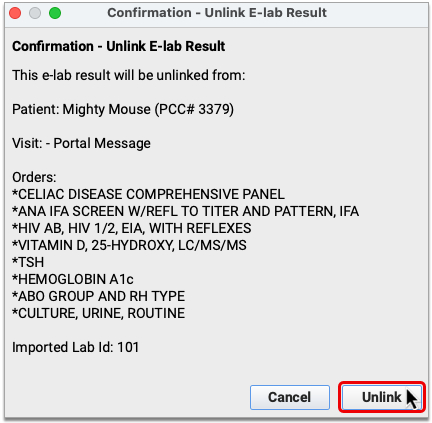
Confirm your selection, then close the Unlink E-lab Results tool.
Relink the E-lab Result to the Correct Patient and Encounter
Unlinked e-lab results return to the E-lab Results queue in PCC EHR, where they can be relinked to the correct patient and encounter.
To learn how to link e-lab results to patients and encounters, jump to Import and E-lab Test Result.