Configure Your Patient Portal Message Templates
Busy parents want a way to communicate effectively with your practice when it’s convenient for them, without having to play phone tag.
PCC EHR includes three optional patient portal message templates that you can use as-is, or customize to work better for your office.
You can also create your own messaging templates.
Contents
How do Portal Message Templates Work?
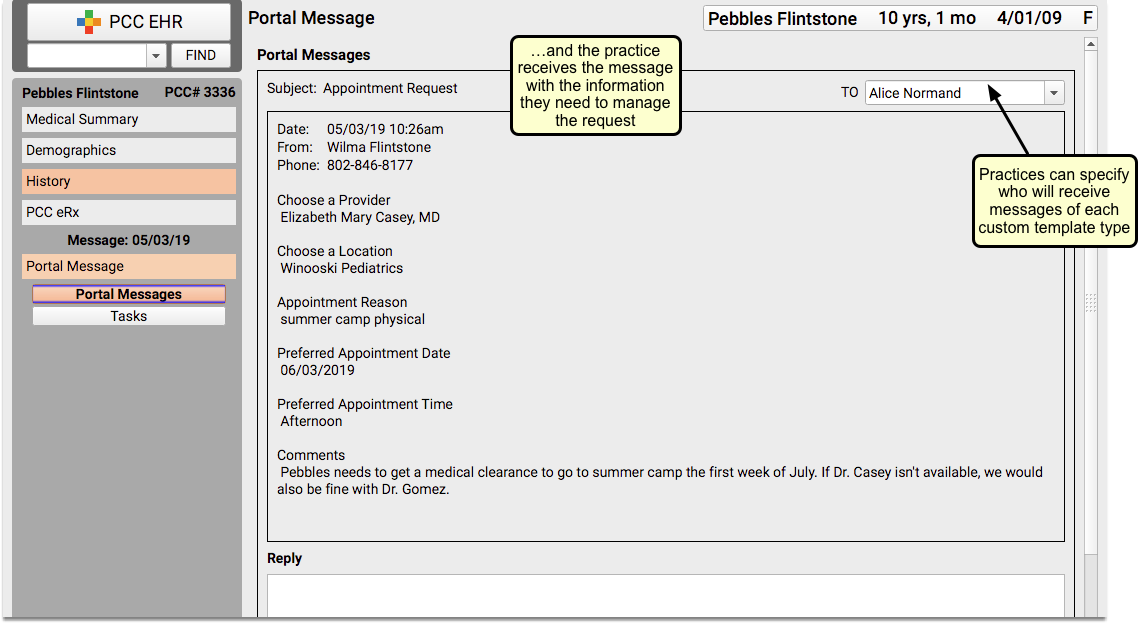
When a parent or other portal user sends you a message using a template, the results appear in the portal message in PCC EHR.
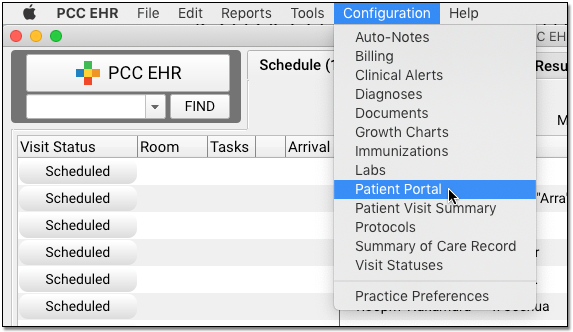
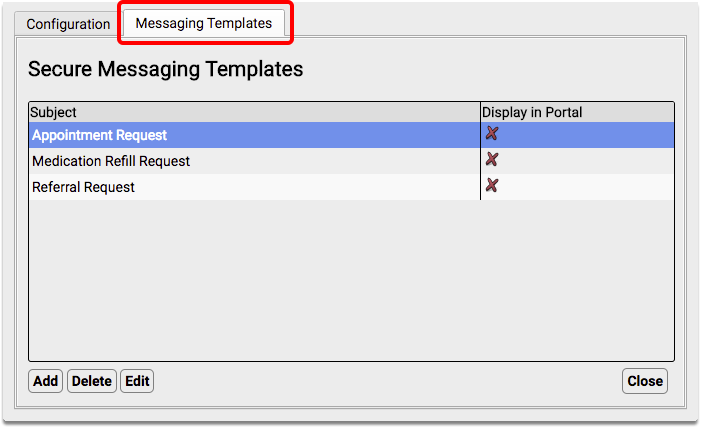
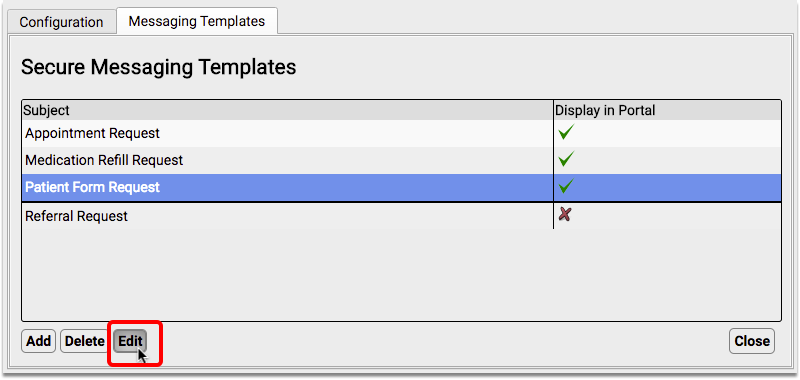
To work with your practice’s patient portal message templates, click on the Messaging Templates tab of the Patient Portal Configuration tool.
In order to use portal messaging templates, your practice must have Secure Messaging enabled. For more information about configuring your patient portal, read Patient Portal Practice Settings and Configuration.
Templates are Turned Off by Default: If you want to use the three optional patient portal message templates, you will need to turn them on. Edit the template and check the “Display in Portal” checkbox to make the template available to your patient portal users.
Default Templates: What Families Will See
If your practice chooses to enable patient portal messaging templates, your portal users will see a new Subject drop-down option when they choose to create a message:
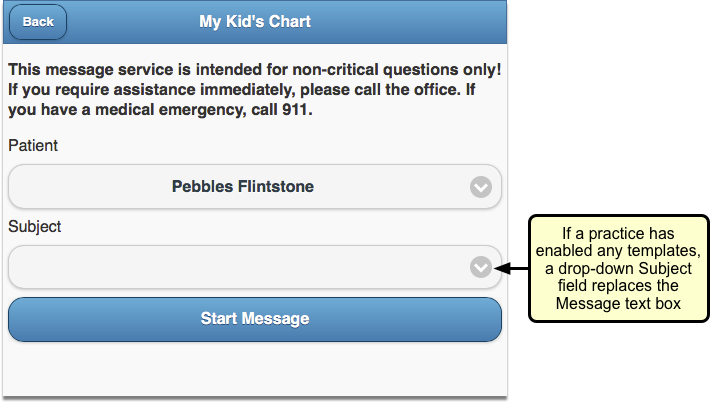
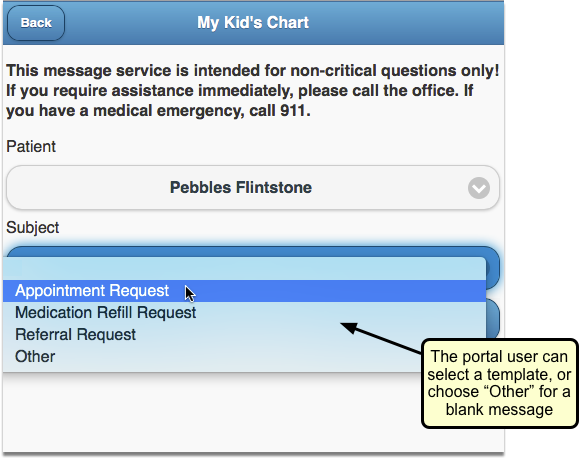
When the portal user selects a message subject, they will see a list of information to fill out, depending on which subject they select.
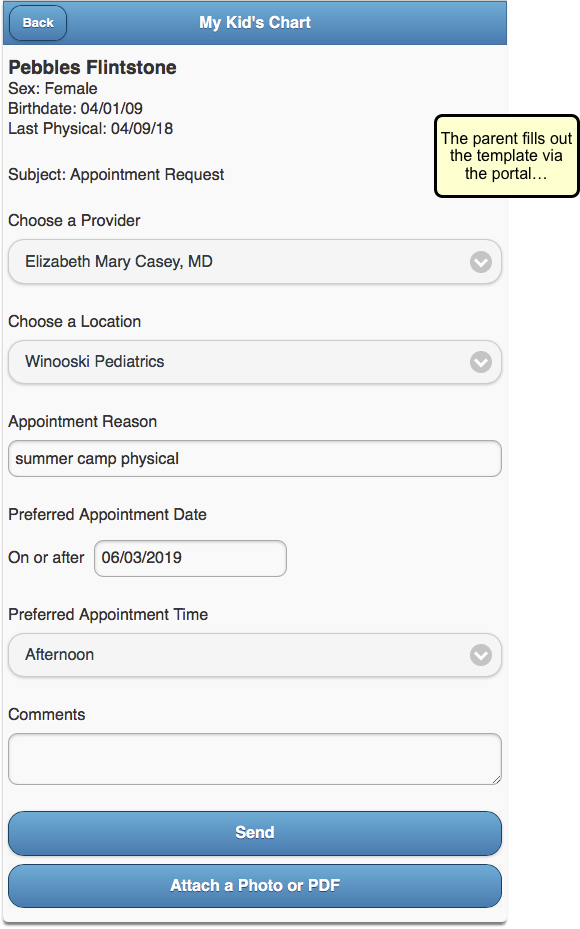
Appointment Request
The Appointment Request default portal message allows the portal user to select a desired provider and location on a specified date at a preferred time of day.
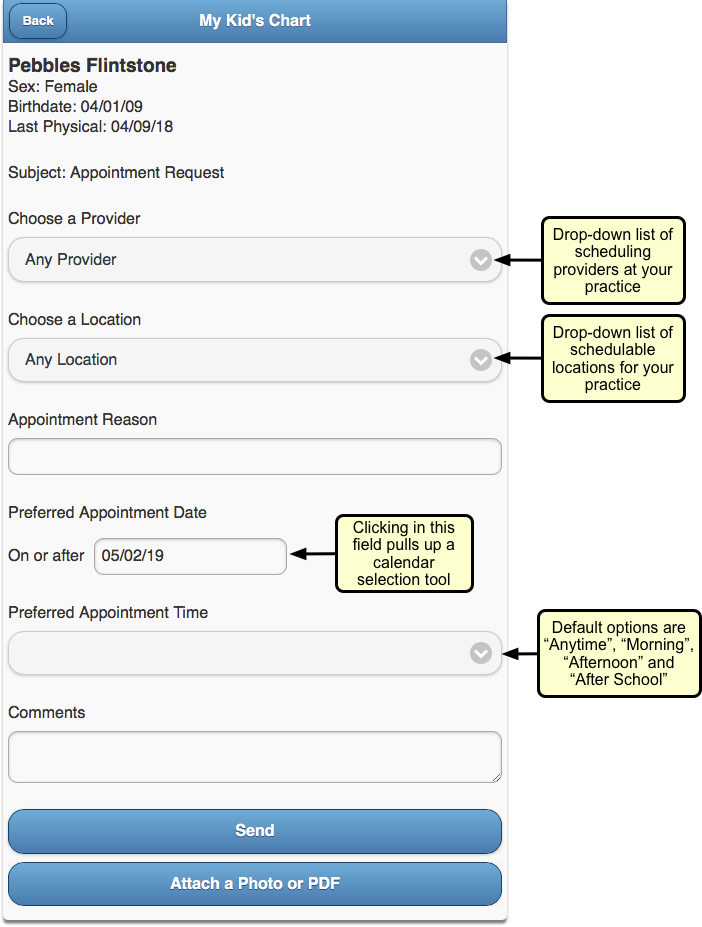
The portal user can write a short note about the type of appointment they need and can include a longer note with comments. They can even attach a related photo if they choose.
Your practice can edit the Appointment Request default template to better suit your needs.
Medication Refill Request
The Medication Refill Request default portal message includes a list of the patient’s medication allergies, with a request to confirm them. There are entry fields for the portal user to record the prescription they want refilled and the name and location of the pharmacy they want to use.
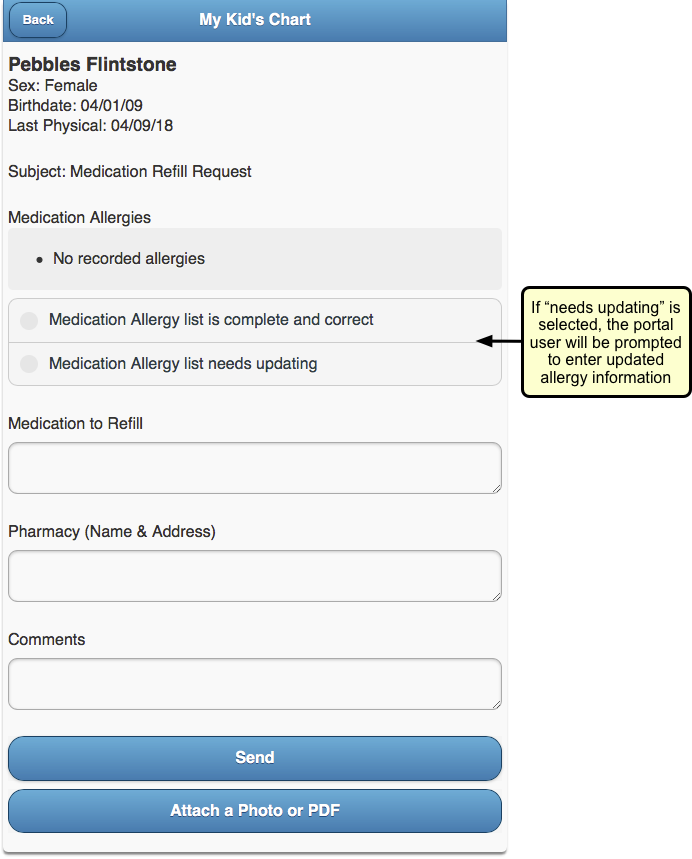
The portal user can add comments if they need to, and can attach a photo as well, if applicable.
Your practice can edit the Medication Refill Request default template to better suit your needs.
Referral Request
The Referral Request default portal message includes entry fields for the portal user to describe why they want a referral, who they wish to see and what the provider’s speciality is, along with the provider’s phone, fax, and office name and address.
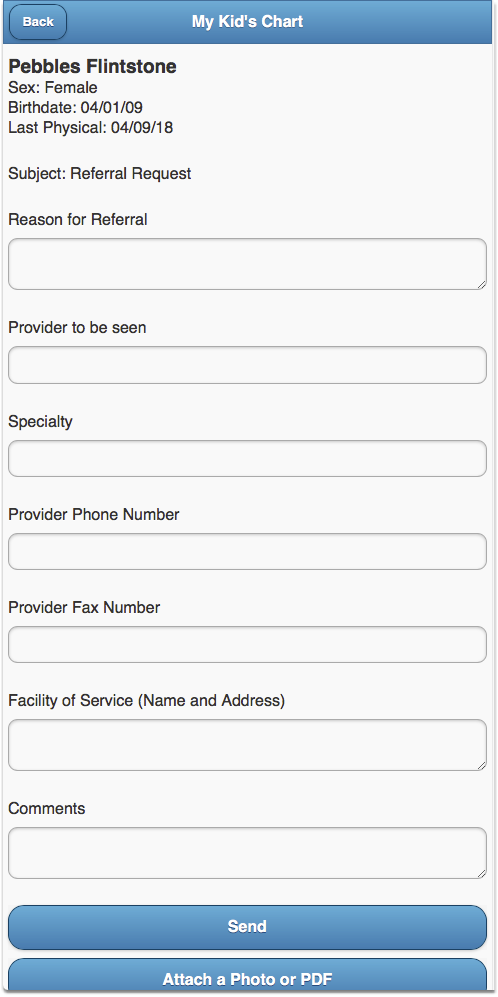
The portal user can add comments if they need to, and can attach a photo as well, if applicable.
Your practice can edit the Referral Request default template to better suit your needs.
Edit Portal Message Templates
If the default portal message templates don’t work for your practice, or if you want to update a custom template, you can easily make changes.
Edits are Permanent: Keep in mind, when you edit a default template, the original template will be lost. You will need to recreate it from scratch if you wish to use it again.
From the Messaging Templates tab of the Patient Portal Configuration screen, highlight the template you want to update and click “Edit”.
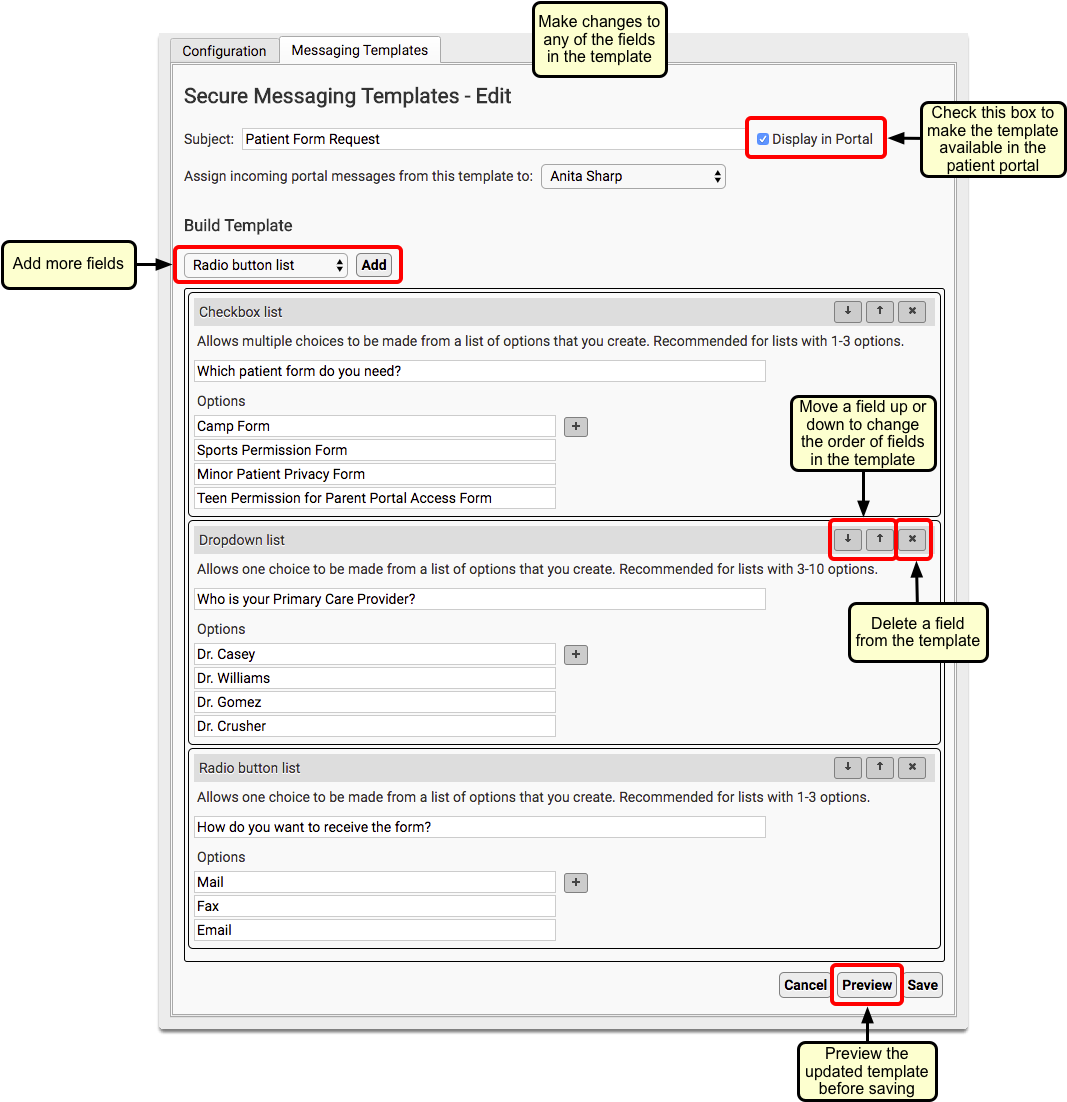
You can make changes to any of the template fields. You can add new fields (see the Portal Message Template Field Reference, below), move fields up or down, and delete fields that you don’t want.
To see what your changes will look like before you save, you can click “Preview”.
When you are satisfied with your changes, click “Save”.
Create New Message Templates
Your office can create your own custom messaging templates.
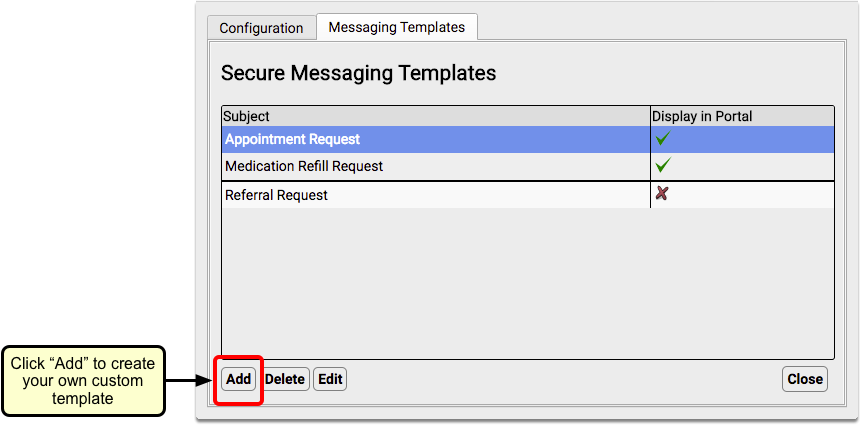
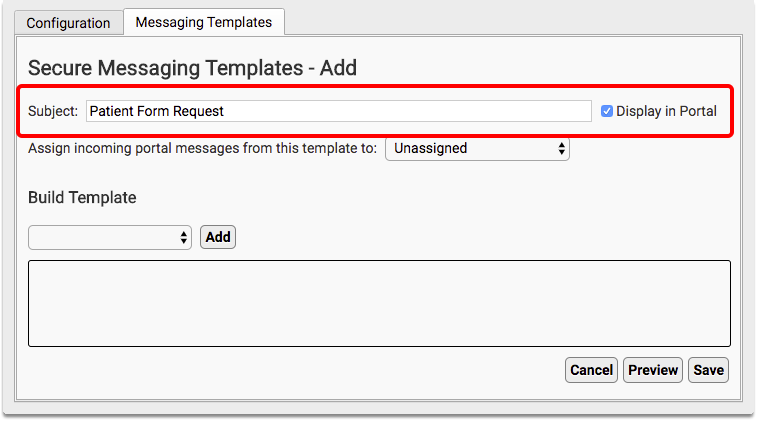
Click “Add”
From the Messaging Templates tab of the Patient Portal Configuration screen, click “Add”.
Name the Template and Optionally Enable and Assign
Enter a name for your new template in the Subject field, and select the “Display in Portal” checkbox to make the template visible to portal users.
You can also choose to automatically assign incoming messages of a certain template to a specific person at your practice.
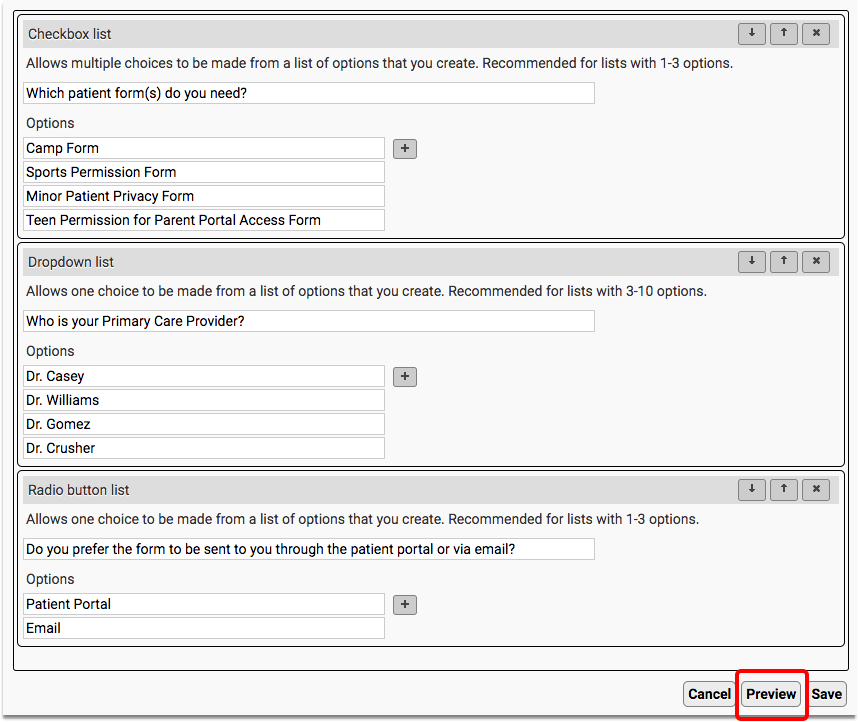
Add a Field to the Template
Select a field type from the Build Template drop-down and click “Add”.
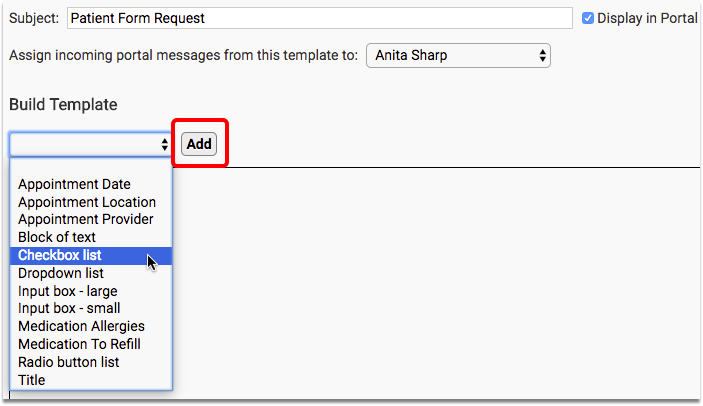
In this example, we are creating a checkbox field. Check out the Portal Message Template Field Reference, below, for a description of each available field type.
Name the Field and Add Options (for some types of fields)
Give the field a name.
Since we are adding a checkbox field, we will add checkbox list options one after another.
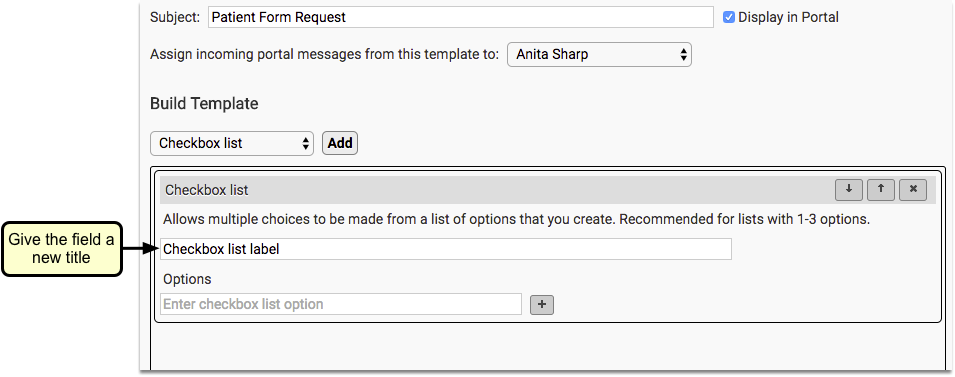
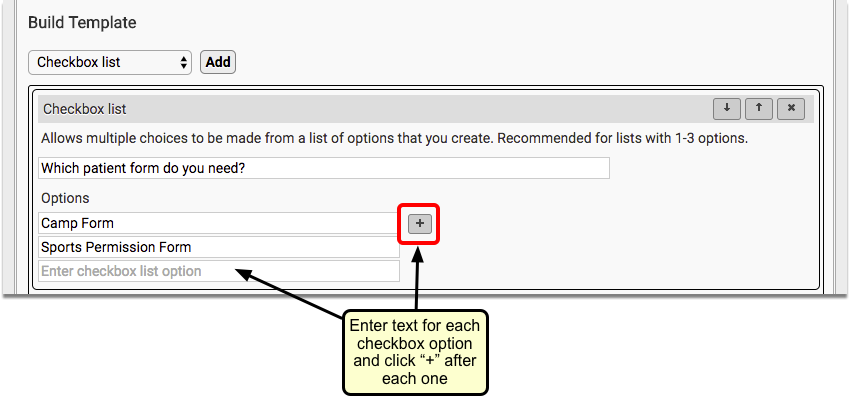
Enter text in the Options fields and click the “+” button after each entry.
Add Additional Fields, as Desired
Repeat Steps 3 and 4 until your template is complete.
Preview Your Template
Click the “Preview” button to see what the template will look like to families in your patient portal.
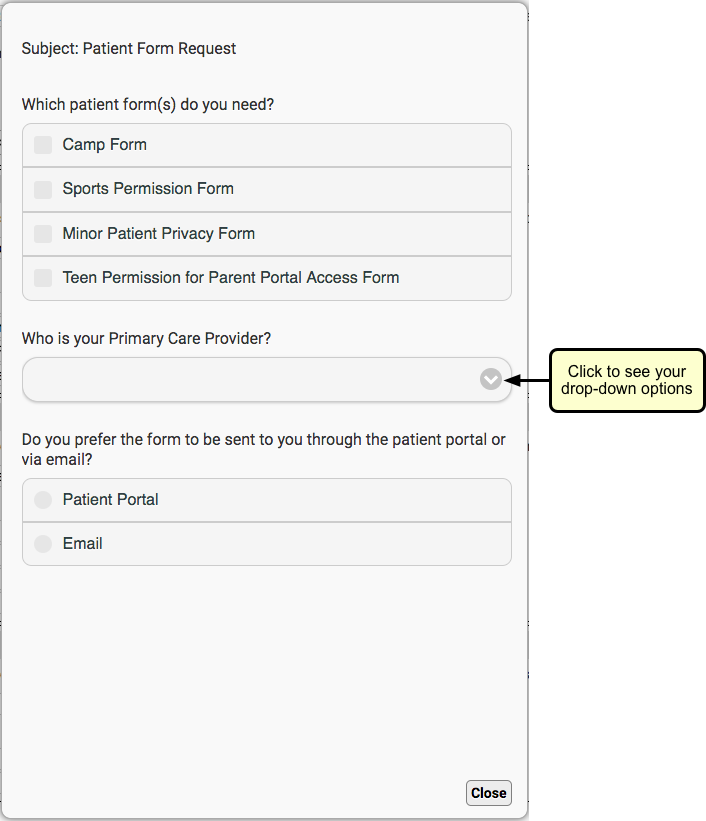
Click “Close”. Make any changes needed.
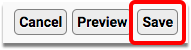
Click “Save”
When you are satisfied with your template, click “Save”.
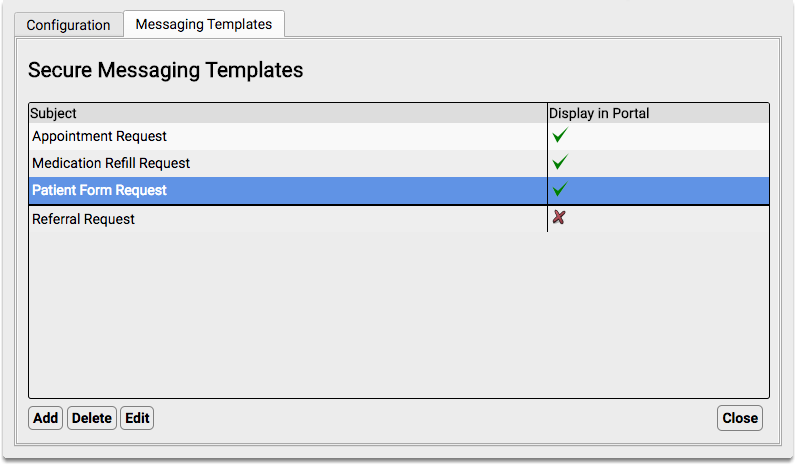
You will see your new template in the Secure Messaging Templates list.
Portal Message Template Field Reference
The following field types can be used when creating new portal message templates. Several of them also appear in the default portal message templates provided with PCC EHR.
-
Agreement: Adds the option to upload a document, such as a policy document, and the option for the user to electronically sign the document. For detailed information about this field, click here.
-
Appointment Date: Adds a Calendar selection tool to your template. The selected date will default to the current date.
-
Appointment Location: Creates a drop-down selection field that includes all of your practice’s scheduling locations. An “Any Location” option will also be included and selected by default.
-
Appointment Provider: Creates a drop-down selection field that includes all of your practice’s scheduling providers. An “Any Provider” option will also be included and selected by default.
-
Attachment: Adds the option to attach an image or PDF file, and a text field for a label.
-
Block of text: Display-only sentence or paragraph. Use this to create an introduction, instructions, or comment.
-
Checkbox list: Creates a list of custom checkbox items. Any or all of the options may be selected. None of the boxes will be checked by default.
-
Dropdown list: Creates a drop-down selection field where one choice can be made from a list of options you create. PCC recommends using this field type for lists with three to ten options. The field will be blank by default.
-
Input box-large: Creates an expanding entry field within which the portal user can input several lines of text. This field type is recommended when you want a sentence or paragraph length answer.
-
Input box-small: Creates an entry field within which the portal user can enter one line of text. This field type is recommended when you want a one-word or short answer.
-
Medication Allergies: Displays a bulleted list of the patient’s active medication allergies, followed by radio buttons for the portal user to verify the allergies or provide updates. If the portal user indicates that the list needs updating, an entry field will appear in which they can enter comments. Nothing will be automatically updated; the updated information will need to be manually added to the patient’s chart.
-
Medication To Refill: Displays a checkbox list of active medications from the patient’s Medication History. Any or all of the options may be selected. None of the boxes will be checked by default. Additionally, entry fields are included for the portal user to record additional medications they want refilled, and the name and location of the pharmacy they want to use.No prescriptions will be automatically generated; a prescriber will need to manually create the medication refill, if appropriate.
-
Radio button list: Creates a radio button selection field where one choice can be made from the options you create. Nothing will be selected by default.
-
Title: Display-only larger sized bold text. Use this to create a form title and for section headings.