Configure Procedure and Diagnosis Billing in PCC EHR
Use the Billing Configuration tool in PCC EHR to configure billing behaviors of procedures and diagnoses. You can map chart diagnoses (SNOMED-CT) to billing diagnoses (ICD-10), customize which diagnoses and billing procedures are triggered by each order, customize the clinician’s Bill window for ease of use, and more.
Contents
- 1 Introduction: How is work prepared for billing?
- 2 Configure the Procedure Billing Code Mapping for Each Order
- 3 Link Chart Diagnoses to ICD-10 Billing Codes
- 4 Add Selectable Procedures to the Bill Window (Electronic Encounter Form)
- 5 Example: Configure Immunization Orders to Trigger a Diagnosis and Billing Procedure Code
- 6 Configure the Order in Which Medical Procedures Appear on a Claim
- 7 Edit Your Practice’s Prices and Billing Procedure Codes
Introduction: How is work prepared for billing?
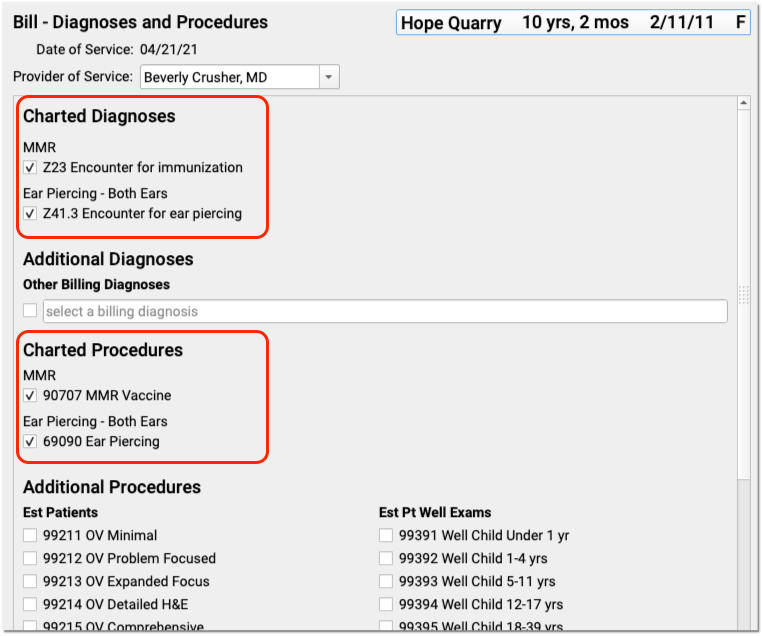
As a clinician charts a visit, they add orders, procedures, and diagnoses to the chart note. Based on your configuration, PCC EHR automatically adds appropriate diagnosis and procedure codes to the encounter. Clinicians then click the “Bill” button at any time to visit the Bill window. (The Bill window is also called the “Electronic Encounter Form” or “EEF”, as before EHRs and EMRs some clinicians used a paper “Encounter Form” to select billing codes.)
In the Bill window, the clinician can see what has been coded for an encounter so far, make changes, add additional billing codes (select a visit level), link procedures and diagnoses, and then approve the visit for billing. (Read Prepare an Encounter for Billing to learn more.)
Your practice can use the Billing Configuration tool in PCC EHR to control all of these billing behaviors. For example, you can configure codes for orders; configure the mapping between diagnosis descriptions, which are in SNOMED-CT terms, and ICD-10 billing codes; and adjust the default procedures (like 99213 and other visit codes) that appear on the Bill window. You can also set up “optional” codes for orders, and make use of other custom configuration options to streamline the PCC EHR workflow for your practice.
Here are some notes to keep in mind as you use the Billing Configuration tool:
-
Changes Only Affect Future Visits, Not the Past: When you make to your billing configuration and electronic encounter form, previous billed visits will not lose information. For example, you could change what procedures are triggered by an order, and that change will only affect future orders. Similarly, old visit encounter forms will display whatever was billed at the time and not reflect any configuration changes.
-
User Access: Permission to use the Billing Configuration configuration tool is controlled in the User Administration tool. Contact your system administrator if you can not run the tool. To prevent over-writing each other’s work, the Billing Configuration tool can only be opened by a single user at a time.
-
ICD-9 and ICD-10 Compatible: Some of the examples below display ICD-9 and ICD-10 codes. All features of PCC EHR work with both ICD-9 and ICD-10. A few years after the ICD-10 transition, PCC removed ICD-9 as a configuration option, but a patient’s old ICD-9 charge records will still display in charge histories and on charts.
Configure the Procedure Billing Code Mapping for Each Order
When you create an order for a patient, procedure codes and diagnoses can be automatically added to the Bill window for the encounter. Use the first tab of the Billing Configuration tool to configure which billing codes your labs and other orders will trigger by default. You can also set optional, selectable procedures.
Why Do This?: When you indicate a diagnosis on a patient’s chart note, it appears on the Bill window for the encounter automatically. Orders, labs, and medical procedures require one or more procedure billing codes (usually CPT codes), and may also have optional codes based on the situation.
Follow this procedure to configure which billing codes are triggered by an order.
Open the Billing Configuration Tool from the Configuration Menu
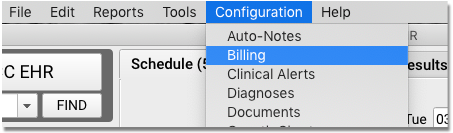
From anywhere in PCC EHR, click on the Configuration menu and select “Billing”.
Select “Order Mapping”
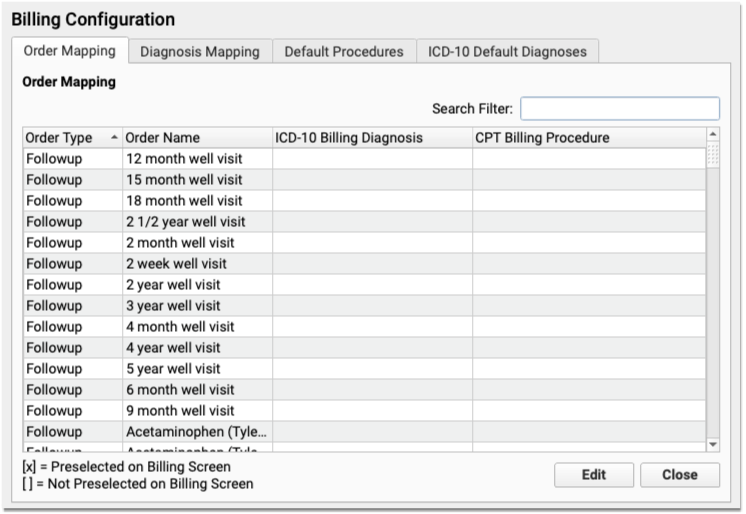
Click on the first tab, “Order Mapping” to view order mapping.
Find an Order
Use the Search Filter to find an order or group of orders to edit.
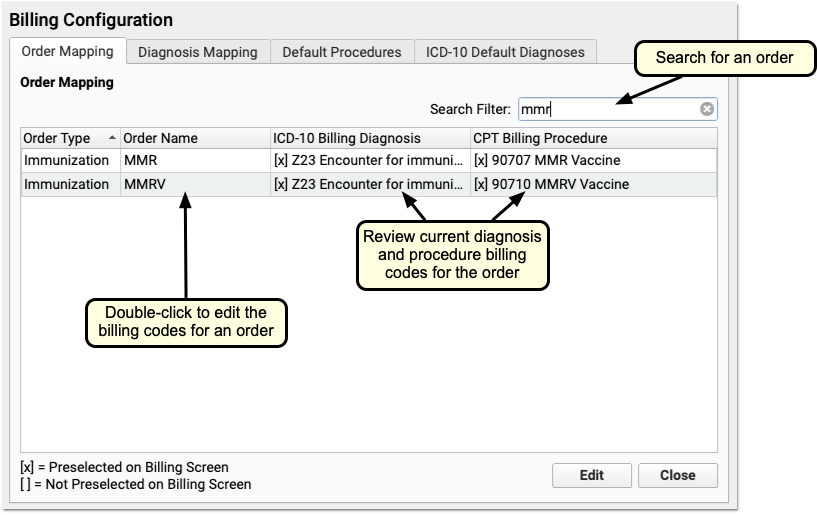
Double-click on an order to edit the billing codes.
Note: You can create new labs in the Lab Configuration Tool. You can create orders for followups, handouts, new medical procedures, medical tests, radiology, referrals, screenings, supplies, and surgical procedures in the Component Builder in the Protocol Configuration tool. The list of available immunization orders comes from under-the-hood configuration. Contact PCC Support for help with order configuration or for help adding new vaccines.
Add the Order’s Procedure Billing Codes (and Optionally Diagnosis Codes)
Next, add one or more procedure billing codes. These are typically CPT codes. Optionally, you can also add a billing diagnosis code.
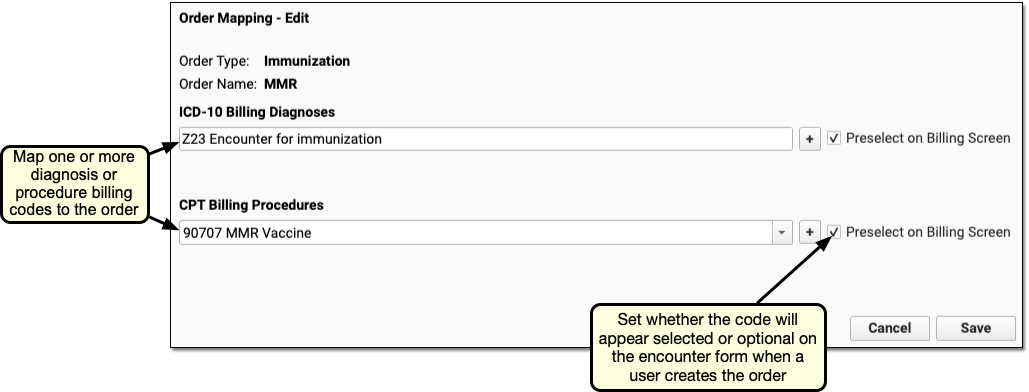
You can start typing in a field to search and then select from the pull-down menu. You can click the plus sign (+) to add additional codes. PCC EHR will not allow you to select a billing code that has expired (due to an ICD-10 code update, for example), but you can add codes that will be valid in the future.
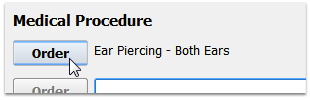
Automatic Diagnosis Codes Should Be Rare: Clinicians enter diagnoses on a patient’s chart note. If you configure an order to automatically trigger a billing diagnosis, it will not appear on the chart note and will be difficult to track in the patient’s record. However, certain procedures, such as ear piercing or the Z23 immunization diagnoses (as shown above), do not appear on a chart note but are required for reimbursement from an insurance company.
Optional: Add “Optional” Codes
The “Pre-Select on Billing Screen” option will be selected by default when you add a code. That means that whenever the order is made, the code will appear on the Bill window, pre-selected. If you deselect this option, then the codes will appear unselected.
Use this feature when an order may or may not require a certain billing code. The clinician can then decide whether or not to send the billing code on-the-fly, while billing.
Optional: Continue to the Other Tabs to Configure Other Billing Options
After working on your orders, you may want to make revisions to diagnosis code mapping or to the diagnoses and procedures that will always appear on the encounter form. Click on the other tabs to review other billing settings.
See the procedures below for complete instructions.
Click “Save”
Click the Save button to save your work and close the Billing Configuration tool.
Test Your Changes
Next, create a visit for a test patient and then create the order on the chart note. Click “Bill” to see if the correct billing codes appear.
Link Chart Diagnoses to ICD-10 Billing Codes
When the clinician selects a diagnosis on a chart note, they use SNOMED-CT. PCC EHR automatically selects an appropriate ICD-10 billing diagnosis and adds it to the visit’s Bill window for billing.
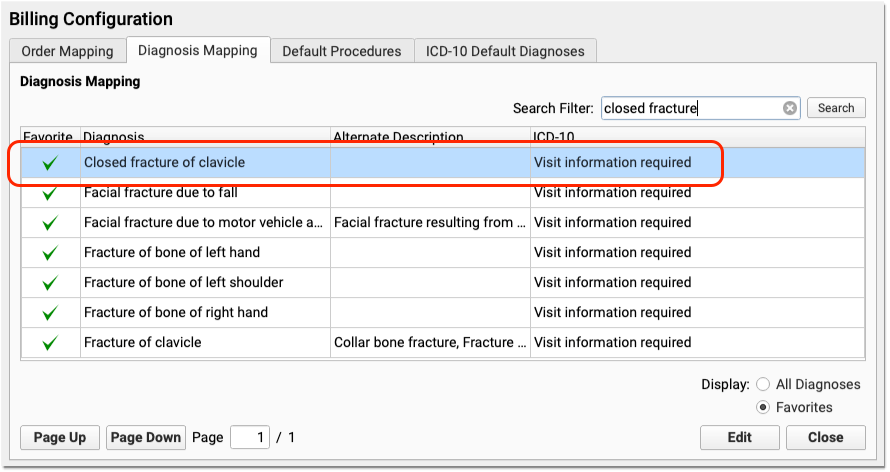
Use the Diagnosis Mapping tab in the Billing Configuration tool to specify which ICD-10 billing diagnoses will be added to the encounter form for each SNOMED-CT diagnosis description.
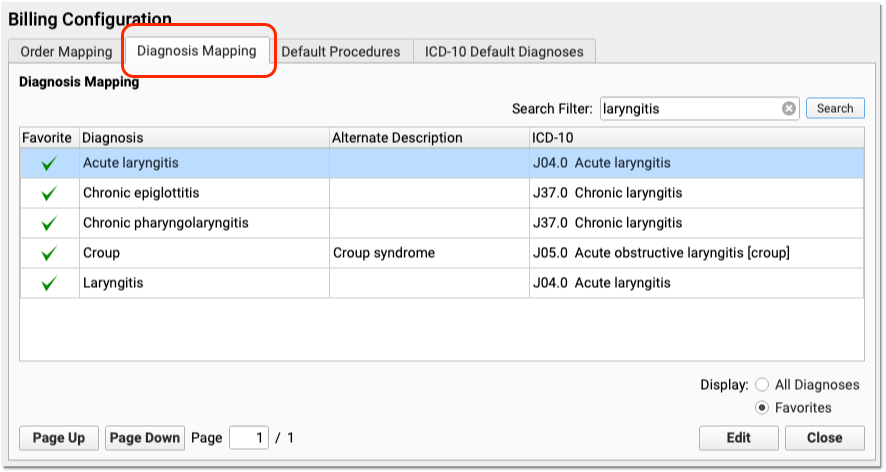
Use the Search Filter to find a diagnosis, and double-click on any description to make changes.
When you edit a diagnosis, you can adjust the corresponding ICD-10 billing codes. When a clinician selects the diagnosis on a patient’s chart, what ICD-10 code will appear on the claim?
PCC EHR will not allow you to select a billing code that has expired (due to an ICD-10 code update, for example), but you can add codes that will be valid in the future.
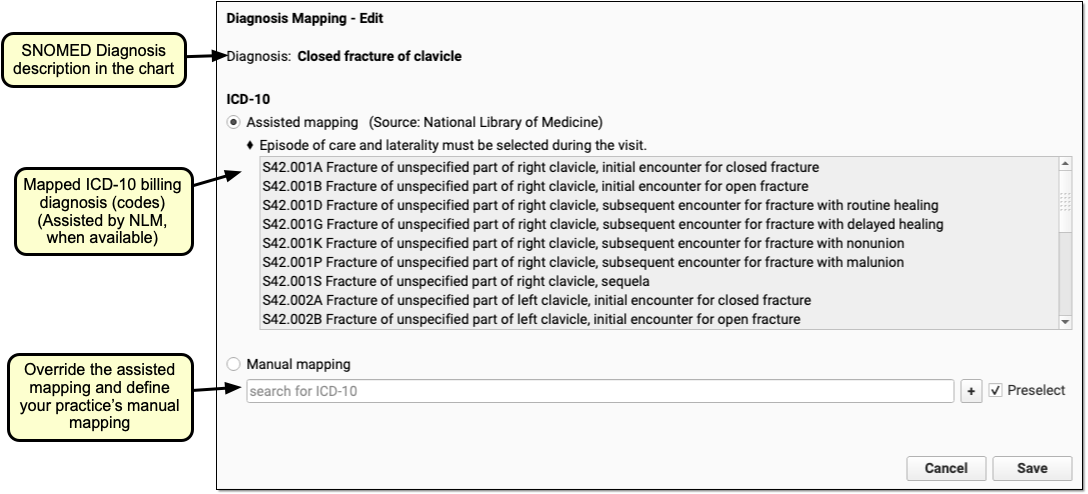
Assisted Mapping, Manual Mapping Options
When available, the Diagnosis Configuration tool will display an “assisted mapping” option. The assisted mapping option describes any patient details or coding conventions that will determine the code. It then lists all possible ICD-10 codes for the given diagnosis description.
PCC’s ICD-10 assisted mapping comes from the National Library of Medicine. Your practice can switch to a manual mapping code to suit your billing needs.
There may also be diagnoses with no available mapped ICD-10 code. When there is no assisted mapping option, you can use the manual mapping option to set the billing diagnoses.
You Can Also Change Codes Later, On a Case-by-Case Basis: Regardless of the assisted mapping or manual mapping settings, your practice can change the billing code later. Clinicians can select diagnoses on the Bill window and billers can make changes later when they post charges. Diagnosis Mapping sets the default code that appears when a clinician first selects a diagnosis.
Map Multiple, Optional ICD-10 Billing Codes to a Single Diagnosis
You can configure multiple ICD-10 mapping options for any SNOMED diagnosis description.
When your practice decides that a SNOMED diagnosis description needs a list of optional ICD-10 billing codes, use the Manual mapping section to add to or edit a list of ICD-10s.
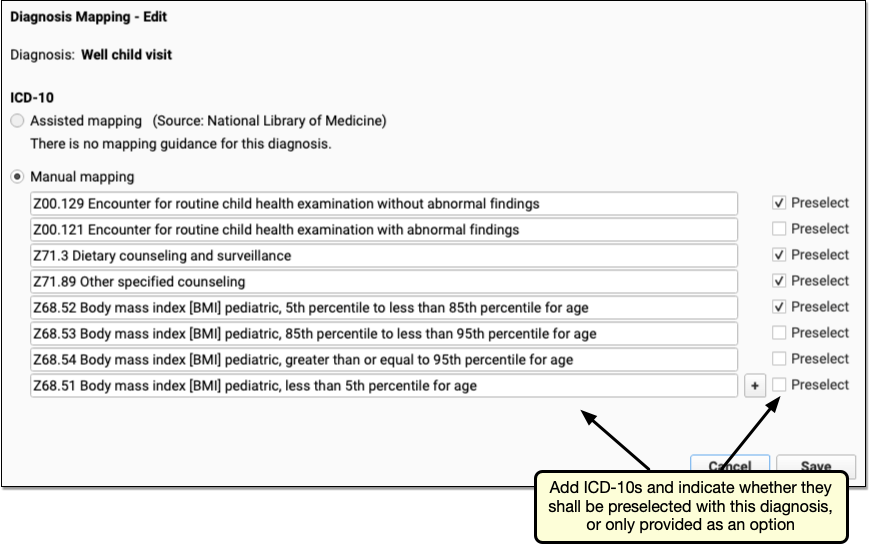
You can select the “Preselect” checkbox for one or more ICD-10 codes. If set to “Preselect”, that ICD-10 code will be added to the visit automatically when the user selects the SNOMED-CT diagnosis on the chart note. Otherwise, it will be available through a drop-down menu.
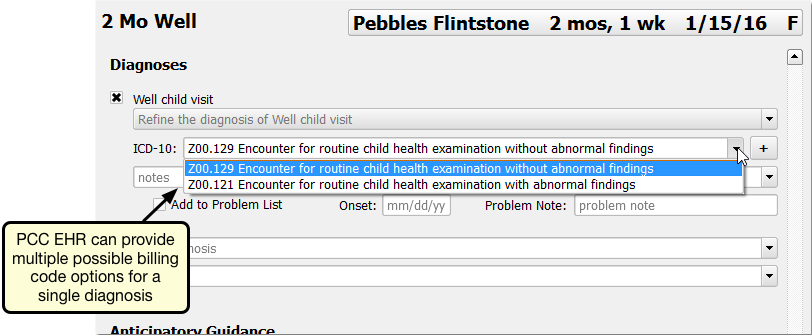
For example, your practice may want a certain ICD-10 to be preselected automatically, but allow the clinician or biller to adjust it to one of several other options that are not preselected. You can use the ICD-10 manual mapping features to create a pick-list for the clinician.
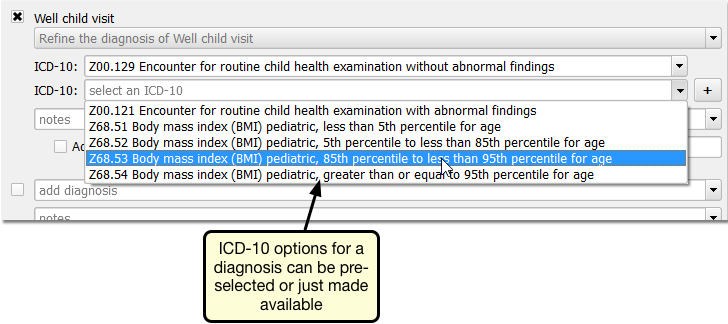
Update Previous Work-Arounds: Before the PCC 7.3 (April 2016) update, your practice may have used different SNOMED-CT descriptions to indicate well visits, mapping them for with/without abnormal findings. You may also have created Electronic Encounter Form shortcuts for BMI reporting or made different mapping options available for recording prematurity. You can now use the multiple-mapping option to reconfigure your diagnoses and your billing screens to use the new, optional mapping features.
Add Selectable Procedures to the Bill Window (Electronic Encounter Form)
As you chart a patient’s visit, PCC EHR adds diagnoses and procedures to the Bill window (sometimes called the Electronic Encounter Form, or EEF.) The Bill window can also display your practice’s list of common visit procedures, such as E&M visit codes, telemedicine encounter codes, or other billing codes that a clinician needs to select.
Follow the procedure below to use the Billing Configuration tool to modify the Procedures list and make it more useful for your practice.
Open the Billing Configuration Tool from the Configuration Menu
From anywhere in PCC EHR, click on the Configuration menu and select “Billing”.
Select a Tab to Edit Procedures (or Diagnoses)
Click on one of the section tabs to edit either the Default Procedures or Default Diagnoses section of the encounter form.

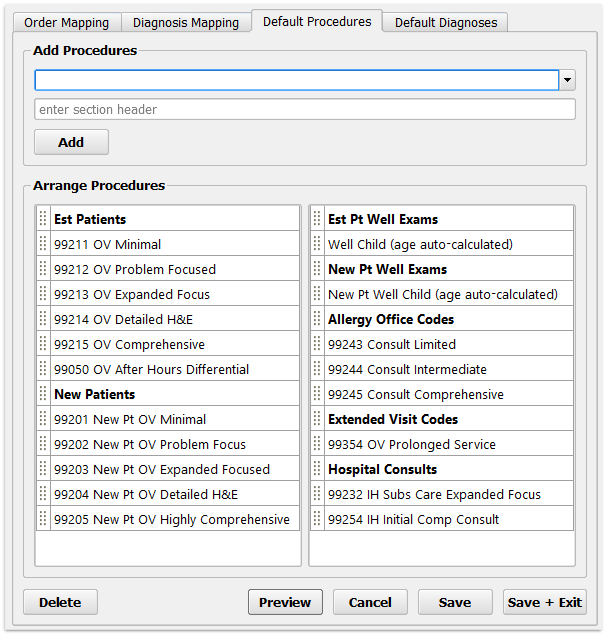
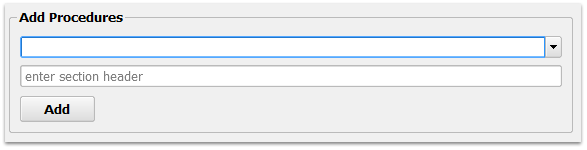
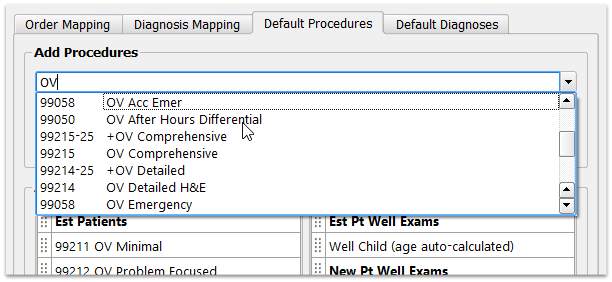
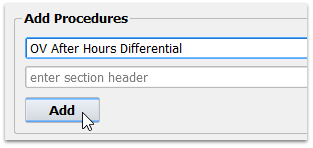
Find an Item, or Type a Custom Heading Name
Use the search field at the top to find a procedure (or diagnosis). You can search by name or code.
If you wish to add a non-selectable heading, for organizing items on the screen into categories, enter your heading label in the second field.
-
Well Visits: You do not need to add each of the age-appropriate Well Child procedures to your encounter form. Add the “Well Child (Age Auto-Calculated)” entry instead, and the corresponding “New Well Child (Age Auto-Calculated)”. PCC EHR will adjust the Bill window to reflect the patient’s age each new visit.
-
Note: If you can’t find the procedure or diagnosis you are looking for, first double-check that you are working in the correct tab (Diagnoses, Procedures) of the Encounter Form Editor. Next, check the respective tables in the Partner Table Editor (ted). The encounter form can only display procedures and diagnoses found in the Partner tables.
-
Multiple Units or Special Procedures?: If you need to regularly order a special procedure or multiple unit procedure, you may be able to create a new entry in the Partner Table Editor (ted) to communicate your need to the Partner billing system. Some offices use such procedures to indicate the need for a follow-up visit, for example.
Click “Add”
Diagnoses: In order to keep a complete patient record, physicians should enter diagnoses on the chart note. All charted diagnoses are automatically added to the Bill window with their corresponding ICD-10 billing code. It is possible to manually enter new diagnoses on the Bill window, as a message to your checkout or billing staff, but those items will not become part of the patient’s medical record.
Click and Drag Items to Desired Locations
New items appear in the lower-left corner of the list. Click on the drag handle and move any item to a new location.
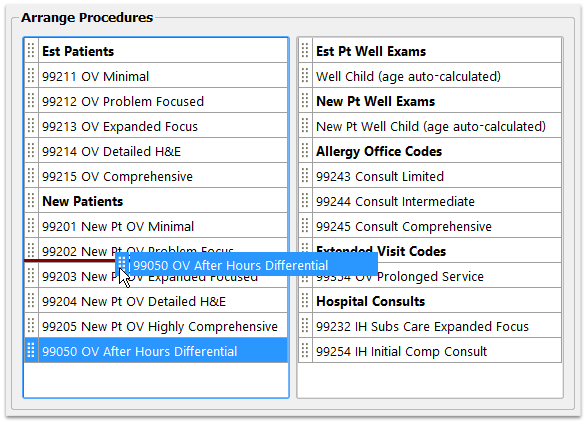
Two Columns: Note that there are two columns on the screen. You may click and drag items between the two columns.
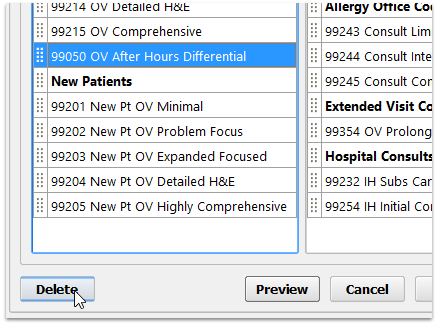
Optional: Delete Items
Click on any item and then click “Delete” to remove it from the Bill window. If you make a mistake or need to rewrite a heading, simply delete an item and add it again.
Click “Save” or “Save + Exit”
Click the Save button to save your work, or Save + Exit to save and close the Billing Configuration tool.
Add Default ICD-10 Diagnosis Codes to the Bill Window (Electronic Encounter Form)
You can also additional ICD-10 codes to your Electronic Encounter Form. These codes will appear, ready for selection, whenever you click “Bill” from a chart note.
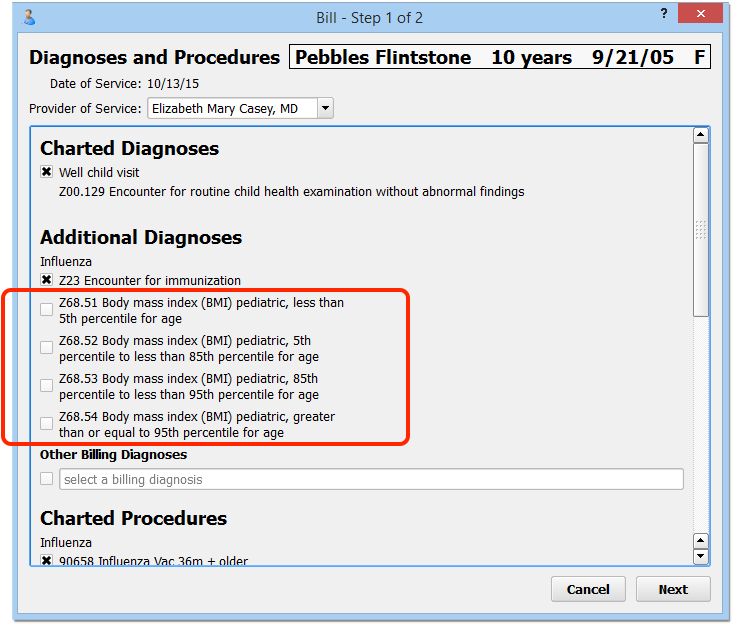
Diagnoses should always be recorded on the chart note, accompanying other assessment notes. However, there are a few unusual billing situations where you may need to add an ICD-10 billing code to an encounter.
For example:
- Some PCMH programs ask for BMI percentile coding on claims. There are ICD-10 codes for BMI percentiles that are not described by SNOMED-CT. Your practice could add the BMI percentiles to the electronic encounter form for easy selection during any visit.
- The ICD-10 codes for abnormal well visits do not have a set of clear 1-to-1 associations in SNOMED-CT.
You can use the Billing Configuration tool to add ICD-10 diagnoses to your billing screen.

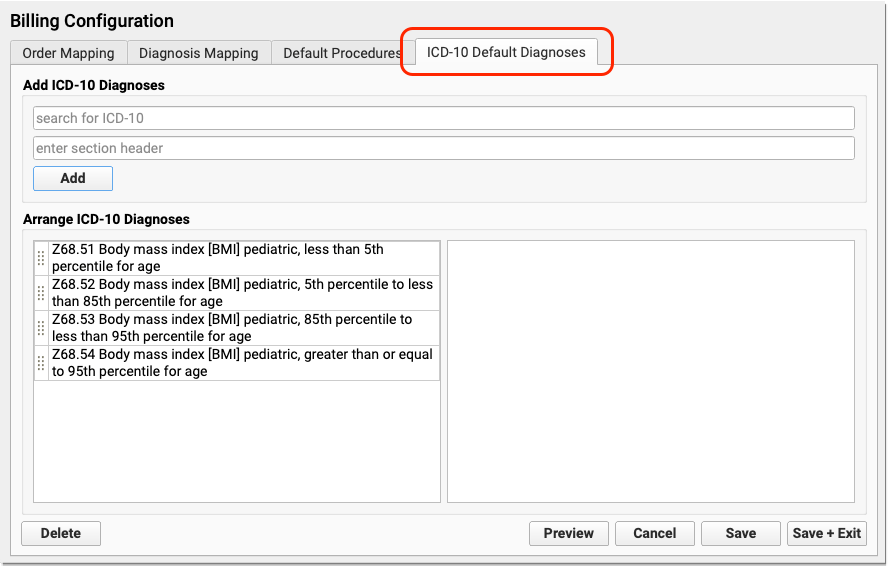
As you add diagnosis codes, remember that these codes are for billing purposes only. They will not appear on the patient’s chart note or be part of a patient’s medical history or summary of care.
Example: Configure Immunization Orders to Trigger a Diagnosis and Billing Procedure Code
Use the Billing Configuration tool to configure each immunization order so that it triggers the appropriate billing codes for both the diagnosis and the procedure. The standard PCC installation includes this configuration, and PCC Support will be happy to help you adjust your configuration.
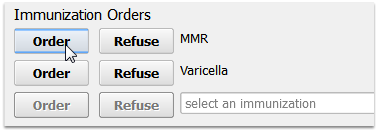
Your practice can use the Billing Configuration tool to configure your immunization orders.
Open each order and adjust billing diagnoses and procedures.

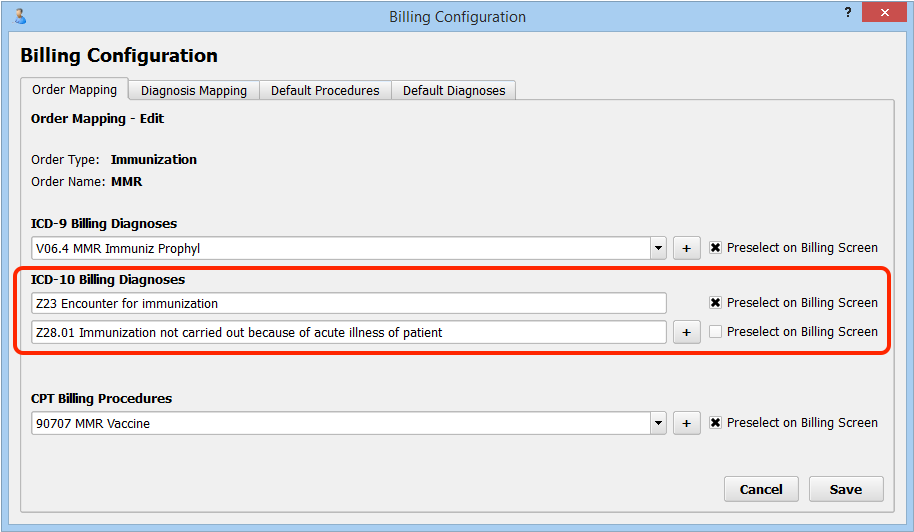
If you add the Z23 “Encounter for immunization” billing diagnosis code to all immunizations, and add the appropriate billing procedure codes as well, it will save time later for your billers.
You can also add additional, unselected codes to orders (as shown above) in order to make them available on the electronic encounter form whenever an order is placed.
Configure the Order in Which Medical Procedures Appear on a Claim
While it is not part of the claim standard, some payers have rejected vaccine procedures if they appear on a claim before the well visit code. You may encounter other situations where a payer’s claim software denies procedures based on their order.
If a payer suggests you need to rearrange how procedures appear on claims (for example, to have the well visit code appear before immunization codes), you can reply to the payer that they are not following the claim standard and should pay the claim as-is.
However, PCC can also adjust your configuration to have certain procedure codes always appear first on a claim.
First, identify all of your visit codes and the payers who have asked for this non-standard configuration. If possible, obtain documentation for the corresponding requirement(s). Contact PCC Support and ask them to add these codes to the claim generation configuration file for the insurance batches for the indicated payers. PCC Support will add your list of codes to the procedure order question for the relevant insurance batch. (Under-the-hood, this question reads: “In what order should procedures appear on the claim form; list procedure codes in order by priority:”) Then, when you process claims for that payer, those codes will appear first.
Edit Your Practice’s Prices and Billing Procedure Codes
When you need to add a new CPT code to your PCC system, or adjust your prices, use the Table Editor found in PCC’s under-the-hood Practice Management window.
Read the Steps: You can read a reference guide to learn how to add or update procedure billing codes, prices, and other procedure information.
Watch a Video: Watch Edit Your Prices and Billing Procedure Codes for a video tutorial of the steps.
Add an Immunization: You can also read a more specific guide, which covers additional details and steps for immunizations: Add and Configure Immunizations.